
Oh, Thanksgiving! The table groans under the weight of turkey, mashed potatoes, and all those amazing sides. But then there are the desserts, right? For many of us, especially as busy parents, the thought of tackling those can bring on a whole new level of holiday stress. Trust me, I’ve been there! I remember my very first Thanksgiving as a new mom, trying to whip up everything from scratch while also keeping a tiny human happy… let’s just say it didn’t go smoothly. Out of sheer desperation, I grabbed a recipe for pumpkin pie that promised to be “foolproof,” and you know what? It actually worked! That’s why I’m so excited to share how to make Thanksgiving desserts (foolproof!) that actually deliver. As a Certified Family Nutrition Strategist who’s also elbow-deep in the daily reality of parenting, I know how crucial it is to have recipes you can rely on when things get hectic. We’ll get you the sweet ending you deserve, without the extra worry!
Why You’ll Love How to Make Thanksgiving Desserts (Foolproof)
Alright, listen up! This recipe for how to make Thanksgiving desserts (foolproof!) is your new holiday best friend. Here’s why:
- Incredibly Easy: Seriously, even if you’ve never baked a pie before, you’ve got this. No fancy techniques, just simple steps.
- Totally Reliable: It’s designed to work every single time. You get that perfect pie without the guesswork.
- Time Saver: We all need more time during the holidays, right? This recipe is designed to be efficient, and it’s totally make-ahead friendly!
- Delicious for Everyone: It tastes *amazing*. Your guests will think you spent hours in the kitchen.
Gather Your Ingredients for Foolproof Thanksgiving Desserts
Alright, let’s get our game faces on and gather everything we need! You know, using good ingredients really does make a difference, and since this is such a simple recipe, the flavor of each ingredient really shines through. It’s all about quality here to make sure our foolproof Thanksgiving dessert turns out just right!
For the Pie Crust
- 1 homemade pie crust or a 9-inch deep-dish frozen pie crust shell, thawed
For the Pumpkin Filling
- 1 (15-oz) can pure pumpkin (that’s about 1 ¾ cups)
- 1 large egg
- 3 large egg yolks
- ½ cup granulated sugar
- ½ cup light brown sugar, packed
- 2 tablespoons all-purpose flour
- ½ teaspoon salt
- 1 teaspoon ground cinnamon
- 1 teaspoon ground ginger
- ½ teaspoon ground nutmeg
- ⅛ teaspoon ground cloves
- ⅛ teaspoon ground black pepper
- 1¼ cups evaporated milk (you won’t use all of this, but this is what the can has!)
Essential Equipment for How to Make Thanksgiving Desserts (Foolproof)
Okay, to nail how to make Thanksgiving desserts (foolproof!) like this pie, you just need a few trusty tools. Having the right gear makes all the difference, seriously! It makes the whole process so much smoother.
- 9-inch deep-dish pie pan: This is key for holding all that yummy filling! Gotta have enough room.
- Baking sheet: We’ll pop the pie on this in the oven to catch any drips and make it easier to slide in and out.
- Parchment paper: Essential for blind-baking the crust and keeping it from sticking.
- Pie weights or dried beans: These hold down the crust while it bakes so it doesn’t puff up like a balloon!
- Foil: For tenting those pie crust edges if they start looking a little *too* golden too fast.
- Large bowl: For mixing up all that delicious pumpkin filling.
- Whisk: The best way to get a super smooth, lump-free filling!
- Flat spatula: Handy for gently pressing down any puffing in the pie crust.
- Wire rack: So important for letting your beautiful pie cool down properly.
Step-by-Step Guide: How to Make Thanksgiving Desserts (Foolproof)
Alright, this is where the magic really happens! Following these steps for how to make Thanksgiving desserts (foolproof!) is your ticket to a perfect pie. Don’t worry, I’ve learned a few tricks over the years to make sure you don’t run into any drama. Remember, patience is key, especially with that crust! If you want to geek out even more on pie crust perfection, this site has some great tips.
Preparing the Pie Crust
First things first, let’s get that crust ready. If you made your own dough, roll it out and gently fit it into your 9-inch deep-dish pie pan. Press it in snugly all around the edges and the bottom – you want it to hold its shape! Pop it in the fridge for at least half an hour to chill. While it’s chilling, crank your oven up to 375°F (190°C) and set a rack in the middle. Get your chilled crust onto a baking sheet, line it with parchment paper, and fill it about three-quarters full with pie weights or dried beans. Bake it for 20 minutes. Then, carefully take it out, lift off the parchment and weights, and tent the edges with foil strips. Pop it back in for another 15 to 20 minutes until it looks dry and just lightly golden. If the bottom looks a little puffy, gently press it down with your spatula. Remove the foil. If you’re using a store-bought frozen crust, just follow the package directions for blind-baking – they’re usually pretty good!
Creating the Foolproof Pumpkin Filling
Now for the filling! It’s super simple: grab your largest bowl. Toss in the pure pumpkin, the whole egg, and those three egg yolks. Then add your granulated sugar, light brown sugar (make sure it’s packed down!), flour, salt, and all those warm spices – cinnamon, ginger, nutmeg, cloves, and that tiny pinch of black pepper. Give it all a good whisk until everything is whisked together and it looks seriously smooth and gorgeous. Finally, pour in the evaporated milk and whisk again until it’s perfectly combined. This is where you get that custardy goodness!
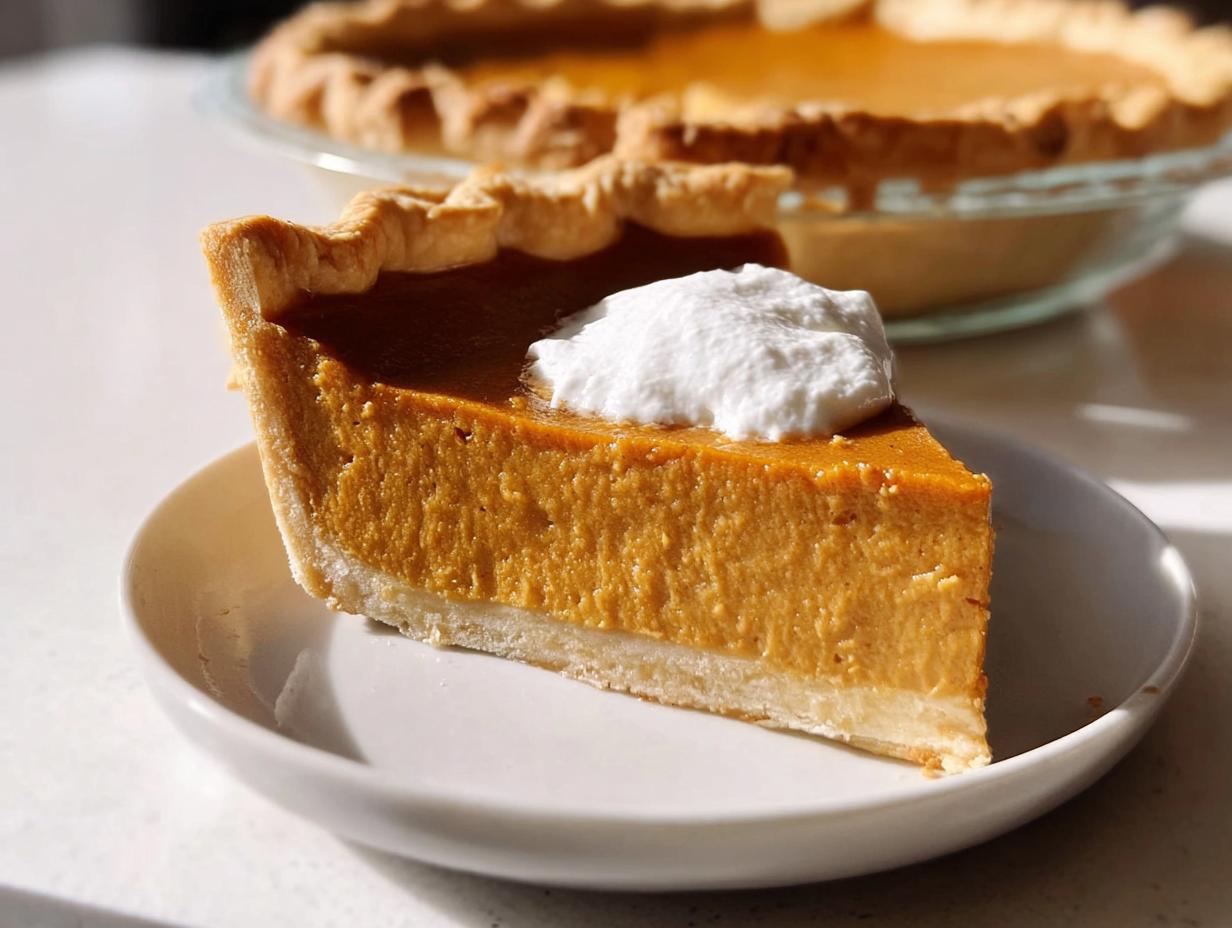
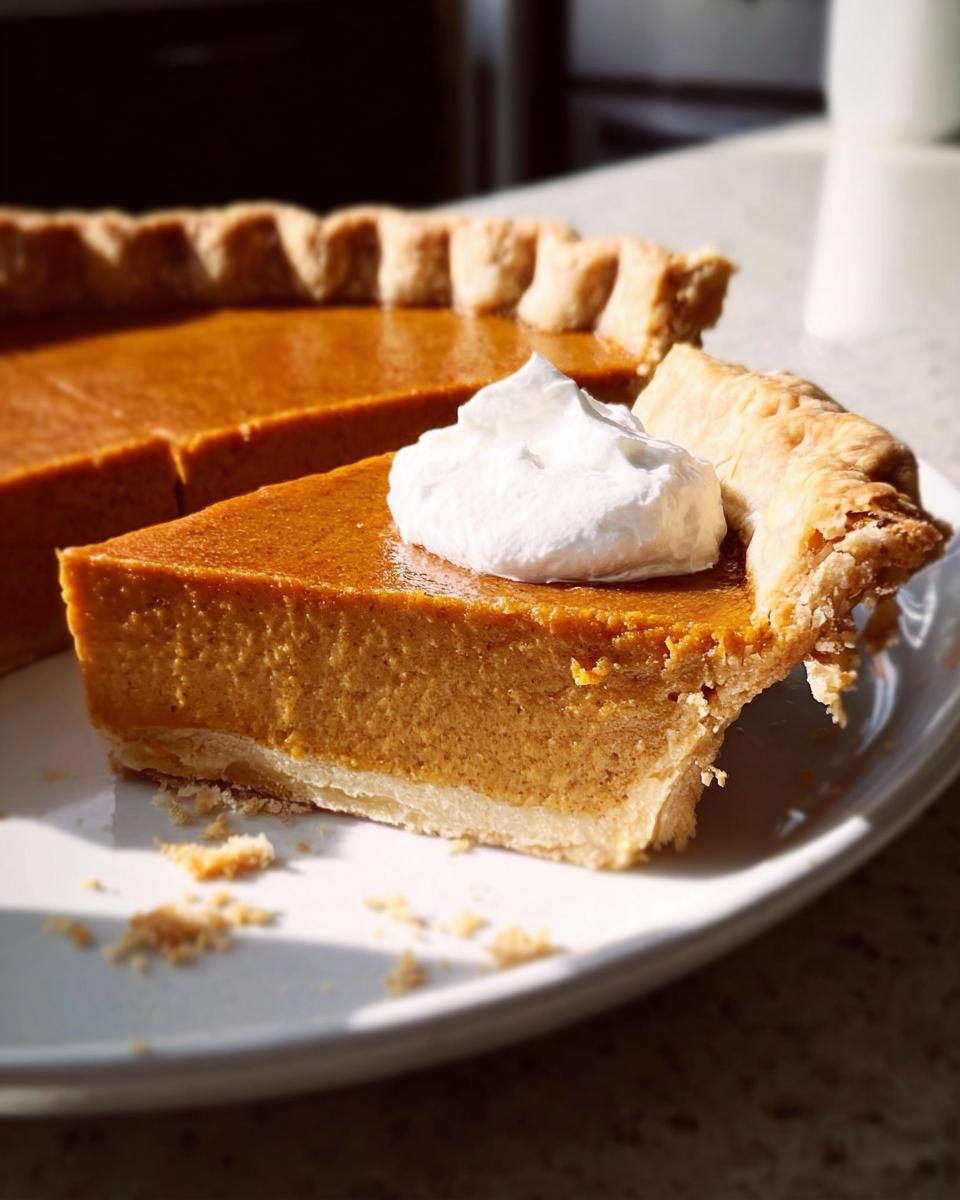
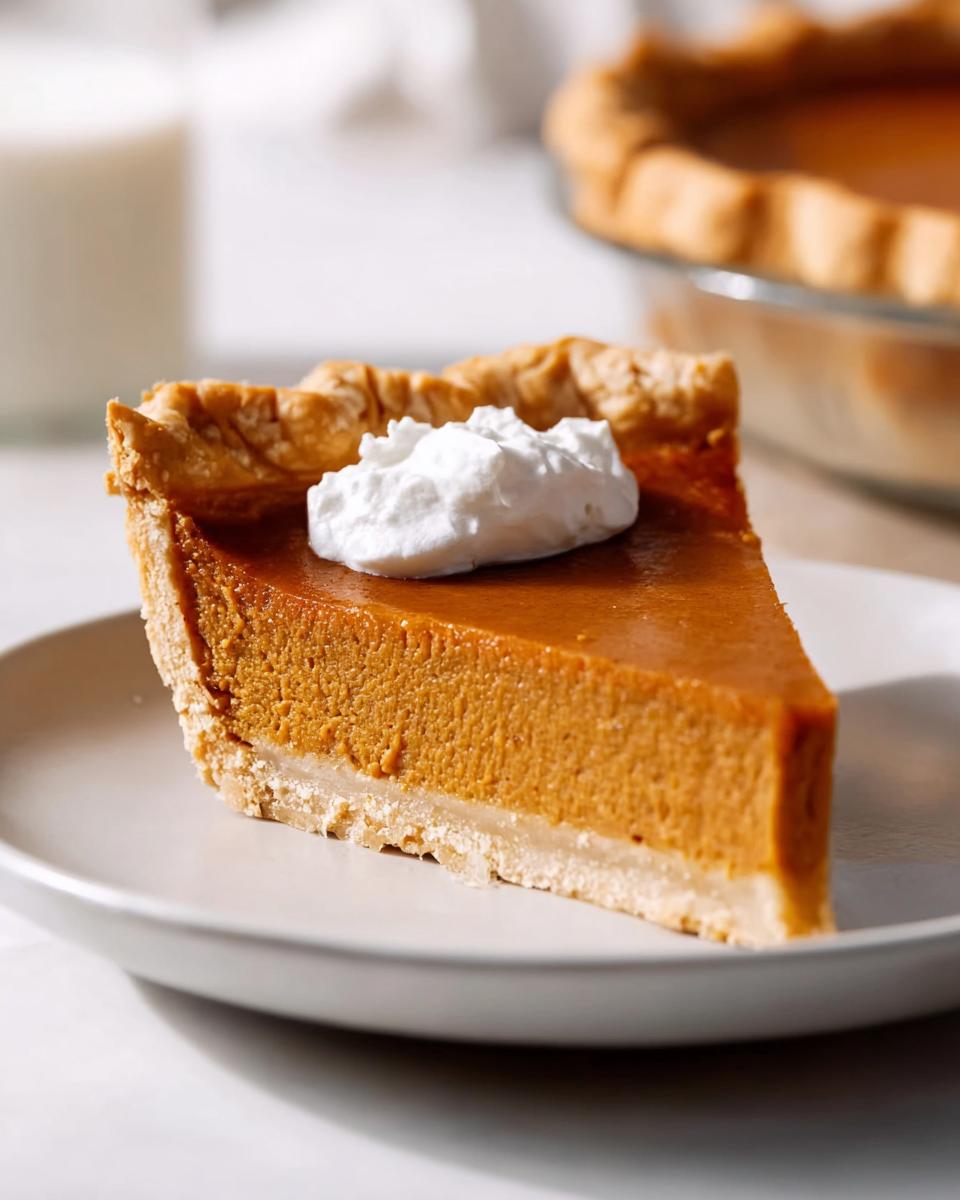
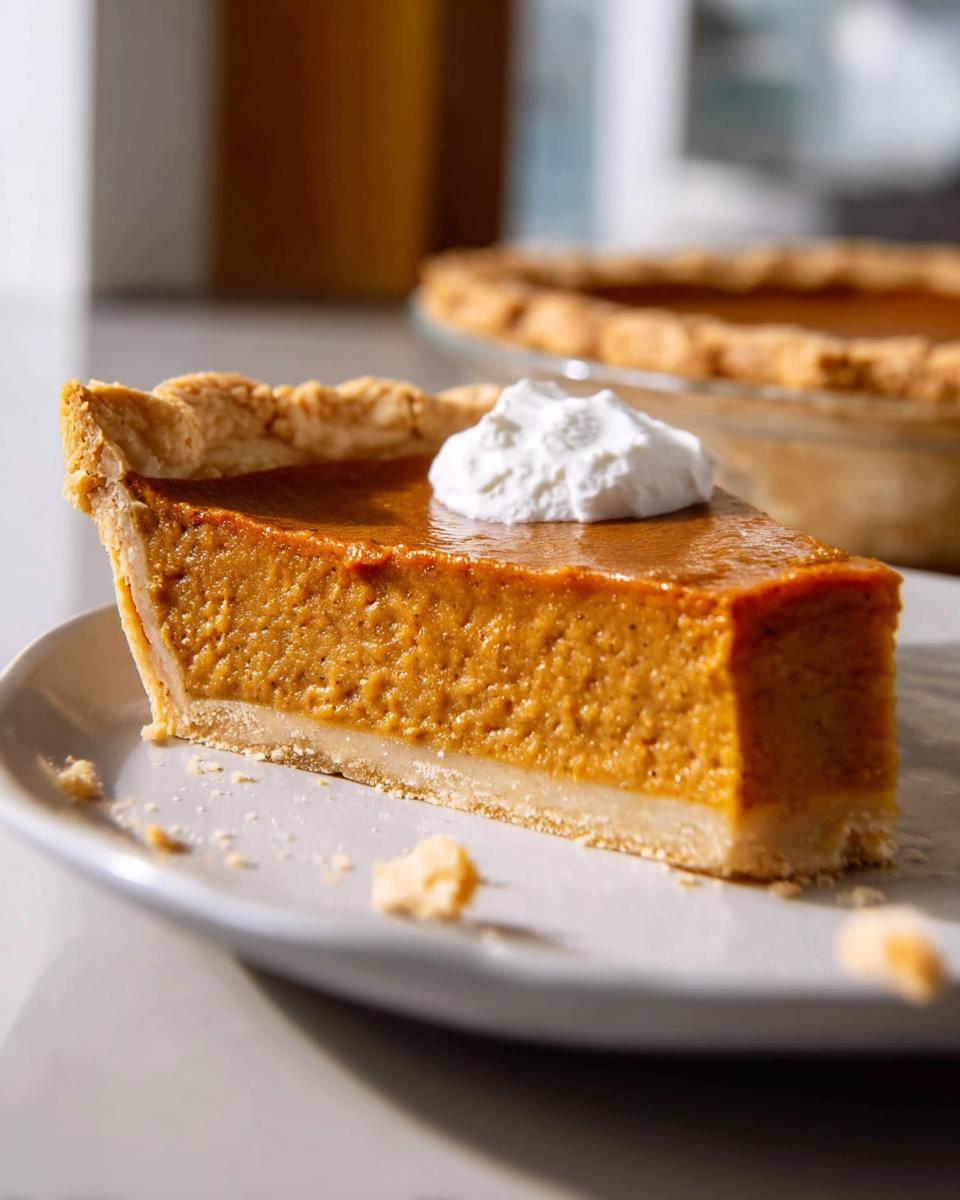
Baking and Cooling Your Thanksgiving Dessert
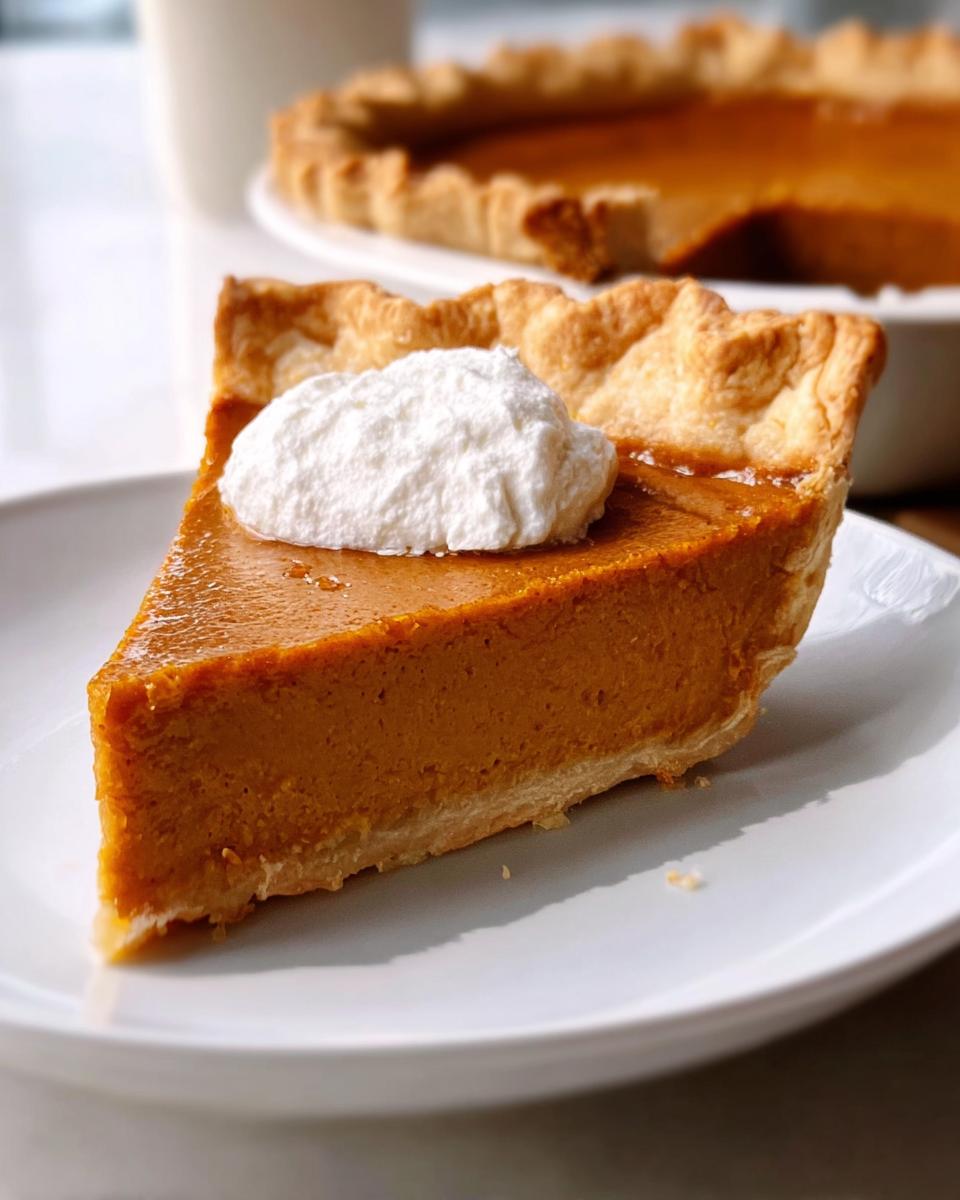
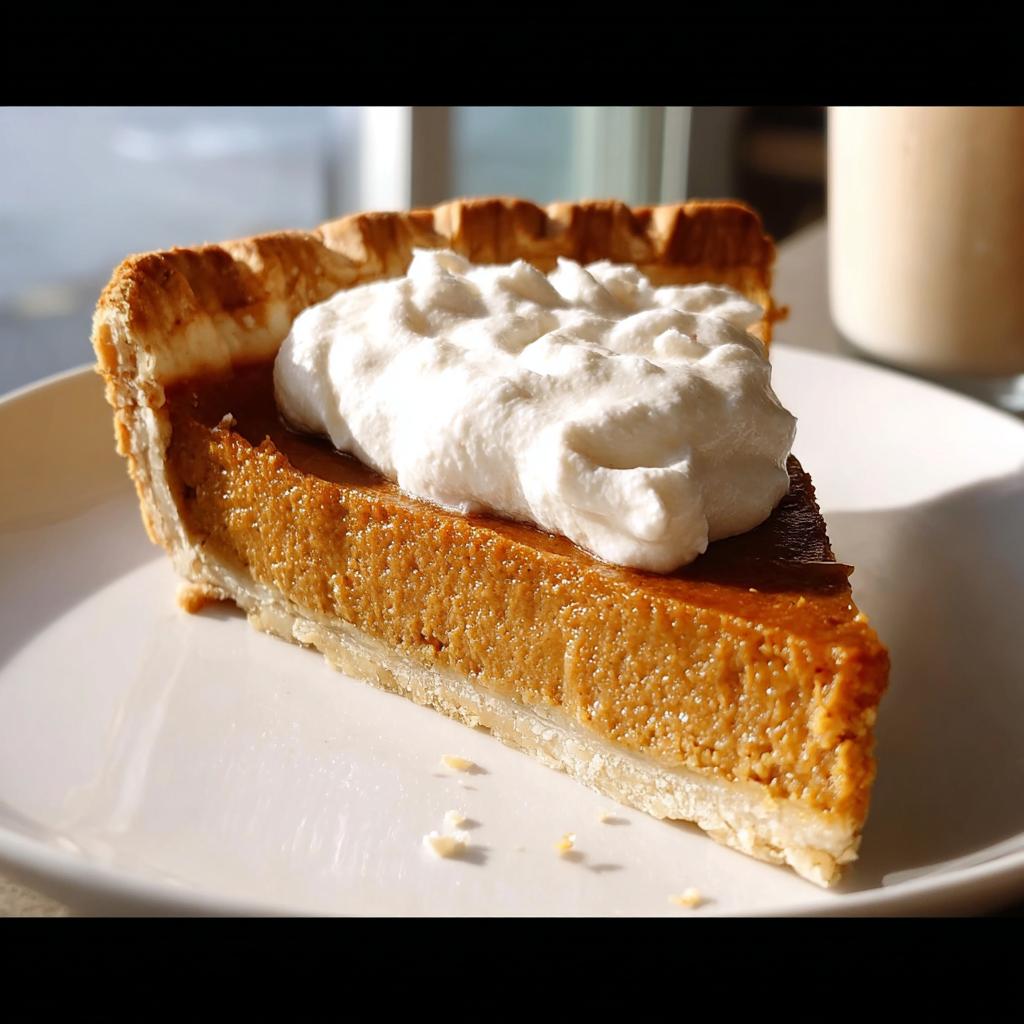
Okay, oven time! Once your crust is blind-baked, turn the oven temperature down to 325°F (160°C). Carefully pour all that luscious pumpkin filling into your pre-baked crust. Be gentle! Now, pop it back into the oven and bake for about 50 to 60 minutes. You’re looking for the filling to be mostly set – the edges should look cooked, but the very center should still jiggle just a little when you gently nudge the pan. If those crust edges start looking a bit too dark before the center is done, don’t panic! Just tent them with those foil strips again. Once it’s baked, carefully take the pie out and let it cool completely on a wire rack. This part is crucial for the pie to set up properly and make sure it’s not soggy. Let it sit on that baking sheet for a good few hours until it’s totally at room temperature.
Make-Ahead and Freezer Tips for Thanksgiving Desserts
Life with little ones is hectic, right? That’s why I love that this pie is totally make-ahead friendly. It takes a huge chunk of stress off your plate on Thanksgiving Day. You can totally bake this foolproof pumpkin pie the day before and just let it chill in the fridge. Then, before you serve it, just bring it to room temperature for a bit. Easy peasy!
And if you’re a super planner, good news! The pie dough itself can hang out in the fridge for a couple of days, or you can freeze it for up to a month. Just thaw it overnight in the fridge before you need it. You can even freeze the whole baked pie for up to a month. Just make sure it’s completely cooled, wrap it up tight in foil or a freezer bag. Thaw it in the fridge overnight, and boom – dessert is covered!
Ingredient Notes and Substitutions for Your Thanksgiving Dessert
Let’s chat about a couple of ingredients that might have you scratching your head, or maybe you’re missing something! For this foolproof Thanksgiving dessert, evaported milk is really special. Please, please don’t confuse it with sweetened condensed milk – that’s a whole different ballgame and will make your pie super sweet and weirdly textured. If you absolutely can’t find evaporated milk, you can try using whole milk, but you might need to add an extra egg yolk to get that lovely creamy consistency. And for the pumpkin? Make sure it’s PURE pumpkin puree, not pumpkin pie filling, which already has spices and sugar mixed in.
Frequently Asked Questions About How to Make Thanksgiving Desserts (Foolproof)
Got questions about tackling this foolproof pumpkin pie recipe? I’ve got answers! It’s always good to know the little tricks for how to make Thanksgiving desserts (foolproof!) that are guaranteed hits. Let’s dive in:
Can I use a different type of milk in the pumpkin pie?
So, the recipe calls for evaporated milk, and honestly, it’s pretty key for that creamy, rich texture without making the filling too watery. It’s different from condensed milk (which is way too sweet!). If you absolutely can’t find evaporated milk, you could *try* whole milk, but you might need to add an extra egg yolk or two to get that lovely thickness and richness. It won’t be exactly the same, but it’s a decent workaround if you’re in a pinch!
Why did my pumpkin pie crack?
Oh, the dreaded pie crack! It usually happens when the pie bakes too long or at too high a temperature, causing the center to puff up and then sink. Over-mixing the filling can also contribute. For this recipe, make sure you’re baking at 325°F and only until the center is *just* set with a little jiggle. Cooling it slowly on a wire rack also helps prevent that dramatic crack. Don’t worry too much though, a little crack never hurt anyone’s Thanksgiving spirit!
How do I prevent a soggy pie crust bottom?
This is a big one, especially for holiday baking! The secret is that blind-baking step at the beginning. By pre-baking the crust until it’s already dry and golden, you create a barrier that stops the wet filling from soaking into it later. Make sure you chill the crust well before baking it the first time, and don’t skip lining it with parchment paper and pie weights! That helps the bottom cook through and stay crisp.
Can I make this pumpkin pie without the egg yolks?
You know, those egg yolks really add to the custard-like texture and richness that makes this pie so delicious! While you could technically leave them out, the pie might be a bit less creamy and potentially a little more prone to cracking. If you absolutely must omit them, you might want to add a tiny bit more flour or cornstarch to the filling to help it set up, but I really recommend keeping them in for the best results for this foolproof Thanksgiving dessert!
Estimated Nutritional Information
Just a heads-up, the numbers below are estimates and can totally vary based on the exact brands and ingredients you use. But for a slice of this delicious, foolproof pie, you’re looking at roughly 335 calories, 45g of carbohydrates, 6g of protein, and about 15g of fat. It’s a decadent treat that’s totally worth it for your Thanksgiving table!
Share Your Foolproof Thanksgiving Dessert Creations!
I just love hearing from you! Did you try out this foolproof pumpkin pie recipe for your Thanksgiving feast? I’m dying to know how it turned out! Please, share your thoughts, leave a comment below, or even rate the recipe. If you snap a pic of your amazing creation, tag me on social media – I’d love to see it!
How to Make Thanksgiving Desserts (Foolproof)
Ingredients
Equipment
Method
- For a homemade crust: Roll out the dough and fit it into a 9-inch deep-dish pie pan. Make sure it is snug against the pan’s edges and bottom. Chill for at least 30 minutes. Preheat your oven to 375°F and place an oven rack in the middle position. Place the chilled pie crust on a baking sheet. Cover the crust with parchment paper and fill about three-quarters full with dried beans or pie weights. Bake for 20 minutes. Remove the crust from the oven, take off the parchment paper and beans/pie weights. Tent the edges with foil strips. Bake for another 15 to 20 minutes, until the dough is dry and lightly golden. If the bottom puffs up, gently press it down with a flat spatula without puncturing it. Remove the foil.
- For a frozen crust: Follow the package instructions for blind-baking.
- After blind-baking the crust, reduce the oven temperature to 325°F.
- In a large bowl, combine the pumpkin, egg, egg yolks, granulated sugar, brown sugar, flour, salt, cinnamon, ginger, nutmeg, cloves, pepper, and evaporated milk. Whisk until smooth. Pour the filling into the pre-baked crust.
- Bake the pie for 50 to 60 minutes at 325°F. The filling should be just set, with the edges dry and the center jiggling slightly. If the crust edges brown too quickly, tent them with foil strips. Let the pie cool on a wire rack on the baking sheet to room temperature, which takes a few hours. Slice or refrigerate until ready to serve.
- Make Ahead: You can make the pumpkin pie one day ahead and refrigerate it. Bring it to room temperature before serving.
- Freezer-Friendly Instructions: The dough can be made ahead, wrapped in plastic, and refrigerated for up to 2 days, or frozen for up to 1 month. If freezing, thaw overnight in the refrigerator. The pie can be frozen after baking for up to 1 month. After it cools completely, double-wrap it securely with aluminum foil or plastic freezer wrap, or place it in a heavy-duty freezer bag. Thaw overnight in the refrigerator and bring to room temperature before serving.
Nutrition
Notes
Tried this recipe?
Let us know how it was!
Certified Family Nutrition Strategist
My path into family nutrition began working with Phoenix Area Family Services, where I saw how traditional nutrition advice often ignored real-world constraints like budget limitations, time crunches, and kids who refuse to eat anything green. That experience sparked my mission to develop meal planning systems that work with family realities, not against them.
Over eight years, I’ve helped hundreds of families reduce grocery spending by 25% while dramatically improving their nutrition. My meal planning frameworks have been adopted by local wellness centers because they actually work for busy parents juggling different ages, preferences, and dietary needs in one household.
As a bilingual first-generation Mexican-American and mother of three, I personally navigate the daily challenge of feeding a family nutritiously while honoring cultural traditions and managing a household budget. My “kid-friendly low-carb” protocols show families how to gradually introduce healthier options without triggering mealtime battles or abandoning beloved family recipes.
My “realistic wellness” philosophy is straightforward: health improvements must work within existing family dynamics and financial realities to be truly sustainable. When I’m not developing meal planning systems, I’m creating portable trail snacks for our weekend family hiking adventures – because healthy eating should fuel the life you want to live.
My personal low-carb journey started after pregnancy as a way to regain energy for active parenting, and that experience continues to inform my professional commitment to making healthy eating feel supportive rather than burdensome for busy families.