

Oh, chicken! It seems so simple, right? But how many of us have ended up with a dry, flavorless bird that just *isn’t* worth the effort? I totally get it. For years, even as a Certified Family Nutrition Strategist, getting that perfectly juicy, tender chicken on the table felt like a culinary Everest. That’s why I’ve poured all my experience and a few hard-won lessons into this Ultimate Chicken Guide: Ingredients, Temps, Tips. My goal is to banish dry chicken forever and make cooking it a joy, not a chore. I vividly remember the first time I attempted to roast a whole chicken. As a young mother, I was juggling the demands of a busy household while trying to prepare a nutritious meal. The recipe seemed simple enough, but with three hungry kids at my feet, I felt overwhelmed. As the chicken roasted, my kitchen filled with an aroma that made everyone’s mouth water. It was a huge hit at the dinner table, and seeing my family enjoy that meal ignited my passion for cooking chicken in various ways. It taught me that with the right knowledge, anyone can create comforting and delicious meals that bring families together.
Your Ultimate Chicken Guide: Essential Ingredients for Success
Alright, let’s talk chicken! Getting that perfect roast isn’t about fancy tricks; it’s about starting with the right stuff. Think of these as your trusty sidekicks for a truly amazing meal. We’re keeping it simple here in the Ultimate Chicken Guide: Ingredients, Temps, Tips, because good food doesn’t need a million components. Trust me, these core ingredients make all the difference in getting that incredibly juicy chicken we all dream about.
Core Ingredients for the Perfect Roast
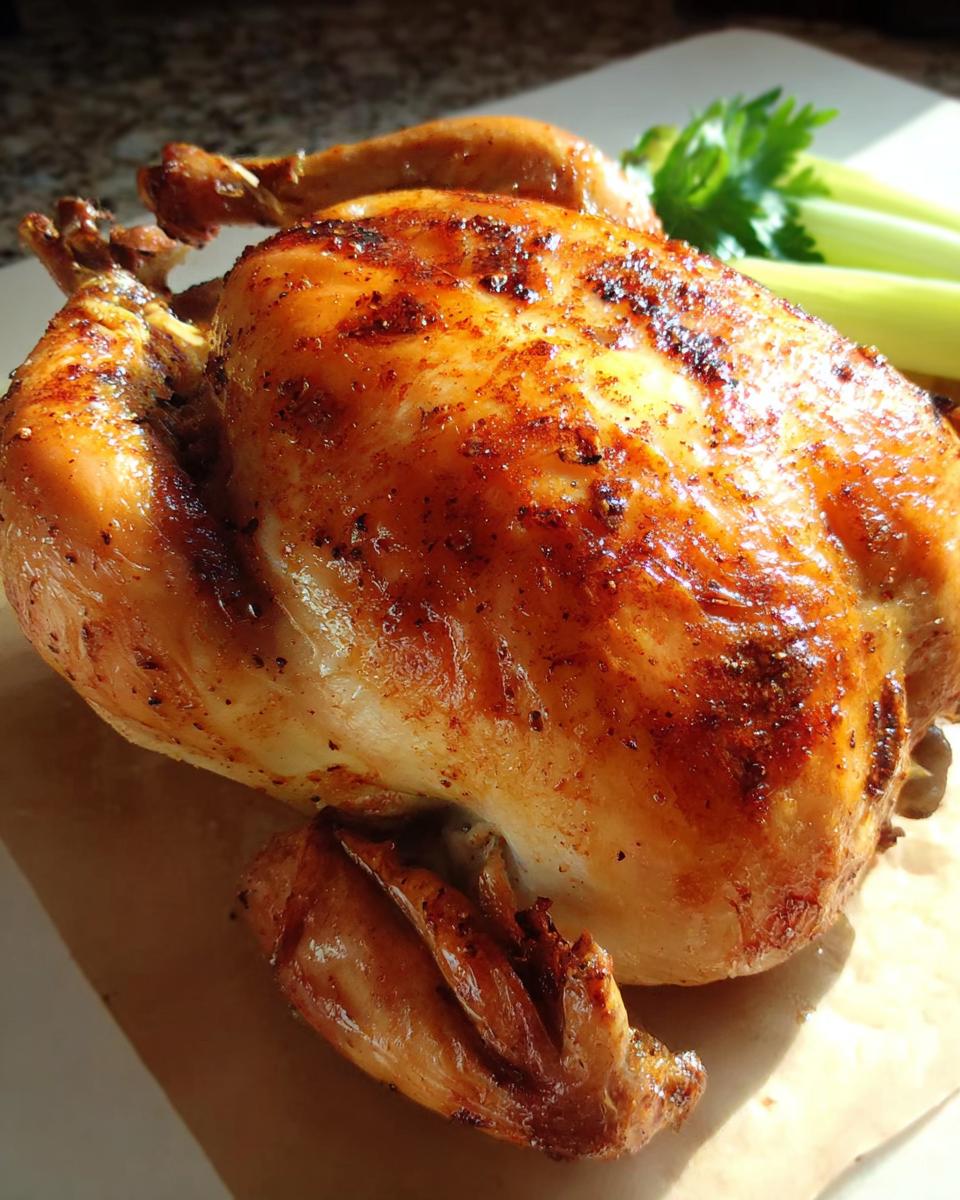
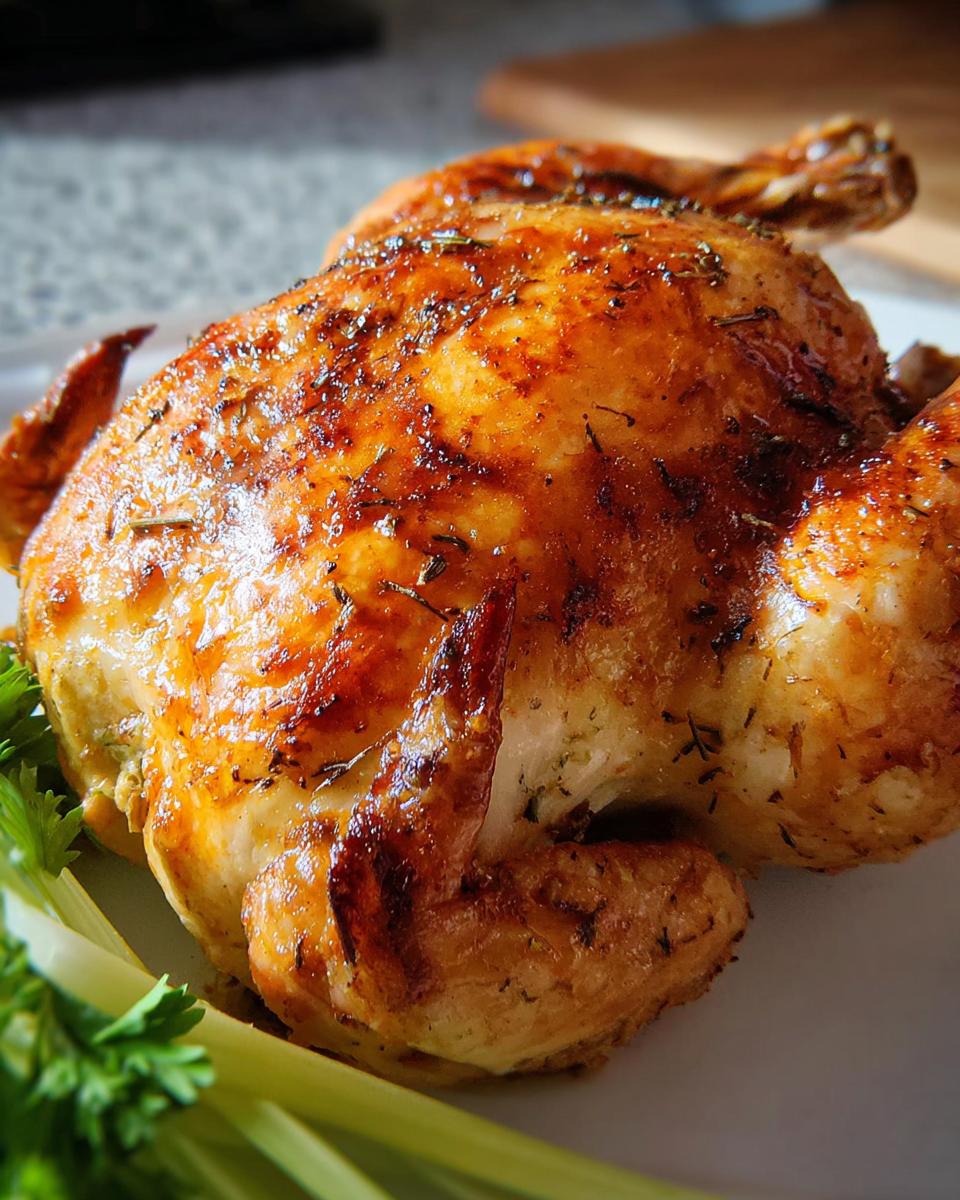
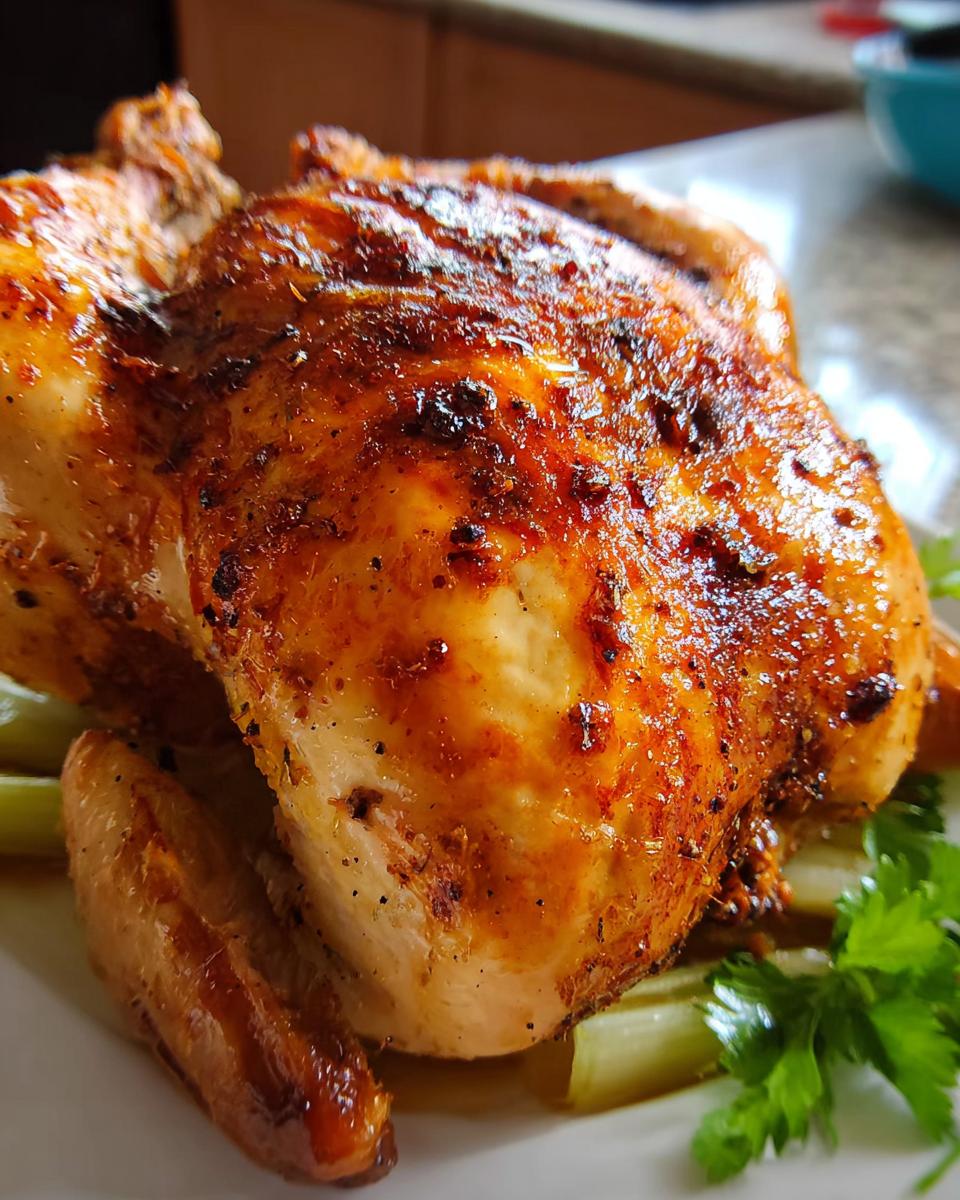
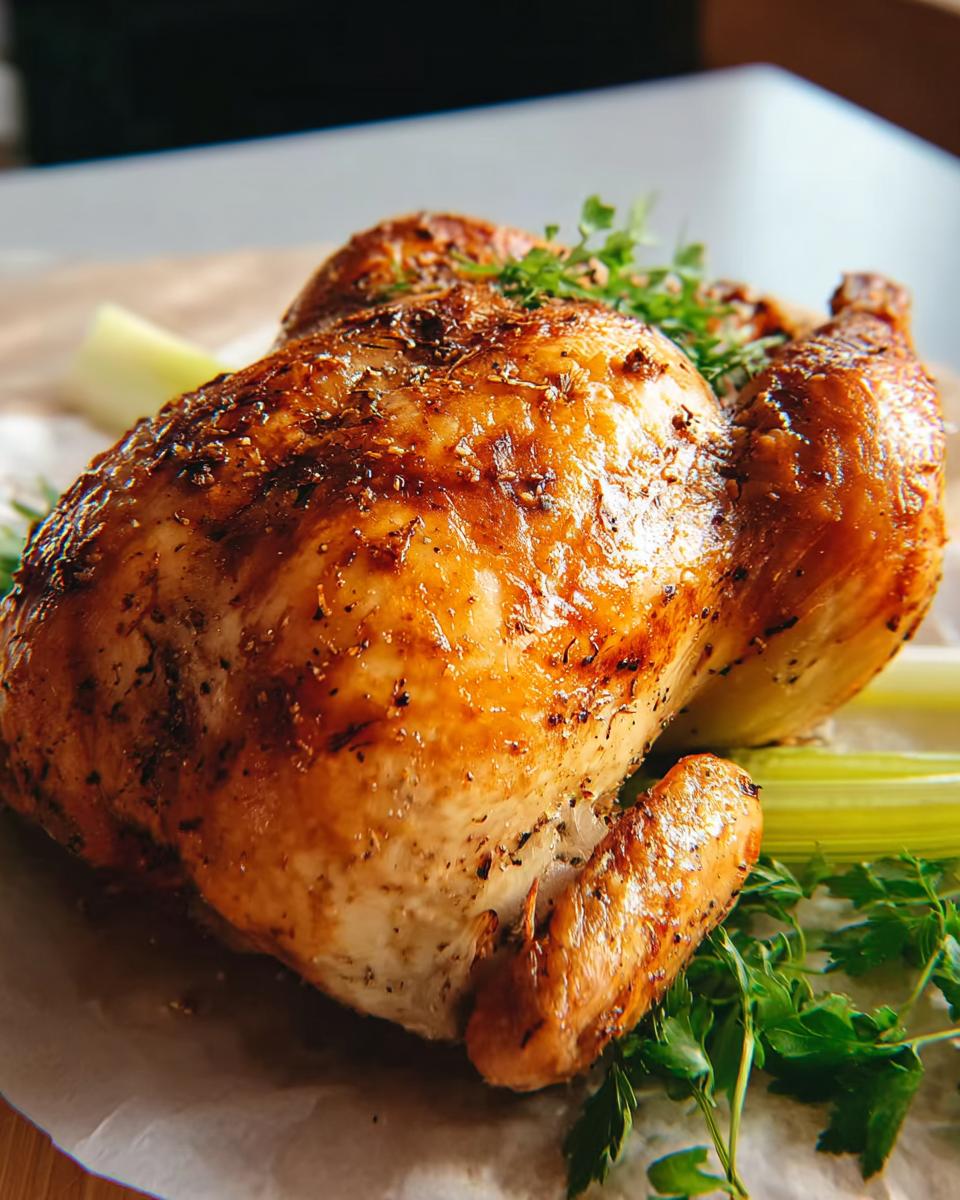
So, what do you absolutely need for a killer roasted chicken? First up, the star of the show: a good quality whole chicken. I like to grab one that’s around 3 to 4 pounds for a nice, manageable size, and always remember to take out those giblets tucked inside – they’re great for stock, but not for roasting! Next, you’ll need some good old salt and freshly cracked black pepper. Don’t be shy with these; they really bring out the chicken’s natural flavor. Then, we’ve got onion powder. It’s my secret weapon for adding that savory depth without having to chop a whole onion for the rub. And for that incredible moisture and golden-brown skin? Yep, butter! Unsalted is best so you can control the saltiness. We’ll use some inside the cavity and some for the outside. Lastly, for a little aromatic surprise inside, a stalk of fresh celery. It sounds simple, but it adds a subtle, clean flavor that just complements everything beautifully. Easy peasy, right?
Mastering Chicken Cooking Temperatures for Juicy Results
Okay, let’s get to the nitty-gritty because this is where the magic *really* happens – temperatures! Getting your chicken cooked *just right* is the secret to avoiding that dreaded dry bird and keeping everyone happy and healthy. It’s all about hitting that sweet spot where it’s perfectly safe to eat but still incredibly moist and tender. When you’re following along with this Ultimate Chicken Guide: Ingredients, Temps, Tips, remember that the thermometer is your new best friend! Cooking chicken to the right internal temperature is crucial not just for taste, but for safety, making sure any nasty bacteria are zapped away. It’s pretty neat how a few degrees can make such a huge difference, right? For more tips on getting that perfect roast, check out this juicy roasted chicken recipe.
Internal Temps for Perfectly Cooked Chicken
So, how do you know when your chicken is ready? It’s all about hitting 165 degrees Fahrenheit (that’s 74 degrees Celsius for my metric friends!). For thighs and wings, you might even want to push it to 170-175°F (77-79°C) for extra tenderness. Always use an instant-read thermometer inserted into the thickest part of the meat, away from any bones, to get a true reading. If you don’t have one – oops! – you can check by piercing the thigh with a knife; the juices should run clear, not pink. But seriously, get yourself a thermometer; they’re lifesavers for perfectly cooked chicken every single time!
Step-by-Step: Your Ultimate Chicken Guide to Preparation
Alright, let’s get cooking! This is where we bring everything together to make that amazing, juicy chicken. Following these easy steps in our Ultimate Chicken Guide: Ingredients, Temps, Tips will set you up for success, whether you’re oven baking for the first time or a seasoned pro. It’s more about getting a feel for it than anything super complicated, so let’s dive in!
Prepping Your Chicken for the Oven
First things first, turn on your oven and let it preheat to 350°F (175°C). While it’s warming up, grab your chicken and pat it *really* dry with paper towels – trust me, this is key for crispy skin later! Make sure you’ve removed any giblets from the cavity. If you haven’t already, give it a quick sprinkle of salt and pepper inside and out. Pop it into your roasting pan, ready for the next delicious step.
Seasoning and Butter Application
Now for the flavor and moisture magic! Take about 3 tablespoons of that lovely butter and tuck it right inside the chicken’s cavity. It’ll melt and perfume the inside as it cooks. Then, dollop the remaining butter all over the outside of the chicken. This helps the skin get gorgeously golden and keeps the meat underneath super tender. Don’t forget to season the outside generously with onion powder, salt, and pepper too!
Adding Aromatics to the Cavity
This step is super simple but adds a nice little something-something. Just take that stalk of celery, trim off the leaves, and cut it into a few pieces. Pop these right into the cavity with the butter. They’ll soften as the chicken cooks and release a fresh, subtle aroma that just makes the whole house smell amazing.
Roasting and Checking for Doneness
Into the preheated oven it goes! Let your chicken roast uncovered for about 1 hour and 15 minutes. You’re looking for that beautiful golden-brown color and juices that run clear. The most reliable way is to use your instant-read thermometer – aim for 165°F (74°C) in the thickest part of the thigh. Remember, cooking times can vary, so always check!
The Crucial Resting Period
This is SO important, don’t skip it! Once it’s out of the oven, baste the chicken with those delicious pan drippings. Then, cover it loosely with foil and let it rest for a good 30 minutes. This lets all those juices redistribute throughout the meat, ensuring every bite is perfectly moist. Going straight to carving means all that juiciness runs out onto the board. Patience here really pays off!
Expert Tips for the Ultimate Chicken Guide
You’ve got the basics down, now let’s talk about those little touches that *really* make your chicken sing! These aren’t complicated, but they’re the secrets to taking your roasted chicken from “pretty good” to “absolutely phenomenal.” When you nail these, you’ll feel like a total kitchen pro, and dinner will be so much more satisfying. This is all part of my Ultimate Chicken Guide: Ingredients, Temps, Tips – helping you shine!
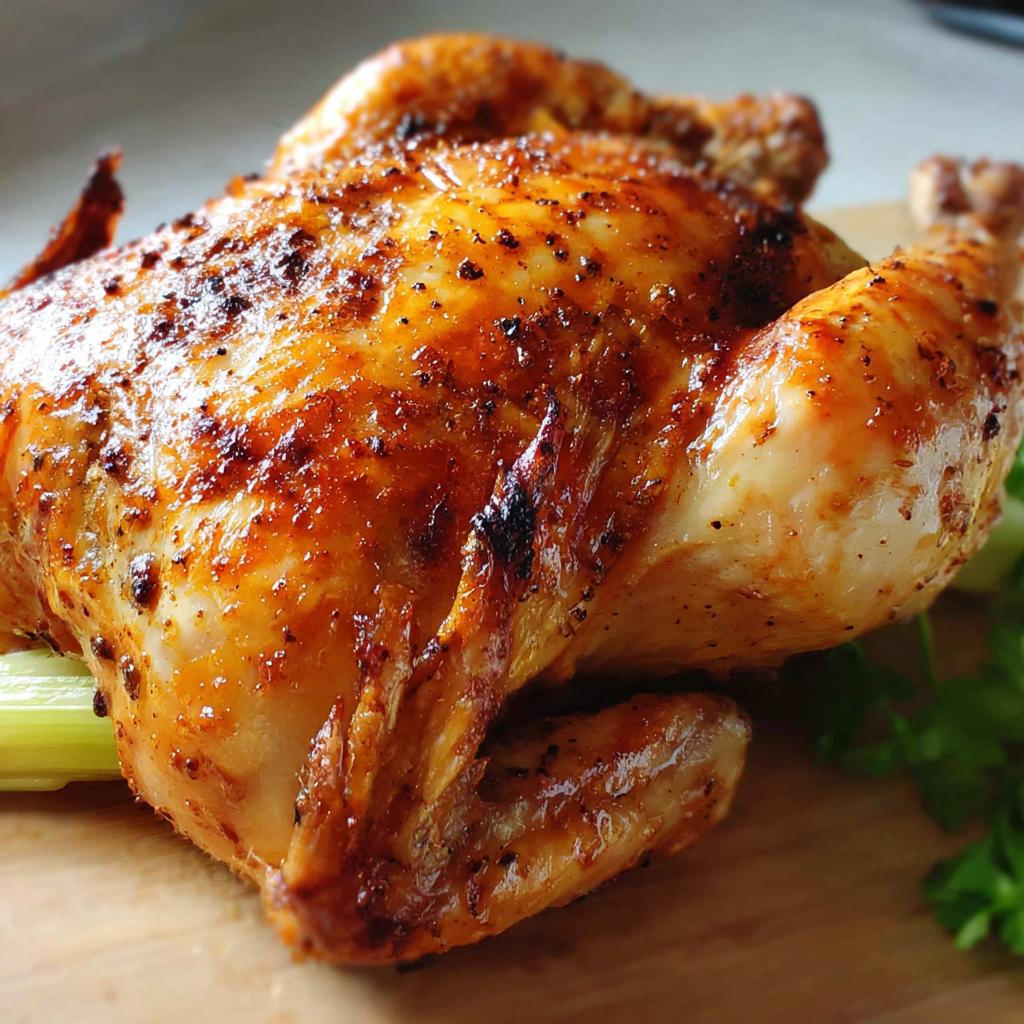
Achieving Crispy, Golden Skin
Oh, that perfect crispy skin! It’s a game-changer. The absolute *most* important thing? Pat your chicken bone-dry with paper towels before you do anything else. Seriously, get it as dry as possible. Then, making sure you rub softened butter or even a little olive oil all over the skin helps it crisp up beautifully. If your oven runs a bit cool, you might even crank it up to 375°F or even 400°F for the last 15-20 minutes to get that final golden touch!
Ensuring Moisture and Flavor
Nobody wants dry chicken, right? For ultimate moisture, besides not overcooking it (remember that resting time!), I love basting the chicken with its own juices every 20 minutes or so while it roasts. It keeps the surface moist and helps build flavor. If you’re feeling fancy and have extra time, a quick brine overnight can work wonders, but honestly, for a busy weeknight, focusing on that butter and those aromatics in the cavity, plus gentle basting, does a fantastic job! And don’t be afraid to experiment with marinades for different flavor profiles!
Serving Your Perfectly Roasted Chicken
Okay, the moment we’ve all been waiting for! That beautiful, golden chicken is out of the oven, it’s rested, and it’s ready to be devoured. Now, what do we pair with this masterpiece? This part of our Ultimate Chicken Guide: Ingredients, Temps, Tips is all about celebrating your success and making it a meal to remember!
Classic Side Dishes
You really can’t go wrong with the classics, can you? Think fluffy mashed potatoes doused in butter, a vibrant, fresh green salad with your favorite vinaigrette, or some simple roasted root vegetables like carrots and potatoes tossed with a little olive oil and herbs. It’s all about letting that amazing chicken shine!
Creative Serving Ideas
And what about those delicious leftovers? Don’t let them go to waste! Shredded chicken is fantastic in sandwiches, tossed into pasta salads, or simmered into a comforting soup. And for serving, don’t stress too much about fancy carving. A simple presentation with the chicken carved into generous portions on a platter is always lovely. Enjoy every bite!
Frequently Asked Questions about Chicken
Got chicken conundrums? I get it! Cooking can bring up all sorts of questions, and I’m here to clear them up so you can feel totally confident in your kitchen. These are some common things folks ask when they’re aiming for that perfect, juicy chicken. It’s all part of making this Ultimate Chicken Guide: Ingredients, Temps, Tips truly yours!
Is it safe to eat chicken if it’s slightly pink?
Honestly, it’s best to play it safe here! Chicken is only considered fully safe once it reaches an internal temperature of 165°F (74°C) everywhere. If it’s still pink and hasn’t hit that temperature, it’s better to pop it back in the oven for a bit longer to make sure it’s cooked through. Your thermometer is your best buddy for this!
How can I prevent my chicken from drying out?
Oh, this is a big one! The secrets are simple: don’t overcook it! Use that thermometer to know exactly when it’s done. Also, that resting period after cooking is non-negotiable – it lets the juices settle. Basting with pan drippings during the cooking process also helps keep things super moist and flavorful. It really makes a difference for that juicy chicken we love!
Can I use different seasonings for my chicken?
Absolutely, yes! While salt, pepper, and onion powder are fantastic, please, experiment! Try paprika for color, garlic powder for extra punch, or a mix of Italian herbs. For even more flavor, especially on a busy weeknight, don’t shy away from marinades. They can infuse so much taste right into the meat before you even start cooking!
Nutritional Information
Now, let’s talk about what’s in that delicious chicken! For a typical serving of this roasted chicken, you can expect around [Insert Calorie Estimate] calories, about [Insert Fat Estimate] grams of fat, and a hearty [Insert Protein Estimate] grams of protein. Keep in mind these numbers are just estimates, of course. They can change a bit depending on the exact size of your chicken, how much butter you use, and any other seasonings you might add. It’s a wonderfully nourishing meal, though!
Share Your Chicken Creations!
Alright, you’ve made it through the Ultimate Chicken Guide! Now it’s your turn to shine. I really hope this helps you create the most amazing, juicy chicken you’ve ever had. Have you tried it? Did you add your own special twist? I’d absolutely *love* to hear all about it! Leave a comment below, tell me how it went, or even share a picture of your beautiful chicken with me online. Happy cooking!
Ultimate Chicken Guide: Ingredients, Temps, Tips
Ingredients
Equipment
Method
- Gather all ingredients. Preheat the oven to 350 degrees F (175 degrees C).
- Place chicken in a roasting pan; season generously inside and out with onion powder, salt, and pepper. Place 3 tablespoons of butter in chicken cavity; arrange dollops of remaining butter on the outside of chicken.
- Cut celery into 3 or 4 pieces; place in the chicken cavity.
- Bake chicken uncovered in the preheated oven until no longer pink at the bone and the juices run clear, about 1 hour and 15 minutes. An instant-read thermometer inserted into the thickest part of the thigh, near the bone, should read 165 degrees F (74 degrees C).
- Remove from the oven and baste with drippings. Cover with aluminum foil and allow to rest for about 30 minutes before serving.
Notes
Tried this recipe?
Let us know how it was!
Certified Family Nutrition Strategist
My path into family nutrition began working with Phoenix Area Family Services, where I saw how traditional nutrition advice often ignored real-world constraints like budget limitations, time crunches, and kids who refuse to eat anything green. That experience sparked my mission to develop meal planning systems that work with family realities, not against them.
Over eight years, I’ve helped hundreds of families reduce grocery spending by 25% while dramatically improving their nutrition. My meal planning frameworks have been adopted by local wellness centers because they actually work for busy parents juggling different ages, preferences, and dietary needs in one household.
As a bilingual first-generation Mexican-American and mother of three, I personally navigate the daily challenge of feeding a family nutritiously while honoring cultural traditions and managing a household budget. My “kid-friendly low-carb” protocols show families how to gradually introduce healthier options without triggering mealtime battles or abandoning beloved family recipes.
My “realistic wellness” philosophy is straightforward: health improvements must work within existing family dynamics and financial realities to be truly sustainable. When I’m not developing meal planning systems, I’m creating portable trail snacks for our weekend family hiking adventures – because healthy eating should fuel the life you want to live.
My personal low-carb journey started after pregnancy as a way to regain energy for active parenting, and that experience continues to inform my professional commitment to making healthy eating feel supportive rather than burdensome for busy families.