
If you’re anything like me, the joy of hosting can sometimes get buried under a mountain of last-minute stress. Seriously, who wants to be scrambling for a decent dessert when guests are already asking for their coats in the hallway? That’s why I am completely obsessed with having an impressive, elegant dessert ready to go. This, my friends, is the ultimate Chocolate Mousse (Make-Ahead Dessert) you’ll ever need. I still remember the first time I brought a chocolate mousse to a family gathering. It was a chaotic weekend, with the kids running around and dinner prep in full swing. I needed a dessert that could be made ahead and still wow everyone at the table. As I whisked the chocolate and cream together, I could hear my children’s laughter in the background—a sound that always warms my heart. When I finally unveiled the chocolate mousse, the smiles around the table were worth the effort. It became a beloved tradition in our family, showing that a little bit of planning can lead to sweet, shared moments that we all cherish.
Why This Chocolate Mousse (Make-Ahead Dessert) Simplifies Entertaining
Look, if you’re hosting, your day should be about chatting with your guests, not sweating over a hot stove at 9 PM! That’s the real magic behind utilizing this Chocolate Mousse (Make-Ahead Dessert). It moves all the hard work—the careful folding and the rich melting—to a time when you actually have free hands. It’s crowd-friendly because everyone loves a good individual serving of chocolate perfection, and let me tell you, it looks incredibly elegant!
Key Benefits of a Make Ahead Dessert
- You get to enjoy your own party because everything is done hours before anyone walks through the door.
- The chilling time is a huge plus; it lets all those rich chocolate and cream flavors really marry together beautifully.
- It’s so easy to portion into individual glasses, making presentation stunning without any fuss.
- No last-minute panic! You pull it out of the fridge, add a little something pretty on top, and you’re done.
Gathering Ingredients for Your Chocolate Mousse (Make-Ahead Dessert)
Okay, let’s talk ingredients! This recipe is simple, which means the quality of what you use really shines through. Since this is a luxurious chocolate mousse, we absolutely cannot skimp on the good stuff. That bittersweet cooking chocolate? It’s what gives us that deep, grown-up flavor! And trust me, using full-fat cream that can really hold its shape is non-negotiable for that classic light-yet-rich texture. Don’t let your pantry fool you; grab these exactly as listed for the best outcome.
Ingredients for the Mousse Base
- 3 eggs (separated, room temperature)
- 125 g dark cooking chocolate (bittersweet, 70% cocoa)
- 10 g unsalted butter
- 1/2 cup cream (full fat, heavy or thickened)
- 3 tbsp caster sugar
Garnish Ingredients
These are your finishing touches! We want this elegant dessert to look as good as it tastes, right?
- Whipped cream (additional)
- Chocolate shavings
Essential Equipment for Perfect Chocolate Mousse (Make-Ahead Dessert)
Don’t stress about fancy gadgets here! I love recipes that work with what I already have tucked away in the kitchen cupboards. Good news—this mousse doesn’t need anything too intimidating. It just requires a few basic tools to handle the whipping and folding we need to do to get that gorgeous, airy texture. Having these things ready before you start keeps the workflow smooth!
For this project, you definitely want to make sure you have a couple of things ready to go:
- A microwave-proof bowl for melting all that glorious chocolate.
- A sturdy whisk, especially for those yolks!
- A nice, flexible rubber spatula—this will be your folding best friend!
- An electric mixer (handheld or stand mixer works fine) to get those egg whites perfectly stiff.
- Small glasses or cute little pots if you are portioning them out ahead of time for serving.
Step-by-Step Instructions for the Chocolate Mousse (Make-Ahead Dessert)
Now for the fun part! Making this Chocolate Mousse (Make-Ahead Dessert) is really all about technique, especially when it comes to folding. We need to introduce air gently so we don’t get flat, heavy mousse! Don’t rush this section, and remember: we are aiming for elegance, not speed, in the mixing bowl. Pay close attention to those fold counts; they truly matter here.
Preparing the Base Components
First things first, separate those eggs when they are cold—it makes life easier! Put the whites in a nice big bowl for later and the yolks in a smaller one. Whisk those yolks real slow until they look nice and uniform. Meanwhile, break up your dark chocolate and melt it down with the butter. You’ll melt this in short bursts in the microwave, stirring hard in between until it’s smooth as velvet, then set it aside to cool just a little bit. Next, whip up your heavy cream until you get stiff peaks—watch it closely so you don’t end up with butter!
Separately, sugar goes into your egg whites, and you beat them until they hold firm peaks. You know they are ready when you can turn the bowl upside down and nothing falls out!
Folding Techniques for Lightness
This is where the magic happens! Gently fold your egg yolks into that whipped cream, only doing about eight folds—it’s okay if a little white streak hides in there! Then, check your chocolate; it needs to be runny but only warm (around 95°F is perfect). If it’s too cool, give it a quick 5-second zap in the microwave.
Pour that warm, runny chocolate into the cream and yolk mix and fold that gently, again, no more than eight folds. Now, take about a quarter of your fluffy egg whites and fold those in to lighten the chocolate base—maybe ten folds here. Finally, pour that entire chocolate concoction into the remaining whites. Fold carefully until you have no big white patches left. I’d count to twelve folds max! That air is precious.
Assembly and Setting Time for Your Make Ahead Dessert
Once you’ve got that gorgeously unified batter, divide it equally into your four little serving glasses or pots. You’ve done the work! Now, cover them up and they need a good, long rest. Seriously, you must refrigerate this for at least six hours, but honestly, overnight is the real key for any great make ahead dessert.
Tips for Success with Your Chocolate Mousse (Make-Ahead Dessert)
I want you to feel like a baking rockstar when you pull this Chocolate Mousse (Make-Ahead Dessert) out of the fridge! Since the recipe is so reliant on beautiful ingredients interacting together, how you handle them matters tons. Pay attention to these little tricks I learned over years of making this for holiday parties; they are what separate ‘good’ mousse from ‘call-the-caterer’ mousse.
Ingredient Handling and Temperature
Listen, you need to separate those eggs when they are cold because they are easier to crack cleanly! But here’s the trick: let the whites sit out on the counter until they warm up slightly before you start whipping. Warmer whites whip up to a much higher, more stable volume, which is exactly what we need for airiness.
And for the melted chocolate—oh my goodness, temperature is key! If it’s too hot when you stir it into the cream and yolks, you’ll shock them and start cooking the eggs. It should feel just slightly warm to the touch, definitely not piping hot. If you’re unsure, use a quick thermometer check!
Achieving the Right Texture
I cannot stress this enough: folding is not stirring! You are trying to move those heavy chocolate layers into the fluffy egg whites without collapsing all that hard work. Use your rubber spatula and cut down the middle, then scrape along the bottom and lift everything up and over. Seriously, stop mixing after about ten gentle motions. If you see a few faint white streaks remaining, LEAVE THEM ALONE! They will disappear into the rest of the batter as it chills, and trying to get rid of them just means you’ll deflate the mousse. That slight streakiness is your badge of honor right now.
Variations for This Elegant Dessert
Once you master the base—and believe me, you will!—this recipe transforms into a fantastic canvas for your own creativity. This is where that elegant dessert gets personalized for whatever occasion you’re planning, whether it’s a cozy family night or maybe something a bit fancy for New Year’s Eve!
Don’t be afraid to shake things up a little bit. Think about what flavors complement dark, rich chocolate. My family loves when I experiment, and sometimes the simplest additions make the biggest difference without wrecking that beautiful set structure.
Upping Your Chocolate Game
You used 70% cocoa, which is perfect, but if you’re feeling bold, try different types! You can split the weight exactly in half: use half bittersweet (70%) and half milk chocolate if you have kids who prefer things a little sweeter. If you want super intense flavor, try a 75% or even 85% and see how deep the flavor gets—wow!
A Little Bit Extra Flavor
Since this mousse is chilled for so long, adding a little liquid flavor is totally safe because it won’t affect the set too much. Up to one tablespoon is my max recommendation—you don’t want to dilute those wonderful egg whites! A splash of Grand Marnier pairs beautifully if you’re having an adult-focused gathering. Espresso powder dissolved in a teaspoon of hot water is also incredible; it just magnifies the richness of the chocolate without tasting distinctly like coffee.
Spice It Up Slightly
Sometimes all you need is a tiny hint of warmth. For winter gatherings, try folding in just half a teaspoon of pure vanilla extract right when you add the yolks to the cream. You could even whisk a tiny, tiny pinch of cayenne pepper into the dry ingredients before you start melting chocolate. It just gives this subtle spark at the end of the bite—it’s unexpected and really fun!
Serving Suggestions for Your Make Ahead Dessert
Okay, the mousse is perfectly set, cold, and gorgeous in its little glass! This is the moment where we turn a great make ahead dessert into an absolutely elegant dessert presentation. Since all the hard work is done, we can focus purely on making it look spectacular for our guests.
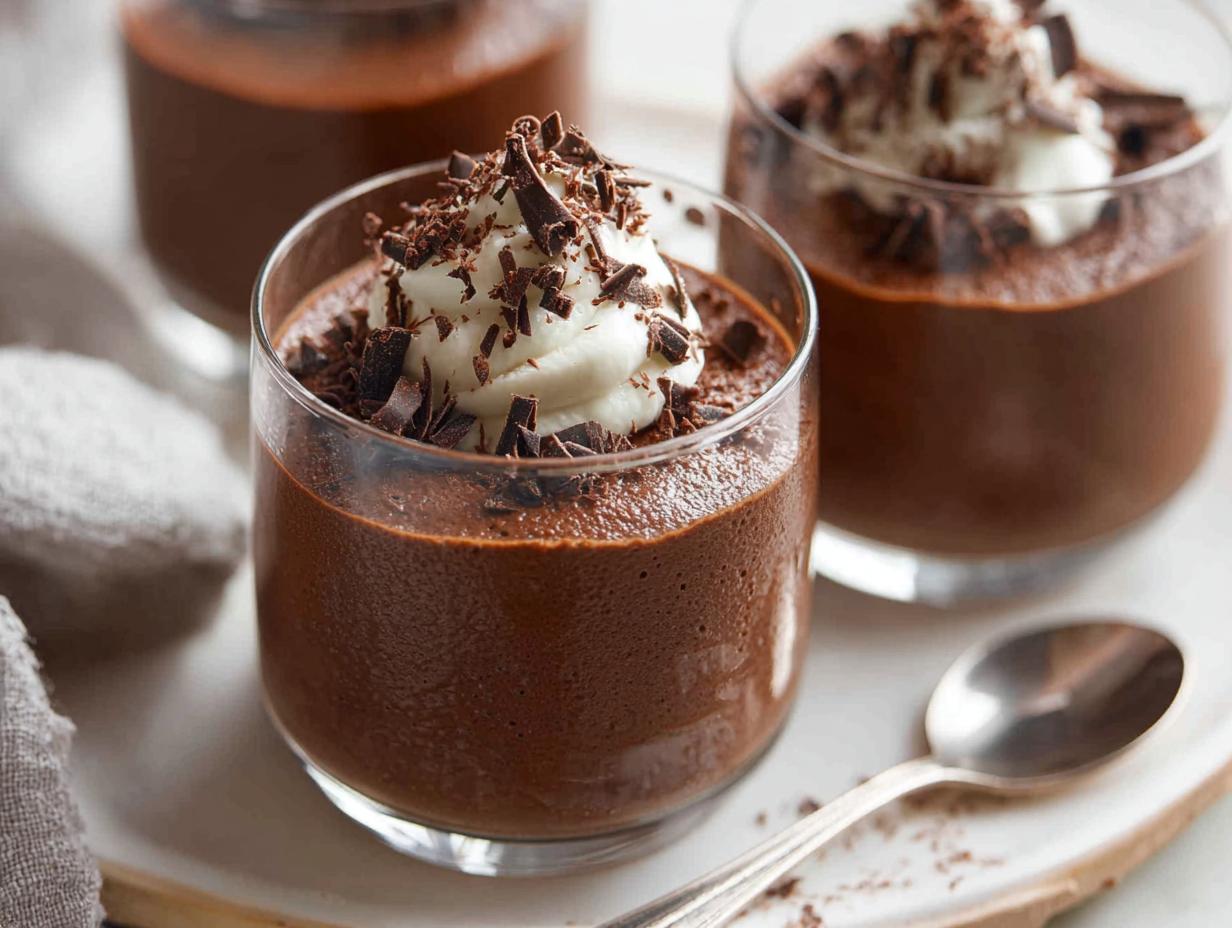
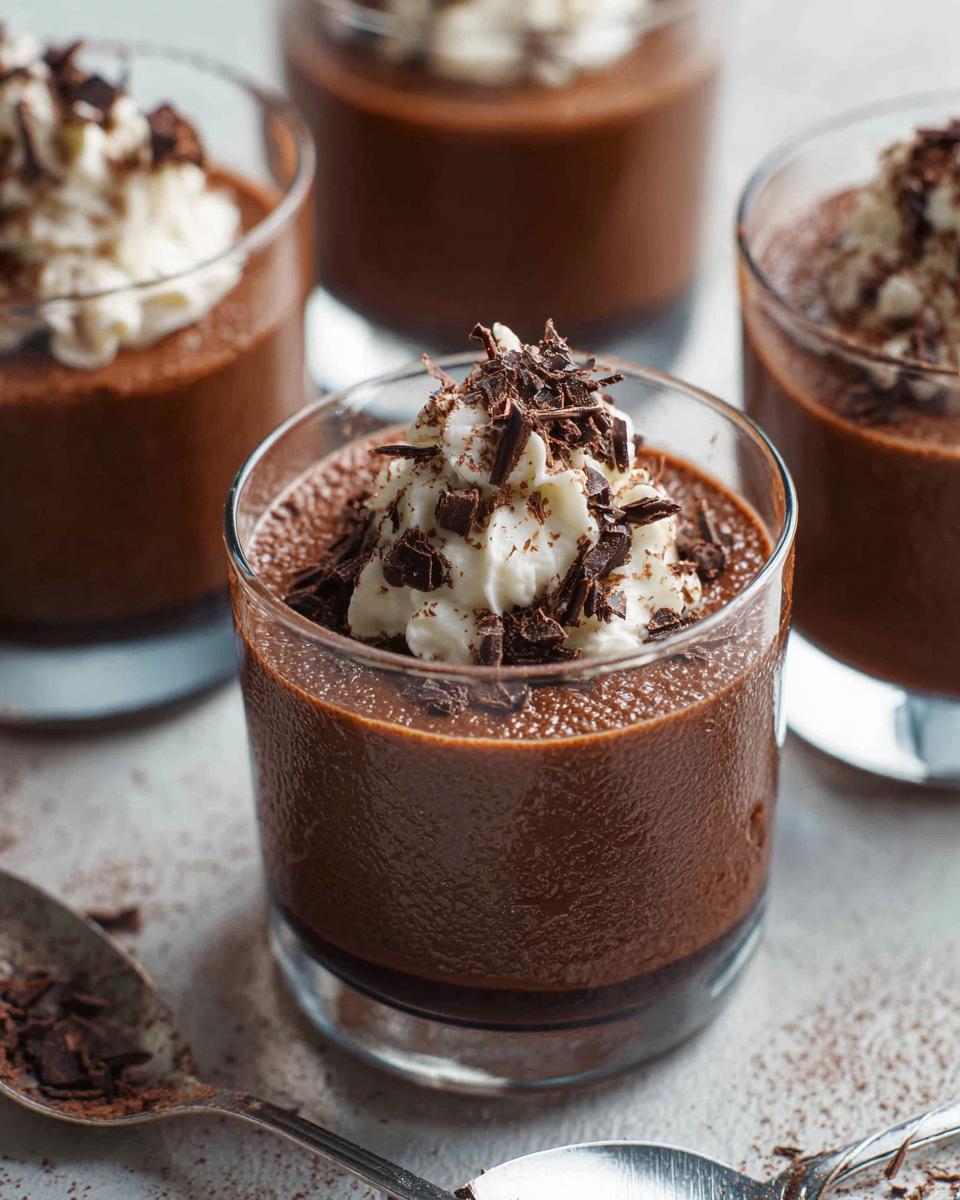
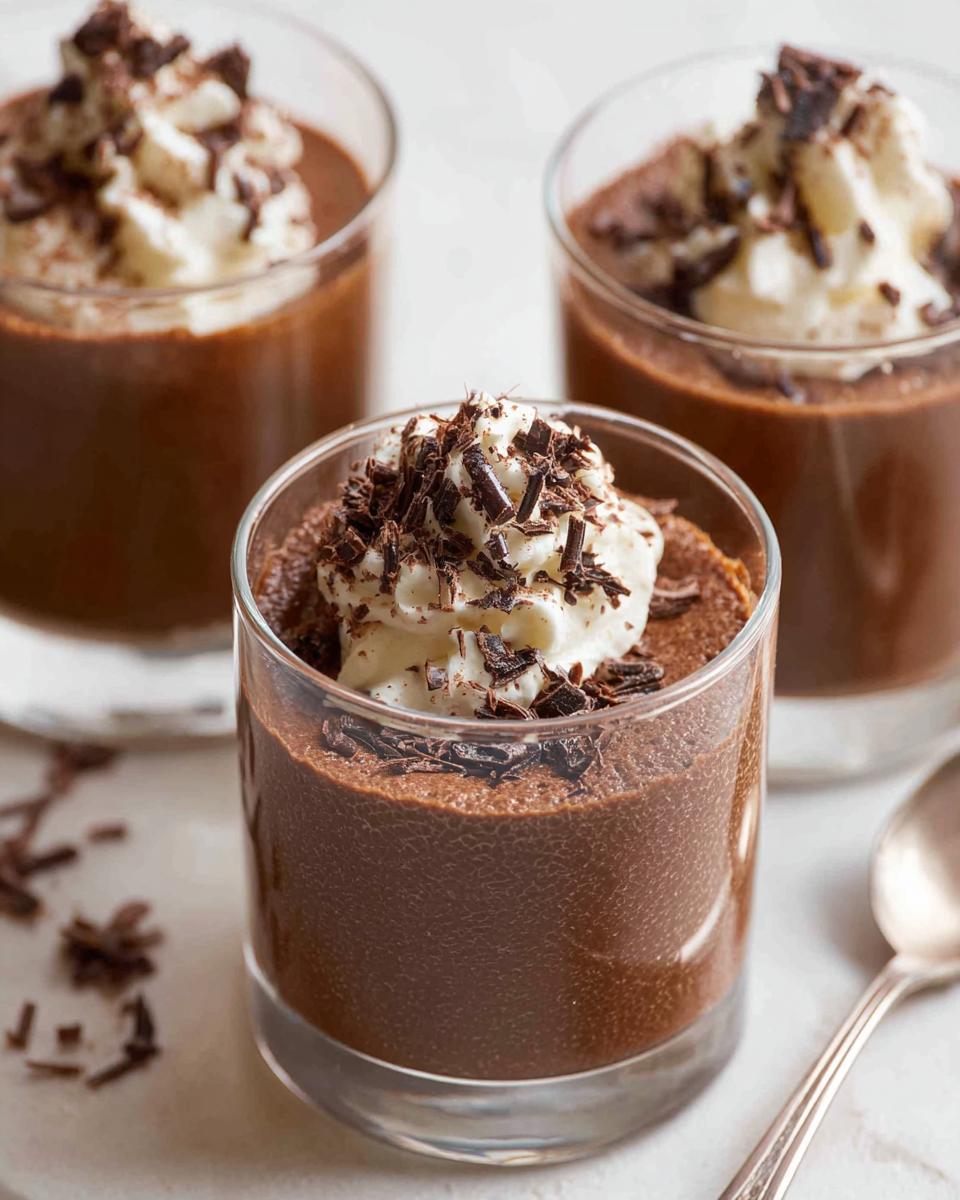
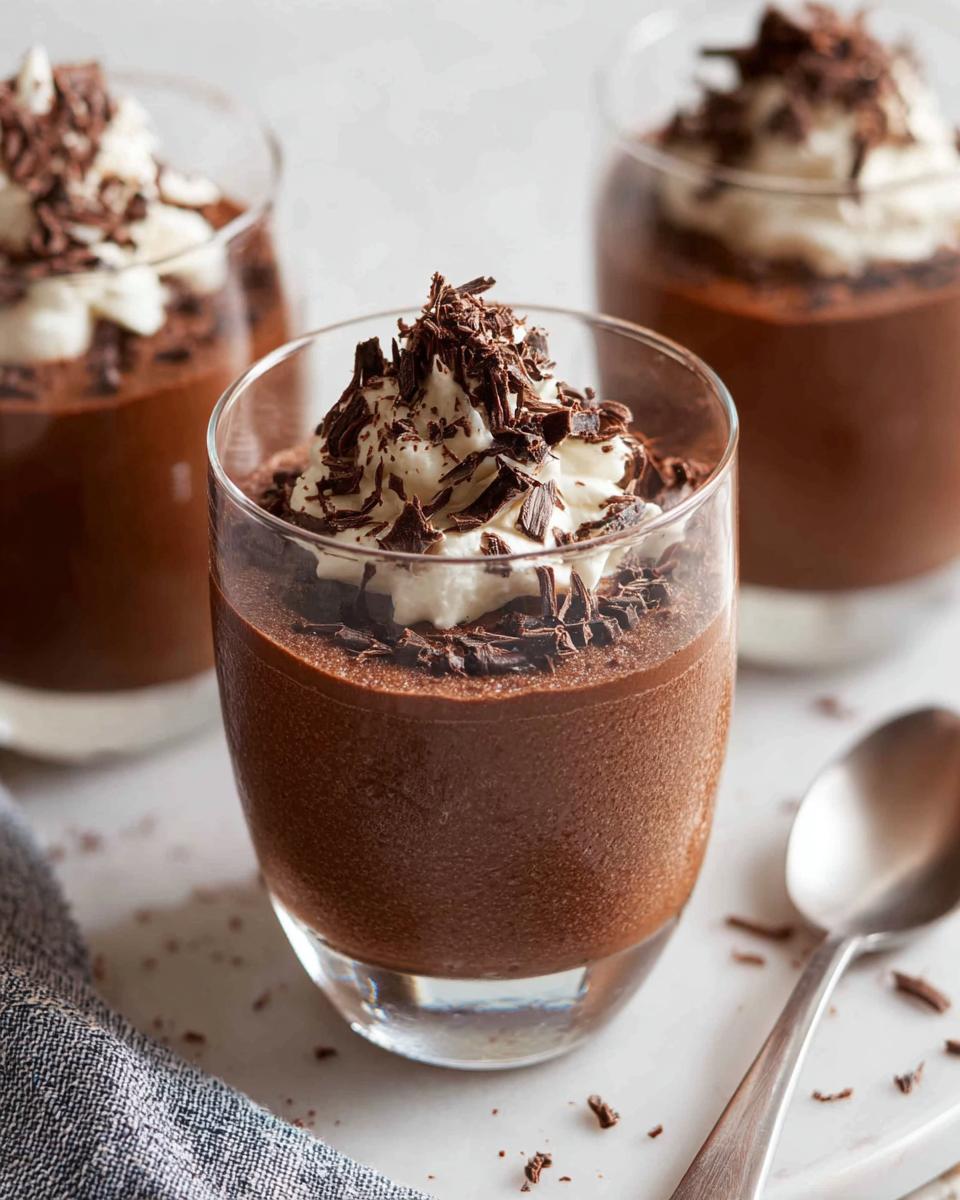
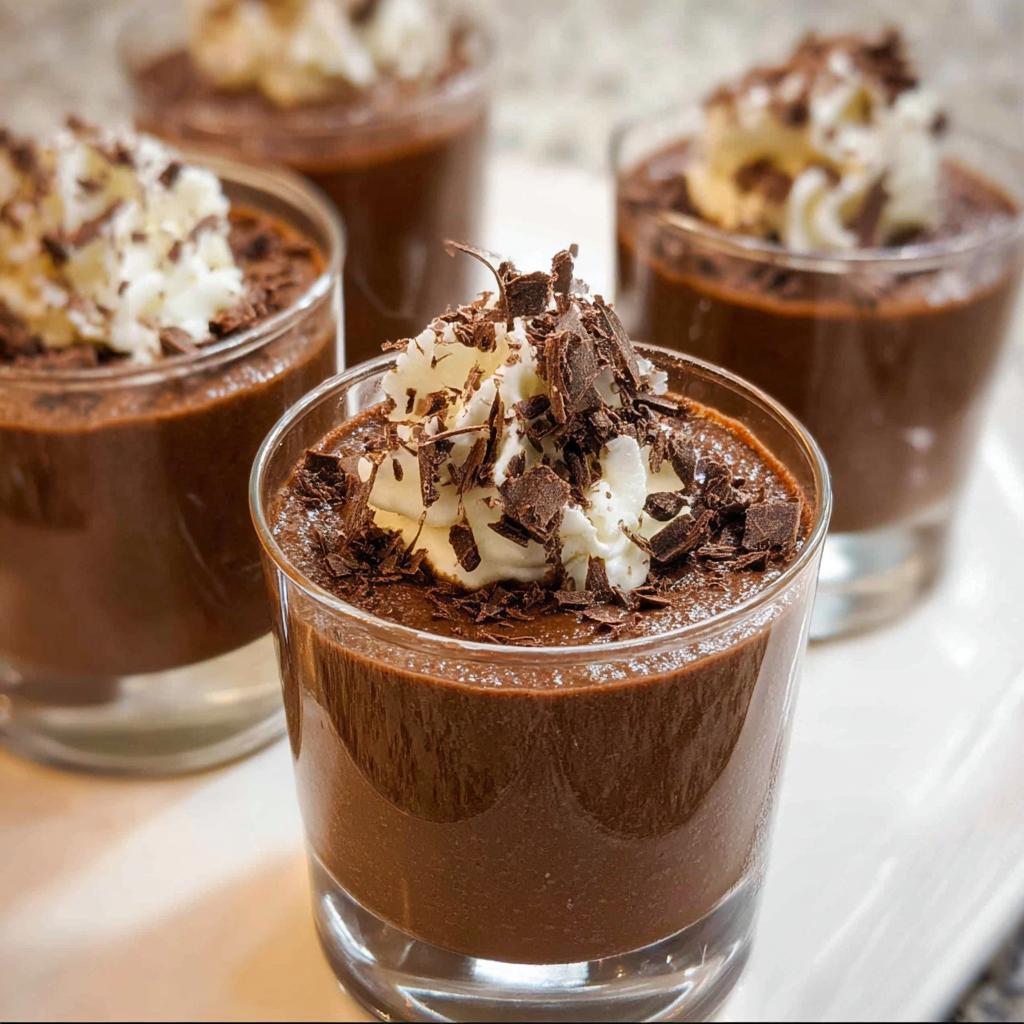
Remember those garnish ingredients we listed? Now is the time to bring them out! Top each individual serving with a generous dollop of that extra whipped cream. Seriously, don’t be shy with the cream!
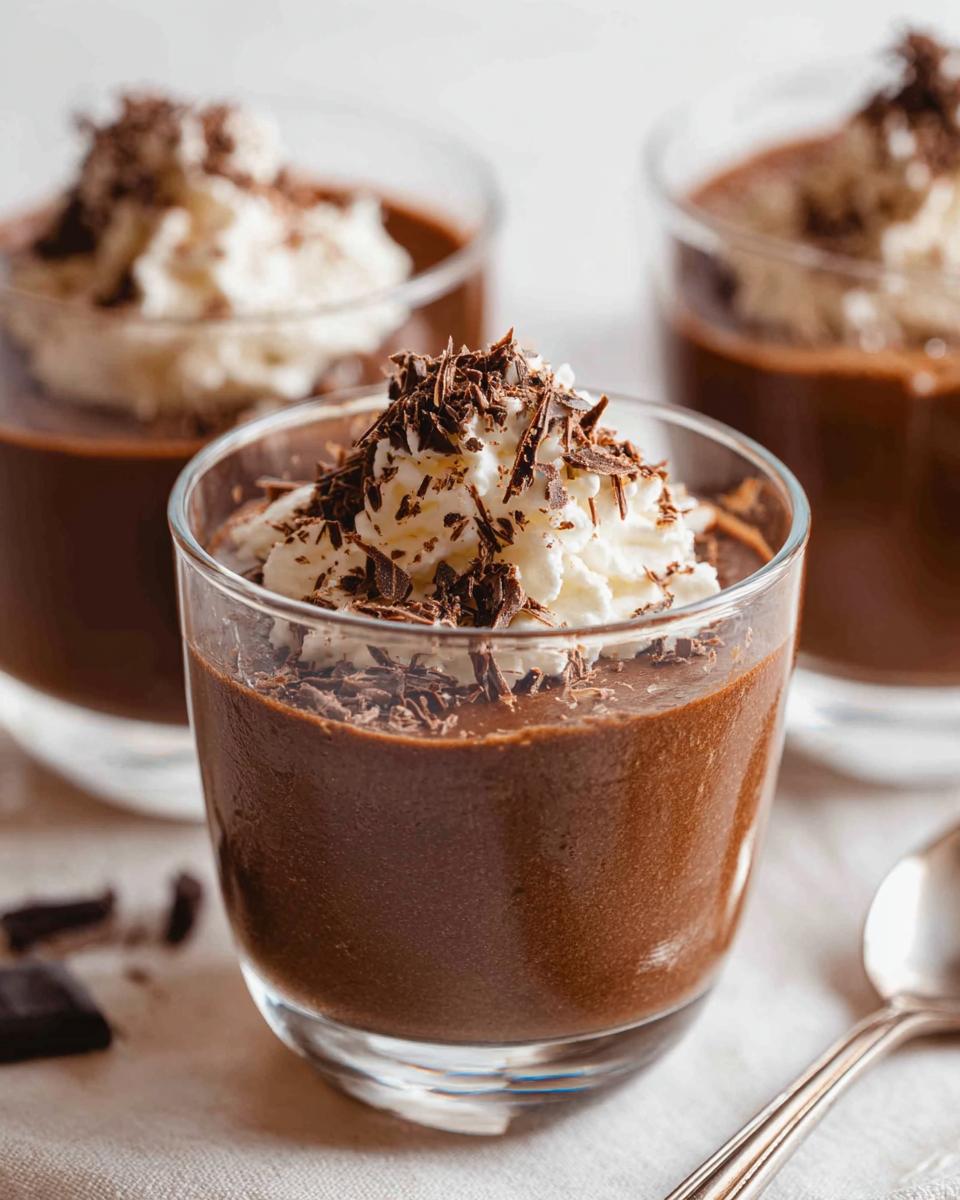
Then, grab your knife and scrape it across that block of chocolate to get those delicate chocolate shavings. Sprinkle them right over the top of the cream. This adds texture and looks so professional!
If you want a pop of color—and I always recommend this, especially around the holidays or for a New Year’s Eve Dessert—add three or four fresh raspberries next to the cream swirl, and maybe tuck a tiny mint sprig right near the edge of the glass. Instant elegance, zero stress!
Storage and Shelf Life of Chocolate Mousse (Make-Ahead Dessert)
The best part about mastering this Chocolate Mousse (Make-Ahead Dessert) is knowing that the hard work doesn’t need to be done right before serving. Because the structure relies on the chilling process, this mousse is perfect for long-term planning!
Once you have portioned the mousse into your individual serving glasses—and remember, they must be covered tightly—they can chill happily in the refrigerator. We are dealing with eggs and dairy here, so keeping them cold is essential for safety and texture.
When is it best consumed?
For the absolute, hands-down, best experience—when that mousse is impossibly light, perfectly set, and the chocolate flavor is at its peak—you want to aim to eat it within two days of making it. That’s when it tastes the freshest!
However, I’ve certainly forgotten about a batch hiding in the back of the fridge (oops!), and I can tell you that it holds up surprisingly well for longer. You can safely keep it covered in the refrigerator for up to a week. Trust me, if it’s well-covered, it won’t taint any lingering leftovers from dinner!
Do not try to reheat this!
Just a quick safety note, or maybe just a plea from my heart: please don’t try to warm this up! You’ll just end up with sad, separated, lukewarm chocolate soup. This French classic is meant to be served perfectly chilled, straight from the cold.
The beauty of this recipe is that you pull it out of the fridge, maybe add your pretty garnish, and serve. That’s the whole point of making a wonderful make ahead dessert!
Frequently Asked Questions About Chocolate Mousse
It happens! When you’re whipping up something elegant like this, sometimes questions pop up. I’ve collected a few of the ones I get asked most often about making this the perfect Chocolate Mousse (Make-Ahead Dessert). Knowing the answers ahead of time just makes you feel more confident when you’re whipping!
Can I substitute the egg yolks in this Make Ahead Dessert?
Oh, I really wish you could, but for this classic texture, no, I wouldn’t recommend it. Egg yolks are doing a lot of heavy lifting here! They emulsify with the cream and butter, giving that mousse its deep richness and incredible smoothness. If you skip them, you risk losing that decadent mouthfeel that makes this elegant dessert shine. Stick to the recipe; you won’t regret it!
How far in advance can I prepare this Chocolate Mousse?
This is truly the champion Make Ahead Dessert! While the minimum chilling time is six hours, I always push for overnight. When I make it for a big event, I always complete the entire process the day before. This lets the chocolate flavor deepen and the texture firm up perfectly, meaning when serving time rolls around, you are completely stress-free. It’s just waiting for you in the fridge!
What if my whipped cream won’t stiffen?
Ugh, that is so frustrating! Usually, if the cream isn’t whipping up, it means one of two things: either your cream wasn’t cold enough to begin with, or you might have accidentally bought a lower-fat cream that just can’t hold its structure. Quick fix? Sometimes, adding just one extra teaspoon of caster sugar and cranking the mixer speed up can help, especially if it’s just being stubborn. If it’s truly refusing to cooperate, it might be time to restart that part with a fresh batch of very cold, full-fat cream.
Is this suitable for a crowd, like for NYE Dessert?
Absolutely! Since you serve this in individual glasses, it’s one of the most crowd-friendly options out there. You prepare the whole batch, portion it out—maybe you even use fancy little champagne coupes for your NYE Dessert table—and then you completely forget about it until it’s time to pull them out! It always impresses people.
Estimated Nutritional Information for This Dessert
Okay, now that we’ve talked about how delicious and easy this Chocolate Mousse (Make-Ahead Dessert) is, let’s touch on the nutrition label for a moment. I always try to keep track, especially when I’m serving my family and want to make sure things are reasonably balanced, even when it’s a decadent dessert!
You need to remember that these numbers are based on the standard recipe quantities provided, using the suggested dark chocolate and full-fat cream. Because we are whipping air into this, the exact numbers can shift a little bit depending on how much air you incorporate during your folding process. But this gives us a great ballpark figure for each of the four servings!
Here’s the estimated breakdown:
- Calories: 375
- Fat: 26g (with about 18g being saturated fat—hello, butter and cream!)
- Protein: 7g
- Carbohydrates: 27g
- Sugar: 19g
- Cholesterol: 171mg
- Fiber: 1g
It’s rich, it’s dark, and it’s what makes it such an elegant dessert! Perfect for enjoying in moderation. Trust me, after all that whipping and folding, you deserve every single calorie!
Share Your Experience Making This Chocolate Mousse
Whew! That’s the entire process down! I hope you feel totally ready to tackle this amazing Chocolate Mousse (Make-Ahead Dessert). Honestly, when you pull those little glasses out of the fridge looking perfectly set and elegant, there’s no better feeling of accomplishment.
But I really want to hear from you! Did you manage to keep your cool and stick to those gentle folding rules? Or did you maybe add a fun twist? Did you make it as an NYE Dessert, or was it just a Tuesday night treat?
Please, please, let me know how it went down! It means the world to me when I hear that something I shared helped make your hosting duties easier.
Rate and Review!
If you loved this fuss-free method for making the ultimate Make Ahead Dessert, please take a second to leave a star rating right below. Those ratings really help other busy cooks who are looking for reliable, impressive recipes!
Show Me Your Creations!
And if you were feeling extra fancy, I absolutely live for seeing finished photos of your mousse presentations! Tag me on social media when you post those gorgeous chocolate shavings! I’m always looking for new plating inspiration for when I make my next batch of this rich, crowd-friendly treat.
Happy baking—or rather, happy *not* baking, since this one is so easy!
Chocolate Mousse (Make-Ahead Dessert)
Ingredients
Equipment
Method
- Separate eggs while cold. Place whites in a large bowl and yolks in a small bowl. Set whites aside.
- Whisk the egg yolks until uniform in color.
- Break chocolate into pieces and place in a microwave-proof bowl with butter. Melt in 30-second bursts, stirring between each, until smooth. Set aside to cool slightly.
- Beat the cream until stiff peaks form. Be careful not to over-whip.
- Add sugar to the egg whites. Beat until firm peaks form.
- Gently fold the egg yolks into the whipped cream using a rubber spatula, using a maximum of 8 folds. Some streaks are acceptable.
- Ensure the melted chocolate is still runny but warm (between 35C/95F and 40C/104F). If too cool, microwave in 5-second bursts until runny.
- Pour the melted chocolate into the cream and yolk mixture. Fold gently, using a maximum of 8 folds. Some streaks are acceptable.
- Add about one-quarter of the beaten egg whites to the chocolate mixture. Fold gently until incorporated, using about 10 folds to blend any white lumps.
- Pour the chocolate mixture into the remaining egg whites. Fold gently until incorporated and no obvious white patches remain, using a maximum of 12 folds.
- Divide the mousse mixture evenly between 4 small glasses or pots.
- Refrigerate for at least 6 hours, or preferably overnight.
- To serve, garnish with additional whipped cream and chocolate shavings. Raspberries and a mint sprig can also be added for color.
Nutrition
Notes
Tried this recipe?
Let us know how it was!
Certified Family Nutrition Strategist
My path into family nutrition began working with Phoenix Area Family Services, where I saw how traditional nutrition advice often ignored real-world constraints like budget limitations, time crunches, and kids who refuse to eat anything green. That experience sparked my mission to develop meal planning systems that work with family realities, not against them.
Over eight years, I’ve helped hundreds of families reduce grocery spending by 25% while dramatically improving their nutrition. My meal planning frameworks have been adopted by local wellness centers because they actually work for busy parents juggling different ages, preferences, and dietary needs in one household.
As a bilingual first-generation Mexican-American and mother of three, I personally navigate the daily challenge of feeding a family nutritiously while honoring cultural traditions and managing a household budget. My “kid-friendly low-carb” protocols show families how to gradually introduce healthier options without triggering mealtime battles or abandoning beloved family recipes.
My “realistic wellness” philosophy is straightforward: health improvements must work within existing family dynamics and financial realities to be truly sustainable. When I’m not developing meal planning systems, I’m creating portable trail snacks for our weekend family hiking adventures – because healthy eating should fuel the life you want to live.
My personal low-carb journey started after pregnancy as a way to regain energy for active parenting, and that experience continues to inform my professional commitment to making healthy eating feel supportive rather than burdensome for busy families.