
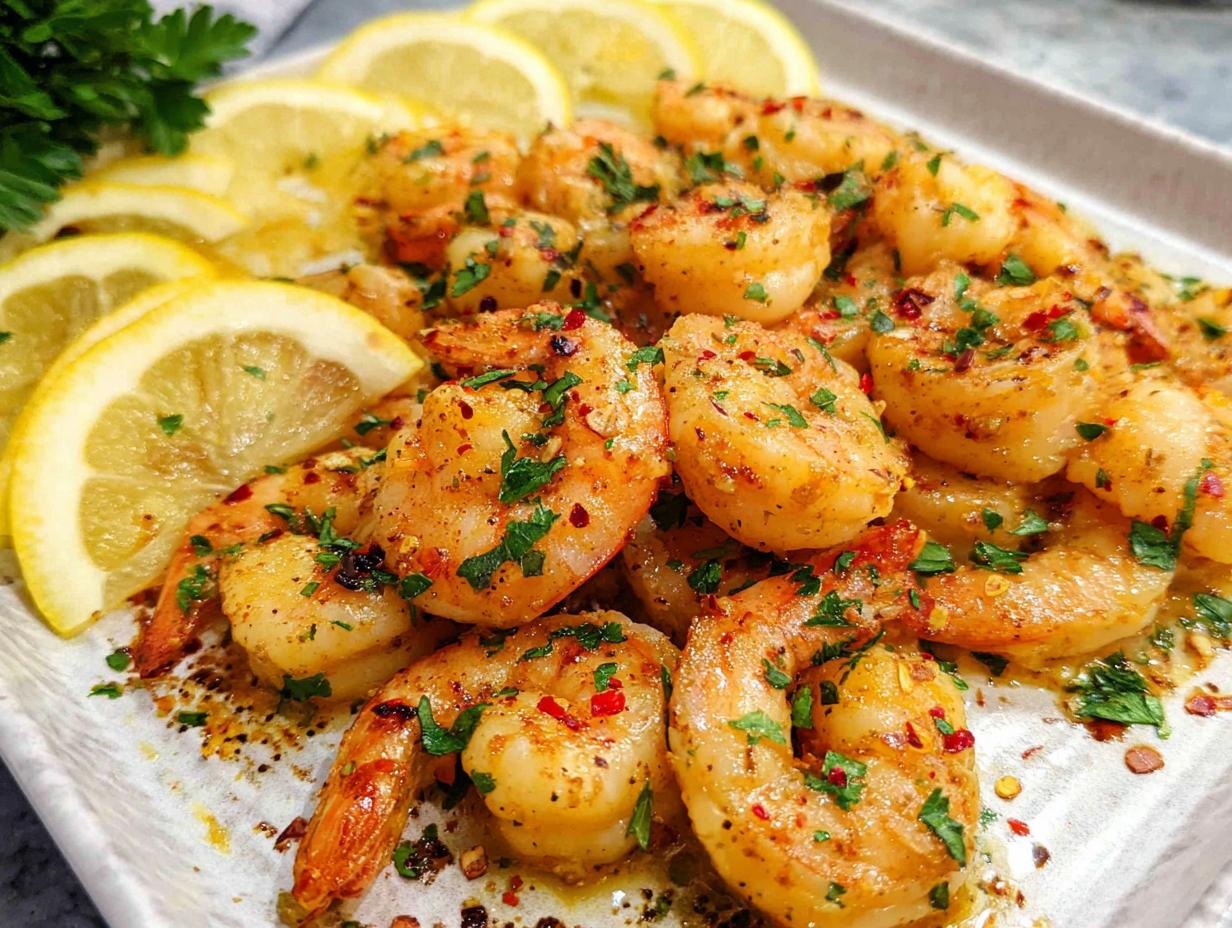
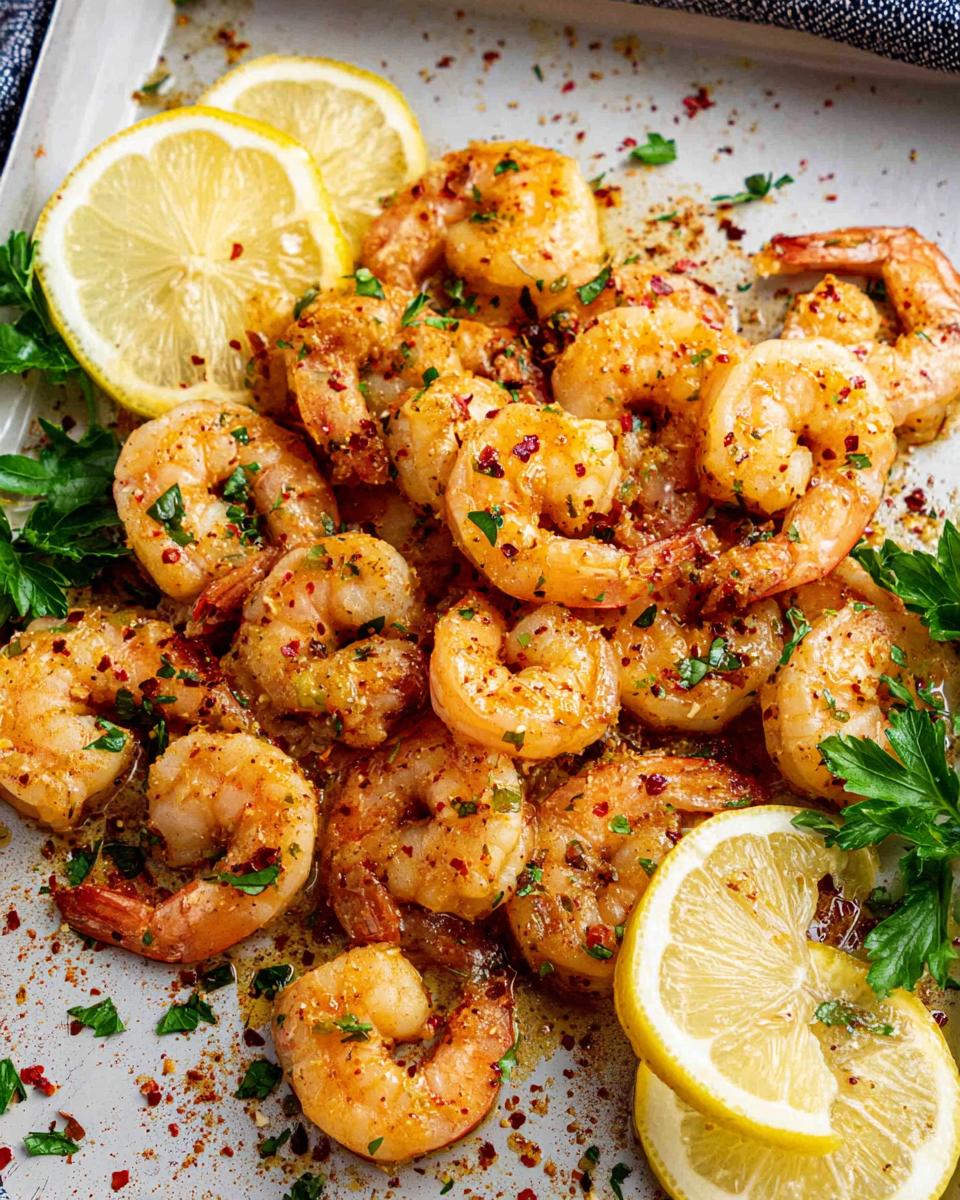
Listen, when you need dinner on the table fast but refuse to settle for boring, seafood is almost always the answer. Nothing beats that instant satisfaction of perfectly cooked shrimp, and honestly, who wants to scrub three different pans after a long day? That’s why this Garlic Butter Shrimp (Sheet Pan) recipe is my absolute secret weapon for quick weeknight magic that somehow tastes like it came from a fancy restaurant, minimum cleanup guaranteed!
I actually perfected this recipe one sunny afternoon in my San Diego kitchen after a seriously epic day surfing. I had this huge craving for something rich and garlicky, and before I knew it, I was whipping up this amazing shrimp using just one pan and a few pantry staples. The smell instantly drew in my ever-curious pup, Mango, who was convinced I was making something extraordinary! That meal just proved that healthy, restaurant-quality food can genuinely come together in minutes, even for us busy folks.
I’m Clara Martinz, by the way—a Master of Culinary Visual Arts—but I promise, this recipe requires zero fancy techniques. Just pure, delicious ease!
Why This Garlic Butter Shrimp (Sheet Pan) Recipe Works for Busy Cooks
If your life is hectic—and whose isn’t these days?—you need recipes that respect your time but don’t sacrifice flavor. That’s exactly what this sheet pan approach delivers. Forget soaking pots and juggling multiple stovetop pans; we are keeping it simple so you can get back to whatever adventure awaits!
Here are the main reasons this Garlic Butter Shrimp (Sheet Pan) flies off my counter:
- It’s lightning fast from fridge to table.
- Cleanup is literally just one piece of foil or parchment.
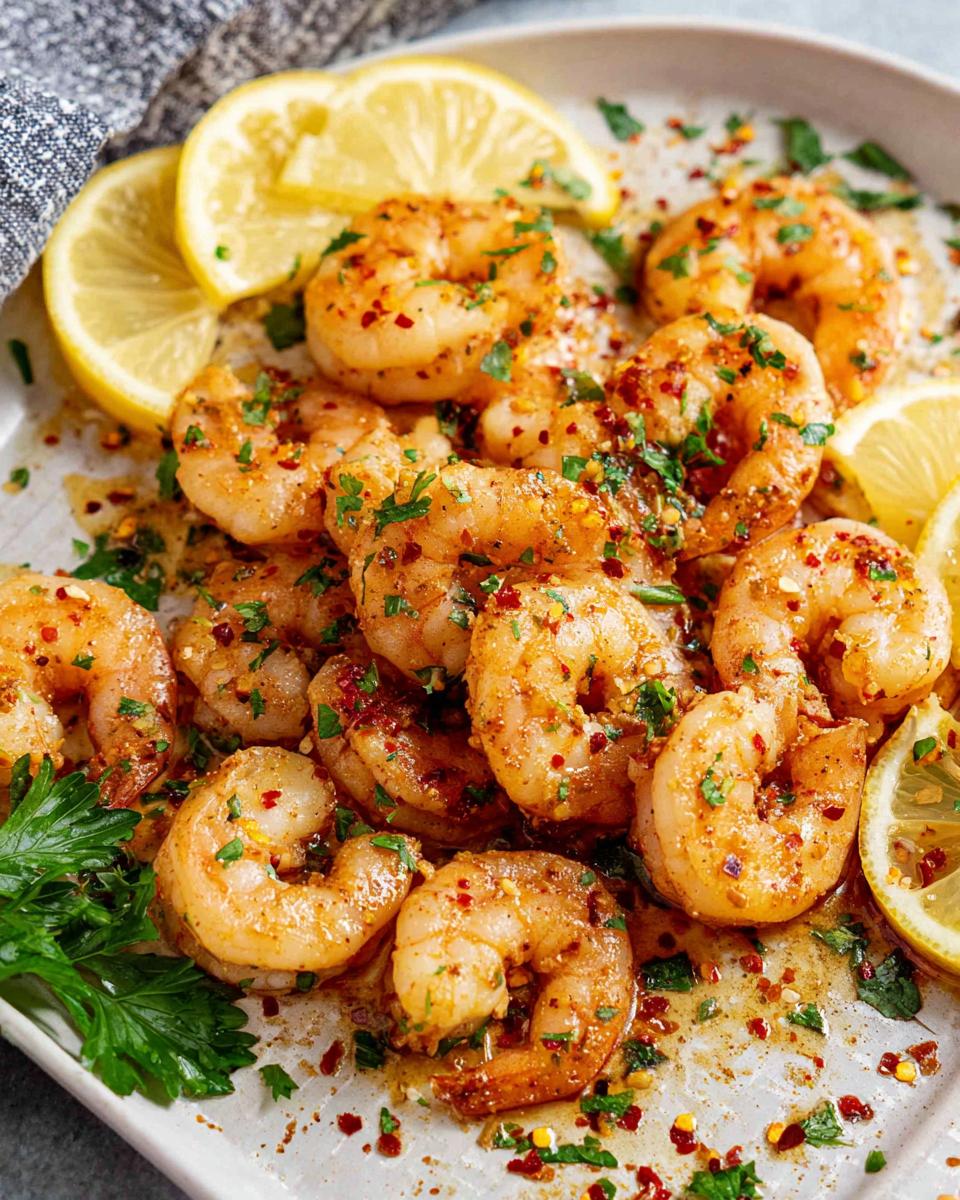
- The flavor? Pure, intense, restaurant-grade butter and lemon goodness.
Speed and Simplicity of Garlic Butter Shrimp (Sheet Pan)
Seriously, check the stats! We are talking about 10 minutes of prep work—just chopping some garlic and grabbing ingredients—and then only 10 minutes in the oven. We clock in the whole thing under 25 minutes! If you need a show-stopping, last-minute Quick Appetizer that doesn’t taste like you rushed it, this is your answer.
Flavor Profile: Elegant Yet Easy
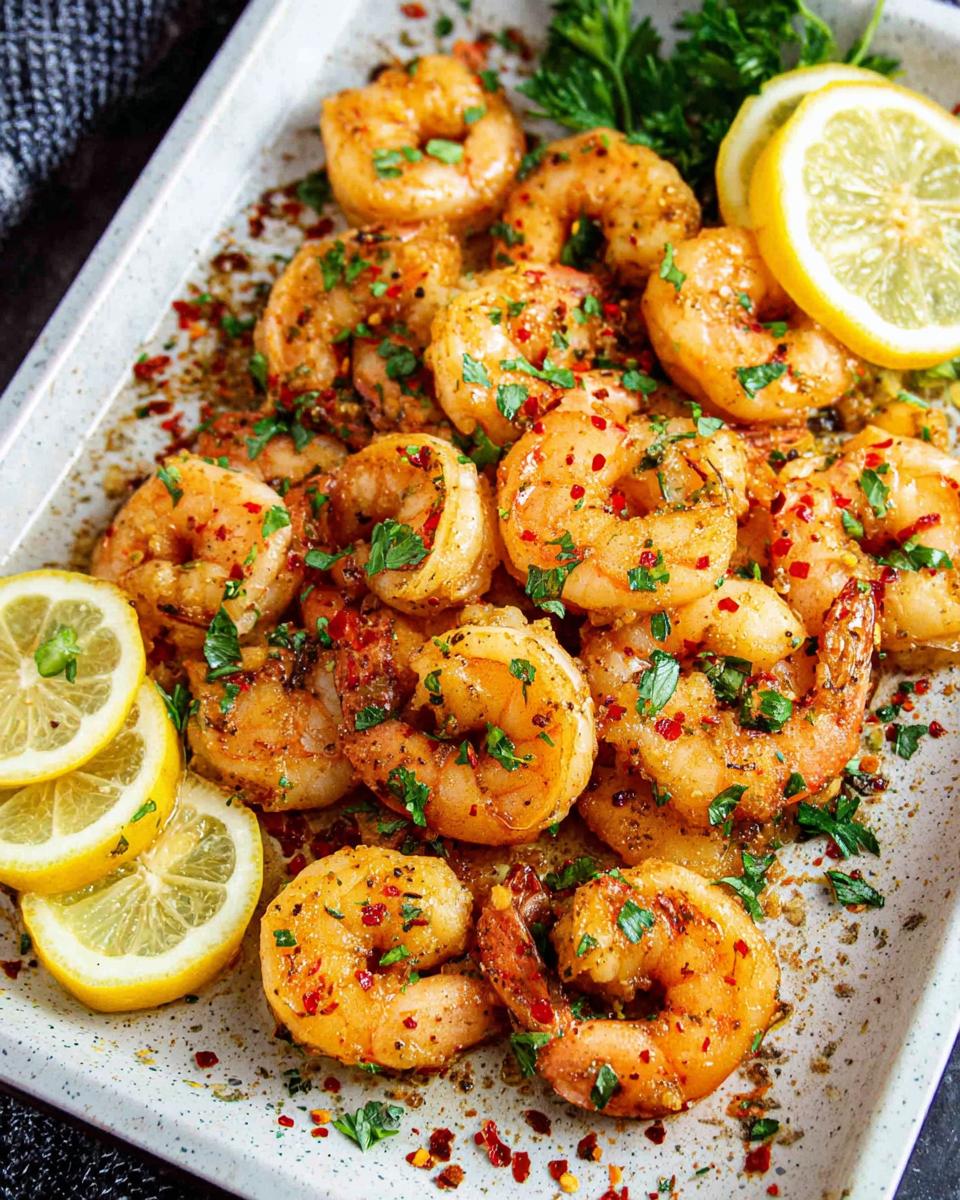
Don’t let the easy method fool you; the taste is incredibly sophisticated. That blend of fresh garlic, bright lemon, and rich butter feels special, which is why I keep this recipe in my back pocket for unexpected Entertaining. It looks elegant plated up, but you barely broke a sweat making it. It’s the perfect weeknight dinner that pretends it’s Friday night.
Gathering Your Ingredients for Garlic Butter Shrimp (Sheet Pan)
Okay, since this recipe has so few components—that’s part of the beauty, right?—the quality needs to shine through. Trust me, using the best shrimp you can find makes all the difference here. You don’t want to waste that gorgeous garlic butter on weak little shrimp! For the absolute best results, I always head to my local fishmonger. You can check out some great tips for sourcing seafood that cooks up perfectly here: Sheet Pan Garlic Butter Shrimp.
Essential Components for Perfect Sheet Pan Shrimp
Grab these few things, and you are halfway to dinner. Don’t skimp on the seasoning; we want big flavor!
- Large Shrimp: You’ll need a pound and a half, folks. Make sure they are peeled and deveined already, which cuts down on your prep time dramatically.
- Butter: Half a cup of unsalted butter, and it must be melted. This is the delivery system for all that heavenly flavor.
- Garlic: Four cloves, and I insist on freshly minced garlic. The jarred stuff just doesn’t have the same pop when it hits the high heat.
- Spice Kick: A quarter teaspoon of red pepper flakes adds just enough warmth, plus a teaspoon of sweet paprika for color.
- Freshness: Don’t forget about the fresh parsley, chopped finely, and of course, salt and pepper to taste!
Expert Tips for Preparing Your Garlic Butter Shrimp (Sheet Pan)
Making amazing Garlic Butter Shrimp (Sheet Pan) isn’t just about throwing things on a tray; it’s about setting the flavor up for success before the heat even comes on! Since we’re dealing with such a quick cook time—we only have about 10 minutes in the oven—the prep work we do now is crucial for maximizing that buttery, garlicky punch.
Preparing the Flavorful Garlic Butter Base
When you mix up your glorious sauce, remember this: gentle is better! You want to fold those ingredients together in your medium bowl until everything is just combined. You’re not whipping cream here; you just need the minced garlic, paprika, and spice flakes nicely coated in that melted butter.
If you feel anxious about the salt level—which is totally normal when you’re cooking seafood—you can grab a clean spoon and carefully taste a tiny drop of the mixture. Remember, the shrimp will absorb whatever seasoning you give it. A light mix ensures the garlic doesn’t get mashed, keeping those little bits intact so they caramelize beautifully in the oven!
Achieving the Best Sheet Pan Shrimp Layout
This is where we talk about avoiding soggy shrimp! The number one rule of Sheet Pan Cooking, especially with seafood, is the ‘single-layer rule.’ You absolutely must arrange your shrimp so they aren’t touching each other or overlapping in any way.
Why does this matter so much? If you pile them up, the steam gets trapped between the shrimp. Instead of searing beautifully in that incredible butter, they end up steaming, and you lose that lovely, slightly crisped edge we are aiming for. Give them space to breathe on that pan, and they will thank you with perfect texture!
Step-by-Step Instructions for Garlic Butter Shrimp (Sheet Pan)
This is where the magic happens! Because the total cooking time is so short, we have to be ready to move quickly. Remember, we are aiming for tender, bright, and beautifully seasoned shrimp. Keep an eye on the oven door during the broil phase—that’s key! For the best overall heat control, make sure you check out my guide on oven temperature accuracy.
Oven Setup and Tossing the Shrimp
First things first: you’ve gotta crank that heat! Preheat your oven to 400°F (200°C). And listen, grab a sturdy baking sheet, preferably one with a rim about an inch high; this catches all those delicious buttery juices. Spray it lightly with cooking spray.
Next, in your medium bowl, toss together that melted butter, all that wonderful minced garlic, the red pepper flakes, paprika, parsley, salt, and pepper. Make sure it’s a lovely, even mix before you add your shrimp!
Baking and Achieving Perfect Texture for Garlic Butter Shrimp
Now, get those cleaned shrimp onto that prepared sheet pan. Make sure they are spread out flat, remember our single-layer rule! Pour that gorgeous sauce right over the top and give them a gentle toss right there on the pan if you need to, ensuring every piece gets coated.
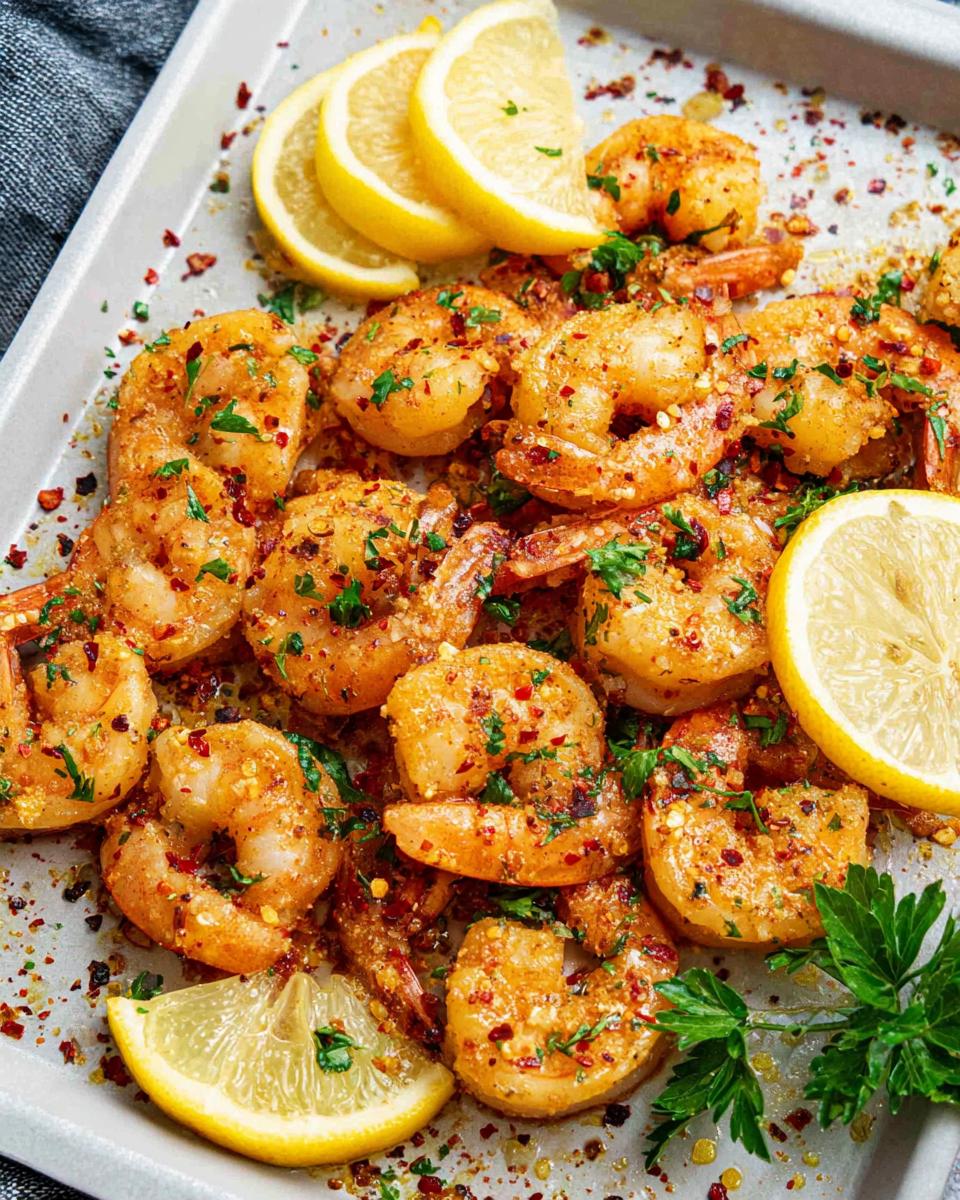
Bake them for about 8 to 10 minutes. Shrimp cooks so fast! If you want that extra little crust and beautiful color—and I usually do—switch the oven to broil for the last 2 minutes. You have to watch them like a hawk here; if you step away, you go from golden brown to burnt garbage in seconds. We want Garlic Butter Shrimp perfection, not charcoal!
Finishing Touches and Serving Garlic Butter Shrimp (Sheet Pan)
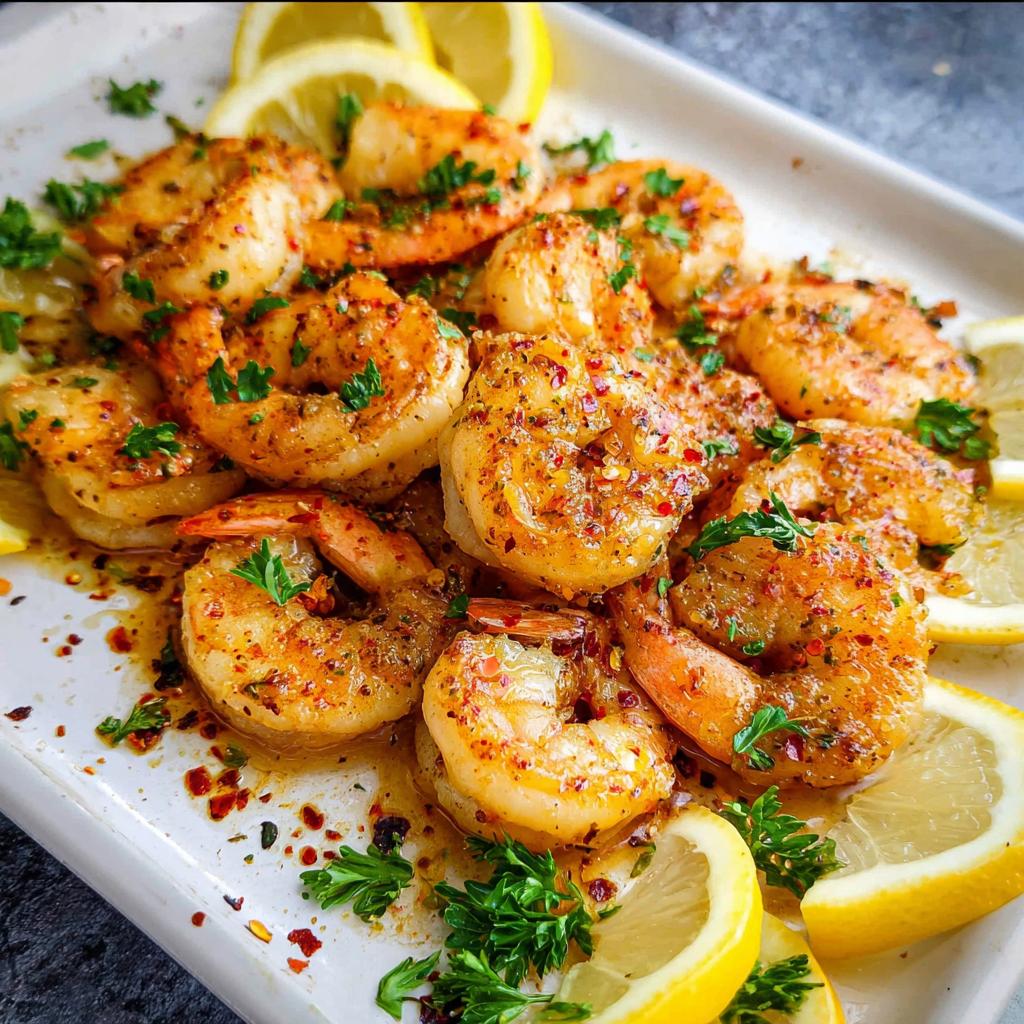
Once they are perfectly pink and opaque, pull that tray out right away. Drizzle everything with fresh lemon juice—it just brightens up all that richness—and serve it up instantly! I like to put a little pile of extra lemon wedges right next to the pan because squeezing fresh juice over your Sheet Pan Shrimp is non-negotiable for the best flavor.
Sheet Pan Cooking Tips for Optimal Garlic Butter Shrimp
Okay, let’s get tactical for a second. Since this whole recipe relies on the brilliance of the sheet pan method, we need to talk execution. Doing Sheet Pan Cooking right means you get that sear instead of steam every single time. I’ve learned a few things over the years about maximizing flavor and keeping those pans usable for the next time!
If you’re concerned about handling hot metal racks or just want to make sure your pan is safe for high heat use, always take a peek at my guide on sheet pan safety tips before you start.
Managing Shrimp Size and Doneness
The 8-to-10-minute window I gave you? That’s usually perfect for large shrimp—the kind that look plump when raw. But let’s say you grabbed jumbo shrimp, or maybe you found some smaller salad shrimp at the market. You have to adjust your timing!
Bigger shrimp means you might need an extra minute or two in the oven, maybe pushing that broil time slightly longer. Smaller shrimp needs way less time—seriously, watch it like a hawk, or you’ll end up with rubbery little beads!
The visual cue is everything, even more than the timer. You are looking for the shrimp to turn totally opaque—meaning you can’t see any grayness left—and curl up nicely into a ‘C’ shape. If it curls into a tight ‘O’, oops, you overcooked it! Keep them slightly C-shaped for that tender bite.
Lining Your Pan for Easy Cleanup
I can’t stress this enough: lining your pan is the key to instant gratification when it comes to cleanup. For this Garlic Butter Shrimp, I strongly prefer parchment paper over aluminum foil. Why? Foil can sometimes wrinkle and create high spots where your sauce pools up, causing uneven cooking or splashing.
Parchment paper lays flat, keeps the shrimp separated nicely, and it peels right off the baked-on garlic bits. The only downside is you can’t use it under the broiler for extended periods. Since we are only broiling for two minutes tops, it usually holds up fine. If you are worried about burning the paper, you can brush the parchment with a tiny bit of that melted butter before adding the shrimp!
Variations on Lemon Garlic Sheet Pan Shrimp
This recipe is designed to be super fast, but that doesn’t mean it has to be boring! One of the best things about the sheet pan method is how easily you can shake things up just by adding in another component. We’ve got the incredible base of Lemon Garlic flavor happening, so let’s build on that! I always have a few tricks up my sleeve for turning this 20-minute shrimp wonder into a full-fledged, veggie-packed dinner.
Adding Vegetables to Your Sheet Pan Meal
If you want to skip making a separate side dish, just toss some veggies right onto the pan with the shrimp! The secret is choosing things that cook in about the same ten-minute window as your shrimp, or just slightly longer. You don’t want mushy asparagus, right?
My favorites for this kind of quick cook are slender asparagus spears or those cute little halved cherry tomatoes. They soften up beautifully and soak up all that amazing butter goodness. Toss them in the sauce with the shrimp before they hit the oven.
Now, if you have something like chopped bell peppers or broccoli florets—which take a little longer to get tender—here’s what you do: Put those veggies on the sheet pan first, maybe drizzle them with just a bit of oil and salt, and give them about five minutes in the oven on their own. Then, pull the pan out, nestle your shrimp in among the partially cooked veggies, pour the rest of the garlic butter over everything, and bake for the final 8 to 10 minutes. That way, everything finishes cooking perfectly at the same time!
Serving Suggestions for Garlic Butter Shrimp (Sheet Pan)
Even though this Garlic Butter Shrimp (Sheet Pan) is undeniably amazing all by itself—seriously, you could eat it straight off the sheet pan with a fork—sometimes you need to bulk it up into a real centerpiece dinner. The best part about this recipe is that the sauce it creates is spectacular! We absolutely cannot let that buttery, garlicky, lemony elixir just go to waste, right? While it’s fantastic as a standalone Quick Appetizer for guests, here are a few ways I love turning it into a satisfying meal.
Pairing with Starches and Sides
My number one suggestion, and what I almost always do, is serve it right over something starchy that can really mop up those juices. Simple white rice is perfect because it lets the shrimp and the sauce truly shine.
But if you’re feeling a bit fancier, toss these beauties over some linguine or angel hair pasta. Just make sure you toss the shrimp and sauce with the pasta *off* the heat, using a little bit of the pasta water you cooked it in to emulsify the butter sauce slightly—it makes it stretch perfectly!
And you absolutely cannot forget the crusty bread! A few slices of a good, rustic baguette, maybe lightly toasted? That’s the easiest side there is. People genuinely fight over who gets the last piece to sop up every last drop of that sauce on their plate. It feels so luxurious, and yet, you cooked it in twenty minutes!
Storing and Reheating Your Garlic Butter Shrimp
Even when this Garlic Butter Shrimp (Sheet Pan) disappears as fast as it appears, sometimes you get lucky and have a few glistening gems leftover! Since shrimp cooks so quickly, the main fear anyone has about leftovers is texture—nobody wants tough, chewy shrimp the next day. So, we have to treat those leftovers gently to keep that buttery flavor intact.
Make sure you let the shrimp cool down completely before you try to store them. Don’t leave them sitting out on the counter for hours, either; seafood needs to be chilled relatively quickly for safety reasons. Remember that rich sauce? That’s what we are trying to save!
The Best Way to Store Leftover Sheet Pan Shrimp
Get yourself an airtight container—glass is my favorite because it doesn’t hold onto strong smells. Transfer the shrimp *and* all the leftover garlic butter sauce into that container. Seriously, don’t drain the sauce! That sauce is your flavor gold, and it’s what will keep the shrimp from drying out when you warm it up later.
If you store it correctly, this Sheet Pan Shrimp can be kept safely in the refrigerator for about two, maybe three days, maximum. Any longer than that, and you risk losing that fresh, bright flavor we’re aiming for.
Gentle Reheating: Avoiding Rubber
Okay, here is the most important part: reheating any seafood requires a light touch. High heat equals rubber bands, and we absolutely won’t stand for that! Forget throwing it in the microwave on high—that’s a recipe for disaster.
The best method is actually using a skillet on the stovetop. Put the container of shrimp and all that sauce directly into a non-stick skillet over medium-low heat. You are not trying to cook it again; you are just gently warming it through. Keep the heat low, stir it occasionally, and let that residual butter melt and coax the shrimp back to serving temperature. It should only take about 3 to 5 minutes depending on how much you have.
If you absolutely must use the microwave (I get it, sometimes we’re lazy!), put the shrimp and sauce in a microwave-safe dish and heat it in very short bursts—maybe 30 seconds at a time—stirring well between each burst. Pull it out as soon as it’s warm to the touch, not hot. This short, intermittent heating keeps the shrimp tender and ready to enjoy!
Frequently Asked Questions About Sheet Pan Shrimp
I always get so many great questions when people start making this recipe for the first time, which is awesome because it means you’re excited to cook it! Usually, the concerns fall right around timing, ingredient swaps, and how best to handle that gorgeous sauce. If you’re planning on cooking this for a big crowd or for Entertaining, these tips will really help you nail the execution of your Garlic Butter Shrimp!
Can I use frozen shrimp for this Garlic Butter Shrimp (Sheet Pan)?
Oh, absolutely you can! We all reach for the frozen bag sometimes. But here’s the crucial point: you cannot put them on the sheet pan frozen or even partially frozen. They will release too much water and steam your shrimp instead of searing them, and nobody wants watery shrimp!
You need to thaw them completely first. The safest way I’ve found is to put them in a colander in the sink under cold running water—not warm, cold!—and let the water run over them until they feel fully pliable. That usually takes about 10 to 15 minutes depending on how much you have. Pat them thoroughly dry with paper towels after they thaw; that dryness helps the butter stick better!
What if I don’t have fresh parsley?
Life happens, and sometimes the fresh herbs wilt before we get to them! If you’re out of fresh parsley, you can definitely use dried, but you have to adjust the quantity—dried herbs are way more potent than fresh ones.
For this recipe, if you would have used 2 tablespoons of chopped fresh parsley, substitute it with just 2 teaspoons of dried parsley flakes stirred right into your melted butter mixture. It won’t have that vibrant pop of fresh parsley flavor, but it still adds that necessary herbaceous note to our Garlic Butter Shrimp!
How do I keep the butter sauce from burning under the broiler?
This is a super valid concern because that butter and garlic smell so good, and it’s easy to get distracted! Remember, we only use the broiler for the very end, right when the shrimp are almost done, just to give them that beautiful color. But that high heat source can turn a perfect roast into black smoke in like forty-five seconds flat.
My personal rule is this: never, ever walk away when the broiler is on for this dish. Seriously, keep your eye on it. Set a timer for 1 minute and 30 seconds, check it, and if you think it needs another 30 seconds, use that time. If you’re overly worried about the garlic bits burning, you can skip the broil altogether and just rely on the 400°F bake time, but that broil is what gives it that restaurant look! For general safety around high heat, always review my best practices for handling seafood safely in the kitchen.
Estimated Nutritional Breakdown
So, you want to know how much goodness you’re putting into your body? That’s smart planning! Since this Garlic Butter Shrimp (Sheet Pan) relies heavily on butter, we do see a higher fat content, but remember, shrimp itself is super lean protein! This breakdown should give you a good idea of what you’re working with when you enjoy this delicious meal.
Here are the general estimates based on the 4 servings this recipe yields:
- Calories: Approximately 210 per serving
- Total Fat: Around 23g
- Saturated Fat: About 15g (This is where the butter really shows up!)
- Protein: Roughly 15g (Give or take, depending on your shrimp size!)
- Carbohydrates: Very low, usually just 1g
Now, keep in mind that these figures are just estimates, darling! They are based on standard measurements for large shrimp and unsalted butter. If you swap out the butter for olive oil, or if your shrimp are significantly smaller or larger than what’s called for, your final numbers will shift a little bit. But honestly, when something tastes this good, it’s best just to enjoy the incredible flavor!
Share Your Sheet Pan Success
And just like that, you’re done! See? I told you this Garlic Butter Shrimp (Sheet Pan) wouldn’t take over your entire evening. You’ve got perfectly cooked, vibrant shrimp coated in the most addictive sauce, and the cleanup took maybe thirty seconds. Now comes the best part—telling everyone how easy it was!
I absolutely love hearing from you guys when you try my favorites. Did this become your new go-to quick dinner too? If you made this recipe, please take a second to leave me a star rating right down below the recipe card. That feedback helps other busy cooks know they can trust a quick recipe!
And hey, if you snapped a photo of that beautiful glistening shrimp—maybe piled high over some rice or sitting next to a big glass of wine?—tag me! I live for seeing your creations on social media. Seriously, the moment you realize you made something elegant in under twenty-five minutes? That’s the payoff!
Let me know in the comments how fast you managed to get that Garlic Butter Shrimp (Sheet Pan) onto the table. Did you beat my post-surf time? I have a feeling you totally did!
Garlic Butter Shrimp (Sheet Pan)
Ingredients
Equipment
Method
- Preheat your oven to 400°F (200°C). Spray a baking sheet with cooking spray.
- In a medium bowl, combine the melted butter, minced garlic, red pepper flakes, paprika, chopped parsley, salt, and pepper. Toss well to combine.
- Place the shrimp on the prepared baking sheet. Pour the garlic butter mixture over the shrimp and arrange them in a single layer.
- Transfer the baking sheet to the oven and bake for 8 to 10 minutes. For a crispier finish, turn on the broiler for the last 2 minutes, watching closely to prevent burning.
- Drizzle lemon juice over the shrimp and serve immediately with lemon wedges.
Nutrition
Notes
Tried this recipe?
Let us know how it was!
Master of Culinary Visual Arts
My culinary journey started in the fast-paced kitchens of boutique coastal restaurants throughout Southern California, where I learned that beautiful food doesn’t have to be complicated. After nine years of professional cooking, I’ve made it my mission to prove that sophisticated, nutritionally sound meals can be accessible to busy home cooks who refuse to compromise on flavor or visual appeal.
What changed everything for me was watching talented home cooks feel intimidated by healthy cooking. That’s when I transitioned to private instruction, teaching busy professionals and families how to create restaurant-quality meals using simple techniques and ingredients they can actually find at their local grocery store. My “15-minute meal” frameworks are now used by several regional cooking schools!
As a third-generation Mexican-American, I love weaving vibrant Latin flavors into low-carb creations – proving that healthy eating can be both culturally authentic and visually spectacular. My “effortless elegance” philosophy is simple: nutritious food should look as stunning as it tastes, without requiring professional chef skills or expensive equipment.
When I’m not developing recipes in my San Diego coastal kitchen, you’ll find me surfing the local breaks with my Golden Retriever mix, Mango, who’s both my kitchen companion and unofficial taste-testing assistant. My personal low-carb lifestyle started as a way to maintain energy for my active coastal life, and it’s become the foundation for proving that healthy eating enhances rather than restricts life’s pleasures.