
Oh, I know your pain! There’s nothing sadder than carefully cutting out darling little stars or perfect snowmen, only to pull them from the oven and find a heap of sad, puffy blobs. We’ve all been there! It’s frustrating when the dough decides to take a vacation from whatever shape you gave it in the first place. Well, guess what? That ends today!
I’m sharing the exact blueprint I used when I first tackled holiday baking. I remember spending an entire afternoon trying to get crisp shapes for a party; I used every seasonal cutter I owned but kept getting soft edges until I finally cracked the code. This recipe isn’t just about mixing flour and sugar; it’s about the technique needed to guarantee you master making Cutout Sugar Cookies (Sharp Edges). Trust me, once you see those precise lines come out of the oven, you’ll feel that surge of pride. These keepers are now the staple at every family celebration!
Why This Recipe Delivers Perfect Cutout Sugar Cookies (Sharp Edges)
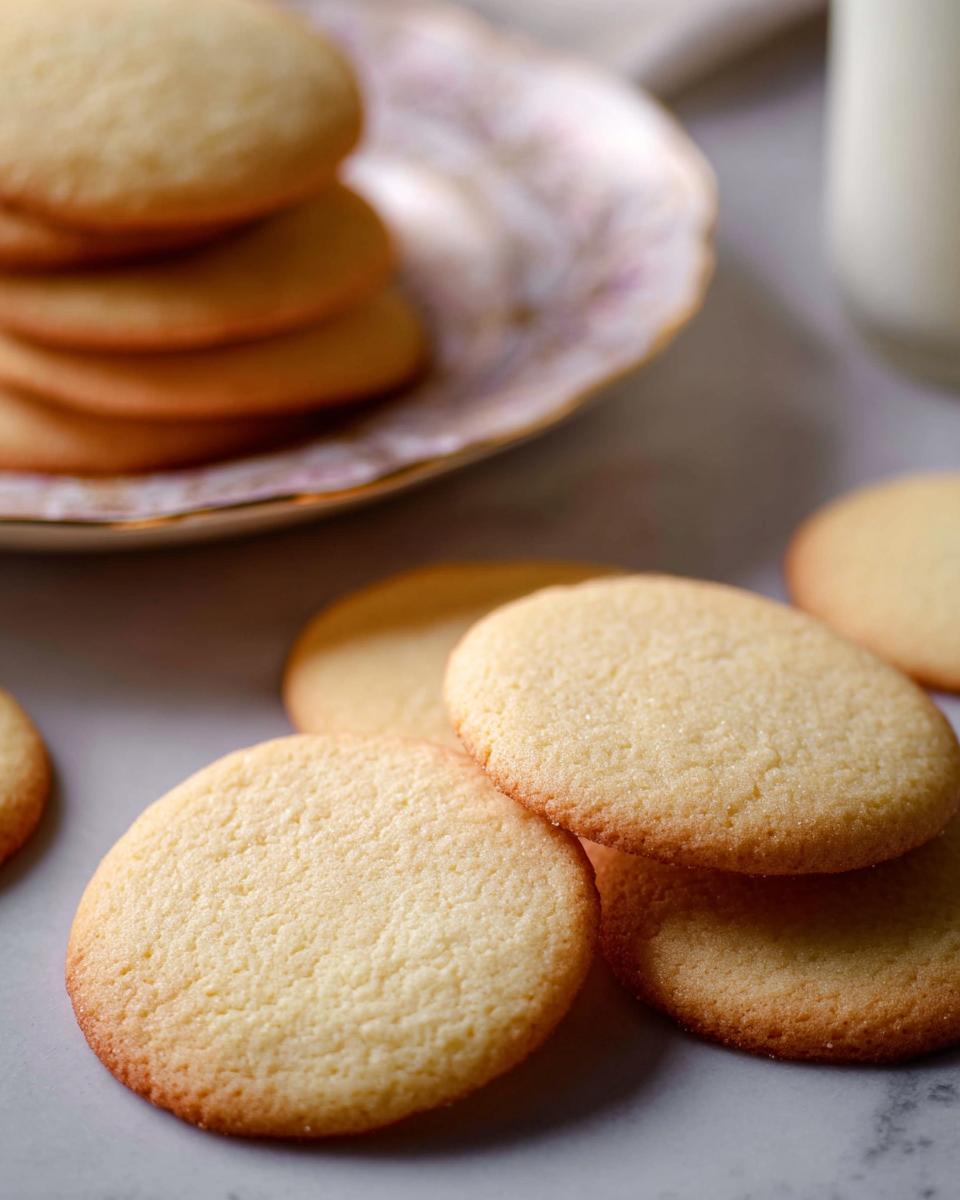
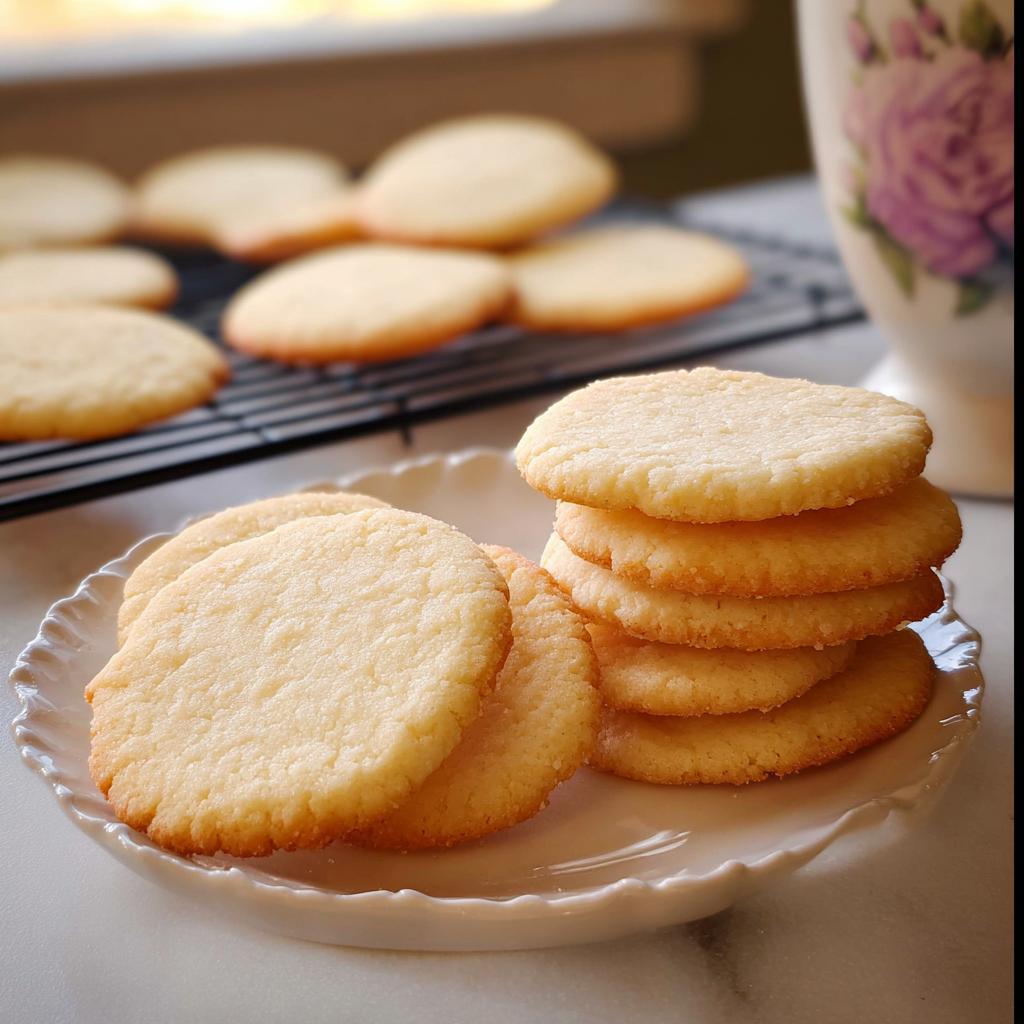
This recipe beats the batch slump because we focus on structure right from the start. You want cookies that look exactly like the cutter you used, and that’s exactly what you’re going to get. This isn’t magic; it’s just knowing a couple of non-negotiable rules!
- You get that famously crisp look because this dough is engineered for No Spread.
- Thorough chilling means zero distortion when the heat hits them.
- The payoff? Utter precision, which makes decorating a dream, not a disaster. It’s the key to stunning Cutout Sugar Cookies (Sharp Edges) every time.
The Secret to No Spread Sugar Cookie Cutouts
Why don’t these cookies go rogue in the oven? It truly comes down to how we balance things out. We use just the right amount of fat and sugar compared to the flour. This thoughtful ratio creates a strong, stable dough structure before it even hits the mixing bowl. When you chill this dough, those ratios lock in place. That’s why we get excellent No Spread results. It holds its form perfectly, ensuring those beautiful cut shapes stay put!
Essential Equipment for Cutout Sugar Cookies (Sharp Edges)
You don’t need a professional kitchen, but having the right tools makes achieving those sharp edges so much easier—seriously! We need the basics for mixing, of course: your mixing bowls and a stand mixer if you have one. Trust me, it saves your arm on this recipe!
But the real secret weapon here? Your cookie cutters. Forget those thick plastic ones if you want perfect results. I absolutely insist on using thin, sharp metal cutters when making Cutout Sugar Cookies (Sharp Edges). The thinner blade presses cleanly through the dough without dragging or causing drag marks that fill in while baking. You also need standard baking sheets, parchment paper (non-negotiable!), and a solid rolling pin.
Gathering Ingredients for Cutout Sugar Cookies (Sharp Edges)
Okay, let’s talk about what goes into the bowl! If we treat these ingredients with respect, they will absolutely bake up perfectly for you. While the process looks straightforward, the details in the ingredient prep are what pushes these over the top. We only have one group here—the components for the cookies themselves—but every measurement counts when you are focusing on precision!
Make sure your four cups of all-purpose flour are ready to go (we need that 480g measured correctly, so weigh if you can!). We need that full cup of unsalted butter, and it has to be properly softened—not melted, just soft enough to leave a gentle dent when you press it. Then we mix in the sugar, followed by those two large eggs, one at a time, and finally, two teaspoons of pure vanilla extract. Grab your salt and baking powder too; we’ll combine those dry bits separately.
If you’re looking for an amazing resource on general sugar cookie techniques, you might want to check out this great guide while you’re measuring things out!
Ingredient Notes and Substitutions
Listen, low-quality ingredients scream in a simple cookie like this one, so use the good stuff! The butter temperature is everything; too cold and it won’t cream up to incorporate the air we need for structure. Too warm, and we invite spreading!
Also, don’t skimp on the vanilla. We need two full teaspoons, and please, use real vanilla extract. The flavor is so clean, and it lets the subtle buttery taste shine through. Since there are no strong spices here to hide behind, good vanilla really makes the difference in these simple Cutout Sugar Cookies (Sharp Edges).
Step-by-Step Instructions for Perfect Cutout Sugar Cookies (Sharp Edges)
Now for the moment of truth! We take those beautiful dry ingredients and wet ingredients we mixed and turn them into cookie heaven. The instructions seem simple, but the order and timing are everything when you are determined to get Cutout Sugar Cookies (Sharp Edges) that look like they came from a professional bakery. First things first: get that oven preheated to 375F. We want it ready to go!
Start by incorporating your dry mix into the creamy butter/sugar mixture gradually. Mix until everything is just combined—don’t go overboard! We aren’t making bread here, so stop mixing as soon as you don’t see any more flour streaks. Then, wrap that dough up tight and get it cold. Patience now saves you from heartache later!
The Crucial Chill Dough Step for Sharp Edges
I cannot stress this enough: you MUST chill this dough. We need that minimum two-hour chill time—I often leave mine for a whole day! Why? Because when the fat in the dough is rock hard, it can’t melt quickly when it hits the hot oven air. This is the single most important element for achieving Sharp Edges. The Chill Dough step locks in the exact shape you create with the cutter, meaning your little reindeer doesn’t turn into a puddle. If you chill it for over two hours, just let it sit out for 15 to 30 minutes until it’s pliable enough to roll without cracking.
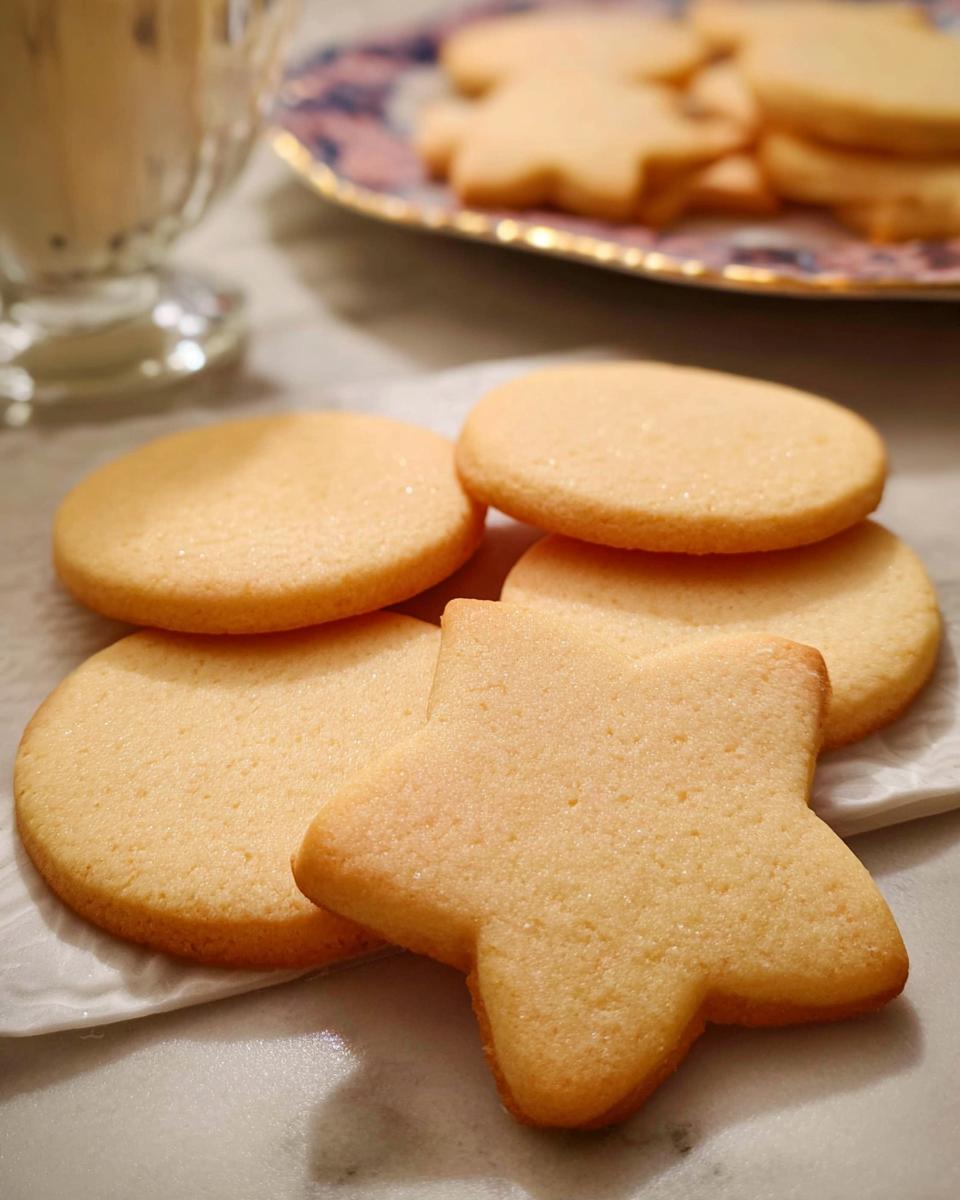
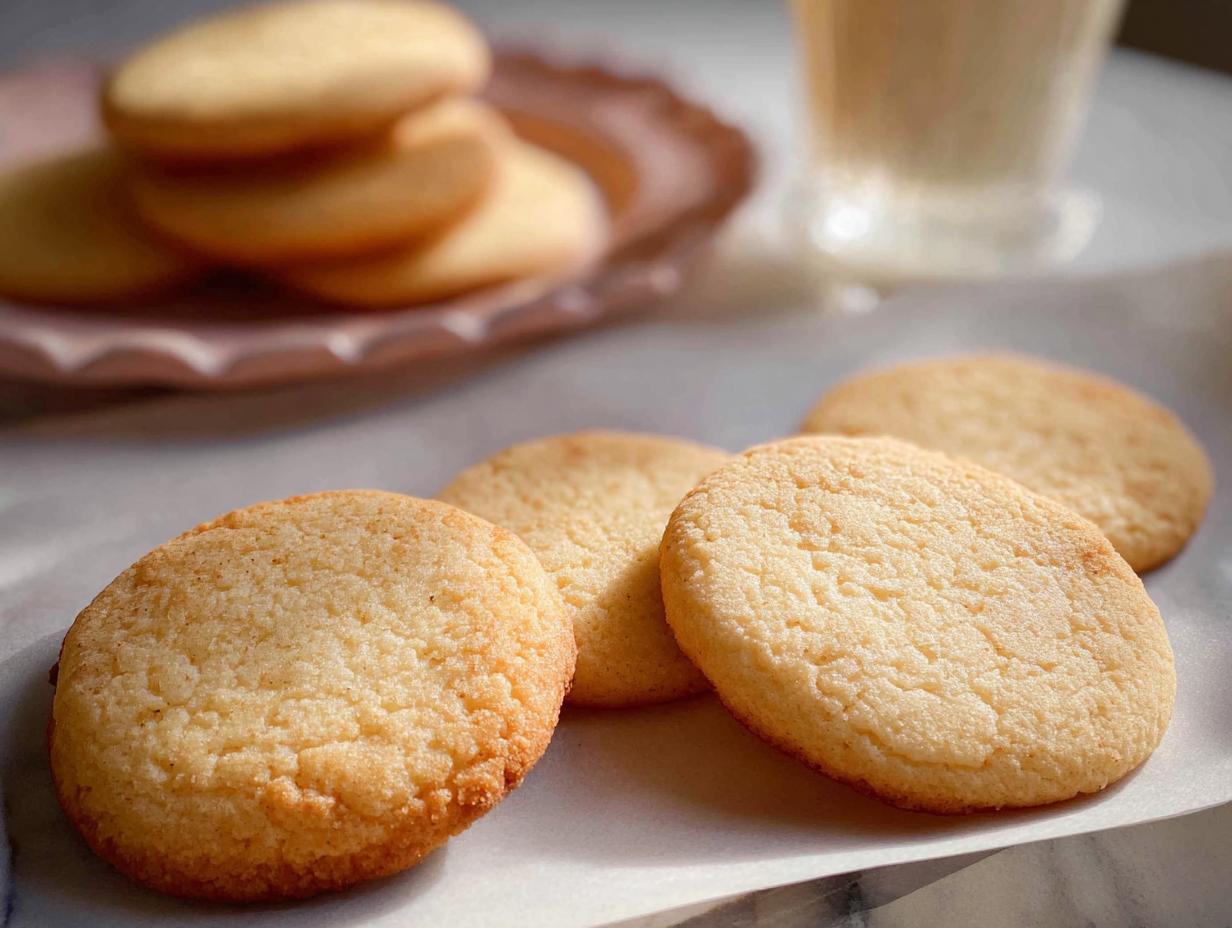
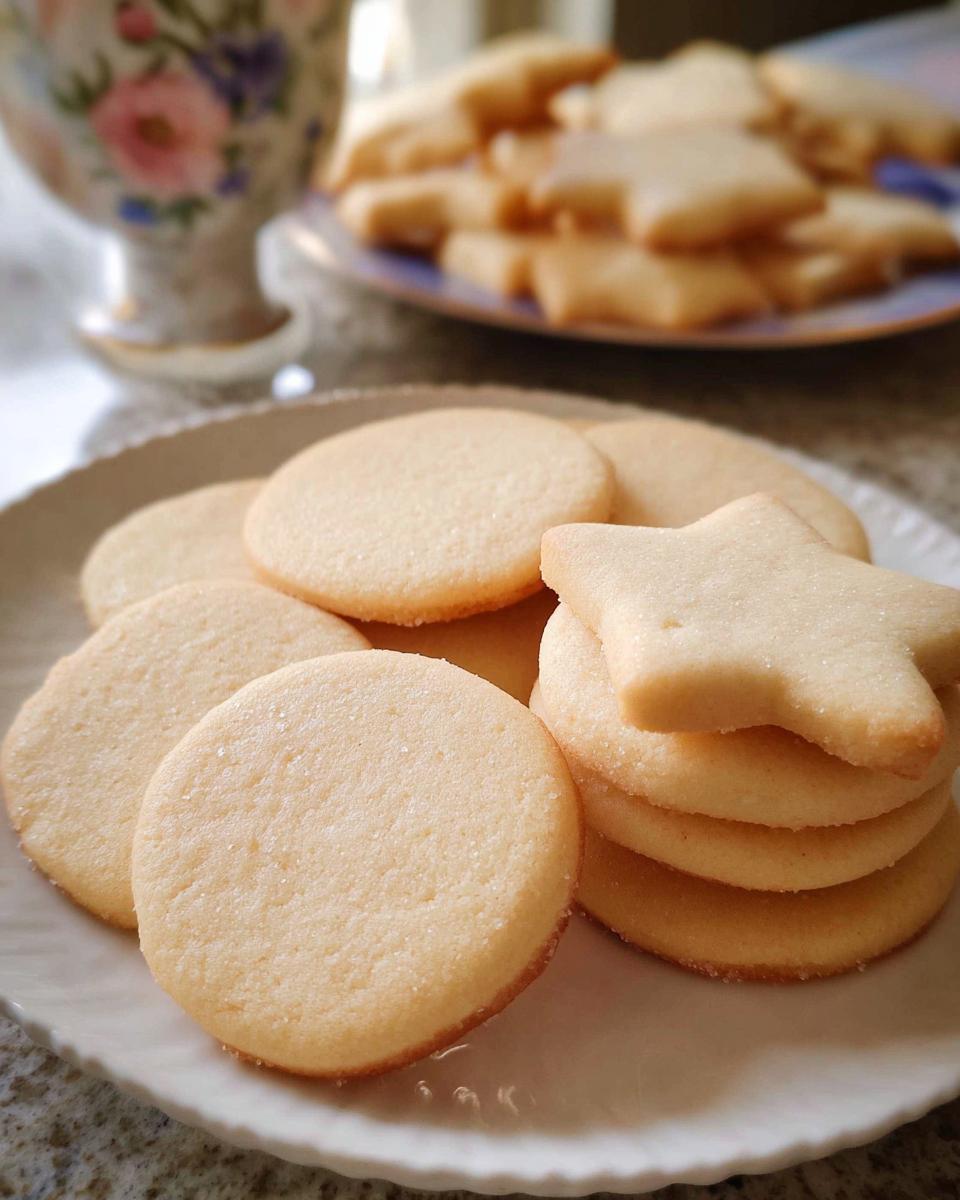
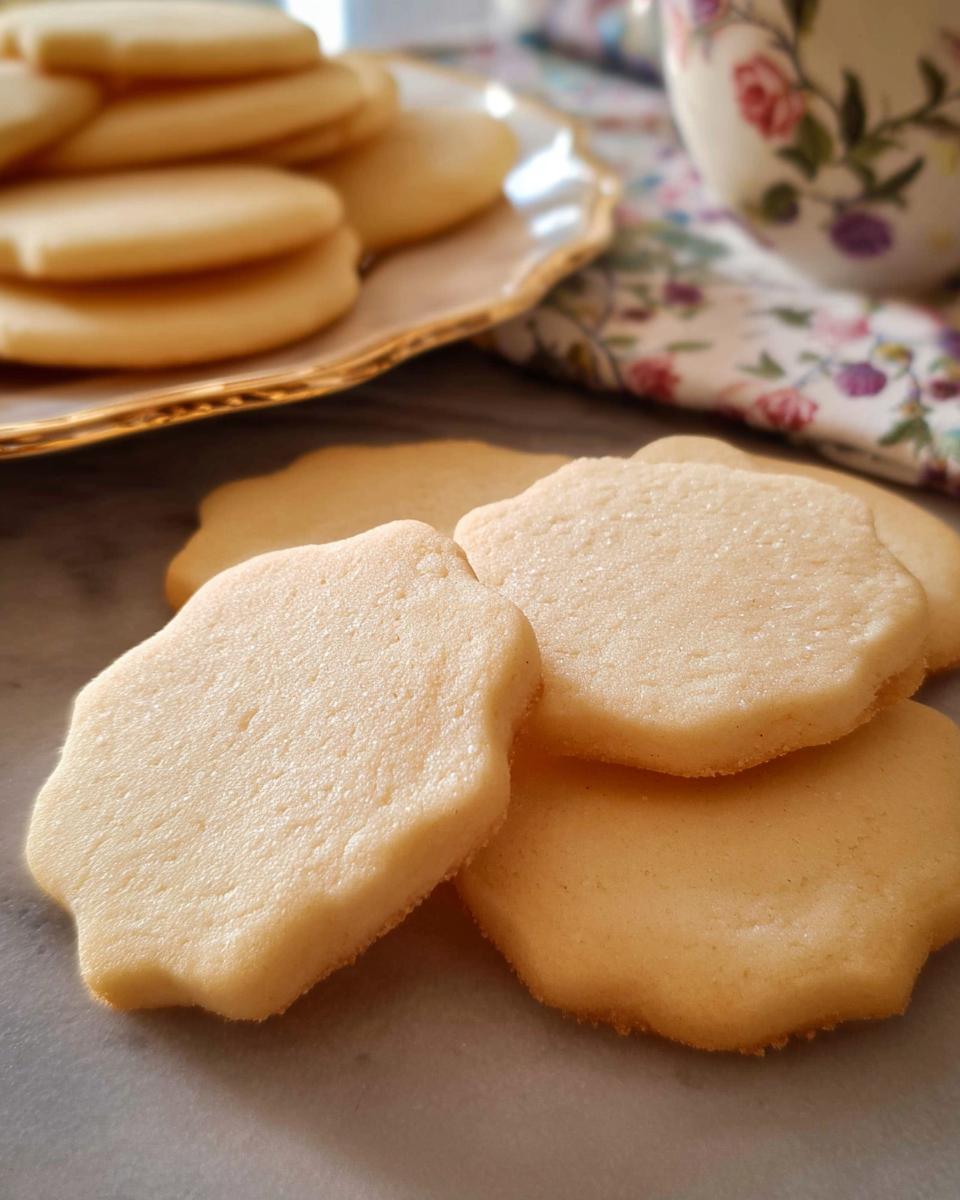
Rolling and Cutting Techniques for Sharp Edges
Once chilled, dust your surface lightly with flour. Roll that dough out evenly to a perfect ¼-inch thickness across the whole sheet. If you hear any cracking on the edges, it’s a little too cold, so give it a minute to warm slightly. This thickness ensures a substantial cookie that won’t snap but still bakes evenly.
When you use your cutter, press straight down firmly and quickly, and then lift straight up—no wiggling or twisting, even slightly! Twisting is the number one reason for fuzzy edges. Place your shapes immediately onto parchment-lined baking sheets spaced about an inch apart. This preparation is what guarantees those crisp, beautiful Sharp Edges when they come out of the oven.
Tips for Baking Perfect Sugar Cookies
We’ve done the hard work getting the dough ready and cutting beautiful shapes, but the final bake is where some people still lose their crisp lines! You want to pay close attention to your oven temperature—it’s the real hero or villain here. I always use an oven thermometer because those settings on the dial lie more often than not!
When baking, try to stick to baking one sheet at a time if you can. If you absolutely must use two sheets, swap their positions halfway through the cook time. This small rotation is one of my favorite Baking Tips because it guarantees even heat distribution, meaning every cookie cooks the same way. And please, pull them as soon as you see that faint golden brown color on the bottom edges—better slightly pale than secretly overbaked!
Decorating Ideas For Sugar Cookies
Look at you! You have perfectly shaped cookies with crisp outlines! Before you rush off to grab your piping bags, we need to talk about cooling. If you try to ice a warm or even slightly room-temperature cookie, your beautiful icing will melt right off the edges, and all that hard work goes down the drain! Set them aside on that wire rack and let them get completely, totally cool. I mean, room temperature.
Once they are cool, royal icing is my absolute go-to for these sharp-edged beauties. It dries hard, which helps maintain those crisp lines you worked so hard for, and it gives you that professional, smooth finish that looks incredible once decorated. Don’t be intimidated; it’s worth mastering because these cookies deserve fantastic decoration!
Achieving Polished Decorating Results on Sugar Cookie Cutouts
Since the base of your Sugar Cookie Cutouts is so sturdy, you can really go for detailed work. Use the ‘outline and flood’ method if you’re using royal icing. Outline the entire shape first with a slightly thicker icing consistency—this creates a little dam. Wait ten minutes for that outline to set up just a tiny bit, and then flood the center with a thinner icing.
This technique keeps the flooded center from oozing over your perfectly sharp edges. The result is always so sharp and clean. It looks like the design was printed right onto the cookie!
Storage & Reheating Instructions for Cutout Sugar Cookies (Sharp Edges)
Okay, you nailed the bake, and maybe you even iced them perfectly. Great job! Now we have to protect these works of art. Storing iced cookies is tricky because if they press against each other, you’ll smash your hard work. For iced cookies, make sure the icing is totally dry—like rock hard—then store them in a single layer in an airtight container at room temperature. If you must stack them, put a piece of parchment paper between each layer to stop them from sticking or cracking.
If you didn’t ice them yet, just keep your plain Cutout Sugar Cookies (Sharp Edges) in an airtight container at room temp for up to a week. They honestly taste best within the first three days! No need to refrigerate these unless your kitchen gets super humid. They don’t really reheat well; just let them come to room temperature if they’ve been stored somewhere cold.
Frequently Asked Questions About Sharp Edges Cookies
I know that even with the best recipe, sometimes things still go a little sideways in the oven! Don’t get discouraged. Most issues with sugar cookies come down to temperature management or technique timing. Let’s clear up any lingering doubts so your next batch of Cutout Sugar Cookies (Sharp Edges) is flawless!
Why do my cookies spread even after chilling?
If you’re still seeing spread when you want those crisp Sharp Edges, there are usually two culprits. First, check your chilling time—did you chill for the full two hours minimum? If you only did an hour, the fat still wasn’t cold enough. Second, check your butter temperature before you started mixing. If your butter was too soft or even slightly melty before mixing, it created a batter that spreads too easily, even if you chilled it afterward. Make sure for the next batch that the butter is pliable but still cool to the touch!
Can I skip chilling the dough for these Cutout Sugar Cookies?
Oh, honey, please don’t! I know it feels like an extra day stuck waiting when you are excited to bake, but skipping the chill is the fastest way to ruin your efforts to get those beautiful, clean Sharp Edges. If you don’t use the Chill Dough technique, the butter melts instantly when it hits the heat, and *poof*—your perfect circles turn into sloppy puddles. This recipe is specifically designed around that long chill period to ensure that signature No Spread outcome. Seriously, resist the urge!
Estimated Nutritional Data for Cutout Sugar Cookies (Sharp Edges)
I know a lot of you are focused on the artistry, but it’s good to know what you’re looking at nutritionally when you make these! Based on the base recipe ingredients alone—not counting any heavy royal icing you choose to pile on—here’s the rough estimate per cookie. Remember, these are estimates, so they will shift if you use different brands of butter or alternative sugars.
- Calories: 122
- Fat: 6g
- Carbohydrates: 16g
- Protein: 2g
If you are using the cream cheese frosting or a heavy layer of royal icing on your Cutout Sugar Cookies (Sharp Edges), expect those numbers, especially the sugar count, to jump up a bit. Enjoy the treat; you earned it!
Share Your Beautifully Shaped Holiday Cookies
We did it! You’ve got the blueprint to make Cutout Sugar Cookies (Sharp Edges) that look like they came from a professional decorator. Now I really want to see what you came up with! Please take a moment to give this recipe a star rating right here on the site; it helps other bakers find this precise technique.
Don’t forget to snap a picture of your perfectly shaped holiday cookies! Tag me on social media so I can admire those sharp lines you achieved. And if you learned something new about chilling dough or cutting techniques, leave a comment below. Happy baking—I can’t wait to see your masterpieces!
Cutout Sugar Cookies (Sharp Edges)
Ingredients
Equipment
Method
- In a medium bowl, sift together the flour, salt, and baking powder.
- In a large mixing bowl or the bowl of a stand mixer fitted with the paddle attachment, beat the butter and sugar together on medium speed until light and fluffy, about 2 minutes.
- Add the eggs, one at a time, while mixing. Scrape down the sides of the bowl. Beat in the vanilla.
- With the mixer running, gradually add in the flour mixture and mix until everything is well incorporated. Divide the dough in half, shape into two disks, and tightly wrap in plastic wrap. Refrigerate for 2 hours or up to 2 days. If chilling longer than 2 hours, let the dough sit at room temperature for 15 to 30 minutes or until slightly softened.
- Once the dough is chilled and you are ready to bake, preheat the oven to 375F.
- Roll the dough on a lightly floured surface to ¼-inch thickness. Cut out shapes using 2½-inch cookie cutters. Re-roll as needed for more cookies.
- Place the cut-outs on non-stick or parchment-lined baking sheets 1 inch apart.
- Bake one sheet at a time for 10 to 12 minutes or until the bottom edges start to turn brown. Let cool for a few minutes on the pan then transfer to a wire rack and cool completely.
- Serve plain or decorate with royal icing.
Nutrition
Notes
Tried this recipe?
Let us know how it was!
Master of Global Fusion Innovation
My culinary adventure reflects my Lebanese-Italian heritage and a decade spent in the dynamic fusion restaurant scenes of Miami and Barcelona. I’ve made it my mission to prove that beloved global comfort foods can be successfully adapted for low-carb living without losing their soul, their cultural authenticity, or their ability to comfort.
With advanced training in molecular gastronomy and experience spanning Mediterranean, Middle Eastern, and Latin American traditions, I’ve developed what I call “respectful innovation” – culinary creativity that honors traditional cooking wisdom rather than replacing it. My alternative ingredient substitution systems are now taught in specialty diet cooking schools throughout the region.
Drawing from my trilingual upbringing, I understand how deeply food connects to identity and memory. That’s why my flavor-bridging techniques allow classic dishes from around the world to maintain their comforting, familiar qualities while meeting contemporary nutritional standards. I regularly share these techniques at international culinary symposiums and innovation events.
When I’m not experimenting in my Miami fusion kitchen laboratory, you’ll find me at local salsa dance venues – the rhythm and improvisation skills translate directly to my creative cooking process! My role as a foster parent to rescue rabbits has unexpectedly inspired some of my most creative plant-based low-carb innovations.
My personal low-carb journey began as a way to maintain energy for my active lifestyle, but it’s evolved into a professional mission of proving that healthy eating can be globally adventurous rather than restrictively limiting. Every recipe I create is a passport to culinary adventure, transforming kitchens into laboratories for exploring healthy versions of the world’s most beloved comfort foods.