
Okay, let’s just talk honestly for a second. Who hasn’t found themselves staring at a box of cake mix when the in-laws unexpectedly show up? I used to feel a little sneaky pulling that box out, like I was cheating! But then I realized, why settle for ‘standard’ when you can have ‘spectacular’ with just a tiny bit of extra love? That realization led to what I now call the Box Mix Glow-Up: Fancy Finishes.
This method takes that humble chocolate mix, punches up the moisture with an incredible peanut butter soak, and tops it with a frosting so dreamy, people ask if you bought it from a bakery. It’s pure, easy elevation, I promise!
I remember one chaotic weekend when I tried my first upgrade. I had leftover raspberry jam and dusted the top with gourmet sea salt. The reaction? Total shock! It taught me that baking should be fun, not stressful. With this recipe, you get a gourmet dessert that truly wows everyone, and hardly anyone will guess the secret is a box mix underneath all that glory.
Why This Box Mix Glow-Up: Fancy Finishes Recipe Works (Easy Elevation Secrets)
Why bother if a box mix is already easy? Because ‘easy’ shouldn’t mean ‘boring,’ right? This little trick delivers huge flavor and texture payoff with almost zero extra work. We’re talking about true, delicious Easy Elevation here.
The magic happens because the peanut butter soak doesn’t just sit on top; it seeps deep into the cake crumbs, keeping everything unbelievably moist long after you bake it. It’s the secret weapon against dry cake!
Key Benefits of This Box Mix Upgrade
- The Syrup Soak: It bathes the cake in peanut butter richness, making it incredibly dense and fudge-like, way beyond standard box mix texture.
- Minimal Effort: We are already using a mix, so the work is minimal, but the results look like you sweated over it for hours.
- Presentation Power: A rich, velvety frosting with crunchy toppings immediately screams ‘gourmet’—hello, party-ready cake!
Gathering Your Ingredients for Box Mix Glow-Up: Fancy Finishes
Gathering up what we need is the fun, low-stress part! Since we’re working with a standard box mix, most of this is just pantry stocking. But trust me, those little additions—especially the peanut butter situation—are what push this cake into that spectacular category we’re aiming for. We’re dividing everything up so you know exactly what goes into the cake, the soak, and the final dazzling toppings.
For the Cake Batter Boost
You’re starting with one package of your favorite chocolate cake mix, but we’re making sure it’s ready for greatness! Don’t just dump the mix and water in; we’re adding two extras that make a difference.
- 1 package chocolate cake mix (regular size—just prepare according to the box directions until you get to the wet ingredients stage!)
- 1 teaspoon vanilla extract (This just wakes up that chocolate flavor!)
- 1 dash salt (Crucial for balancing the sweetness.)
Creating the Peanut Butter Soak
This is the heart of the moisture boost! You need creamy peanut butter—none of that crunchy stuff for the soak, please. And we need the whole can of condensed milk to get that perfect, pourable texture.
- 2/3 cup creamy peanut butter
- 2 cans (14 ounces each) sweetened condensed milk
Assembling the Fancy Finishes Frosting and Toppings
For the frosting, we get clever because we are only using *part* of the soak mixture! Make sure you reserve some of that incredible peanut butter liquid before you start icing.
- 1 teaspoon vanilla extract (the remainder)
- 1 cup confectioners’ sugar (This adjusts the soak mixture into proper frosting!)
- 1 cup chopped peanut butter-filled sandwich cookies (Go crazy here; this is your final flourish!)
Step-by-Step Instructions for Your Box Mix Glow-Up: Fancy Finishes
Alright, this is where the transformation truly happens! You don’t need complicated techniques, just following the order correctly will give you that stunning result. I’ve broken it down into three clear stages so you can enjoy the process without getting overwhelmed.
Baking the Base and Preparing the Syrup Soak
First, get that oven humming at 350°F (175°C). You’ll mix up your chocolate cake mix exactly how the box says, but remember those little nudges we talked about! Throw in that extra teaspoon of vanilla and just a single dash of salt right before you pour it into your greased 13×9-inch pan. Bake it until done, then—this is vital—let it cool completely! Seriously, a warm cake absorbs the soak unevenly, and we don’t want that.
While it’s cooling down, grab a medium bowl. You’re whisking together that creamy peanut butter and both cans of sweetened condensed milk. Whisk it until everything smooths out; you want a beautiful, rich liquid ready to go. This slurry is powerful stuff!
Applying the Syrup Soak and Chilling for Moisture
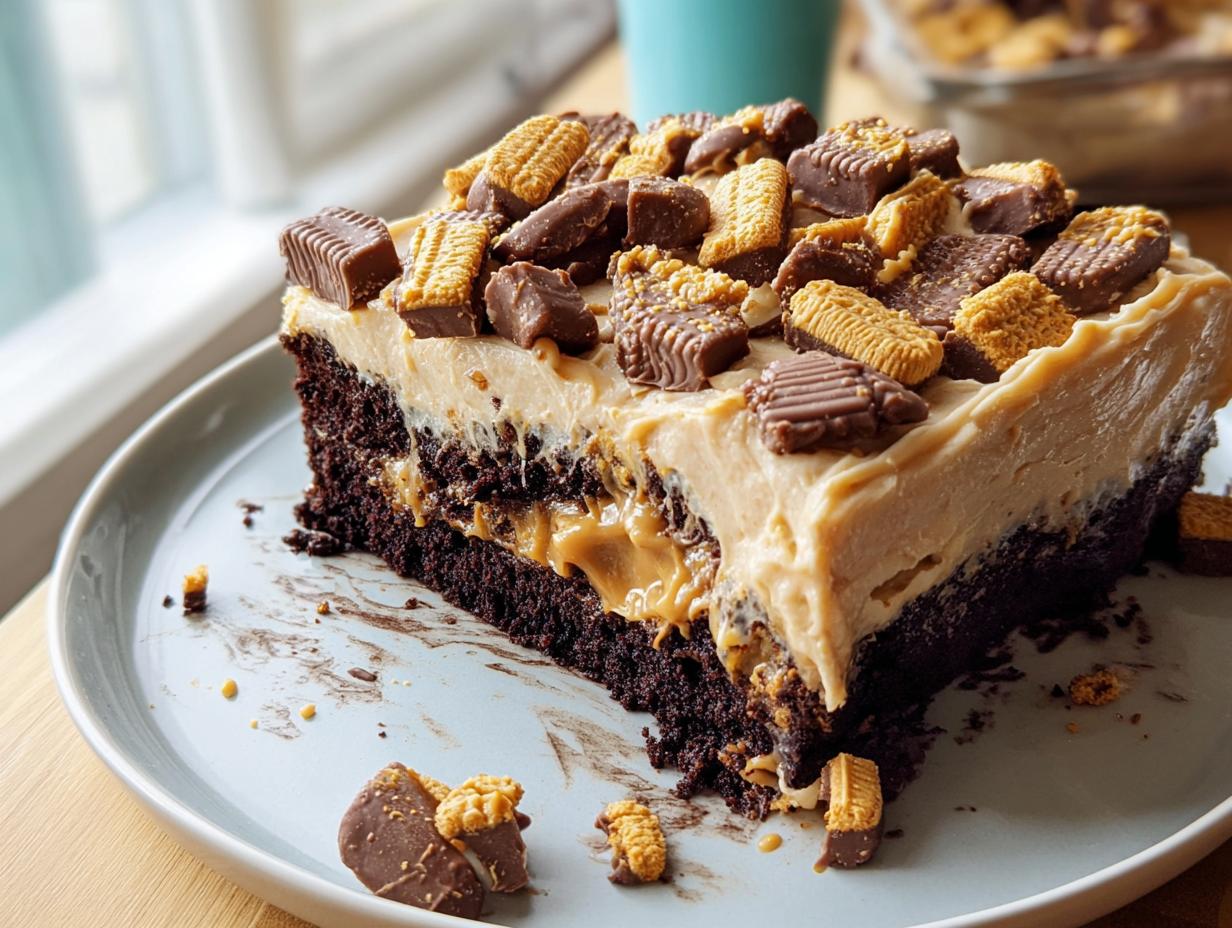
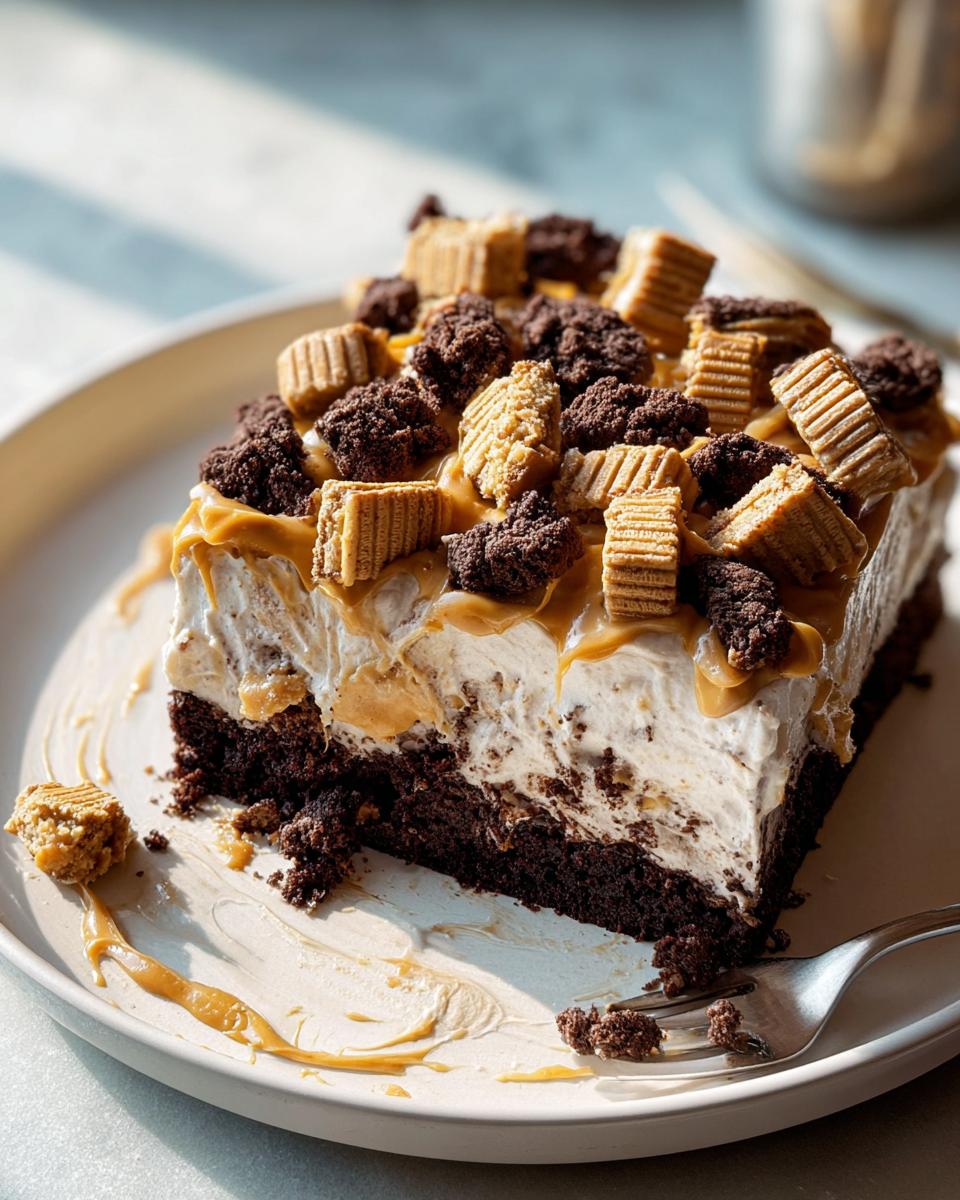
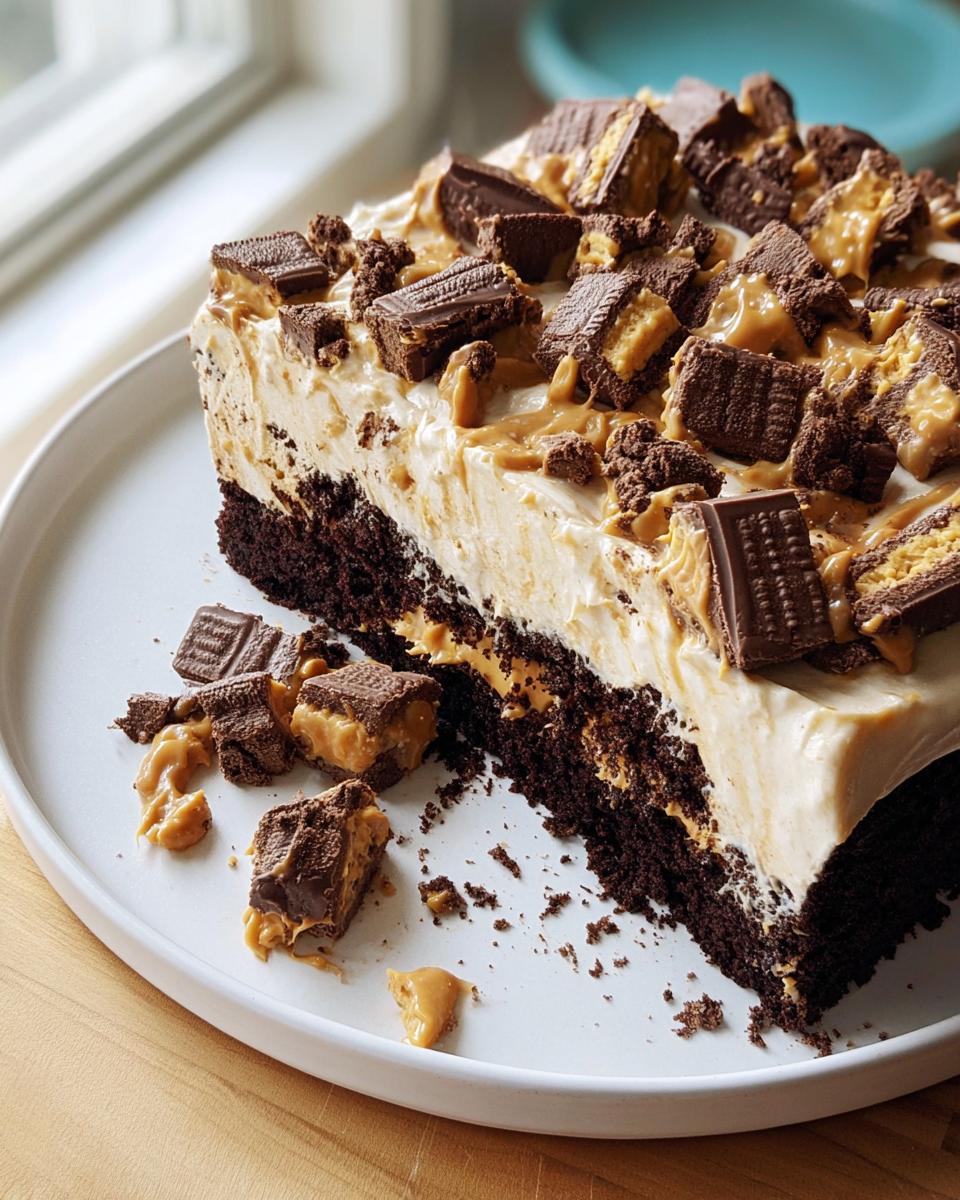
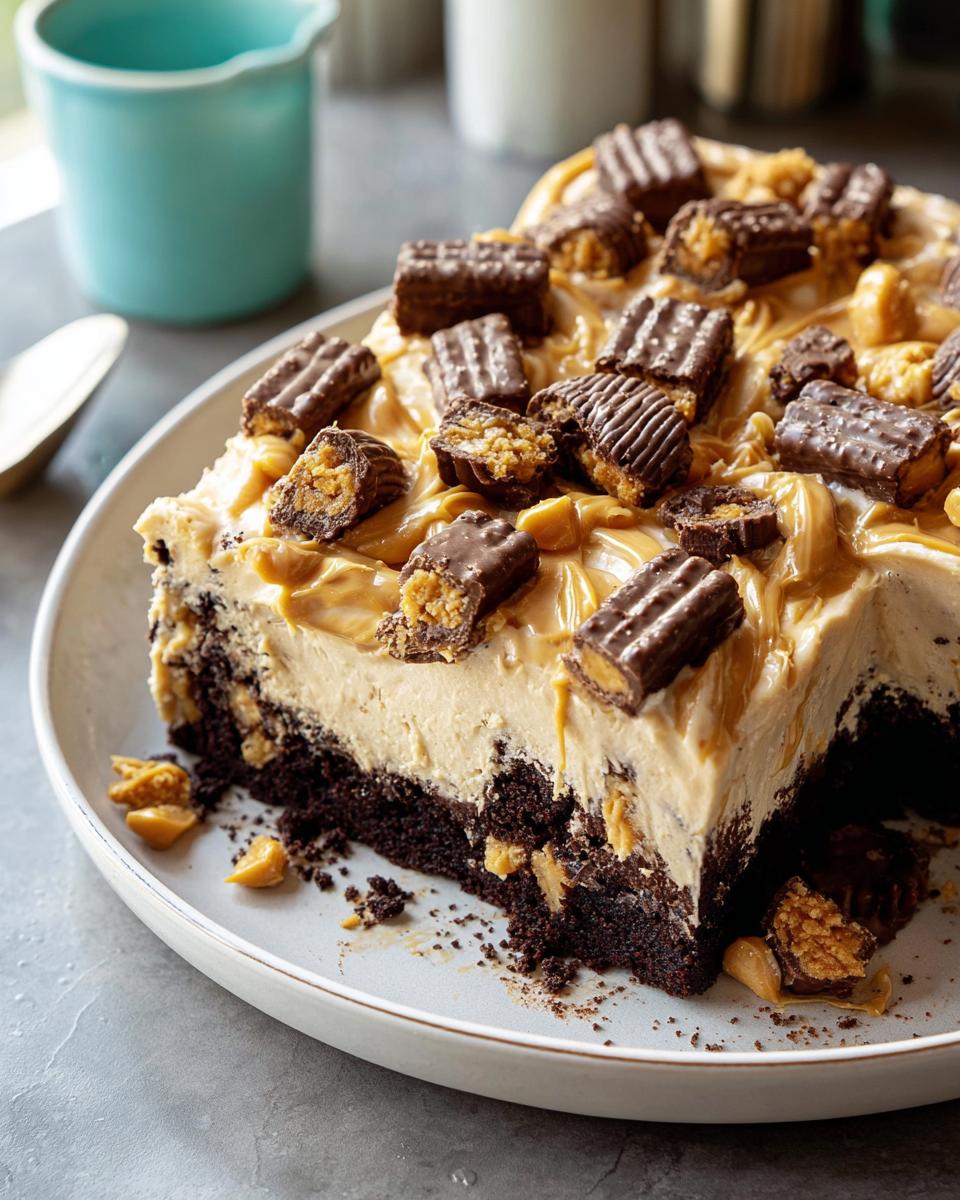
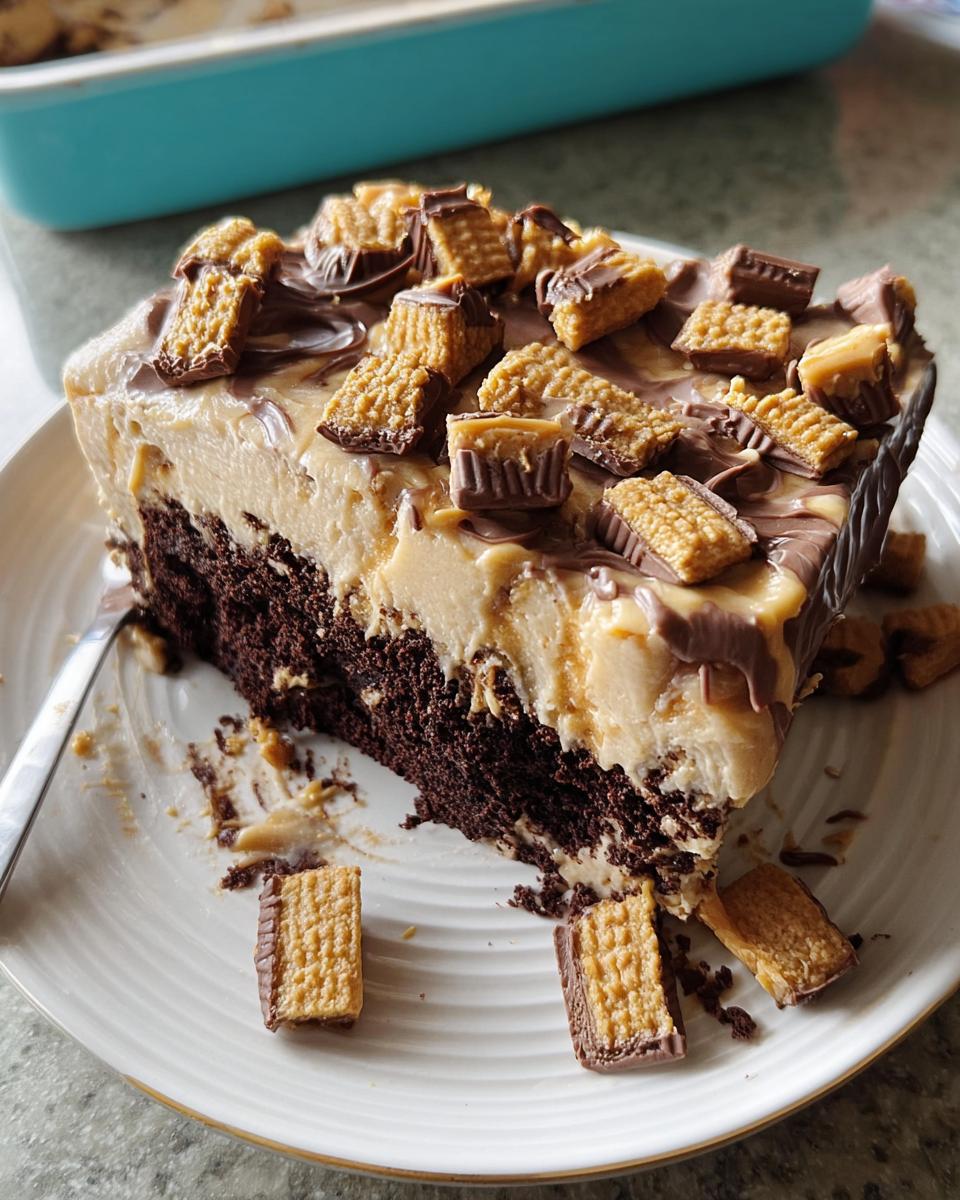
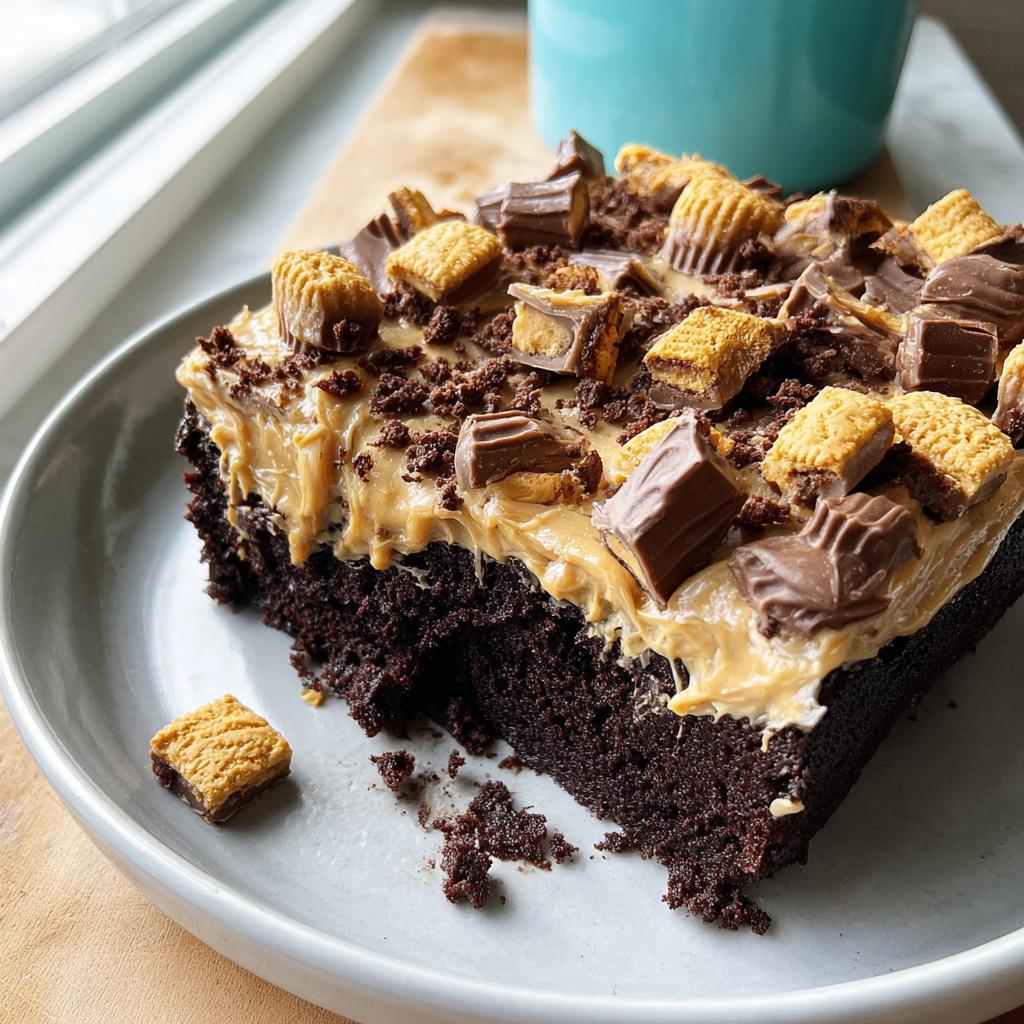
Once your cake is totally chill, grab the handle of a wooden spoon—yes, the handle end works best for this—and start poking holes all over the surface. I aim for holes about two inches apart, making sure I hit the corners too. Now, slowly drizzle about two cups of that wonderful peanut butter mixture right over the top. Pour it gently so it drips down into those little tunnels you just made.
Cover the whole thing up and put it in the fridge for a good 2 to 3 hours. This lengthy chilling time is non-negotiable! It allows the Syrup Soak to really penetrate and set, giving you that dense, moist texture that defines this Box Mix Glow-Up. You’ll save the rest of the soak for the frosting!
Making the Frosting and Final Box Mix Glow-Up: Fancy Finishes
Now for the crowning glory! Take the peanut butter soak mixture you refrigerated (the part you didn’t pour on the cake) and whisk in the rest of that vanilla extract. Then, you’ll start incorporating the confectioners’ sugar, a little at a time. Keep beating until it transforms into a thick, spreadable frosting. If it looks too stiff, maybe add half a teaspoon of milk, but be careful, we want it thick!
Spread that glorious frosting evenly over your chilled cake. This is your chance to make it look fancy! Finally, sprinkle those chopped peanut butter sandwich cookies—or maybe Reese’s Cups, I won’t tell!—all over the top for the ultimate finish. Pop it back in the fridge until you’re ready to serve!
Expert Tips for Perfect Box Mix Glow-Up: Fancy Finishes
Even though we’re working with a box mix, treating it with some respect goes a long way toward that gourmet outcome. These little techniques are the difference between good and amazing, and they tap right into classic Baking Tips And Tricks.
Achieving the Best Soak Saturation
I cannot stress this enough: your cake absolutely *must* be completely cool before you start poking holes for the peanut butter blend. If that cake is even slightly warm, the structure collapses under the moisture, and you end up with a heavy, soupy mess instead of a dense, soaked crumb. Patience pays off here; let it sit on the counter until it’s totally room temperature!
Adjusting Frosting Consistency
Since the frosting base is already rich from the condensed milk and peanut butter, it tends to set up quite firm in the fridge. If you find your frosting is too stiff right out of the fridge for spreading, resist the urge to add too much liquid too fast. Add just one teaspoon of milk at a time, mixing thoroughly between each addition until it gets smooth and velvety again. Too thin, and you’ll lose that fluffy height, but a little sugar adjustment usually firms it right up!
Creative Cake Decorating and Dessert Presentation Ideas
This is the part where we really earn that “Glow-Up” title! Just because we started with a box mix doesn’t mean the final reveal should look rushed. We’re moving into Creative Cake Decorating territory, but keeping it quick and fun, because who has time for fancy piping bags?
The peanut butter cookies on top look fantastic, but we want layers of visual appeal! Think texture, sheen, and contrast. Since this cake is so rich, keeping the presentation clean really helps it shine.
Elevating the Look for a Party-Ready Cake
Do you have five extra minutes? Use them here! If you happen to have a ziplock bag, snip the very corner off, and you can pipe a simple rope border around the edge of the frosting. It instantly frames the cake beautifully.
Another trick I love is dusting! Grab a fine-mesh sieve and lightly dust the empty patches of cream-colored frosting with unsweetened cocoa powder. The contrast between dark brown and creamy tan is stunning.
If you have a small amount of extra chocolate chips or peanut butter—melt it down! A few tiny controlled drizzles of melted chocolate over those cookie chunks just adds that professional, polished ‘wow’ factor. It makes it look so much more deliberate!
Storage and Making Ahead for Your Box Mix Upgrade
I know that making a dessert this rich usually means leftovers, and you want to make sure that Box Mix Upgrade tastes just as good the next day, right?
Because we’re dealing with a rich peanut butter soak and thick frosting, airtight storage in the refrigerator is a must. Once you cut into it, cover the exposed cake tightly with plastic wrap—or transfer the slices to a sealable container. This cake stays wonderfully moist for about four days in the fridge, though mine never lasts that long!
You can actually get a head start by making the peanut butter soak mixture a day ahead of time. Keep it covered tightly on the counter. Then, bake your cake the next day, and proceed with soaking and frosting. It cuts down on day-of chaos!
Reheating Tips for Maximum Flavor
Now, about reheating… forget the microwave! The microwave makes that incredible peanut butter density get weirdly gummy, and we worked too hard to lose that perfect texture. Since this cake really shines when it’s cool, I suggest letting individual slices sit out on the counter for about 20 minutes before serving. Letting it come up to cool room temperature just takes the chill off, making the frosting softer and bringing out all those deep chocolate and peanut butter flavors. Trust me, that 20 minutes is worth the wait!
Frequently Asked Questions About Box Mix Glow-Up: Fancy Finishes
I always get loaded up with questions when people try this easy elevation trick for the first time! It’s amazing how a simple chocolate cake mix can turn into something so decadent. Here are the things I hear most often about making this cake absolutely perfect.
Can I use a different cake mix flavor?
Oh, you totally can! While the chocolate cake mix is perfection with that rich peanut butter pairing, this recipe is extremely forgiving. If you use a yellow or vanilla cake mix, you’ll end up with a decadent peanut butter bomb that tastes almost like a massive peanut butter cookie! Just be aware that yellow cake might absorb some of the darker soak color, but the flavor combo is still killer. It keeps that Box Mix Upgrade shining!
What if I do not have sweetened condensed milk for the soak?
This is where it gets tricky, sweetie. Sweetened condensed milk is crucial because it’s super thick, already very sweet, and it doesn’t boil or separate when mixed with the peanut butter like regular milk would. If you absolutely must substitute, you could try mixing heavy cream with powdered sugar until it’s thick, but honestly, it won’t achieve the same density or richness. For this specific Syrup Soak magic, I really urge you to use the condensed milk; it’s the heavy lifter here!
How long does this Party-Ready Cake last?
Because of all that glorious moisture from the soak and the rich frosting, this cake is actually better the next day! Stored tightly covered in the refrigerator, it stays incredibly moist and delicious for about 4 to 5 days. As I mentioned before, just pull those slices out about 20 minutes before serving so they aren’t fridge-cold. It stays delicious long enough to be the star of any party!
Estimated Nutritional Data for Box Mix Glow-Up: Fancy Finishes
Now, I know when we’re dealing with this much deliciousness—all that peanut butter and chocolate!—we aren’t exactly aiming for diet fuel, right? But I always like to give you a general idea of what you’re diving into with this amazing Box Mix Glow-Up.
The numbers below are estimates based on standard grocery store ingredients for one generous slice (out of 12 total servings). Use this as a guideline, but remember that every brand and size of cake mix can shift these figures slightly! We’re focusing on flavor here, not counting macros, but knowledge is power!
- Calories: 360
- Fat: 16g
- Saturated Fat: 4g
- Cholesterol: 41mg
- Sodium: 312mg
- Carbohydrates: 49g
- Sugar: 40g
- Fiber: 1g
- Protein: 7g
Just a friendly note: because we are adding that rich peanut butter soak and condensed milk, the sugar and fat content is higher than your standard plain cake. That’s the trade-off for this amazing moist texture and gourmet flavor! Enjoy every single bite, because you absolutely earned this spectacular finish!
Share Your Box Mix Glow-Up Creations
Wow, you made it to the end! You’ve turned a humble chocolate box mix into something that deserves to be on a fancy dessert platter. Now, the best part of baking is sharing the joy, isn’t it?
I’m genuinely thrilled for you and your friends who get to enjoy this masterpiece. Seriously, I absolutely want to know how your Box Mix Glow-Up: Fancy Finishes turned out! Did you stick with the sandwich cookies, or did you try a totally different topping for your own spin on the frosting?
Please, don’t be shy! Leave a comment down below and tell me what you thought. If you gave it a rating, let me know how many shining stars it earned! And if you took a photo of that gorgeous slab of peanut butter-soaked perfection, tag me on social media! Seeing your creations using these simple, fun tricks is what keeps me experimenting in the kitchen every single day. Have fun sharing this incredible, easy-to-make treat!
Box Mix Glow-Up: Fancy Finishes
Ingredients
Equipment
Method
- Preheat your oven to 350°F (175°C). Prepare the chocolate cake mix according to the package directions. Add 1 teaspoon of vanilla extract and a dash of salt to the batter before mixing. Pour the batter into a greased 13×9-inch baking pan. Bake and cool the cake completely as directed on the package.
- While the cake cools, whisk together the creamy peanut butter and sweetened condensed milk until well blended. This is your peanut butter soak.
- Once the cake is completely cool, use the end of a wooden spoon handle to poke holes in the cake, spacing them about 2 inches apart. Slowly pour 2 cups of the peanut butter mixture over the cake, ensuring it fills each hole.
- Cover the cake and the remaining peanut butter mixture. Refrigerate both for 2 to 3 hours, or until the cake is thoroughly chilled.
- To make the frosting, combine the remaining 1 teaspoon of vanilla extract with the reserved peanut butter mixture. Gradually beat in the confectioners’ sugar until you reach a spreadable consistency. You may need to add a little more or less sugar depending on your desired thickness.
- Spread the frosting evenly over the chilled cake. Sprinkle your desired toppings, such as chopped peanut butter-filled sandwich cookies or peanut butter cups, over the frosting.
- Refrigerate any leftovers.
Nutrition
Notes
Tried this recipe?
Let us know how it was!
Master of Global Fusion Innovation
My culinary adventure reflects my Lebanese-Italian heritage and a decade spent in the dynamic fusion restaurant scenes of Miami and Barcelona. I’ve made it my mission to prove that beloved global comfort foods can be successfully adapted for low-carb living without losing their soul, their cultural authenticity, or their ability to comfort.
With advanced training in molecular gastronomy and experience spanning Mediterranean, Middle Eastern, and Latin American traditions, I’ve developed what I call “respectful innovation” – culinary creativity that honors traditional cooking wisdom rather than replacing it. My alternative ingredient substitution systems are now taught in specialty diet cooking schools throughout the region.
Drawing from my trilingual upbringing, I understand how deeply food connects to identity and memory. That’s why my flavor-bridging techniques allow classic dishes from around the world to maintain their comforting, familiar qualities while meeting contemporary nutritional standards. I regularly share these techniques at international culinary symposiums and innovation events.
When I’m not experimenting in my Miami fusion kitchen laboratory, you’ll find me at local salsa dance venues – the rhythm and improvisation skills translate directly to my creative cooking process! My role as a foster parent to rescue rabbits has unexpectedly inspired some of my most creative plant-based low-carb innovations.
My personal low-carb journey began as a way to maintain energy for my active lifestyle, but it’s evolved into a professional mission of proving that healthy eating can be globally adventurous rather than restrictively limiting. Every recipe I create is a passport to culinary adventure, transforming kitchens into laboratories for exploring healthy versions of the world’s most beloved comfort foods.