
Oh, haven’t we all secretly wished we could walk into a bakery, point to the biggest, most perfectly domed muffin in the case, and magically have that result appear when *we* bake? I know I have! That’s exactly the dream I chased when I started working on this recipe. Forget those flat, sad little caps; we are aiming for glorious, skyscraper-high tops for our Banana Muffins (Bakery Style).
I still remember the first time I really put my heart into creating these. It was a surprisingly rainy afternoon here in Miami, and I was feeling completely nostalgic for those cozy little artisanal cafés in Barcelona that always had the best baked goods. Armed with a bit of that Lebanese-Italian sensibility I carry, I decided I needed a treat that honored the classic comfort of a traditional muffin but still fit my low-carb way of eating. Wow, the aroma that filled up my kitchen was practically a warm hug! It brought back memories of laughter and that sweet shop indulgence. Every single bite wasn’t just the joy of a bakery treat—it was that deep satisfaction of creating something delicious that still aligns with how I like to eat. Trust me, these are worth every minute of focused mixing you put in!
Why You Will Love These Banana Muffins (Bakery Style)
Honestly, these aren’t just *any* banana muffins; they are engineered for maximum breakfast happiness. If you’ve ever felt let down by a muffin that just didn’t rise right, get ready to be obsessed. These are the ones you’ll want to pull out when company comes over!
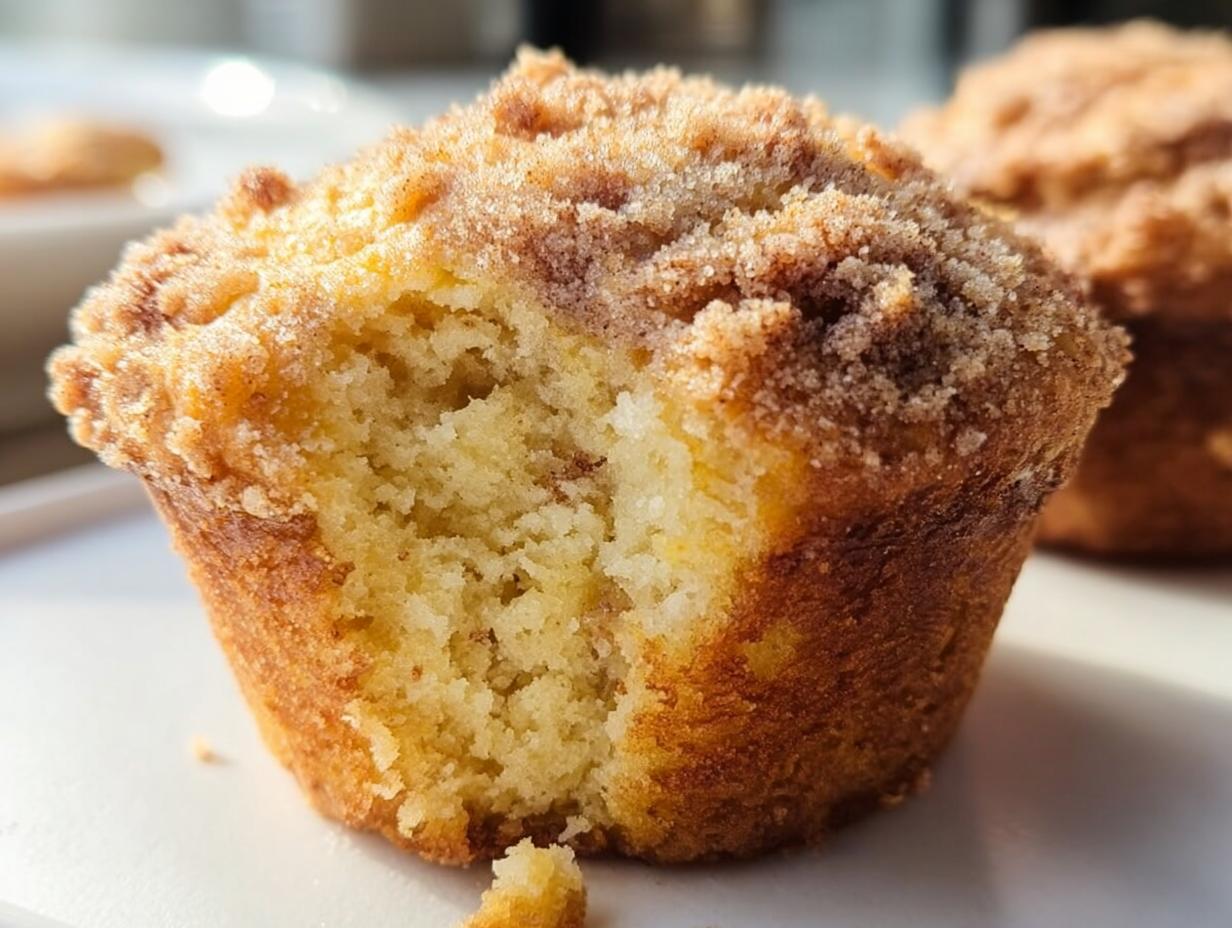
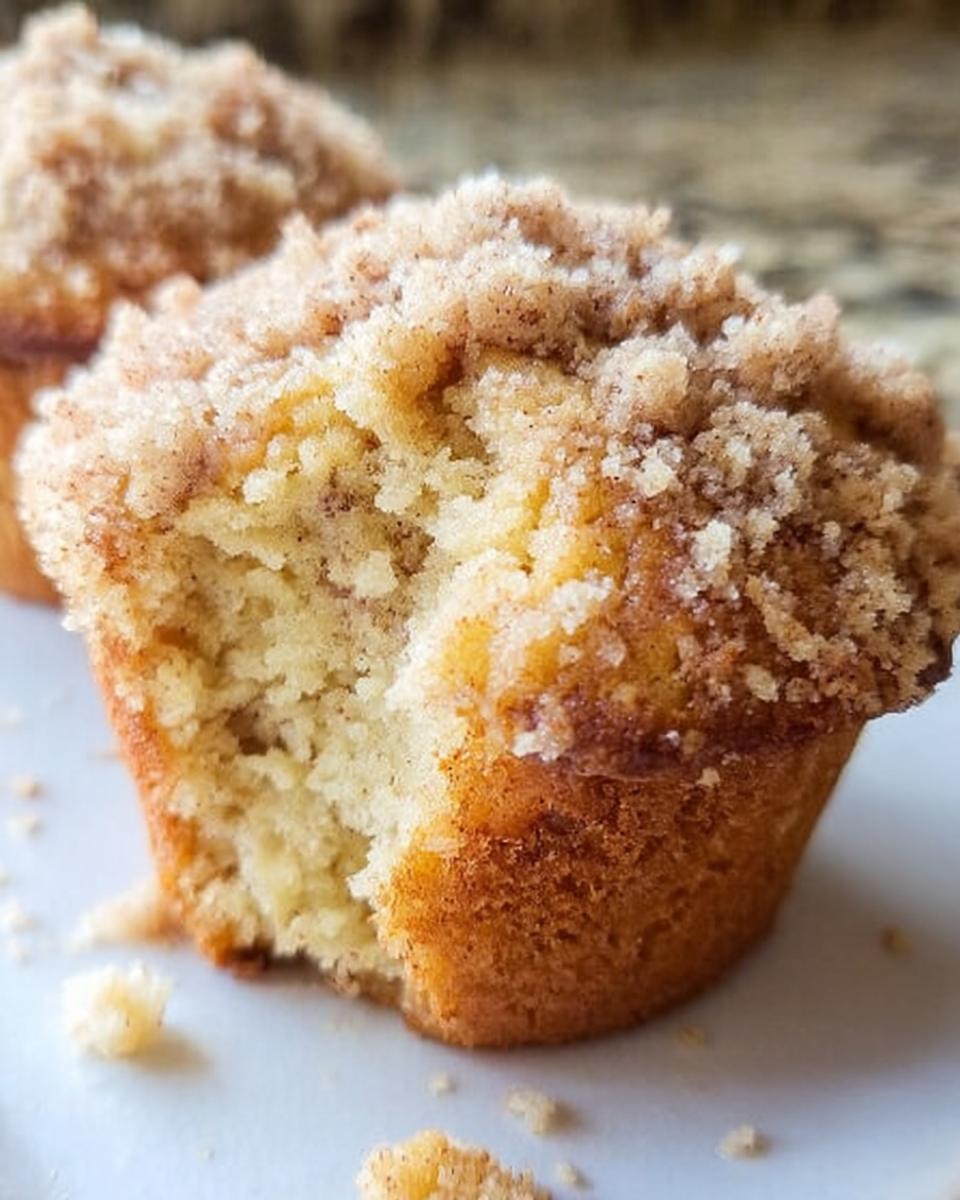
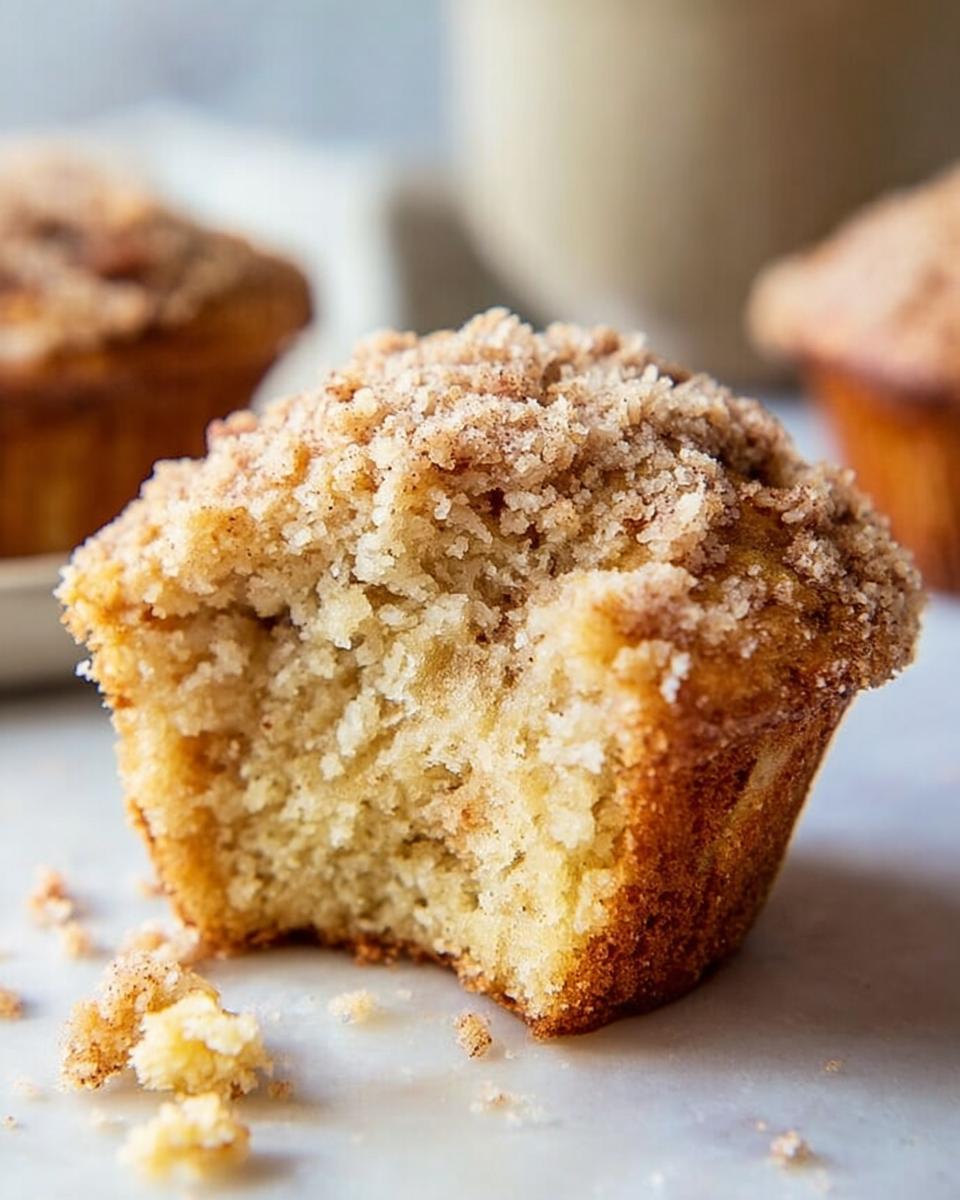
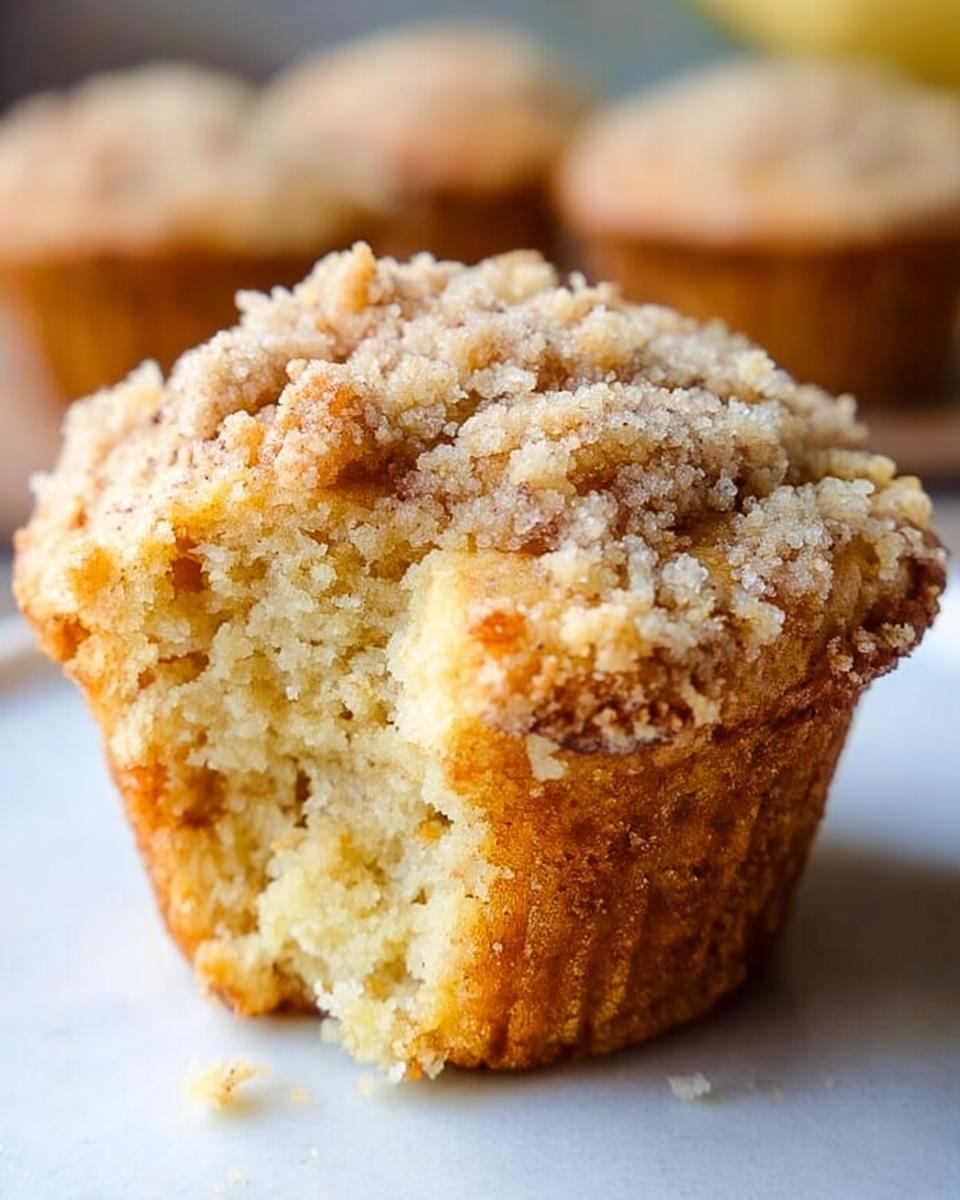
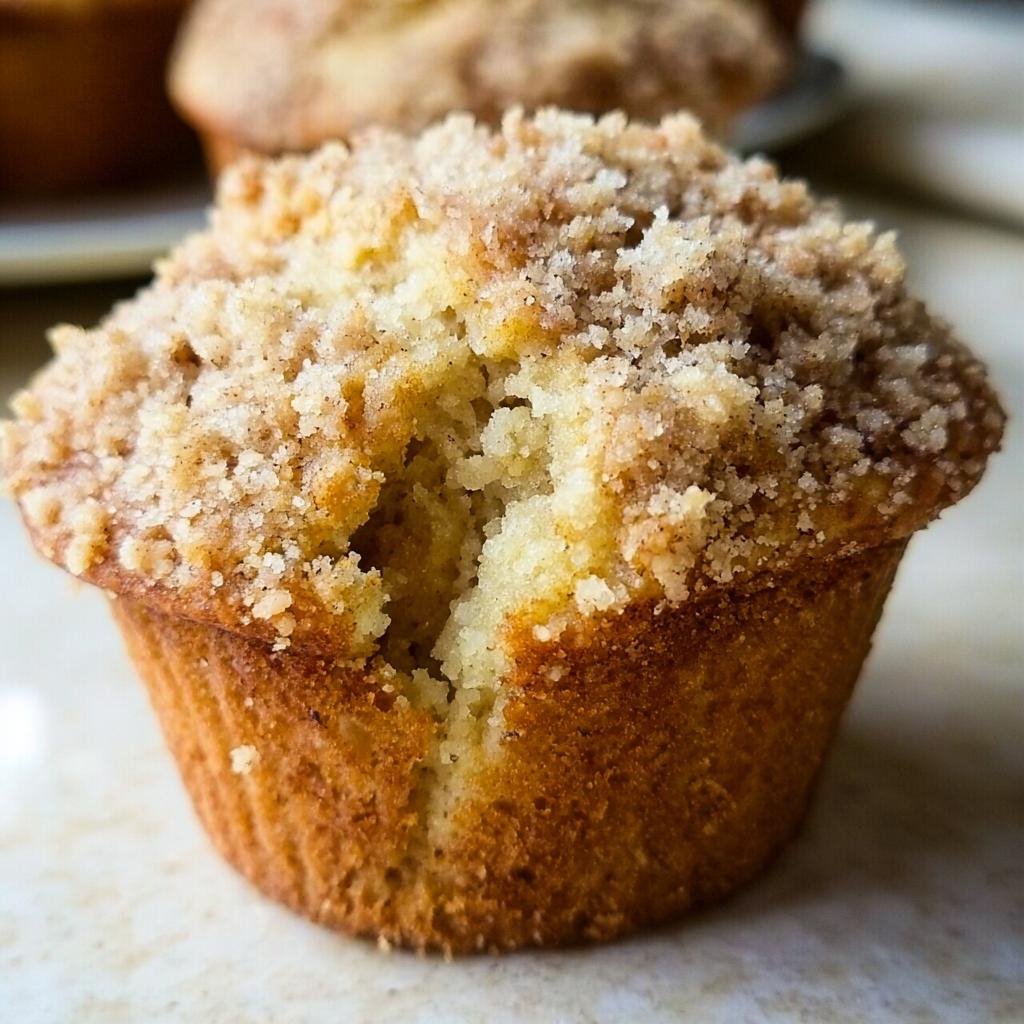
- The Towering Tall Domes: We use a special trick that gives these muffins that gorgeous bakery lift right out of the oven. They look impressive, even if you just whipped them up on a Tuesday morning!
- Ridiculously Tender Crumb: Thanks to the right mix of fats and just enough liquid, these stay soft and moist for days. No dry edges here, ever.
- Perfect for Quick Bake Mornings: Prep time is fast, and these are done before you even finish your coffee. Great for grabbing on your way out the door.
- Comfort Food Upgraded: They taste like that perfect, indulgent treat you find in a cozy café, but made right in your own kitchen. Hello, best Breakfast Muffins ever!
Essential Ingredients for Perfect Banana Muffins (Bakery Style)
The secret to getting that amazing Bakery Style crumb and height isn’t just in the oven trick—it starts with what you put in the bowl! When I first started experimenting on those rainy days, I learned quickly that the quality of your ingredients, especially temperature, makes all the difference.
First and foremost: your bananas need to look borderline offensive. They should be heavily spotted, almost black! That’s where the deep, concentrated sweetness comes from. Also, don’t just pull your eggs and buttermilk straight from the fridge. Room temperature items mix together so much better, giving you a smoother batter foundation. This is crucial if you want those tall domes to lift evenly!
If you want that irresistible crunchy top, the optional streusel is non-negotiable! It’s super easy, but you must remember to keep the butter *freezing* cold for that perfect, crumbly finish. You can find even more tips on making sure your batter sings by checking out other great baking advice, like what this lovely recipe suggests: here.
For the Banana Muffins (Bakery Style) Batter
Look, I try to keep things simple, but when it comes to these Banana Muffins (Bakery Style), you need precision. Here is the heavy-hitter lineup:
- The Stars: 1.5 cups of ripe bananas, mashed—and I mean *well-mashed*! Aim for about 3 large bananas doing the work.
- Fats: We need a mix! 1/4 cup of avocado or vegetable oil, and 1/4 cup of unsalted butter that has been melted and then allowed to cool down a bit.
- Sweetness: Combine 1/2 cup of regular sugar with 1/2 cup of light brown sugar, packed in tight for that molasses depth.
- The Binders: 2 large eggs, preferably at room temperature, and 1/4 cup of room-temperature buttermilk. That little bit of acid in the buttermilk helps with the rise!
- The Flavor Pop: A full 1 Tablespoon of vanilla extract. Don’t skimp!
- The Dry Mix: 2 cups of all-purpose flour, 1.5 teaspoons of baking powder, 1/2 teaspoon of baking soda, and 1/2 teaspoon of salt. Whisk these well before they meet the wet stuff!
For the Optional Streusel Topping
This is the crunchy crown! Remember, the texture here depends entirely on keeping the butter really cold.
- 1/2 cup all-purpose flour
- 1/2 cup brown sugar
- 1/4 teaspoon salt
- 1/4 cup unsalted butter—must be cold cut into tiny cubes!
Equipment Needed for Bakery Style Banana Muffins
To get those gorgeous, restaurant-worthy results—I mean, who wants to bake if you don’t have the right tools?—you’ll need to gather a few things first. Don’t worry, most of this is standard stuff. Having these ready means we can focus solely on mixing delicately later! It’s all about preparation so you don’t have to stop mid-recipe.
Having these tools ready ensures our Quick Bake time is actually quick, and we don’t lose any of that crucial rising power!
- Muffin tin: The workhorse for any good muffin batch!
- Paper liners: A total lifesaver, especially if you want those clean bakery edges.
- Large bowl: For combining all the wet goodness.
- A fork: Good for initial mashing, or for the final mixing stage if you prefer.
- Potato masher: My secret weapon for getting those bananas absolutely smooth faster than just a fork can manage.
- Medium-sized bowl: Designated purely for our dry ingredients and the streusel mix!
- Pastry cutter: Essential if you’re making that optional streusel topping to get those perfect coarse crumbs without melting the butter with hot hands.
Step-by-Step Instructions for Tall Domes on Your Banana Muffins (Bakery Style)
Okay, listen up, because this part is where we separate the nice muffins from the ones that make people stop and ask, “Where did you buy these?!” Achieving those majestic, bakery-worthy tops isn’t magic, it’s all about the heat. Every instruction here builds toward that perfect, glorious crown on your Banana Muffins (Bakery Style). We want volume, people!
Preparing the Wet and Dry Bases
First things first: Crank that oven up! We need it roaring hot at 425F (220C) before anything else happens. Line your tin—this saves so much scrubbing later. Now, grab those dark, sad-looking bananas and mash them into oblivion in your big bowl. Seriously, mash them until they look like baby food!
Next, we bring in the wet friends. After your bananas are smooth, stir in the oil and the slightly cooled melted butter. Keep going until everything looks happy. Then, add your sugars and mix until they dissolve a little. Finally, whisk in those room-temperature eggs, the buttermilk, and the vanilla. Give it a good stir; this mix should look rich and a little sweet.
Meanwhile, in your separate, medium bowl, we build the dry foundation. Whisk the flour, baking powder, baking soda, and salt together like you mean it. This ensures the leaveners are evenly distributed, which is vital for a straight rise. Set this bowl aside and don’t touch it!
Mixing the Banana Muffins (Bakery Style) Batter
This is the moment that separates the tough muffins from the truly tender ones. When you bring the dry bowl and the wet bowl together, remember this rule: Gentle, gentle, GENTLE folding!
Add about half of your dry mixture into the wet stuff and fold with a spatula until it’s *mostly* gone. Then, add the rest of the dry ingredients and keep folding. Stop mixing the second you see the last streak of flour disappear. I mean it! A few little lumps in your Banana Muffins (Bakery Style) batter are not just acceptable; they are a sign you are doing it perfectly. Overmixing develops gluten, and gluten means tough, chewy muffins, and we are seeking tender crumb heaven!
Fill your prepared liners about three-quarters full. Don’t try to overfill them yet; we need room for the topping and the great rise coming up!
Creating and Applying the Streusel Topping
If you opted for the crunchy crown, now is the time to build it quickly before your batter gets too settled. Dump your streusel flour and brown sugar into that empty medium bowl. Add a pinch of salt. Now, here is the part you can’t mess up: take that COLD, cubed butter and toss it in.
Use your pastry cutter or, if you’re feeling brave, your fingertips, to break that butter into the dry mixture. You are looking for coarse crumbs, like tiny pebbles. If your hands are getting too warm and the mixture looks greasy, just pop the bowl in the fridge for five minutes. Once it’s crumbly, sprinkle that topping generously and evenly over the surface of each muffin cup.

The Secret to Achieving Bakery Style Tall Domes
Ready for the trick that professional bakers use? It’s all about the temperature shock. This initial blast of heat forces the muffins to shoot upward before the structure is fully set. It’s explained best when you look at the science behind why leavening agents react so fiercely to heat—you can read a tiny bit about that here if you’re curious!
Bake these beauties at that scorching 425F (218C) for exactly 8 minutes. Set a timer—don’t guess this part! After 8 minutes, you will see the muffin tops already starting to puff rapidly. Immediately—and I mean *without opening the oven door* if you can help it, because you don’t want to lose that heat—reduce the oven temperature down to 350F (175C). Continue baking for another 7 to 8 minutes.
This two-step heat treatment is the absolute key to those amazing Bakery Style tall domes. Once they are baked through, pull them out before they overbake, let them cool slightly, and enjoy the view!
Expert Tips for Perfect Banana Muffins (Bakery Style)
I want you to succeed! Baking muffins that look professional takes a little finesse, but once you know these non-negotiables, you’ll never look once back. These tips are what took my early attempts from “meh” to “seriously, buy a bakery!” It’s all about respecting the chemistry, especially when aiming for that glorious Bakery Style lift.
Ingredient Temperature Matters for Quick Bake Success
I mentioned it before, but I’m drilling it home because it’s that important for soft texture! When your eggs and buttermilk are cold, the cold hits the fat (the oil and butter you just melted), and it gets hard and clumpy quickly. If that happens, you don’t get a smooth emulsion.
A smooth emulsion holds air much better. When you mix room-temperature ingredients, they blend beautifully, creating a silky base that will trap those gases released by the baking powder and soda efficiently. This lovely, light mixture is a must for a successful Quick Bake rise! For more on maximizing fruit flavor in baking, checking out my guide on how to pick perfect bananas is super helpful.
Avoiding Dense Breakfast Muffins
If those beautiful domes you worked so hard for collapse slightly as they cool, chances are you over-mixed the flour. This is the number one destroyer of light, fluffy muffins everywhere! When you beat the flour too much after adding it to the wet ingredients, you start developing gluten structures.
Think of it like bread dough—you want to develop gluten for chewy bread, but for a tender Breakfast Muffin, you want to keep the gluten minimal. Just fold until the flour streaks are almost gone. Seriously, if you see a few dry pockets, don’t stress; they’ll hydrate during baking. Trust me, a slightly lumpy batter is miles better than a perfectly smooth one!
Storage and Reheating Instructions for Banana Muffins
You made 15 glorious, tall-domed Banana Muffins (Bakery Style)! Now comes the hard part: saving some for later—if you can resist eating them all right now. These guys are definitely best the day they are baked, but proper storage keeps them tender for a few days, which is perfect for easy weekday breakfasts!
Because we used a combination of oil and melted butter, these muffins are quite sturdy, which is great for storage. If you didn’t make the streusel topping, you can often get an extra day or two of freshness, but either way, humidity is your enemy!
If you are skipping the streusel, I find they keep best in an airtight container right on the counter. If you did make that delicious, crunchy topping, you might want to let them cool completely—and I mean *completely* cool—before sealing them up. Warm muffins create steam, and steam makes toppings soggy. Not what we want!
For keeping them fresh for 3 to 4 days, an airtight container at room temperature works like a charm. Just make sure they are not packed too tightly, especially if you have that streusel top.
If you want to freeze these guys for an emergency Breakfast Muffin craving down the line, here is my absolute favorite trick for keeping that tall dome intact.
- Cool Down Completely: This is crucial. Let them cool on a wire rack until they are totally room temperature, usually about an hour.
- Wrap Them Individually: Wrap each muffin tightly in plastic wrap. Don’t skip this step; it locks in that moisture!
- The Freezer Bag: Once individually wrapped, tuck them into a heavy-duty freezer bag. Squeeze out as much air as you can. They stay happy in the freezer for up to three months.
When you are ready for a treat, just pull one out! You can either let it thaw on the counter for an hour, or, if you are impatient like me, wrap the still-slightly-frozen muffin in a damp paper towel and microwave it for about 20 seconds. It comes out tasting like it just came out of the oven!
Frequently Asked Questions About Banana Muffins (Bakery Style)
Whenever I share my recipes, especially one where I’m teaching the famed two-step bake for those amazing Tall Domes, I always get a few great questions! People want to know how to adapt things for their pantry or how to troubleshoot. It’s my job to make sure everyone gets perfect Bakery Style results the first time they try these Breakfast Muffins!
Can I make these Banana Muffins without buttermilk?
Oh, absolutely! Life happens, and sometimes you just don’t have buttermilk on hand, but you have bananas staring you down that need to be used *right now*. Don’t worry, you can make a fantastic substitute in about five minutes!
Just take 1/4 cup of regular whole milk (or even regular milk works fine) and stir in one teaspoon of either white vinegar or fresh lemon juice. Give it a quick little swirl and let it sit on the counter for about five to ten minutes until it looks slightly curdled. That’s your homemade buttermilk!
The reason we need buttermilk, real or fake, is the acidity. That acid reacts beautifully with the baking soda we added, creating extra carbon dioxide gas. That trapped gas is what gives your muffins that final powerful lift right before the dough sets, helping create those high tops!
How ripe should the bananas be for the best flavor?
This is a non-negotiable point for deep, rich banana flavor! You do not want yellow bananas. You want bananas that look like trouble—the ones you almost threw out. We are looking for bananas that are heavily spotted, darkened brown, or even almost black. Seriously, the darker, the better!
When the banana skin turns dark, that means the starches inside have converted fully into sugars. This translates directly into intensely sweet, concentrated banana flavor in your final muffins, and it contributes so much natural moisture. If you use slightly green or yellow bananas, your Breakfast Muffins will taste bland and a bit watery. Keep those dark bananas handy!
Why are my muffins sinking after baking?
Ugh, sinking muffins are so disheartening after all that hard work getting that beautiful initial dome! Usually, there are one of two culprits when your muffin structure collapses after you pull it out of the oven. If you want to dive deeper into general muffin troubleshooting, I have some notes over here.
First, are you opening the oven door too soon? Remember how we blast them at 425F? If you open that door before those 8 minutes are up, a rush of cold air hits the rapidly rising batter, and the whole structure instantly deflates. It’s like popping a massive bubble!
The second, less common reason, is measuring your leavening agents incorrectly. If you used too much baking powder or soda, the initial rise is too fast and dramatic, and the structure can’t support that weight when the heat stabilizes. Make sure your measurements are level scoops—don’t heap those spoons!
Nutritional Estimation for Banana Muffins
Now, I know what you’re thinking. After all that butter, sugar, and those glorious bananas—how naughty are these incredible Banana Muffins (Bakery Style), really? Well, my approach to cooking is about enjoying life while making smarter choices where I can. Since these are packed with fruit and designed to be light enough for a quick breakfast, I wanted to share a ballpark look at what you’re putting into your body.
Please remember, because I’m tossing in my own personal tweaks, using slightly different sized bananas, or maybe you went wild with the streusel topping, these numbers are just an estimate based on the recipe as written for one muffin. Think of it as a helpful guide, not a strict medical declaration!
Here’s the general breakdown per single muffin, assuming we got about 15 lovely servings from the batch:
- Calories: Around 281
- Fat: About 11 grams (with 5g being saturated fat)
- Carbohydrates: Roughly 43 grams
- Protein: A small 3 grams
- Sugar: Approximately 24 grams (mostly natural from the bananas and brown sugar, but still!)
- Cholesterol: Around 42 mg
The good news is that these are far more satisfying than grabbing something from a chain coffee shop, and they keep you full thanks to the fruit content! Enjoy one (or two!) guilt-free!
Share Your Bakery Style Banana Muffins Creations
Okay, that’s it! We’ve mashed, we’ve mixed, we’ve double-baked to create those unbelievable Tall Domes. Now, I honestly cannot wait to see what you’ve created in your kitchen!
Baking is communal, even when we’re mixing things alone on a quiet afternoon. It means the world to me when you take the time to tell me how the two-temperature trick worked for you. Did you get serious height? Did the streusel stay crunchy? Did your family immediately devour every single one of your Banana Muffins (Bakery Style)?
Please, please, please come back and leave a review or a comment below! Five stars if they earned it! Telling me about your success isn’t just nice feedback; it really helps other home bakers feel confident trying this recipe next time. I love hearing about your triumphs and seeing your pictures. Tag me on social media if you snap a shot of those majestic tops!
There is nothing better than knowing my little rainy-day baking nostalgia helped bring a delicious, bakery-quality moment to your table. Happy baking, my friends!
Banana Muffins (Bakery Style)
Ingredients
Equipment
Method
- Preheat your oven to 425F (220C) and line a muffin tin with paper liners.
- Mash the ripe bananas in a large bowl until well-mashed.
- Add the oil and melted butter to the mashed bananas and stir well.
- Stir in the sugars until well-combined.
- Add the eggs, buttermilk, and vanilla extract. Stir well and set aside.
- In a separate bowl, whisk together the flour, baking powder, baking soda, and salt.
- Add the dry ingredients to the wet batter and gently fold until just combined. Do not over-mix.
- Portion the batter into the prepared muffin liners, filling each about ¾ of the way full. Set aside and prepare the Streusel topping.
- For the Streusel: Combine flour, brown sugar, and salt in a medium bowl. Stir with a fork.
- Use a pastry cutter to incorporate the cold butter until the mixture resembles coarse crumbs.
- Sprinkle the streusel topping evenly over each muffin.
- Bake at 425F (218C) for 8 minutes. Then, reduce the oven temperature to 350F (175C) without opening the oven door. Bake for an additional 7-8 minutes.
- Test for doneness by inserting a toothpick into the center of the largest muffin. It should come out clean or with a few moist crumbs.
- Allow the muffins to cool before enjoying.
Nutrition
Notes
Tried this recipe?
Let us know how it was!
Master of Global Fusion Innovation
My culinary adventure reflects my Lebanese-Italian heritage and a decade spent in the dynamic fusion restaurant scenes of Miami and Barcelona. I’ve made it my mission to prove that beloved global comfort foods can be successfully adapted for low-carb living without losing their soul, their cultural authenticity, or their ability to comfort.
With advanced training in molecular gastronomy and experience spanning Mediterranean, Middle Eastern, and Latin American traditions, I’ve developed what I call “respectful innovation” – culinary creativity that honors traditional cooking wisdom rather than replacing it. My alternative ingredient substitution systems are now taught in specialty diet cooking schools throughout the region.
Drawing from my trilingual upbringing, I understand how deeply food connects to identity and memory. That’s why my flavor-bridging techniques allow classic dishes from around the world to maintain their comforting, familiar qualities while meeting contemporary nutritional standards. I regularly share these techniques at international culinary symposiums and innovation events.
When I’m not experimenting in my Miami fusion kitchen laboratory, you’ll find me at local salsa dance venues – the rhythm and improvisation skills translate directly to my creative cooking process! My role as a foster parent to rescue rabbits has unexpectedly inspired some of my most creative plant-based low-carb innovations.
My personal low-carb journey began as a way to maintain energy for my active lifestyle, but it’s evolved into a professional mission of proving that healthy eating can be globally adventurous rather than restrictively limiting. Every recipe I create is a passport to culinary adventure, transforming kitchens into laboratories for exploring healthy versions of the world’s most beloved comfort foods.