
There’s just something magical about Sunday mornings, isn’t there? Especially when you’re still in your pajamas, and the kitchen starts smelling incredible. I remember the first time I made pancakes for my kids; the sun was just peeking through the window, and the batter sizzled just right on the skillet! My little ones absolutely squealed watching those rounds rise up into perfect little pillows. My Fluffy Buttermilk Pancakes (Classic) recipe quickly turned into our home’s most cherished tradition. For all you busy parents out there trying to carve out special moments, this easy recipe is your key to creating lasting memories, just like it did—and still does—for us!
Why This Fluffy Buttermilk Pancakes (Classic) Recipe Works So Well
When I tell people my pancakes are the best, it isn’t just boasting! It really comes down to a couple of clever tricks that make these so light and tender. This simple buttermilk recipe is designed exactly for those weekend mornings when you want maximum fluff and minimal fuss. If you follow the steps outlined in the cooking instructions, you’ll see why people keep asking for this recipe.
- The combination of baking powder AND baking soda gives us a double dose of lift.
- We use buttermilk, which is slightly acidic, to react perfectly with that soda.
- That secret ingredient, sour cream, adds unbelievable richness that keeps them moist even when stacked high.
The Secret to Truly Fluffy Pancakes
Okay, this is the crucial part, so listen up! We separate the eggs, right? That’s what makes the difference between a flat pancake and something that looks like a cloud on your plate. We whip those whites until they form stiff peaks.
When you gently fold those luscious whites into the batter at the very end, you are literally folding air into the mix! The buttermilk helps activate the leavening agents beautifully. It’s the mechanical lift from the egg whites, combined with the chemical reaction from the acid, that gives these pancakes their incredible height!
Gathering Your Ingredients for Fluffy Buttermilk Pancakes (Classic)
Getting the right stuff ready is half the battle when you’re whipping up a classic breakfast first thing in the morning. Trust me, for pancakes this good, you want to use quality ingredients. This recipe is designed to feed about six hungry people, so maybe plan on making a double batch if your kids are teenagers!
I always lay out everything first—it helps me not forget the baking soda when I’m scrambling to get supper going later. Also, before we dive into the wet ingredients, I want to mention the sour cream secret: if you don’t have it, you can totally swap it out for an equal amount of thick Greek yogurt. It works nearly perfectly!
Dry Ingredients for the Best Fluffy Buttermilk Pancakes (Classic)
We start simple with our dry mix. Keep these components in one bowl, and promise me you’ll give it a good whisk to make sure everything is evenly distributed. We need that baking powder working its magic evenly throughout!
- 10 ounces of all-purpose flour (that’s about 2 cups, if you’re scooping!)
- 1 teaspoon of baking powder
- 1/2 teaspoon of baking soda
- 1 teaspoon of kosher salt
- 1 tablespoon of sugar
Wet Components and Dairy for Your Buttermilk Recipe
Now for the parts that bring the whole show to life! Remember, the eggs need to be carefully separated for this recipe to get that incredible lift. That buttermilk and sour cream combo is what makes these pancakes so rich and tender—it’s worth the extra trip to the store!
- 2 large eggs, carefully separated (whites in one clean bowl, yolks in another!)
- 1 1/2 cups of buttermilk (about 12 ounces, but make sure it’s real buttermilk!)
- 1 cup of sour cream (or Greek yogurt if you’re swapping!)
- 4 tablespoons of unsalted butter, melted (and not too hot when you add it!)
- Warm maple syrup, ready for drizzling when they come off the griddle.
Step-by-Step Instructions for Perfect Fluffy Buttermilk Pancakes (Classic)
Now that we have all our beautiful ingredients ready to go, it’s time to turn them into the fluffiest pancake stack you’ve ever seen! I find it helps if you put on some good music during this part. Remember, this recipe is fairly quick, but timing the mix just right is key for maximizing that fluff factor you worked so hard for. Check out these helpful breakfast ideas while you wait for the griddle to heat up!
Preparing the Batter for Fluffy Buttermilk Pancakes (Classic)
We have to handle these wet and dry parts separately at first, or we lose all that lovely air we need.
- First, take that bowl of dry ingredients—flour, soda, salt, all happy together—and just give them a quick whisk so they get acquainted.
- Next, tackle the egg yolks! In your second bowl, whisk those yolks with the buttermilk and the sour cream until everything is smooth. It might look a little thick, but don’t worry, that means it’s working!
- Pour that wet mix right into your dry ingredients. Now, here is the golden rule for this entire buttermilk recipe: Mix gently until they are *just* combined. I mean it! I always stop mixing when I can still see a few streaks of flour. Lumps are your friends here; lumps mean lightness!
- While you’re doing that, grab a clean, dry bowl. Use your whisk or an electric mixer and beat those reserved egg whites until they form stiff, proud peaks. They should hold their shape when you lift the whisk straight up. This is non-negotiable for maximum height!
- Now, fold those glorious whites into the batter along with your melted butter. You want to do this very tenderly, cutting down the middle and scooping up the sides. You are integrating air, not destroying it. Stop folding as soon as it’s mostly uniform—we’re almost there!
Cooking Your Classic Breakfast Pancakes
It’s griddle time! Make sure your skillet or flat-top is set over medium heat. Too low, and they spread out too much; too high, and the outside burns before the inside is cooked through. Lightly butter the surface before pouring the first batch.
Use a 1/4 or 1/2-cup measure for consistent sizing. Pour the batter onto the hot surface. You’re looking for patience here—don’t poke them! Wait for those bubbles to form all over the surface and start popping, and you’ll see the edges looking set and dry, usually about 2 to 3 minutes.
Once you see those cues, slide that spatula underneath and flip! Cook the second side until it’s golden brown as well, usually just a minute or two shorter than the first side. Take them off the heat immediately and serve them up loud and proud!
Tips for Success with Fluffy Buttermilk Pancakes (Classic)
Nobody wants flat, rubbery pancakes when they woke up early specifically for a classic breakfast treat! Even with recipes this easy, a couple of small tweaks can turn ‘good’ pancakes into ‘the best ever.’ I figured these little secrets out the hard way, usually by ending up with a pile of sad-looking discs that didn’t rise right.
My biggest rule, which I mentioned before, is about the mixing: DO NOT overmix the final batter! Seriously, stop stirring when you see a few dry spots. Those lumps are trapped air bubbles waiting to explode in the heat. If you mix until it looks perfectly smooth, you’ve whipped out the fluffiness, and you’re just left with tough, chewy batter. Keep it lumpy!
Also, keep an eye on your heat. Medium heat is your friend, but every stove is different. If your first pancake browns instantly before the bubbles even start to form on top, turn the heat down a touch. Patience with the temperature ensures that the inside cooks fully before the outside has time to get tough.
Ingredient Notes and Substitutions for Your Buttermilk Recipe
Let’s talk ingredients one more time, just to make sure everything goes perfectly for your stack. If you’re out of sour cream—life happens, I know—plain Greek yogurt is a fantastic stand-in. Use the exact same measurement, about 8 ounces, and it brings that necessary richness and tang that plays so well with the baking soda.
Now, about the buttermilk. I swear by real buttermilk for this recipe because the specific bacteria and acidity levels are just perfect for the reaction with the baking soda. If you must make a quick substitute in a pinch—say, pour one tablespoon of white vinegar or lemon juice into a cup of regular milk and let it sit for five minutes—it will work for emergency fluffy pancakes. But if you have a chance to grab true buttermilk, take it! It always yields a superior flavor and texture in this classic recipe.
Serving Suggestions for Your Fluffy Buttermilk Pancakes (Classic)
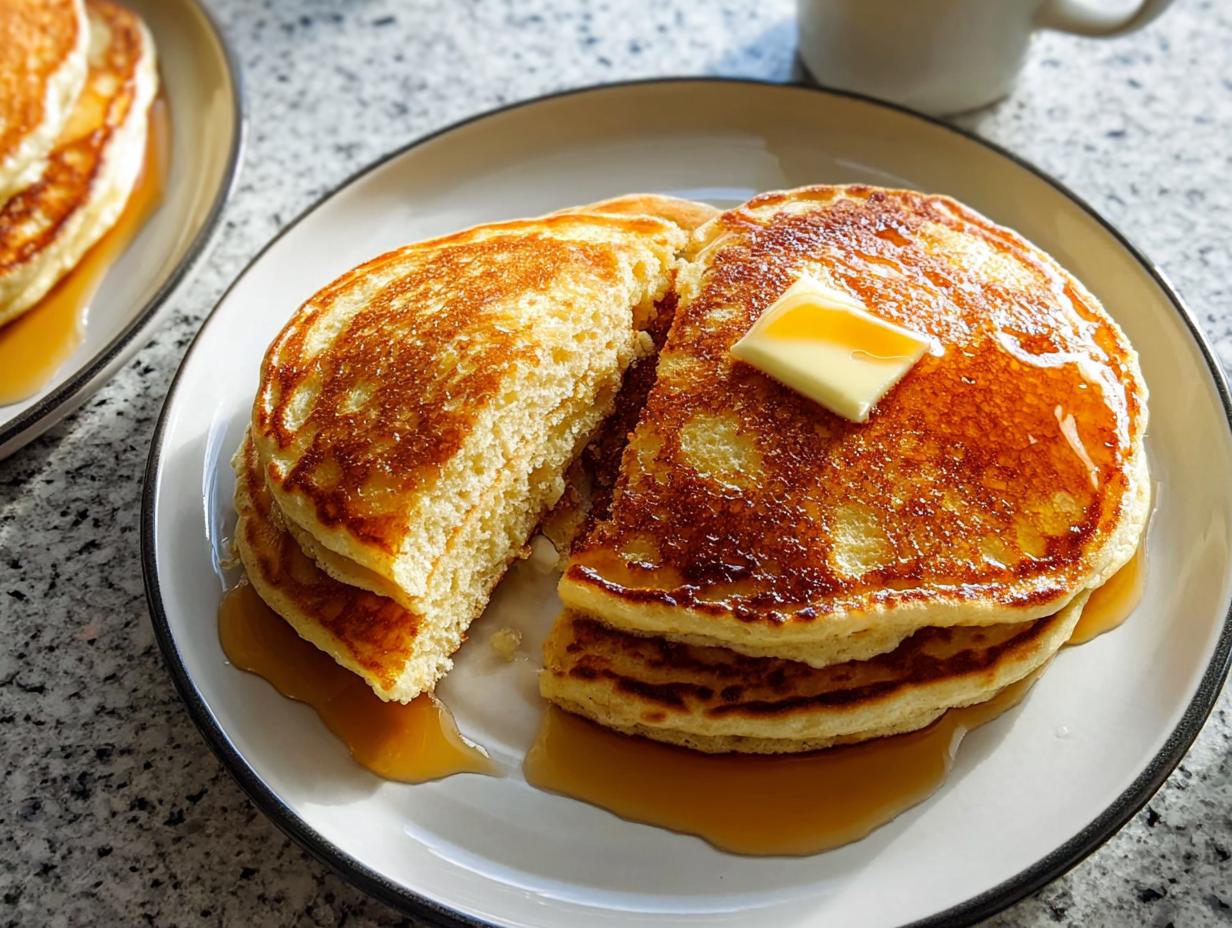
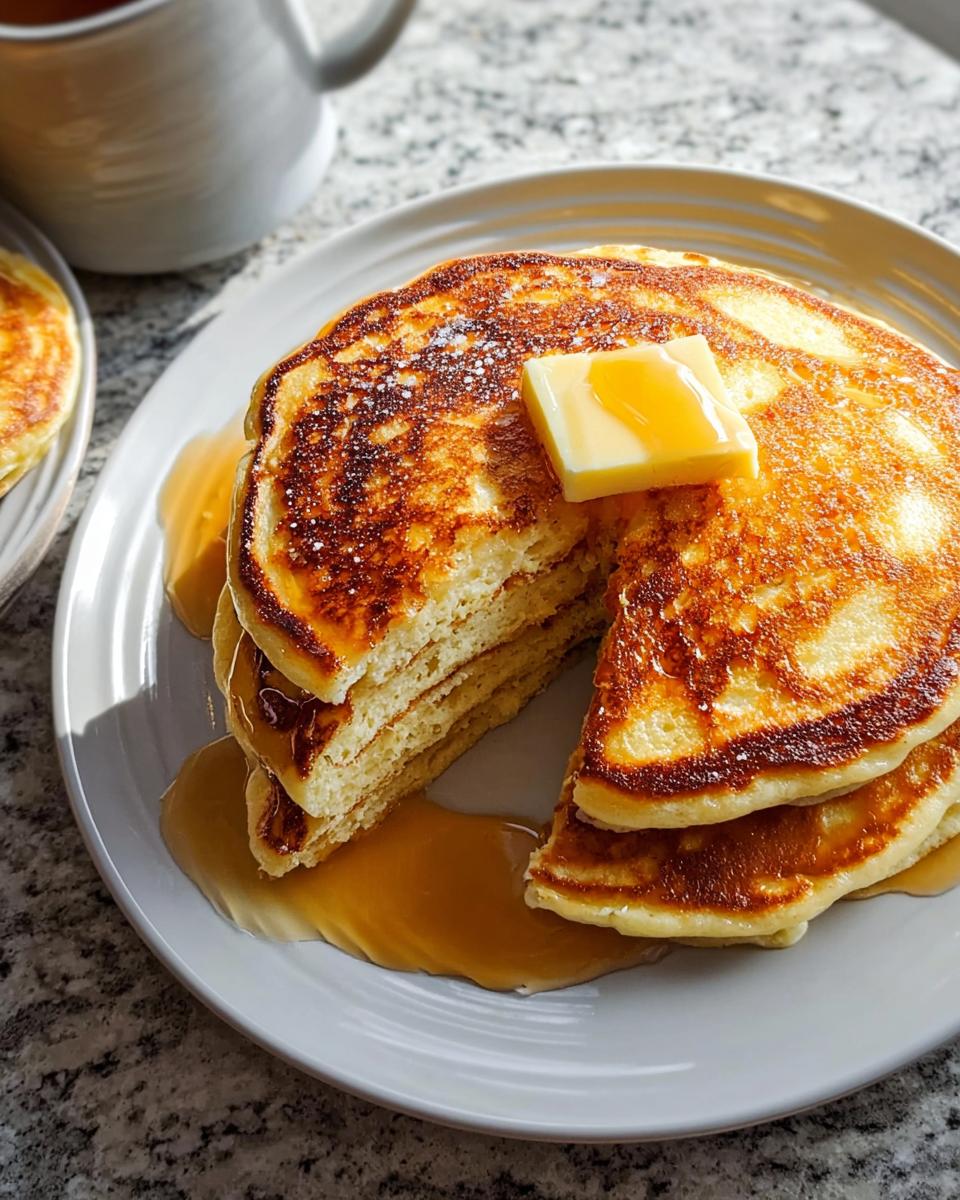
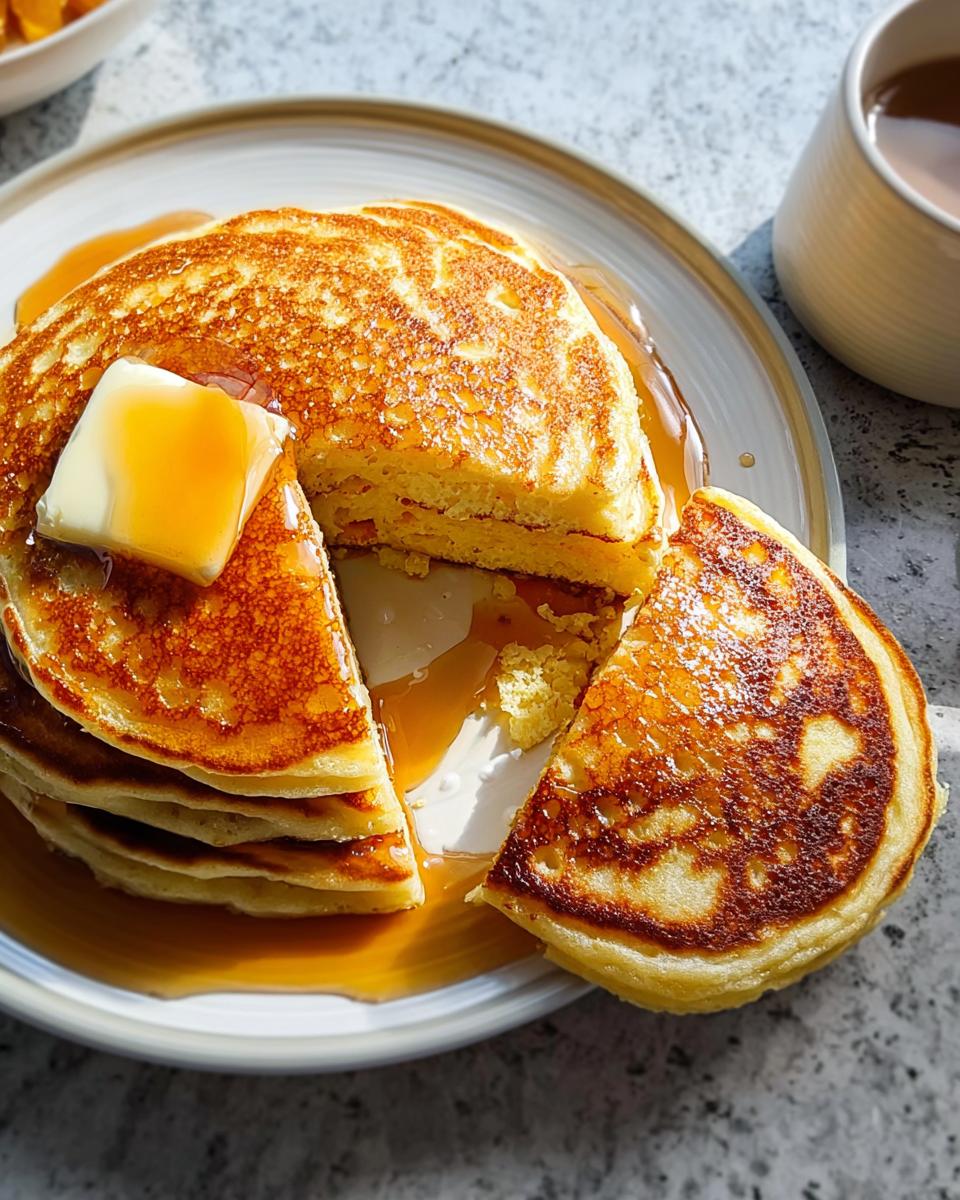
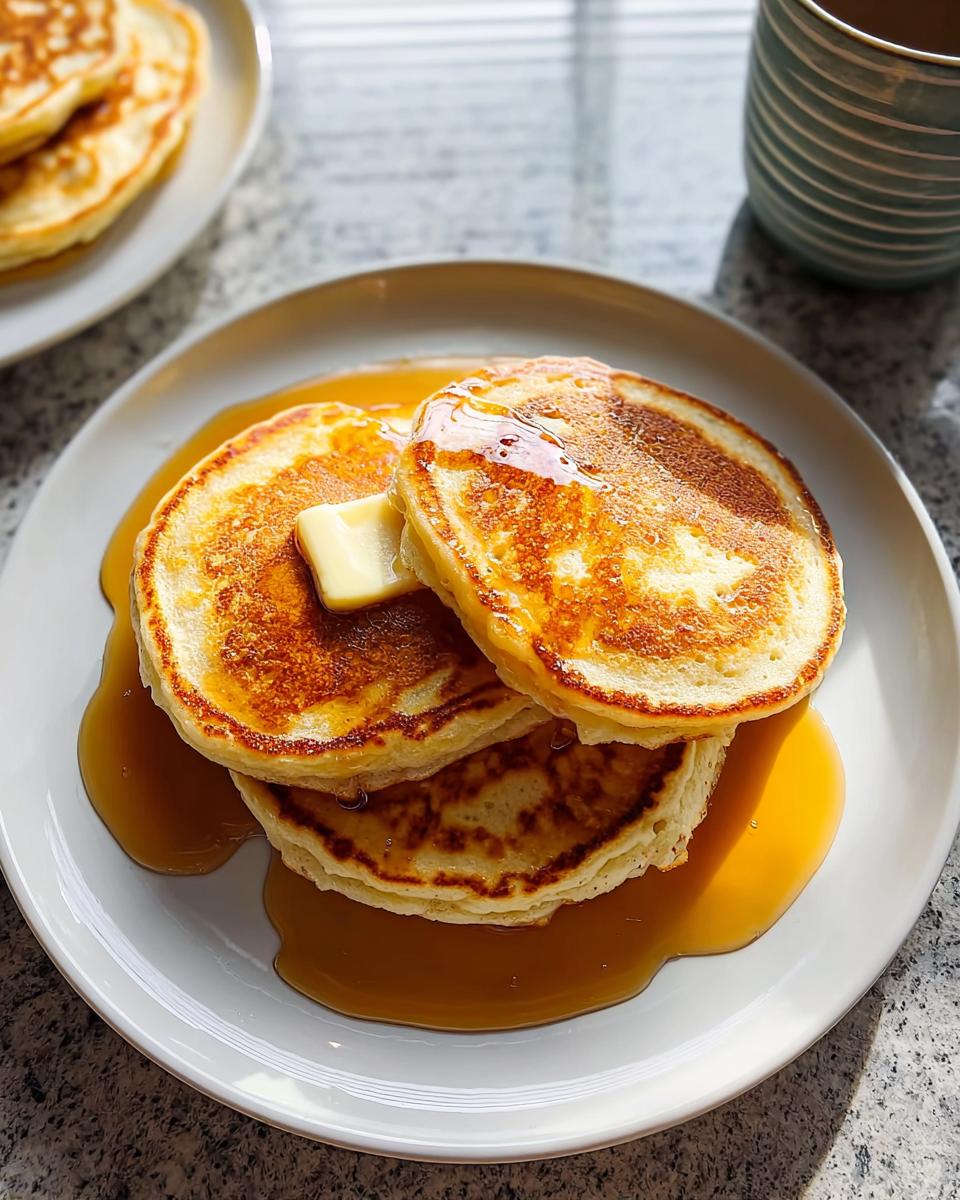
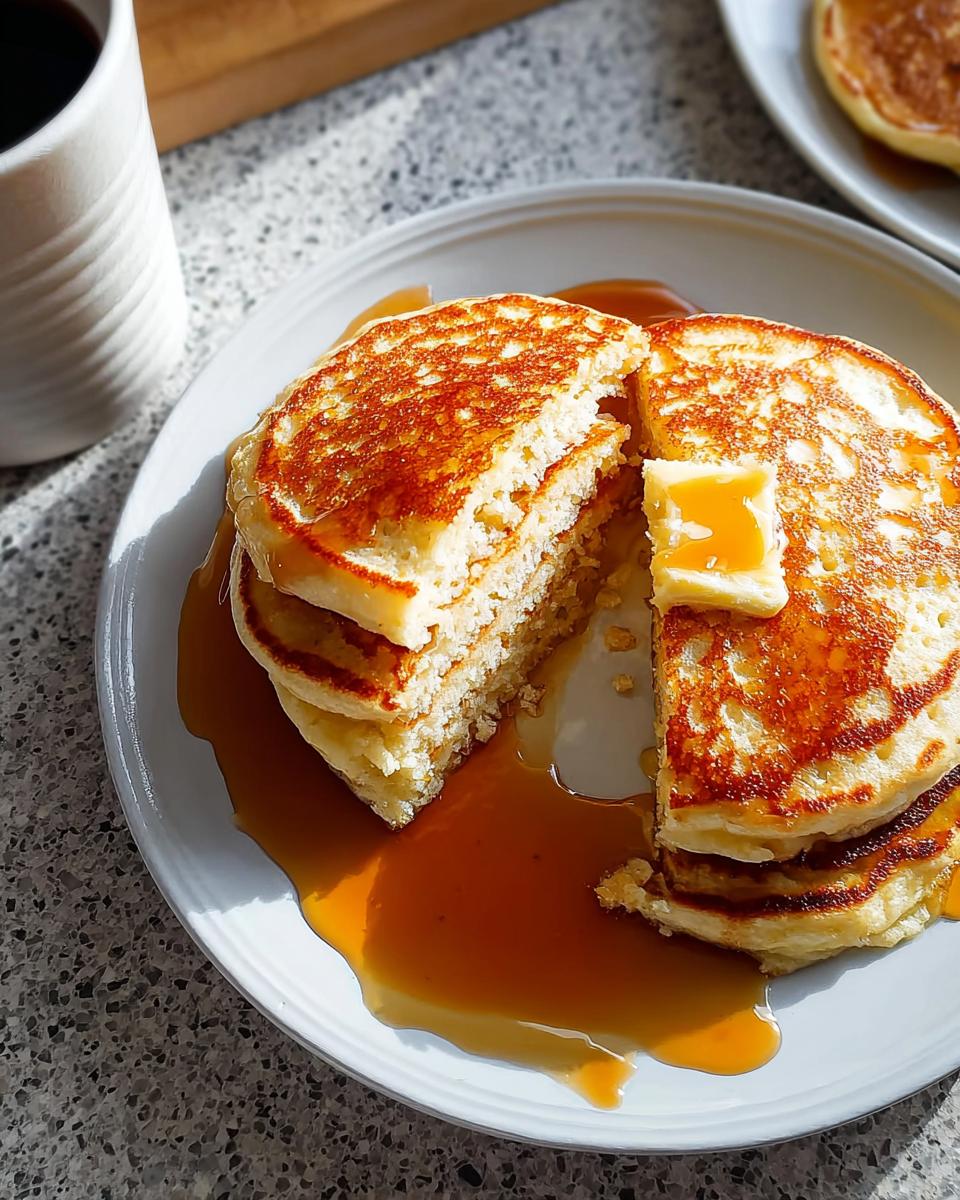
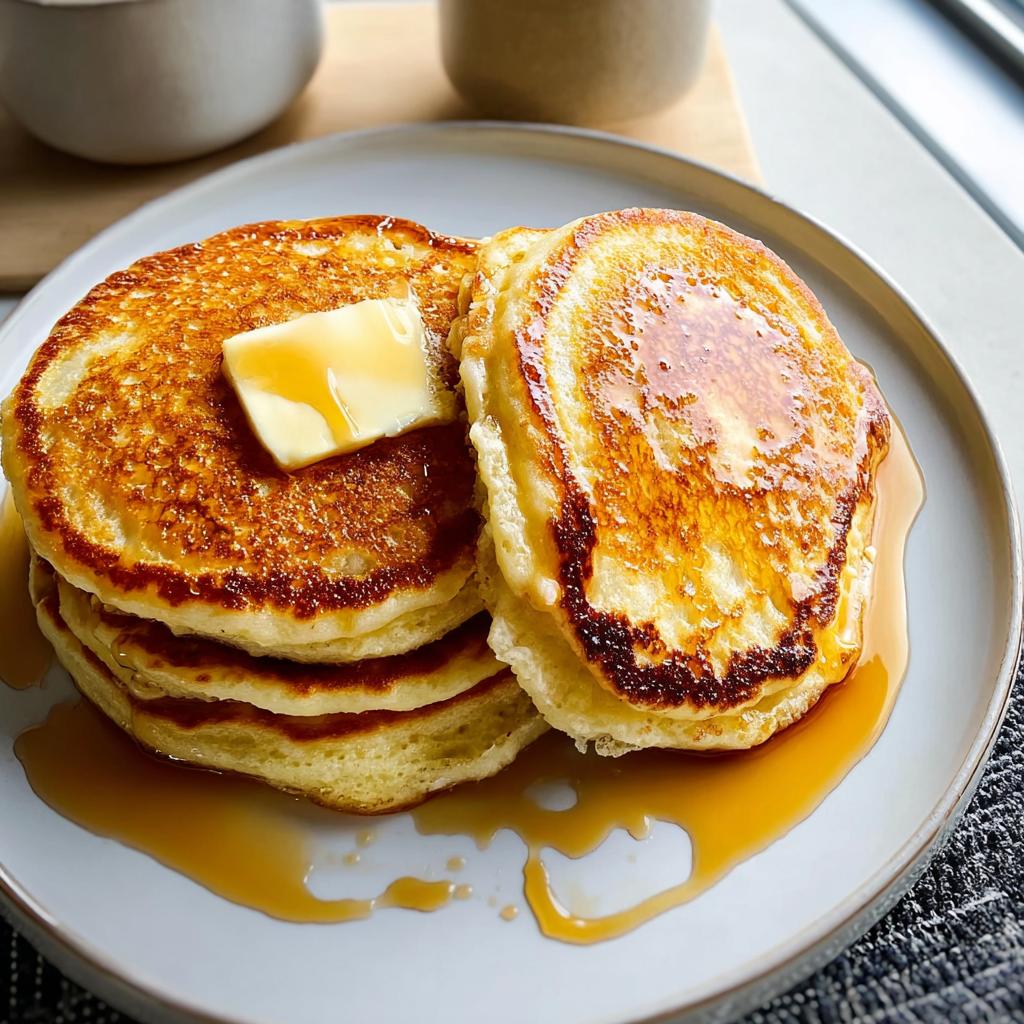
You’ve done the hard work—you separated the eggs, you folded gently, and now you have these towering, golden miracles on your plate! Don’t let all that effort go to waste by just slapping a pat of cold butter on top. These deserve a presentation worthy of a true weekend treat!
The absolute classic, the non-negotiable topping in my house, is good quality butter and warm maple syrup. Make sure you warm up that syrup! Cold syrup sinks into the warm pancake and cools it down instantly, which ruins the fluff experience. I usually heat mine gently in a small saucepan or even microwave it for about 20 seconds until it’s pourable and steaming slightly.
If you want to make it look extra special, especially if you’re serving these fluffy pancakes to company, try some fun additions:
- Fresh berries—blueberries or raspberries folded right into the batter are amazing, but topping a finished stack with fresh fruit is picture-perfect.
- A light dusting of powdered sugar—it looks fancy but takes zero extra effort!
- A dollop of whipped cream on top, maybe with a tiny sprinkle of cinnamon? Yes, please!
These pancakes are so flavorful on their own thanks to the buttermilk and sour cream, they don’t need much else. But honestly, stacking them high while they are piping hot and drizzling that warm syrup over the top is the absolute best way to enjoy every bite of this classic breakfast.
Storage and Reheating Instructions for Fluffy Buttermilk Pancakes (Classic)
I know, I know. These pancakes are so good that usually, there aren’t any leftovers! But just in case you managed to save a few of those glorious rounds, you still want them to taste fresh when you serve them up later, right? No one wants a hockey puck for breakfast the next day.
The key to storing them is moving them out of the kitchen heat quickly to prevent steaming, which makes them soggy. If you plan on eating them the next morning, you can simply stack them on a plate, place a paper towel between each layer to absorb any lingering moisture, and cover the whole stack tightly with plastic wrap. Pop them in the fridge; they’ll be good for about two days.
The Best Way to Reheat Pancakes for That Fresh Flavor
Forget the microwave if you can! Microwaving works in a pinch if you’re super rushed, but it tends to steam the pancake and makes them chewy, which is the opposite of what we want for these fluffy pancakes.
My favorite reheat method is the oven. Just lay the pancakes out in a single layer on a baking sheet—don’t stack them while reheating, or they steam! Slide that sheet into a moderate oven, maybe 350°F (175°C), for about 5 to 8 minutes. This gently warms them all the way through and lets the edges crisp up just a little bit, making them taste almost freshly made.
If you’re only doing one or two, the toaster works wonders! Just pop the slightly cooled pancakes into your toaster slots. Keep an eye on them because they’re thicker than regular bread, but only takes a minute or two to get them perfectly hot and ready for syrup.
Freezing Your Fluffy Buttermilk Pancakes (Classic)
If you’ve made a huge batch and want to save some for a busy weekday when you need an easy breakfast fix, freezing is the way to go. This is a lifesaver when you have guests or when you just want a real treat without the fuss of mixing the batter!
Cool the pancakes completely first—this is important. Once cool, place a square of parchment or wax paper between each pancake. Then, slip the entire stack into a heavy-duty freezer bag. Seal it up tight, pressing out as much air as you can. They should keep beautifully for up to two months.
When you want one, just take them straight from the freezer bag and reheat them either in the toaster or the oven method described above. No need to thaw them first—just add an extra minute or two to the reheating time. It really is the simplest way to guarantee a perfect classic breakfast later on!
Frequently Asked Questions About Fluffy Pancakes
It’s natural to have questions when you’re trying a new recipe, especially when you’re chasing that perfect, cloud-like texture! I get asked the same things all the time about achieving truly fluffy pancakes without all the fuss. Since this is such an easy recipe once you know the tricks, let me clear up a few common concerns right here.
Can I make Fluffy Buttermilk Pancakes (Classic) ahead of time?
That’s a great question, especially if you want a quick breakfast during the week! While they are far better served fresh, you absolutely can make them ahead of time. Remember what I said about storage? You need to cool them completely first and layer them with parchment paper before sealing them in an airtight container, either in the fridge or freezer. Reheating them in the oven is the best way to maintain that wonderful texture we worked so hard to achieve!
What if I don’t have buttermilk for this Buttermilk Recipe?
Oh, the great buttermilk panic! Don’t let that stop you from making these fantastic pancakes. You can whip up a quick substitute using regular milk and an acid. Just take one cup of regular milk—any percentage works, though whole milk is richer—and stir in one tablespoon of white vinegar or lemon juice. Let that sit on the counter for about five minutes until it looks slightly curdled. It’s not *exactly* the same as true cultured buttermilk, and sometimes the lift isn’t *quite* as dramatic, but it certainly allows you to whip up a delicious classic breakfast!
Sharing Your Experience Making Fluffy Buttermilk Pancakes (Classic)
This recipe is now yours! Honestly, creating these Fluffy Buttermilk Pancakes (Classic) always brings me back to those quiet, sunlit Sunday mornings we used to have. I put so much love into making sure this recipe gives you and your family those picture-perfect, high-rising pancakes we all dream about.
Now it’s your turn to bring this tradition to your own kitchen table! Did your kids squeal when they saw them rise? Did my tip about separating the eggs really make a difference for your fluff factor? I would absolutely love to hear all about it.
Please come back and leave a rating for the recipe—it really helps other busy parents know they can trust this method. If you tried out the Greek yogurt substitution or had a special way you topped them, share that in the comments too! Even better, snaps a photo of your finished stack and share it with me on social media! Knowing these pancakes are becoming a beloved part of *your* family rituals is the best reward for me.
Fluffy Buttermilk Pancakes (Classic)
Ingredients
Equipment
Method
- In a large bowl, whisk together the flour, baking powder, baking soda, salt, and sugar for the dry mix.
- In a separate bowl, whisk the egg yolks, buttermilk, and sour cream until combined.
- Pour the wet ingredients into the dry ingredients. Mix gently until just combined. Do not overmix; a few lumps are fine.
- In a clean bowl, beat the egg whites until stiff peaks form.
- Gently fold the beaten egg whites into the batter along with the melted butter until just incorporated. This step creates the fluffiness.
- Heat a lightly buttered skillet or griddle over medium heat. Pour the batter onto the skillet to form pancakes of your desired size.
- Cook for 2 to 3 minutes per side, until golden brown and bubbles appear on the surface. Flip and cook the other side until done.
- Serve immediately with extra butter and warm maple syrup.
Notes
Tried this recipe?
Let us know how it was!
Certified Family Nutrition Strategist
My path into family nutrition began working with Phoenix Area Family Services, where I saw how traditional nutrition advice often ignored real-world constraints like budget limitations, time crunches, and kids who refuse to eat anything green. That experience sparked my mission to develop meal planning systems that work with family realities, not against them.
Over eight years, I’ve helped hundreds of families reduce grocery spending by 25% while dramatically improving their nutrition. My meal planning frameworks have been adopted by local wellness centers because they actually work for busy parents juggling different ages, preferences, and dietary needs in one household.
As a bilingual first-generation Mexican-American and mother of three, I personally navigate the daily challenge of feeding a family nutritiously while honoring cultural traditions and managing a household budget. My “kid-friendly low-carb” protocols show families how to gradually introduce healthier options without triggering mealtime battles or abandoning beloved family recipes.
My “realistic wellness” philosophy is straightforward: health improvements must work within existing family dynamics and financial realities to be truly sustainable. When I’m not developing meal planning systems, I’m creating portable trail snacks for our weekend family hiking adventures – because healthy eating should fuel the life you want to live.
My personal low-carb journey started after pregnancy as a way to regain energy for active parenting, and that experience continues to inform my professional commitment to making healthy eating feel supportive rather than burdensome for busy families.