

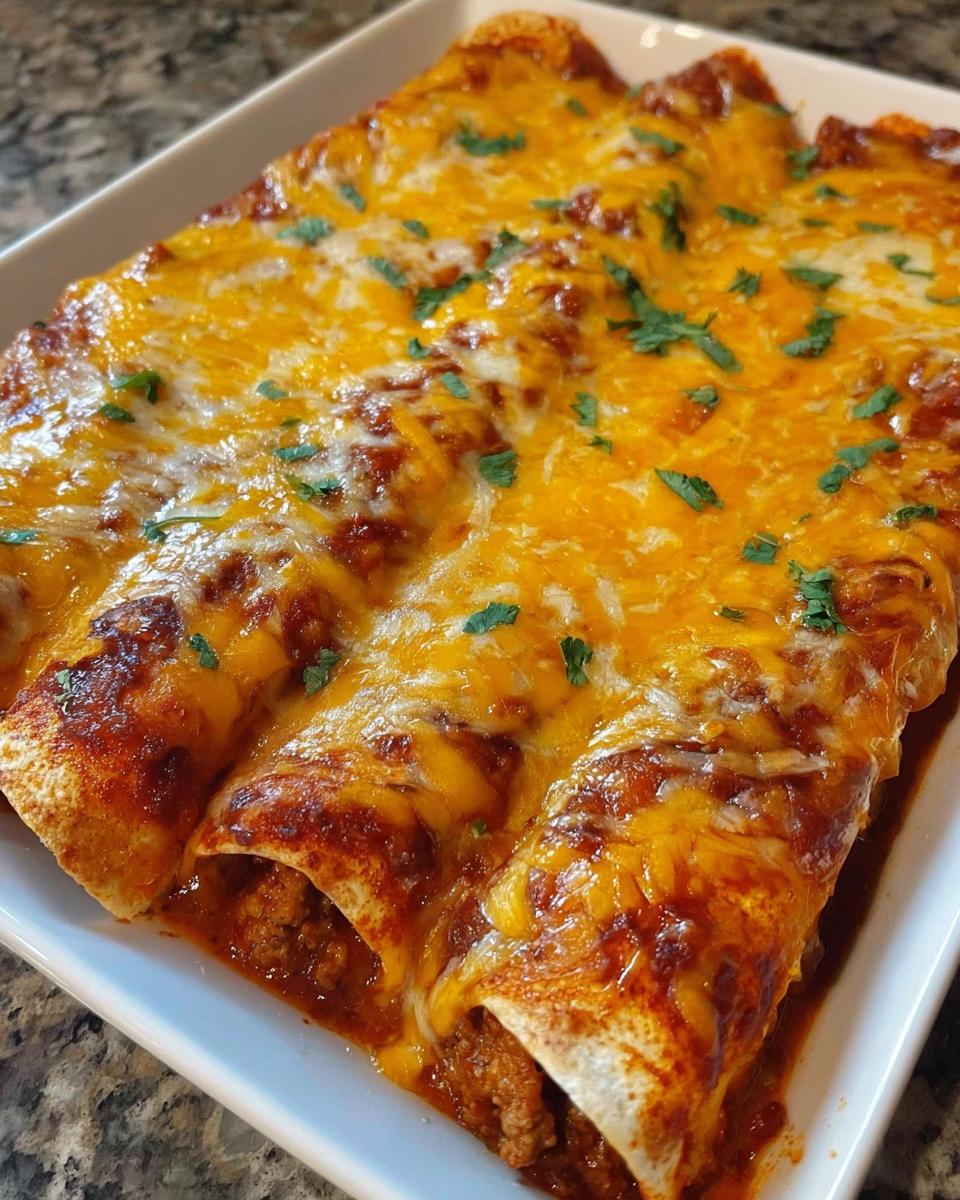
When the week feels long and you just need a dinner that wraps the whole family in a warm hug, nothing beats a pan full of cheesy, savory comfort food. That’s why these Baked Cheesy Beef Enchiladas became my absolute go-to recipe. I still remember the first time I tried my hand at making them after a long week of work and family commitments; it turned into a delightful kitchen adventure, filled with laughter and cheesy goodness.
The moment I pulled that bubbling dish from the oven, the savory aromas filled the house, and my family’s cheers were music to my ears. It’s seriously the easiest, most satisfying way to feed a crowd. If you’re looking for a method that guarantees lots of gooey cheese and zero fuss, trust me, this is the one I developed into a family staple right there in my own kitchen.
Why You Will Love These Baked Cheesy Beef Enchiladas
Honestly, these aren’t just dinner; they are a guaranteed weeknight win! You want simple food that tastes like you spent hours on it, right? Well, this is it. Here’s why they always end up on my rotation:
- Quick Preparation for Busy Weeknights: We’re talking fifteen minutes of prep! That’s barely enough time to set the table, and then it’s straight into the oven.
- Ultimate Comfort Food Experience: The flavor is just savory, spicy, and completely smothered in cheese. It hits that comforting spot every single time. It just smells like happiness baking!
Gathering Ingredients for Baked Cheesy Beef Enchiladas
Okay, let’s talk about what you need to pull off these amazing Baked Cheesy Beef Enchiladas. Don’t let the list scare you; it’s really simple stuff, and the flavor payoff is huge for such an easy grocery run. I always grab the cheese a day early so I can grate it myself—trust me on this one, pre-shredded just doesn’t melt the same way! When you’re ready to substitute anything, check out my guide on ingredient swaps, but for the first go-around, stick to this list.
Ingredients for the Beef Filling and Assembly
We break this down into two simple groups. For the main event, the filling, here’s what you need:
- 1.5 lbs ground beef (That’s what makes it hearty!)
- 2 oz taco seasoning (That’s usually about 2 packets, so check your seasoning brand!)
- 1 small onion, chopped
- 1 small red bell pepper, chopped (Adds just a lovely little crunch)
- 20 oz red enchilada sauce (Don’t skimp on the sauce!)
- 1 lb cheddar cheese, hand grated, divided
- 1 lb Monterey Jack cheese, hand grated, divided (The two together are magic!)
- 6 to 8 medium tortillas (I use flour, but see later tips if you try corn!)
And for serving, these are totally optional, but they really dress things up:
- Fresh parsley or cilantro for garnish (optional)
- Sour cream (optional, but highly recommended for cooling things down!)
Expert Tips for Perfect Baked Cheesy Beef Enchiladas
Getting those perfect, gooey results that scream quality mexicana dinner recipes takes just a couple of little tricks. It’s all about respecting the ingredients and the assembly process! I’ve learned the hard way what keeps these from turning into a soupy mess or, worse, having tortillas that crack the second you try to roll them.
Handling Tortillas Before Rolling
This is crucial, especially if you’re using flour ones! You absolutely must warm your tortillas before filling them. If you don’t, they will tear a hole right through the bottom when you try to roll them up tight. I either wrap my stack in a damp paper towel and microwave them for 30 seconds, or you can gently warm them one-by-one on a dry skillet. Want the full rundown on the best methods? Check out my guide on how to properly warm tortillas—it makes rolling so much easier!
Achieving the Best Cheese Melt
Seriously, stop buying pre-shredded cheese for things like these cheesy oven meals! That stuff is tossed in anti-caking agents that keep it from melting smoothly. When you spend the extra five minutes grating the cheddar and Jack yourself, you get that luxurious, pull-apart stretchiness when you cut into the finished dish. It makes all the difference between good enchiladas and *great* enchiladas.

Step-by-Step Instructions for Baked Cheesy Beef Enchiladas
Alright, this is where the magic happens! Before we even start cooking, make sure your oven is preheated to 350 degrees Fahrenheit. Don’t skip that step because it helps everything bake evenly. We are going to move fast here, so have your greased baking dish ready to go!
Preparing the Savory Beef Filling
First things first, grab your large skillet and heat up a touch of oil. Toss in that chopped little onion and the red bell pepper and let them sizzle away for about 5 minutes until they start getting nice and soft. Then dump in the ground beef. You gotta break it up really well while it cooks until it’s all browned nicely—no pink allowed!
Once the beef is done, drain off any extra grease, unless you love that slick feeling—I usually don’t! Now, turn the heat *off*. Seriously, turn it off! We don’t want to cook the sauce too much. Stir in your two packets of taco seasoning according to their directions, then immediately add the entire can of enchilada sauce and about half of your combined shredded cheese. Stir it all together until that cheese is beautifully melted into the beef mix. That’s your filling!
Assembling and Baking Your Baked Cheesy Beef Enchiladas
Now, take those warmed tortillas—remember, they have to be soft! Distribute that rich beef filling evenly down the center of each one. Roll them up snug and place them seam-side-down in your greased baking dish. It’s okay if they are snuggled up tight; they love cuddling!
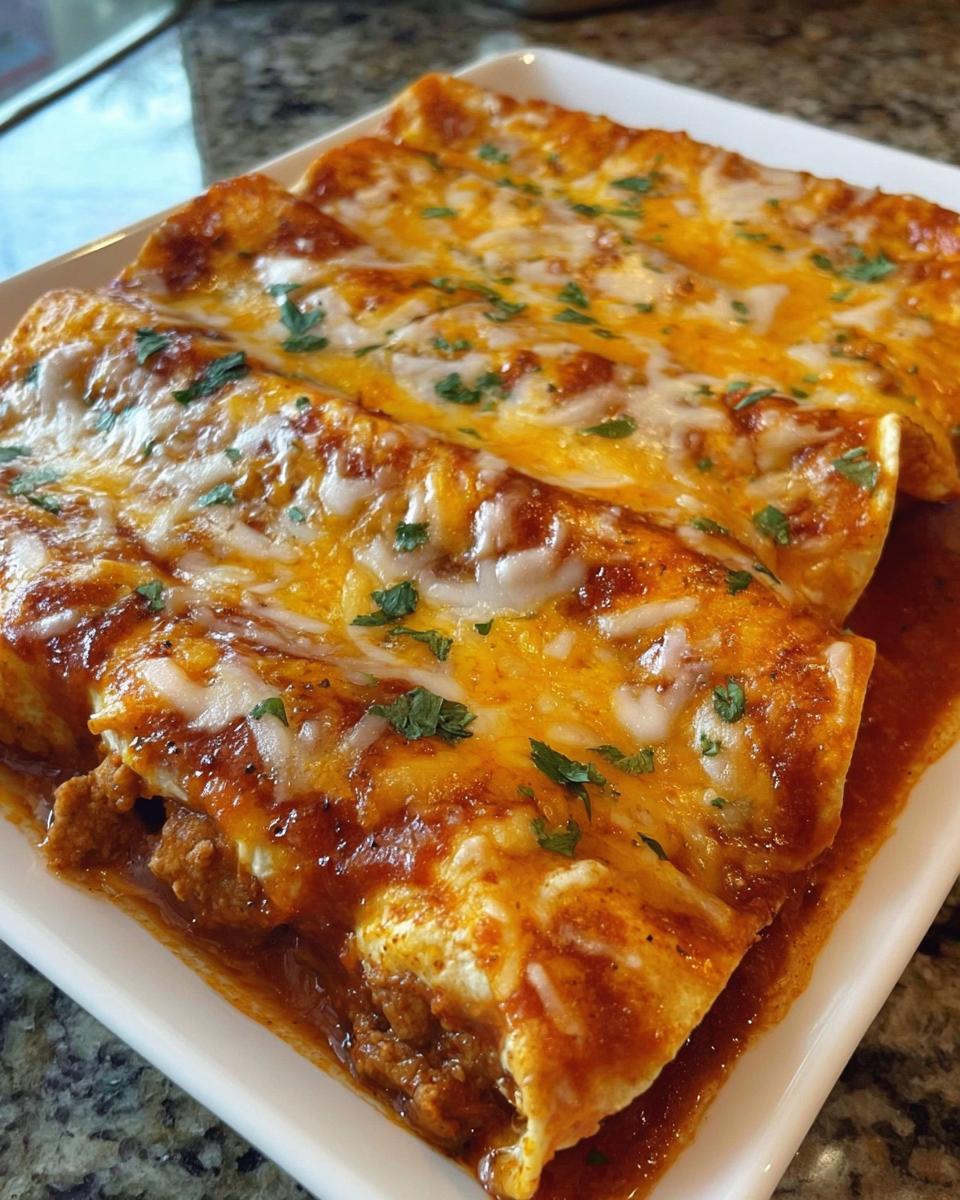
Pour the rest of that red enchilada sauce right over the top of those rolled beauties. Then, you gotta use the rest of your hand-grated cheese here—make sure every single enchilada is covered! Pop the whole dish into the 350°F oven. They need about 20 to 25 minutes to become perfect. You’ll know they’re done because the sauce will be bubbling up the sides and that cheese layer will be gooey and looking golden brown. When you pull them out, let them settle for just five minutes so they don’t fall apart when you serve them up. For a great reference shot, you can look at how the gals over at Alden Diva do theirs here!
Variations for Your Baked Cheesy Beef Enchiladas
Now, I know you might want to tweak things once you master this basic recipe for Baked Cheesy Beef Enchiladas, and I totally encourage it! Cooking is about making things your own. I’ve had weekends where I’ve run out of one thing and had to get creative, and honestly, some of those little changes ended up sticking around permanently. It’s fun finding new ways to make these great Mexican dinner recipes your own!
Adjusting the Heat Level
If your family likes a little more fire, this is the easiest recipe to spice way up! My husband always asks for extra kick. You can do this two ways. First, you can totally swap out your standard red enchilada sauce for a hot or smoky variety if you find one you love. Or, if you have fresh jalapeños sitting around, chop up half of one really finely—seeds out if you’re worried about the heat!—and toss it right in with the onions and peppers in the beginning. That fresh heat really wakes up the whole filling.
Different Cheese Combos
Cheddar and Monterey Jack are the gold standard here because they melt so beautifully, but why stop there? When I’m feeling fancy, I’ll mix in some Pepper Jack for an extra spicy layer of cheese goodness, or if I want that authentic, stringy texture, a little bit of Oaxaca cheese mixed into the blend is unbelievable. Feel free to experiment with whatever melts well! If you want to dive deeper into mixing and matching seasonings, I have a whole guide on using different DIY spice blends if you want to move away from the packets!
Serving Suggestions for Fiesta Night Ideas
Once your Baked Cheesy Beef Enchiladas come out piping hot, you need the right supporting cast to make it a real fiesta! These cheesy oven meals are rich, so you want sides that lighten things up. I always make sure I have a big bowl of crisp, cool toppings ready to go. My favorite thing is a dollop of sour cream, but you really need something acidic!
Grab some crunchy shredded lettuce and some diced fresh tomatoes—and don’t forget my quick, zesty salsa! You can find the recipe right here if you need it. A little side of creamy guacamole is always welcomed to round out what turns into a fantastic Mexican dinner recipe!

Storing and Reheating Your Cheesy Oven Meals
Don’t worry if you have leftovers, because these cheesy oven meals actually taste pretty great the next day too! If you’re popping them in the fridge, just cover that baking dish tightly with plastic wrap or transfer the remaining enchiladas to an airtight container. They keep well for about three or four days.
When it’s time to reheat, skip the microwave if you can—it ruins that lovely baked texture! I prefer popping them covered with foil back into a 350°F oven for about 15 minutes until they are warmed through. If you want to freeze them, let them cool completely, wrap individual portions tight in foil, and then slip them into a freezer bag. They are solid gold lunches!
Frequently Asked Questions About Baked Cheesy Beef Enchiladas
I know when I look at a new recipe, I always have a few little questions buzzing around, especially when I’m in the middle of cooking! That’s totally normal for any great Mexican dinner recipes. Here are the things people ask me most often about making these Baked Cheesy Beef Enchiladas.
Can I use corn tortillas instead of flour for these beef enchiladas?
You absolutely can use corn tortillas for your beef enchiladas! Corn gives you that more traditional, sturdy flavor. The catch is, corn tortillas crack much easier than flour ones when you roll them. My tip? You need to make sure they are super pliable. Warm them up really well—I’d even dip them quickly in warm sauce before filling, like some folks do, just to keep them from breaking apart on you.
Can I assemble the Baked Cheesy Beef Enchiladas ahead of time?
Oh, yes! This is one of my favorite shortcuts. You can totally assemble the whole thing—roll them, sauce them, cheese them—put the lid on the baking dish, and keep it covered in the fridge for up to a full day. Just add about 10 to 15 extra minutes to the covered baking time since it’s starting cold. It’s perfect for planning big family meals!
What is the best way to reheat leftovers?
If you want your cheesy goodness back to its glorious, fresh-from-the-oven self, stick with the oven! Cover your leftovers loosely with foil and heat them at 350°F until they are piping hot all the way through, which usually takes about 15 minutes. Microwaving works in a pinch, but honestly, it can make the cheese tough and the tortillas a little rubbery. If you want to learn the differences between flour and corn tortillas for different uses, check out my guide on tortilla types!
Nutritional Estimates for Baked Cheesy Beef Enchiladas
Now, I know we cooked these because they taste amazing and they feed a crowd, but sometimes you just want a general idea of what you’re putting on the table, right? Since everyone’s brands of cheese and sauce are different—plus the size of those tortillas can vary wildly—these numbers are just my best educated guess based on the recipe as written, feeding 6 people.
These are rough estimates per serving (1 enchilada), so take them with a grain of salt! If you load up on extra sour cream and cilantro garnish, that’s going to shift things around a little.
- Calories: Around 520-560 kcal
- Total Fat: Approximately 30g
- Protein: About 30g
- Carbohydrates: Roughly 35g
Just remember, this is an estimate based on the standard ingredients we used. The best part about making these wonderful Baked Cheesy Beef Enchiladas at home is knowing exactly what went in, but for exact counts, you always want to plug in the exact labels you purchased! Enjoy the comfort!
Share Your Family’s Experience Making This Recipe
Oh, I really hope these Baked Cheesy Beef Enchiladas become the great big hug your family needs on a chilly evening! Honestly, seeing pictures and hearing how your dinner turned out is my favorite part of having this blog. When you make something that brings food and togetherness to the table, that’s a total win in my book!
Did you try out one of the variations? Maybe you swapped out the peppers or found a secret spice combo that blew everyone’s minds? Please don’t be shy! Tell me about it down in the comments below. A little star rating helps other busy cooks decide if they should make this great Mexican dinner recipe tonight!
If you post a picture of your bubbling, cheesy pan on social media, tag me! I love seeing these comfort meals come to life in other kitchens. Happy cooking, and I hope you enjoy every single, glorious, cheesy bite!
Baked Cheesy Beef Enchiladas
Ingredients
Equipment
Method
- Heat oil in a large skillet and sauté the bell pepper and onion for 5 minutes.
- Add the ground beef. Break it into small pieces and cook until the beef is brown. Drain the grease and follow the cooking directions on the back of the taco seasoning packets, using 2 packets for 1.5 lbs of beef.
- Turn the heat off and add enchilada sauce and shredded cheese. Stir everything together until it is evenly combined.
- Evenly distribute the beef filling into the center of each tortilla. Roll each tortilla up and place them seam side down into a greased baking dish.
- Pour more enchilada sauce over the rolled tortillas and top with the rest of the shredded cheeses.
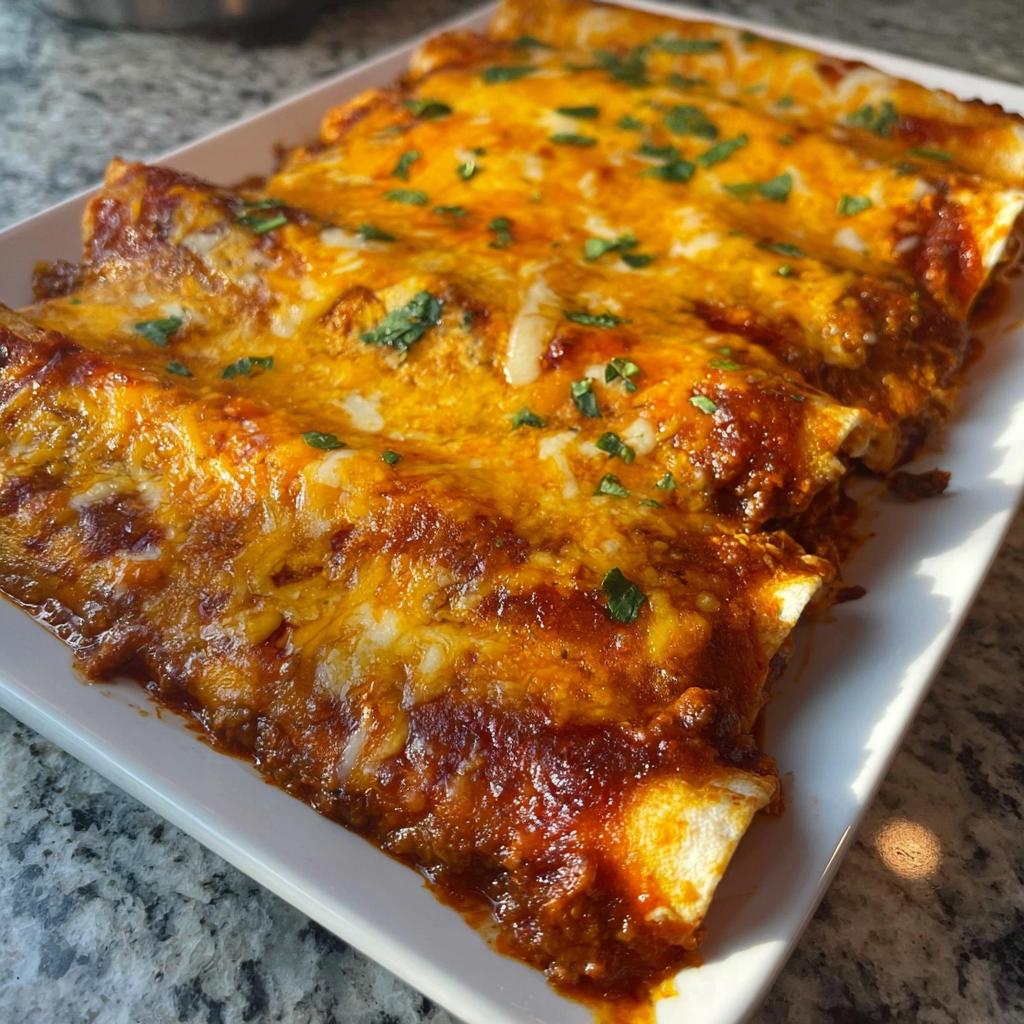
- Bake them at 350 degrees Fahrenheit for about 20 to 25 minutes, or until the cheese is melted and the sides are hot and bubbly.
- Let them cool slightly, garnish with either parsley or cilantro, and serve with sour cream.
Notes
Tried this recipe?
Let us know how it was!
Master of Global Fusion Innovation
My culinary adventure reflects my Lebanese-Italian heritage and a decade spent in the dynamic fusion restaurant scenes of Miami and Barcelona. I’ve made it my mission to prove that beloved global comfort foods can be successfully adapted for low-carb living without losing their soul, their cultural authenticity, or their ability to comfort.
With advanced training in molecular gastronomy and experience spanning Mediterranean, Middle Eastern, and Latin American traditions, I’ve developed what I call “respectful innovation” – culinary creativity that honors traditional cooking wisdom rather than replacing it. My alternative ingredient substitution systems are now taught in specialty diet cooking schools throughout the region.
Drawing from my trilingual upbringing, I understand how deeply food connects to identity and memory. That’s why my flavor-bridging techniques allow classic dishes from around the world to maintain their comforting, familiar qualities while meeting contemporary nutritional standards. I regularly share these techniques at international culinary symposiums and innovation events.
When I’m not experimenting in my Miami fusion kitchen laboratory, you’ll find me at local salsa dance venues – the rhythm and improvisation skills translate directly to my creative cooking process! My role as a foster parent to rescue rabbits has unexpectedly inspired some of my most creative plant-based low-carb innovations.
My personal low-carb journey began as a way to maintain energy for my active lifestyle, but it’s evolved into a professional mission of proving that healthy eating can be globally adventurous rather than restrictively limiting. Every recipe I create is a passport to culinary adventure, transforming kitchens into laboratories for exploring healthy versions of the world’s most beloved comfort foods.