
Oh, that smell! You know the one—that warm, deeply comforting cloud of sugar baking with spices and toasted nuts that instantly makes you want to grab a coffee mug. It’s the smell of home, and I’m obsessed with recreating it. I remember the first time I baked my grandmother’s famous Banana Nut Bread with Walnuts; the aroma in her kitchen was like being wrapped in a hug. While that original was full of old-school goodness, I’ve spent years tweaking inherited recipes to fit my modern life—including my lean toward lighter eating—without losing one bit of that nostalgic moisture.
This version nails that rich, tender texture we all crave in a perfect loaf. Honestly, it’s the best hybrid of comfort and convenience. Trust me, whether you’re a seasoned baker or just starting out, this recipe is going to make your kitchen smell incredible.
Why This Banana Nut Bread with Walnuts Recipe Stands Out
Why bother with this specific recipe when there are so many others out there? Well, I think you’ll love it because it hits all the necessary notes without any fuss. It’s your classic, comforting flavor profile delivered consistently!
- It stays incredibly moist thanks to those perfectly ripe bananas—no dry corners here!
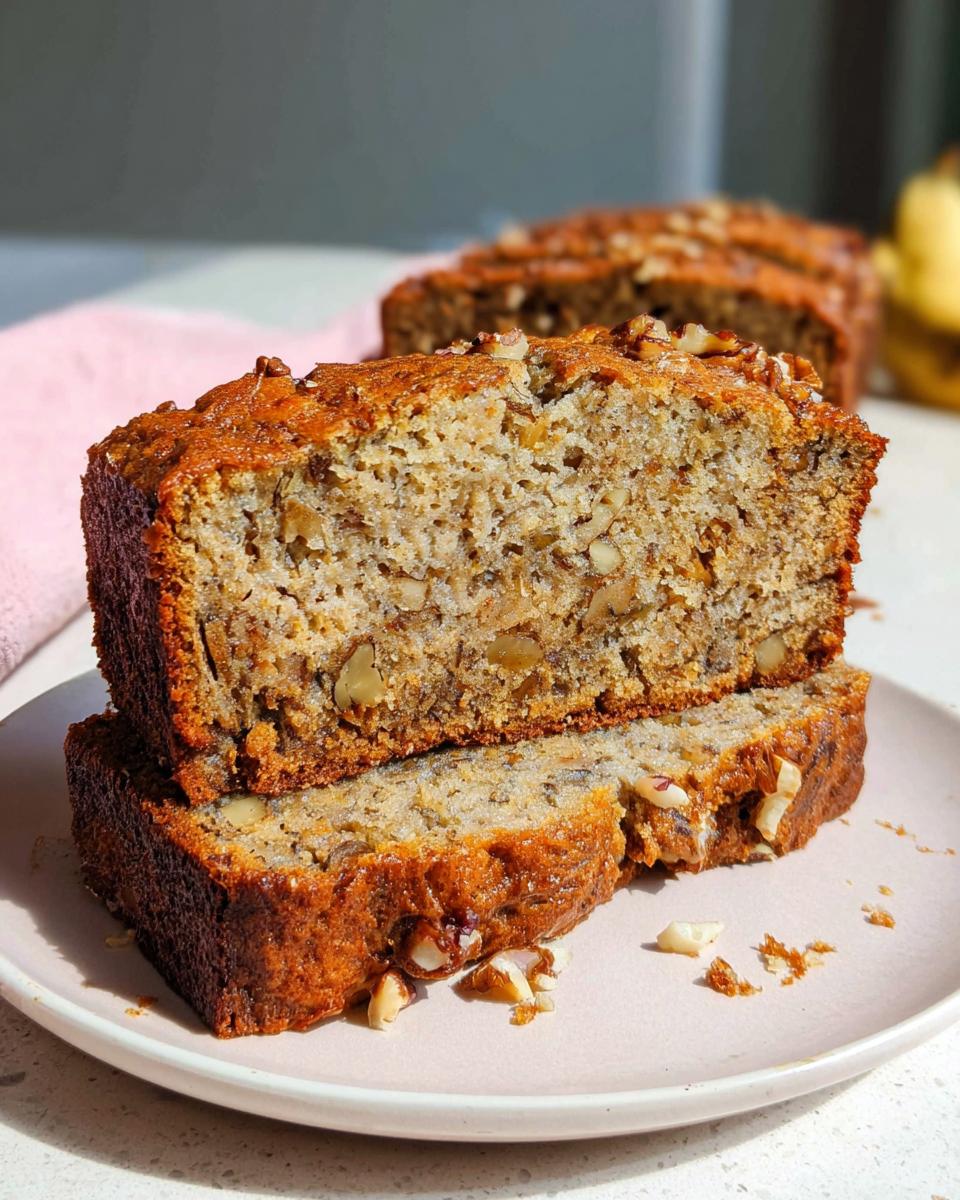
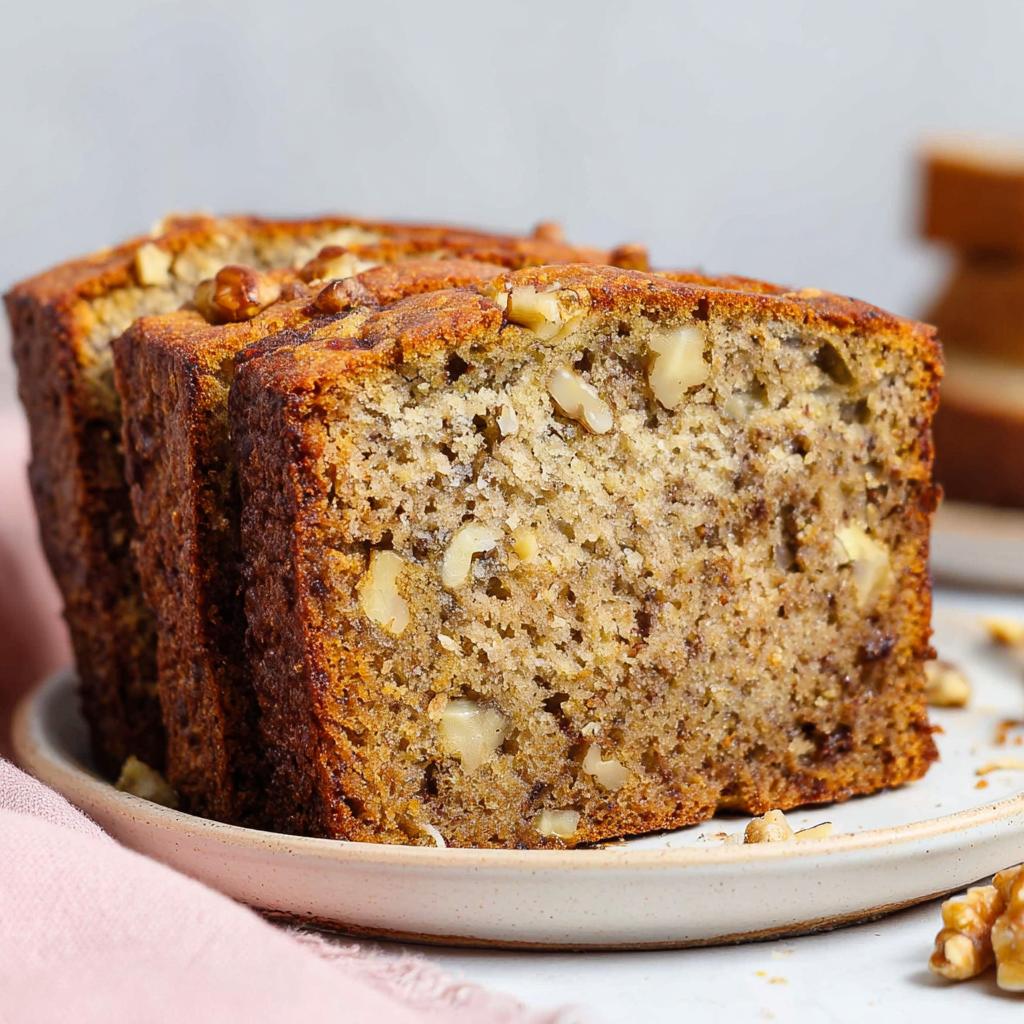
- The texture is just right: soft bread complementing the crunch of the walnuts.
- It’s fast! You can mix up the batter in about fifteen minutes flat.
It’s the ideal choice when you need quick, satisfying coffee time treats.
Quick Prep for Cozy Fall Baking
Seriously, the prep time is just fifteen minutes. That’s fantastic news when you’re eager to get something warm baking, especially when that perfect craving for cozy fall baking strikes on a chilly afternoon. Toss the ingredients together, pour, and walk away!
Gathering Ingredients for Perfect Banana Nut Bread with Walnuts
Okay, let’s talk ingredients! For any great quick bread, the quality of what you toss in really matters. Don’t skimp here, especially when it comes to the fruit. My secret weapon for the best texture and natural sweetness is using bananas that look like they’ve had a rough life—I mean, seriously spotted and turning brown.
We’re making enough here to fill two standard loaf pans, which is great because you can freeze one or gift it right away. Everything is separated nicely so you don’t accidentally overmix later!
Dry Ingredients for Your Banana Nut Bread with Walnuts
You’ll need to start by getting your dry stuff together in one bowl so everything is perfectly distributed. This keeps the baking soda from causing any surprise clumps later on.
- 2 cups all-purpose flour (that’s about 240 grams, just so you know)
- 1.5 teaspoons of baking soda
- 1 tiny pinch of salt—don’t skip it, salt makes the sweet sing louder!
Wet Ingredients and Additions
This is where the magic starts to happen, especially with the bananas! Remember, the riper they are (the ones you were thinking of throwing out?), the sweeter and moister your final Banana Nut Bread with Walnuts will be. We need about four of those fully spotted ladies!
- 1 cup granulated sugar (198 g), ready to blend with the oil
- 0.5 cup vegetable oil—I really prefer oil over butter for the consistent moisture in this loaf, trust me!
- 2 eggs, straight from the carton, no need to warm them up
- 1 teaspoon of vanilla extract—use the good stuff here if you have it!
- 4 medium ripe bananas, mashed well (aiming for about 1⅓ cups mashed)
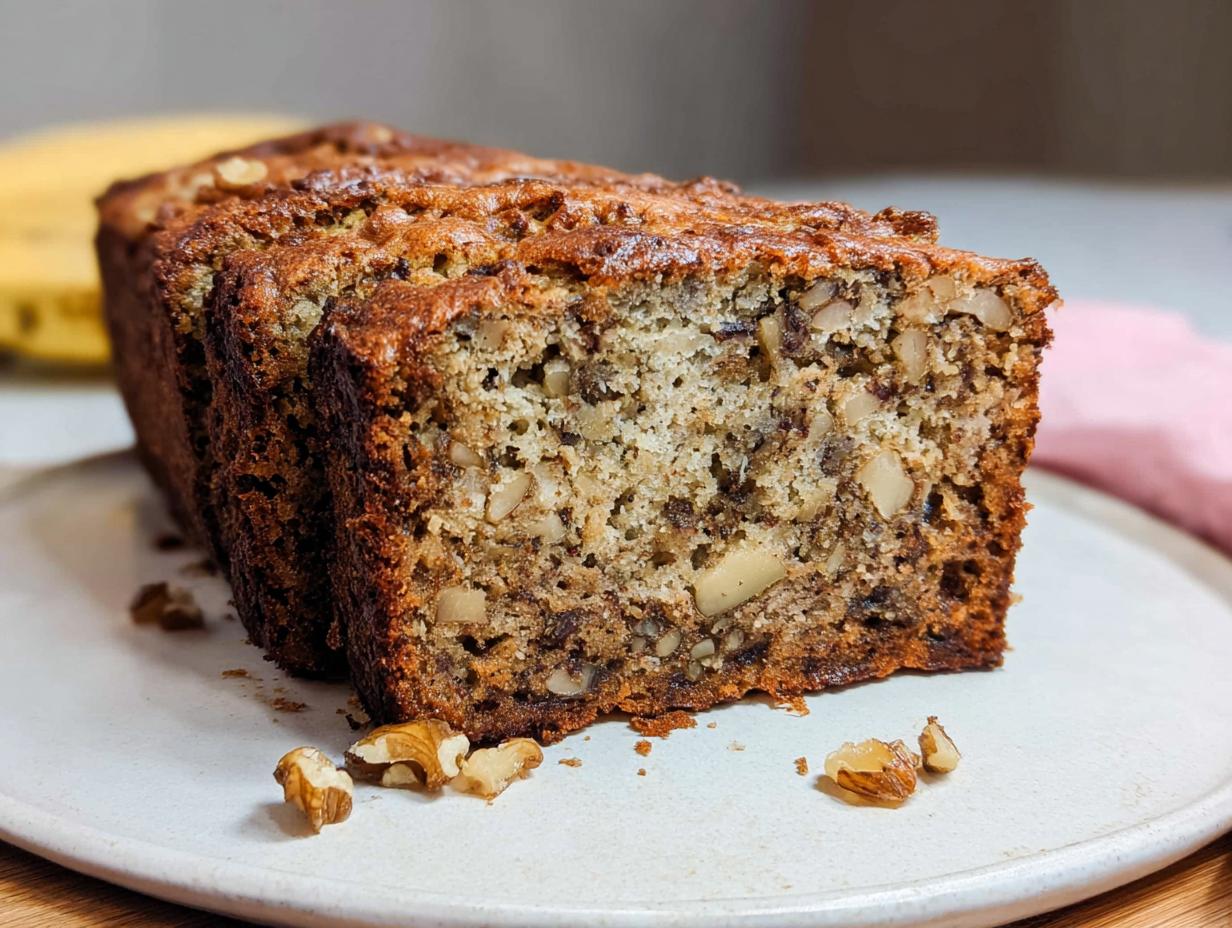
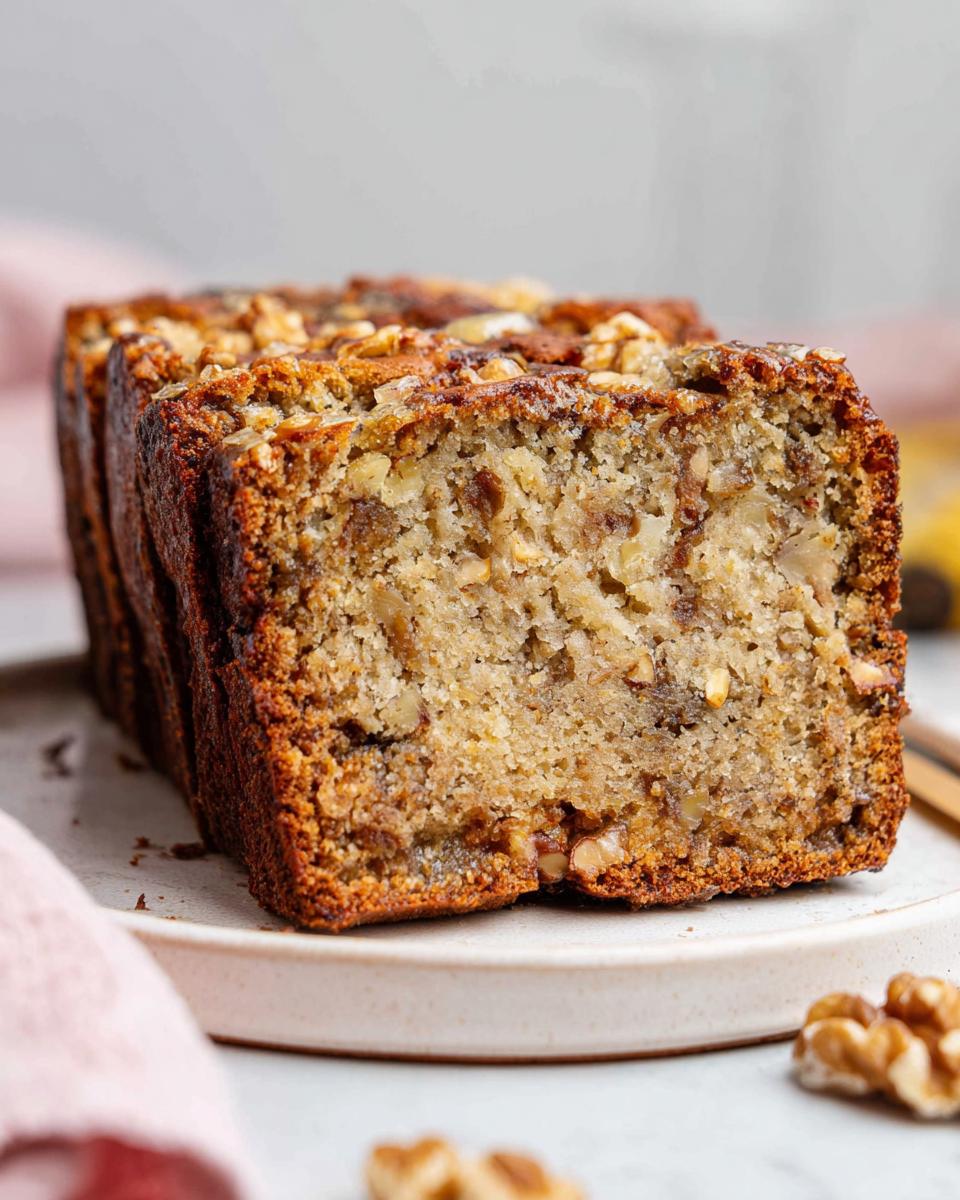
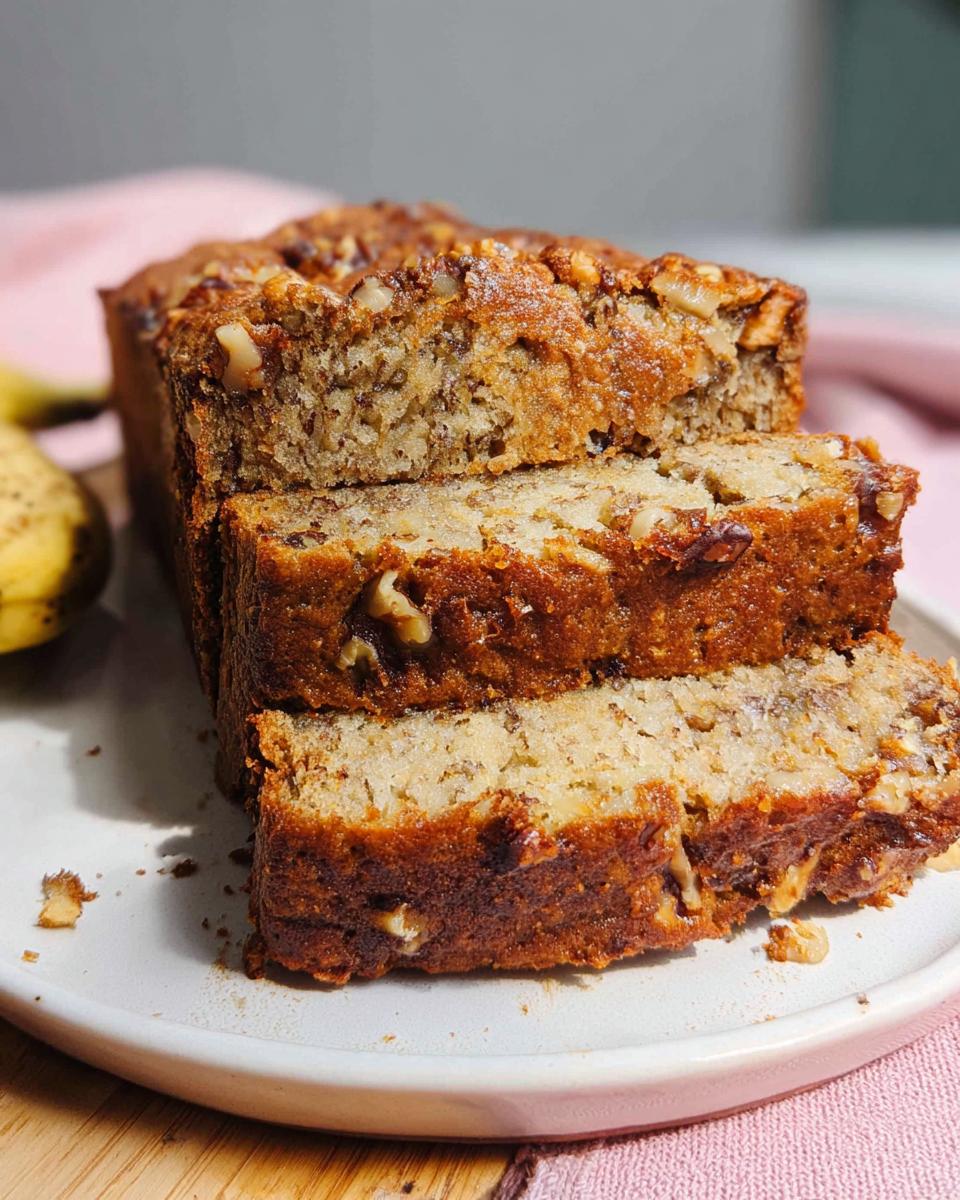
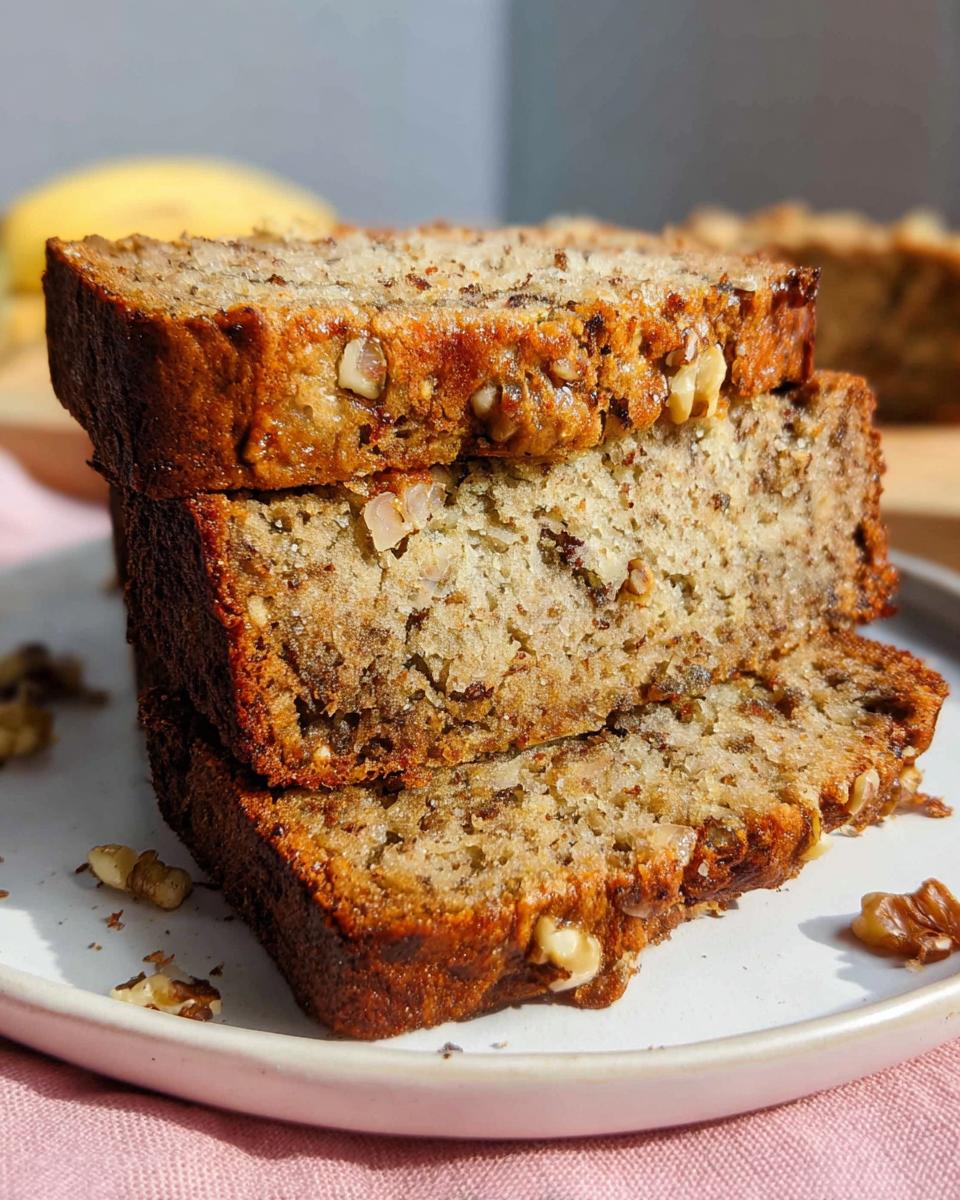
- 1 cup of coarsely chopped walnuts (113 g). These go in last to keep things crunchy!
Essential Equipment for Your Crunchy Walnut Loaf
Before you even think about mashing those first bananas, let’s make sure your tools are ready to go. Getting your equipment out first means cleanup is way smoother later, and you won’t be frantically searching for a spatula when the batter needs folding!
Since we are making two loaves, you need the right pans ready to bake. Trust me, having everything lined up makes this 15-minute prep time totally realistic.
- You’ll definitely need two bowls: a medium one for the dry bits and a big, large bowl for mixing all the wet stuff and eventually bringing it all together.
- Make sure you have two 8×4-inch loaf pans ready to go. Grease them well, or line them with parchment—I’ll share my go-to release trick later!
- Grab a simple rubber spatula. This is crucial for gently folding in those walnuts at the very end so you don’t deflate all the air you just mixed in.
- Finally, a wire rack is essential for cooling, giving those bottom crusts some breathing room so they don’t get soggy while waiting to cool down.
Step-by-Step Instructions for Banana Nut Bread with Walnuts
This is where the magic happens, friends! Don’t feel overwhelmed by the steps. Since we got all our ingredients measured and our equipment ready, this process is super fast. The key is to mix the wet and dry parts separately first, which keeps everything from getting overworked. Remember that link I found that has a great classic take on this bread? You can see a similar structure there, but stick with my little family tricks!
Mixing the Banana Nut Bread with Walnuts Batter
We start by heating things up—preheat your oven to 350 degrees F first, and make sure those two 8×4-inch loaf pans are nice and greasy. Now, take your dry mixture from the medium bowl and set it right next to the big bowl holding your sugars, oil, eggs, vanilla, and those mashed beauties.
Pour that dry flour mixture right into the wet stuff. Mix gently with your spatula until you *just* see no more streaks of flour. Seriously, stop stirring! Then, gently fold in those chopped walnuts. We want the walnuts nestled in there, not dissolved underneath a tough gluten network!
Baking and Cooling the Loaves
Divide that perfect batter evenly between your two pans. Pop them into the oven for 35 to 45 minutes. Now, here’s the crucial part about baking: If you notice the tops are getting too dark around the 30-minute mark, just loosely drape a piece of aluminum foil over them. That saves the top from burning while the middle finishes baking!
When you think they are done, test them by sticking a thin knife right into the center. If it comes out clean, they are ready! Pull those loaves out and let them cool right there in the pans for exactly 10 minutes. After that short rest, flip them out onto a wire rack to finish cooling completely. Patience here keeps them from falling apart when you slice them later!
Ingredient Notes and Substitutions for Banana Nut Bread
I know sometimes you open the pantry and you’re missing one little thing, or maybe you just aren’t a huge fan of walnuts, even though they are traditional in this quick bread. That’s totally fine! Baking should be flexible. This recipe is super forgiving, which is one of the reasons I love pulling it out anytime.
We’ve already covered the ripe banana thing—and yes, that’s truly the most important variable for natural sweetness and moisture—but let’s talk about those crunchy additions and what happens if you only have one loaf pan lying around.
Tips for Choosing Bananas and Swapping Nuts
Remember, those brown spots are your friends! The browner the banana peel, the more the starches have converted to sugar, meaning less added sugar is needed, and you get an amazing, deep banana flavor. Don’t settle for yellow; go for spotty!
Now for the nuts! Walnuts are classic, but they are certainly not the *only* option here. You have total freedom to mix and match based on what you have on hand or what you prefer to eat. If you have a nut allergy in the house, skip them altogether; the bread is still delicious plain, or you can use an equal amount of sunflower seeds for texture.
- You can easily swap the walnuts for pecans—they have a slightly sweeter, earthier flavor that works just as well with the banana.
- If you want something really different, try substituting chopped almonds or even hazelnuts. They give a wonderful, slightly harder crunch.
- If you use peanuts because that’s what you’ve got, go for it! It turns into a lovely, slightly savory profile.
Also, just a quick note on pan size: If you only have one standard 9-inch loaf pan, just use it! Dump all the batter in there, but know that your baking time is going to increase. Keep checking it around the 55-minute mark, but it might honestly need closer to an hour total since the heat has to travel further into the center to set.
Tips for Success When Making Banana Nut Bread with Walnuts
Baking this bread has become second nature to me now, and over the years, I’ve learned a few little tricks that keep my loaves perfect every single time. You want that soft inside that melts in your mouth, right? Well, sinking or dryness are the enemies of a good quick bread, so listen up!
Here’s how we guarantee success, even when life gets busy:
- Don’t Overmix! I cannot stress this enough. Once that flour hits the wet ingredients, you mix *just* until the streaks disappear, and then you stop. Overmixing builds gluten, and gluten gives you tough muffins instead of tender banana bread. A few small lumps are far better than a dense block of bread.
- Oven Temperature is Key: Make sure your oven is fully preheated to 350°F before the batter even enters. If the oven isn’t hot enough, the center rises too slowly, which can cause the bread to sink once you pull it out.
- Protect Your Top: If those gorgeous walnuts on top start getting too dark before the middle is set, just quickly tent the pan with some aluminum foil. This acts like a little heat shield and ensures even baking without scorching the top layer.
If you’re ever in a hurry and don’t have time to wait for a full loaf bake, I have an amazing workaround! This batter transfers beautifully into muffin tins. Just line about 12 muffin cups, fill them about three-quarters full, and bake them for only 24 to 28 minutes. They make amazing grab-and-go breakfast items!
Storage and Reheating Instructions for Banana Nut Bread with Walnuts
Now that you’ve baked two perfect loaves of Banana Nut Bread with Walnuts, you need to know how to keep that beautiful moisture locked in! Quick breads like this are fantastic because they actually taste even better the next day once the flavors have settled in, but you have to store them right to keep that tender crumb.
If you managed not to eat both loaves immediately (good luck!), here is my tried-and-true method for keeping your bread fresh. It’s all about airtight protection!
To keep your bread wonderfully fresh for up to four days, you need to make sure it’s completely cool first. Don’t wrap it while it’s even slightly warm, or you’ll end up steaming the crust and making it soggy—nobody wants soggy bread!
- Once totally cool, I wrap each loaf tightly first in plastic wrap. Really press that plastic wrap down onto all sides to seal it against the air.
- For extra protection (especially if your kitchen is humid), I slip the plastic-wrapped loaf into a large zip-top bag and press out every bit of air before sealing it. This method seems to work best for maintaining that fresh-out-of-the-oven texture.
- If you aren’t planning to eat your second loaf within four days, freeze it! Double-wrap it just like I mentioned, and it will keep perfectly for up to three months. Just remember to thaw it slowly overnight on the counter.
Reheating it is simple and instantly brings back that cozy feeling. If you’re just having a slice with your morning coffee, I recommend microwaving a single slice for about 10 to 15 seconds. It softens the loaf beautifully. For the absolute best result, though, I like to toast a slice lightly in a toaster oven. That warms the bread up and gives the walnuts a nice little crackle again, making it taste almost freshly baked!
Frequently Asked Questions About Banana Nut Bread
Y’all always have the best follow-up questions when I share a recipe, and that’s how we all learn, right? I’ve bundled up the most common things I get asked about this Banana Nut Bread with Walnuts below. If you’re looking for that perfect slice to enjoy with your afternoon tea, these tips should help you nail it every time.
Can I make this recipe low-carb?
That is such a smart question, especially since I know so many of us are watching our carb intake these days! Now listen, the recipe I shared here is the traditional way—we are using white flour and regular sugar because that’s what makes it taste like the classic loaf I remember from childhood. If you want to make it genuinely low-carb, you’d have to swap out the flour for something like almond or coconut flour, and replace the sugar with a granular sweetener like erythritol or monk fruit blend.
It takes a bit more tweaking because the ratios change completely, but I’m working on a dedicated low-carb variation soon! For now, just know this standard recipe is pure comfort, but there are definitely ways to adapt it when you’re ready for deep-diet modifications.
How do I get a crunchy walnut loaf top?
Oh, hello, texture lover! A good, slightly crisp top really elevates these coffee time treats. The walnuts we fold into the batter are going to get toasted in the oven, but they get a little insulated by the surrounding batter. If you want guaranteed crispiness right on the surface for that perfect crunchy walnut loaf, here’s what you do!
Right after you pour the batter into the pans and smooth the top, take about a quarter cup of extra, roughly chopped walnuts. Just sprinkle them evenly across the top of the batter. They will bake right on the surface, catching that direct oven heat, and they become gloriously crunchy while keeping the inside of the loaf super soft. It’s such a simple trick, honestly, and it makes all the difference visually and texturally!
Understanding the Estimated Nutrition of Banana Nut Bread with Walnuts
I always get so many questions about what exactly is in this bread, especially since comfort food sometimes gets a bad rap! While this recipe isn’t specifically tailored to be low-carb (as we discussed!), it’s helpful to see the breakdown of what you’re enjoying when you slice into a piece of this incredible Banana Nut Bread with Walnuts.
Remember, these numbers are based on dividing the total recipe yield (two loaves cooked) by the serving size of two, so if you make smaller slices, the numbers will change slightly! I always say that ingredients made with love taste better, but knowing the general profile helps when planning your day!
Here are the estimated values per serving:
- Calories: 219
- Carbohydrates: 28 grams
- Protein: 3 grams
- Total Fat: 10 grams
- Saturated Fat: 5 grams
- Sugar: 14 grams
Now, I absolutely have to put a little asterisk next to these numbers, because this is my kitchen, not a lab! These figures are only estimates, darling. The actual nutrition can vary quite a bit depending on the brand of vegetable oil you use, the exact size of your bananas, and even the specific walnuts you pick up at the store. So, take these as a helpful guideline, but enjoy the bread knowing it’s made with real, whole ingredients!
Banana Nut Bread with Walnuts
Ingredients
Equipment
Method
- Preheat your oven to 350 degrees F. Grease two 8×4-inch loaf pans and set them aside.
- In a medium bowl, whisk together the flour, baking soda, and salt. Set this mixture aside.
- In a large bowl, whisk together the sugar, oil, eggs, and vanilla extract. Add the mashed bananas and stir gently to combine the wet ingredients.
- Add the flour mixture to the wet ingredients and stir until the batter is completely blended. Using a rubber spatula, fold in the chopped walnuts.
- Divide the batter evenly into the two prepared loaf pans.
- Bake for 35 to 45 minutes, or until a thin knife inserted into the center of the loaf comes out clean. If the tops of the loaves start to get too dark before the center is done, cover them loosely with aluminum foil.
- Allow the loaves to cool in the pans for 10 minutes. Then, turn them out onto a wire rack to cool completely.
Nutrition
Notes
Tried this recipe?
Let us know how it was!
Master of Global Fusion Innovation
My culinary adventure reflects my Lebanese-Italian heritage and a decade spent in the dynamic fusion restaurant scenes of Miami and Barcelona. I’ve made it my mission to prove that beloved global comfort foods can be successfully adapted for low-carb living without losing their soul, their cultural authenticity, or their ability to comfort.
With advanced training in molecular gastronomy and experience spanning Mediterranean, Middle Eastern, and Latin American traditions, I’ve developed what I call “respectful innovation” – culinary creativity that honors traditional cooking wisdom rather than replacing it. My alternative ingredient substitution systems are now taught in specialty diet cooking schools throughout the region.
Drawing from my trilingual upbringing, I understand how deeply food connects to identity and memory. That’s why my flavor-bridging techniques allow classic dishes from around the world to maintain their comforting, familiar qualities while meeting contemporary nutritional standards. I regularly share these techniques at international culinary symposiums and innovation events.
When I’m not experimenting in my Miami fusion kitchen laboratory, you’ll find me at local salsa dance venues – the rhythm and improvisation skills translate directly to my creative cooking process! My role as a foster parent to rescue rabbits has unexpectedly inspired some of my most creative plant-based low-carb innovations.
My personal low-carb journey began as a way to maintain energy for my active lifestyle, but it’s evolved into a professional mission of proving that healthy eating can be globally adventurous rather than restrictively limiting. Every recipe I create is a passport to culinary adventure, transforming kitchens into laboratories for exploring healthy versions of the world’s most beloved comfort foods.