

Oh, there is nothing quite as comforting as that smell wafting out of the oven when you bake something homemade, is there? Forget the fancy pastries; for me, true kitchen comfort starts with bread—specifically, the perfect loaf of sweet, spiced banana bread. I’ve spent years chasing the ghost of my grandmother’s recipe, that absolute foolproof way to turn sad, brown bananas into something magnificent.
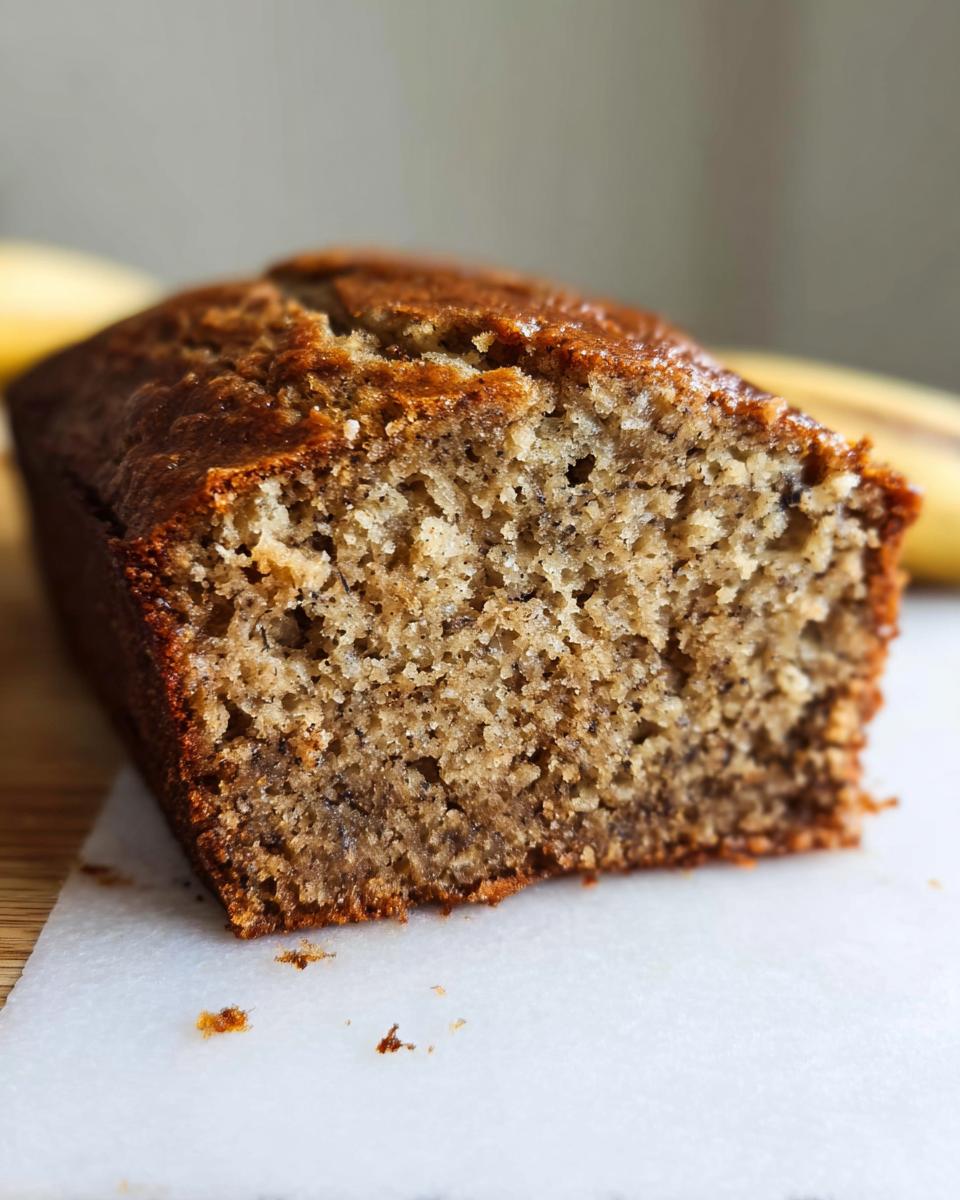
If you’re tired of dense, dry loaves, then trust me, this is the definitive recipe for Classic Moist Banana Bread. I’m Clara Martinz, Master of Culinary Visual Arts, and I can tell you that my journey started right there in my grandmother’s cozy kitchen. She had this magical ability to transform those overripe bananas into the most unbelievably moist loaf. As we mashed them by hand and mixed in the spices, the kitchen would fill with this warm, embracing scent. Now, every time I pull this Classic Moist Banana Bread out of the oven, I’m transported back to sharing slices with family, knowing I’m passing down that exact same love.
Why This Recipe Creates the Best Classic Moist Banana Bread
So, what makes this different from every other quick bread recipe out there? Honestly, it comes down to a few things I learned the hard way. The goal here isn’t just flavor; it’s texture you can practically drink! This truly is an easy quick bread that feels gourmet, but requires zero fussy steps.
- We guarantee using up every speck of those sad, speckled bananas until they cry sweet juice!
- The balance of fat and sugar is calibrated for maximum tenderness every single time.
- It’s simple enough that even if you’re new to baking, you’ll look like a pro.
The Secret to Ultimate Moisture in Classic Moist Banana Bread
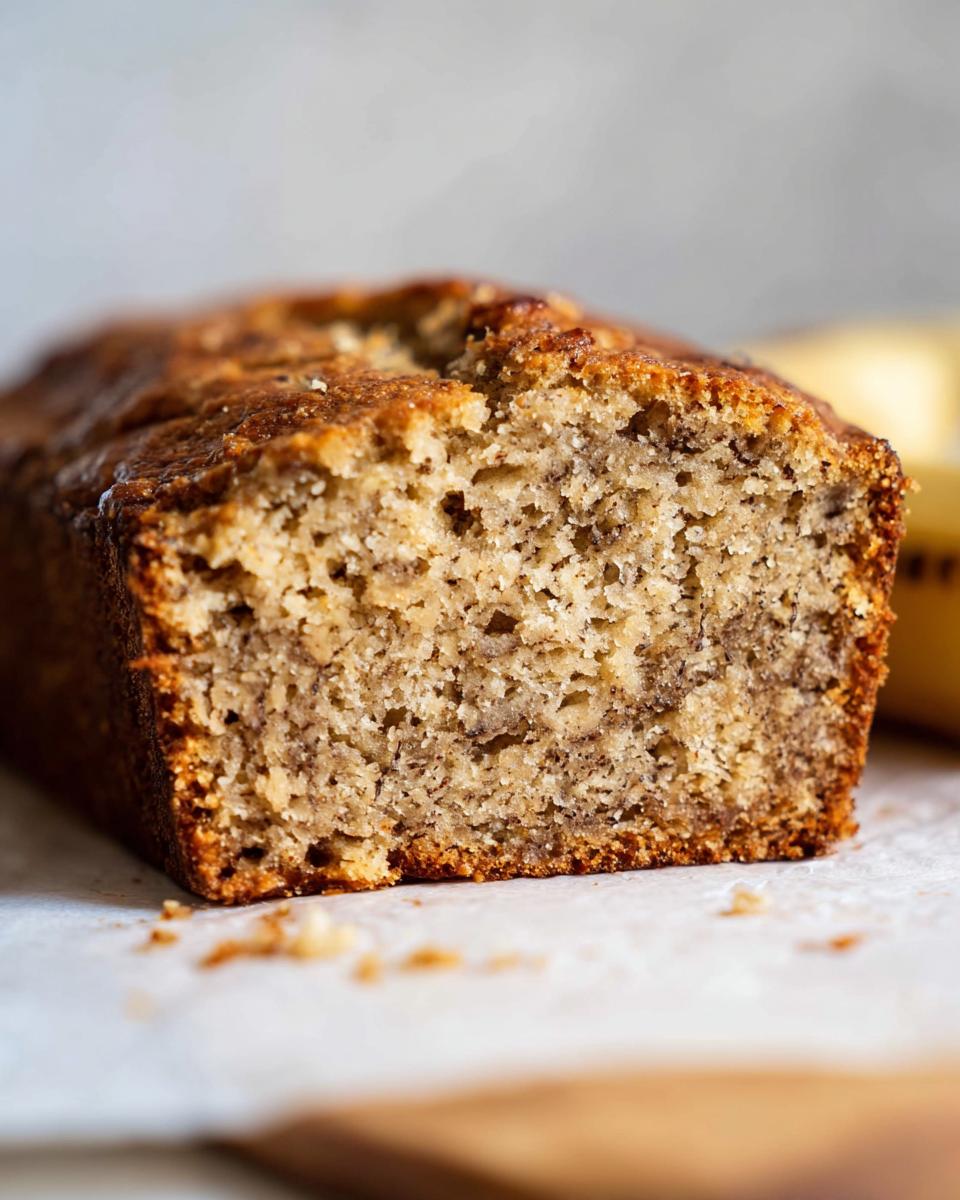
The real hero here is how much banana we use – two whole cups! That’s a lot, and it’s crucial. We’re aiming for a wet batter, not a stiff one. My big expert tip? When you mix the dry ingredients into the wet, stop mixing the second you see no more flour streaks. Seriously, put the spoon down! Overmixing is the fastest way to kill the tenderness in your Classic Moist Banana Bread, making it tough instead of melt-in-your-mouth soft.
Essential Equipment for Your Classic Moist Banana Bread
Before you even think about mashing those bananas, we need to make sure your kitchen is ready for action. Getting the right tools out beforehand saves so much time and guesswork, which is vital when you’re following an easy quick bread recipe like this one.
When I make my Classic Moist Banana Bread, I always pull these items right near my mixing station. Don’t stress if you don’t have a fancy stand mixer; any electric handheld one will do the trick just fine, or even a strong arm and a good wooden spoon!
Here’s what you’ll need to have ready to go:
- Your trusty 9×5 loaf pan. This size is non-negotiable for hitting the right baking time specified in the recipe.
- A stand mixer or electric mixer. This helps you get that perfect creaming action between the butter and sugars, which adds air and lift.
- At least two bowls—one large one for mixing the wet ingredients and wet bananas after creaming, and one medium one for whisking the dry parts together.
- A good wire rack for cooling. This is really important! If you leave the bread in the hot pan too long, the bottom steams and gets soggy. The rack lets air circulate underneath immediately.
Having these pieces ready means you can transition smoothly between mixing the dry components and whipping up that fluffy butter base!
Gathering Ingredients for Classic Moist Banana Bread
Alright, let’s talk about the heart of the operation: the ingredients! When we talk about making the best Classic Moist Banana Bread, we aren’t using just any bananas. You know the ones I mean—the ones that have gone completely brown, maybe even got a little squishy in the fruit bowl? Those are gold! We absolutely must use those super overripe bananas because that’s where all the concentrated sweetness and moisture comes from that makes this recipe sing.
I always lay everything out before I start mixing—it’s called mise en place, but I just call it ‘not panicking halfway through.’ Keep an eye on those notes next to the ingredients; they are there for a reason, especially the part about needing your eggs at room temperature. That little bit of preparation makes mixing so much smoother.
Here is exactly what you need, broken down just like I keep my own notes:
Dry Ingredients
- 2 cups all-purpose flour (Remember to spoon and level this! Don’t scoop right out of the bag, or you’ll pack it too tight.)
- 1 teaspoon baking powder
- 1/2 teaspoon baking soda
- 1/2 teaspoon ground cinnamon
- 1/2 teaspoon salt
Wet Ingredients
- 1/2 cup unsalted butter (It needs to be properly softened, not melted! This is crucial for creaming.)
- 1/2 cup granulated sugar
- 1/4 cup light brown sugar (Make sure this is packed tight when measuring!)
- 2 large eggs (Please, please make sure they are at room temperature.)
- 2 teaspoons pure vanilla extract
- 2 cups mashed banana (This is your beauty ingredient!)
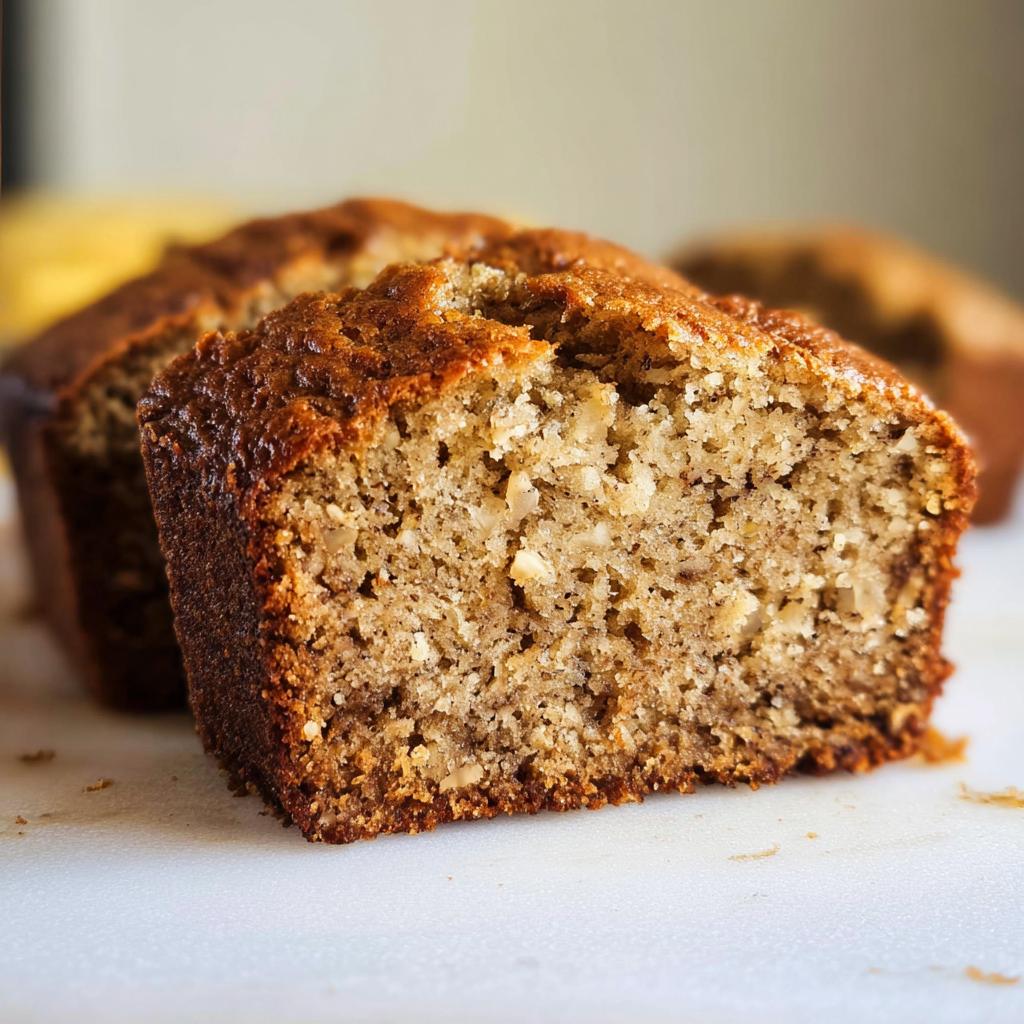
- 1/2 cup chopped walnuts (Only if you’re feeling nutty, totally optional!)
See? It’s really straightforward! This list proves that this delicious loaf is really one of the essential, most reliable basic baking recipes you can master.
Ingredient Notes and Substitutions for Baking
A few quick notes on making choices here, because I know sometimes you just have to work with what’s in the cupboard. If you’re allergic to nuts, just skip the walnuts entirely. The flavor profile of the banana bread stands perfectly strong on its own, I promise!
If you’re out of light brown sugar, you can use a bit more granulated sugar, but I’d recommend mixing in a teaspoon of molasses just to bring some of that deep caramel flavor back. It won’t be exactly the same, but it keeps the flavor dynamic. Before you totally dive in, you can check out some of my other foundational baking tips if you want to brush up on how temperature affects your ingredients—it really helps guarantee success!
Step-by-Step Instructions for Classic Moist Banana Bread
Okay, now for the fun part! This is where we turn those beautiful ingredients into the fragrant, tender loaf we’ve been dreaming about. It’s a straightforward process, but pay attention to the handling, and you’ll nail this Classic Moist Banana Bread every single time. First things first: we need heat!
Get that oven fired up to 350°F (177°C). I like to prep my 9×5 loaf pan right away—I spray it well with nonstick spray, then I line it with parchment paper so that it hangs over the sides a little bit. That overhang becomes my built-in sling for lifting the loaf out later; trust me, it saves your knuckles!
Next, whisk together all your dry stuff—flour, baking powder, soda, cinnamon, and salt—in one bowl. Set that aside. Now, in your mixer, cream that softened butter with both sugars until it looks genuinely light and fluffy, like fluffy clouds. Then, beat in your room-temperature eggs one at a time, scraping down the sides, followed by that glorious vanilla and the mashed banana. Mix hard enough to combine, but don’t beat it into oblivion!
Here comes the most important part, the gentle fold! Add your dry mixture into the banana mixture in two or three additions, mixing ONLY until you see JUST combined. Stop stirring when you still see the tiniest hint of flour! Seriously, if you overmix, you activate the gluten, and bye-bye moisture! Gently stir in those optional walnuts now.
Pour that gorgeous batter into your prepared pan and smooth the top. We are looking at roughly 55 to 65 minutes for baking time. For more baking insight on structure, feel free to check out what I wrote about the science behind a great quick bread!
Baking Time and Testing Doneness
Baking usually takes between 55 and 65 minutes at 350°F. Keep an eye on the top around the 45-minute mark, though. If the top is getting dark brown but the center still feels a little jiggly, don’t panic! Just grab a small piece of aluminum foil and gently tent it over the top. This shields the crust from burning while the middle finishes baking. That old toothpick test is your best friend here: stick it right into the center, and if it comes out clean, or maybe with just a couple of moist crumbs clinging to it—not wet batter—you’re done! You can also check out a recipe that inspired my early attempts.
Cooling Process for the Perfect Loaf
Resist the urge to flip this baby out the second it leaves the oven! If you try to remove it immediately, the structure hasn’t quite set, and it might sag or even crumble. Let it sit patiently in that hot loaf pan for a solid 20 minutes. This slow cooldown period is vital for stabilizing the structure of your banana bread recipe. After those 20 minutes, use those handy parchment paper overhangs to gently lift the loaf out of the pan. Then, move it straight onto a wire rack to cool completely before slicing a thick piece for yourself!

Tips for Perfecting Your Classic Moist Banana Bread
You’ve mastered the main steps, which is fantastic! But sometimes, those tiny details are what take a good loaf of Classic Moist Banana Bread and make it truly legendary. I’ve collected a few non-negotiable tricks over the years that I always follow now.
These tips aren’t about making the recipe harder; they are about making it foolproof. If you follow these, you’ll be the talk of the neighborhood for your beautiful, moist loaves!
- Don’t Cheat on Banana Ripeness: I said it before, but I need to yell it here! If your bananas are just yellow, or even yellow with a few brown spots, they aren’t done enough. You need black or nearly black peels. When they look repulsive on the counter, they are perfect for the mix. That dark color means sugars have developed fully, giving the bread its deep, authentic banana flavor and keeping it moist for days.
- Room Temperature Eggs are Non-Negotiable: If your eggs are straight from the fridge, they will chill down your creamed butter and sugar mixture instantly when added. This deflates all those beautiful air pockets we worked so hard to create! Trying to rush this step results in a denser, slightly sadder crumb. Make sure your eggs sit out for about 30 minutes before you start mixing.
- Measure Flour by Weight If You Can: I know not everyone has a scale, but if you do, try using it for the flour. If you don’t have one, at least use the ‘spoon and level’ method we discussed. Scooping the measuring cup directly into the bag compresses the flour significantly, meaning you might end up with an extra quarter cup of flour. Too much flour is the number one killer of moist cake, making your Classic Moist Banana Bread turn out wonderfully flavored but crumbly and dry.
- Use Room Temperature Soft Butter: We creaming butter and sugar for a reason—to trap air! Melted butter releases all that trapped air when combined with sugar, leading to a greasy texture. Your butter should yield slightly when you press it with a finger but still hold its shape. It needs that pliable texture to incorporate air correctly under the mixer beaters.
Variations on the Basic Baking Recipes
Once you master the foundation of this wonderful loaf, you’ll realize that the base recipe is like a blank canvas, just begging for a little creative flair! You don’t have to stick to the standard; these simple tweaks mean you can keep churning out loaves and have something new and exciting every time. It’s so fun experimenting with these basic baking recipes, and the additions are usually super easy!
Here are three of my favorite ways to jazz up the standard banana bread. You can mix and match these too, if you’re feeling brave!
Chocolate Chip Dream Loaf
Okay, this is a classic for a reason. About 10 minutes before you are ready to pour the batter into the pan, gently fold in one cup of semi-sweet chocolate chips. Now, here’s my trick: reserve about a quarter cup of the chips and toss them with a tiny bit of flour (just a half teaspoon). This keeps them from sinking straight to the bottom while baking. Sprinkle those floured chips on top right before it goes into the oven for that lovely melted chocolate pooling on the top crust!
A Warm Spice Upgrade
If you want something that smells even more autumnal and cozy than the standard recipe, play around with the spices we already used. The cinnamon is great, but you can swap half of it out for something deeper. Try adding 1/2 teaspoon of pure nutmeg or a quarter teaspoon of allspice right in with your dry ingredients. Speaking of spices, if you want to learn more about how different flavors interact, I put together a little guide on my favorite spices for home baking. Adding a bit of freshly grated lemon zest, about one teaspoon’s worth, also brightens up the banana flavor beautifully!
The Streusel Topping Sensation
Sometimes you want your quick bread to taste a little more like dessert, right? A simple streusel topping takes only five minutes and adds a delightful buttery crunch. You’ll simply mix 1/2 cup flour, 1/4 cup brown sugar, 1/4 cup cold, cubed butter, and maybe a pinch of cinnamon with a fork until it looks like coarse crumbs. Sprinkle this topping evenly over the batter right before it goes into the oven. It bakes up golden and crunchy, turning your loaf into something truly special for breakfast or dessert!
Storage and Reheating Instructions for Classic Moist Banana Bread
Once you have successfully baked the most perfect, tender loaf of Classic Moist Banana Bread, the question becomes: How do I stop myself from eating the whole thing in one sitting? Kidding! Sort of. But seriously, proper storage is key to keeping that moisture locked in so it tastes just as good tomorrow as it does today.
The lovely thing about this recipe is that it actually gets a little better on day two! The moisture from the banana needs time to redistribute evenly through the crumb. If you plan on keeping it for just a few days, leave it right there on the counter, but you have to wrap it correctly.
Here is my best practice for keeping your loaf fresh:
- Room Temperature Storage: Wait until the bread is completely cool—and I mean totally cool, down to the center—before wrapping. If you wrap it warm, the steam gets trapped, and you get a legitimately gummy top crust. Once cool, wrap the entire loaf tightly in plastic wrap, or place it in an airtight container. It should stay wonderfully moist on the counter for about 3 to 4 days.
- Freezing for Later: This bread freezes like a dream, which is perfect if you made two loaves (and why wouldn’t you?). Wrap the cooled bread very tightly in two layers of plastic wrap, and then secure it with a layer of aluminum foil over that. This double wrap stops any freezer burn. It lasts beautifully frozen for up to three months.
Reheating to Restore That Fresh-Baked Warmth
If you’ve stored your Classic Moist Banana Bread in the fridge or freezer, you definitely want to warm it up before serving. Nobody wants cold banana bread! Warming it back up releases those beautiful spice aromas, making it taste like it just came out of the oven.
For slices that are slightly chilled or day-old, the microwave is your fast friend. Just take your slice, wrap it loosely in a paper towel (this prevents the edges from drying out while the center warms), and hit it for about 10 to 15 seconds. That’s usually enough to make it perfectly warm and soft again.
If you’re reheating a whole or half loaf that was just sitting on the counter, I prefer the oven method. It’s gentler. Preheat your oven to a very low 300°F (150°C). Wrap the bread loosely in foil and let it warm through for about 10 to 15 minutes. This gently coaxes the internal temperature up without drying out the exterior crust. It really melts the butter flavor back into the crumb!

Frequently Asked Questions About This Banana Bread Recipe
Can I use frozen bananas for this easy quick bread?
Absolutely, frozen bananas are a lifesaver! If you have bananas that are rock hard in the freezer, just pop them in a bowl on the counter overnight, or even just give them a quick defrost in the microwave—but be careful not to cook them! As they thaw, they release a ton of extra liquid, sometimes even more than room temperature bananas. When you measure them out, make sure you are measuring 2 cups of mashed fruit, and if the liquid seems excessive, just drain *some* of it off before adding it to the wet ingredients. You still want that rich banana flavor for your banana bread recipe!
How can I easily make this banana bread recipe vegan?
You can definitely adapt this! The two main substitutions will be the butter and the eggs. For the butter, just use a good high-quality plant-based butter stick—use the exact same measurement, 1/2 cup. For the eggs, which are important for structure in this recipe, I recommend using a flax egg substitute. Mix 2 tablespoons of ground flaxseed with 6 tablespoons of water, let it sit for about 5 minutes until it gets gelatinous, and use that amount (this equals two eggs). This keeps the richness in the loaf beautifully, making it a great alternative among basic baking recipes.
What is the best way to measure mashed banana accurately?
This is such a frequent question because it seriously impacts the look of your Classic Moist Banana Bread! Since bananas are not uniform, relying just on the number of bananas is a guess. The best way is to mash them first, then use standard dry measuring cups to measure out 2 cups. Don’t mash them until they are completely liquid smooth; a few little lumps remaining are perfectly fine, and actually nice for texture! If you want more detail on proper measuring techniques for all your baking projects, you can check out my guide on how to store and prep fruit for baking.
Why do you call this an ‘easy quick bread’?
I call it an easy quick bread because there’s no yeast involvement, no rising time, and no complex folds required—you mix the dry things, you mix the wet things, you combine them gently, and it goes straight into the oven. It’s a one-bowl mixing method (mostly!) and it’s incredibly forgiving, even if you don’t have a stand mixer. It’s the perfect entry point if you’re just starting out with basic baking recipes, but the flavor profile is anything but basic!
Share Your Classic Moist Banana Bread Creations
Now it’s your turn to bring this warmth into your own kitchen! Seriously, I am so excited for you once you pull that perfect, golden loaf of Classic Moist Banana Bread out of the oven. Don’t keep all that beautiful baking goodness to yourself!
I absolutely love seeing how my recipes turn out when real people make them. Did you use walnuts? Did you sneak in some chocolate? Or did you keep it perfectly pure?
Give It a Star Rating!
Once you get a slice—or maybe a couple of slices—let me know what you thought! Head right back up to the top of the page and give this banana bread recipe a star rating. Five stars means it’s going straight into your emergency recipe binder, right?
Tell Me All About It
Please, please drop a comment below telling me about your experience. I read every single one! Did you use bananas that were so black they looked suspicious? Did you successfully resist slicing it until it cooled completely? Sharing your triumphs and your kitchen stories is what community baking is all about!
And if you snapped a picture of your beautiful loaf warming up your countertop, I’d be thrilled if you shared it on social media and tagged me! Let’s spread the warmth that comes from baking something truly delicious from scratch.
Classic Moist Banana Bread
Ingredients
Equipment
Method
- Preheat the oven to 350°F (177°C). Spray a 9×5 loaf pan with nonstick cooking spray, line the pan with parchment paper, and set it aside.
- In a large mixing bowl, whisk together the flour, baking powder, baking soda, cinnamon, and salt.
- In the bowl of a stand mixer fitted with the paddle attachment, or in a large mixing bowl using an electric mixer, mix together the butter, granulated sugar, and brown sugar for 4-5 minutes or until light and fluffy.
- Mix in the eggs and vanilla, making sure to mix well after each addition. Stop and scrape down the sides of the bowl, then add the mashed banana and mix until fully combined.
- Add the dry ingredients to the wet ingredients and mix until just combined. Do not overmix the batter. Gently stir in the chopped walnuts.
- Scoop the batter into the prepared loaf pan and spread it around into one even layer.
- Bake at 350°F (177°C) for 55-65 minutes or until a toothpick inserted into the center comes out clean. Tent with aluminum foil to prevent excess browning if needed.
- Remove the bread from the oven and allow it to cool in the loaf pan for 20 minutes. Carefully remove the bread from the loaf pan and transfer it to a wire rack to cool completely.
Notes
Tried this recipe?
Let us know how it was!
Master of Culinary Visual Arts
My culinary journey started in the fast-paced kitchens of boutique coastal restaurants throughout Southern California, where I learned that beautiful food doesn’t have to be complicated. After nine years of professional cooking, I’ve made it my mission to prove that sophisticated, nutritionally sound meals can be accessible to busy home cooks who refuse to compromise on flavor or visual appeal.
What changed everything for me was watching talented home cooks feel intimidated by healthy cooking. That’s when I transitioned to private instruction, teaching busy professionals and families how to create restaurant-quality meals using simple techniques and ingredients they can actually find at their local grocery store. My “15-minute meal” frameworks are now used by several regional cooking schools!
As a third-generation Mexican-American, I love weaving vibrant Latin flavors into low-carb creations – proving that healthy eating can be both culturally authentic and visually spectacular. My “effortless elegance” philosophy is simple: nutritious food should look as stunning as it tastes, without requiring professional chef skills or expensive equipment.
When I’m not developing recipes in my San Diego coastal kitchen, you’ll find me surfing the local breaks with my Golden Retriever mix, Mango, who’s both my kitchen companion and unofficial taste-testing assistant. My personal low-carb lifestyle started as a way to maintain energy for my active coastal life, and it’s become the foundation for proving that healthy eating enhances rather than restricts life’s pleasures.