
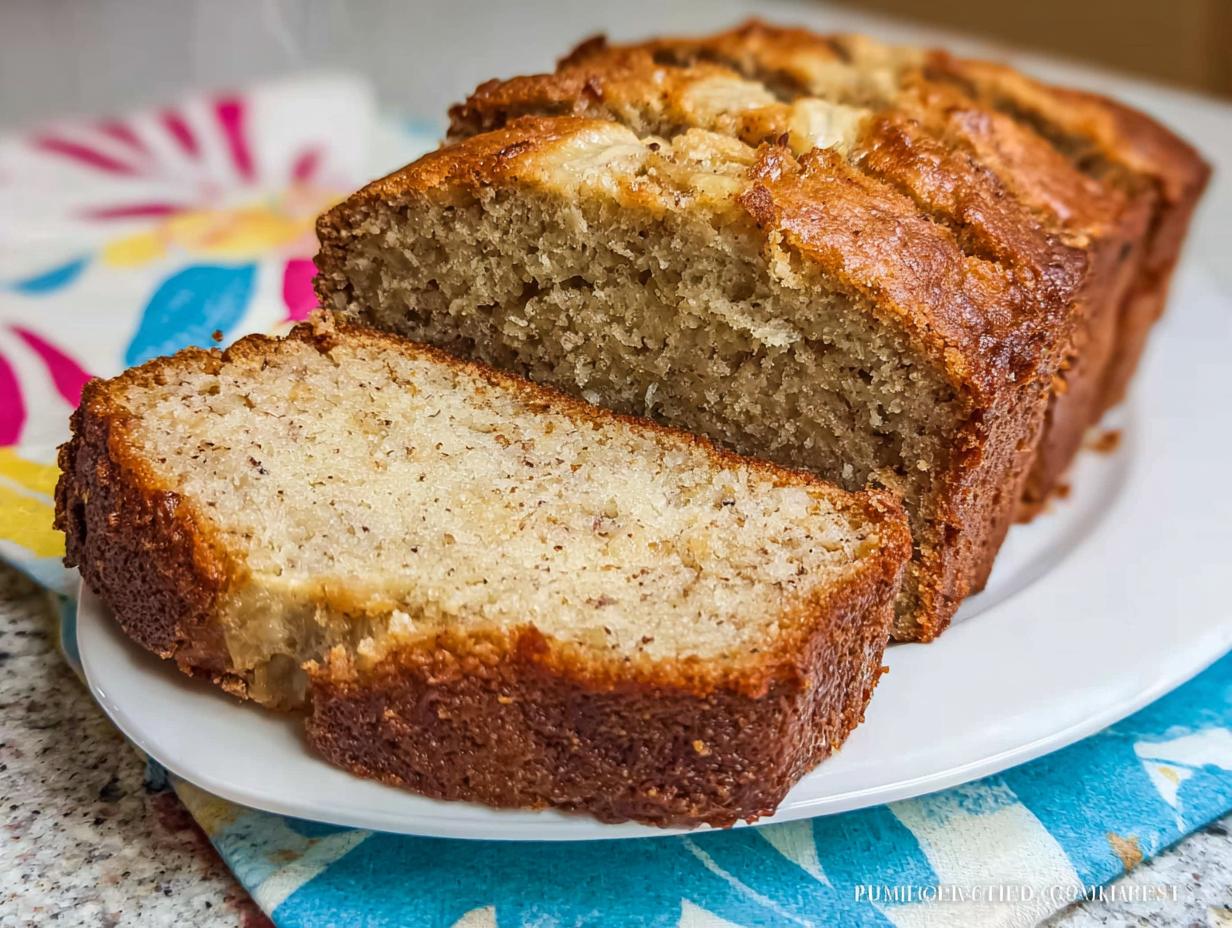
Oh, those rainy Saturdays! You know the ones—you’re stuck inside, and suddenly, those bananas on the counter look less like a snack option and more like a baking emergency. We’ve all been there, right? Well, I have the absolute go-to solution that turns those overly speckled, nearly black beauties into something magical: my Sour Cream Banana Bread. It’s honestly my most reliable, go-to family favorite.
I still remember the first time I baked Sour Cream Banana Bread with my kids. It was a rainy Saturday afternoon, and we had some overripe bananas sitting on the counter that were begging to be transformed. As we mixed the ingredients together, their giggles filled the kitchen, and the scent of vanilla and banana wafted through our home. When we finally took that first warm bite, it was a delightful moment of shared joy that brought us closer together—and now, it’s a cherished family recipe we make whenever we want to create sweet memories.
This recipe isn’t just good; it’s structurally sound! And believe me, as Maria Fernandez, your Certified Family Nutrition Strategist, I’ve made sure that while we are making happy memories, we’re also creating a fantastic, moist result every single time.
Why This Sour Cream Banana Bread Is Your New Family Recipe Ideas Staple
Let’s face it, busy parents need recipes that are foolproof and fast. This Sour Cream Banana Bread check all those boxes! It’s incredibly straightforward—no fancy techniques required—which makes it perfect for involving the kids. This isn’t just bread; it’s one of those wonderful family recipe ideas that you’ll pull out for decades.
- It always comes out perfectly soft, even if you bake two loaves back-to-back.
- It freezes like a dream, so you always have a snack ready for unexpected guests.
- The taste reminds everyone of home—pure comfort food!
Achieving That Extra Moist Banana Bread Texture
The absolute secret—which you now know—is the sour cream. It’s not just for tang! That fat content does magic, ensuring you get an extra moist banana bread crumb that stays tender days after baking. Seriously, forget dry banana bread forever; the sour cream guarantees richness.
Essential Ingredients for Perfect Sour Cream Banana Bread
When we talk about making this bread the *best* it can be, we have to talk about the ingredients. It’s not complicated, trust me, but preparation is everything! Since this recipe makes two loaves, you’ll need enough of the basics to go around, but every item plays a specific role in getting that signature melt-in-your-mouth texture.
First up, you need your base fats and sugars. Make sure that 1/3 cup of butter is truly softened—not melted, just squishy—so it creams up beautifully with the 1 1/4 cups of white sugar. That initial creaming step is vital for developing structure! Then come the binders: two eggs mixed until they’re happy before you introduce the real stars.
For the fruit flavor and moisture bomb, you need four large, I mean *very* ripe, mashed bananas. And of course, the ingredient giving us that luxurious tang and structure: the full cup of sour cream! We fold in the vanilla, and then we move to the dry components.
The dry mix centers around your 2 1/2 cups of flour. I want you to know that you have options here. Finally, we have the leavening agents—2 teaspoons of baking soda and 1/2 teaspoon of salt—which work hard to give the bread its rise. And don’t forget those optional walnuts if you like a little crunch!
Ingredient Notes and Substitutions for Sour Cream Banana Bread
Listen, substitutions happen, life happens! If you’re trying to sneak in a little extra goodness, this recipe is great because you can swap the all-purpose flour for white whole wheat flour, and it holds up beautifully. The bread will be slightly more rustic, but just as moist.
Now, about those bananas: the notes say use four large ones, but here’s my secret tip: if your bananas are smaller than average, just bump it up to five! The riper they are—meaning *darker* skin—the sweeter and more flavorful your bread will be. Don’t worry if they look tragic; that means they’re perfect for baking. And if someone in your house despises nuts, just skip the cup of optional chopped walnuts. It’s still delicious without them!
Baking Tips for Superior Sour Cream Banana Bread
Okay, now that you have your ingredients ready, let’s talk performance. This is where we turn good banana bread into amazing banana bread, and it mostly comes down to what you *don’t* do! The biggest piece of advice for successful sour cream baking is gentle mixing. I learned this the hard way. The first time I made this, I thought more mixing meant everything was better incorporated, and folks, I got bread that tasted dense, almost like a hockey puck!
Once you add the dry flour mixture in, grab your spatula and fold only until you see no more streaks of white flour. Seriously, stop right there! Overmixing develops the gluten, and we want tender bread, not tough bread. We’re aiming for perfection here.
Also, make sure your oven is dialed in correctly. The recipe calls for 325 degrees F, and I stick to that religiously. That lower temperature allows the insides to bake through evenly without forcing the outsides to brown too fast. If you use the link above for more general Baking Tips, you’ll see I mention checking your oven temperature often, because mine always runs a little hot!
Step-by-Step Instructions for Your Sour Cream Banana Bread
Alright, let’s get baking! You’ve prepped your ingredients, and now it’s time for the fun assembly. Remember, this whole recipe flows pretty quickly—the prep time is only about 15 minutes, and then they bake for about an hour. We are making two lovely loaves today, so make sure you have those two 8 1/2 x 4 1/2 inch loaf pans ready to go. Don’t forget to grease them generously!
Here is the basic flow, following the steps right from my recipe card:
- Get that oven set before you even look at the bananas! We need it at 325 degrees F.
- Take your large mixing bowl and start the creaming process—butter and sugar go first.
- Next, we add the eggs, mixing until they blend in nicely.
- Now for the wet magic: add in the sour cream, your mashed bananas, and that splash of vanilla. Stir until everything looks happy together.
- In a separate bowl (or straight into the main bowl if you’re feeling bold, but two bowls keep it cleaner!), whisk your dry ingredients—the flour, salt, cinnamon, and baking soda.
- Gently add the dry mix into the wet. I mean gently! Stir just until you don’t see any dry pockets of flour left. If you’re using them, toss in those chopped walnuts now and fold them in a couple of times.
- Divide that beautiful batter evenly between your two greased pans.
- Slide them into the oven! They need about 60 minutes total bake time. You know they are done when a toothpick inserted right into the center comes out spotless.
And that’s it! Cool them in the pan for about 10 minutes before turning them out onto a wire rack. If you need more general help with oven temperatures, you can always check out some helpful reading on banana bread with sour cream.
Mixing the Batter for the Best Sour Cream Banana Bread
I cannot stress this enough: the first step where you cream the softened butter and sugar is what sets the foundation. You need that mixture to be light and fluffy before the eggs even show up. Think pale yellow, like pale sunshine!
Once the wet ingredients are combined—the bananas, the sour cream, the vanilla—things get tender. When you bring those dry ingredients in, switch immediately to folding or stirring on the absolute lowest speed. When you see just a few lingering patches of flour, I need you to put the spoon down. Trust me, those last few flour bits will disappear during the 60-minute bake time without overdeveloping the gluten. That’s the secret handshake for amazing, soft results!
Making Freezer Friendly Loaves of Sour Cream Banana Bread
One of the best things about this recipe is that it yields two loaves, which is basically a built-in gift to your future self! That’s why this is such a solid choice for freezer friendly loaves. Baking once means having dessert or breakfast taken care of for weeks!
The key here is cooling completely—and I mean *completely*. Don’t wrap them while they are even slightly warm, or you’ll end up with soggy spots, and nobody wants that. Once they are totally cooled, wrap each loaf tightly, first in plastic wrap, and then maybe wrap them again in foil or place them in a heavy-duty freezer bag. They last beautifully for about three months this way.
When you need a snack fast, just pull one out right before bed. Let it thaw on the counter overnight, and it’s perfect for breakfast with a cup of coffee the next morning. Easy peasy!
Serving Suggestions for Your Homemade Sour Cream Banana Bread
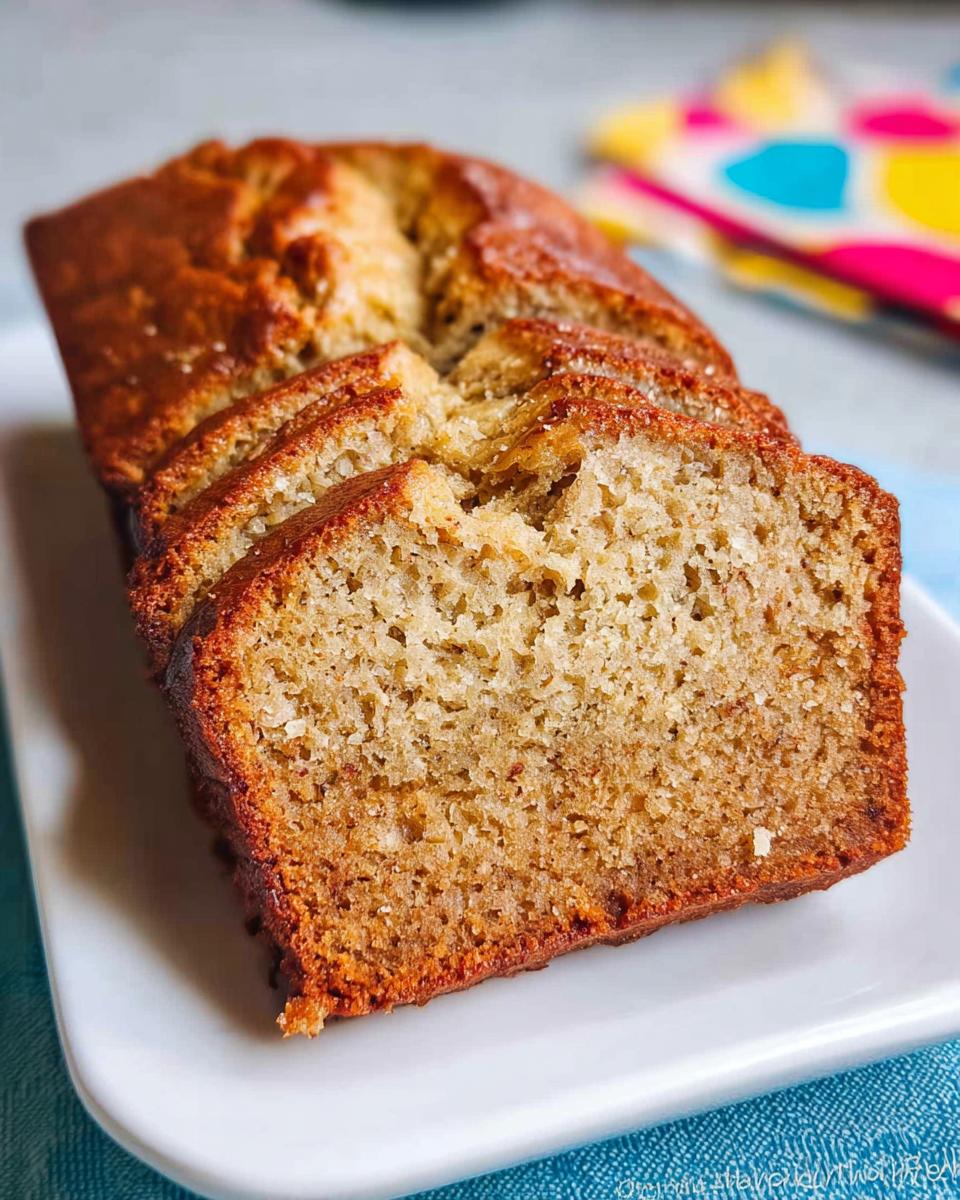
Once your gorgeous loaves of Sour Cream Banana Bread are cooled and sliced, the real decision begins: how should we eat this magical creation? Honestly, it’s so flavorful and perfectly moist right out of the oven that it really doesn’t need much adornment, but sometimes dressing it up just adds to the fun!
For us, the simplest way is still the best way. A slice on its own while it’s still slightly warm is my favorite way to sample the first loaf. That tenderness is unmatched when it hasn’t fully set yet. This makes a fantastic, quick breakfast when you’re rushing everyone out the door, or maybe a mid-afternoon snack when the kids need an energy boost.
If you want to elevate it just a tiny bit, try toasting a slice lightly. It brings out the spice aroma wonderfully! A thin spread of quality salted butter that melts right into the holes is heavenly. Since we’ve already built so much moisture in with the sour cream, you absolutely don’t need cream cheese frosting here unless you’re serving it for a party!
It is divine alongside a hot cup of coffee or a tall glass of cold milk. Honestly, having this on hand makes packing lunches so much easier, too. It’s healthy enough to feel like you’re doing something good, but delicious enough that nobody complains about their snack!
Frequently Asked Questions About Sour Cream Banana Bread
Because this recipe is so popular in our little community group, I always get asked the same few things when people try baking it for the first time. Don’t hesitate to ask your own questions in the comments below, but here are the usual suspects, including some tips on those Ingredient Substitutes!
What if my bananas aren’t perfectly ripe?
Oh, honey, I wish I could give you good news here, but for the best results, they truly need to be *very* ripe. If they are just slightly yellow, you are missing out on vital sweetness and moisture. If you only have medium-ripe bananas, try baking them on a sheet pan at 300 degrees F for about 15-20 minutes until the peels are black and spotty. Let them cool completely before peeling and mashing. That little trick helps concentrate the flavor!
Can I easily make this without any walnuts?
Absolutely, yes! Remember how I said the walnuts are optional? You can skip them entirely without changing the baking time or texture one bit. If you still want that bit of texture without nuts, try tossing in a cup of chocolate chips instead. That makes a wonderful—though perhaps slightly less healthy—variation for the kids!
Can I swap the sour cream for buttermilk?
This is a tricky one! While both sour cream and buttermilk are acidic ingredients necessary for reacting with the baking soda, they aren’t direct one-for-one swaps here. Buttermilk is thinner and less fatty than our full-fat sour cream. If you *must* substitute, I would suggest using Greek yogurt instead of buttermilk, as it’s much closer in consistency to sour cream baking. If you use Greek yogurt, you may need to add an extra splash of milk to help thin the batter just a tiny bit so it mixes smoothly.
Is this recipe good for making freezer friendly loaves?
It’s one of the best! As I talked about earlier, this is one of my favorite family recipe ideas because it freezes so well. The high moisture content from the bananas and sour cream protects the loaf perfectly during freezing. Just ensure you wrap them super tight in several layers once they are completely cool—that’s the key to making sure they don’t get freezer burn!
Estimated Nutritional Information for Sour Cream Banana Bread
I always get asked about the nutritional breakdown because, as a mom focusing on family health, I need to know what we’re serving! While this bread is a true treat, having an estimate on what’s inside helps me balance out our weekly meals. This is a fantastic example of something you can feel good about making, especially since we are getting some potassium from those bananas!
This information below is based on the recipe yielding two standard loaves, and the numbers reflect one serving size. Please keep in mind, because we all use slightly different measurement brands, these are just fantastic guidelines, not gospel. You can find more generalized information on healthy baking by checking out some Nutritional Information resources!
Here is what you can generally expect per serving:
- Calories: About 292
- Carbohydrates: Around 43 grams
- Total Fat: Roughly 12 grams
- Protein: About 5 grams
- Sugar: That’s around 24 grams, mostly natural sugars from the ripe fruit and molasses in the brown sugar!
It might sound like a lot of sugar, but remember, a lot of that sugar is coming from those gorgeous, dark, ripe bananas we loaded in there! This bread is best enjoyed as a weekend breakfast treat or an after-school snack, not a low-carb staple, but we’ve kept the fat content down nicely by using just a bit over 1/3 cup of butter total for two whole loaves!
Share Your Sour Cream Banana Bread Creations
Now that I’ve shared all my secrets for making the best, most tender Sour Cream Banana Bread—from selecting the right bananas to avoiding that dreaded overmixing—it’s your turn to get into the kitchen! Honestly, seeing your family enjoy these little loaves is the whole point of sharing my cherished recipes.
I truly hope this warm, comforting bread brings as many smiles to your table as it does to mine. Did your picky eater finally try it? Did the kids love helping you mash the bananas? I want to hear every little detail!
Please take a moment to come back here and leave me a rating! Five stars if it made your kitchen smell amazing, or tell me exactly what you thought so I can adjust my notes for the next baker. And if you snap a picture of your finished loaves cooling on the rack, tag me on social media! Sharing these little victories and family traditions is what makes baking so much fun. Happy baking, friends!

Sour Cream Banana Bread
Ingredients
Equipment
Method
- Preheat oven to 325 degrees F and generously grease two loaf pans that are approximately 8 1/2 x 4 1/2 inches in size.
- Cream butter and sugar in a large bowl. Add the eggs and mix well. Add sour cream, mashed bananas, vanilla and stir to combine.
- Add the flour, salt, cinnamon and baking soda to the wet ingredients and stir until just combined. Fold in the walnuts, if using.
- Divide the batter evenly between prepared loaf pans. Bake for 1 hour or until a toothpick inserted in the center comes out clean.
Nutrition
Notes
Tried this recipe?
Let us know how it was!
Certified Family Nutrition Strategist
My path into family nutrition began working with Phoenix Area Family Services, where I saw how traditional nutrition advice often ignored real-world constraints like budget limitations, time crunches, and kids who refuse to eat anything green. That experience sparked my mission to develop meal planning systems that work with family realities, not against them.
Over eight years, I’ve helped hundreds of families reduce grocery spending by 25% while dramatically improving their nutrition. My meal planning frameworks have been adopted by local wellness centers because they actually work for busy parents juggling different ages, preferences, and dietary needs in one household.
As a bilingual first-generation Mexican-American and mother of three, I personally navigate the daily challenge of feeding a family nutritiously while honoring cultural traditions and managing a household budget. My “kid-friendly low-carb” protocols show families how to gradually introduce healthier options without triggering mealtime battles or abandoning beloved family recipes.
My “realistic wellness” philosophy is straightforward: health improvements must work within existing family dynamics and financial realities to be truly sustainable. When I’m not developing meal planning systems, I’m creating portable trail snacks for our weekend family hiking adventures – because healthy eating should fuel the life you want to live.
My personal low-carb journey started after pregnancy as a way to regain energy for active parenting, and that experience continues to inform my professional commitment to making healthy eating feel supportive rather than burdensome for busy families.