
Oh, you know those nights, right? When the clock is laughing at you, the kids are starving, and the thought of complicated stovetop sauces makes you want to order pizza? Trust me, I’ve been there! That’s exactly when this super simple bbq chicken recipe saved my sanity and ended up becoming a family legend. Seriously, I’m talking about the easiest, juiciest Honey BBQ Baked Chicken Legs you’ll ever make.
One evening, after a truly chaotic day filled with school activities and work demands, I found myself scrambling to make dinner. With three hungry kids and a time crunch, I opened my fridge and saw a pack of chicken legs staring back at me. Inspired by the bottle of BBQ sauce on my shelf, I whipped up what became our family’s favorite Honey BBQ Baked Chicken Legs. The aroma wafting through the house was enough to draw everyone to the kitchen, and that night we shared not just a meal, but laughter and great memories. This recipe has since become a staple!
It proves that you don’t need hours to make something truly delicious. As a Certified Family Nutrition Strategist, Maria Fernandez, I always look for ways to maximize flavor while keeping things quick, and this recipe delivers big flavor with minimal fuss. It’s proof that weeknight magic can absolutely happen!
Why These Honey BBQ Baked Chicken Legs Are a Weeknight Hero
When you’re dodging dinner stress, you need reliability, and these sticky baked legs provide that in spades. They aren’t just for weeknights, though; they are fantastic for impromptu game day dinners when friends drop by unexpectedly.
- They deliver that perfect sweet and smoky flavor without demanding hours over a grill or smoker.
- Cleanup is ridiculously simple because we line the pan—a total win for busy parents!
Quick Prep for Fast Family Meals
Okay, here’s the best part for all my fellow multi-tasking parents: the actual hands-on prep takes less than ten minutes. Seriously! You toss the chicken, you get the spices on, and it’s ready for the oven. That speed means you can manage homework supervision or just collapse on the sofa while it cooks itself.
Kid-Approved Sweet and Smoky Flavor
I wasn’t kidding when I called this a family favorite. The honey in the sauce caramelizes just enough to make it sound exciting, but it’s balanced perfectly by the savory spices. If your kids turn their noses up at spicy food, this flavor profile is the way to introduce them to delicious BBQ; it’s sweet, warm, and just doesn’t make anyone reach for the water pitcher.
Gathering Ingredients for Perfect Honey BBQ Baked Chicken Legs
When it comes to getting these Honey BBQ Baked Chicken Legs ready, simplicity is key. That fifteen minutes of prep time I mentioned earlier? It’s totally achievable because the ingredients list is short and sweet, which is perfect when you’re juggling everything else!
You’ll need about a pound and a half of chicken drumsticks, which is usually enough for three people, maybe four if you have little ones asking for seconds. The real star, besides the BBQ sauce, is the spice blend. You’re going to mix up some good quality olive oil with your basic pantry spices: salt, pepper, paprika, garlic powder, onion powder, and just a little kick of cayenne pepper.
Make sure you grab at least a cup and a half of your favorite store-bought barbeque sauce. I usually grab one that has a nice little sweetness to it, but feel free to use your preferred brand. Don’t skimp on the last bit of sauce, because we use it for those beautiful final coats!
Step-by-Step Guide to Making Honey BBQ Baked Chicken Legs
Now we get to the fun part—turning those seasoned legs into glossy, irresistible dinner stars! Don’t stress about the timing or the broiler; I walk you through it, and trust me, if I can keep this calm while wrangling toddlers, you can certainly handle this easy recipe. We’re aiming for that amazing caramelized exterior that makes these Honey BBQ Baked Chicken Legs absolutely addictive.
Preparation and Initial Seasoning
First things first, crank that oven up to 400 degrees F! While it heats, grab your baking sheet and line it with some foil. This is my pro-tip for zero cleanup later! Toss those lovely drumsticks in the large bowl with the olive oil and all those beautiful spices we mixed up. Make sure every single piece is coated evenly. Don’t just dump the spices on top—really toss them around! Then, spread the chicken out on your prepared sheet in a single layer. They need space to breathe and brown, so don’t crowd them!
The Baking and First Glaze for Sticky Baked Legs
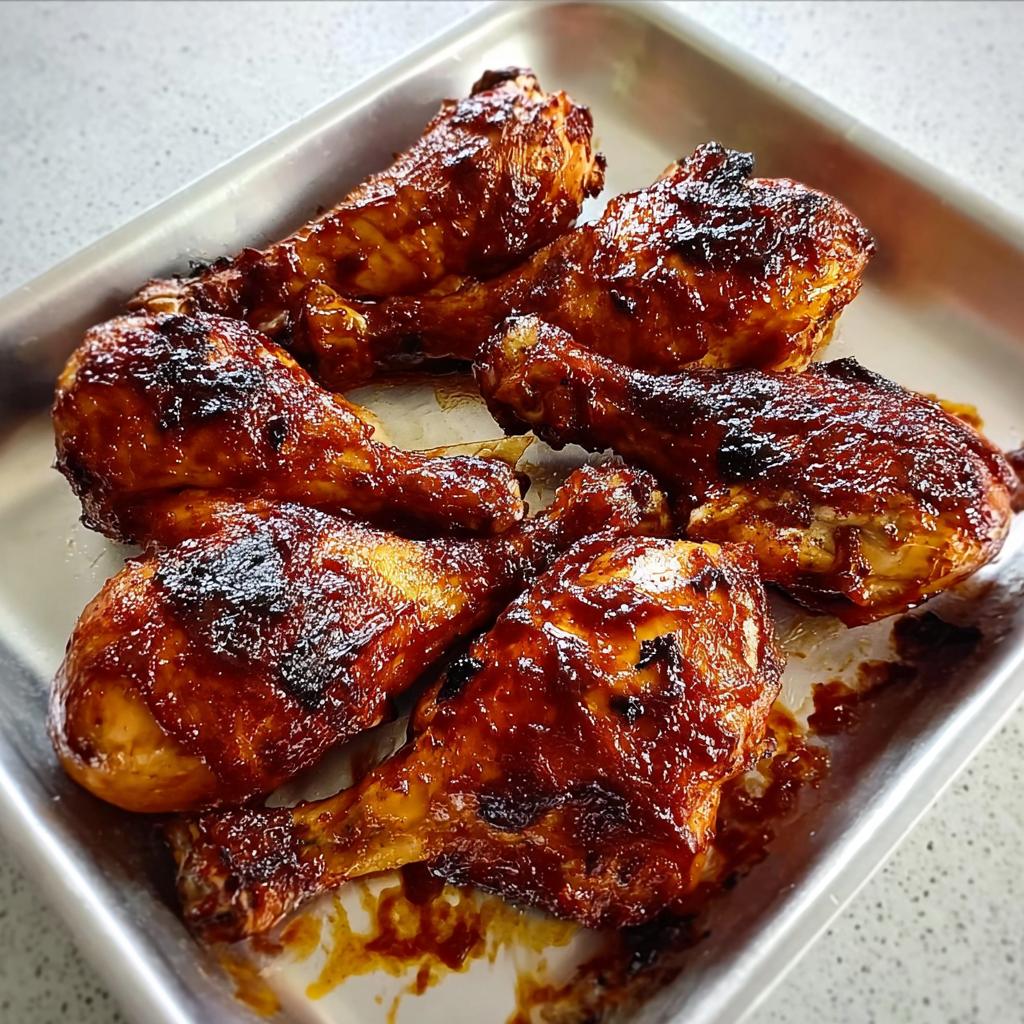
Pop those seasoned legs into the 400°F oven to start their cooking marathon. They need a good 20 minutes just to get half-cooked through. When those 20 minutes are up, carefully pull the tray out. Now it’s time for the BBQ sauce magic! Brush them generously with the sauce on top. Pop them back in for another 7 to 8 minutes. This first glaze starts building that wonderful sticky baked legs texture!
Flipping and Achieving That Perfect Finish Under the Broiler
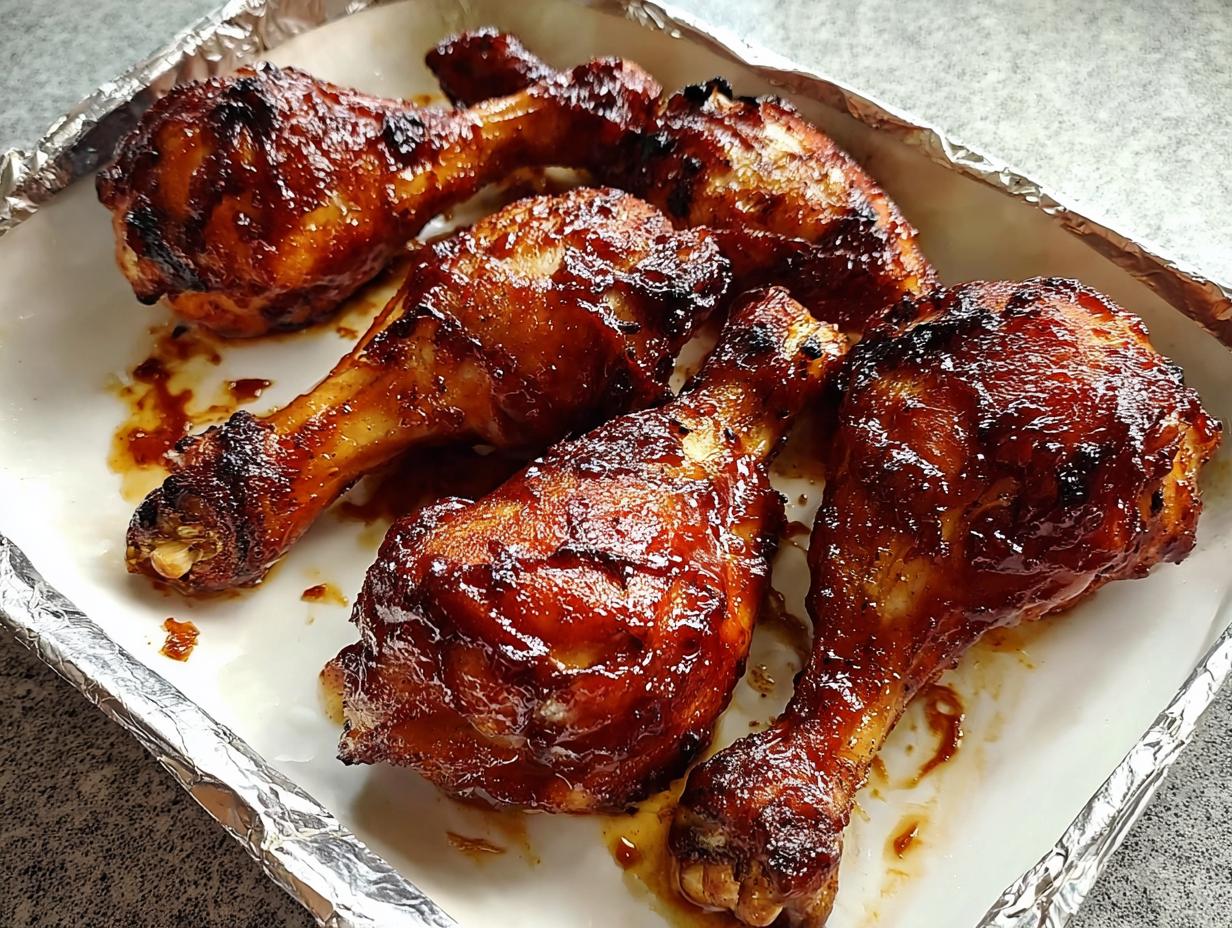
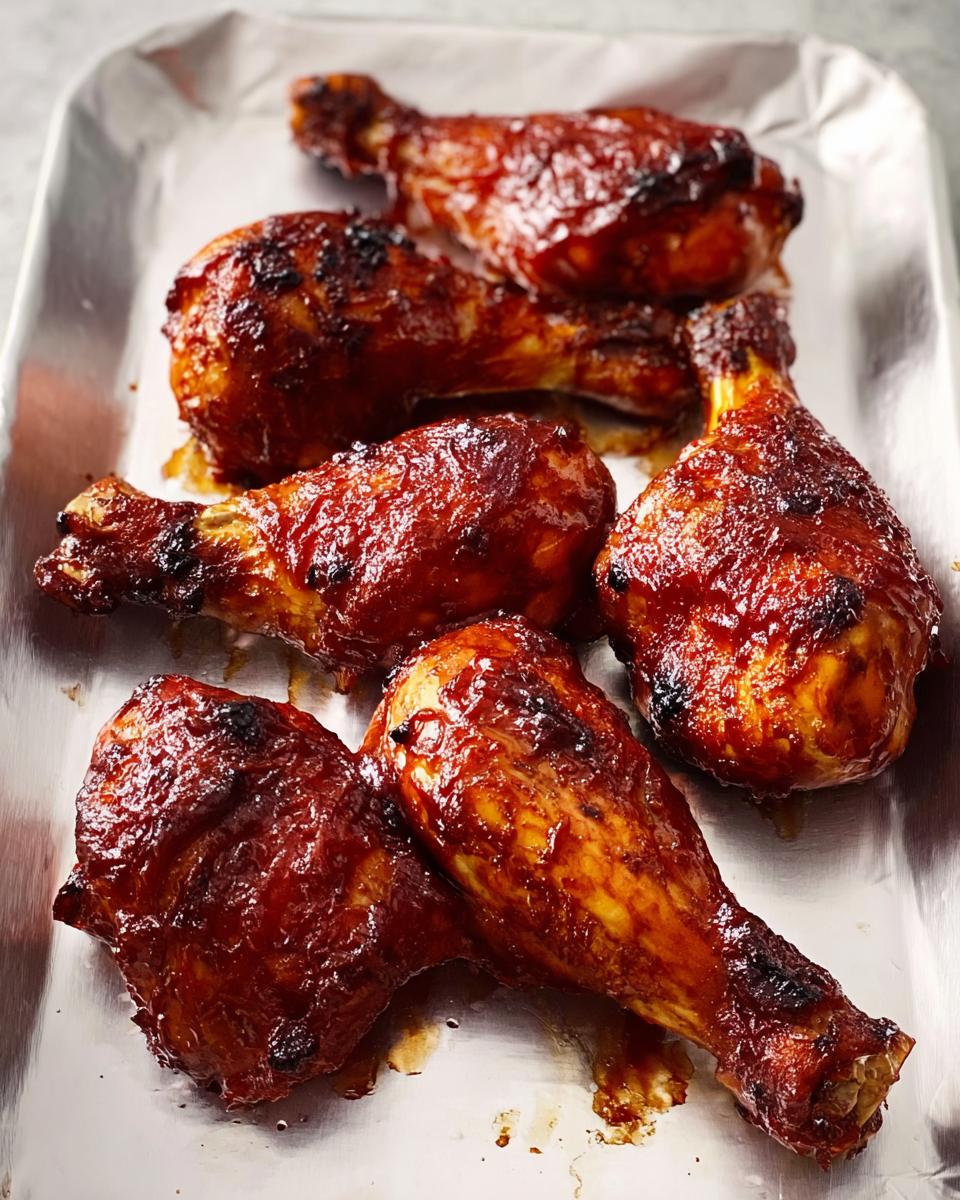
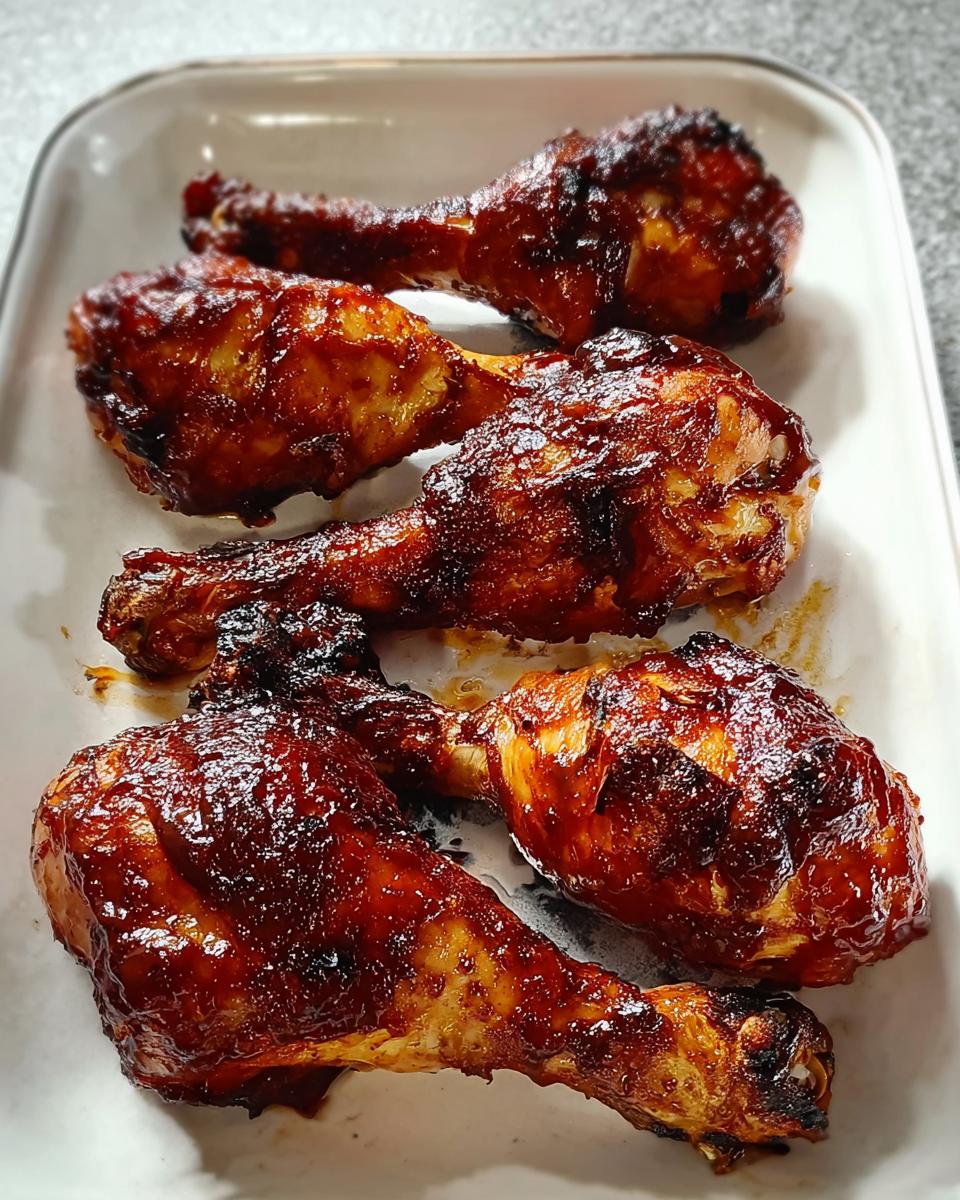
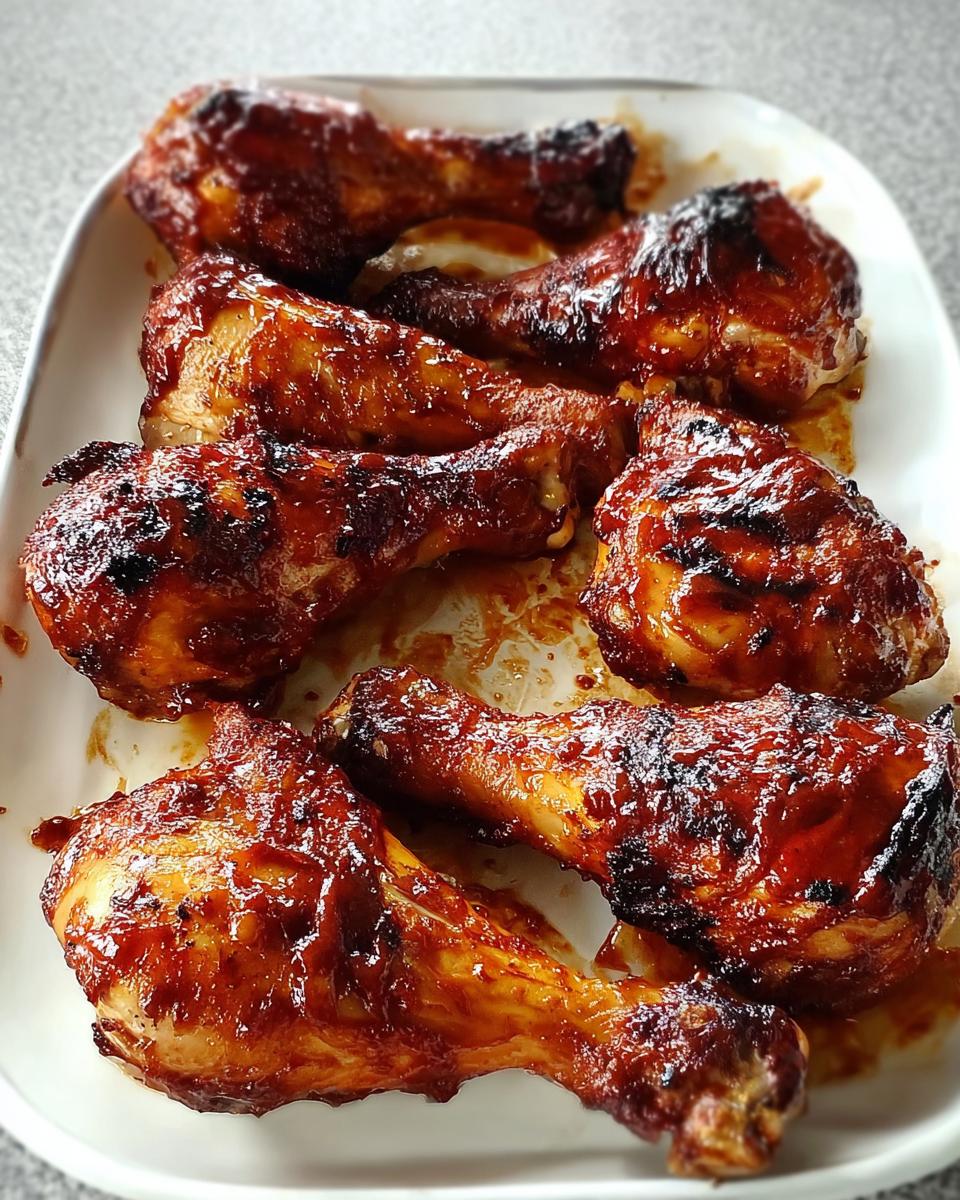
Quickly flip every single leg over. Seriously, flip them all! Brush the second side with the final coating of sauce. Back into the oven they go for 7 or 8 more minutes. Once that time is up, we unleash the broiler. Move that rack closer to the heat source—about six inches away is perfect. Brush them one last time and broil for 3 to 4 minutes, watching like a hawk! Flip them again, sauce that last side, and broil for just 3 to 4 more minutes until the juices run clear. Use that thermometer one last time; we need 165 degrees F near the bone for safety, but my bbq chicken recipe usually gets them even hotter and beautifully bubbly!
Tips for Perfect Honey BBQ Baked Chicken Legs Every Time
Look, even simple recipes have little secrets. If you want skin that’s browned and caramelized instead of just steamed, listen up! The biggest mistake people make when cooking sticky baked legs is saucing them too early. If you coat them heavily right at the beginning, that sugar burns before the meat is even cooked through, and nobody wants scorched honey!
My top tip is to always let the chicken get most of its cooking done naked—seasoned, but sauceless. Then, for the absolute crispiest coating, try draining off any pooled grease from the pan before that very last saucing session. And remember that broiler? It’s powerful! Keep an eye on those last few minutes. Those legs can go from perfect to blackened in about 30 seconds flat if you walk away to grab something.
Ingredient Substitutions for Your Honey BBQ Baked Chicken Legs
Listen, cooking for a family means sometimes you have to roll with what you have in the pantry, right? These Honey BBQ Baked Chicken Legs are so forgiving, which is another reason I love them so much for those chaotic nights. If you are out of the exact BBQ sauce I used, please don’t panic!
If you want to dial up the heat in your sauce, try stirring in a dash of hot sauce or using a spicier BBQ blend instead of the sweeter one. On the flip side, if you’re cooking for little ones who are sensitive to spice, just skip the cayenne pepper entirely—the sweet honey will still shine through beautifully. You can even mix in a teaspoon of apple cider vinegar for a bit of tang if your sauce is too flat.
Now, let’s talk chicken cuts. I use drumsticks because they are budget-friendly and stay so juicy, but if you only have bone-in, skin-on chicken thighs on hand, go for it! Thighs have a bit more fat, so they stay moist easily, but because they are thicker, you might need to add an extra 10 to 15 minutes to that initial baking time before you start applying the sauce. Just check for that safe internal temperature. Or, if you’re looking for another great base idea for baked chicken, check out this resource for baked BBQ chicken drumsticks!
You can also swap out the olive oil if you need to; any neutral oil like canola or vegetable oil works just fine when you are tossing the spices on during the first step.
Storage and Reheating Instructions for Leftover Honey BBQ Baked Chicken Legs
The best part about making a double batch of these Honey BBQ Baked Chicken Legs is having leftovers for lunch the next day! They are truly delicious cold right from the fridge—seriously, try it next time! But if you want them warm and that sauce nice and gooey again, you need to treat them gently so they don’t dry out.
First off, let the chicken cool down completely before you put it away. Stuffing hot chicken into a sealed container is a recipe for soggy skin, and we worked hard to get that beautiful glaze!
Store your leftovers in a good quality airtight container. They should stay perfectly fine and tasty in the refrigerator for about three to four days. Don’t leave them sitting out more than two hours, though—safety first, always!
Reheating for That “Just Baked” Flavor
If you must use the microwave, go for it, but I promise you, the texture suffers. The microwave turns that beautiful crust soft. If you’re in a huge hurry, use 50% power and heat them in short bursts, maybe 30 seconds at a time.
My favorite way to revive these babies is in the oven. Preheat your oven to a relatively low temperature, maybe 350 degrees F. Lay the Honey BBQ Baked Chicken Legs out on a foil-lined baking sheet—you can put a little piece of parchment paper down first if you’re worried about sticking. Bake them for about 10 to 12 minutes. That gentle warmth brings the sauce back to life without incinerating the outside.

If you have an air fryer, even better! Toss them in for just about 4 minutes at 350°F. The air fryer shocks the outside back into crispiness much faster than the standard oven. No matter how you reheat them, just make sure they reach that safe 165 degrees F internal temperature again.
Understanding the Health Benefits of This BBQ Chicken Recipe
When you’re busy feeding the crew every night, sticking to healthy choices can feel like a second job. But that’s why I love this easy bbq chicken recipe so much! As Maria Fernandez, your friendly Certified Family Nutrition Strategist, I always look for smart swaps. The biggest benefit here is simple: we are baking these Honey BBQ Baked Chicken Legs instead of frying them. That alone cuts down on a ton of unnecessary grease!
Chicken legs are a fantastic source of protein, which keeps everyone full and energized for playing or studying. Now, let’s be real—we are keeping the skin on for flavor and that delicious crunch, but remember that the skin holds most of the saturated fat, so enjoying it in moderation is the secret. When you bake them at 400 degrees, you get that amazing texture while keeping the overall meal much lighter than traditional fried versions. It’s a delicious win for weeknight dinners!
Frequently Asked Questions About Honey BBQ Baked Chicken Legs
If you’re looking for more tips on mastering your Honey BBQ Baked Chicken Legs, you’ve come to the right place! I get asked the same few things all the time, especially when people are planning their first batch for game day dinners. Let’s clear up a few mysteries so you can cook with total confidence!
What is the best temperature for baking these sticky baked legs?
Trust me on this one: start hot! The recipe calls for preheating your oven to 400 degrees F. This high initial heat gets the chicken cooking quickly and starts rendering that fat just enough to begin crisping the skin right away. If you go too low, the chicken steams instead of bakes, and you won’t get that lovely foundation needed for truly sticky baked legs later on when you add that sweet honey glaze!
Can I make Honey BBQ Baked Chicken Legs ahead of time?
Yes, absolutely you can! If you want to get ahead of dinner, you can season the chicken and toss it in the oil just like in Step 2, cover it, and keep it chilled in the fridge for up to 24 hours. Don’t sauce it yet, though! When you’re ready to cook, just add about 5 to 8 minutes to that initial baking time since the chicken will start out colder. You can definitely prep the full bbq chicken recipe a day ahead.
How do I ensure the BBQ sauce doesn’t burn?
This is the million-dollar question! The trick is patience regarding liquid sugar. You wait until the chicken is already mostly cooked—after that first 20 minutes—before you apply the initial layer of sauce. That way, the sauce is just melting and caramelizing, not burning. Also, watch that broiler time like it’s gold! When you move them under the broiler for the final finish, go for short blasts of 3 to 4 minutes and flip often. If you are worried, you can always just skip the broiler and bake them an extra few minutes at 375°F, though the crust won’t be quite as bubbly. Check out these related tips on bbq chicken recipe methods if you want more assurance!
Serving Suggestions for Your Family Dinner
You’ve mastered the Honey BBQ Baked Chicken Legs, now what about the rest of the plate? Since we spent less than an hour on dinner, we can afford a super quick side dish. Don’t feel obligated to make anything complicated!
For a truly fast meal, serve these sticky baked legs over a simple bed of plain white rice or grab a bag of pre-cut coleslaw mix. Corn on the cob is fantastic—just microwave the ears right in their husks for about three minutes! If you want something green, steamed green beans with a little sprinkle of garlic salt are always a hit. Keep it simple so you can all enjoy that amazing sweet and smoky flavor!
Share Your Honey BBQ Baked Chicken Legs Experience
Whew! It feels like we successfully navigated a perfect weeknight dinner together, making the best game day dinners or family meal imaginable. I really hope these tips help you bring that sticky, sweet, and smoky chicken right to your own table without breaking a sweat!
Now, I’m dying to hear what you thought. Did you try making these Honey BBQ Baked Chicken Legs for the first time? Did your family devour them as fast as mine does? Don’t be shy—let me know in the comments below!
Tell me specifically: What was your favorite side dish pairing? And for the adventurous ones out there, spill the beans: did you try that little kick of cayenne pepper, or keep it purely sweet for the kiddos? Your feedback helps me keep perfecting these recipes for all us busy cooks out there. Rate this recipe up top, leave your notes, and let’s keep this cooking community going strong!
Honey BBQ Baked Chicken Legs
Ingredients
Equipment
Method
- Preheat the oven to 400 degrees F (200 degrees C). Line a baking sheet with foil.
- Mix olive oil, salt, pepper, paprika, garlic powder, onion powder and cayenne together in a large bowl. Add drumsticks and toss to coat. Spread them out on the prepared baking sheet.
- Bake in the preheated oven for 20 minutes. Remove from the oven and brush with barbeque sauce; bake for 7 to 8 minutes.
- Flip the drumsticks, brush again with barbeque sauce, and bake for an additional 7 to 8 minutes.
- Set an oven rack about 6 inches from the heat source and turn on the oven’s broiler.
- Brush the drumsticks with more barbeque sauce and broil for 3 to 4 minutes. Flip the drumsticks, brush with barbeque sauce, and broil until the chicken is no longer pink at the bone and the juices run clear, 3 to 4 more minutes. Check that an instant-read thermometer inserted near the bone reads 165 degrees F (74 degrees C).
Notes
Tried this recipe?
Let us know how it was!
Certified Family Nutrition Strategist
My path into family nutrition began working with Phoenix Area Family Services, where I saw how traditional nutrition advice often ignored real-world constraints like budget limitations, time crunches, and kids who refuse to eat anything green. That experience sparked my mission to develop meal planning systems that work with family realities, not against them.
Over eight years, I’ve helped hundreds of families reduce grocery spending by 25% while dramatically improving their nutrition. My meal planning frameworks have been adopted by local wellness centers because they actually work for busy parents juggling different ages, preferences, and dietary needs in one household.
As a bilingual first-generation Mexican-American and mother of three, I personally navigate the daily challenge of feeding a family nutritiously while honoring cultural traditions and managing a household budget. My “kid-friendly low-carb” protocols show families how to gradually introduce healthier options without triggering mealtime battles or abandoning beloved family recipes.
My “realistic wellness” philosophy is straightforward: health improvements must work within existing family dynamics and financial realities to be truly sustainable. When I’m not developing meal planning systems, I’m creating portable trail snacks for our weekend family hiking adventures – because healthy eating should fuel the life you want to live.
My personal low-carb journey started after pregnancy as a way to regain energy for active parenting, and that experience continues to inform my professional commitment to making healthy eating feel supportive rather than burdensome for busy families.