
Are you tired of appetizers that are either soggy or just plain boring? Trust me, I’ve been there, especially after a long week demanding kitchen creativity! I’m Clara Martinz, and with my background as a Master of Culinary Visual Arts, I know that an appetizer needs to be a showstopper. That’s why when I first served these Sweet Chili Glazed Chicken Wings at a backyard barbecue, the reaction was priceless. The sun was setting, and I just wanted to serve something way beyond typical grill fare. When my family and friends took that first crispy, spicy, and sweet bite, I knew these were keepers. This recipe perfectly nails that sticky chicken recipe magic, proving that food should always bring connection and joy!
Why You Will Love These Sweet Chili Glazed Chicken Wings
Honestly, I developed this recipe because I needed wings I could rely on—wings that tasted incredible without needing hours of fuss. These Sweet Chili Glazed Chicken Wings hit every single mark, which is why they instantly became my go-to for any gathering, big or small.
Here’s why I know you’re going to adore making these:
- They deliver that incredible balance: perfectly sweet from the sugar, just enough heat, and that savory depth from the marinade. Seriously good flavor layering!
- They work beautifully in the air fryer, meaning less oil splatter and cleanup for you. We love easy cleanup, right?
- These wings are amazing straight out of the air fryer or stovetop, achieving that desirable sticky chicken recipe texture.
- The prep time is super quick—we’re talking 20 minutes max to prep everything before the cook time starts.
- They transition perfectly from a weeknight treat to those essential tailgate snacks everyone fights over first.
- As an appetizer, they offer huge flavor payoff which always makes my guests feel spoiled.
Perfect Texture Every Time
The secret to avoiding soggy disappointment lies right in the dry coating, and this is where my culinary training kicks in! We use a blend of potato starch (or cornstarch if you can’t find it) along with a little baking powder. That baking powder is magic; it helps the coating stay light, airy, and incredibly crisp when cooked, meaning you get a fantastic bite every time, even under the glaze.
Quick Preparation for Sweet Chili Glazed Chicken Wings
Don’t let the delicious glaze fool you into thinking this is a complicated, multi-day project. My favorite thing about these Sweet Chili Glazed Chicken Wings is that the total active time is so short. You marinate them briefly—20 minutes is enough if you’re in a rush, though overnight is always better!—and then it’s quick coating and cooking. They are genuinely ready from start to finish in under 45 minutes, which is practically instant gratification in the kitchen!
Essential Ingredients for Sweet Chili Glazed Chicken Wings
Okay, now that we know these wings are worth your time, let’s talk about what makes them taste so unbelievably good! Building flavor is everything when you’re aiming for those next-level asian style appetizers. This recipe is broken down into three clear parts: the marinade, the dry coating that gives us the crunch, and the star of the show, the glaze itself.
This recipe is perfectly portioned to feed about 6 hungry people (or 3 of my teenage boys!), yielding about 2 pounds of amazing chicken wings.
For the Marinade and Coating
First step is getting flavor *into* the chicken before we even think about frying or air frying. You want to grab everything for the wet marinade and mix it up well. But pay close attention to the wings themselves—they absolutely must be patted very dry first! That surface moisture is the enemy of crispiness, so grab a few paper towels and get those 2 pounds of chicken wings patted down thoroughly.
Once marinated, we pull out the dry stuff. This mixture is where we build that signature crunch. Remember to use potato starch or cornstarch—that’s key for getting that authentic, light crust!
- For the Marinade: 1/4 cup soy sauce, 2 tablespoons brown sugar, 2 tablespoons rice vinegar, 1 tablespoon neutral oil.
- For the Coating: 1/2 cup potato starch or cornstarch, 2 teaspoons garlic powder, 1/2 teaspoon onion powder, and 1/2 teaspoon baking powder.
Crafting the Signature Sweet Chili Glaze
The sauce is what pulls it all together and makes these the ultimate sticky chicken recipes. When we make this, we need to reserve some of that lovely marinade from earlier—don’t forget that part! We build the sauce in a saucepan. You really want to focus on getting that sweet chili sauce nice and thick.
Here are the building blocks for that beautiful, glistening glaze:
- 5 garlic cloves, minced (don’t skimp here, fresh is best!)
- The remaining marinade you set aside earlier.
- 1/2 cup sweet chili sauce (the main flavor driver!)
- 1 teaspoon sesame oil for that nutty finish.
- 2 tablespoons of water, just in case things seize up or get too salty while simmering.
Step-by-Step Instructions for Sweet Chili Glazed Chicken Wings
Alright, this is where we turn simple ingredients into gold! Making these Sweet Chili Glazed Chicken Wings is simple, but timing is everything to get that ultimate crunch. We have two amazing cooking paths here—the oven-free air fryer or the tried-and-true stovetop fry—and both are fantastic, but you need to manage your steps!
Marinating and Preparing the Wings
First things first, we wake up those wings with flavor. Dump all your marinade ingredients—the soy sauce, brown sugar, vinegar, and oil—into that Ziplock or airtight container. Give it a good shake until that brown sugar dissolves. Now, toss in your 2 pounds of patted-dry chicken wings. Massage that goodness in there—really work it into every nook! Seriously, try to let them hang out for at least 20 minutes. If you can swing it overnight in the fridge? Even better magic happens!
Here is the crucial bit that trips people up: Before you coat these babies in starch, you need to pull out about half a cup of that marinade and pop it into a separate small dish. That reserved marinade is our secret weapon for the sauce later. Don’t forget this step, or your glaze will taste sad!
Achieving Crispiness: Coating Technique
Time for the crunch coat! Take your dry mixture—the starch, garlic powder, onion powder, and that little bit of baking powder—and pop it all in a clean Ziplock bag. Add your marinated wings (letting excess marinade drip off first, please!) and shake them crazy until they look totally coated. Don’t rush the coating process itself.
Now for my pro tip, building on that culinary expertise: Once your wings are coated, just let them sit right there in the bag for about five minutes. I know, I know, we want to eat! But letting them “rest” allows that starch to really grab hold of the chicken surface. This simple pause before cooking makes a massive difference in how crispy they get!
Cooking Methods: Air Fryer or Stovetop Frying
You get to choose your adventure here. If you’re using the air fryer, preheat it to 360° F and brush the rack lightly with oil. Lay the wings in a single layer—no piling them up! Spray or brush the tops with a little more neutral oil. Cook for 12 to 15 minutes, flipping halfway through, until they look golden around the edges.
If you are feeling retro and going stovetop, heat a medium-sized pot with your high-smoke point oil over medium-high heat. Be careful when you add the wings in batches! Overcrowding the pot drops the oil temperature, and soggy wings are the result. Cook for about 5 to 7 minutes until they are browned, drain them on a wire rack, and then you must let them rest for 10 to 15 minutes while your oil comes back up to spitting-hot temperature.
For the air fryer crew, we’re doing a quick second blast! Turn that heat up to 390° F and cook for about 5 more minutes until gorgeously golden and cooked through. If you’re not using a thermometer, cut into the thickest one—it should be 165° F internally, and the juices must run clear. You can review some other amazing wing techniques here: crispy-sweet-and-spicy-chicken-wings.
Making the Sticky Sweet Chili Glaze
While the chicken is finishing up its crispy transformation, get that sauce going! Grab a small saucepan and heat it over medium heat with about a tablespoon of oil. Toss in your 5 minced garlic cloves and cook them for just a few seconds until you can really smell them—don’t let them burn!
Now, pour in that reserved marinade, the sweet chili sauce, and the 2 tablespoons of water. Bring this mixture up to a slow simmer. Let it cook down for about 10 minutes. You’re watching for it to transform into a thick, sticky glaze that coats the back of a spoon. If it starts looking super thick or tastes too salty, just splash in a tiny bit more water and let it simmer back down. Kill the heat once it’s perfect, cover the pot, and keep it warm.
Final Toss and Serving the Sweet Chili Glazed Chicken Wings
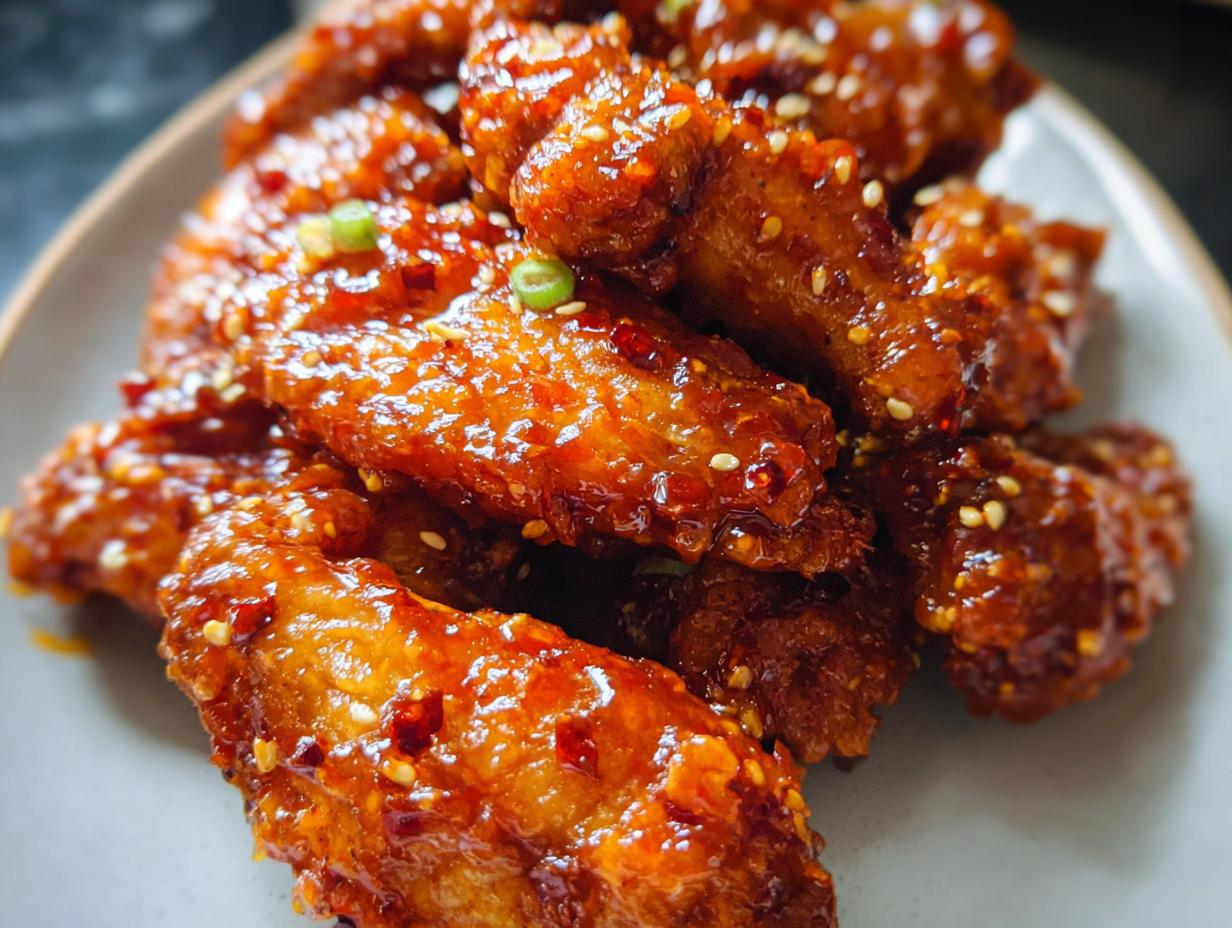
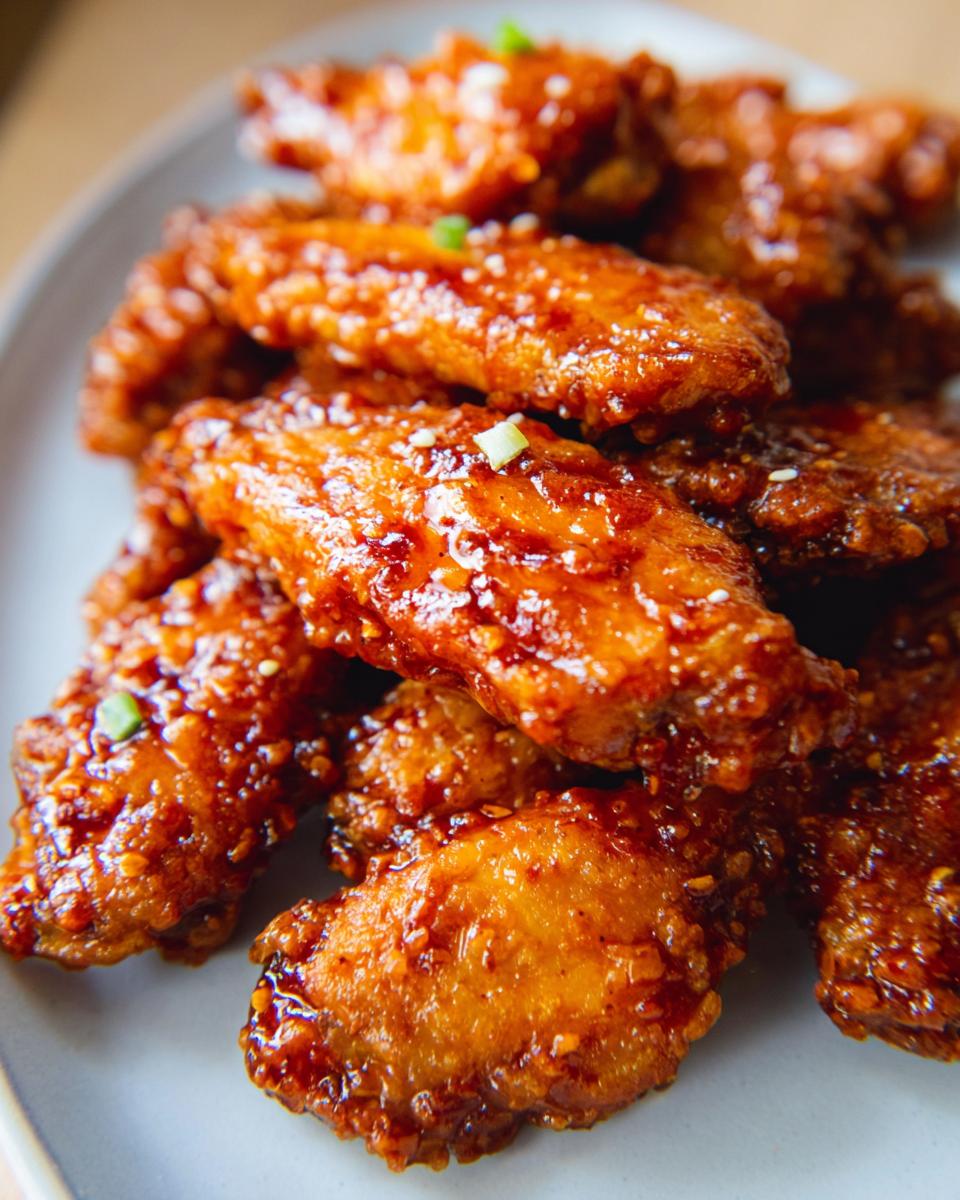
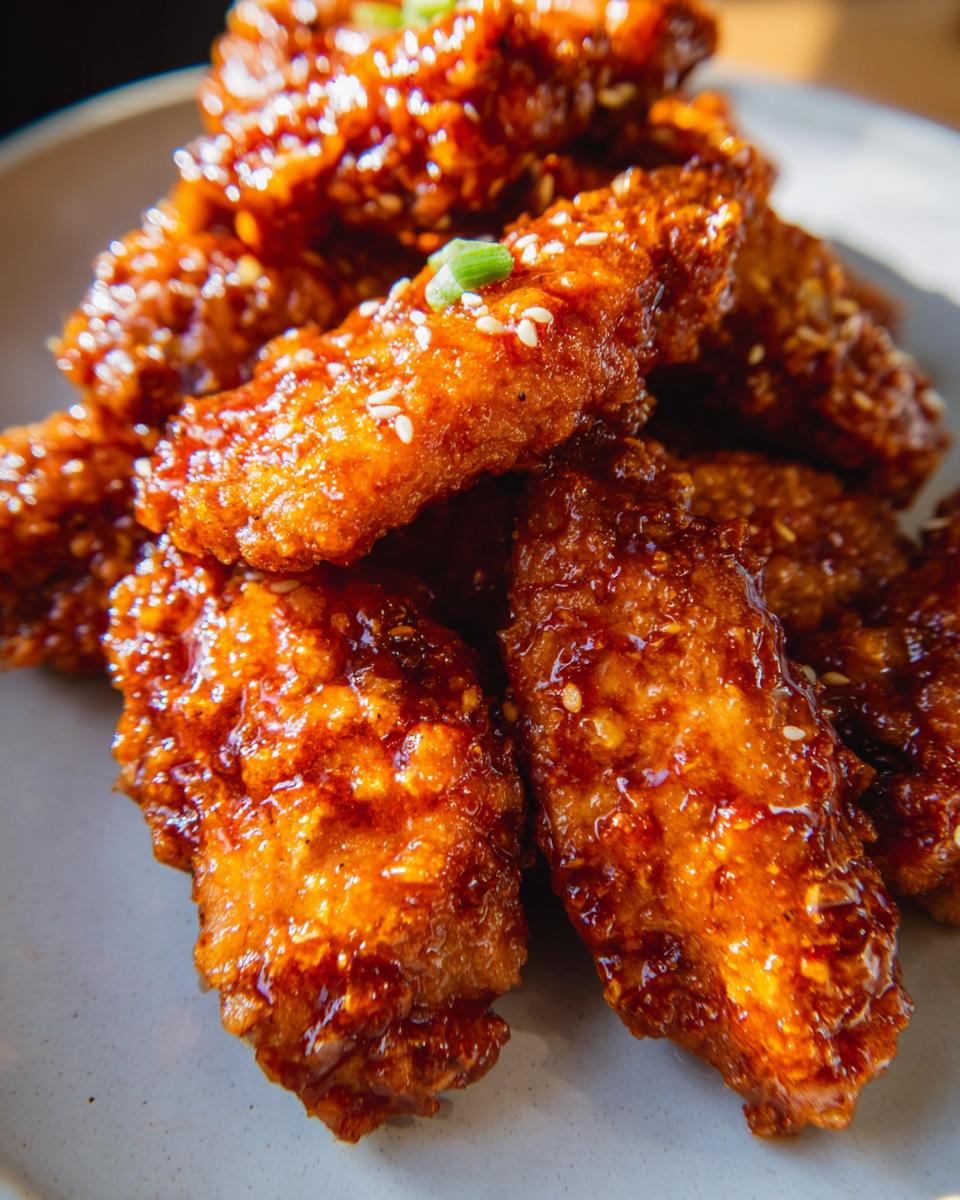
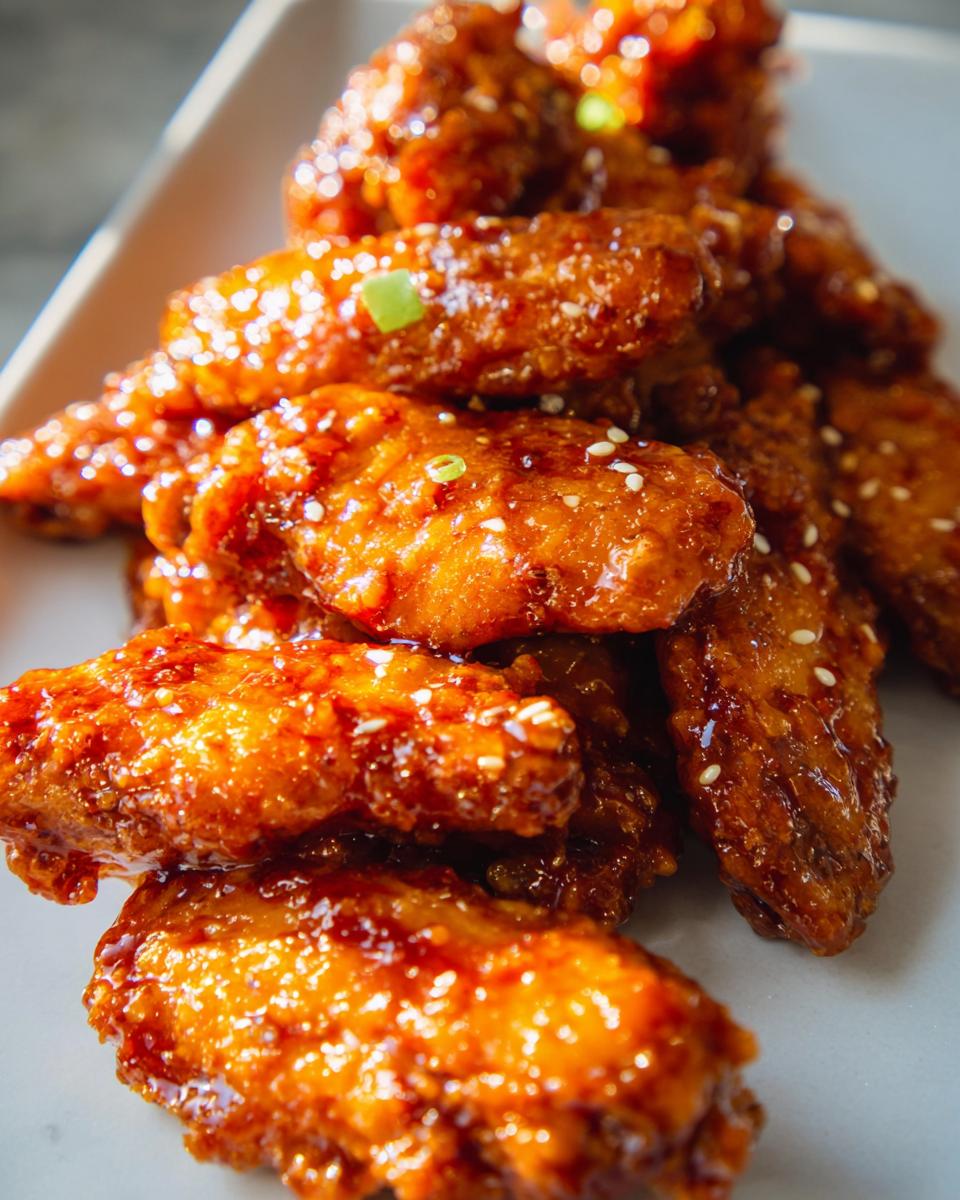
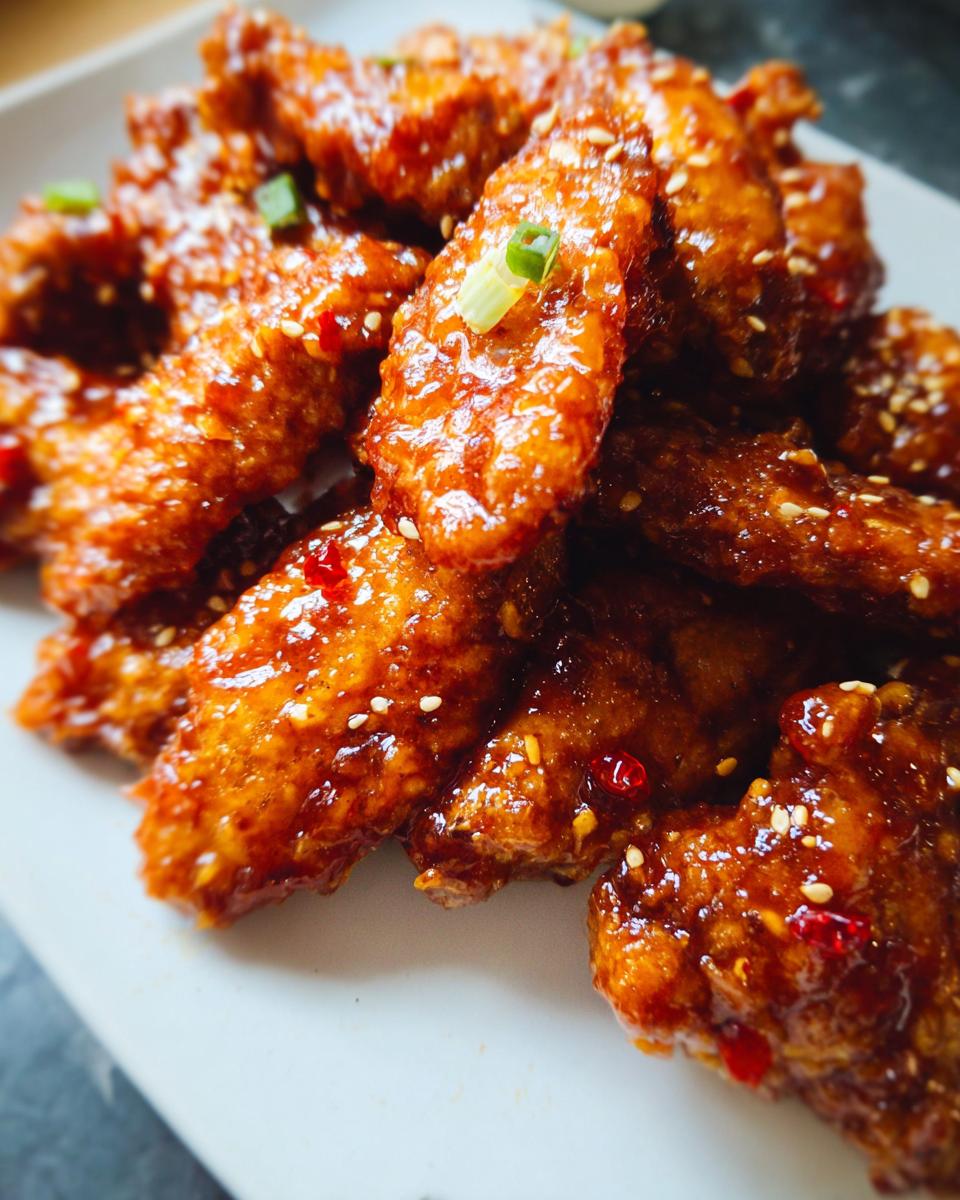
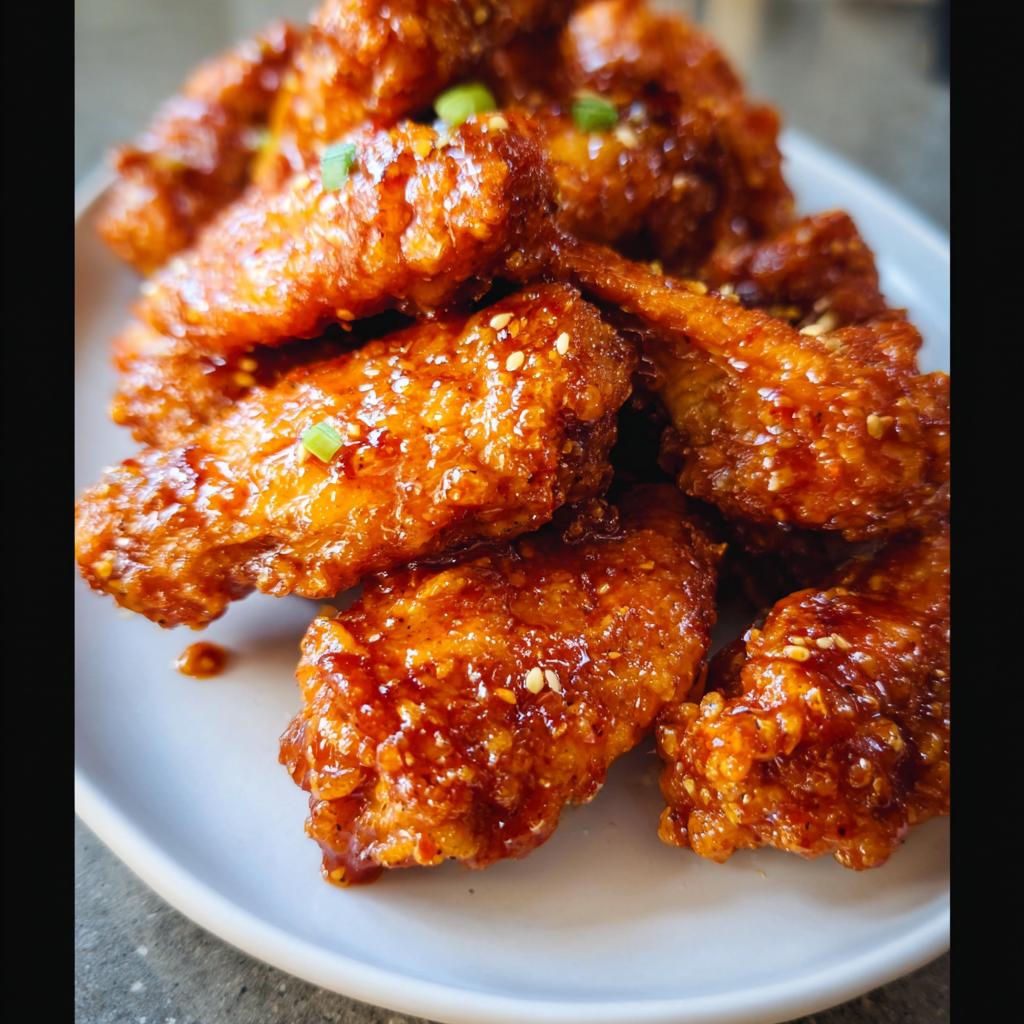
The grand finale! Get all those perfectly cooked, crispy wings into a large bowl—the biggest one you have! Pour that glorious, thick sauce right over the top. Now, toss, toss, toss! You want to keep going until every single piece of chicken has a beautiful, glistening coat of that sweet and spicy goodness. If you want it saucier, double that sauce recipe next time! Finally, garnish them brightly with sesame seeds and fresh chopped cilantro. Serve immediately while they are still piping hot—these Sweet Chili Glazed Chicken Wings won’t last long at any party!
Tips for Perfect Sweet Chili Glazed Chicken Wings
Even the best recipes can go sideways if you skip a tiny step, right? Since you all trust me with these amazing Sweet Chili Glazed Chicken Wings, I want to share a few insider secrets so you get that restaurant-quality crispiness and flavor level every single time. Don’t worry about substitutions, either—I’ve got ideas for those too!
Ingredient Substitutions and Flavor Adjustments
Let’s talk about that starch first. I absolutely swear by potato starch if I can find it at the Asian market; it creates a shell that is almost shatteringly crisp. If you can’t find it, cornstarch is a perfectly wonderful backup, so please don’t stress if your pantry is only stocked with that! Either one works brilliantly for coating.
You might notice some recipes call for fish sauce to boost the savory background flavor—that umami kick! If you’re hesitant, don’t worry, you absolutely don’t need it here. The soy sauce we use in the marinade already provides a lot of salty depth. However, if you want to experiment next time, just a tiny splash balances out the sweetness beautifully without tasting fishy at all.
Also, think about quantity. This batch makes a beautiful, thin, glistening coat—what I call a perfect glaze. If you are sitting down for a movie night and want wings you’re actually dipping into excess sauce, you should definitely scale up the sauce recipe. I usually double or triple the sauce ingredients if I want truly saucy wings, rather than just glazed ones. It’s your kitchen; you make the rules!
Troubleshooting Common Issues
If your wings come out sad and floppy when they should be crisp, there is usually one culprit: moisture! I cannot stress this enough: you must pat those chicken wings incredibly dry before they ever see the marinade *or* the dry coating. Surface moisture steams in the air fryer or oil, ruining that crust we worked so hard to build. Get rid of that water!
If your sauce tastes drastically too salty after simmering down, please don’t panic! Remember that little bit of water we added? Sometimes you need a splash more of just plain water to thin it out and mellow that intense savoriness. Simmer it for another minute to incorporate, and you’ll be back on track.
Finally, always check your baking powder. If it’s old, it won’t help create those little air pockets we need for the *lifting* action on the crust. If you haven’t checked the date recently, maybe swap it out for a fresh little can!
Serving Suggestions for Your Sweet Chili Wings
Now that you have these stunning, sticky, sweet chili wings ready to go, the next big question is what you serve them with! These aren’t just great for weeknight dinners; they absolutely shine when you bring them out as an appetizer or when you’re setting up for a game day spread—they are prime tailgate snacks, trust me.
Because the wings have such a bold, sweet, and slightly spicy profile, you want sides that offer either a cooling contrast or stand up to that flavor. If you’re serving these as the main event for our asian style appetizers spread, here are a few things I always put out:
- Cooling Vegetable Crudités: Keep things light with thick sticks of cucumber, carrots, and chilled bell peppers. Dipping them in a side of plain Greek yogurt or a very simple ranch dressing helps cut the lingering heat from the chili glaze.
- Simple Steamed Rice: A small bowl of sticky white rice on the side is fantastic. It’s the perfect vessel to soak up any extra sauce that drips off the wings—waste not, want not!
- Crunchy Slaw: A vinegar-based coleslaw is brilliant here. Skip the heavy mayonnaise dressing and use something bright with a little lime juice. The crunch and the tang are the perfect counterpoint to the sticky glaze on the chicken.
- Pickled Goodness: Keep some pickled daikon radish or carrots handy. That sharp, vinegary bite cleanses your palate between wings and makes the next bite taste just as incredible as the first.
Honestly, these wings are so good they barely need anything else, but having those cooling components around ensures everyone keeps reaching for more!
Storing and Reheating Leftover Sweet Chili Glazed Chicken Wings
Oh, leftovers! If you manage to have any of these glorious Sweet Chili Glazed Chicken Wings left over—and I have my doubts, because they disappear fast!—you need to treat them right. Nobody wants a soggy wing the next day, right? We put in all that work for that spectacular, sticky crust, and we are going to save it!
The fridge is fine for a couple of days, but the key is how you bring them back to life. For this recipe, the stovetop frying method holds up a little better to reheating, but I have a great trick for the air fryer versions too, which works wonders for bringing back that initial crunch.
Proper Storage Techniques
First, the storage. You have to let the wings cool down fully before you even think about putting them in the fridge. If you seal them up warm, you trap steam, and that moisture immediately destroys the crisp coating we worked so hard for. Seriously, let them sit on a cooling rack for about 30 minutes until they are just room temperature.
Then, store them in a single layer in an airtight container. If you have to stack them, put a piece of parchment or paper towel between the layers to absorb any residual surface moisture. They should be good in the refrigerator for up to three days. After that, the texture really starts to suffer, even with the best reheating tricks.
Restoring That Crispy Texture When Reheating
When you’re ready to eat them again, forget the microwave! Microwaving these delicious sticky chicken recipes is a one-way ticket to rubbery sadness. We need hot, dry heat to bring that crust back.
My Preferred Air Fryer Reheat: This is the best way to resurrect air-fried wings. Preheat your air fryer to 375° F. Lay the wings in a single layer, and cook them for about 4 to 6 minutes. Maybe give them a little shake halfway through. They will crisp right back up! The sauce might look a little darker, but that’s just concentrated flavor!
Stovetop Frying Revival: If you fried them first, you can give them the same treatment as the original fry, just faster. Heat about an inch of neutral oil in a small pot to about 350° F. Carefully drop the cold wings back into the hot oil for just 1 to 2 minutes. This is purely to reheat them and crisp the coating; they are already cooked, so you are just flash-frying them. Drain them on a paper towel, and they are perfect again!
If you want to give them an extra layer of glaze after reheating, you can always quickly whisk up half a batch of the sauce recipe again to toss them in right before serving. Enjoy those second-day wings!
Frequently Asked Questions About Sweet Chili Wings
I know when I look at a new recipe, I immediately start thinking about variations or potential snags. It’s just how we bakers and cooks think, right? Since these Sweet Chili Glazed Chicken Wings are a favorite for everything from casual weeknights to bigger parties, I’ve gathered the questions I get asked most often about making them perfect every time.
Can I bake these Sweet Chili Glazed Chicken Wings instead of air frying?
Absolutely! While I am totally obsessed with the air fryer for how fast it gets these crispy, you can definitely use your conventional oven. You’ll want to preheat your oven to a nice hot 425° F. Make sure you place the coated wings on a wire rack set over a baking sheet. This lets the air circulate underneath, which is super important for crisping up the bottom!
Bake them for about 20 minutes, flip them over, spray them with a little oil, and bake for another 15 to 20 minutes, or until they hit that 165° F internal temperature. Once cooked, you toss them exactly the same way in the glaze. They won’t be *quite* as intensely crispy as the air-fried version, but they are still fantastic savory and sweet treats!
How spicy are these sweet chili wings?
This is a great question, and the answer depends mostly on the brand of sweet chili sauce you buy! Generally, I find these wings land around a mild-to-medium heat level that carries flavor more than pure fire. It’s a pleasant warmth that makes you want to grab another one—perfect for the whole family!
If you know your crowd prefers things ultra-mild, you can easily reduce the amount of sweet chili sauce by about a quarter cup when making the glaze. You can replace that missing volume either with a little extra reserved marinade or just some water. If you like it spicier, though? Throw in a dash of cayenne pepper or a little bit of Sriracha right along with the chili sauce when you start simmering the glaze!
What is the best way to make these great tailgate snacks ahead of time?
When you are prepping for a big event like a tailgate, you want to get as much done early as possible! These wings are great candidates for making ahead, but we have to be smart about timing to lock in that crispiness. The absolute best stage to prep ahead is the coating step.
Go ahead and complete the marinade step, wipe off the excess marinade, and then coat the wings thoroughly in the dry mixture. Lay those perfectly coated wings in a single layer on a baking sheet lined with parchment paper. Cover them tightly with plastic wrap and pop them into the fridge for up to 8 hours. When it’s game time, you just pull them out and immediately start cooking them via the air fryer or stovetop frying method we talked about. This makes the actual cooking part quick and ensures you serve up the best sticky chicken recipes possible!
Nutritional Estimates for Sweet Chili Glazed Chicken Wings
Now, I know what some of you busy folks are thinking when you spot something this perfectly delicious: “But wait, Clara, how does this fit into my plan?” Cooking what you love shouldn’t feel like cheating, but it’s always smart to know what you’re working with!
These estimates are based on the standard recipe serving 6 people, using the ingredients listed. Remember, because we are dealing with wings (which have skin!) and a sticky glaze, the numbers might look a little higher than plain chicken breast. That’s the joy of indulgence for your tailgate snacks, right?
Here’s a quick look at the estimated breakdown per serving:
- Calories: 520
- Fat: 26g
- Protein: 26g
- Carbohydrates: 46g
- Sugar: 33g
- Sodium: 3752mg (Yes, that’s high! This is due to the soy sauce and sweet chili sauce—use low-sodium soy sauce if you need to cut this down!)
A few other highlights for you:
- Saturated Fat: 9g
- Cholesterol: 109mg
- Fiber: 2g
A Little Disclaimer: Please take these numbers with a grain of salt, just like you would any recipe online! These are calculated estimates. The actual nutritional profile can swing a bit depending on the exact brand of sweet chili sauce you pick up, the fat content in your specific chicken wings, and how much glaze you decide to heap onto your portion. But overall, this gives you a great baseline for planning those fun gatherings!
Share Your Experience Making These Wings
Now that you have made the absolute best Sweet Chili Glazed Chicken Wings, I really want to hear from you! Cooking should be a sharing experience, and since these wings are my personal favorite way to connect with people, I live for hearing about your kitchen successes.
Did you stick perfectly to my method, or did you sneak in a little something extra? Maybe you found the absolute perfect beer pairing for these incredible sticky chicken recipes? Maybe you used the stovetop method and it blew your air fryer away? I want all the details!
Please take a moment after you’ve devoured every last bite—and trust me, you will—to pop down below and leave a comment. Tell me how they turned out! If you can, give the recipe a star rating so other home cooks know these sweet and spicy amazing appetizers are worth their time. Your feedback helps build our little community here in the kitchen, and I read every single note. Happy cooking, everyone!
Sweet Chili Glazed Chicken Wings
Ingredients
Equipment
Method
- In a Ziplock or airtight container, mix together the soy sauce, brown sugar, rice vinegar, and oil until sugar has dissolved. Add chicken wings, massage marinade into wings, and marinate for at least 20 minutes or up to overnight.
- In a Ziplock bag, combine cornstarch, garlic powder, onion powder, and baking powder until well combined. Add chicken wings, shaking off excess marinade and reserving marinade. Shake bag until wings are well coated, then allow wings to sit for about 5 minutes to allow cornstarch to better stick to the wings. Then, choose one of the cooking methods below.
- Air Fryer Method: Preheat air fryer to 360° F then lightly brush air fryer rack with oil to prevent sticking. Lay chicken wings in a single layer, working in batches if needed. Spray or brush wings with neutral oil, then cook for 12-15 minutes, flipping halfway through. You will know they are ready when they are golden brown and crispy on both sides.
- While the chicken cooks, heat a small saucepan on medium heat. Add about a tablespoon of oil, then toss in garlic and cook for a few seconds until fragrant. Pour in marinade, sweet chili sauce, and water. Bring to a simmer and cook for about 10 minutes or it has turned into a thick sticky glaze.
- If the sauce becomes too thick or salty, you can add a splash of water, then simmer to your desired consistency. Turn off heat and cover to keep warm.
- Increase air fryer heat to 390° F and spray a little more oil if you notice any dry spots. Cook for about 5 more minutes, or until golden and cooked through (juices run clear or internal temperature of at least 165 degrees F).
- Stovetop Frying Method: Heat a medium-sized pot medium-high with a high-smoke point oil. Once hot, carefully add chicken wings in batches to avoid overcrowding. Cook for 5-7 minutes, remove and drain on a wire rack, then repeat for remaining wings.
- Allow wings to rest for 10-15 minutes and allow the oil to come back up to temperature.
- While the chicken cooks, heat a small saucepan on medium heat. Add about a tablespoon of oil, then toss in garlic and cook for a few seconds until fragrant. Pour in marinade, sweet chili sauce, and water. Bring to a simmer and cook for about 10 minutes or it has turned into a thick sticky glaze.
- If the sauce becomes too thick or salty, you can add a splash of water, then simmer to your desired consistency. Turn off heat and cover to keep warm.
- Add chicken wings back in batches and fry for 2-3 minutes, or until golden, crispy, and an internal temperature of at least 165 F. If you do not have a thermometer, cut a small slit in the thickest part of the chicken to the bone and the juices should run clear.
- Combine Wings & Sauce: In a large bowl, toss together chicken wings and sauce until well coated. Continue to mix until there is enough sauce for a thin glaze on the wings. Garnish with sesame seeds and chopped cilantro, then serve immediately.
Nutrition
Notes
Tried this recipe?
Let us know how it was!
Master of Culinary Visual Arts
My culinary journey started in the fast-paced kitchens of boutique coastal restaurants throughout Southern California, where I learned that beautiful food doesn’t have to be complicated. After nine years of professional cooking, I’ve made it my mission to prove that sophisticated, nutritionally sound meals can be accessible to busy home cooks who refuse to compromise on flavor or visual appeal.
What changed everything for me was watching talented home cooks feel intimidated by healthy cooking. That’s when I transitioned to private instruction, teaching busy professionals and families how to create restaurant-quality meals using simple techniques and ingredients they can actually find at their local grocery store. My “15-minute meal” frameworks are now used by several regional cooking schools!
As a third-generation Mexican-American, I love weaving vibrant Latin flavors into low-carb creations – proving that healthy eating can be both culturally authentic and visually spectacular. My “effortless elegance” philosophy is simple: nutritious food should look as stunning as it tastes, without requiring professional chef skills or expensive equipment.
When I’m not developing recipes in my San Diego coastal kitchen, you’ll find me surfing the local breaks with my Golden Retriever mix, Mango, who’s both my kitchen companion and unofficial taste-testing assistant. My personal low-carb lifestyle started as a way to maintain energy for my active coastal life, and it’s become the foundation for proving that healthy eating enhances rather than restricts life’s pleasures.