
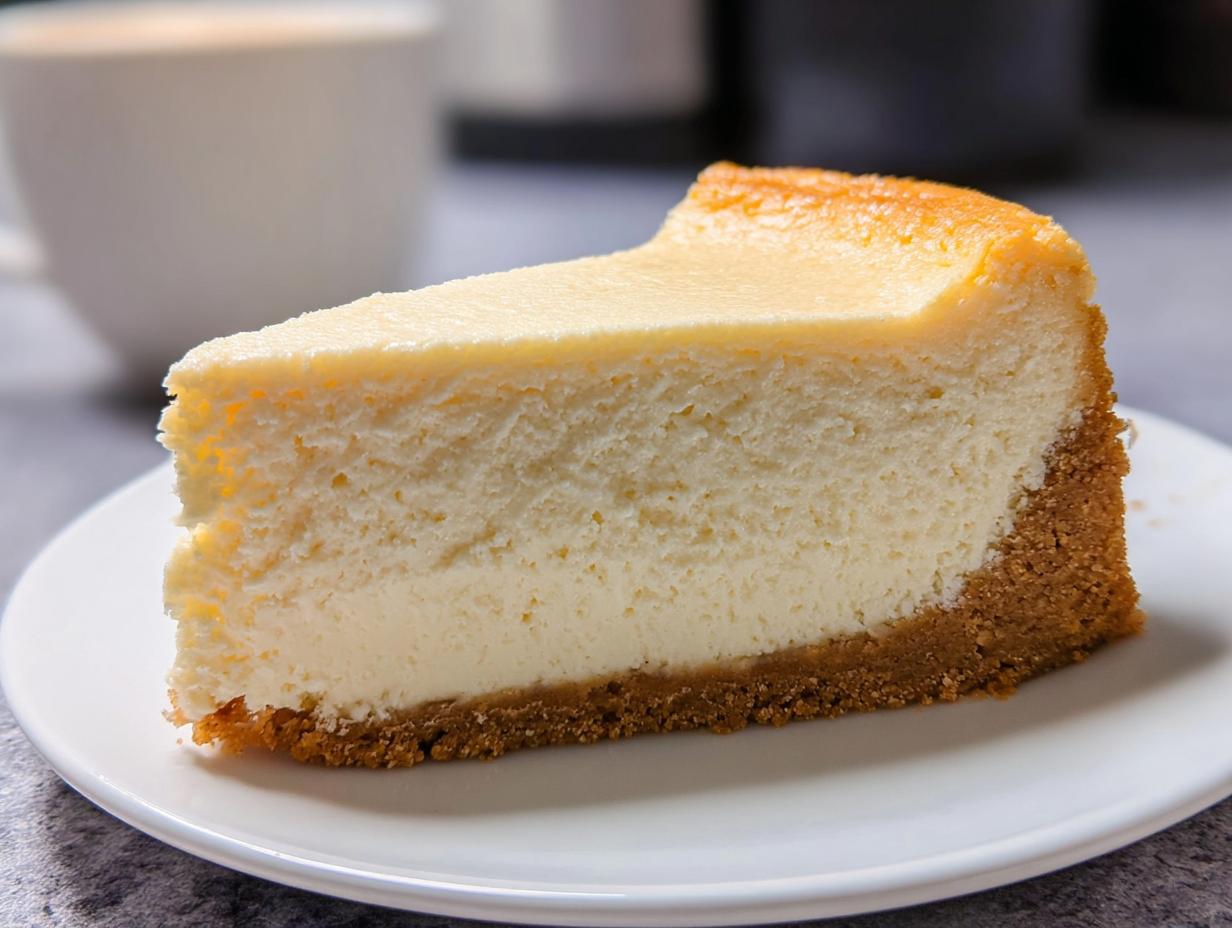
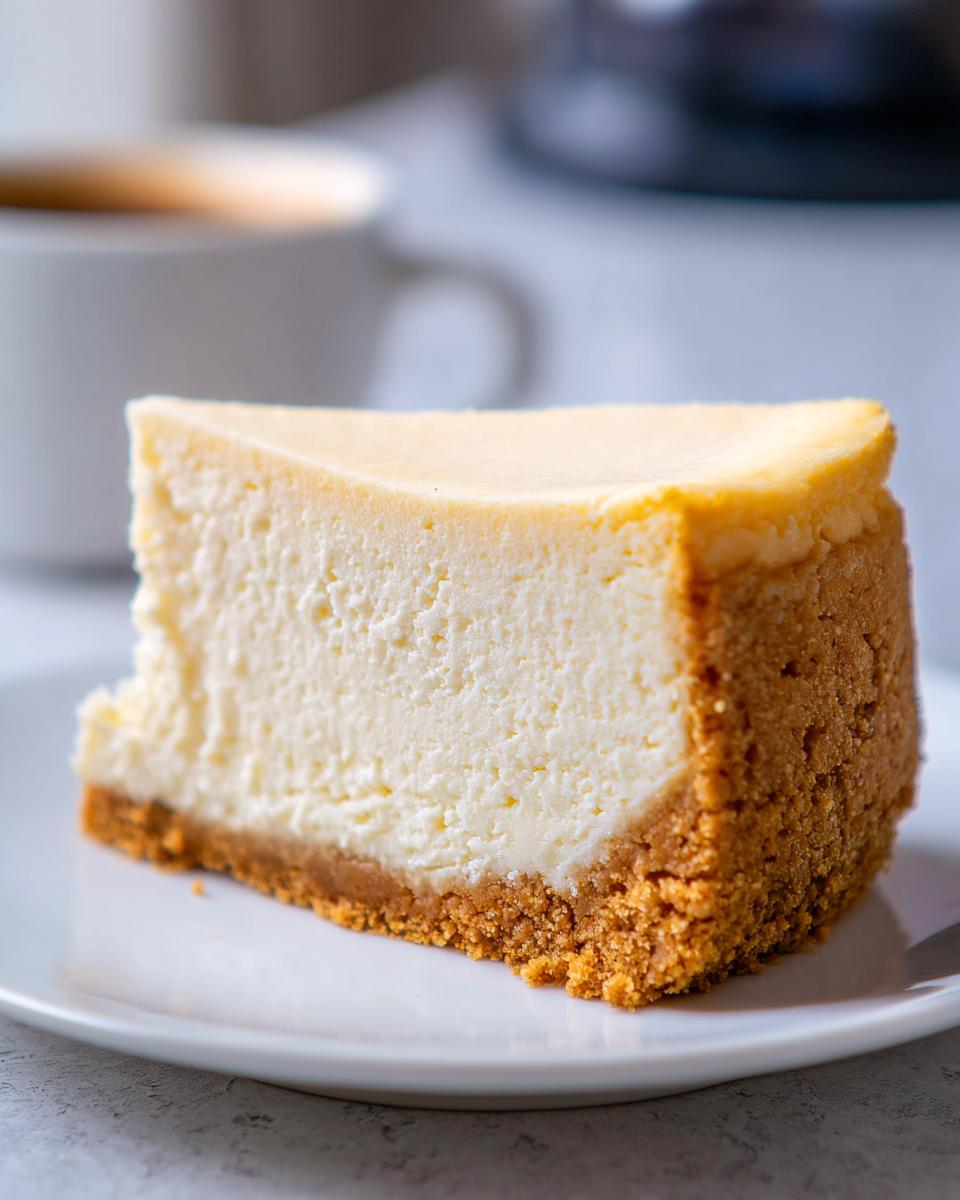
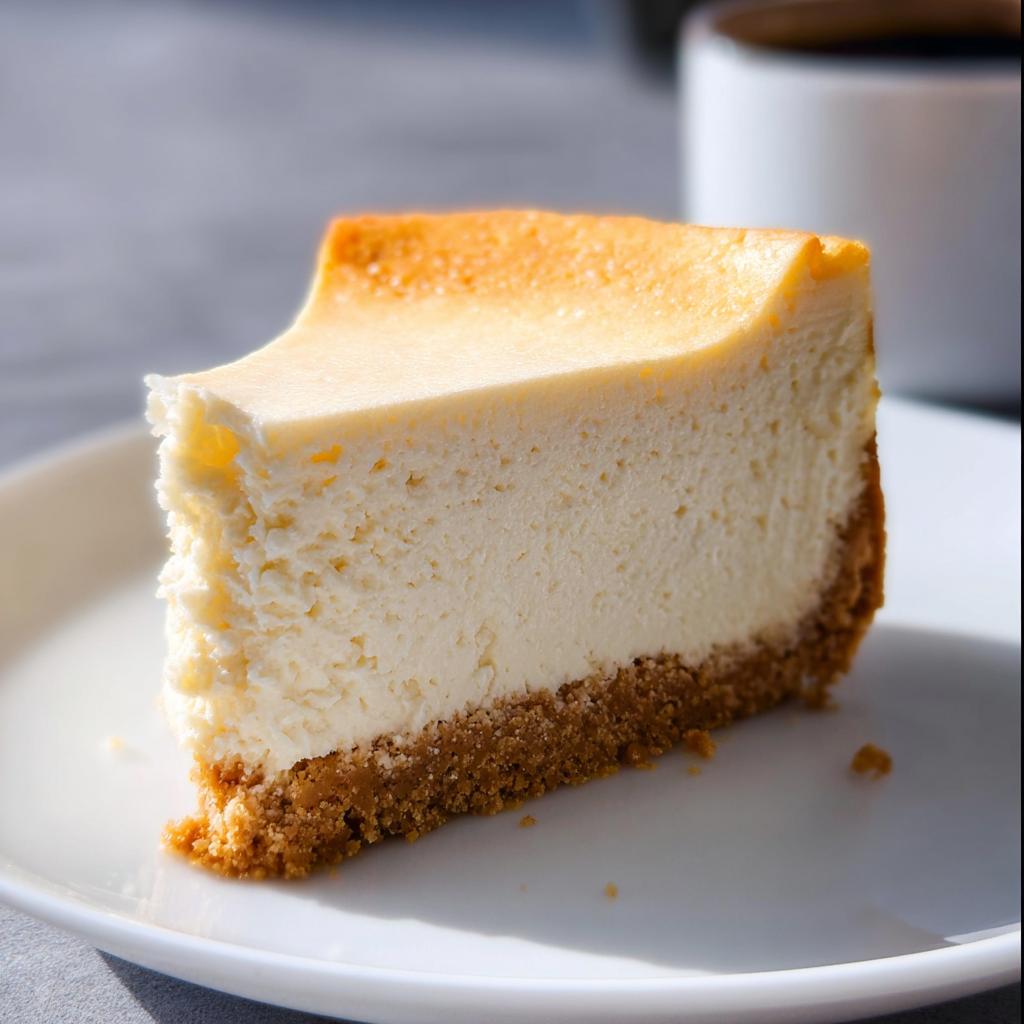
When we talk about truly iconic desserts, the kind that stops conversations and makes every gathering feel like a celebration, nothing beats a proper cheesecake. I remember the first time I tasted a **Classic New York Baked Cheesecake** at my grandmother’s cozy kitchen table; it was a special occasion, and that moment was truly magical. The texture was just unbelievably creamy, the flavor rich and tangy, and oh, that crust was perfectly crumbly!
Years later, when I tried to replicate her recipe, I was absolutely nervous but so excited to capture that feeling again. I can still see my kids’ wide eyes as they took their first bites, and the pure joy on their faces reminded me of my own childhood experience. Honestly, that cheesecake has become our family’s cornerstone; no holiday or birthday feels complete without it, and making it is how we keep creating memories we cherish. This recipe is my promise to you that you can make that same restaurant-quality, utterly irresistible dessert right in your own kitchen.
Why This Classic New York Baked Cheesecake Recipe Works (E-E-A-T)
You might ask, what makes this recipe the absolute best? It all comes down to technique, not magic! We are aiming for the silkiest texture possible, which is why this method relies heavily on three things: room temperature ingredients, mixing only until just combined, and, most importantly, the water bath. These steps are how we guarantee one of those stunning, crack-free, truly creamy dessert ideas you see in fancy bakeries.
I’m Maria Fernandez, and as a Certified Family Nutrition Strategist, I’ve analyzed countless recipes, but the structure of a perfect cheesecake relies on precise baking conditions. Getting the heat gentle and consistent is the secret sauce here!
Essential Equipment for Your Classic New York Baked Cheesecake
You don’t need dozens of fancy gadgets, but you do need the right foundational tools. Please trust me on the springform pan; without sides that release, you’ll never get that perfect presentation for your special occasion sweets!
- A 9- or 10-inch springform pan (this is non-negotiable!)
- An electric mixer (handheld or stand mixer works fine)
- One large roasting pan – this will hold your water bath!
Gathering Ingredients for the Perfect Classic New York Baked Cheesecake
Okay, let’s talk about what goes into making this dream happen! For the best results in any baked cheesecake recipe, the temperature of your dairy is everything. I cannot stress this enough: your cream cheese and your eggs *must* be fully at room temperature. If they are too cold, you’ll end up whipping air pockets in that luxurious filling, and that’s how cracks start!
We keep the process simple by treating the crust and the filling separately, just like any great recipe should be structured. Getting these components right sets us up for success before we even touch the oven. Trust me, taking five extra minutes to let that cheese soften pays off huge when you see how beautifully smooth that batter gets.
For the Crumb Crust
- 1.5 cups graham cracker crumbs (this comes out to about 12 whole crackers that you’ve crushed yourself!).
- 5 tablespoons unsalted butter, melted
- 2 tablespoons sugar
- 1/8 teaspoon salt
For the Creamy Filling of Your Classic New York Baked Cheesecake
This is where the richness comes from. Remember that room temperature rule again—it’s worth repeating!
- 32 oz cream cheese, at room temperature (that’s four 8-oz blocks, people!)
- 2 cups sugar
- 3 tablespoons all-purpose flour (just enough to stabilize without making it cakey)
- 4 teaspoons vanilla extract (don’t skimp on the good stuff!)
- 1 teaspoon packed lemon zest (from one bright lemon)
- 2 teaspoons fresh lemon juice (also from that same lemon for perfect tang)
- 1/4 teaspoon salt
- 6 large eggs (again, make sure these are warmish!)
- 0.5 cup sour cream
- As needed berry sauce, for serving (optional, but highly recommended for a pop of color!)
Step-by-Step Instructions for Your Baked Cheesecake Recipe
This is where we bring it all together! Don’t let the water bath scare you; it’s our best defense against cracks, and once you see the results, you’ll understand why every great new york cheesecake needs one. This process takes time, but I promise the results are worth every minute. Just take it one calm step at a time, and soon you’ll have a decadent dessert ready to serve!
Preparing the Pan and Crust for the Classic New York Baked Cheesecake
First things first: we seal this pan tight! Preheat your oven to 375°F and get your rack positioned low down. You need a heavy-duty layer of aluminum foil around your springform pan—like armor! Wrap it once; then wrap it again. We are making sure absolutely zero water from the bath sneaks in. Once it’s sealed up, give the inside a little spray of nonstick goodness.
For the crust, just mix your graham cracker crumbs, melted butter, sugar, and salt right in a bowl until it looks like wet sand. Press it evenly onto the bottom of that foil-wrapped pan. Pop it in the preheated oven for 10 minutes until it looks set. Then, pull it out and quickly drop that oven temperature down to 325°F.
Mixing the Rich Filling for Your New York Cheesecake
Now for the smooth part! Get your mixer running on medium speed. Beat your room-temperature cream cheese with the sugar and flour until it’s just unified—we don’t want a fluffy mountain here, just smooth sailing. Then add all your flavorings: the vanilla, lemon zest, lemon juice, and salt. Mix that just until you can’t see the white streaks anymore.
Here’s the crucial part for that signature creamy texture: add those six eggs one at a time. Mix on LOW speed until the yolk disappears, then stop and scrape the bowl. Do NOT over-mix! You want to incorporate, not aerate. Finally, gently fold in the sour cream by hand if you can, or on the absolute lowest mixer speed until it’s just blended. Stop mixing as soon as it looks uniform!
Baking the Classic New York Baked Cheesecake in a Water Bath
Remember that kettle of water you should have boiled? Now’s showtime! Carefully set your cake pan inside that big roasting pan. Pour the smooth batter over the pre-baked crust. Then, gently pour that boiling water into the roasting pan until it comes about an inch up the side of your cheesecake pan. This gentle heat is what keeps our water bath technique working its magic.
Slide the whole setup into your 325°F oven. It needs a good long bake—we’re looking for 1 hour and 30 minutes to 1 hour and 45 minutes. You know it’s close when the center barely wobbles if you nudge the roasting pan. It will firm up as it cools down, so don’t be tempted to overbake it!
Cooling and Chilling Your Baked Cheesecake Recipe
The cooling is almost as important as the actual baking to prevent sinking or cracking! First, carefully take the roasting pan out and place it on a cooling rack. Let the cheesecake sit in that warm water bath for a full 45 minutes. After that time, you can take the pan out of the water, take off that messy foil wrapping, and run a thin knife around the edge. This prevents sticking when it shrinks a bit.
Cover it loosely with plastic wrap and move it to the fridge. This isn’t instant gratification, folks! For that perfect density and flavor depth, it needs at least 8 hours, but overnight is truly best to set up your finished baked cheesecake recipe properly.
Tips for a Flawless Classic New York Baked Cheesecake
Alright, you’ve finished baking, and now you want perfection for your big night! While this recipe is super sturdy, I always have a few last-minute emergency tips ready for when I’m preparing these special occasion sweets for company. Remember, cheesecake is fussy, but only because it wants to be perfect for you!
The two most common problems—cracks and weeping—are almost always fixed by one simple thing we’ve already discussed, but it’s worth repeating one last time because it’s that important for getting that ultra-smooth finish.
Ingredient Temperature Matters for Creamy Dessert Ideas
Seriously, I could shout this from the rooftops! If your cream cheese isn’t perfectly soft, it won’t incorporate evenly with the sugar, leaving you with little tiny hard bits in your supposedly silky filling. That’s a guaranteed lump! Cold eggs are the same way; they fight the smooth batter structure you built.
If your ingredients aren’t room temperature, you have to beat the mixture longer, which adds too much air. Too much air equals a thin wall that collapses after cooling, leading straight to a sad crack right across the top of your beautiful **Classic New York Baked Cheesecake**. Don’t panic if you see a slight lean, though; a good chilling usually helps everything level out. If you do end up with a surface issue, check out the tips on how to fix cracked cheesecake tops—we’ve got you covered!
Serving and Storing Your New York Cheesecake
The hardest part of this whole amazing process is waiting for it to chill, but trust me, you need that time! Once it’s set and firm from the overnight bath in the fridge, it’s time for the big reveal. You’ll want to carefully remove the sides of the springform pan. Now, if you’re feeling fancy, you can try to slide the whole thing onto a serving platter using two thin spatulas underneath—it takes a steady hand!
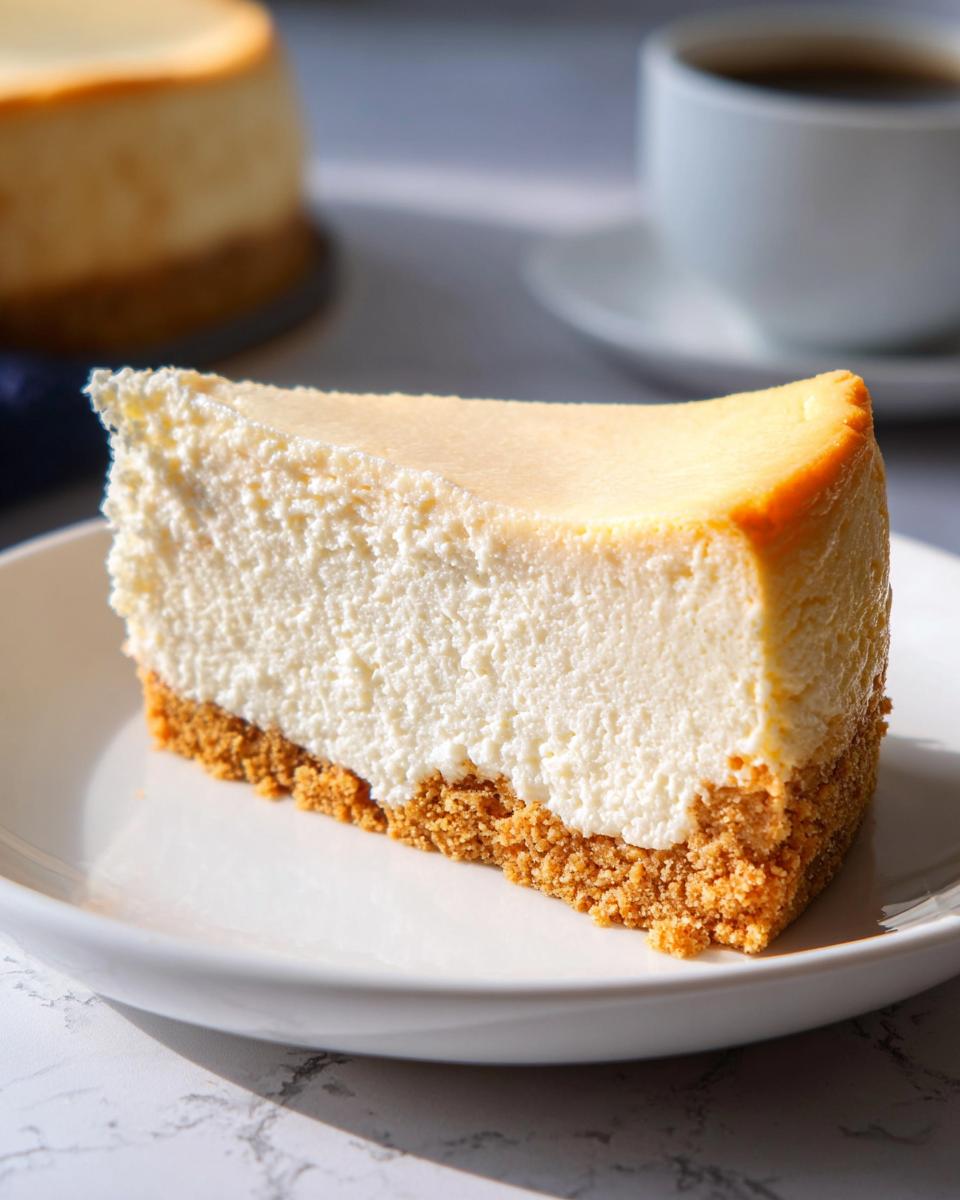
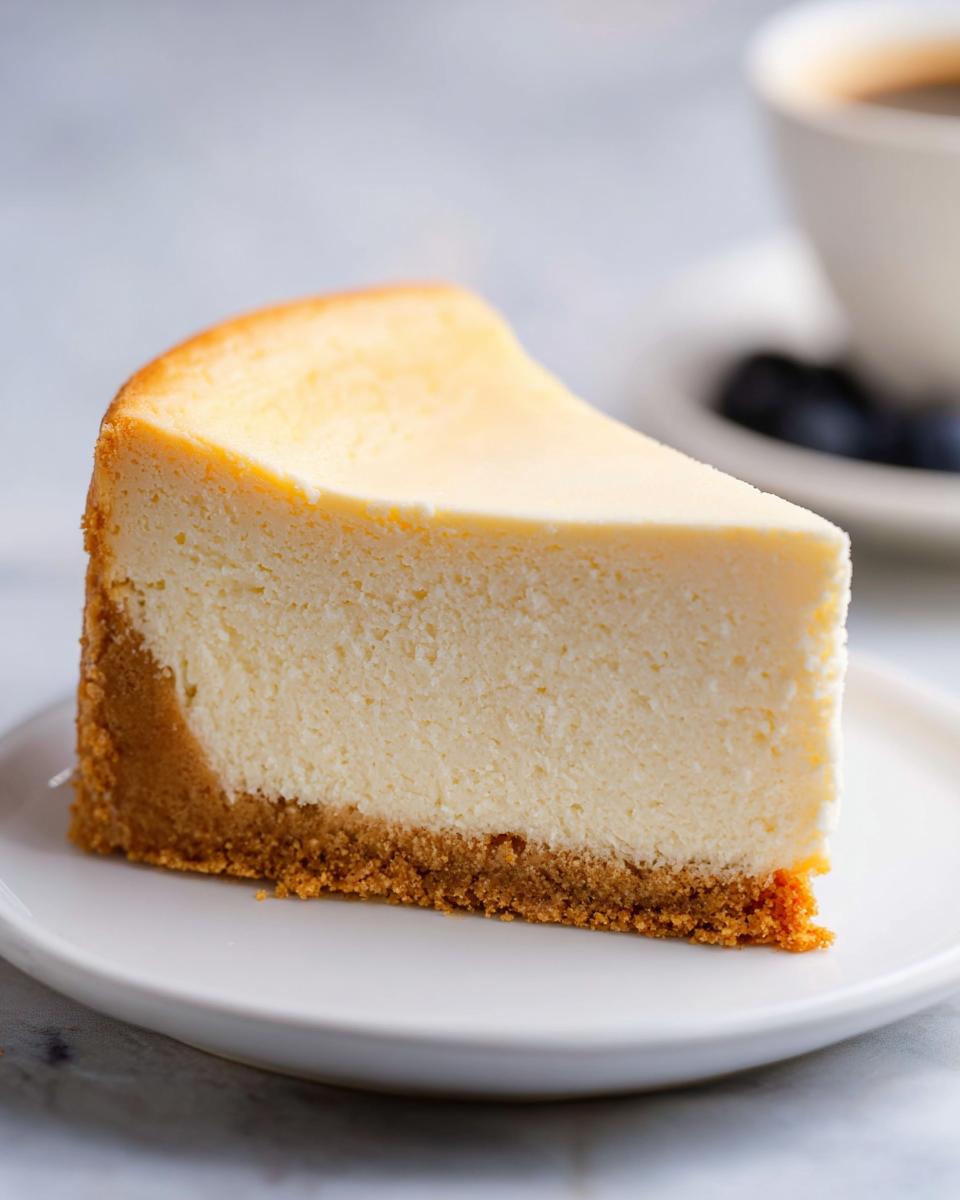
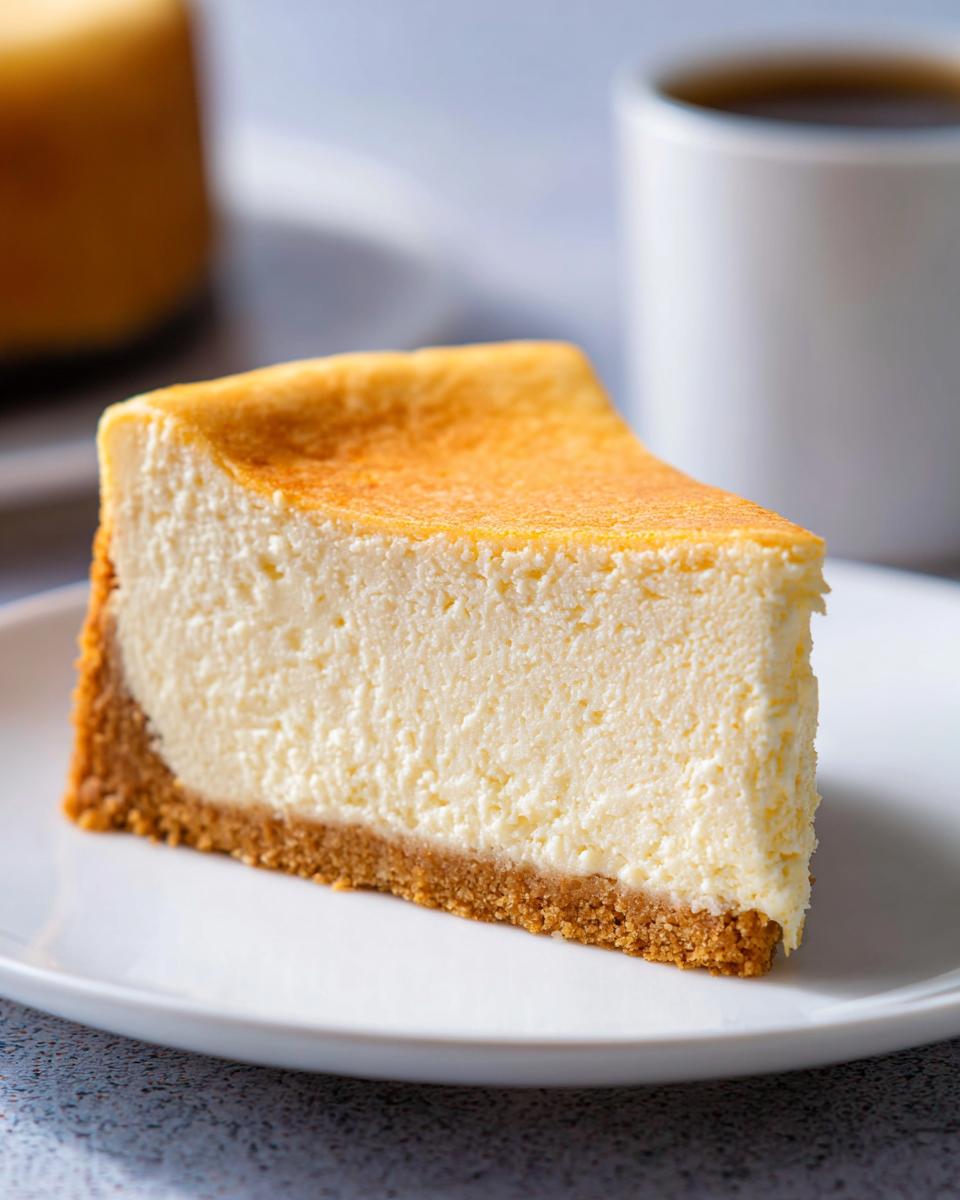
When slicing your perfect **Classic New York Baked Cheesecake**, always use a very sharp, long knife. Dip that knife into a tall glass of hot water, wipe it completely dry, and then make your first cut. Wipe it clean again before the next slice! This simple trick keeps those clean edges looking pristine. A little drizzle of berry sauce on the side is just the ticket if you want a little color contrast.
If you have leftovers—which, let’s be real, rarely happens in my house—it keeps beautifully wrapped tightly in plastic wrap in the fridge for up to two days. Want to save some for later? You absolutely can! Freeze it unwrapped until it’s firm, then double-wrap it tightly in plastic and foil. Thaw it slowly overnight in the fridge, and it tastes just as sensational later on!
Frequently Asked Questions About This Baked Cheesecake Recipe
Can I skip the water bath when making the Classic New York Baked Cheesecake?
Oh, please don’t try it! I know the fuss with wrapping the springform pan in all that foil seems like a pain, but skipping the water bath is the fastest way to guarantee cracks—and nobody wants a cracked **Classic New York Baked Cheesecake**! The water bath creates a moist, steamy environment in the oven, which cooks the filling slowly and evenly. This gentle heat is what keeps the sides from setting too fast while the center is still liquid, ensuring you get that unbelievably smooth texture without any baking drama.
What is the best way to get clean slices of this creamy dessert?
This is the pro trick that separates the amateurs from the seasoned bakers! You need patience and a really hot knife. Grab a sharp, long knife—don’t use a dull butter knife for this precision work! Dip the blade deeply into a tall glass of steaming hot water. Pull it out, wipe it totally dry with a clean towel, and then make your cut. That warmth lets the knife glide right through the dense, chilled filling. Repeat that quick hot-dip-and-wipe between every single slice, and you’ll have gorgeous wedges worthy of any party!
Can I use a different crust for my new york cheesecake?
You certainly can branch out if you’re feeling adventurous, but the graham cracker crust is traditional for a reason—it provides that slightly salty, sweet contrast we all love! If you’re tired of graham crackers, shortbread cookies are a wonderful upgrade; just crush those up instead and treat them the same way!
However, for the *classic* experience, stick with the graham crumbs. They crumble just right and don’t overpower the tangy richness of the filling. Finding the right balance is key when preparing these gorgeous **creamy dessert ideas**!
Nutritional Estimate for Classic New York Baked Cheesecake
Because we cherish honesty in our kitchen, here are the estimates for this rich and wonderful dessert. Keep in mind, these numbers are based on using standard ingredients for 10 slices. If you swap out the sour cream or use different brands of cream cheese, things will shift slightly!
- Calories: 659
- Total Fat: 43g
- Carbohydrates: 59g
- Protein: 11g
- Sugar: 49g
This is certainly a treat, not an every-day thing, but that’s why it’s perfect for our special occasion sweets!
Share Your Experience Making This Timeless Dessert
Whew! You’ve done it! You’ve mastered the art of the **Classic New York Baked Cheesecake**, and I bet your kitchen smells absolutely incredible right now. Remember that first bite I told you about? Now you get to make that moment happen for your own family and friends!
I would absolutely love to hear all about your success (or maybe a little funny mishap—we all have them!). Did your kids love it as much as mine do? Was the crust perfectly crisp? Take a picture of your beautiful creation, because these are the moments we bake for!
Please drop a rating for this recipe down below—let me know how many stars you’d give this incredible **baked cheesecake recipe** out of five. And don’t forget to let us know in the comments how this newest memory joins your family’s tradition. Happy baking, everyone!
Classic New York Baked Cheesecake
Ingredients
Equipment
Method
- Preheat the oven to 375°F and set an oven rack in the lower middle position. Wrap a 9- or 10-inch springform pan with one large piece of heavy-duty aluminum foil, covering the underside and extending all the way to the top so there are no seams on the bottom or sides of the pan. Repeat with another sheet of foil for insurance. Spray the inside of the pan with nonstick cooking spray.
- Make the crust: In a medium bowl, combine the graham cracker crumbs, melted butter, sugar, and salt. Stir until well combined. Press the crumbs into an even layer on the bottom of the prepared pan. Bake the crust for 10 minutes, until set. Remove the pan from the oven and set aside.
- Reduce the oven temperature to 325°F. Set a kettle of water to boil.
- Make the batter: In the bowl of an electric mixer fitted with the paddle attachment or beaters, beat the cream cheese, sugar, and flour together on medium speed until just smooth, about 1 minute. Scrape the bottom and sides of the bowl to be sure the mixture is evenly combined. Add the vanilla, lemon zest, lemon juice, and salt; beat on low speed until just combined. Add the eggs, one at a time, mixing on low speed until incorporated, scraping the bowl as necessary. Mix in the sour cream. Make sure the batter is uniform but do not over-mix.
- Check to make sure your oven has cooled to 325°F, then set the cheesecake pan in a large roasting pan. Pour the batter on top of the crust. Pour the boiling water into the large roasting pan to come about 1 inch up the side of the cake pan. Bake until the cake is just set, 1 hour and 30 minutes to 1 hour and 45 minutes. If the cheesecake starts to look too golden on top towards the end, cover it loosely with foil. The cake should not look liquidy at all but will wobble just a bit when the pan is nudged; it will continue to cook as it cools.
- Carefully remove the roasting pan from the oven and set it on a wire rack. Cool the cheesecake in the water bath until the water is just warm, about 45 minutes. Remove the springform pan from the water bath and discard the foil. If necessary, run a thin-bladed knife around the edge of the cake to make sure it is not sticking to the sides, then cover with plastic wrap and transfer to the refrigerator to cool for at least 8 hours or overnight.
- For serving: Remove the sides of the springform pan. Serve the cheesecake right from the base of the pan; or, to transfer it to a serving platter, run a long, thin spatula between the crust and the pan bottom, and then use two large spatulas to carefully transfer the cheesecake to a serving dish. Slice with a sharp knife, wiping the knife clean between slices. Serve with berry sauce, if you like.
Nutrition
Notes
Tried this recipe?
Let us know how it was!
Certified Family Nutrition Strategist
My path into family nutrition began working with Phoenix Area Family Services, where I saw how traditional nutrition advice often ignored real-world constraints like budget limitations, time crunches, and kids who refuse to eat anything green. That experience sparked my mission to develop meal planning systems that work with family realities, not against them.
Over eight years, I’ve helped hundreds of families reduce grocery spending by 25% while dramatically improving their nutrition. My meal planning frameworks have been adopted by local wellness centers because they actually work for busy parents juggling different ages, preferences, and dietary needs in one household.
As a bilingual first-generation Mexican-American and mother of three, I personally navigate the daily challenge of feeding a family nutritiously while honoring cultural traditions and managing a household budget. My “kid-friendly low-carb” protocols show families how to gradually introduce healthier options without triggering mealtime battles or abandoning beloved family recipes.
My “realistic wellness” philosophy is straightforward: health improvements must work within existing family dynamics and financial realities to be truly sustainable. When I’m not developing meal planning systems, I’m creating portable trail snacks for our weekend family hiking adventures – because healthy eating should fuel the life you want to live.
My personal low-carb journey started after pregnancy as a way to regain energy for active parenting, and that experience continues to inform my professional commitment to making healthy eating feel supportive rather than burdensome for busy families.