

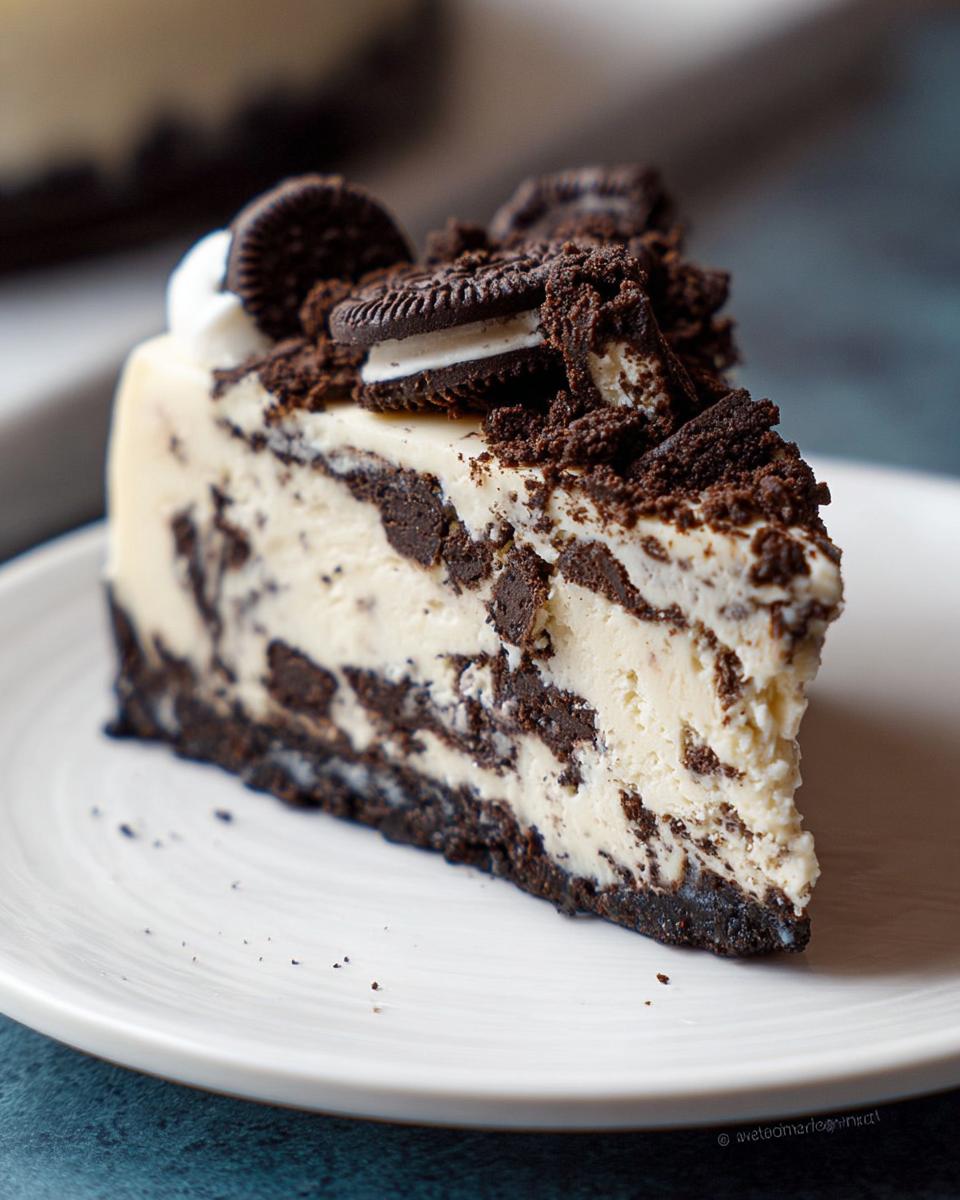
When you need a dessert that screams comfort, nostalgia, and pure indulgence rolled into one, you just can’t beat a classic cheesecake. But we’re not making just any old cheesecake today, oh no! We’re making the ultimate crowd-pleaser: the perfect Oreo Cookies and Cream Cheesecake. I still remember the first time my kids and I decided to bake this together. It was a rainy day, and I wanted to distract them from the gloomy weather outside. The kitchen quickly filled with laughter as we crushed the Oreos, blending fun with the sweet aroma of cream cheese mixing with chocolate. Each step was a chance for us to bond, and seeing their faces light up as we took that first bite was a rewarding reminder of why I love creating desserts. This cheesecake has since become our go-to for birthdays and family gatherings. As a Certified Family Nutrition Strategist, I promise you this recipe is easy to follow, reliably decadent, and guaranteed to bring smiles to your table!
Why This Oreo Cookies and Cream Cheesecake Recipe Works for Families
I know life gets busy, and sometimes baking something spectacular feels impossible. But trust me, this recipe is designed for real families! It isn’t just about the amazing chocolate and cream filling; it’s about making baking fun and stress-free. You don’t need to be a professional pastry chef to nail this one.
- It’s totally kid-approved—crushing those cookies is mandatory fun!
- It uses techniques, like the water bath, that guarantee you won’t end up with cracks. Hello, perfect texture!
- It’s reliably delicious every single time, which is what we need in our go-to kid approved recipes, right?
Simple Steps for a Perfect Oreo Cookies and Cream Cheesecake
Honestly, the hardest part is waiting for it to chill! We handle the baking smoothly by using a simple water bath—don’t let that scare you. It’s just hot water in a pan, and it creates this steamy environment that cooks the filling gently. This trick alone is the key to that impossibly creamy texture we are aiming for in this wonderful cookies and cream dessert. You’ve got this!
Essential Ingredients for Your Oreo Cookies and Cream Cheesecake
Okay, let’s talk ingredients! The quality of what you start with really matters here, especially when making a showstopper like the Oreo Cookies and Cream Cheesecake. We need just a few things, but preparation is everything. Remember, we’re aiming for that ultra-smooth, never-gritty texture that makes people ask for the recipe! If you’re looking for where I source some of my favorite baking supplies, you can check out some great starting points here for inspiration.
For the Chocolate Cookie Crust
This layer is the chocolate foundation, the perfect starting point for the whole dessert. You’ll need exactly 20 regular Oreo cookies—and I mean the whole cookie, filling and all! Make sure they are crushed down into fine crumbs, almost like sand. Mix those crumbs with 5 tablespoons of melted butter. That’s it! Just butter and cookies. It sounds simple, but that ratio is what keeps the crust from crumbling completely when you try to slice it later.
For the Creamy Filling of the Oreo Cookies and Cream Cheesecake
Here is where we need to be careful about temperature! You simply must have 24 ounces (that’s three standard blocks!) of cream cheese that is fully softened to room temperature. If it’s cold, you’ll get lumps, and we want smooth sailing here. You’ll mix that with 1 cup of granulated sugar and 1 cup of sour cream or full-fat plain yogurt—the yogurt cuts the richness just a tiny bit, which I love! Don’t forget 1 tablespoon of vanilla extract. Then, we add the 3 large eggs, bringing them in one at a time while mixing just gently. Finally, the fun part: gently fold in 18 Oreos that you’ve crumbled up. Make sure those crumbles aren’t too big, or they’ll weigh down your smooth filling.
Step-by-Step Instructions for the Oreo Cookies and Cream Cheesecake
Alright, grab your notes, because this is where we put it all together! Don’t panic about the steps; they are laid out just like I do them in my kitchen, and if you ever get nervous, there’s always a step-by-step video available to walk you through the tricky parts. Remember the 9-inch springform pan? Get that ready first, because we need to seal it up tight for the water bath later on. Check out the equipment list—we’ll be using our mixer and that big roasting pan soon enough! If you follow these carefully, you’ll master the baking techniques needed for a flawless result. You can learn more about my general baking philosophy right here.
Preparing the Chocolate Cookie Crust
First things first: you absolutely have to preheat that oven to 350°F (175°C). Before you even look at the filling ingredients, wrap that 9-inch springform pan completely in heavy-duty aluminum foil, like you’re wrapping a precious gift. Trust me, this foil is our shield against any soggy bottom tragedies! Once the pan is wrapped, quickly pulse those 20 Oreos into fine crumbs in your food processor—we are building a solid base for an amazing Oreo Cookies and Cream Cheesecake. Stir those crumbs with the 5 tablespoons of melted butter until it looks like wet sand. Press it firmly into the bottom of your prepared pan. Pop that right into the oven for just 9 to 10 minutes to set before you let it cool down while you tackle the filling.
Mixing the Cheesecake Filling
Time to bring out the mixer! Start by beating that room-temperature cream cheese with the granulated sugar until it looks totally smooth—no sugary lumps allowed. Then mix in the sour cream or yogurt and the vanilla extract until it’s just combined. Now, the critical part with the eggs: add them one at a time, mixing only on low speed, just until you see the yolk disappear. If you over-beat this part, you’re beating in air, and air equals cracks later! Once the eggs are incorporated, switch to a spatula and gently fold in those 18 crumbled Oreos. Don’t stir hard; we just want them spread throughout the batter evenly for those cookies and cream bites.
Baking and Cooling the Oreo Cookies and Cream Cheesecake
This is where we build the environment for perfection! Place your foil-wrapped springform pan inside that large roasting pan and move both into the oven. Now, pour hot water—and I mean hot, straight from the kettle—into the roasting pan until the water comes about halfway up the side of the springform pan. That’s your water bath! Bake it for 50 to 60 minutes until the center is just barely jiggly—almost set. When that time is up, turn the oven completely off, crack the door open just a bit, and let the cheesecake stay in there to rest for a full hour. This slow temperature drop is fantastic for keeping the top smooth. After that hour, take it out, let it cool all the way on the counter, and then it’s chill time for at least 4 hours, preferably overnight!
Expert Tips for a Flawless Oreo Cookies and Cream Cheesecake
Listen, I’ve had sunk centers and cracked tops just like everyone else when tackling a cheesecake. That’s why I want to share the secrets that make this recipe so reliable. When you’re looking to buy your blocks of cream cheese, think about quality; sometimes spending just a little more translates directly into a richer flavor for your final Oreo Cookies and Cream Cheesecake. If you’re stocking up on ingredients for perfection, thinking about where to buy them can sometimes make a difference!
Achieving the Smoothest Texture in Your Oreo Cookies and Cream Cheesecake
This is my #1 rule that you cannot skip: your cream cheese, yogurt, and especially your eggs have to be at room temperature. If they are cold, they just won’t blend together nicely, and you’ll end up beating the batter way too long trying to scrape down the sides and erase lumps. This leads directly to cracking!
Once those eggs are in, you switch to low speed, right? Keep it low! Over-beating the batter after the eggs are added incorporates too much air. When that air heats up in the oven, it expands, and when it cools down, boom—crack right down the middle. We want dense and creamy, not fluffy and cracked. Remember to check out my thoughts on ingredient sourcing if you want to up your game!

Storing and Serving Your Oreo Cookies and Cream Cheesecake
Congratulations! You’ve managed the tricky baking part, and now you have this gorgeous, creamy creation staring back at you. But trust me, rushing this last stage is a recipe for disappointment. The chilling time is crucial. You absolutely must let the Oreo Cookies and Cream Cheesecake cool completely on the counter first, which stops it from getting sweaty or collapsing when you move it.
Once it’s cool to the touch, cover the entire pan loosely with plastic wrap—but make sure the wrap doesn’t touch the top, or you’ll ruin that nice flat surface! Into the fridge it goes for a minimum of four hours. Honestly, if you can manage to wait overnight, that’s when the flavor really marries up and the texture firms up exactly how it should. It’s torture, but it’s worth it!
When you finally can’t wait anymore, it’s time to release it from the pan. Run a thin, flexible knife or offset spatula around the inside edge first. This loosens the cheesecake from the metal rim. Then, carefully unclasp and lift off the ring. Sometimes, you might need to carefully slide an even thinner knife underneath the crust to loosen it from the springform base before serving. I usually put it right onto a nice serving plate before taking the bottom base off.
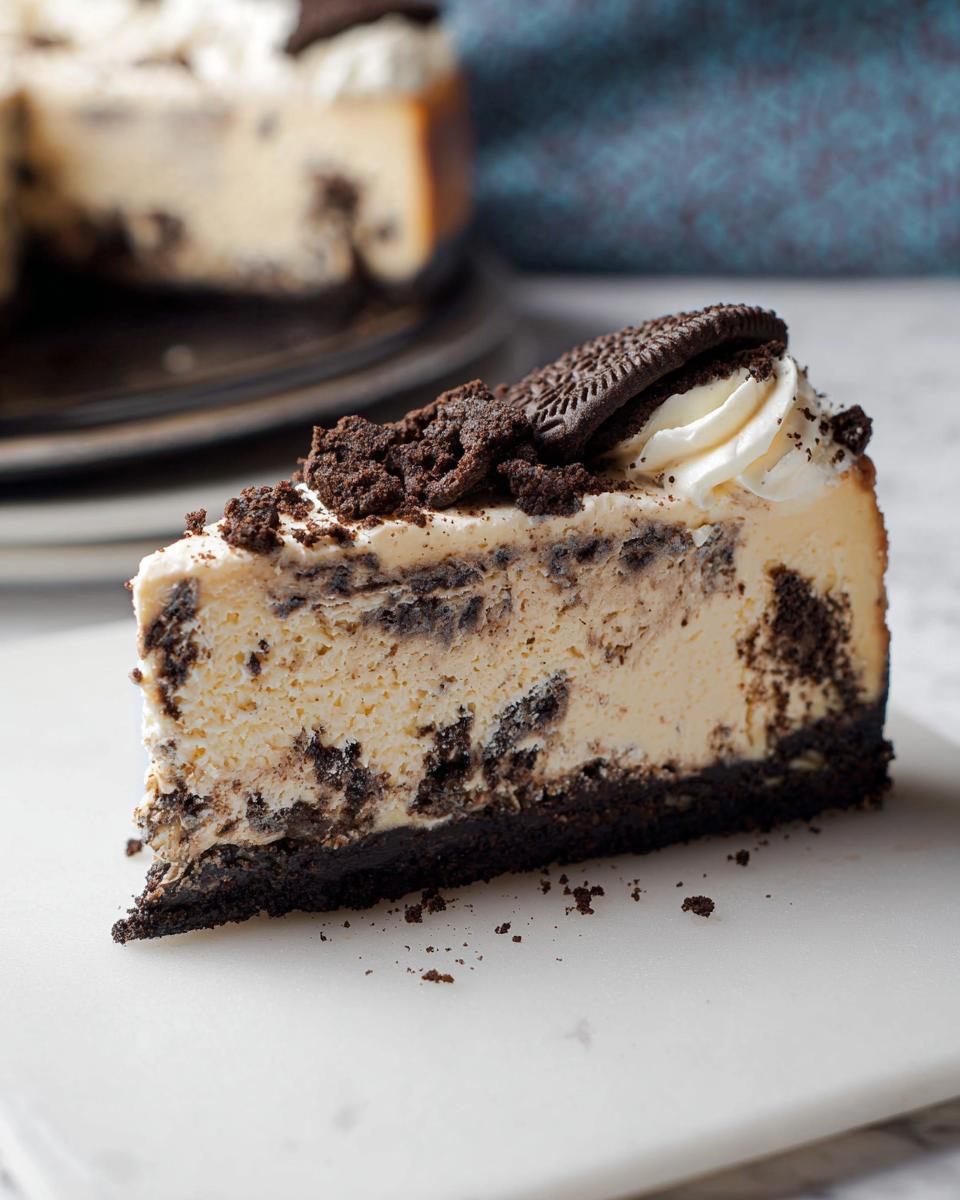
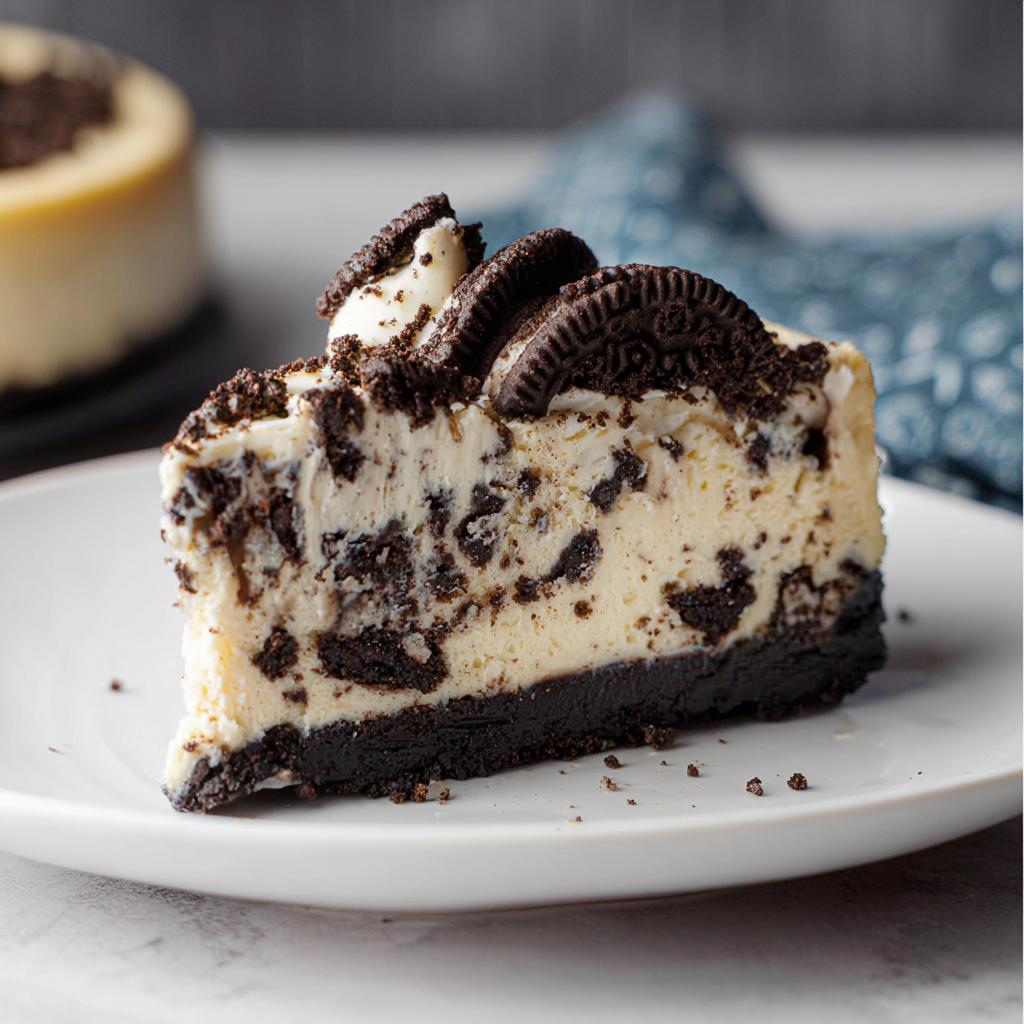
Now for the finishing touches! Remember those 5 extra Oreos we saved back? Take those and crumble them up roughly—we want texture here, not fine dust. Pile up some fresh whipped cream right on top and sprinkle those glorious chocolate bits all over it. It just screams cookies and cream desserts!
If you happen to have any leftovers—which seems unlikely with this crowd-pleaser—just cover the cake tightly (the plastic wrap should touch the edges of the topping this time if you stored it already topped) and keep it in the refrigerator. It stays wonderfully fresh for up to four days. Every day it gets just a little bit richer, if that’s even possible!
Frequently Asked Questions About Oreo Cheesecake
If you’re anything like me, you might have a few quick questions buzzing around before you dive in to make the absolute best Oreo Cookies and Cream Cheesecake. That’s totally normal! Baking cheesecake involves a few specific steps, but once you know the ‘why,’ it gets so much easier. Here are the common things I hear from folks rolling out this recipe.
Can I skip the water bath when making this Oreo Cookies and Cream Cheesecake?
Oh, I really wish you could, but I have to say a firm no on this one! The water bath—or bain-marie—is not just some fancy technique chefs use to show off. It’s absolutely essential for any good cheesecake, especially one as rich as this Oreo cheesecake. The water creates a humid, gentle environment in the oven. This traps moisture and ensures the cheesecake cooks evenly from the outside edges all the way to the center, which prevents those awful cracks from forming on top. Skimping on it means rough edges and a dense, slightly rubbery texture, and we want smooth and creamy!
What is the best way to crumble the Oreos for this cookies and cream desserts recipe?
This depends on where the crumbs are going! For that crisp chocolate cookie crust, you want them super fine—think powder mixed with sand texture. A food processor is your best friend here; it gets them perfectly uniform fast. But for the 18 cookies you fold into the creamy filling? I change my tune! For those, I toss them into a sturdy zip-top bag, seal it up, make sure the air is out, and then I use a rolling pin or even the bottom of a heavy mug to crush them by hand. This way, you get a mix of finer powder and some chunkier bits, which gives you those wonderful textural surprises throughout the cookies and cream desserts!
Is this Oreo cheesecake recipe suitable as a kid approved recipes option?
Absolutely, one hundred percent yes! This is probably one of the top kid approved recipes in my house. Baking this Oreo cheesecake together is fantastic family time. The kids absolutely *love* getting to mash up the Oreos, and they feel so proud when they see the finished product studded with chocolate chunks. Plus, let’s be real, who doesn’t love cookies and cream? It’s a guaranteed win for any celebration you have coming up!

Estimated Nutritional Data for Oreo Cookies and Cream Cheesecake
I always get asked about the numbers, especially since I approach baking as a family nutritionist! While this Oreo Cookies and Cream Cheesecake is definitely an indulgent treat, knowing the basics can help you plan your serving sizes. Remember, these figures are just estimates based on the ingredients list I provided—they can change a bit depending on the brand of cream cheese or yogurt you choose. Nutrition labels are tricky, but here’s a general idea of what you’re looking at per slice (based on 12 generous servings).
It’s rich, but oh my goodness, it’s worth every single bite! When you’re enjoying a slice of this decadent cookies and cream dessert, just pair it with a nice piece of fruit for balance!
- Calories: 458
- Fat: 31g
- Carbohydrates: 39g
- Protein: 4g
Please keep in mind these are just rough estimates, as the exact nutritional breakdown changes based on the specific brand of Oreos or cream cheese you purchase. Don’t sweat the small stuff; just enjoy the fact that you made something incredible!
Share Your Oreo Cookies and Cream Cheesecake Creations
Wow, we made it through the whole recipe! I truly hope you loved baking this Oreo Cookies and Cream Cheesecake as much as I love seeing people enjoy it. This isn’t just some random dessert; it’s a memory maker, a five-star comfort food, and I’m so excited for you to taste it.
Now that you’ve chilled it for a day and served up those perfect slices, I really want to hear from you! Did it disappear as fast as mine does? Did the kids help you crush the Oreos? Don’t be shy, head down to the comments section below to leave a review—if it earned five stars in your house, tell the world!
And please, snap a picture if you can! Tag me when you share your beautiful, creamy creation on social media. Seeing your versions of this classic family favorite brightens my whole week. Go on now, put that fork to work, and enjoy every single bite!
Oreo Cookies and Cream Cheesecake
Ingredients
Equipment
Method
- Adjust the oven rack to the lower third position and preheat oven to 350°F (175°C).
- Place a 9-inch springform in the center of a large sheet of heavy duty aluminum foil (about 18 by 18-inches). Carefully wrap foil around sides of cheesecake pan, spray inside with non-stick spray.
- In a food processor or blender, pulse 20 Oreos to fine crumbs. In a medium mixing bowl stir together the Oreo crumbs and melted butter until well combined.
- Press mixture into an even layer in bottom of prepared springform pan. Bake in preheated oven 9 – 10 minutes then allow to cool as you prepare the filling.
- In a mixing bowl, using a hand-held electric mixer or a stand mixer fitted with a paddle attachment, beat the cream cheese and granulated sugar until smooth and creamy.
- Add in the sour cream or yogurt and the vanilla and mix well. Add eggs one at a time and mix on low speed just until combined.
- Gently fold in 13 crumbled Oreo cookies. Do not over-mix. Pour the filling into the cooled crust.
- Place the springform pan into a large roasting pan and place in the oven. Fill the roasting pan up with hot water until the water level comes about halfway up the outside of the cheesecake pan.
- Bake in preheated oven 50 – 60 minutes, or until the center is almost set. Turn the oven off and open the door slightly. Let the cheesecake rest in the oven for 1 hour.
- Remove from oven and allow to cool completely at room temperature. Refrigerate for at least 4 hours or overnight.
- Loosen the cheesecake from the rim of the pan and remove the rim. Top with whipped cream, crumble remaining 5 Oreos and sprinkle over cheesecake. Cut into slices and serve chilled.
- Cover the cheesecake and store in refrigerator up to 4 days.
Nutrition
Notes
Tried this recipe?
Let us know how it was!
Certified Family Nutrition Strategist
My path into family nutrition began working with Phoenix Area Family Services, where I saw how traditional nutrition advice often ignored real-world constraints like budget limitations, time crunches, and kids who refuse to eat anything green. That experience sparked my mission to develop meal planning systems that work with family realities, not against them.
Over eight years, I’ve helped hundreds of families reduce grocery spending by 25% while dramatically improving their nutrition. My meal planning frameworks have been adopted by local wellness centers because they actually work for busy parents juggling different ages, preferences, and dietary needs in one household.
As a bilingual first-generation Mexican-American and mother of three, I personally navigate the daily challenge of feeding a family nutritiously while honoring cultural traditions and managing a household budget. My “kid-friendly low-carb” protocols show families how to gradually introduce healthier options without triggering mealtime battles or abandoning beloved family recipes.
My “realistic wellness” philosophy is straightforward: health improvements must work within existing family dynamics and financial realities to be truly sustainable. When I’m not developing meal planning systems, I’m creating portable trail snacks for our weekend family hiking adventures – because healthy eating should fuel the life you want to live.
My personal low-carb journey started after pregnancy as a way to regain energy for active parenting, and that experience continues to inform my professional commitment to making healthy eating feel supportive rather than burdensome for busy families.