
Ah, grilled cheese. Just saying the words conjures up feelings of pure comfort and happy memories, doesn’t it? For me, it always takes me back to lazy, rainy afternoons when staying inside was the only option. I remember once, my kids were getting a little stir-crazy, and I decided to jazz up our usual grilled cheese with some avocado and a pinch of smoked paprika I had lying around. Watching their faces light up when they took their first bites of these “fancy” sandwiches… that was a moment! It really showed me how a simple grilled cheese can be totally transformed into something special, perfect for busy families. That’s why I’m so excited to share Why Everyone Loves This Grilled Cheese Recipes (+ Make-Ahead Tips) – it’s a recipe that’s warm, comforting, and secretly brilliant for busy weeknights. As a Certified Family Nutrition Strategist, I know how important it is to have meals that are not only delicious but also easy to manage, and this one totally delivers!
Why Everyone Loves This Grilled Cheese Recipes (+ Make-Ahead Tips)
Okay, so you’ve heard this one’s a winner, and trust me, it really is! This isn’t just any grilled cheese; it’s *the* grilled cheese that makes everyone ask for seconds. We’re talking about a recipe that hits all the right notes – super comforting, ridiculously easy, and with that amazing make-ahead magic I know you busy bees will love. It’s the perfect way to get a consistently delicious, melty masterpiece on the table, even when time is tight. Let’s dive into what makes this grilled cheese recipe so darn special!
The Secret to the Perfect Melty Grilled Cheese
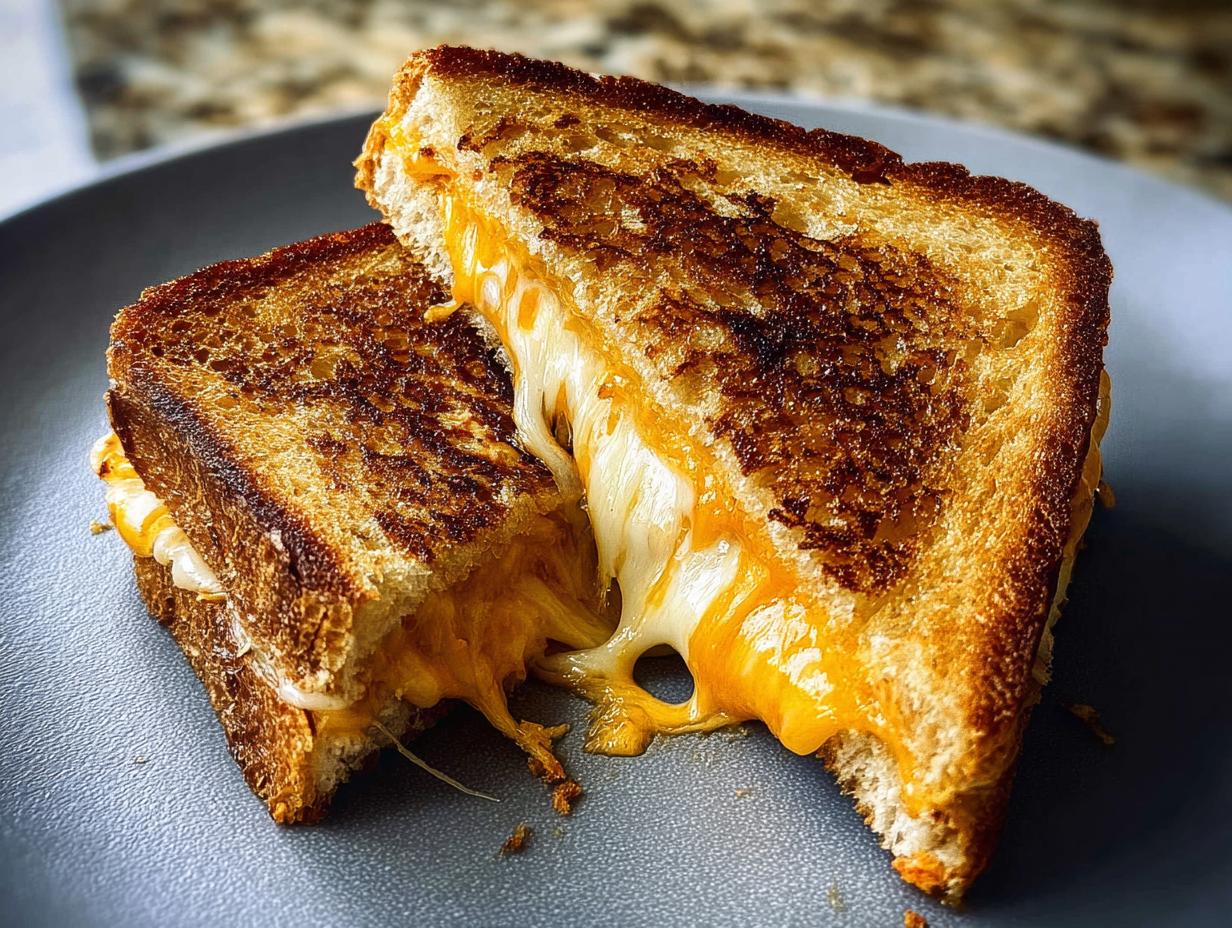
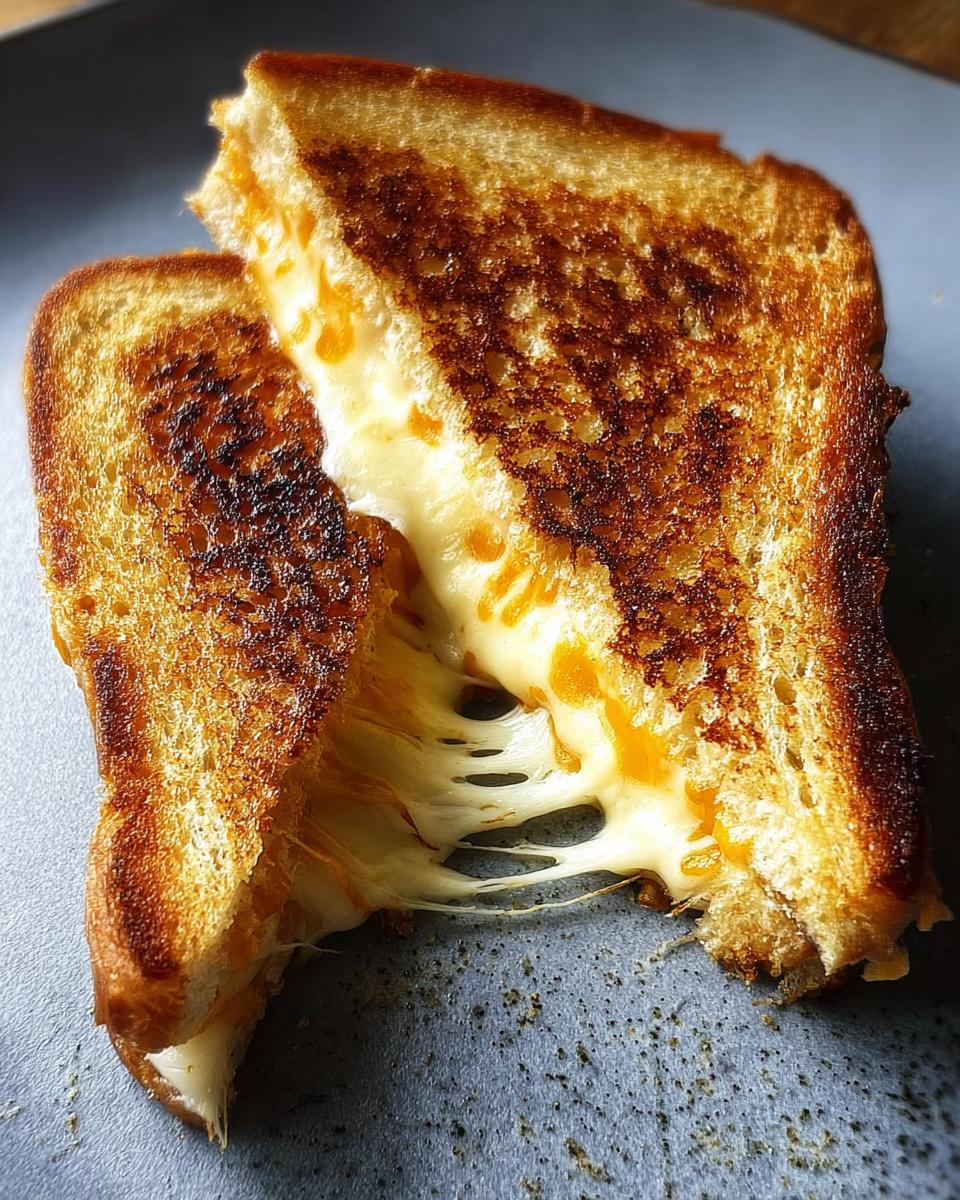
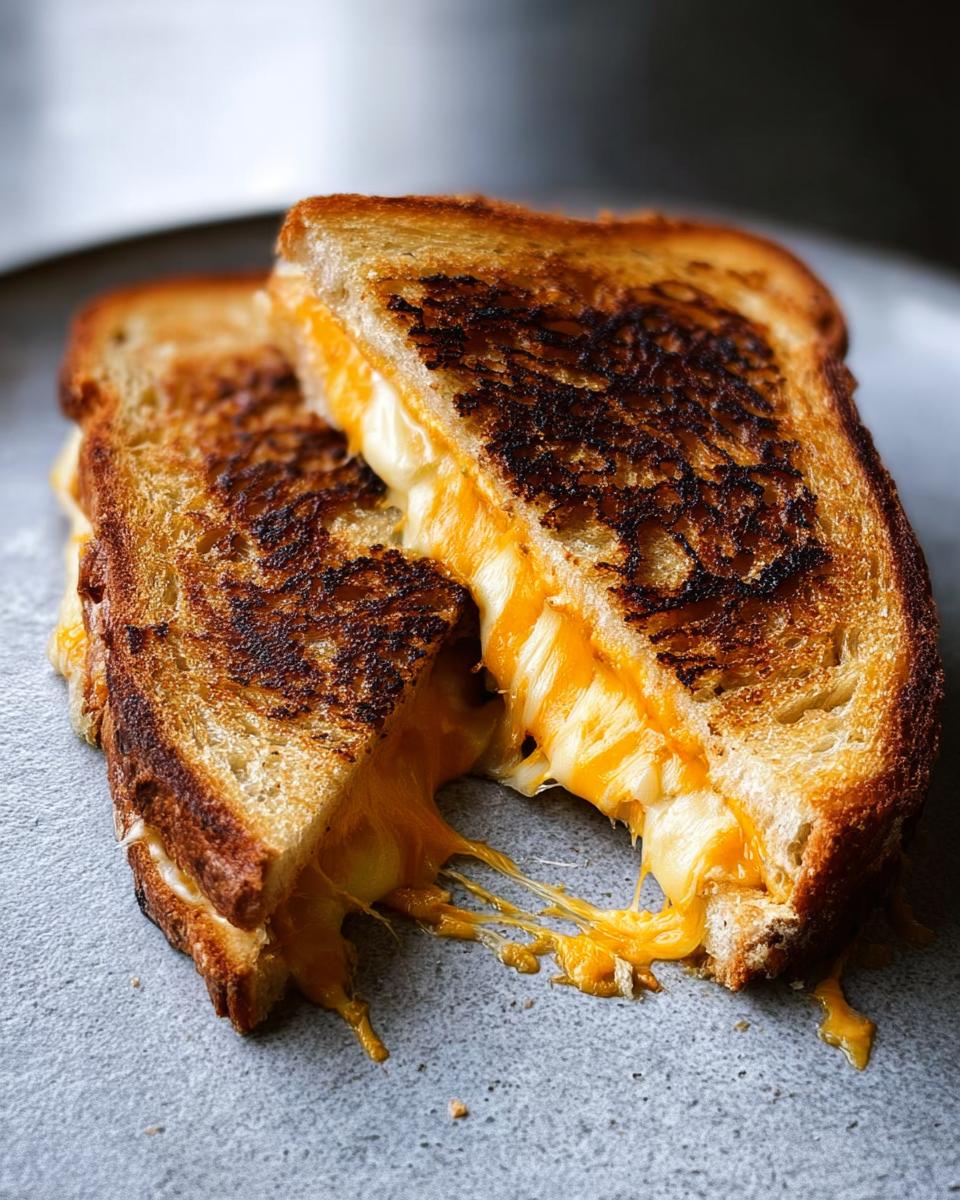
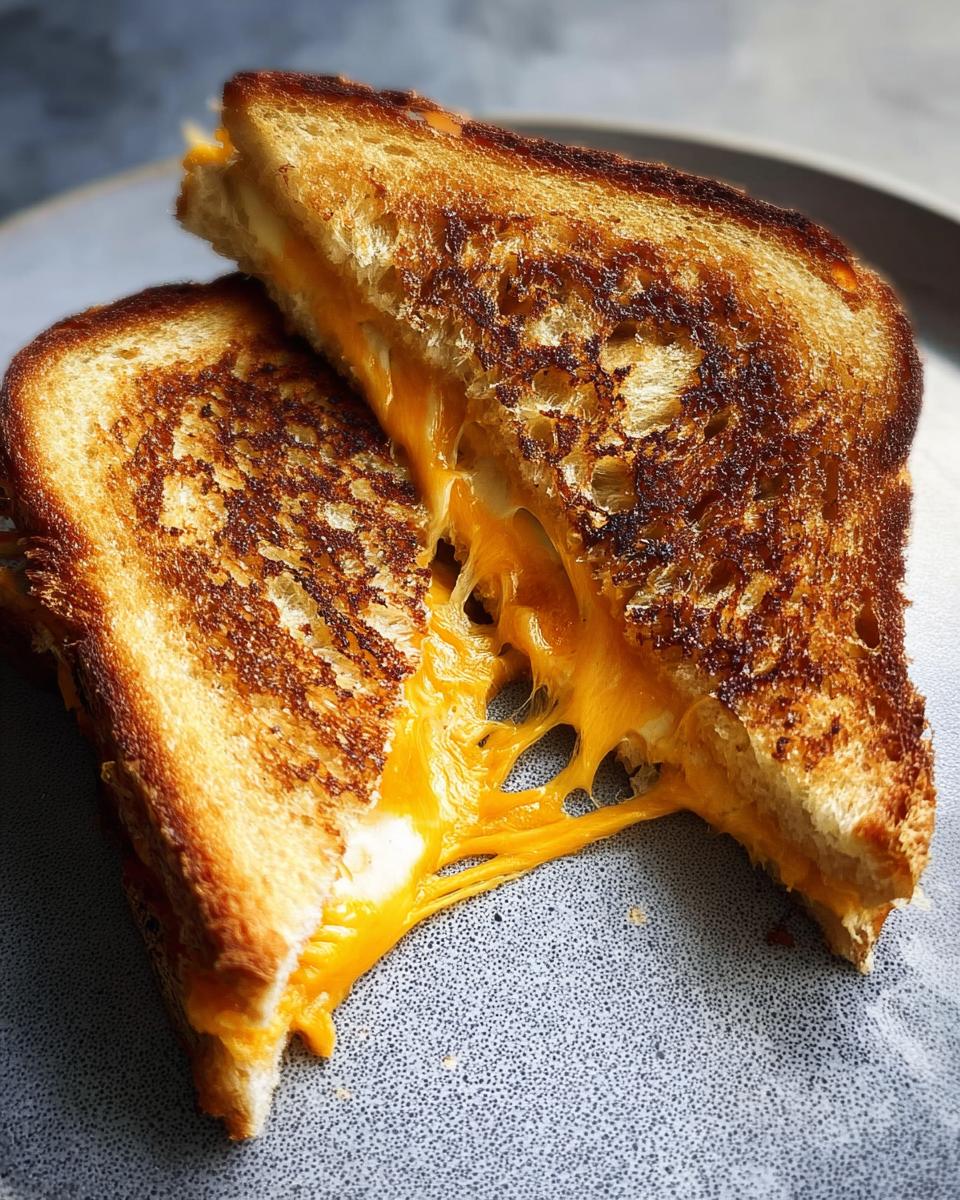
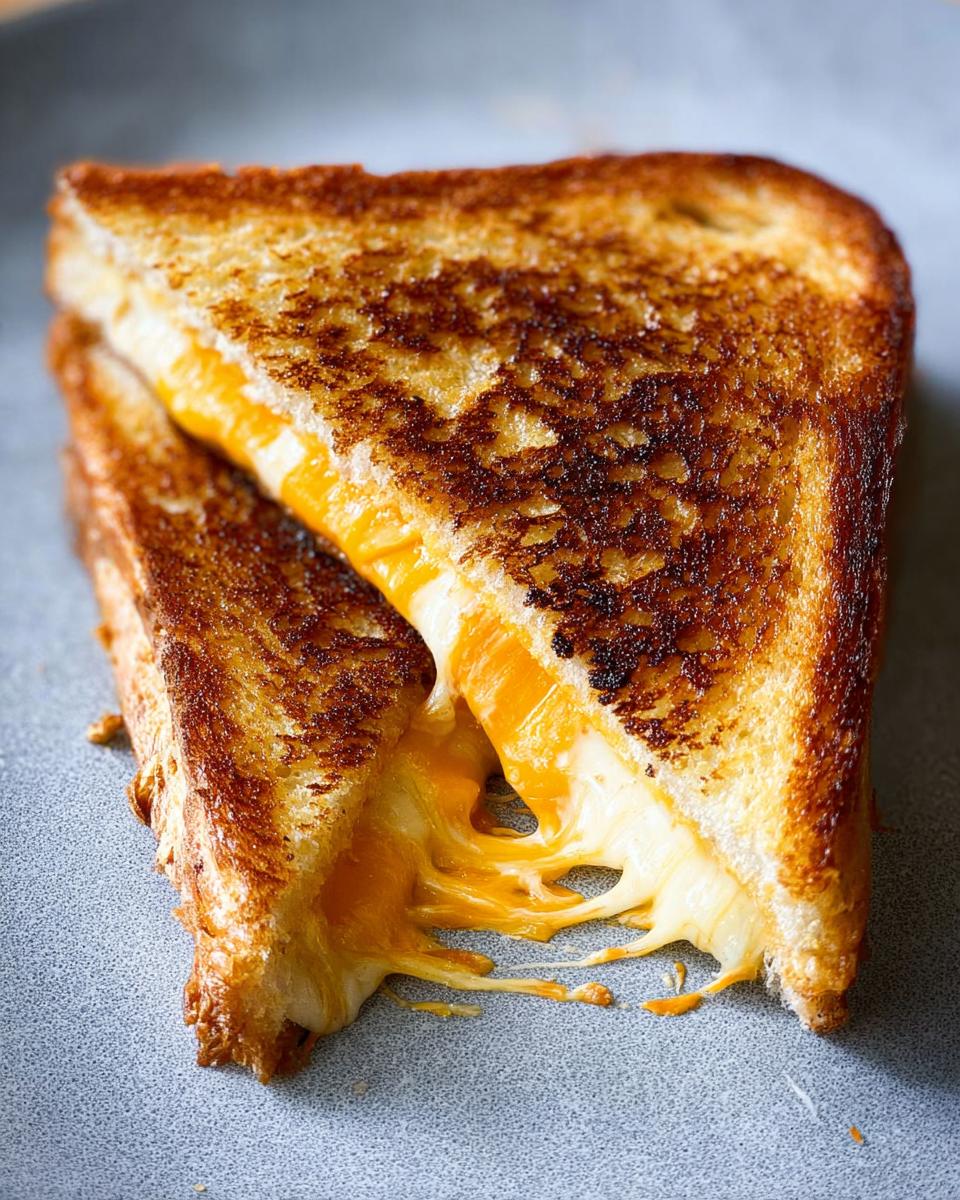
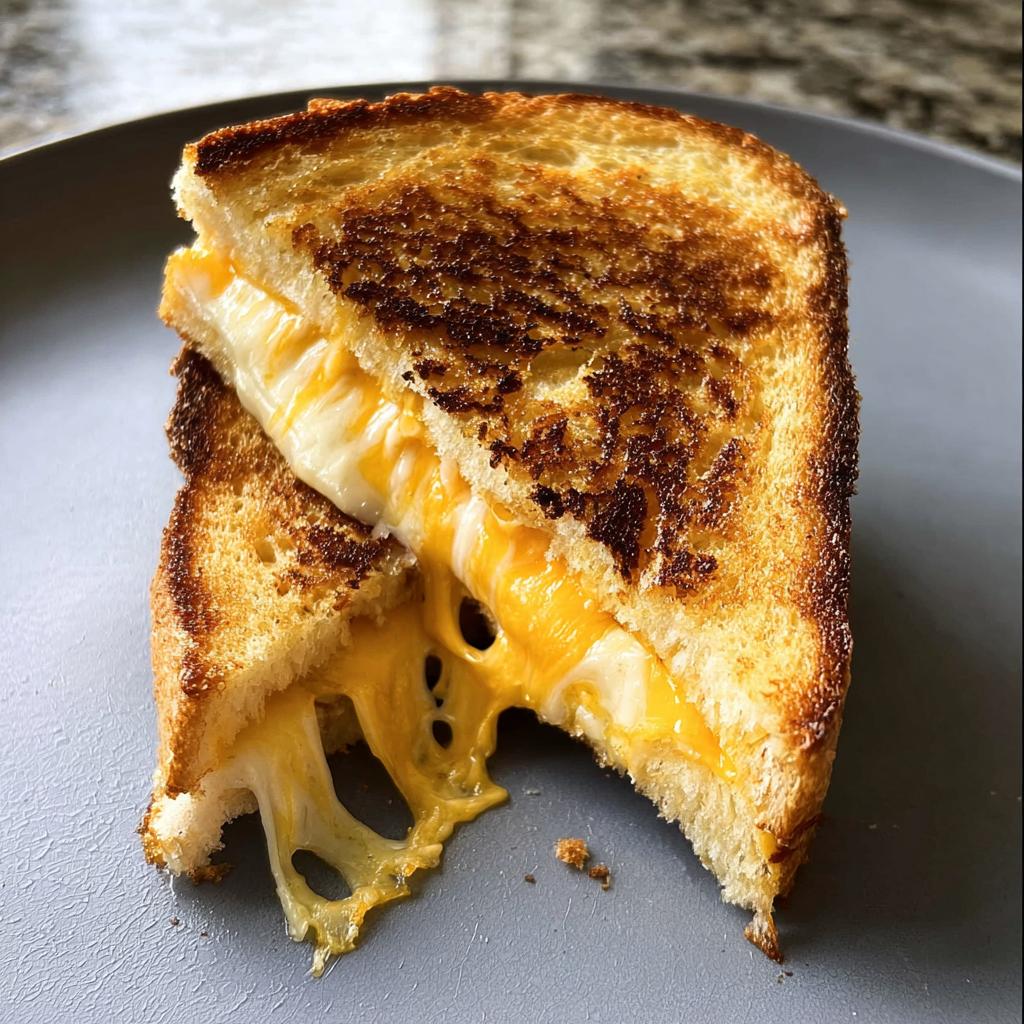
So, what’s the big deal? It all starts with the cheese blend, really. We’re using a mix of sharp cheddar for that classic tang and Gruyère (or raclette if you can find it!) for its incredible meltiness. Grating your own cheese is a total game-changer here; it melts so much better than pre-shredded stuff, which sometimes has anti-caking agents that get in the way. Then there’s the bread – sourdough is my go-to because it’s sturdy enough to hold all that gooey goodness and gets beautifully crisp. And the cooking? It’s all about that low and slow heat. We want golden brown, crunchy bread and perfectly melted cheese inside, not burnt toast with cold cheese, right? This combo ensures every bite is pure, melty bliss.
Ingredients for Your Ultimate Grilled Cheese
Here’s what you’ll need to pull off this grilled cheese dream:
For the Sandwich:
- 2 slices sourdough bread
- Mayonnaise, for spreading
- Dijon mustard, for spreading
- 1 to 2 ounces grated sharp cheddar cheese (depending on your bread size!)
- 1 to 2 ounces grated Gruyère or raclette cheese (depending on your bread size!)
For Cooking:
- Butter, for the pan
How to Make This Quick Grilled Cheese Recipe
Alright, ready to make some magic happen? This quick grilled cheese recipe is an absolute lifesaver during busy days, but it doesn’t skip on flavor one bit. Seriously, you can have a gourmet-level sandwich in just minutes! Let’s get this done so you can start enjoying it.
Step-by-Step Sandwich Assembly
First things first, grab your cutting board. Lay out your two slices of sourdough bread. Now, spread a thin layer of mayonnaise on one side of each slice – this is our secret to that perfect golden crust, trust me! Flip one slice over and spread its other side with a little Dijon mustard. This adds a lovely bit of zing. Then, pile on that glorious grated cheddar and Gruyère cheese. You want to make sure it’s evenly distributed so you get melty goodness in every single bite. Top it all off with the other slice of bread, mayo-side facing up.
Achieving the Perfect Golden-Brown Crust
Now for the cooking part! Get a nonstick or cast-iron skillet heating over medium-low heat. You don’t want it too hot, or you’ll burn the bread before the cheese even thinks about melting! Melt enough butter in the pan to coat it nicely. Carefully place your assembled sandwich into the warm, buttered pan. Pop a lid on top – this helps trap the heat and melt that cheese perfectly. Let it cook for about 2 to 3 minutes. You’re looking for that bottom slice to turn a beautiful golden brown and get nice and crisp. Then, flip it over, put the lid back on, and cook for another 1 to 3 minutes until the other side is golden and the cheese is completely melted and oozy. If your bread is getting too dark before the cheese melts, just turn the heat down a notch. Slice it in half and serve immediately – the absolute best way to enjoy that melty perfection!
Make-Ahead Magic: Your Grilled Cheese Strategy
Life gets hectic, right? That’s where this grilled cheese recipe really shines! I’ve figured out a few tricks so you can totally get a head start and still have that amazing, melty sandwich ready when you need it. It’s like having a little bit of kitchen magic up your sleeve for those busy weeknights. Being able to prep these ahead is a total game-changer for busy weeknights or even a quick lunch the next day!
Assembling for Future Enjoyment
So, ready to get a head start? You can totally assemble these grilled cheese sandwiches ahead of time. Just follow all the steps up to layering the cheese and putting the top slice of bread on, but don’t cook them yet! Once assembled, carefully wrap each sandwich individually in plastic wrap or parchment paper. Then, pop them into an airtight container or a resealable bag in the fridge. This keeps them fresh and ready to go. Make sure the mayo side is facing out on both slices to help keep the bread from getting soggy.
Quick Reheating and Serving
When hunger strikes, just unwrap your pre-assembled sandwich and toss it straight into a buttered skillet over medium-low heat, just like we talked about earlier. You might need to cook it just a smidge longer than a fresh one, maybe an extra minute or two per side, to get that perfect crispy crust and gooey interior. Keep an eye on it to make sure it turns that lovely golden brown. Serve this beauty up immediately, maybe with a side of tomato soup or a quick salad, and enjoy your stress-free, delicious meal!
Tips for the Ultimate Grilled Cheese Experience
Want to take your grilled cheese from *great* to *absolutely epic*? I’ve got a few tricks up my sleeve that will really make it shine. Think of these as little ways to boost your game, using simple swaps or just a little extra thought. Building on that perfect foundation, we can really create something special. It’s all about those little details that make a big difference, you know? Like making sure every bite is just *chef’s kiss*! You can find even more amazing ideas over at Love and Lemons.
Creative Cheese Combinations for Extra Flavor
While cheddar and Gruyère are amazing, don’t be afraid to play around with other cheeses! A good quality Monterey Jack or a mild Provolone will give you that same fantastic melt. For a bit of a tang, try adding some fresh mozzarella or even a smear of goat cheese. And for a little something different, a sprinkle of Parmesan on the outside of the bread before grilling adds an extra layer of nutty flavor and gets super crispy. Just a heads-up, harder cheeses might need a bit more time to melt, so keep that heat on low!
Bread Choices for the Perfect Crunch
Sourdough is my number one for a reason – it’s hearty and gets that perfect crisp. But honestly, almost any good bread can work. A nice thick-cut challah or brioche will give you a richer, slightly sweeter sandwich. Even a simple white bread can be fantastic if it’s sliced a bit thicker. Just make sure your bread isn’t too thin, or it might get overwhelmed by all that gooey cheese. A good crust is key!
Frequently Asked Questions About Grilled Cheese
Got questions about achieving grilled cheese perfection? I’ve got you covered! It’s a simple sandwich, but a few tweaks can make all the difference. Let’s tackle some common probs and keep that cheese extra melty and that bread perfectly golden.
What’s the best way to get a super melty cheese?
For that ultimate melty goodness, always grate your own cheese! Pre-shredded stuff can be a bit dry. Also, keeping your cooking heat on medium-low is key, and covering the pan for a minute or two helps trap steam to melt everything beautifully.
Can I use different types of bread for this recipe?
Absolutely! While sourdough is my favorite for its sturdy crust, you can totally use other breads. Think brioche for a richer flavor, or even a good whole wheat. Just make sure it’s not too thin, so it can hold up to all that delicious cheese!
How do I prevent my grilled cheese from burning?
The trick here is patience and heat control! Cook your grilled cheese over medium-low heat. This allows the inside to get warm and the cheese to melt thoroughly before the outside gets too dark. If your bread is browning too quickly, just lower the heat even more!
Serving Suggestions for Your Perfect Grilled Cheese
Okay, so you’ve mastered the perfect grilled cheese – that crispy, golden exterior with a gooey, melty center. Yum! But what do you serve with it to make it a complete meal? Honestly, this masterpiece pairs wonderfully with so many simple sides. My absolute favorite is a classic creamy tomato basil soup. Dunking that cheesy goodness into warm soup is just heaven! If you’re looking for something a little lighter, a crisp salad is always a good bet. An easy cucumber Caprese salad offers a lovely fresh contrast to the rich sandwich. Whatever you choose, you’ve got a winner for lunch or a casual dinner!
Nutritional Information
While this grilled cheese is pure comfort, it’s good to know what you’re eating! Keep in mind that these numbers are just estimates and can change depending on the exact ingredients and brands you use. But usually, one of these amazing sandwiches will clock in around 450-550 calories, with about 25-35g of fat, 20-25g of protein, and 25-35g of carbs. Enjoy!
Share Your Grilled Cheese Creations!
Tried this recipe and absolutely loved it? I’d be thrilled to hear all about it! Share your thoughts in the comments below, maybe tell me what special cheeses you used or if you added any fun extras. And if you snapped a pic, tag me! Hearing from you makes my day and helps other home cooks find their next favorite meal. Let’s keep the grilled cheese love going!
Why Everyone Loves This Grilled Cheese Recipes (+ Make-Ahead Tips)
Ingredients
Equipment
Method
- Prepare the sandwich: Place the bread slices on a cutting board. Spread the top side of each slice with mayonnaise. Flip one slice of bread and spread its other side with Dijon mustard. Layer the cheddar and Gruyère or Raclette cheeses on top of the mustard. Place the other slice of bread on top of the cheese, mayonnaise side out.
- Cook the sandwich: Heat a nonstick or cast-iron skillet over medium-low heat. Melt enough butter in the pan to coat it. Place the sandwich in the pan, cover, and cook for 2 to 3 minutes, or until the bottom slice of bread is golden brown and crisp.
- Flip the sandwich, replace the lid, and cook until the other slice of bread is golden brown and the cheese is melted, 1 to 3 minutes. Reduce the heat to low if the bread is getting too brown before the cheese is fully melted.
- Slice and serve immediately.
Notes
Tried this recipe?
Let us know how it was!
Certified Family Nutrition Strategist
My path into family nutrition began working with Phoenix Area Family Services, where I saw how traditional nutrition advice often ignored real-world constraints like budget limitations, time crunches, and kids who refuse to eat anything green. That experience sparked my mission to develop meal planning systems that work with family realities, not against them.
Over eight years, I’ve helped hundreds of families reduce grocery spending by 25% while dramatically improving their nutrition. My meal planning frameworks have been adopted by local wellness centers because they actually work for busy parents juggling different ages, preferences, and dietary needs in one household.
As a bilingual first-generation Mexican-American and mother of three, I personally navigate the daily challenge of feeding a family nutritiously while honoring cultural traditions and managing a household budget. My “kid-friendly low-carb” protocols show families how to gradually introduce healthier options without triggering mealtime battles or abandoning beloved family recipes.
My “realistic wellness” philosophy is straightforward: health improvements must work within existing family dynamics and financial realities to be truly sustainable. When I’m not developing meal planning systems, I’m creating portable trail snacks for our weekend family hiking adventures – because healthy eating should fuel the life you want to live.
My personal low-carb journey started after pregnancy as a way to regain energy for active parenting, and that experience continues to inform my professional commitment to making healthy eating feel supportive rather than burdensome for busy families.