
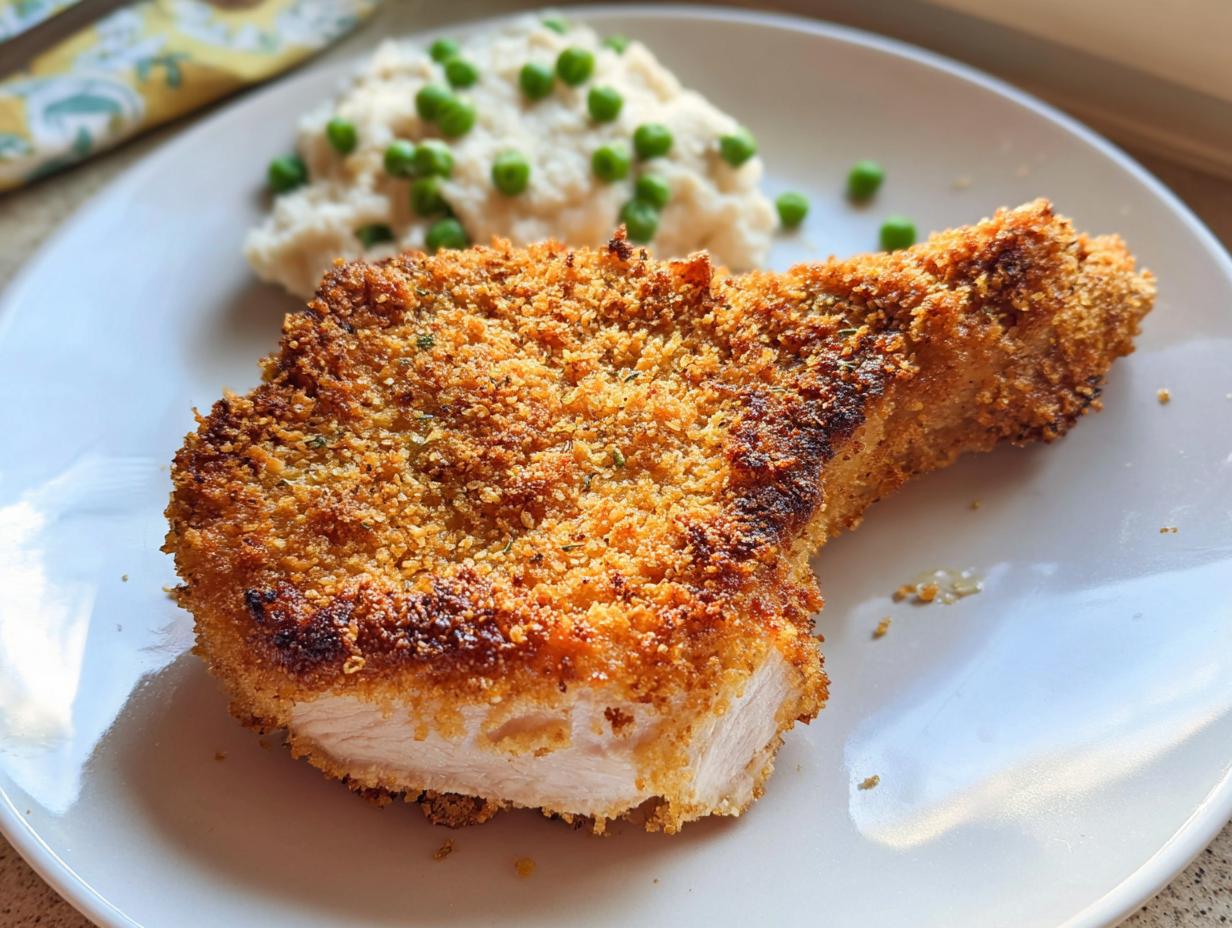
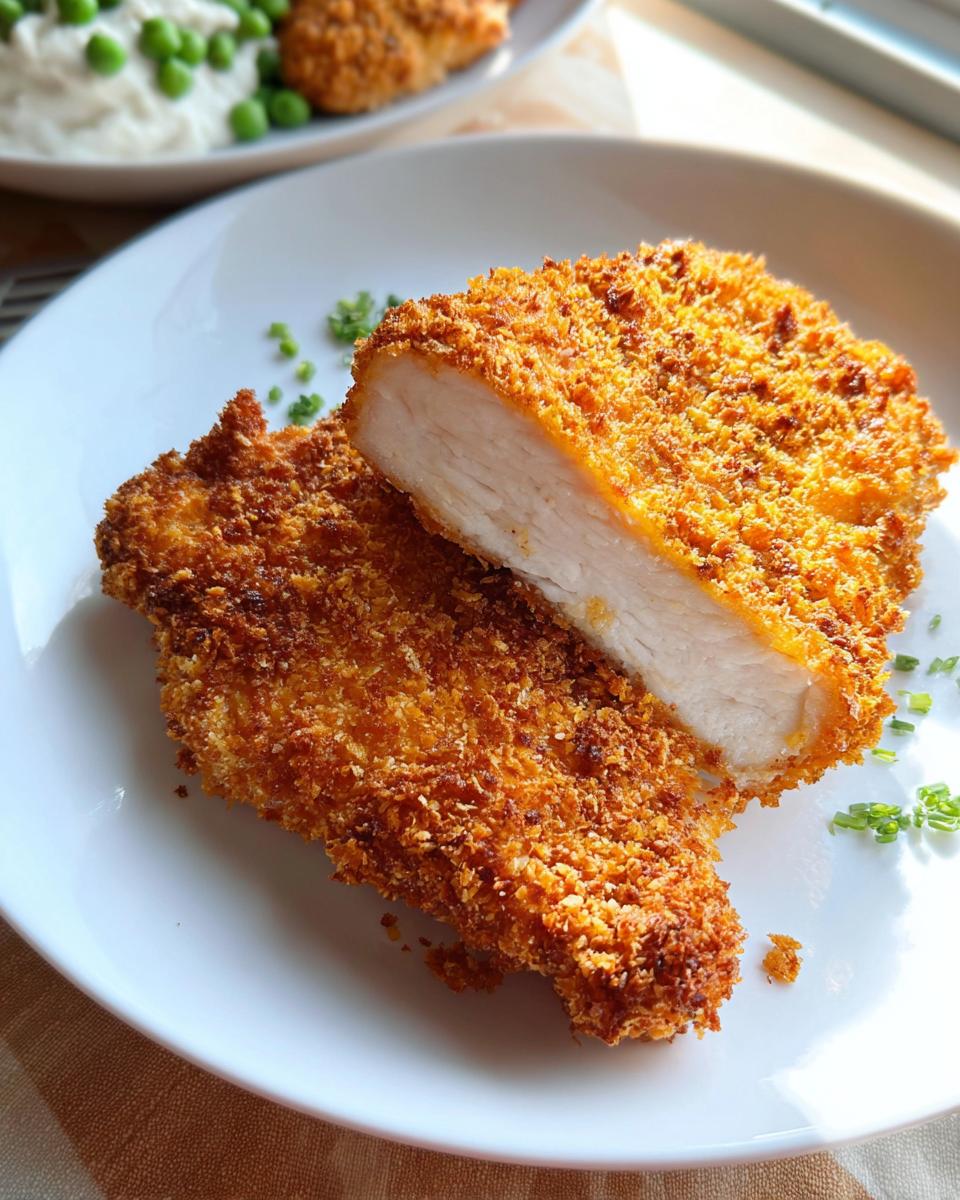
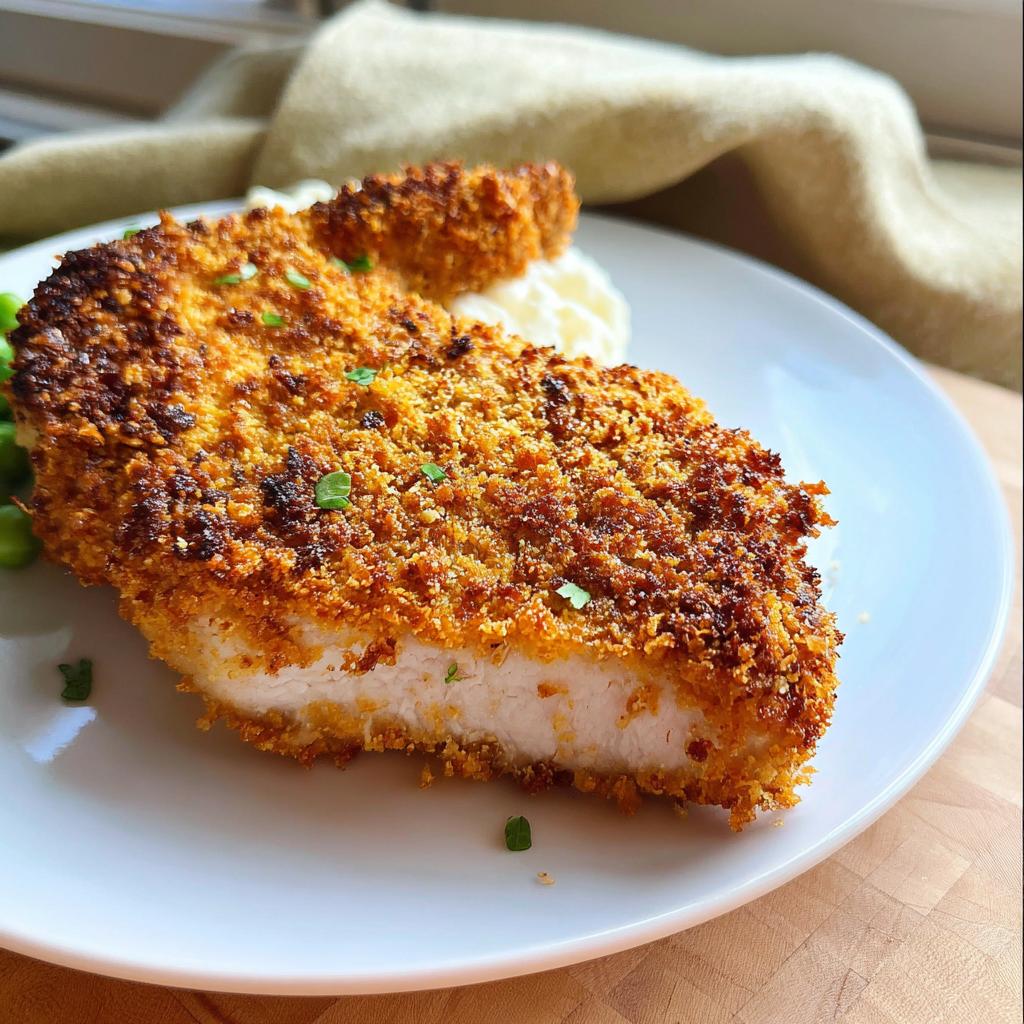
Oh, parents, I know your evenings. Between soccer practice, homework battles, and just trying to remember if you fed the dog, something quick and genuinely delicious can feel like a fantasy. That’s why I’m obsessed with making sure everyone gets dinner on the table without the fuss of deep frying. Trust me, these Baked Panko Crusted Pork Chops deliver that crave-worthy crunch you want, completely oven-baked!
I remember one hectic week when my kids were especially finicky about food. After a long day at work, I threw together this recipe for Baked Panko Crusted Pork Chops, and to my surprise, it became an instant family favorite. The crispy coating and juicy meat made even my pickiest child come back for seconds. That night, as we sat around the table, I realized that with a few simple ingredients, I could create not just a meal but a moment of joy and connection for my family amidst our busy lives.
I’m Maria Fernandez, a Certified Family Nutrition Strategist, and I promise this recipe is your new weeknight secret weapon. Getting that perfect texture without drowning anything in oil? That’s what smart cooking is all about!
Why This Recipe for Baked Panko Crusted Pork Chops is an Easy Family Meal Hero
If you’re tired of hearing “What’s for dinner?” five minutes after you walk in the door, this recipe is for you! It truly feels like cheating because the results scream effort when the reality is total ease. These are prime examples of easy family meals that get put on repeat.
- We get fantastic, crunchy texture in our crispy oven dinners without standing over a hot pan of grease.
- It pairs perfectly with almost any vegetable, making healthy plating simple. Check out some of our favorite quick veggie sides!
Quick Prep and Cook Time
Seriously, how fast is this? You only need about 10 minutes to prep everything—that includes whisking the eggs and seasoning the panko! Then, pop it in the oven for just 25 minutes. In under 40 minutes total, you have a complete dinner ready to serve.
Satisfying Picky Eaters with Baked Panko Crusted Pork Chops
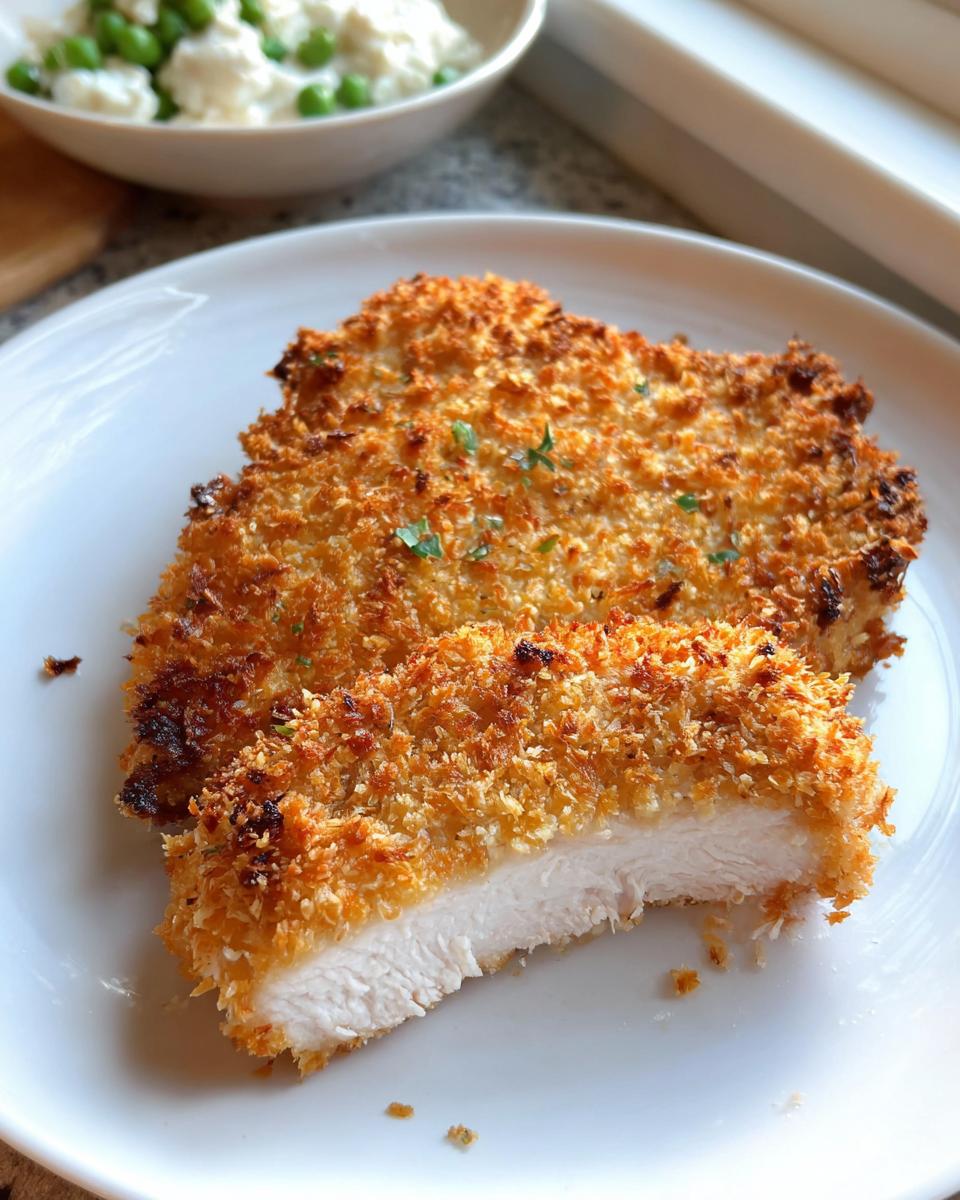
This is the main event! Picky eaters often steer clear of plain meat, but the moment you add texture—especially a light, golden crunch—everything changes. These Baked Panko Crusted Pork Chops manage to hit that satisfying crunch zone every single time. It’s the texture compromise that makes everyone happy again!
Essential Ingredients for Perfect Baked Panko Crusted Pork Chops
The best part about needing just a few simple things is that tracking them down is never stressful. We are using quality ingredients here, but nothing fancy or hard to find! If you’ve got a pack of chops and some Panko laying around, you are already halfway there. Let’s break down exactly what you need to get that fantastic coating that locks in all the flavor.
For the Pork Chops
You need 6 bone-in pork chops. I really push for the bone-in cuts when I can find them because honestly, they just stay juicier! Make sure they are prepped a bit thin, aim for about ½ inch thick. Thicker chops will definitely take longer to cook through, so keeping them uniform helps things bake evenly.
For the Wet Coating
This is just the glue! You only need 2 large eggs, whisked up in a shallow bowl. Now, if you have an egg allergy or just ran out—don’t panic! My notes say you can whisk 1 tablespoon of mayonnaise with 1 tablespoon of Dijon mustard and brush that thin layer on instead. It works shockingly well!
For the Panko Coating Recipe
This is where the magic crunch happens! Grab 1.5 cups of panko bread crumbs. Panko is key; don’t substitute regular breadcrumbs if you want that true light crispiness. Mix your panko with 2 teaspoons of dried minced onions, 1 teaspoon of garlic powder, ½ teaspoon of black pepper, ½ teaspoon of smoked paprika, and 1 teaspoon of sea salt. Don’t skimp on shaking those spices in there!
Step-by-Step Instructions for Crispy Oven Dinners
Okay, let’s get these amazing crispy oven dinners assembled! Since we are aiming for maximum crispness here, the setup is actually the most important part. We need three distinct stations lined up before we even touch the pork chops. This logical flow is what keeps the mess contained and your energy high!
Preparing the Oven and Coating Stations
First things first: blast that oven up to 375 degrees Fahrenheit. Get that heat going! Next, get your two shallow bowls ready. One bowl gets those beaten eggs—just give them a good whisk with a fork. In the second bowl, mix up all those brilliant seasonings with your 1.5 cups of panko. Don’t forget to give your large rimmed baking sheet a good spray or brush with olive oil; this prevents sticking and helps the bottoms brown nicely. If you need a refresher on oven safety, this guide is super helpful!
Coating the Pork Chops for the Panko Crust Recipe
Now for the fun part where we build that delicious breading! Take one pork chop and dip it completely into the beaten egg mixture. You really want to make sure both sides are coated, but here’s the trick: let the excess egg drip right back into the bowl. We don’t want soggy chops! Once drippy, move that chop straight into your seasoned panko. Press the breadcrumbs firmly onto both sides so you nail that perfect panko crust recipe feel. Place the neatly coated chop onto your oiled baking sheet.
Baking and Resting Baked Panko Crusted Pork Chops
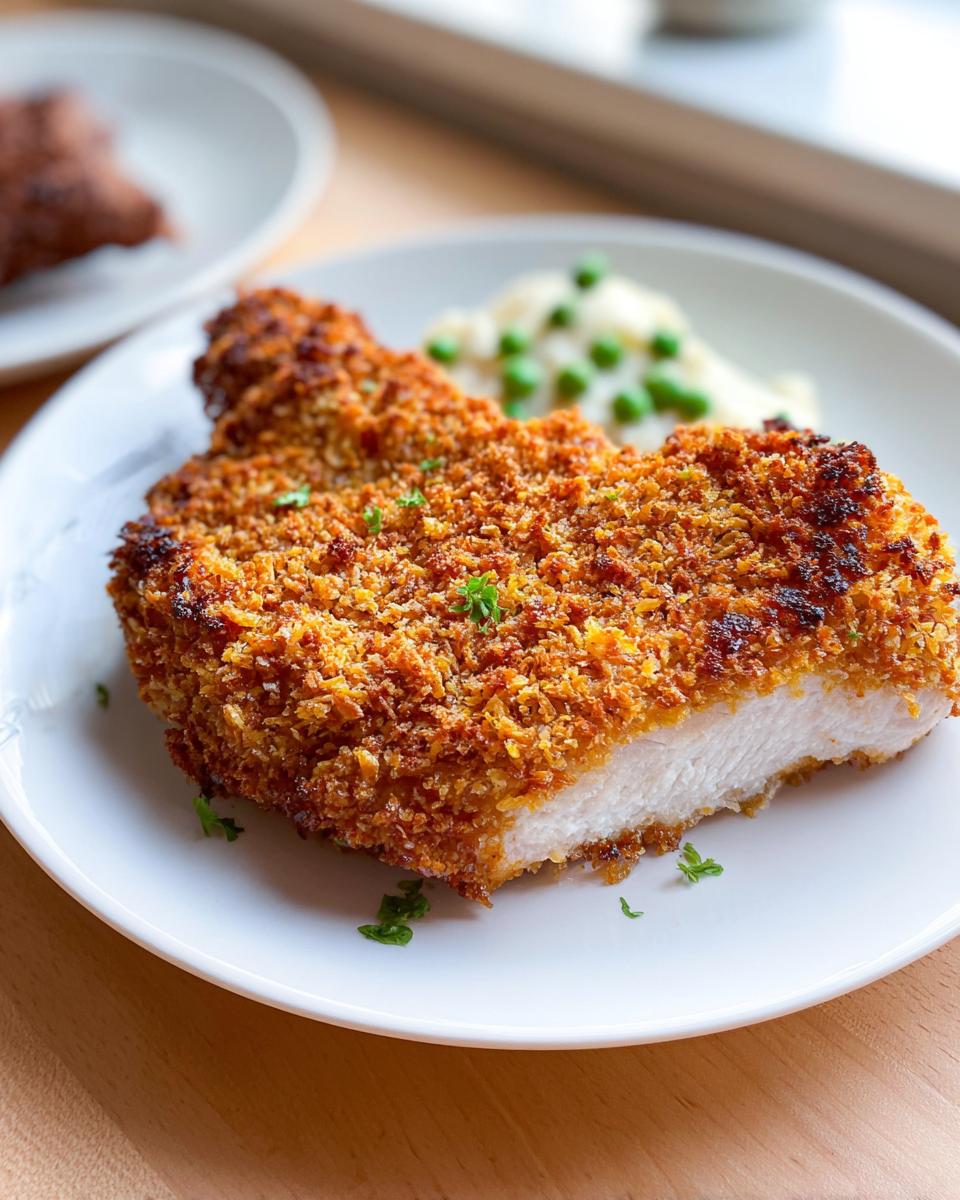
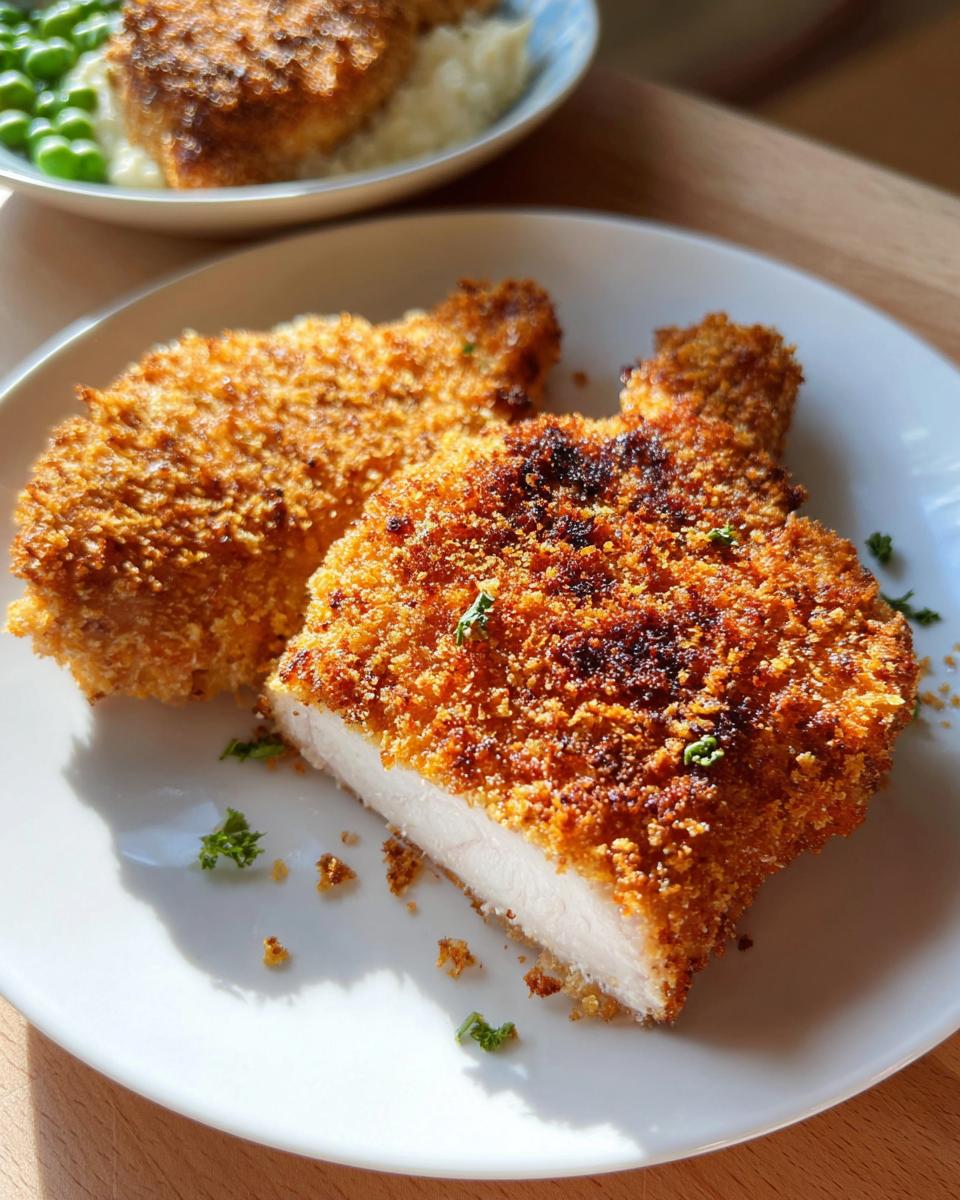
Once all six chops are lined up (make sure they aren’t touching, crowding steams them!), lightly spray the tops again with any leftover olive oil spray for that extra golden finish. Pop them into the hot oven for 25 minutes. For food safety and flavor perfection, you absolutely must check the internal temperature—it has to hit 145 degrees Fahrenheit; that’s how you know these Baked Panko Crusted Pork Chops are done and juicy! If they look a little pale, slide them under the broiler for just 5 minutes to darken them up. Once out, let them rest for those crucial 5 minutes before serving. You can read more about a similar preparation right here.
Tips for Success with Baked Panko Crusted Pork Chops
We want these to be the crispiest things to come out of your oven, ever! Getting that perfect crust on your Baked Panko Crusted Pork Chops isn’t just luck—it’s all about paying attention to a couple of little details during assembly and finishing. Since we aren’t deep frying, we have to be strategic about heat circulation and moisture control. Don’t worry; these tips are super simple!
Achieving Uniform Crispness
When you are placing those beautiful chops on the baking sheet, please, please do not let them touch! Overcrowding is the enemy of crispiness because the moisture released by one chop steams the one next to it. We want air circulating around every side so that panko can turn golden brown, not pale and soggy. Give them space to breathe on that pan. Also, make sure you’re really pressing that seasoned panko onto both sides of the chop with gentle but firm pressure. You notice how much batter is left over after dipping? That means you need to push a little harder to make sure the coating really sticks before it hits the heat!
Checking Doneness for Juicy Baked Pork Chops
I can’t stress this enough: invest in a simple meat thermometer. This is non-negotiable for guaranteeing tender, juicy baked pork chops every time. Pork safety standards changed a few years back, and you should cook them until they read exactly 145 degrees Fahrenheit in the thickest part of the meat. Taking them out right at 145°F means they are perfectly cooked through but retain all their juices.
But the final, crucial step? Letting them rest! After you pull them out, tent them loosely with foil and leave them alone for 5 minutes. This resting period lets all that wonderful juice redistribute back into the meat fibers. If you slice into them immediately, all that moisture just runs out onto your plate instead of staying in the chop where it belongs!
Ingredient Substitutions for Baked Panko Crusted Pork Chops
Sometimes life interferes with the perfect ingredient list, right? Maybe you’re out shopping and they are completely sold out of Panko, or perhaps you’ve got someone in the family who just can’t do eggs. Don’t worry for a second! We can totally tweak this recipe for your Baked Panko Crusted Pork Chops without sacrificing that essential crispiness. It’s all about finding the right stand-in that does the job of the binder or the sharp texture.
If you need an egg-free option, I’m happy to report that the substitution note I mentioned earlier works like a charm! Instead of whisked eggs, just mix up 1 tablespoon of mayonnaise with 1 tablespoon of Dijon mustard. It sounds funny, I know, but the fats and acids create a sticky layer that helps the breadcrumbs adhere beautifully. Pop that mixture into a shallow dish and dip your chops just like you would the egg.
What if you ran out of Panko? That’s a tougher fix, but it’s doable. Panko is Japanese breadcrumb, famous for being lighter and flakier than traditional breadcrumbs. If you only have standard breadcrumbs, you can still use them, but you might need to press them on a little firmer, and the final texture won’t be quite as airy.
Another trick for texture if you’re avoiding gluten or just want a different crunch profile is to look at crushed cornflakes or even crushed rice crackers! Just make sure they are crushed finely enough to stick well when you press them onto the chop. If you want to stock up on pantry essentials ahead of time, I highly recommend looking through this guide on stocking your kitchen so you are never caught off guard again!
Serving Suggestions for Your Dinner Recipes
Now that you’ve mastered the main event, you need sides that are just as easy to manage while the chops are resting! When I’m making these Baked Panko Crusted Pork Chops, I want things that can roast on the same rack or just take five minutes in the microwave. Keep it simple, keep it fresh!
Here are three ideas that always work perfectly on a busy weeknight and make the whole plate look appetizing:
- Simple Roasted Green Beans: Toss fresh green beans with a little olive oil, salt, and pepper. Since your oven is already at 375°F from the pork chops, you can toss these into the oven for the last 15 minutes of cooking time. They get tender-crisp and tie right into the healthy meal idea!
- Quick Lemon Quinoa: If you need a grab-and-go grain, cook up a batch of quinoa ahead of time. Just before serving, stir in a squeeze of fresh lemon juice and some finely chopped parsley. It adds brightness that cuts through the richness of the breading perfectly.
- Steamed Broccoli with a Hint of Garlic: Sometimes you just need the easiest vegetable possible. Steaming broccoli ensures it stays bright green and nutrient-dense. I always finish it with a tiny pinch of garlic powder right before serving. It takes less than five minutes, and kids usually eat it because the little crumbles of panko from the chicken seem to encourage them to eat their greens!
Storing and Reheating Baked Panko Crusted Pork Chops
I am happy to report that leftovers from dinner are usually one of the main reasons I make these chops anyway! Who doesn’t love having a quick, super satisfying lunch the next day? The key here is making sure your storage method minimizes any moisture contact, because moisture is what softens that beautiful crust we worked so hard to create on our Baked Panko Crusted Pork Chops.
When you have leftovers, let the chops cool down completely on a wire rack after that crucial 5-minute rest. Do not put warm meat directly into a container! Once cool, store them in an airtight container. You can pop a paper towel in the bottom of the container, too—this acts like a little sponge to catch any condensation overnight. They should stay perfect in the fridge for about three days.
Now, the reheating process is where most people go wrong! Please, please, skip the microwave unless you are totally desperate. Microwaving heats the water molecules, turning that crisp coating immediately soft and rubbery. That’s just sad!
For the best results and to bring back that fresh-from-the-oven snap, you want dry, ambient heat. Use your regular oven set low, around 325°F, and just heat them through for about 8 to 10 minutes. If you are lucky enough to have an air fryer, that’s even better! Stick the leftover Baked Panko Crusted Pork Chops in the air fryer at 350°F for just 5 minutes. They crisp up unbelievably fast, and honestly, you won’t even know they weren’t just made.
If you have to use the microwave—and I mean *have* to—try placing the chop on a paper towel and only heating it for 30 seconds at a time. It won’t bring back the crisp, but at least it minimizes the sogginess! But seriously, try the oven method first!
Frequently Asked Questions About Baked Pork Chops
I know when you’re juggling so much, questions pop up right when you start prepping. That’s totally fine! Making sure these turn out perfectly crispy and safe is super important to me as a busy mom and nutritionist. Here are the things I get asked most often about making these amazing baked pork chops.
Can I use boneless pork chops instead of bone-in?
Absolutely, you totally can! Boneless chops are often quicker to find, which is great for an easy family meal night. The only real change you need to make is paying careful attention to the thickness. Since the bone adds a bit of natural insulation, boneless chops might cook just a tiny bit faster. If your boneless chops are thicker than that ½ inch mark we recommend, just drop your oven temperature down slightly—maybe to 350°F—and keep checking that internal temperature with your thermometer until you hit 145°F. If they are super thin, they might even finish in 20 minutes!
How do I make the panko crust extra crispy?
This is my favorite question! To get that glorious, golden crunch on your panko crust recipe without frying, two things are non-negotiable. First, make sure you really press that panko onto the egg-dipped chop—don’t just gently roll it, really compact that coating on there! Second, that final spritz of olive oil spray right before baking is essential. It helps the crumbs toast rather than just dry out. Also, don’t overcrowd the pan, remember? Airflow is your secret weapon for unbeatable crispness when making crispy oven dinners!
What is the best way to ensure these are safe to eat?
Because we aren’t dealing with the high heat of a fryer, food safety is paramount, especially when serving the kids. You absolutely must use a reliable meat thermometer, and you cannot guess! Pork is perfectly safe and wonderfully tender when it reaches an internal temperature of exactly 145 degrees Fahrenheit when checked at the thickest part of the chop. Pull them out right when they hit that mark, let them rest for 5 minutes, and you’ve got a safe, juicy, and perfectly cooked meal. Never serve pork under 145°F!
Estimated Nutritional Data for Baked Panko Crusted Pork Chops
When I share a recipe like these wonderful Baked Panko Crusted Pork Chops, I know you’re thinking about the balance; can I serve this on a busy Tuesday and still feel good about what everyone is eating? Since I’m a Certified Family Nutrition Strategist, I always try to keep the nutritional aspect in mind. Knowing the approximate breakdown helps immensely when planning out the rest of the plate!
Here is the typical estimated nutritional profile per serving (based on 6 chops total), but remember, these are just estimates. They can change slightly based on the exact cut of pork you buy or how much oil spray you decide to use. We are trying to keep things lean and high-protein here, which is what makes this a fantastic choice for easy family meals.
- Calories: 385
- Fat: 18g
- Protein: 39g
- Carbohydrates: 13g
- Saturated Fat: 6g
- Cholesterol: 179mg
- Sodium: 615mg
- Fiber: 1g
See that protein count? That’s what keeps the kids full until breakfast! Because we baked these wonderful baked pork chops instead of frying them, we keep the overall fat lower while maximizing that satisfying crunch. It really is the best of both worlds for healthy dinner recipes.
Share Your Family’s Favorite Way to Eat These Chops
We’ve talked about the secrets to the perfect crunch, the easiest assembly, and why these Baked Panko Crusted Pork Chops are always a guaranteed win on a crazy weeknight. Now, it’s your turn! I honestly love hearing how this recipe fits into your home life. Did your picky eater finally try something new? Did the 5 minutes of resting time cause drama at the table because everyone was so hungry?
Don’t keep all that wonderful feedback to yourself! Seriously, I read every single comment that comes through here. If you loved these crispy oven dinners, please take a moment to leave a star rating right below the recipe card! It helps other busy parents find this lifesaver of a recipe.
And I’m always searching for new side dish inspiration! So many of you have brilliant ideas for pairing vegetables or grains with these chops. What’s your family’s absolute favorite side dish when you make these? Do you stick to greens, or maybe a quick baked sweet potato? Drop your suggestions in the comments below, along with your review!
Happy cooking, everyone! I hope these become as much of a beloved staple in your house as they are in mine. Enjoy those juicy, perfectly crusted pork chops tonight!
Baked Panko Crusted Pork Chops
Ingredients
Equipment
Method
- Preheat your oven to 375 degrees Fahrenheit.
- Add the eggs to a shallow bowl, and beat them with a fork.
- Add the panko bread crumbs, dried onions, sea salt, garlic powder, pepper, and paprika to another shallow bowl or a large zip top bag.
- Add olive oil or cooking spray to a large rimmed baking sheet, and set it aside.
- Dip the pork chops into the beaten eggs, and let the excess egg drip back into the bowl.
- Dip the coated pork chops into the seasoned breadcrumbs on both sides, then place them on the prepared baking sheet. Lightly spray the tops with olive oil spray.
- Bake uncovered for 25 minutes or until the internal temperature reaches 145 degrees Fahrenheit. You can optionally broil the chops after baking for about 5 minutes for a darker color.
- Remove the chops from the oven, and let them rest for about 5 minutes before you serve them.
Nutrition
Notes
Tried this recipe?
Let us know how it was!
Certified Family Nutrition Strategist
My path into family nutrition began working with Phoenix Area Family Services, where I saw how traditional nutrition advice often ignored real-world constraints like budget limitations, time crunches, and kids who refuse to eat anything green. That experience sparked my mission to develop meal planning systems that work with family realities, not against them.
Over eight years, I’ve helped hundreds of families reduce grocery spending by 25% while dramatically improving their nutrition. My meal planning frameworks have been adopted by local wellness centers because they actually work for busy parents juggling different ages, preferences, and dietary needs in one household.
As a bilingual first-generation Mexican-American and mother of three, I personally navigate the daily challenge of feeding a family nutritiously while honoring cultural traditions and managing a household budget. My “kid-friendly low-carb” protocols show families how to gradually introduce healthier options without triggering mealtime battles or abandoning beloved family recipes.
My “realistic wellness” philosophy is straightforward: health improvements must work within existing family dynamics and financial realities to be truly sustainable. When I’m not developing meal planning systems, I’m creating portable trail snacks for our weekend family hiking adventures – because healthy eating should fuel the life you want to live.
My personal low-carb journey started after pregnancy as a way to regain energy for active parenting, and that experience continues to inform my professional commitment to making healthy eating feel supportive rather than burdensome for busy families.