
Are you tired of chasing those takeout burger flavors but just don’t have the time when life gets busy? Trust me, I totally get it! That’s why I’m sharing my absolute favorite way to make restaurant-quality Juicy Smash Burger Patties right on your kitchen counter in less than 25 minutes. I remember the first time I introduced these to my skeptical kids—we made it a whole event, seasoning and smashing them together! As soon as they heard that sizzle, their faces lit up, and suddenly, we had a new family staple. It just goes to show how easy and fun dinner can be! I’m Maria Fernandez, and as a Certified Family Nutrition Strategist, I promise these aren’t just tasty; they’re surprisingly quick for even the most packed schedules.
Why These Juicy Smash Burger Patties Are a Family Favorite
When you’re juggling school runs and evening activities, the last thing you need is a complicated meal. These Juicy Smash Burger Patties come together unbelievably fast. They are my go-to because they check all the boxes for busy parents—seriously cheap, packed with flavor, and fast!
- Total time is under 25 minutes, meaning dinner is done before anyone gets grumpy!
- They are sturdy and flavorful enough for adults but simple enough for the pickiest little eaters.
- Using basic ground beef keeps our grocery bill low without sacrificing that satisfying, crispy, restaurant-style crust.
Quick Prep for Busy Weeknights
We’re talking 15 minutes of prep time here, people! That’s less time than it takes to decide what movie to watch. You just roll the cold beef balls and chop a few veggies. Everything else happens right on the hot griddle. It’s fast, efficient, and you’re not waiting around for anything to rise or rest.
Kid-Approved Flavor Profile
Kids love these because they get that perfect caramelized edge—that’s the Maillard reaction goodness! They don’t feel heavy or overloaded with strange ingredients. Plus, the simple burger sauce is my secret weapon. It’s tangy, creamy, and just enough to make them want seconds without needing fancy toppings. It wraps the whole thing up perfectly!
Essential Equipment for Perfect Juicy Smash Burger Patties
You don’t need a specialized restaurant flat-top grill to get that amazing, crispy crust. Honestly, the right setup makes all the difference when you’re trying to achieve those restaurant-quality results at home. For the best Juicy Smash Burger Patties, you need something that holds heat incredibly well. That’s where our trusty cooking surface comes into play.
Mastering Cast Iron Cooking for the Sear
The hero here is definitely a cast iron skillet or a heavy-duty griddle. Listen, if you want that deep, dark sear—that crispy texture that just screams amazing flavor—you have to use cast iron. It distributes heat evenly, which is vital when you’re smashing thin patties down. My biggest tip for successful cast iron cooking? Get that pan screaming hot before the beef even thinks about touching it. If it’s not hot enough, the meat will steam instead of searing, and that’s a tragedy!
Ingredients for Amazing Juicy Smash Burger Patties and Sauce
Okay, let’s talk about why these burgers taste like they came from that fancy diner downtown, but for way cheaper! The ingredients list is simple, I promise, but the quality of just one item—the meat—is non-negotiable. For truly Juicy Smash Burger Patties, you absolutely have to use 80/20 ground beef. That higher fat content melts down, keeps the meat tender, and helps build that gorgeous crust we talked about. I usually grab my beef from the butcher to make sure it’s fresh, but you can certainly look for quality cuts at the store; make sure it’s that 80/20 ratio, trust me on this one!
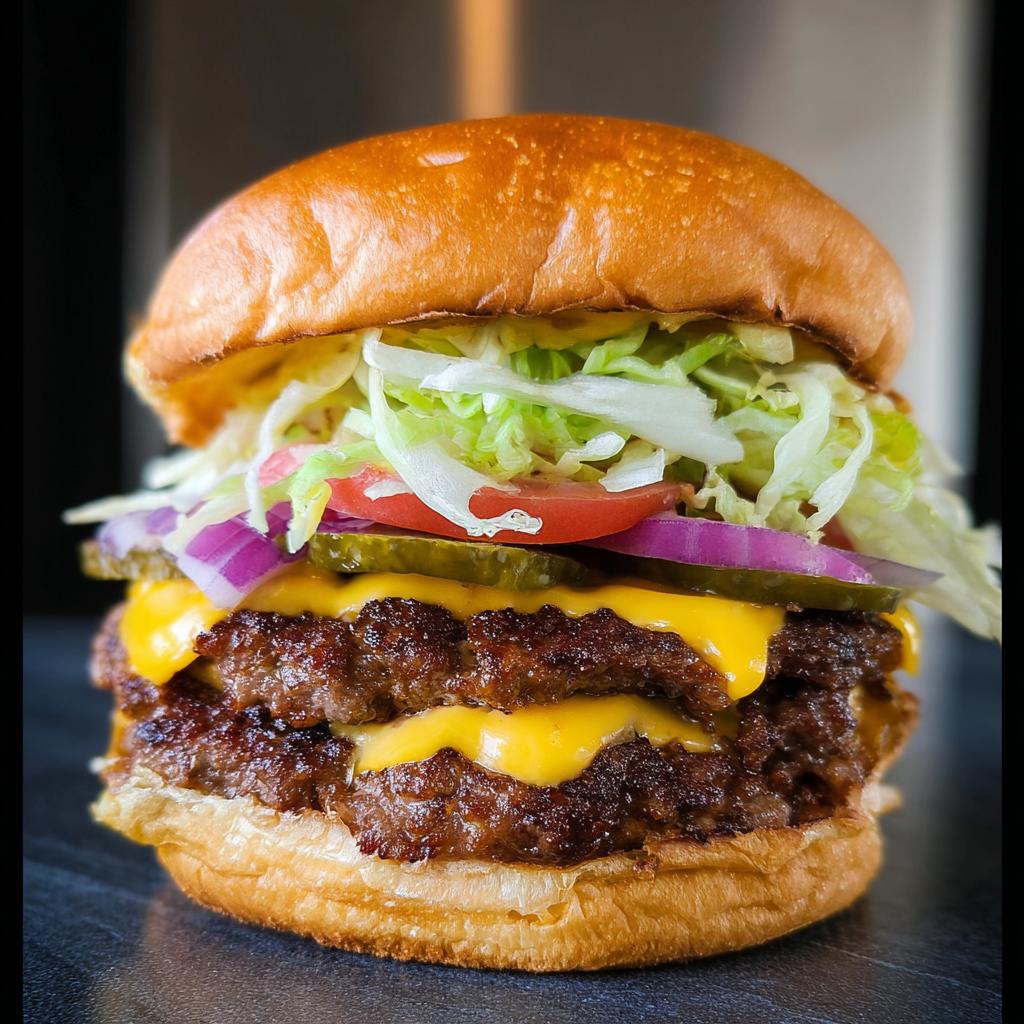
For the actual assembly, keep your toppings fresh. You need four slices of good medium cheddar—thick-sliced holds up better when it melts onto the hot patty. Make sure your iceberg lettuce is shredded nice and fine, not huge floppy pieces. Thinly slice your tomatoes and, this is important, cut your red onion into delicate, thin rings so they don’t overpower the flavor.
The Components for the Burger Sauce
Don’t reach for a bottle of generic stuff! This little sauce—which goes on both the bottom bun and inside the patty stack—is what ties the whole flavor profile together. It’s super tangy and adds that critical burst of moisture that keeps these Juicy Smash Burger Patties from ever tasting dry. It only takes two ingredients plus maybe a dash of something else if you’re feeling adventurous, but the base is just 1/3 cup of mayo mixed with one teaspoon of regular yellow mustard.
When you blend those two together, you get this creamy, slightly sharp topping that complements the richness of the beef perfectly. It’s so easy, you’ll probably never buy jarred burger sauce again. It really adds that special *zing* to the finished homemade burgers.
Step-by-Step Guide to Making Juicy Smash Burger Patties
This is where the magic happens, and I promise it’s fast! If you’ve ever wanted an amazing smash burger recipe that actually works every single time, pay close attention to the timing here. It’s all about high heat and moving quickly. You’ll want to have everything else prepped—buns toasted, lettuce shredded—because once those meat balls hit the pan, things move fast! If you need some extra inspiration, check out this wonderful smash recipe for comparison!
Preparing the Meat for the Smash
First things first: take that 80/20 beef and divide it into 8 small, loose balls. Don’t pack them tight! They should be about 3 ounces each. I usually do this right before I’m ready to cook, or maybe even the night before. The key reason to roll these loose balls and keep them cold is super important for Trustworthiness in this process: cold meat hitting a ripping hot surface creates an incredible Maillard reaction and prevents the fat from just melting out before you even press it. Pop them in the fridge if you aren’t ready to go right away. Remember to handle the meat as little as possible.
The Critical Smash and Sear Technique
Get your griddle or skillet hot—medium-high heat! You want it shimmering. Place two or four of those cold meat balls down. Now, here’s the fun part that shows off my Expertise: Place a square of parchment paper over the meat ball and take your sturdy spatula or burger press and smash down hard. You need to flatten it aggressively! This is what creates the signature thin patty. Cook that first side for exactly two minutes. You’ll see those juices start to bubble up. When you’re ready to flip, slide that metal spatula under at a 45-degree angle—really get under that crust—and flip it fast. Cook that second side for just about one minute.
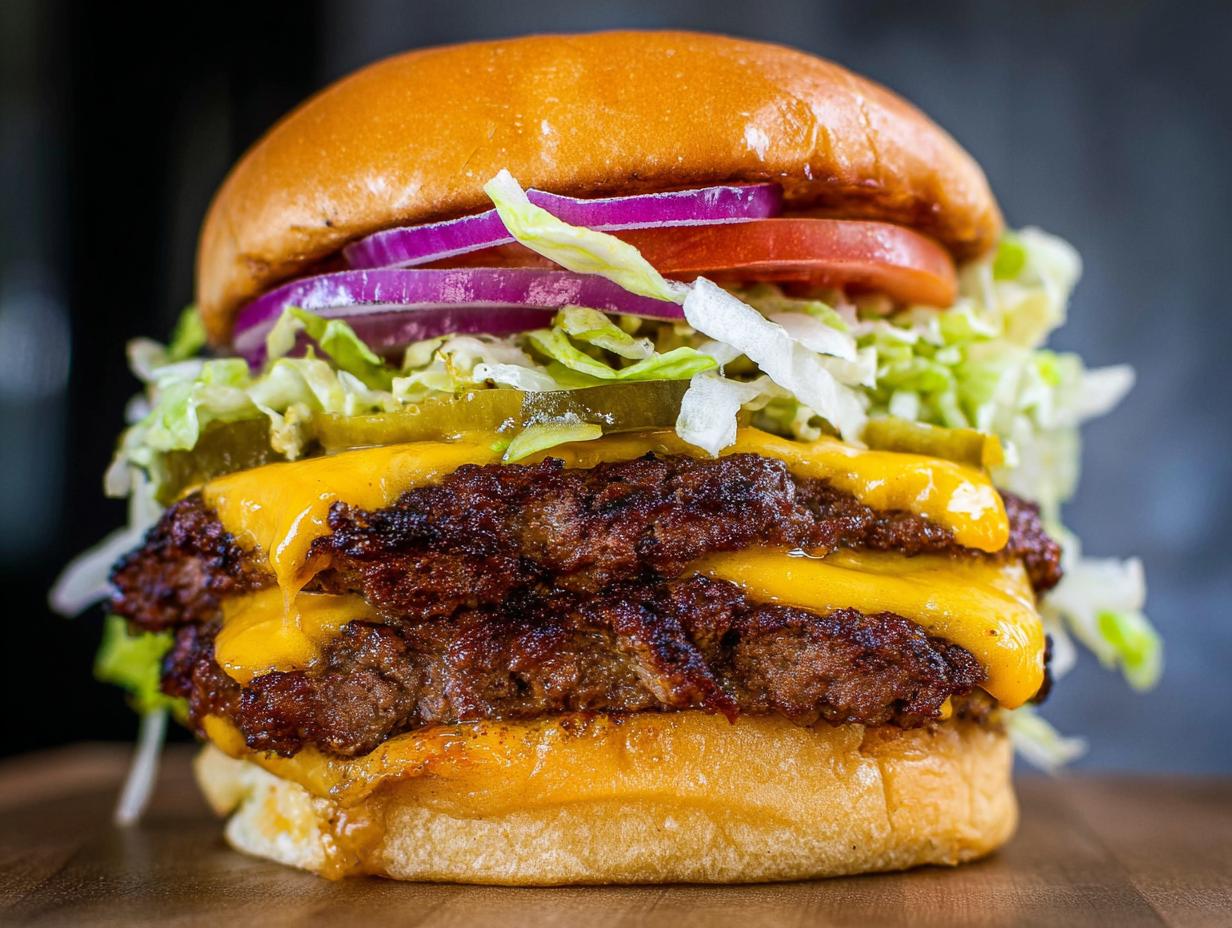
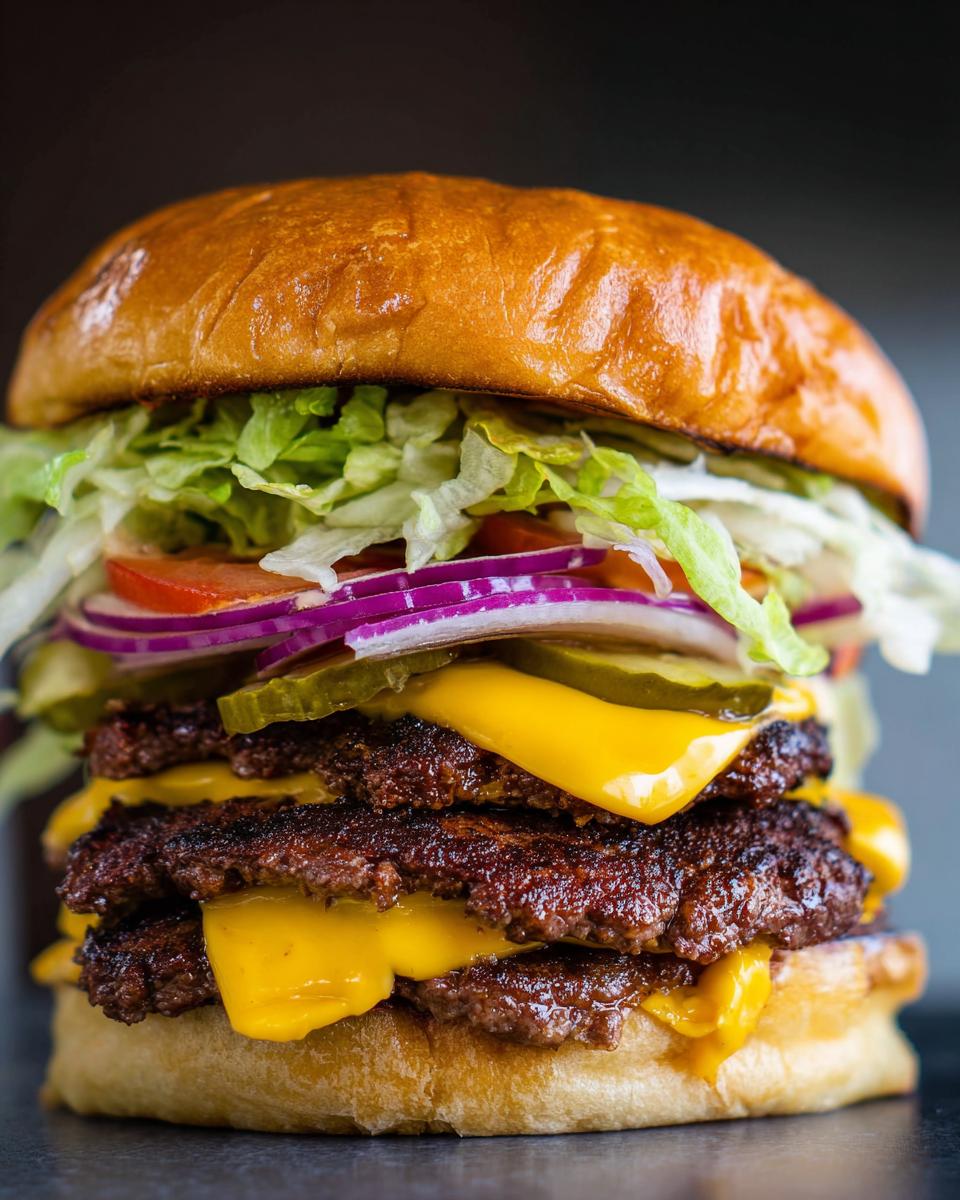
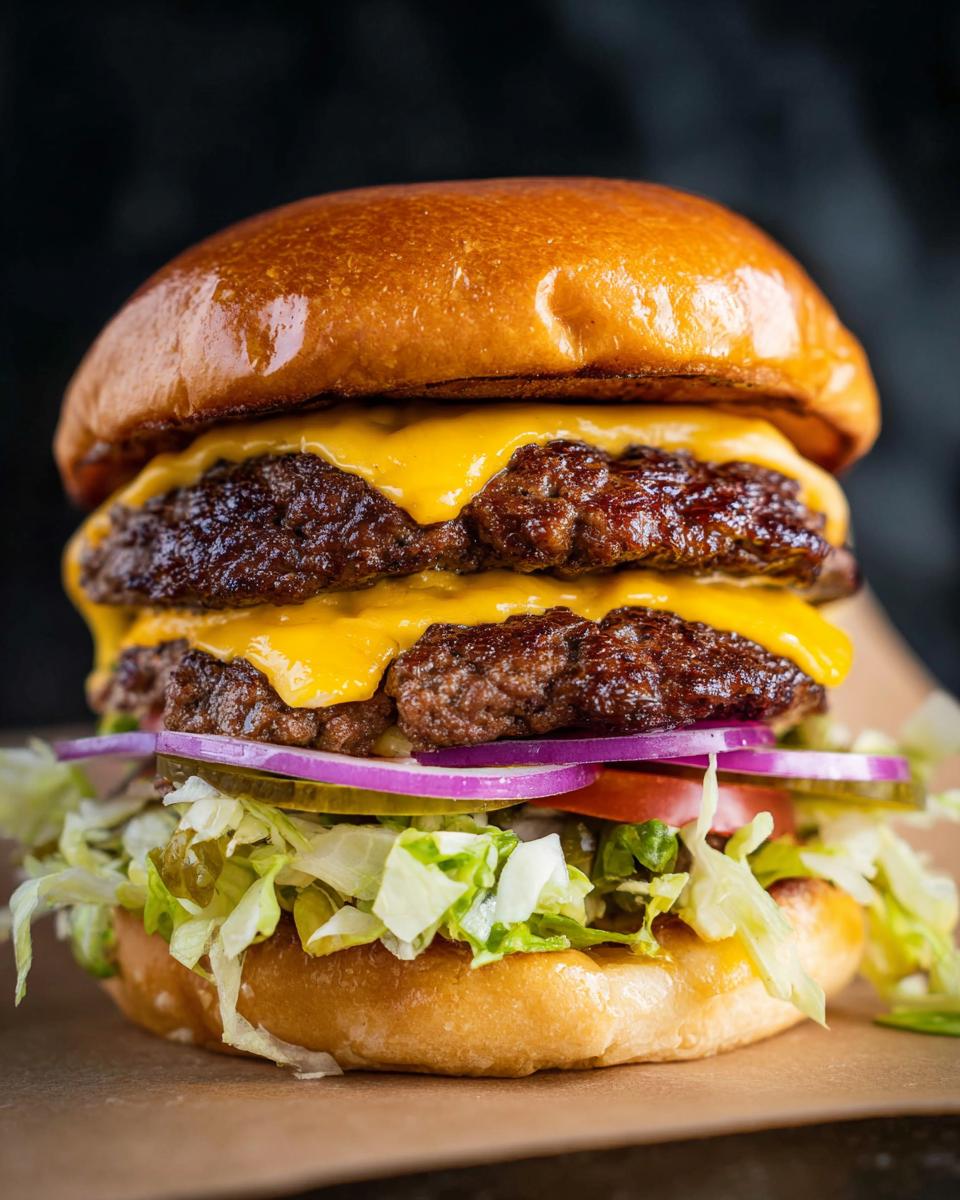
Building the Double Patty Stack
Okay, timing is key here! As soon as you flip the patty onto the second side, quickly top half of them with a slice of cheddar cheese. Then, immediately grab the second patty and place it right on top of the cheese slice. This traps the heat and melts that cheese dreamily all the way through while the patty finishes cooking. Transfer those double stacks straight to your waiting buns. Don’t let them sit! You want that cheese gooey when it hits the sauce you put on the bottom bun.
Tips for Success with Juicy Smash Burger Patties
Even though this recipe for Juicy Smash Burger Patties is straightforward, a few insider tricks can take them from good to absolutely legendary. Listen, nobody wants a sad, grey burger, right? We want that crispy, flavorful crust that just bursts with beefy goodness when you bite into it. It all comes down to heat control and assembly precision. These tips are what elevate what you’re making from just regular homemade burgers to a proper backyard feast!
Ingredient Temperature Matters
I’ve seen people make this mistake a million times, and it ruins the sear! You absolutely must put cold meat patties onto a screaming hot surface. I cannot stress this enough: your griddle needs to be hot—like, almost too hot to touch hot. Why? If the meat is warm or room temperature, the fat starts rendering out right away, and you end up with greasy, steamed discs instead of crispy patties. Cold beef hits that high heat, and boom, instant crust forms while the inside stays totally juicy. It’s pure science, folks, so keep those little balls chilled right up until the moment you press them down!
Assembly Order for Homemade Burgers
You might think the order of toppings on your homemade burgers doesn’t matter, but when you’re dealing with juices and a tender bun, it totally does! The way I layer everything ensures maximum texture and flavor in every single bite. Always put that creamy burger sauce on the bottom bun first. This acts as a little protective layer against sogginess!
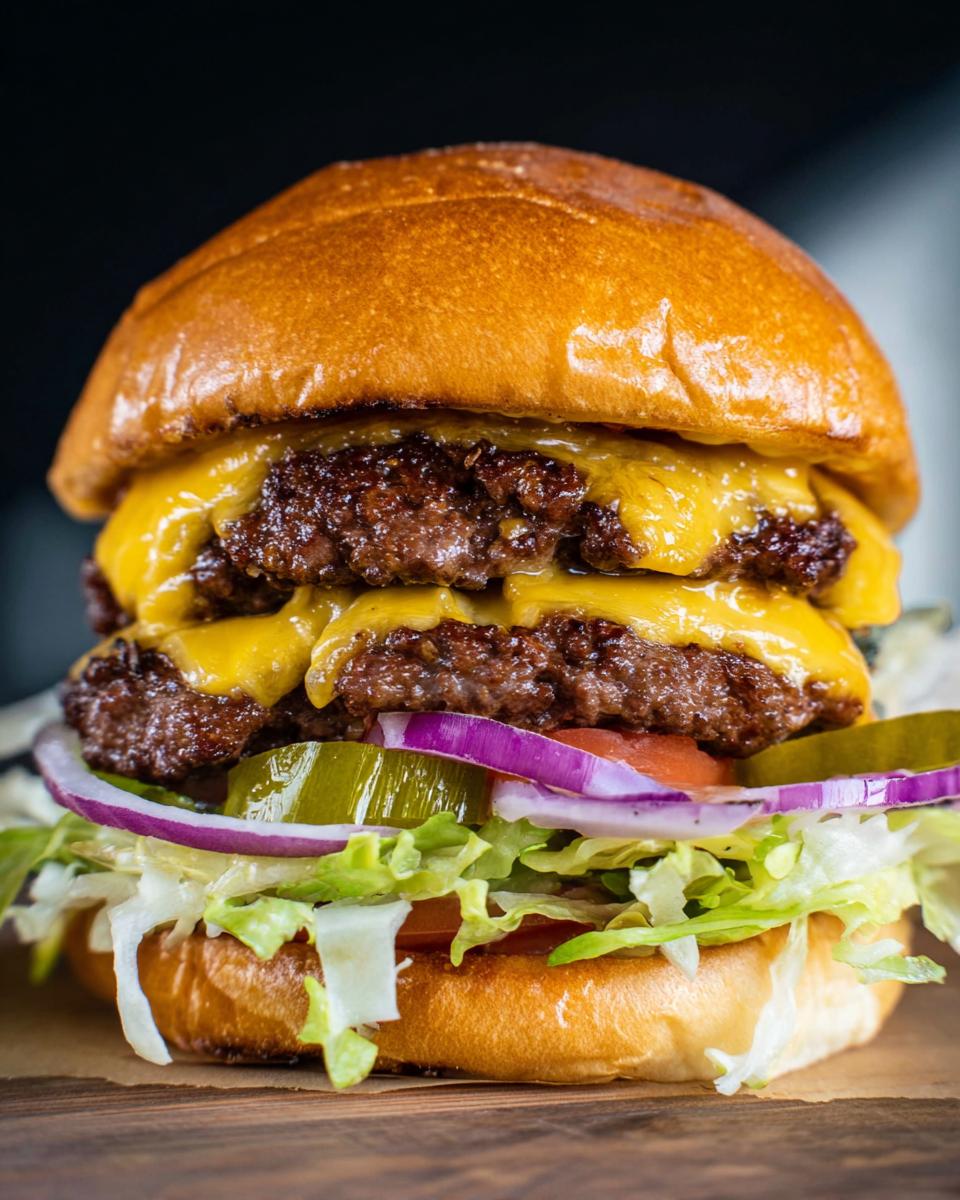
Next, go straight to the pickles. Putting the pickles right against the sauce layer helps them grip better and gives you that first pop of sour crunch. Then comes your lettuce, then the tomato slices, and finally, that salty, cheesy double patty stack goes right on top of the onion rings. This structure keeps the structural integrity of your burger sound, so it doesn’t slide apart when your kid tries to pick it up!
Storage and Reheating Juicy Smash Burger Patties
Even though these Juicy Smash Burger Patties disappear fast, sometimes you end up with one or two leftovers, or maybe you want to do a little meal prep for lunch the next day! That’s totally fine, but we need to handle them right so they don’t turn sad and tough. The best way to store them, if you can manage it, is to keep the components separate. Keep any leftover cooked patties in a shallow, airtight container.
If you’ve already assembled the whole burger, it’s going to get soggy because of the lettuce and sauce. For the best results when reheating, just reheat the patty and toast a fresh bun. You can reheat the patties quickly in a dry skillet over medium heat for about two minutes per side, just until they’re warmed through and you get a tiny bit of the crust back. Check out my tips on proper food storage here!
Serving Suggestions for Your Backyard Burger Night
Okay, you’ve nailed the amazing Juicy Smash Burger Patties, but a burger needs friends on the plate, right? We’re aiming for a great backyard burger night here, which means the sides need to be just as easy and kid-friendly so you aren’t stuck over a hot grill for hours.
Since these burgers cook in about seven minutes flat, we need sides that are fast or can be made ahead of time. Forget fussy casseroles! Think simple, tangy, and crispy sides that everyone loves.
Quick Sides That Don’t Need an Oven
When the grill is already hot for the burgers—or if you just used your cast iron skillet—the last thing you want to do is fire up the big oven. My go-to quick side is sweet potato fries made in the air fryer while the patties are resting. They get crispy fast and kids adore that slight sweetness which cuts through the savoriness of the beef.

If you’re really short on time, you can never go wrong with a big bowl of kettle-cooked potato chips. Just open the bag and serve! It sounds simple, but when you have amazing homemade burgers, sometimes you just need zero-effort sides.
Family-Friendly Salads (That Kids Actually Eat)
Salads can be tricky with little ones, I know! But we need something fresh to balance the richness. My trick is to ditch the heavy dressings. Instead of a massive green salad, try making a cold, crunchy corn and black bean salsa. It’s colorful, full of good stuff, and you can mix it up early in the day. Serve it with some tortilla chips for dipping.
Another huge hit is a simple cucumber and cherry tomato salad tossed with just a splash of red wine vinegar and a tiny bit of salt. It’s bright, cool, and offers a nice palate cleanser after that rich cheese and beef.
Classic Pairings for a Perfect Cookout Vibe
You can’t beat the classics for a backyard burger night! If you have a side burner on the grill, toss some corn on the cob on there—a little butter and salt, and you’re done. If you’re keeping everything inside, baked beans are always a win because you can heat them on the stovetop while you’re smashing the burgers. Just add a little extra brown sugar and a dash of liquid smoke to the canned beans to make them taste homemade. Everyone will be so busy devouring those amazing Juicy Smash Burger Patties they won’t even notice the simple sides!
Frequently Asked Questions About Juicy Smash Burger Patties
I know you’re ready to go try these Juicy Smash Burger Patties, but sometimes last-minute questions pop up before you even grab the spatula. That’s totally normal! Making those perfect thin patties takes a little know-how, especially if you’re trying to replicate that diner crispiness. Here are a few things I always get asked when I teach friends how to make this smash burger recipe.
Can I use leaner ground beef for this smash burger recipe?
Oh, honey, I wish you could, but please don’t! I totally understand wanting to keep things lean, especially when we’re aiming for nutritious choices for the kids. But for Juicy Smash Burger Patties, fat is your friend, and it’s non-negotiable here. You absolutely must stick to 80/20 ground beef (which means 80% lean meat and 20% fat).
That 20% fat melts during the cooking process on that screaming hot griddle. It’s what keeps the interior gorgeously tender and, more importantly, it’s what creates that signature crispy, brown edge when you smash it down. If you use 90/10 or leaner, the patty will seize up, dry out instantly, and you’ll end up with a hockey puck instead of a juicy, satisfying burger.
What is the best way to toast the buns?
Toasting the buns properly is actually a vital step in keeping our homemade burgers from falling apart! Soggy bread is the enemy of a good burger experience. You need to treat the bun like it’s a piece of garlic bread—it needs fat!
Right before you start cooking the meat, take a little bit of butter and spread it thinly on the insides, the cut sides, of your brioche buns. Lay them cut-side down right on the hot griddle or skillet while it’s heating up to temperature. You only need about 30 seconds to a minute. You’re looking for a light golden color, not burnt spots. This locks in the bread’s texture and gives you a slightly crisp platform for all those juices and sauces!
Sharing Your Juicy Smash Burger Patties Creations
Whew! Now you’ve got the secrets to making those perfect Juicy Smash Burger Patties—the seasoning, the smash technique, everything! I hope you’re excited to fire up that griddle because cooking should be fun, not stressful, especially when you are feeding your family.
I genuinely want to know how it goes when you bring these to your next backyard burger night! Did your picky eaters finally try them? Did you try adding a dash of Worcestershire sauce to the burger sauce like I sometimes do?
Please, please take a photo of your finished burgers and tag me! Hearing your stories about how this simple smash burger recipe fit into your busy week is the best part of my job. If you followed along and these made your family happy, leave a quick star rating right here on the page. It helps other busy parents see that restaurant-quality burgers really are achievable on a Tuesday night!
Juicy Smash Burger Patties
Ingredients
Equipment
Method
- Divide the beef into 8 equal portions, about 3 oz each. Loosely roll them into balls. Cover the balls and refrigerate them while you prepare the other ingredients. The meat must be cold when it contacts the hot cooking surface.
- Remove any wilted leaves from the lettuce and finely shred the remaining leaves. Slice the tomatoes, onions, and pickles.
- Butter the cut sides of the buns and toast them over medium heat until the buttered side is golden brown.
- Increase the griddle heat to medium/high. Place 2 to 4 burger balls onto the hot surface. Working quickly, place a square of parchment paper over the meat and use a burger press or spatula to firmly smash straight down into a thin patty.
- Peel back and discard the parchment paper. Season the smashed patties with salt, pepper, and garlic powder. Add 1/2 teaspoon of burger sauce to the top of each patty.
- Cook for 2 minutes on the first side, or until a sear forms and juices appear on the surface. Scrape under the burger with a metal spatula held at a 45-degree angle to lift the caramelized part, and flip the patty.
- Cook the second side for 1 minute. Top half of the patties with a slice of cheese and immediately place a second patty on top of the cheese to create a double stack. Transfer the finished burgers to a platter.
- Assemble the burgers: Place burger sauce on the bottom bun. Top with 3 pickle slices, shredded lettuce, 2 tomato slices, and the thin sliced onion. Add the double patty stack and place the top bun on.
Nutrition
Notes
Tried this recipe?
Let us know how it was!
Certified Family Nutrition Strategist
My path into family nutrition began working with Phoenix Area Family Services, where I saw how traditional nutrition advice often ignored real-world constraints like budget limitations, time crunches, and kids who refuse to eat anything green. That experience sparked my mission to develop meal planning systems that work with family realities, not against them.
Over eight years, I’ve helped hundreds of families reduce grocery spending by 25% while dramatically improving their nutrition. My meal planning frameworks have been adopted by local wellness centers because they actually work for busy parents juggling different ages, preferences, and dietary needs in one household.
As a bilingual first-generation Mexican-American and mother of three, I personally navigate the daily challenge of feeding a family nutritiously while honoring cultural traditions and managing a household budget. My “kid-friendly low-carb” protocols show families how to gradually introduce healthier options without triggering mealtime battles or abandoning beloved family recipes.
My “realistic wellness” philosophy is straightforward: health improvements must work within existing family dynamics and financial realities to be truly sustainable. When I’m not developing meal planning systems, I’m creating portable trail snacks for our weekend family hiking adventures – because healthy eating should fuel the life you want to live.
My personal low-carb journey started after pregnancy as a way to regain energy for active parenting, and that experience continues to inform my professional commitment to making healthy eating feel supportive rather than burdensome for busy families.