
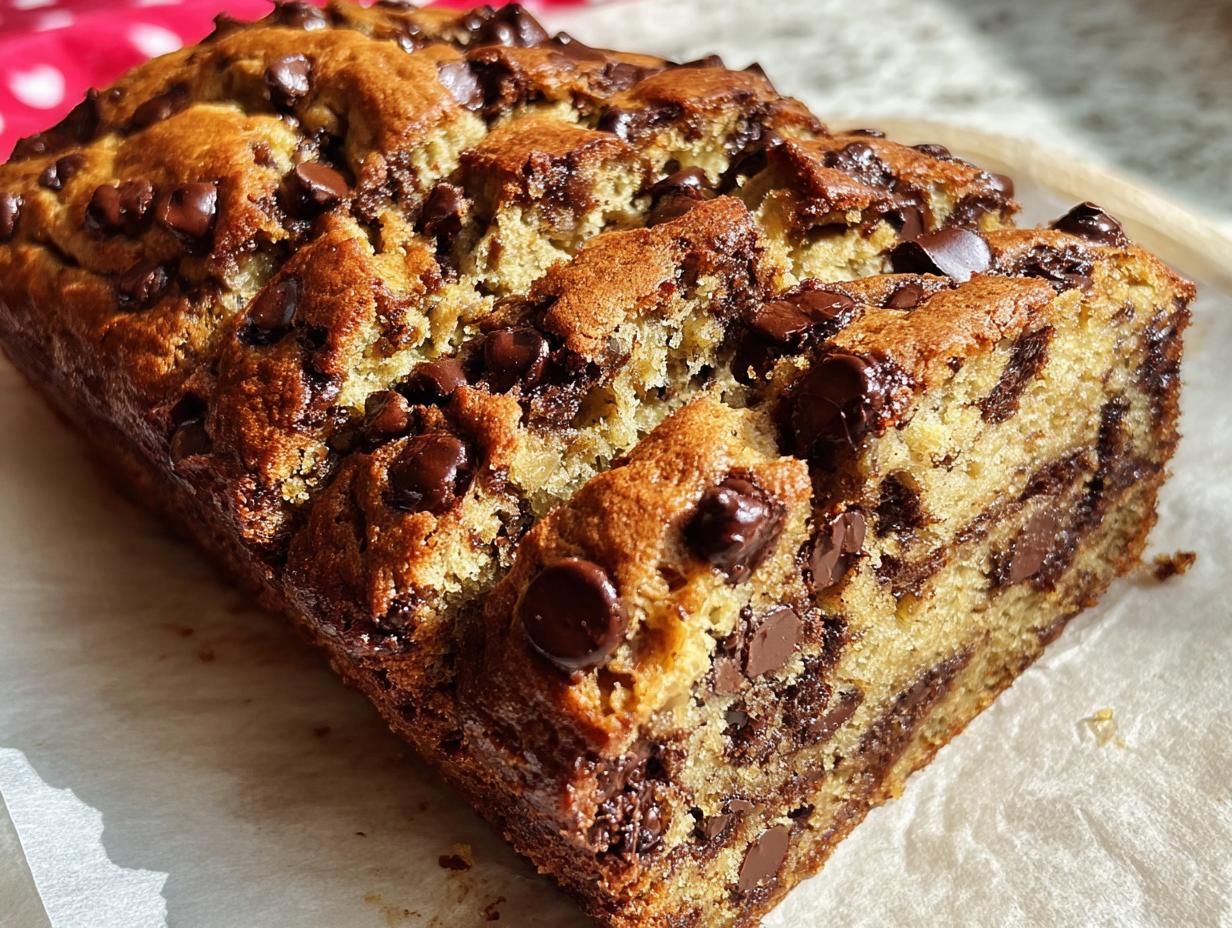
You know those recipes you make that are good, but never quite *great*? Well, we’re fixing that today! Banana bread is a classic, nobody gets that wrong, but sometimes it just needs a little something extra to really shine. That “something extra,” trust me, is brown butter. I still remember the first time I made my version of Brown Butter Banana Bread. It was one of those utterly dreary, rainy afternoons where you just need comfort food. I had way too many bananas turning black on the counter, so I decided to experiment.
As I melted that butter down, the aroma that filled my kitchen was incredible—deep, toasty, and nutty. It instantly transformed my whole house into the coziest place on earth! When the loaf finally came out of the oven, smelling like a gourmet bakery, I couldn’t wait for my family to try it. That first bite? Wow. It took a humble loaf and made it extraordinary. That moment cemented brown butter in my repertoire forever. This recipe is easy enough for any casual baker, but sophisticated enough to wow everyone at your next gathering.

Why This Brown Butter Banana Bread is Your Next Weekend Baking Project
This recipe isn’t just another loaf; it’s a significant step up from your basic recipe! If you’re looking for manageable yet impressive weekend baking projects, this is IT. You get unbelievable flavor payoff for just a few extra minutes of effort.
- It creates a guaranteed rich banana bread experience thanks to that toasted nutty undertone.
- The method is surprisingly quick—most of the time is just baking!
- It freezes beautifully, making it perfect for meal prep or future snacks.
- It’s far superior to store-bought versions, obviously!
The Magic of Brown Butter Desserts
When you brown butter, you are essentially toasting the milk solids in the butter. This process removes water and caramelizes the milk sugars, creating these deep, toasty, hazelnut-like notes. It’s that subtle layer of complexity that makes Brown Butter Banana Bread taste like it came from a professional bakery. It’s honestly the easiest flavor upgrade you can introduce into your baking!
Gathering Ingredients for Perfect Brown Butter Banana Bread
Okay, let’s talk ingredients because that’s half the battle won! The beauty of this recipe is that it uses pretty standard pantry items, but we need to talk about the bananas. If your bananas aren’t speckled black all over, they aren’t ripe enough! You need that intense banana sweetness to counter the richness of the brown butter.
Make sure you have exactly 3 mashed bananas—don’t skimp! We use a full cup of brown sugar, which really enhances that caramelized flavor we are aiming for. Everything else is straightforward, but look closely at the list; those measurements are important for that perfect crumb structure, especially the flour and leavening agents.
Ingredient Notes and Substitution Ideas
We need that 1/2 cup of butter, which we’ll turn into liquid gold, remember that! Now, for the trickiest part: the milk. I wrote down 2 to 4 tablespoons because banana ripeness varies wildly. If your batter looks like thick mud clinging desperately to the sides of the bowl, add that milk a tablespoon at a time until it loosens up. Don’t go crazy, we still want a thick batter!
If you want to cut back on fat slightly, you can substitute the milk with plain Greek yogurt, maybe starting with just 2 tablespoons. The Greek yogurt adds a lovely little tang that balances the sweet chips. Just make sure it’s well incorporated before you add the dry stuff.
Essential Equipment for Making Brown Butter Banana Bread
Before you even dream about melting that butter—we need to make sure your kitchen is set up for success! Since we are doing the browning step ourselves, we need a bit more than just a stand mixer. Don’t panic; these are all simple things you likely have tucked away. Having everything ready makes this recipe flow beautifully, which is crucial when you’re waiting for butter to toast!
Here’s what you’ll absolutely want handy:
- A medium saucepan. Aluminum or stainless steel works best so you can easily see the color change!
- Your trusty 9×5-inch loaf pan. Make sure you grease up those corners really well, or better yet, line it with parchment paper—I can’t stress this enough when dealing with sweets!
- A large bowl for mixing up all those lovely banana bits and sugar.
- A trusty whisk for combining the wet ingredients.
- A good rubber spatula. This is key for folding everything gently at the end so you don’t deflate all the air you worked so hard to create.
Seriously, gather these tools first. It makes that 15-minute prep time fly by, and you’ll feel so organized when it’s time to mix!
Step-by-Step Instructions for Brown Butter Banana Bread
Alright, this is where the real magic happens! Don’t let the browning butter scare you off; it’s incredibly simple once you know what to watch for. We want to take that pale yellow butter and turn it into something deep and aromatic before it goes anywhere near the bananas. Pay close attention to your senses here—smell is your best friend!
First, get that oven warmed up to 350°F (175°C) and get that rack situated right in the middle. Then we prep the pan—grease it well, or do what I prefer, which is lining it with parchment paper so you get the absolute cleanest lift when it’s all done.
Mastering the Brown Butter Technique
Take your half cup of butter and drop it into that saucepan over medium-low heat. You need patience here; low and slow wins the race! As it melts, you’ll see it foam up. Keep swirling the pan gently—don’t stir with a spoon right away! You’re waiting for the foam to subside and for tiny brown specks to form at the bottom. That happens around the 5 to 8-minute mark. When the butter smells deeply nutty, like toasted popcorn or coffee, pull the pan off the heat IMMEDIATELY.
It will keep cooking on residual heat, so you need to stop that reaction fast! Pour that gorgeous liquid into a separate, heatproof bowl immediately—it acts as a heat sink and saves your beautiful brown butter.
Mixing Wet and Dry Ingredients for Rich Banana Bread
Now, back to the basics! Mash those three bananas in your large bowl until they look fairly smooth. Add your cooled brown butter—make sure it’s only slightly cooled, not cold hard butter—along with the brown sugar, one egg, and that lovely vanilla. Whisk this wet mix until everything looks happy together.
In a separate bowl, we’re just quickly whisking the dry stuff—that’s the flour, baking powder, and salt. We are whisking minimally here! Now comes the folding. Pour the dry mixture into the wet ingredients. Using your rubber spatula, gently fold until you just don’t see any more white flour streaks. Overmixing this part is the enemy of a truly rich banana bread!
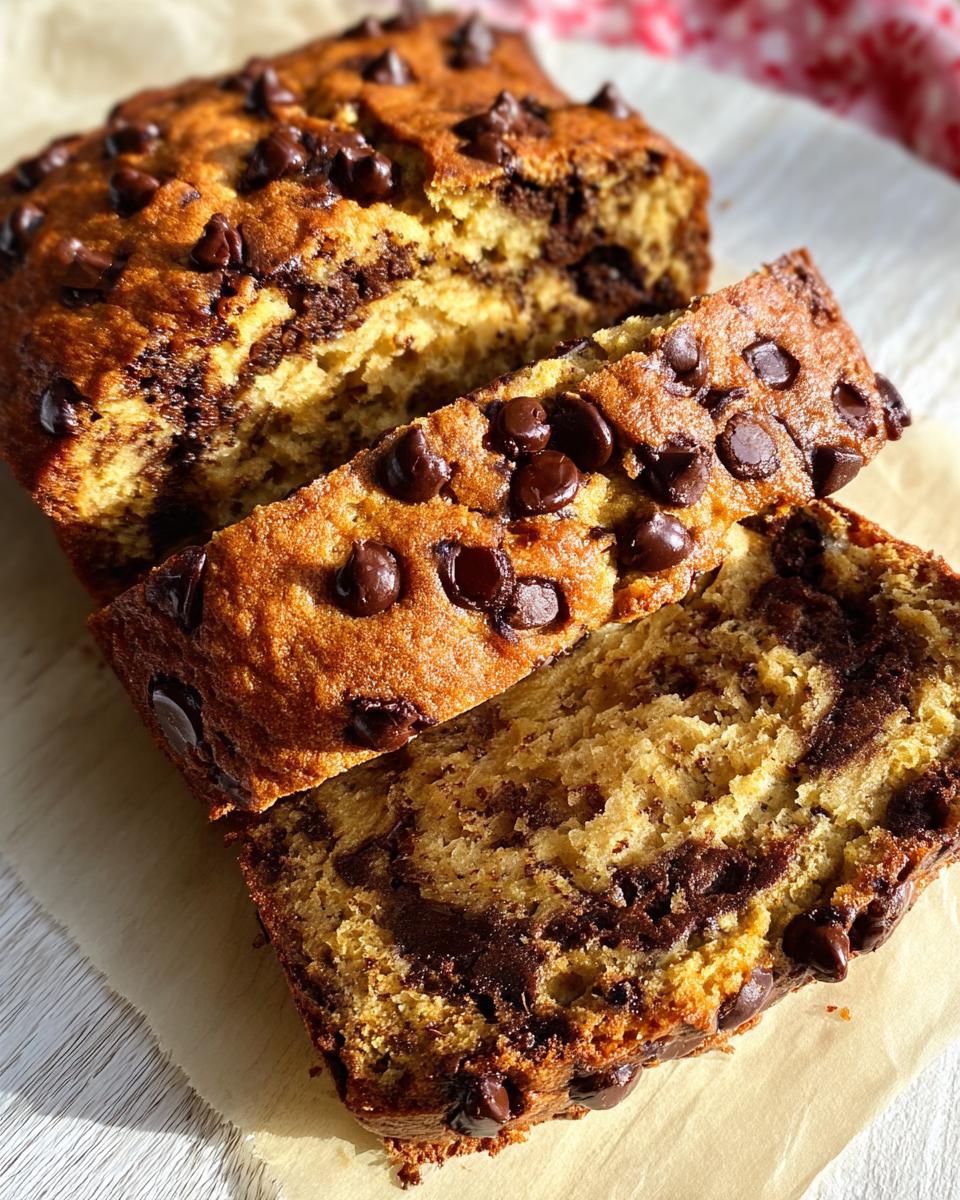
If the batter seems like it won’t budge, stir in a tablespoon of milk at a time until it loosens—remember, we don’t want it runny! Finally, fold in those chocolate chips and/or nuts. Pour the batter into your prepared pan. This whole process makes my favorite version of Brown Butter Banana Bread, and the aroma alone is worth the few minutes of work!
Bake this beauty for about 55 to 65 minutes. If you notice the top is getting too dark before the center is done (which happens!), just carefully drape a piece of aluminum foil over the top for the remaining bake time. A toothpick test is your final confirmation: it should come out with moist crumbs, not wet batter. Let it rest in the pan for 10 minutes before turning it out onto a cooling rack. Don’t skip that rest time! You can see a great reference for browning butter here if you need a visual aid!
Tips for Achieving the Best Brown Butter Banana Bread
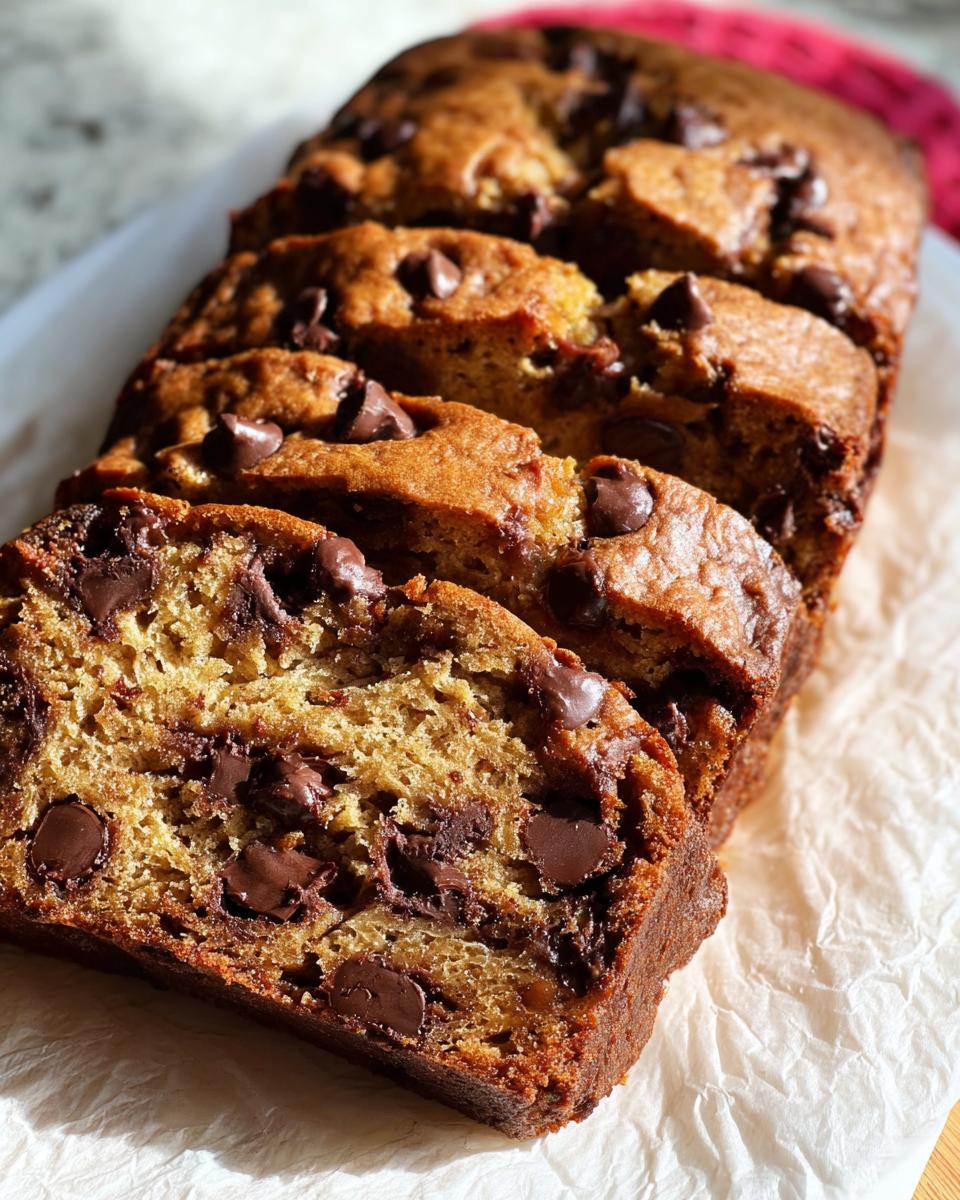
Now that you’ve done the hard, flavorful work by browning the butter, we need to make sure the baking journey is just as smooth. The cooling process is actually almost as important as the mixing when it comes to this Brown Butter Banana Bread texture. Resist the urge to slice into that hot loaf right out of the oven!
If you try to take it out too fast, it can absolutely collapse in the center because the structure hasn’t totally set. Let it sit in that loaf pan for a solid 10 minutes. That brief cooling period allows those starches to firm up just enough. Once you turn it out onto the rack, it needs time to steam off excess moisture, which guarantees that perfect, moist crumb you’re craving.
Also, remember that foil trick I mentioned? If your loaf starts looking deeply golden brown after about 35 or 40 minutes, go ahead and loosely tent it with aluminum foil. The foil shields the top from the direct heat. That way, the inside has time to cook through completely without turning the gorgeous, buttery crust into something bitter or burnt. It’s all about timing and tenting when making this decadent loaf.
Serving Suggestions for Your Brown Butter Banana Bread
This bread is honestly too good to just eat standing over the sink, although I’ve certainly done that! The deep, nutty flavor from the brown butter means it stands up beautifully to richer toppings or incredible sides. It’s one of those versatile treats that works for dessert, a cozy afternoon snack, or as the star of your next weekend gathering.
If you’re serving this up as part of a big spread, it fits perfectly into any lineup of brunch recipes. Forget boring muffins; everyone will gravitate toward this loaf!
Here are a few ways I love serving mine up:
- Simple & Classic: Just a thin smear of good quality salted butter on a warm slice. The salt really makes the brown butter notes pop!
- For a Sweet Kick: Drizzle it lightly with a simple maple glaze. You can mix powdered sugar with a splash of pure maple syrup until pourable. It tastes like autumn in bread form.
- Cream Cheese Frosting (The Decadent Route): If you want to go all out—and why not?—a thin layer of slightly tangier cream cheese frosting cuts through the richness perfectly.
- With Fruit: Serve slices alongside fresh berries like raspberries or sliced oranges. The acidity brightens up the heaviness of the banana and chocolate chips.
Honestly, even just a mug of strong black coffee is the perfect companion. It really cuts through the richness and allows all those complex nutty flavors to shine through. Enjoy your decadent slice!
Storage and Reheating Instructions for Brown Butter Banana Bread
One of the best parts about making a big loaf like this is having leftovers! If you manage not to eat the entire thing in one sitting (which is a major win), you need to know how to keep that moisture locked in. Since we used brown butter and good ripe bananas, this loaf stays moist longer than standard bread, but we still need to treat it right.
If you plan on eating this within two or three days, leaving it on the counter is totally fine. Just wrap it up tight! I use plastic wrap first, making sure I seal the cut end completely, and then I wrap the whole loaf loosely in aluminum foil. This double-wrap method prevents either the air from drying it out or the plastic wrap from getting directly smooshed against the surface, which can sometimes leave a weird film.
Keep it somewhere cool and covered, away from direct sun, which can make it sweat. Two days is my max for countertop storage before I notice a slight texture change.
Freezing Your Loaf for Later
When I know I won’t finish it within 48 hours, I always slice it first—this is a non-negotiable step for me! Trying to freeze a whole loaf and then hacking off a slice later usually results in a crumbly mess.
Once sliced, wrap each individual slice tightly in plastic wrap. Seriously, squeeze every bit of air out! Then, stack those carefully wrapped slices together and seal them all inside a large zip-top freezer bag. The individual wrapping is what saves you time later.
This bread freezes like a dream for up to three months. When you get a craving, you don’t have to thaw the whole thing. Just pull out one or two wrapped slices.
The Best Way to Reheat Your Slice
Reheating is easy, but watch the time! If you microwave a frozen slice, it’ll get hard fast. I prefer using the toaster or a low oven.
For just a slice or two, pop it in the toaster on the lowest setting—even just one quick pass warms it through nicely and brings that beautiful aroma back. If you’re reheating a larger piece (say, half the loaf), wrap it loosely in foil and warm it in a 300°F oven for about 10 minutes. You want it gently warmed, not hot enough to fry the butter all over again!
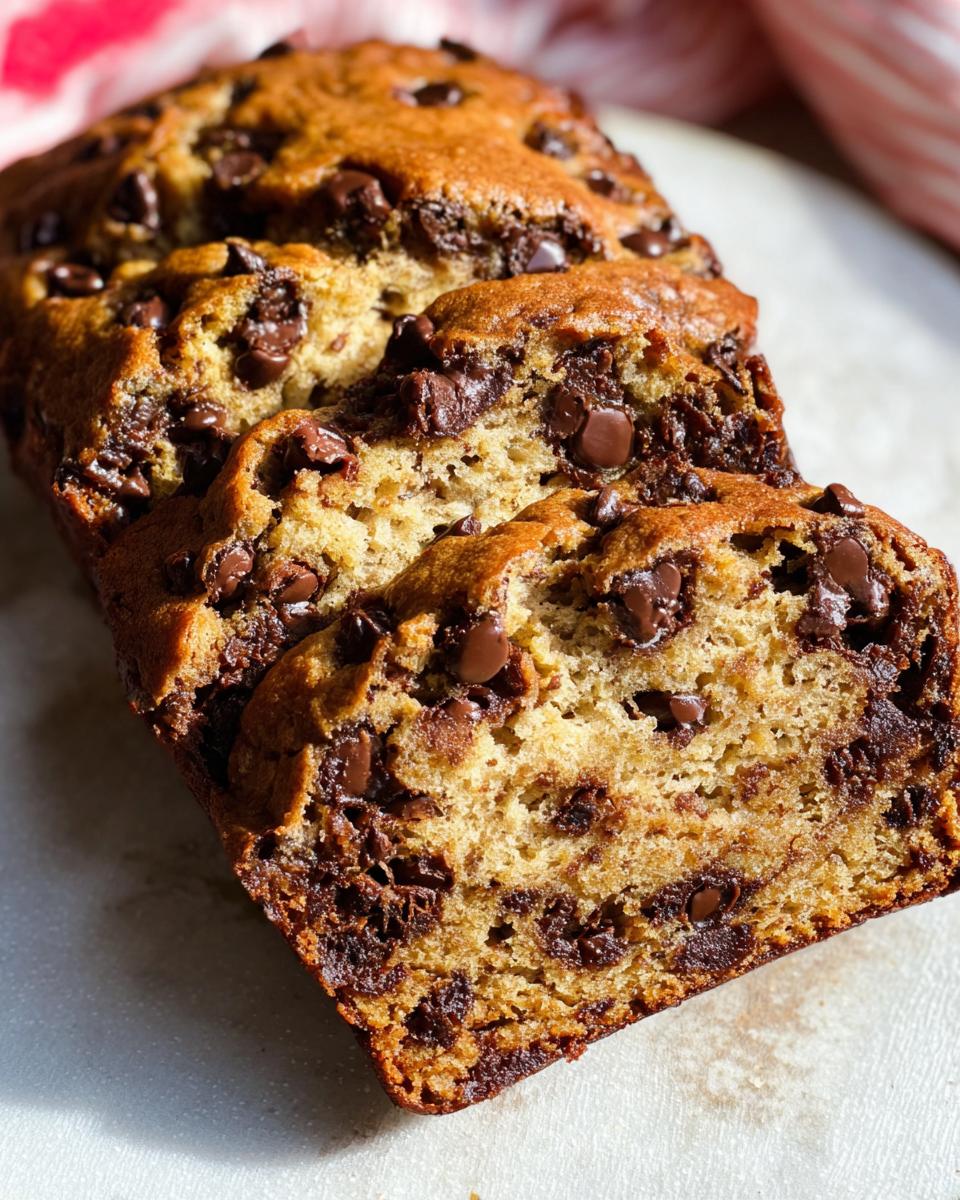
It comes out soft inside, slightly crisp on the edges, and smelling just as good as the day it was baked.
Frequently Asked Questions About Brown Butter Banana Bread
It’s funny, even when a recipe seems straightforward, we always end up with little questions! I get asked about substitutions or doneness tests all the time. Since this is such a fantastic recipe for brunch recipes or just a regular mid-week treat, I pulled together the questions I hear most often about making the perfect loaf of Brown Butter Banana Bread.
Can I make this recipe without browning the butter?
Oh, absolutely, you can! But you’d be missing out on the best part, wouldn’t you? If you’re in a huge rush—say, you need a quick loaf for an unexpected guest—you can certainly just melt the butter and add it, skipping the toasting part. However, you will lose that signature deep, toasted, nutty flavor that makes this loaf so memorable. It will taste like a really great, fantastic standard banana bread, but it won’t sing the way the browned butter version does!
What is the best way to tell if my Brown Butter Banana Bread is done?
The toothpick test is your starting line, not the finish line! Stick the toothpick right in the center; if it comes out clean or with a few dry crumbs clinging to it, you’re looking good. But I always use a couple of visual cues too. First, check the edges of the bread in the pan; if they have shrunk away ever so slightly from the sides, that’s a great sign!
If you used the foil trick because the top was getting too dark (and it happens, especially with that sugar content!), make sure you remove the foil for the last five minutes of baking. This lets the very top crust crisp up just a little bit before you pull it out. A cooked loaf is firm to the touch when gently pressed in the center.
Can I use different kinds of nuts or mix-ins?
Please do! This bread is built for customization, which makes it perfect for those last-minute weekend baking projects. The recipe calls for walnuts or pecans, but I’ve used slivered almonds, and even chopped macadamia nuts when I had them lingering in the pantry—they are amazing with brown butter!
If you aren’t into chocolate chips, you can try substituting them with butterscotch chips or even adding things like dried cranberries or chopped dried cherries. Just remember, if you use dried fruits, you might want to soak them in warm water or a little bit of rum for about 20 minutes first. Drying them off really well before folding them in stops them from drawing excess moisture out of your finished loaf!
Is this recipe good for making banana bread muffins instead?
Yes, muffins are a wonderful idea! Because muffins have a larger surface area compared to a loaf pan, they bake much faster. You should only need about 18 to 22 minutes at that same 350°F oven temperature. Keep an eye on them after 15 minutes and test with a toothpick. They still get that incredible brown butter flavor but are perfect for quick grab-and-go breakfasts for the week!
Nutritional Estimate for Brown Butter Banana Bread
Now, I know we bake this bread for the pure joy and that incredible flavor, right? We aren’t making it for a health food competition, let’s be honest! But I always get asked about the numbers, so I ran some estimates for you based on the 10 slices this recipe yields. Remember, this is just a guideline because your bananas might be bigger, your chips might be darker, and I’m definitely not weighing my butter perfectly!
Think of this as a guideline for when you’re trying to plan out your weekend brunch without feeling guilty about indulging in something so incredibly delicious!
Here’s a general breakdown per slice (assuming 10 slices were cut evenly):
- Calories: Approximately 320-350 kcal
- Total Fat: Around 17g (That brown butter is delicious, isn’t it?)
- Protein: About 4g
- Total Carbohydrates: Roughly 40g
Please keep this in mind: These figures are ballparks! They are based on standard measurements of all-purpose flour, granulated brown sugar, and semi-sweet chips. If you use half a cup of pecans, add a bit more fat and calories. If you use ultra-ripe, giant bananas, the sugar content shifts. This is an estimate for your rough planning, but the taste estimate? That’s 100% guaranteed to be amazing!
Share Your Brown Butter Banana Bread Creations
Okay, that’s pretty much everything I know about transforming regular banana bread into an unbelievably fragrant, rich banana bread using the power of toasty brown butter! I truly hope you give this a shot, especially if you’ve been looking for elevated yet easy weekend baking projects.
Now that the loaf is out of your oven and cooling (or maybe you couldn’t wait and already dove in!), I absolutely want to hear all about it! Did those nutty aromas fill your house the way they do mine?
Did you go for the optional chopped pecans, or did you stick strictly to chocolate chips? Did the browning process go smoothly, or did you have a minor smoke alarm incident? (Oops, it happens to us all!)
Please, please, please leave a comment below! I love reading your feedback, seeing your modifications, and hearing your own little kitchen adventures. Tell me how fast your family devoured the bread—that’s always the best measure of success, isn’t it?
If you took a beautiful picture of your golden, crusty loaf—maybe you paired it with coffee for the perfect morning treat—share it online and tag me! Seeing your finished Brown Butter Banana Bread makes me so happy and keeps my own inspiration baking strong!
Brown Butter Banana Bread
Ingredients
Equipment
Method
- Preheat your oven to 350°F (175°C) and adjust the rack to the center position.
- Melt the unsalted butter in a medium saucepan over medium-low heat. Swirl the pan occasionally. When the butter turns a golden brown color and smells nutty (about 5-8 minutes), remove it from the heat and transfer it to a heatproof bowl to cool.
- Grease a 9×5-inch loaf pan or line it with parchment paper.
- In a large bowl, mash the overripe bananas with a fork until smooth.
- Add the cooled brown butter, brown sugar, egg, and vanilla extract to the mashed bananas. Whisk everything together until well combined.
- In a separate bowl, whisk together the flour, baking powder, and salt.
- Pour the dry ingredients into the bowl with the wet ingredients. Using a rubber spatula, gently fold the ingredients together until just combined. If your batter seems too thick, add 2 to 4 tablespoons of milk to thin it slightly.
- Gently fold in the chocolate chips and any optional nuts until evenly distributed.
- Pour the batter into the prepared 9×5 pan. Spread it out evenly and top with extra chocolate chips if desired.
- Bake in the preheated oven for 55 to 65 minutes, or until a toothpick inserted into the center comes out clean. If the top browns too quickly, cover it with aluminum foil halfway through baking.
- Remove the bread from the oven and let it cool in the pan for about 10 minutes. Then, transfer it to a wire rack to cool completely before slicing.
- Slice the cooled bread and serve it plain or with a topping like whipped cream.
Notes
Tried this recipe?
Let us know how it was!
Master of Culinary Visual Arts
My culinary journey started in the fast-paced kitchens of boutique coastal restaurants throughout Southern California, where I learned that beautiful food doesn’t have to be complicated. After nine years of professional cooking, I’ve made it my mission to prove that sophisticated, nutritionally sound meals can be accessible to busy home cooks who refuse to compromise on flavor or visual appeal.
What changed everything for me was watching talented home cooks feel intimidated by healthy cooking. That’s when I transitioned to private instruction, teaching busy professionals and families how to create restaurant-quality meals using simple techniques and ingredients they can actually find at their local grocery store. My “15-minute meal” frameworks are now used by several regional cooking schools!
As a third-generation Mexican-American, I love weaving vibrant Latin flavors into low-carb creations – proving that healthy eating can be both culturally authentic and visually spectacular. My “effortless elegance” philosophy is simple: nutritious food should look as stunning as it tastes, without requiring professional chef skills or expensive equipment.
When I’m not developing recipes in my San Diego coastal kitchen, you’ll find me surfing the local breaks with my Golden Retriever mix, Mango, who’s both my kitchen companion and unofficial taste-testing assistant. My personal low-carb lifestyle started as a way to maintain energy for my active coastal life, and it’s become the foundation for proving that healthy eating enhances rather than restricts life’s pleasures.