
Oh, summer entertaining! There is nothing better than sunshine, a picnic blanket, and a treat that doesn’t require forks or fancy plating. If you’re like me, you want dessert to be fun, portable, and completely delicious without spending all afternoon fussing over it. That’s why the Strawberry Shortcake Trifle in a Jar showed up in our lives, and honestly, it’s a game-changer for any gathering.
I vividly remember the first time my kids helped me put these together for a family picnic. It turned into a wonderfully messy, laughter-filled adventure! As we layered fresh strawberries, fluffy whipped cream, and soft cake chunks, I was just soaking up their giggles and watching their little creative streaks show up. We weren’t just making a tasty snack; we were making memories that sweetened the whole experience. Trust me, assembling this Strawberry Shortcake Trifle in a Jar is half the fun!
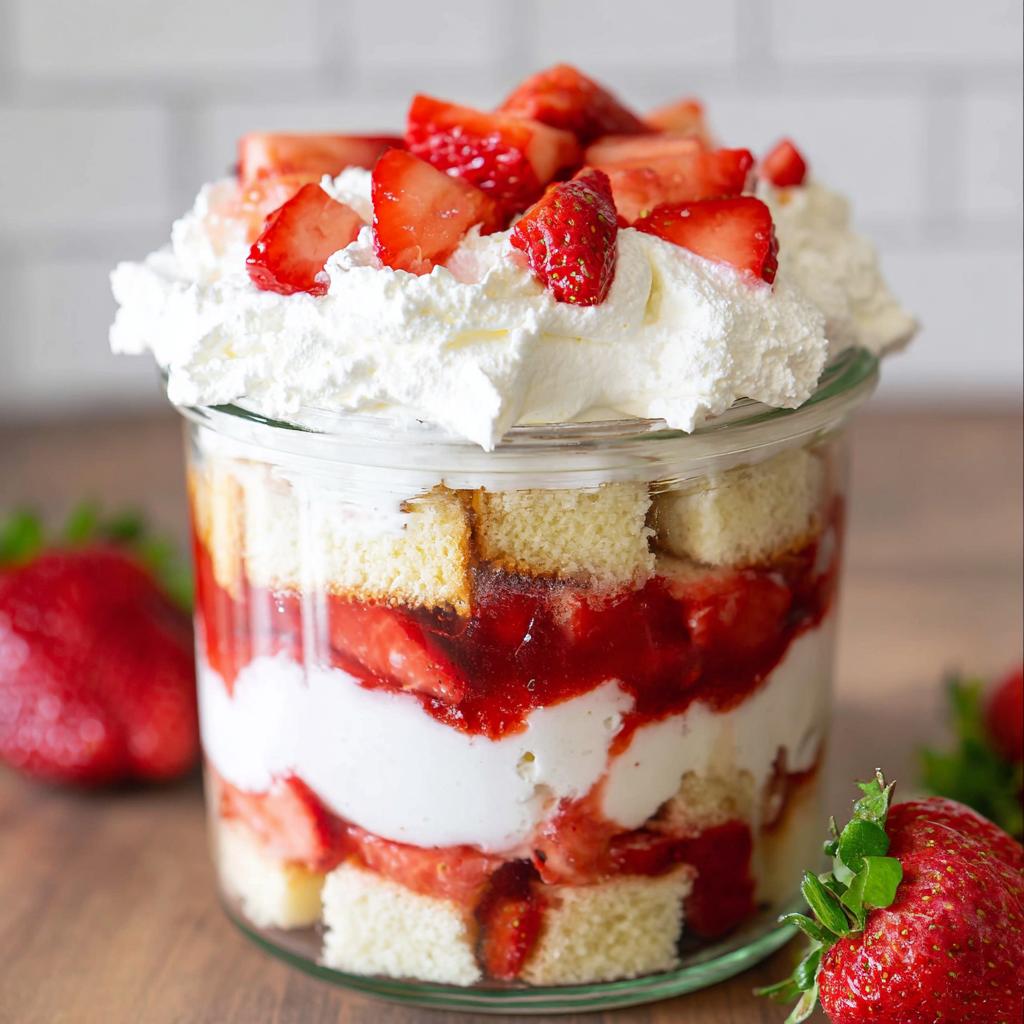
This lets you tuck all that classic strawberry shortcake goodness—vanilla cake, sweet berries, homemade sauce, and heaps of cream—right into a cute little jar. It’s satisfying, portable, and everyone gets their own perfect portion. Ready to jazz up your next afternoon treat?
Why This Strawberry Shortcake Trifle in a Jar is Your New Favorite Summer Party Dessert
Honestly, ditch the big serving dish this summer! This dessert is designed for easy living when you’re trying to wrangle the kids or just get out the door for a cookout. It hits all the right notes for fabulous summer party desserts without adding stress to your plate.
- It’s perfectly portioned, so there’s no messy scooping or fighting over the best bit.
- Everything stays neat and tidy, even on a wobbly picnic blanket!
- The layers look absolutely gorgeous, even if you’re layering fast.
Quick Assembly for Busy Parents
Because we bake the cake separately, assembly is lightning fast. We aren’t scrambling to cool layers! Once the cake cools down and the sauce is made, you just cube, dollop, and stack. It’s such a relief when you can pull out dessert components and have something stunning ready in minutes. I often bake the cake the night before so I’m only dealing with five minutes of layering the next day.
Perfect Presentation: Mason Jar Treats
Who doesn’t love a cute little package? Keeping everything nestled in glass jars makes these the ultimate grab-and-go mason jar treats. They look so cheerful sitting on a buffet table, and you don’t have to worry about bugs—just pop a lid on it! If you’re feeling fancy, tie a little piece of gingham ribbon around the rim before serving. It makes the whole Strawberry Shortcake Trifle in a Jar look extra special.

Gathering Ingredients for Your Strawberry Shortcake Trifle in a Jar
Okay, let’s talk about what goes into making these adorable little beauties. When you’re making layered trifle recipes, the quality of your fruit really makes the difference, especially when strawberries are the star! We want that bright, summery flavor to pop against the rich cake and cream. I always splurge a little on the freshest berries I can find because they carry the whole dessert. This recipe breaks down into three simple groups:
Before you start, if you need a refresher on how to get your dry ingredients mixed perfectly for that cake base, check out my baking essentials guide!
For the Homemade Vanilla Cake Base
Making the cake from scratch is totally worth the 40 minutes of baking time, trust me! For this part, you’ll need 3 cups of all-purpose flour, a quarter teaspoon of baking soda, two and three-quarters teaspoons of baking powder, and 1 teaspoon of salt. Cream up 1 and a half cups of unsalted butter—and make sure it’s room temperature, not melted! Then, 2 cups of sugar, 4 egg whites, 3 teaspoons of vanilla extract, and 1 and a half cups of milk.
Creating the Bright Strawberry Sauce
This is where the pure, intense strawberry flavor comes in! You’ll need 1 pound of strawberries, but these babies must be pureed first. Mix that puree with half a cup of sugar and three-quarters of a teaspoon of vanilla extract. That simmers together to create a gorgeous, thick syrup rather than just watery mush.
Whipped Cream and Assembly Components
For the topping, you need 2 and three-quarters cups of heavy whipping cream—and this MUST be cold, cold, cold! Add 1 and a half cups of powdered sugar and 1 tablespoon of vanilla extract. Finally, for the fresh berry pieces you’ll layer in between, chop up 2 pounds of fresh strawberries (that’s about 5 cups worth!).
Baking the Cake for Your Strawberry Shortcake Trifle in a Jar
Now that we have all our beautiful ingredients lined up, it’s time to tackle the flavor foundation: the vanilla cake! This is the part that takes the longest because we need that nice, rich crumb. But don’t stress; the mixing process is straightforward, even if it has a few steps. Remember, a good, sturdy cake layer is crucial for these layered trifle recipes!
Mixing the Vanilla Cake Batter
First things first, get that oven humming at 350°F (176°C) and prep that 9×13 pan. In one bowl, whisk together your dry friends: flour, baking soda, baking powder, and salt. Now, grab your biggest mixer bowl! Beat that room-temperature butter and sugar until it gets light and fluffy—that takes a couple of minutes to get right. Then, in go the egg whites and vanilla.
This next part is the secret to preventing a dense cake: we alternate! Add about a third of the flour mixture, beat just until it disappears, then scrape the sides. Follow that with half your milk. Keep alternating flour, milk, and finishing with the last bit of flour. Don’t overmix, or you’ll wake up the gluten monsters!
Baking and Cooling Time
Once everything is combined, pour that beautiful batter into your prepared pan. It needs about 35 to 40 minutes in the oven, or until a toothpick comes out clean. This baking step is crucial for creating the perfect cubes for our strawberry shortcake dessert. When it’s done, pull it out and just let it cool completely. If it’s even slightly warm when you cube it for layering, it’s going to get soggy fast!
Preparing the Sauce and Cream for the Strawberry Shortcake Trifle in a Jar
While the cake is cooling down—which is non-negotiable, I can’t stress that enough—we tackle the other two stars of the show: the shiny strawberry sauce and that gorgeous, cloud-like whipped cream. These components come together fast, which is why this recipe feels so luxurious for how little active time it takes!
For the sauce, grab a medium saucepan. We’re taking that pureed strawberry mixture, the half-cup of sugar, and that vanilla, and heating it gently. You want it to come to a boil, just stirring now and then so nothing sticks to the bottom. Once it hits that boil, let it bubble for exactly one minute, then kill the heat. Seriously, don’t cook it longer, or we change the flavor! Set it somewhere it can cool completely—room temperature is fine, but no warm sauce touching cold cream, okay?
Now for the cream! If you want stiff peaks that hold their shape when you pipe them into the jar, your heavy whipping cream absolutely has to be ice cold. Throw it in your mixer bowl with the powdered sugar and vanilla. I use my favorite trick for perfect whipped cream, which involves chilling the bowl first, but most importantly, whip it high and fast until you see those lovely, firm peaks. That’s how you guarantee those gorgeous swirls on top of your finished Strawberry Shortcake Trifle in a Jar!
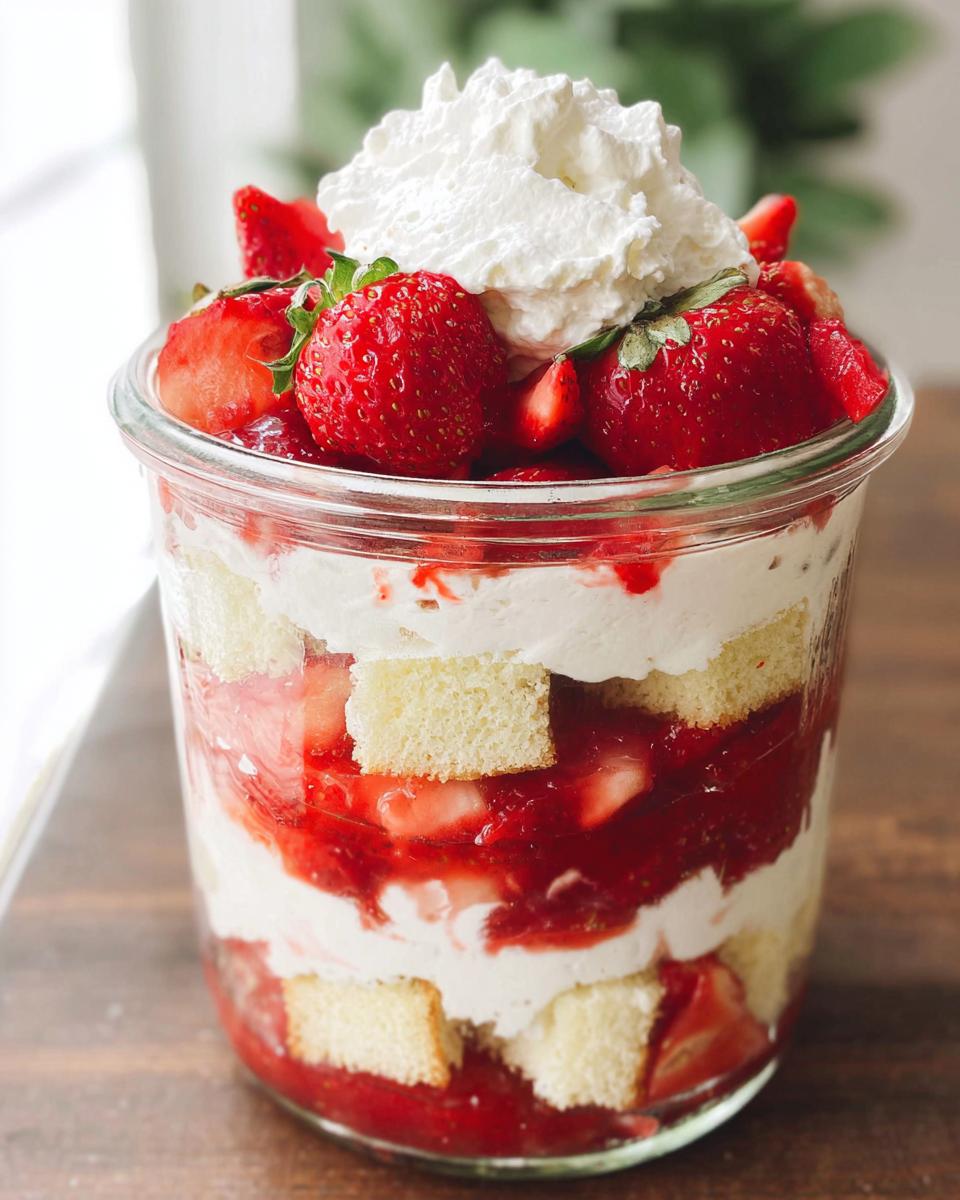
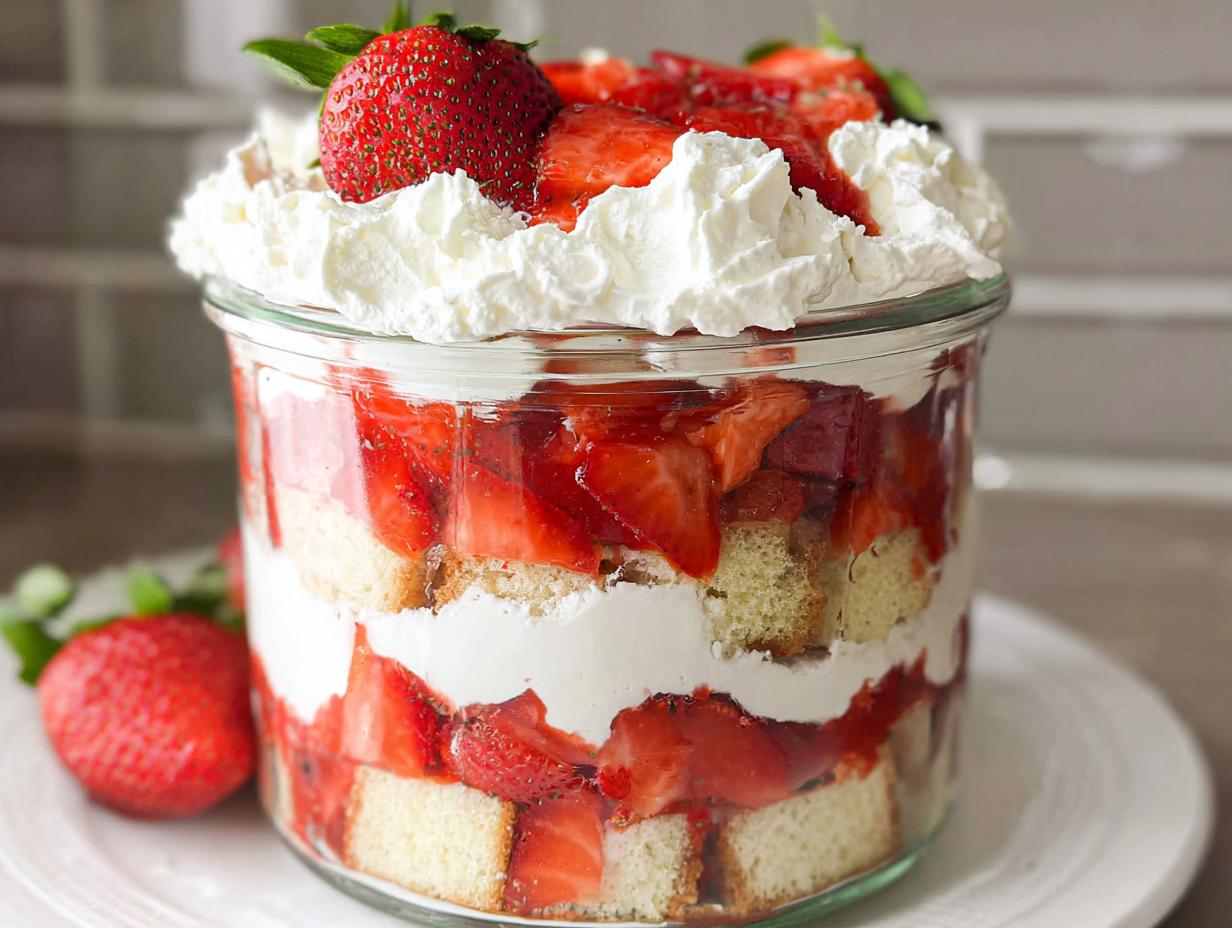
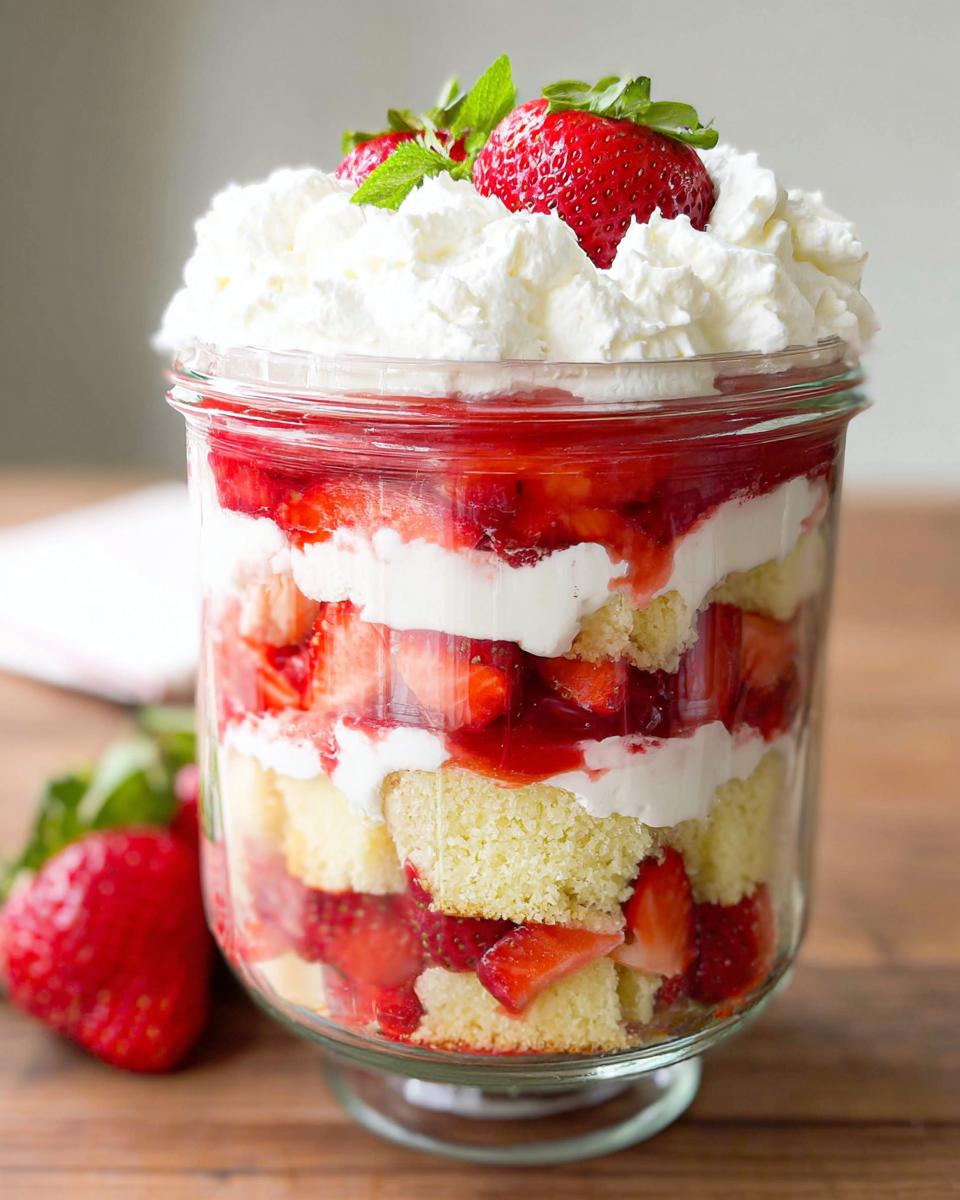
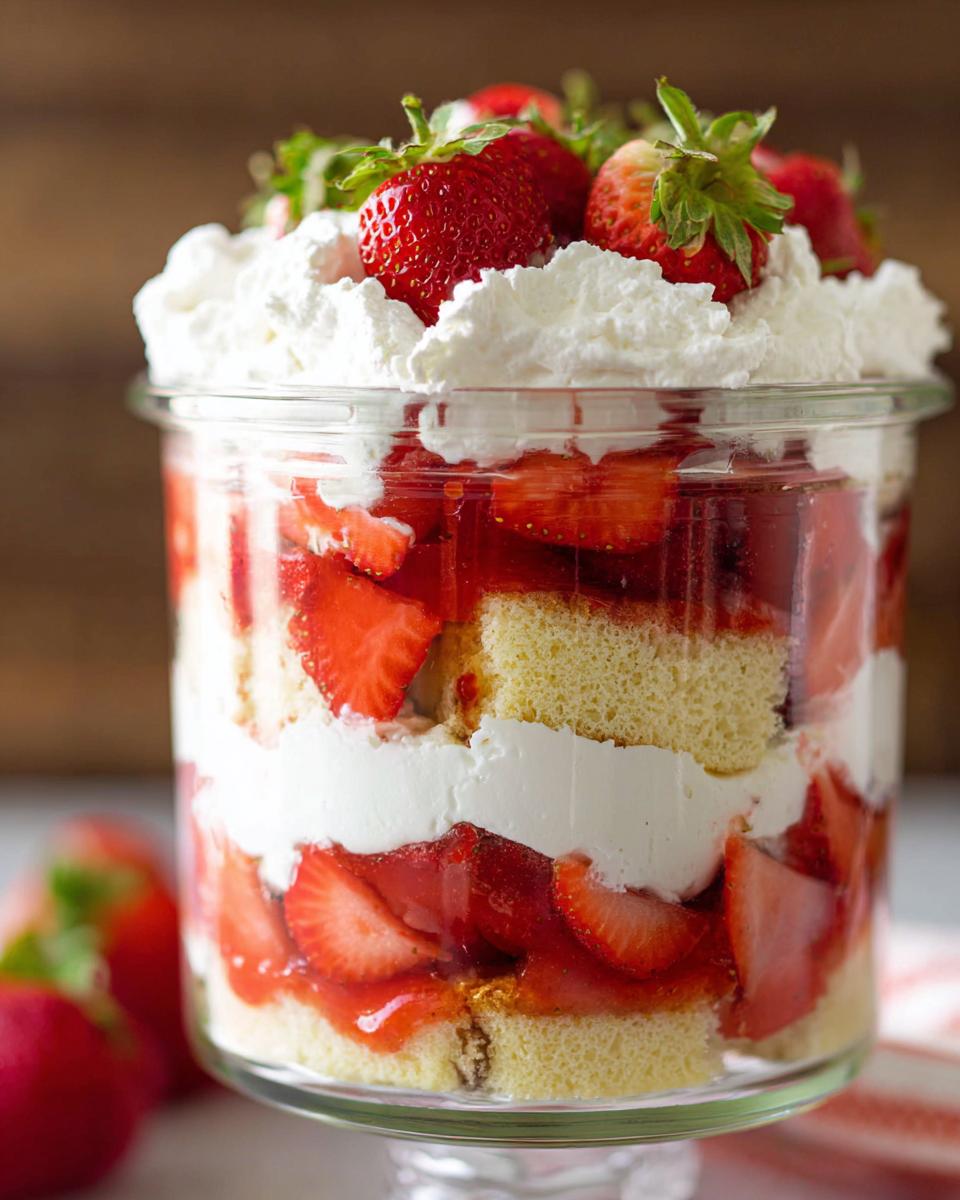
Assembling the Perfect Strawberry Shortcake Trifle in a Jar
This is the moment of truth! All that baking and sauce-simmering is for this—building those beautiful layers. Remember, since we are working in small jars, you might need to cut your already-cooled vanilla cake into smaller chunks rather than neat cubes. Don’t worry if they don’t fit perfectly; they’ll settle down nicely once the sauce hits them! We need to follow a very specific order for the best texture in these layered trifle recipes.
Start with a base layer that sets everything up: cake first. Then the fresh fruit, then the sauce, and finish that round with some glorious cream. We repeat that entire sequence for the second layer, saving the prettiest cream decoration for the very top. For the best results, check out my ideas on fun presentation tips before you start layering!
Layering Technique for Visual Appeal
For your first layer near the bottom of the jar, pack in a good pinch of cake chunks. Follow that with about half of your chopped fresh strawberries and then drizzle about half of your cooled strawberry sauce over the lot. Now, add a generous dollop of whipped cream. You can spoon it in here, but for the truly picture-perfect top layer, I highly recommend loading the rest of the cream into a sturdy piping bag. Repeat the cake, fruit, and sauce sequence on top of that first cream layer. Finish by piping beautiful swirls of cream for that final flourish. Don’t forget to visit this recipe if you need extra inspiration!
Tips for Success with Your Strawberry Shortcake Trifle in a Jar
Listen, I’ve made enough trifles in my life—in jars, in bowls, you name it—to know exactly where things can go wrong. The number one mistake people make with any strawberry shortcake dessert is rushing the cooling process. If you layer a warm cake or sauce with that lovely homemade whipped cream, you’ll end up with a soupy mess instead of those defined layers we worked so hard for.
I’ve made this rule ironclad: if the cake is warm, I stop everything. If the sauce is steaming even a little, it goes back on the counter. Wait until everything is completely room temperature or even chilled before you try to stack it all up. This ensures your cream stays fluffy and your jars look crisp even after sitting in the fridge for a bit!
Ingredient Temperature and Timing
When you are making these mason jar treats, the temperature game is everything. The cake must achieve room temperature at minimum—cool to the touch—before you cut it up. Your strawberry sauce should be able to hold its shape slightly, not pour like water, which means it needs time to thicken as it cools down. Honestly, if you have time, chilling both the cake pieces and the sauce helps them play nicer with that cold heavy cream!
Storage and Keeping Your Mason Jar Treats Fresh
So, you’ve made these gorgeous Strawberry Shortcake Trifle in a Jar treats! Now, how do we keep them looking and tasting perfect until serving time? The good news is that these keep really well in the fridge because they are individually sealed. You can absolutely assemble these a few hours ahead of time, which is a lifesaver when hosting!
I find they are best enjoyed within about 4 hours of final assembly. If you need to prep more ahead, here’s my trick: bake the cake and make the sauce the day before and keep them covered in the fridge. The whipped cream should always be made the day you plan to layer them, or at the very latest, the morning of. Don’t skip sealing those lids tight when you store these mason jar treats!
Frequently Asked Questions About Layered Trifle Recipes
I know when you look at a recipe like this, you probably have a few little technical questions buzzing around! Making gorgeous layered trifle recipes is satisfying, but sometimes you need a quick pointer to make sure it works perfectly in your kitchen. Here are the ones I get asked most often about assembly and storage!
Can I make the cake component ahead of time for the Strawberry Shortcake Trifle in a Jar?
Oh yes, please do! Baking the cake a day ahead is my little secret to reducing stress. Once it’s totally cool, just wrap that 9×13 cake tightly in plastic wrap, maybe even foil on top, and it stays perfectly fresh on the counter or in the fridge. Cutting it into cubes the next day is so much easier!
What is the best jar size to use for this dessert?
For single servings that look great and hold enough dessert without being overwhelming, I swear by standard 8-ounce or 12-ounce mason jars. They offer that perfect height for showing off all those beautiful layers of cream and fruit in your Strawberry Shortcake Trifle in a Jar.
Are there substitutions for the homemade cake in these layered trifle recipes?
Absolutely, if you’re really short on time! Don’t feel guilty about shortcuts. You can totally swap the homemade vanilla cake for store-bought pound cake or angel food cake. Just cube it up the same way, and you still get that fantastic texture in your layered trifle recipes.
Share Your Strawberry Shortcake Trifle in a Jar Creations
Well, that’s it! We’ve mixed, baked, simmered, and layered our way to the most adorable, delicious individual desserts you can imagine. I truly hope you and your family enjoy making and eating this Strawberry Shortcake Trifle in a Jar as much as mine does.
Once you’ve had a chance to dig in—and I mean *really* dig in, getting a bit of cake, cream, and sauce in every spoonful—please come back here and leave me a review! Letting me know how many star a dessert gets helps other busy families decide to try it out. And honestly, when you share photos of your beautiful jars on social media, tag me! I absolutely love seeing how you decorate those final swirls of whipped cream.
Tell me: What was your favorite part of assembling these mason jar treats? Was it the taste of the fresh strawberry sauce, or were you more excited about getting the layers perfectly stacked? Let me know in the comments below!
Strawberry Shortcake Trifle in a Jar
Ingredients
Equipment
Method
- Preheat the oven to 350°F (176°C). Grease a 9×13 cake pan.
- Combine the flour, baking soda, baking powder and salt in a medium sized bowl. Set aside.
- Beat the butter and sugar in a large bowl on medium speed about 2 minutes, until light and fluffy. Scrape down the sides of the bowl.
- Add the egg whites and vanilla and beat on medium speed until well combined and smooth.
- Add about a third of the flour mixture to the batter and beat on medium speed until incorporated.
- Add about half of the milk and beat on medium speed until incorporated.
- Add another third of the flour mixture and beat until incorporated, scraping down the sides of the bowl as needed.
- Add the remaining milk and beat on medium speed until incorporated.
- Add the remaining flour mixture and beat until well combined, scraping down the sides of the bowl as needed.
- Bake the cake for 35-40 minutes, or until a toothpick inserted in the center comes out clean. The cake will be browned on top.
- When the cake is done, set aside to cool.
- To make the strawberry sauce, add the strawberry puree, sugar and vanilla extract to a medium saucepan. Cook over medium heat until it begins to boil, stirring occasionally.
- Allow sauce to boil for one minute, then remove from heat and set aside to cool.
- When everything has cooled, make the whipped cream. Add the heavy whipping cream, powdered sugar and vanilla extract to a large mixer bowl and whip on high speed until stiff peaks form.
- To layer everything in the trifle dish, add a layer of cake on the bottom, then about half of the chopped strawberries, about half of the strawberry sauce, then about half of the whipped cream.
- Add a second layer of cake, strawberries and strawberry sauce, then pipe the remaining whipped cream on top in swirls. Add a few additional strawberries on top as decoration.
Nutrition
Notes
Tried this recipe?
Let us know how it was!
Certified Family Nutrition Strategist
My path into family nutrition began working with Phoenix Area Family Services, where I saw how traditional nutrition advice often ignored real-world constraints like budget limitations, time crunches, and kids who refuse to eat anything green. That experience sparked my mission to develop meal planning systems that work with family realities, not against them.
Over eight years, I’ve helped hundreds of families reduce grocery spending by 25% while dramatically improving their nutrition. My meal planning frameworks have been adopted by local wellness centers because they actually work for busy parents juggling different ages, preferences, and dietary needs in one household.
As a bilingual first-generation Mexican-American and mother of three, I personally navigate the daily challenge of feeding a family nutritiously while honoring cultural traditions and managing a household budget. My “kid-friendly low-carb” protocols show families how to gradually introduce healthier options without triggering mealtime battles or abandoning beloved family recipes.
My “realistic wellness” philosophy is straightforward: health improvements must work within existing family dynamics and financial realities to be truly sustainable. When I’m not developing meal planning systems, I’m creating portable trail snacks for our weekend family hiking adventures – because healthy eating should fuel the life you want to live.
My personal low-carb journey started after pregnancy as a way to regain energy for active parenting, and that experience continues to inform my professional commitment to making healthy eating feel supportive rather than burdensome for busy families.