
It’s tough sometimes when you want to bring something amazing to a party but realize you’ve got zero oven time left. That’s where the magic of no-bake desserts comes in! Trust me, these recipes are life-savers, and they look way more impressive than the time you actually spent on them. I still remember the first time I made the Oreo Cookies and Cream Icebox Cake for a family gathering when the summer sun was blazing, and I was running short on energy. I gathered the kids around to crush the Oreos, and we laughed as we mixed the cream and assembled the layers. When we dug in after dinner, the smiles made the effort completely worth it. As someone who studied Culinary Visual Arts, I love how impactful this simple dessert is. Since then, it’s been my favorite for any warm-weather celebration.
Why This Oreo Cookies and Cream Icebox Cake is Your New Favorite No Bake Cake
Honestly, if you’re staring down a busy week or just don’t want to heat up the kitchen, this is the answer! This recipe proves you don’t need hours of effort to create show-stopping cookies and cream desserts. It’s designed for you, whether you’re a busy parent needing a simple option or a new baker who wants a guaranteed win. It’s just phenomenal!
Quick Assembly for Busy Schedules
The best part? Active prep time is only about 20 minutes! You throw the ingredients together—whoosh!—and then the refrigerator does all the hard work for you. This makes it the perfect no bake cake for when you suddenly realize you promised dessert for tomorrow.
Kid Friendly Treats That Impress Guests
Who doesn’t love Oreos? Seriously! This is one of those recipes where you can totally rope the kids into helping. They absolutely adore crushing the cookies and pressing them into the layers. It’s a fantastic, low-mess way to make some amazing kid friendly treats that truly wow everyone at the party.
Essential Ingredients for Your Oreo Cookies and Cream Icebox Cake
When you’re making something this simple, the quality of what you put in really shines through, right? We aren’t using any fancy stabilizers here—it’s all real dairy and real cookies! I keep my shopping list grouped by function so I don’t forget anything when I’m rushing around. You really only need a few things, but paying attention to the details—like using the *real* stuff—makes all the difference in this icebox cake recipe.
Luckily, you can find everything at your regular grocery store. If you want the absolute best final product—and trust me, you do—stick to what I list here. Check out my guide on ingredient sourcing if you want to dive deeper into finding quality items, but for now, here’s exactly what you need for your layers. I’ve even linked my favorite places to grab these when I’m stocking up over at my ingredient sourcing guide!
For the Homemade Whipped Cream
This is where we build the creamy cloud that holds everything together! Remember, we are ditching the substitutes here. You’ll need:
- 2 cups of heavy whipping cream—make sure it’s cold!
- 1 cup of powdered sugar—sifting it helps but honestly, I often skip that step when I’m in a hurry!
- 1 tablespoon of pure vanilla extract—use the real stuff, the flavor difference is huge!
For the Oreo Cookies and Cream Icebox Cake Layers
This is the fun structural part of our no bake cake. You’ll be using two parts of the cookies, so keep them separate in your mind:
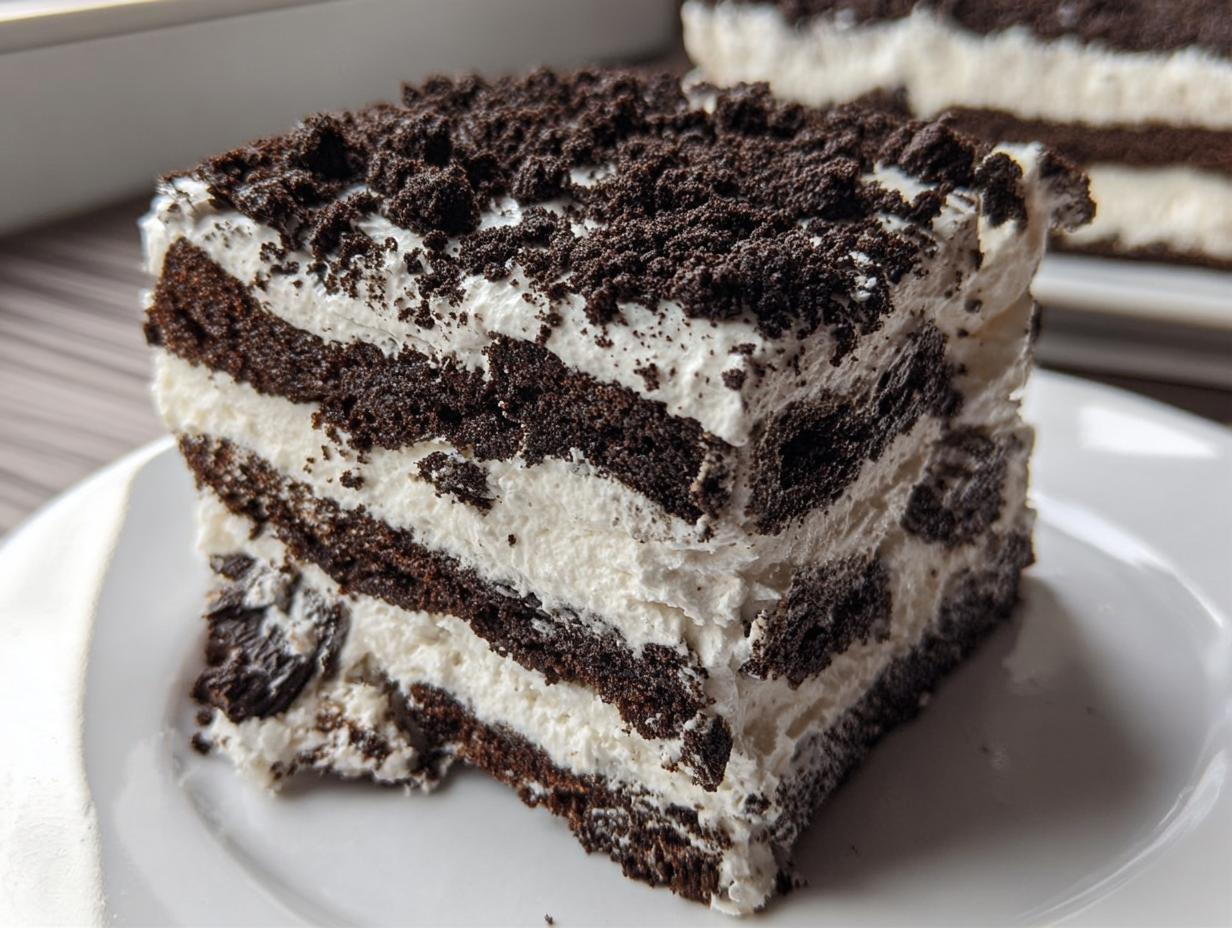
- 30 whole Oreos—these are for the neat layers you stack up. You might need to cut a few pieces to make a solid base, so don’t panic if there are small gaps!
- About 12 crushed or chopped Oreos—save these strictly for the topping later. They stay crunchy for contrast!
Step-by-Step Instructions for the Perfect Oreo Cookies and Cream Icebox Cake
Okay, now for the fun part! This whole thing comes together so fast, but the trick is doing the steps in the right order and being patient during the chill time. Remember, this is an icebox cake recipe, so we are relying on cold to do the heavy lifting. Grab your 8×8 dish and let’s get layering!
Preparing the Stabilized Whipped Cream
First, get your mix going! Combine the cold heavy whipping cream, powdered sugar, and that vanilla extract into your big mixing bowl. Start the mixer on low speed—I learned the hard way that starting high just sends sugar dust everywhere! You want to increase the speed slowly as it starts to thicken up. Keep beating until you get nice, stiff peaks. This usually takes me about 7 to 8 minutes. If you want a deep dive into making cream perfectly stable, check out my guide on whipping cream technique. Once it’s stiff, set it aside.

Assembling the Oreo Cookies and Cream Icebox Cake Layers
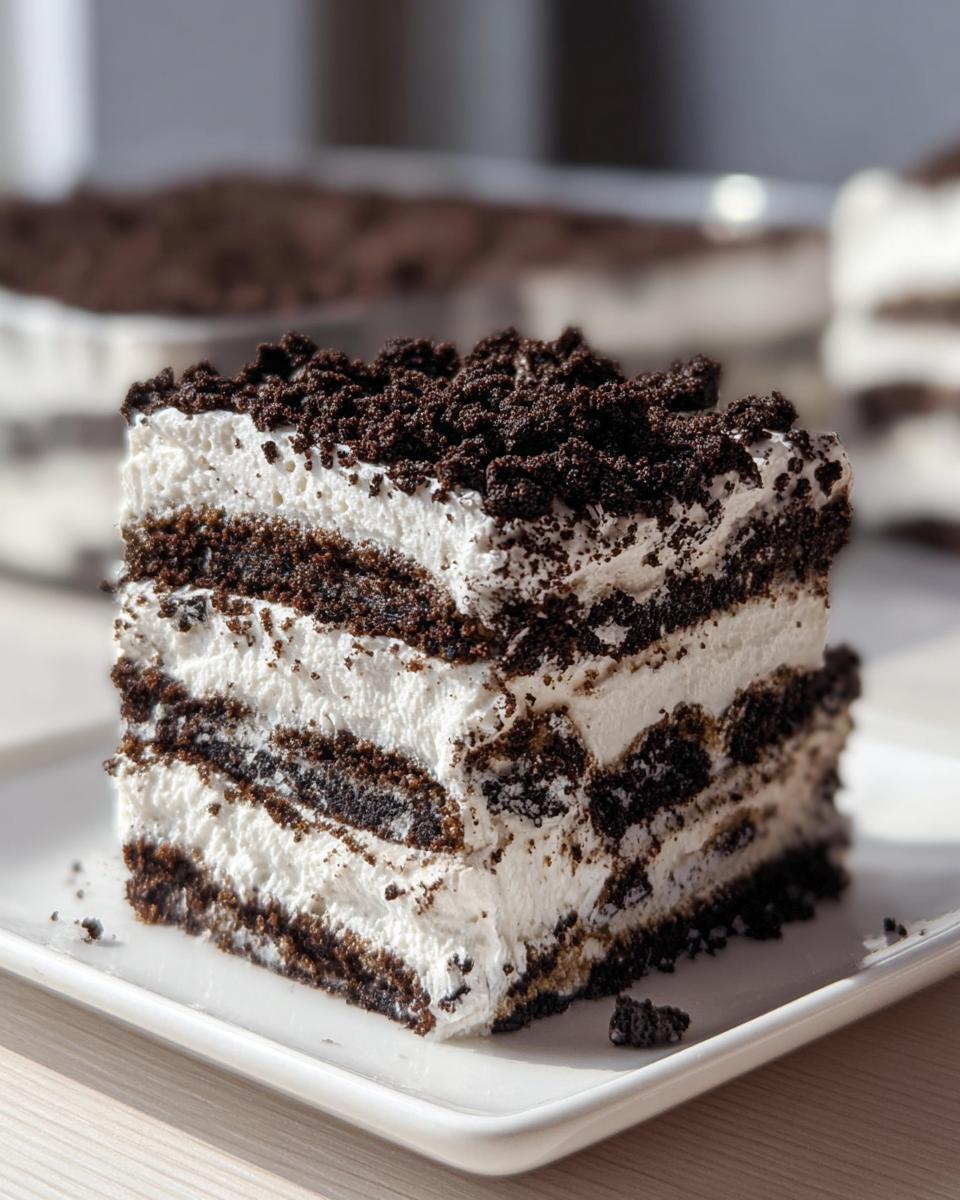
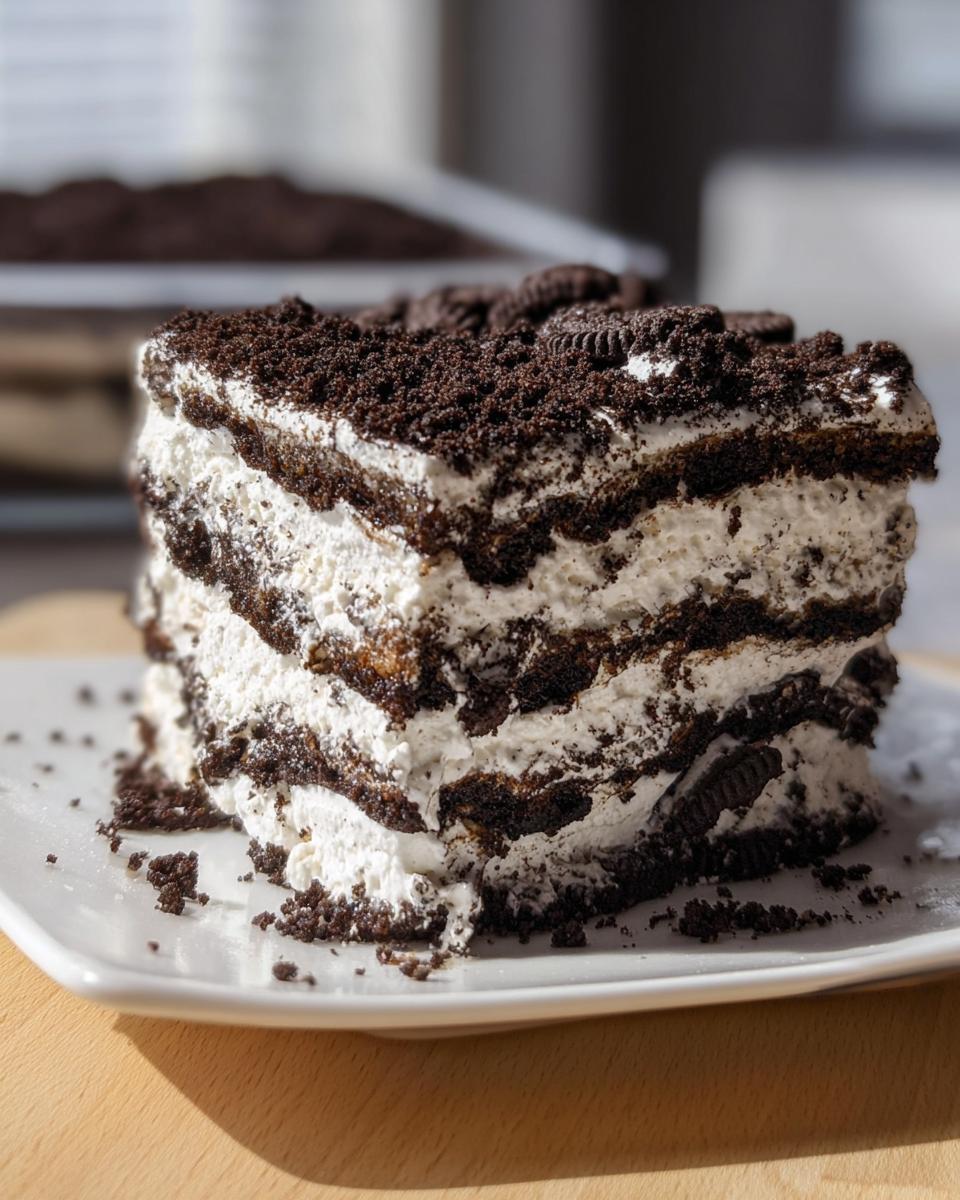
Time to build! Take your 30 whole Oreos and lay a single layer across the bottom of your 8×8 dish. Don’t fret if you have to break or cut a cookie or two to fill in those awkward corners—we want a solid blanket. Spread exactly half of that glorious whipped cream mixture over that first layer of cookies. Next, carefully place your second layer of whole Oreos right on top of the cream. Finish by spreading the rest of the whipped cream evenly over the top. Make sure those edges are smooth!
The Crucial Chilling Time
This step is non-negotiable, friend! You must cover the dish tightly, either with a lid or plastic wrap, and get it into the fridge. This isn’t a dessert you rush. You need a minimum of 8 hours, but seriously, overnight is always better. This chilling time is what magically transforms those hard cookies into a soft, tender cake-like texture. That’s the secret to a great icebox cake recipe!
Finishing and Serving Your Oreo Cookies and Cream Icebox Cake
Once it’s perfectly chilled, take the cake out. Now is the time to bring in those reserved crushed Oreos! Sprinkle those chopped cookies liberally all over the top layer of white cream. You want that contrasting crunch against the soft cake layers underneath. Slice it up—it should cut like a dream—and get ready for the compliments! If you want more tips on assembly and structure, this article from another great baker has some solid ideas: check out this resource.
Tips for Success with Your Oreo Cookies and Cream Icebox Cake
I’ve made this so many times I practically have it memorized, and I learned a few key things along the way that keep it from ending up sad and runny in the fridge! It’s all about respecting the ingredients you choose. Don’t try to sneak in shortcuts; they rarely pay off with this specific dessert!
Ingredient Quality Matters for this Icebox Cake Recipe
Here’s my biggest, most important piece of advice for this entire icebox cake recipe: Do not try to substitute packaged whipped topping—like Cool Whip—for the heavy whipping cream mixture. Honestly, it just doesn’t stabilize the same way! If you use a substitute, your beautiful layers won’t hold their shape while chilling. You need that high fat content from real heavy cream to properly absorb the moisture from the Oreos and set up perfectly. Stick to the homemade stuff; your patience in the whipping stage will be rewarded when it holds that gorgeous slice!
Variations on the Oreo Cookies and Cream Icebox Cake
The beauty of this no bake cake is that it’s so incredibly easy to customize! Since the base structure is just cookies and cream, you can play around with extracts or drizzles without worrying about changing the baking science. You can truly make this your own version of cookies and cream desserts without sweating over flour ratios or oven temperatures. It’s all pure fun!
If you want to get a little fancy, I highly recommend experimenting with different extracts in your whipped cream. Vanilla is classic, but you wouldn’t believe the flavor boost you get from a tiny splash of peppermint extract during the holidays—it’s amazing against the dark cookie!
I also love tossing in some other flavors right before chilling time. You can sprinkle a little finely chopped peanut butter cup layer between the Oreos, or maybe a thin layer of salted caramel sauce on top of the cream before you add the next cookies. The caramel soaks in beautifully! For more ideas on how to jazz up your layers, definitely check out my flavor variation guide; it has a few more creative swaps that stay firmly in the no-bake zone.
And don’t forget the chocolate sauce! If you’re serving this to adults, a deep, bitter chocolate fudge sauce drizzled over the top right before serving, just along with those crushed Oreos, makes it taste instantly gourmet. See? So simple, so impressive!
Storing Leftovers of the Oreo Cookies and Cream Icebox Cake
You know, sometimes you actually have leftovers, which feels like a bonus win! Since this is an icebox cake recipe, storage is pretty straightforward, but you have to be a little careful to maintain that perfect texture we worked so hard to achieve during the chilling time.
The main thing to remember is that the cookies continue to absorb moisture from the cream while in the fridge—that’s the whole point! This means that the longer it sits, the softer and more cake-like the entire thing gets. Honestly, many people (me included!) think day two is even better than day one because those Oreo discs completely meld together.

When you are putting away what’s left in your 8×8 dish, you absolutely have to cover it tightly. I mean *tightly*. Use plastic wrap, pressing it right down onto the surface of the cream if you can, or secure the lid really well. If air gets to the whipped cream, it can dry out or start to sweat, and nobody wants that!
Keep it stored right there in the refrigerator. This no bake cake should stay perfectly good for about three to four days. Just make sure you keep those crushed Oreos you sprinkled on the top reserved separately until you are ready to eat the next slice! If you add them back on too soon, they get soggy, and we lose that wonderful texture contrast we talked about earlier.
Frequently Asked Questions About This No Bake Cake
I know when you read a recipe like this—the ultimate no bake cake that requires zero oven time—a few questions always pop up. Don’t even worry if you’re wondering about timing or storage; I’ve dealt with all of it! Here are the things most people ask me when trying this recipe for the first time. Getting these details right ensures the best results for your kid friendly treats!
Can I make the Oreo Cookies and Cream Icebox Cake ahead of time?
Yes! In fact, you *must* make it ahead of time. This isn’t just a suggestion; it’s mandatory for making this dessert successful! The cookies need that long chill time (at least 8 hours) to soften up and turn into that wonderful cakey texture we love in an icebox cake recipe. The only thing you shouldn’t do ahead of time is the final topping. Keep those crushed Oreos ready in a container, and sprinkle them on right before you serve it so they give you that lovely crunch contrast!
What happens if I skip the chilling time?
Oh, honey, don’t do it! If you skip the 8 hours, you won’t have an icebox cake; you’ll just have stacked cookies and cream, which is delicious, sure, but it’s not the dessert we are making here! The whole magic of this particular icebox cake recipe relies on the moisture from the cream soaking into those crisp wafers. If you serve it early, you’ll end up with distinct, crunchy cookies instead of that unbelievably soft, layered texture.
Is this recipe suitable for freezing?
That’s a tricky one! While you technically *can* freeze the finished no bake cake, I don’t recommend it if you want the best experience. Freezing can sometimes make the whipped cream separate a bit weirdly when it thaws, and the cookies might get closer to ‘soggy’ rather than ‘soft cake.’ If you absolutely have to freeze it—say, for a future potluck—wrap it super tightly and try to use it within a month. But honestly, store it in the fridge for up to four days; that works much better!
Estimated Nutritional Data for the Oreo Cookies and Cream Icebox Cake
Since this is a simple, ingredient-focused dessert that really shines because of rich whole ingredients, you know it’s going to pack a punch! Since we aren’t using any flour or baking soda here, the main numbers come from the sugar and the heavy cream. I ran these estimates for you based on using standard ingredients, but please remember that these are just guides based on serving 8 slices. Your specific brands of Oreos and cream can shift the numbers a little bit.
Here is the quick rundown, measured per slice:
- Calories: 469
- Fat: 29g
- Carbohydrates: 51g
- Protein: 4g
- Sugar: 35g
It’s rich, it’s decadent, and it’s worth every single bite when you realize you didn’t even turn on your oven! Enjoy responsibly, friends!
Share Your Experience Making This Oreo Cookies and Cream Icebox Cake
Wow, I really hope you’re ready to dive into making this incredible dessert! It’s truly a game-changer when you need something fast but memorable. I love hearing from you all when you try my favorite recipes, especially the ones that bring the family together like this beautiful Oreo Cookies and Cream Icebox Cake did for mine.
When you make this for your next gathering—whether it’s a big BBQ or just a Tuesday night treat—please come back here and leave me a rating! Let me know how many stars you give it out of five! I truly cherish hearing your feedback. And if you snap a picture of that beautiful stacked dessert before everyone digs in, tag me on social media! It makes my day to see your success with these simple, magical cookies and cream desserts!
Estimated Nutritional Data for the Oreo Cookies and Cream Icebox Cake
Since this is a simple, ingredient-focused dessert that really shines because of rich whole ingredients, you know it’s going to pack a punch! Since we aren’t using any flour or baking soda here, the main numbers come from the sugar and the heavy cream. I ran these estimates for you based on using standard ingredients, but please remember that these are just guides based on serving 8 slices. Your specific brands of Oreos and cream can shift the numbers a little bit. This is just to give you a baseline!
Here is the quick rundown, measured per slice, for this rich no bake cake:
- Calories: 469
- Fat: 29g
- Carbohydrates: 51g
- Protein: 4g
- Sugar: 35g
It’s rich, it’s decadent, and it’s worth every single bite when you realize you didn’t even turn on your oven! Enjoy responsibly, friends!
Share Your Experience Making This Oreo Cookies and Cream Icebox Cake
Wow, I really hope you’re ready to dive into making this incredible dessert! It’s truly a game-changer when you need something fast but memorable. I love hearing from you all when you try my favorite recipes, especially the ones that bring the family together like this beautiful Oreo Cookies and Cream Icebox Cake did for mine.
When you make this for your next gathering—whether it’s a big BBQ or just a Tuesday night treat—please come back here and leave me a rating! Let me know how many stars you give it out of five! I truly cherish hearing your feedback. And if you snap a picture of that beautiful stacked dessert before everyone digs in, tag me on social media! It makes my day to see your success with these simple, magical cookies and cream desserts!

Oreo Cookies and Cream Icebox Cake
Ingredients
Equipment
Method
- Add the heavy whipping cream, powdered sugar, and vanilla extract to a large mixing bowl. Use a hand mixer or a stand mixer with the whisk attachment.
- Start on low speed, increasing the speed as the mixture thickens. Beat until stiff peaks form, which takes about 7 to 8 minutes.
- In an 8×8 baking dish or pan, place a single layer of whole Oreos to cover the bottom. You may need to cut some Oreos to fill gaps.
- Spread half of the whipped cream over the layer of Oreos and smooth the top with a spatula.
- Add another layer of Oreo cookies on top of the cream.
- Spread the remaining whipped cream over the second layer of cookies and smooth the top.
- Cover the pan with a lid or plastic wrap. Refrigerate for a minimum of 8 hours, or overnight for best results.
- Top the icebox cake with the crushed Oreos right before you serve it.
Nutrition
Notes
Tried this recipe?
Let us know how it was!
Master of Culinary Visual Arts
My culinary journey started in the fast-paced kitchens of boutique coastal restaurants throughout Southern California, where I learned that beautiful food doesn’t have to be complicated. After nine years of professional cooking, I’ve made it my mission to prove that sophisticated, nutritionally sound meals can be accessible to busy home cooks who refuse to compromise on flavor or visual appeal.
What changed everything for me was watching talented home cooks feel intimidated by healthy cooking. That’s when I transitioned to private instruction, teaching busy professionals and families how to create restaurant-quality meals using simple techniques and ingredients they can actually find at their local grocery store. My “15-minute meal” frameworks are now used by several regional cooking schools!
As a third-generation Mexican-American, I love weaving vibrant Latin flavors into low-carb creations – proving that healthy eating can be both culturally authentic and visually spectacular. My “effortless elegance” philosophy is simple: nutritious food should look as stunning as it tastes, without requiring professional chef skills or expensive equipment.
When I’m not developing recipes in my San Diego coastal kitchen, you’ll find me surfing the local breaks with my Golden Retriever mix, Mango, who’s both my kitchen companion and unofficial taste-testing assistant. My personal low-carb lifestyle started as a way to maintain energy for my active coastal life, and it’s become the foundation for proving that healthy eating enhances rather than restricts life’s pleasures.