
One rainy afternoon, when my kids were little, we decided to bake a batch of cookies together to brighten our day. We measured flour, stirred in chocolate chips, and each took turns adding a sprinkle of salt. As the cookies baked, the aroma of brown butter wafted through our home, wrapping us in comfort and warmth. When we finally pulled them out of the oven, the soft and chewy cookies melted in our mouths, and the smiles on my kids’ faces made me realize that these moments of baking together were just as important as the cookies themselves. That day became a cherished family tradition, and our Soft and Chewy Brown Butter Chocolate Chip Cookies recipe has adorned our table at every holiday and gathering since.

I know you’ve made chocolate chip cookies before, but trust me when I say this recipe is a total game-changer. The secret, as you can probably tell, is browning the butter first. It adds the most incredible, deep, slightly toffee-like note that you just can’t get from using it straight out of the stick. Forget dry, crispy cookies! We are aiming for that absolute sweet spot: rich, deeply flavored, and perfectly chewy right out of the oven. If you’re ready to seriously upgrade your cookie game, grab your largest saucepan; we are cooking!
Why These Soft and Chewy Brown Butter Chocolate Chip Cookies Are a Family Favorite
These aren’t just any cookies; they are the centerpiece of our family baking history. When you pull these beauties out of the oven, the whole house smells incredible, and everyone races to the counter. It’s the difference between a basic dessert and something truly gourmet.
- They deliver that unmistakable rich nutty flavor that brown butter is famous for.
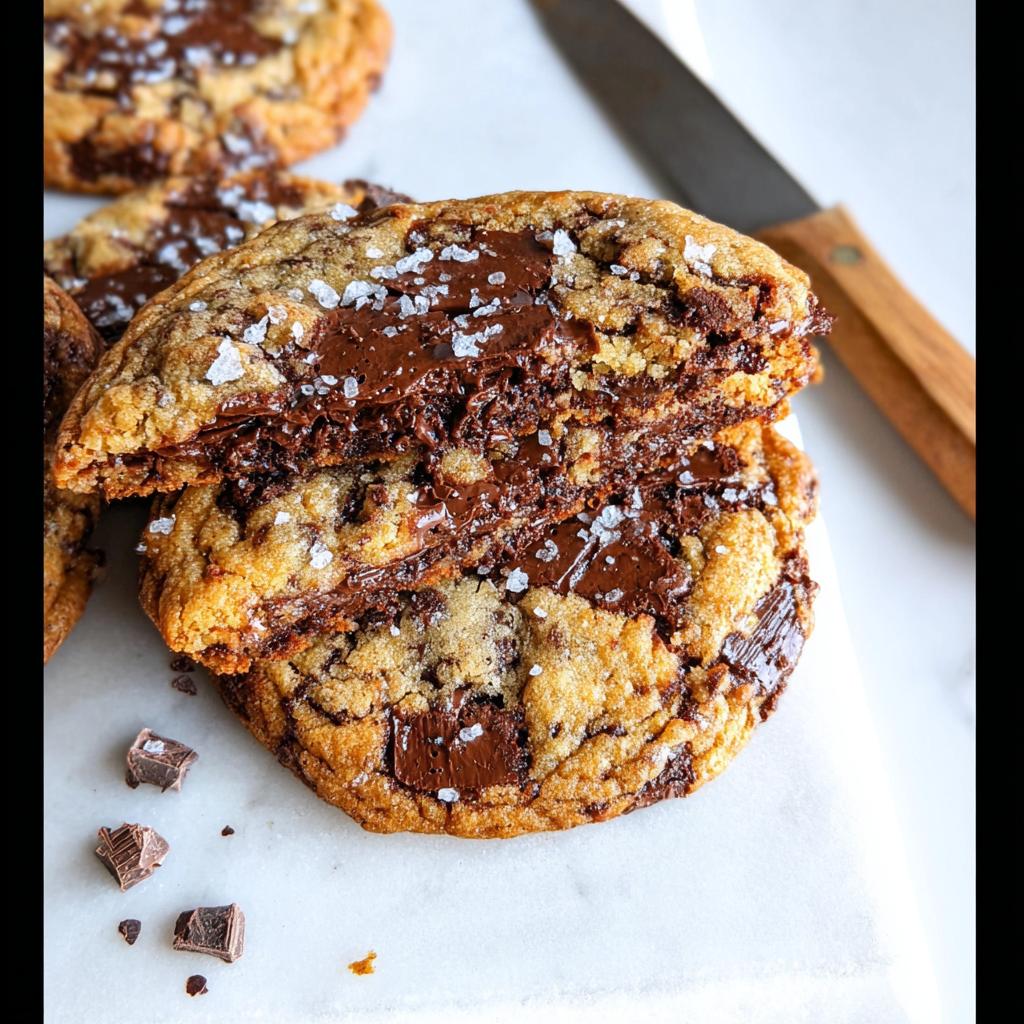
- This is, without a doubt, the ultimate chewy cookie recipe—always soft in the middle, never cakey!
The Magic of Brown Butter: A Rich Nutty Flavor Profile
If you usually skip browning your butter, you are missing the entire point of these brown butter cookies! When you take the time to melt the butter until those little milk solids toast on the bottom of the pan, you unlock depth. It takes them from sweet and simple to complex and comforting. It’s such a small extra step that makes the flavor pop!
Achieving the Perfect Soft and Chewy Cookie Recipe Texture
The key to that perfect textural experience lies in the balance of sugars we use. We rely heavily on that dark brown sugar, which pulls moisture into the dough and keeps the final cookie wonderfully soft. Plus, chilling the dough (which we’ll talk about later!) helps them spread just enough to get those beautiful crinkles on top while staying wonderfully dense inside.
Gathering Your Ingredients for Soft and Chewy Brown Butter Chocolate Chip Cookies
Okay, time to grab your apron and look through the pantry! These cookies need just a handful of things, but the butter step is truly where the magic starts. Remember how I mentioned weighing out the butter? It’s important! Since we are cooking the water out of the butter to get that perfect toasted flavor, your final volume will be less than what you start with. Don’t panic!
Cookie Dough Components
For the dough itself, you’ll need:
- 150g of unsalted butter—this is the starting amount before we brown it down to 110g of glorious brown butter!
- 100g of light or dark brown sugar (dark is always my go-to for extra chew).
- 60g of regular granulated sugar.
- 1 large egg.
- 1/2 teaspoon of vanilla bean paste or good quality extract.
- 150g of all-purpose flour.
- 1/4 teaspoon each of baking powder and baking soda.
- 1 teaspoon of salt.
- 220g of dark chocolate, roughly chopped (don’t skip chopping some yourself; the varied sizes really help!).
For Finishing Touches
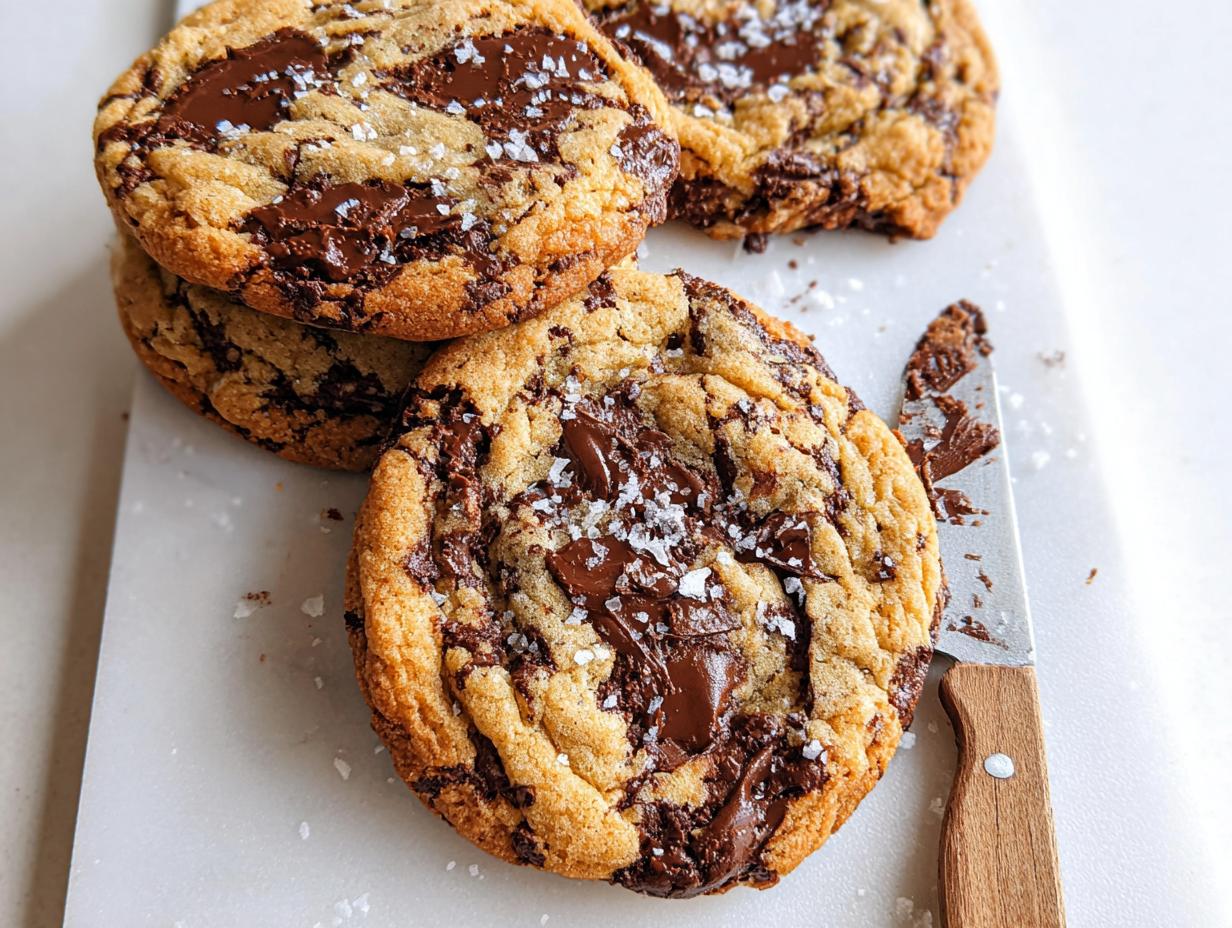
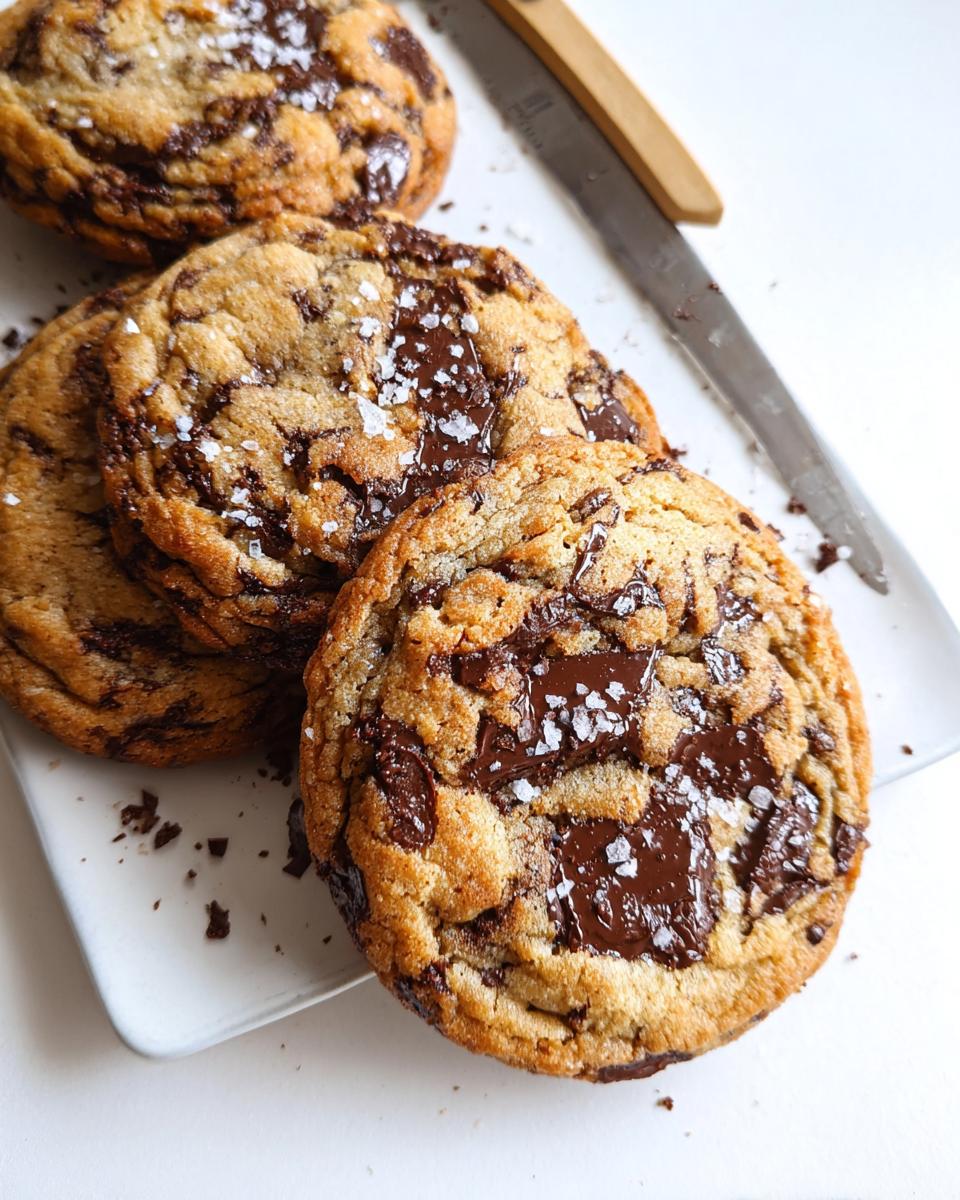
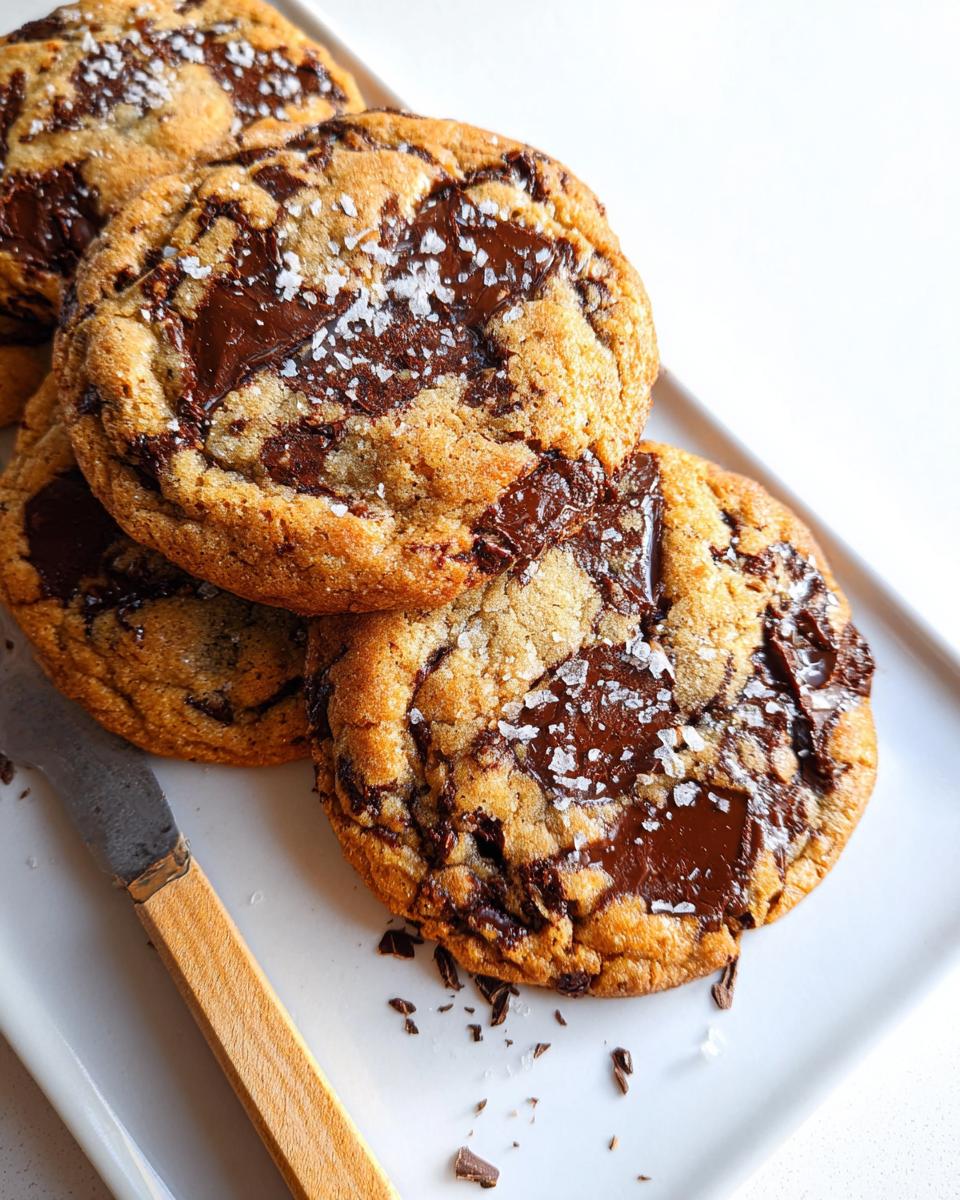
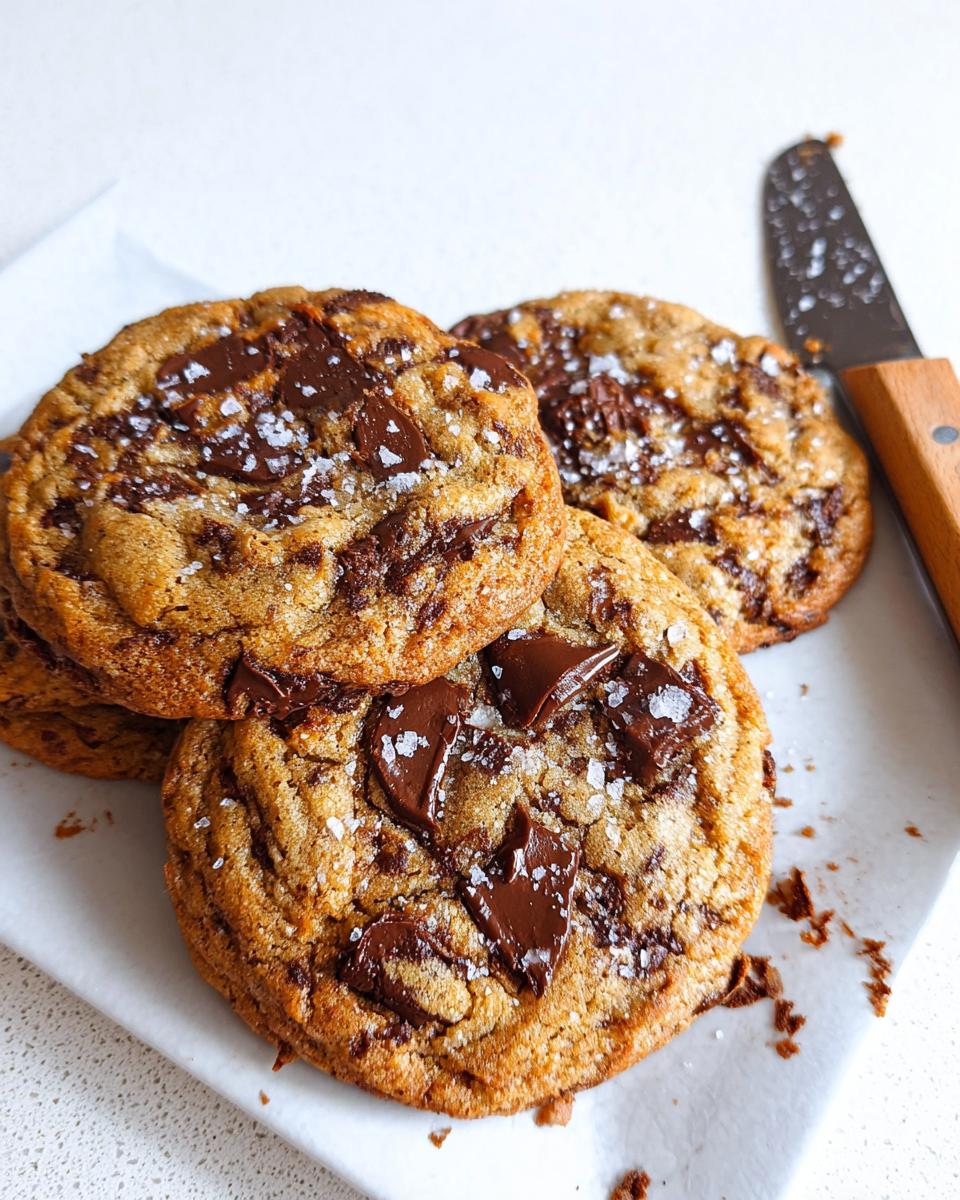
This part is optional, but please, if you can, do this: grab some flaky sea salt. A little sprinkle right when they come out of the oven balances the sweetness perfectly!
Step-by-Step Instructions for Soft and Chewy Brown Butter Chocolate Chip Cookies
Alright, let’s get down to business! This part requires a little attention, but honestly, once you smell that nutty aroma drifting from the stove, you’ll be hooked. Don’t worry if the butter gets a little foamy; that’s exactly what we want. The process is straightforward, but timing is everything, especially when we move from the hot butter to the cooler ingredients.
Browning the Butter and Initial Mixing
First thing, get your oven heating up to 350°F (180°C) and line those sheet pans with parchment paper—trust me, cleaning up is never fun! Next, put your 150g of butter in a saucepan over medium heat. Watch it closely! It will melt, then start to bubble and foam. Keep swirling and whisking until you see little brown specks forming on the bottom and you catch that incredible, rich, nutty smell. That’s the magic! Immediately take it off the heat and make sure you weigh out exactly 110g of that melted brown butter into your mixing bowl. You have to let this cool for about 15 to 20 minutes. If you dump your egg into hot butter, you’ll get scrambled eggs, and nobody wants that in their cookie dough! For a full visual breakdown, check out my notes on brown butter 101.
Combining Dry Ingredients and Folding in Chocolate
Once the brown butter is cool enough to handle, mix in your brown and white sugars until they are happy together. Then, whisk in your egg and vanilla until the mixture lightens up a bit. Now for the dry stuff! Gently fold in the flour, baking powder, baking soda, and salt using just a rubber spatula. I mean it—use the spatula and stop mixing the second you don’t see big streaks of dry flour. Overmixing develops gluten, and gluten makes cookies tough, which is the opposite of what we are aiming for. Fold in those chopped chocolate chunks, and you’re ready to scoop!
Scooping, Baking, and Shaping Your Soft and Chewy Brown Butter Chocolate Chip Cookies
Use a standard 2-tablespoon scoop for your dough balls, leaving about two inches between them on the pan; these babies spread! I like to press a few extra chocolate chips right on top of each ball for that bakery look, and then sprinkle them lightly with flaky sea salt while they are still hot. Bake them for 11 to 13 minutes. Okay, here’s a neat trick if you want magazine-worthy cookies: as soon as you pull the pan out of the oven, gently bang it down hard on the counter once or twice. This deflates them slightly and creates those perfect crinkled edges. Let them sit on the hot pan for a full 10 minutes before moving them to a cooling rack. That final cooling period is critical for that soft and chewy texture!
Expert Baking Tips for Perfect Soft Cookies Every Time
Even with an amazing recipe, the small details can make the difference between a good cookie and an absolutely unforgettable one. Since we are relying on browning the butter, we have to be smart about moisture management. This is where the difference between just baking and truly mastering your chewy cookie recipe comes into play. I’ve learned these things through trial and, yes, a few flat, greasy messes!
Managing Butter Moisture for Consistent Results
I mentioned earlier that browning the butter cooks off water, and that water content varies! If you use a higher-fat butter—like some of those lovely European brands—you hold onto more of that browned milk fat goodness, and you won’t lose as much volume. American butter has more water, so you’ll end up with less cooled, browned butter ready for the mixer. Don’t try to measure the *browned* butter cup-for-cup; always start with the input weight (150g) and measure the output weight (110g) to be consistent. This tiny bit of science ensures you aren’t adding too much fat, which would make your cookies spread too thin.
The Role of Chilling Dough in Chewy Cookie Recipe Success
This is the step I sometimes skip when I’m impatient, but oh, I always regret it! If you have time—and this is crucial for that deep flavor—chill that dough for at least an hour, or even overnight. When the fats are cold, the dough balls don’t flatten out instantly in the oven. This pause allows the sugars and the brown butter to truly meld together, deepening that rich nutty flavor beautifully. When the dough is cold, the edges set up before the middle has a chance to overbake, guaranteeing that soft, gooey center we are absolutely aiming for.
Ingredient Substitutions for Soft and Chewy Brown Butter Chocolate Chip Cookies
I always encourage people to adapt my recipes, especially when they are baking for a crowd or just keeping house essentials on hand. While the original recipe hits that perfect spot for me, sometimes you’re out of dark chocolate or need to skip the eggs for allergy reasons. Don’t sweat it! These adjustments can still give you fantastic results, though the texture might lean one way or the other slightly.
Chocolate Choices and Flavor Variations
If dark chocolate isn’t your jam, you absolutely have options to explore some really fun gourmet baking ideas here. Semi-sweet chocolate chips are a perfect, reliable substitute, making the cookies a little sweeter overall. Milk chocolate works too, but be aware that because milk chocolate has a lower melting point, your cookies might spread just a tiny bit more.
Want to mix things up? Try using high-quality white chocolate chunks alongside dried cherries—that combination is fantastic with the brown butter base. Or, if you like crunch, toss in a cup of toasted pecans or walnuts with your chips! Toasting the nuts first brings out their oils and enhances that wonderful rich nutty flavor we love from the browned butter, just in a different way.
As for the egg situation, if you need a swap, a flax egg (one tablespoon of ground flaxseed mixed with three tablespoons of water left to sit for five minutes) works reasonably well in this recipe. It provides the necessary binding without affecting the overall flavor too much. Just make sure you let your dough chill a bit longer if you use an egg replacer!
Storing and Keeping Your Soft and Chewy Brown Butter Chocolate Chip Cookies Fresh
I always try to eat most of these cookies the day they are baked because, honestly, they are divine when slightly warm! But let’s be real, sometimes you just can’t get through a whole batch (or maybe you are being responsible and saving some for tomorrow). The good news is, these brown butter cookies keep their texture surprisingly well, especially when you use that dark brown sugar we talked about.
The absolute best way to store them is in an airtight container at room temperature. I mean, *airtight*! If air gets in there, they start to dry out quickly, and we definitely don’t want that. If you stack them, put a small piece of parchment or wax paper between the layers, just so they don’t stick together—that little bit of added fat helps, but they can still meld!
If you followed my instructions, they should stay wonderfully chewy for up to three days on the counter. If you need them to last longer than that, you can absolutely freeze them! Scoop your dough balls, place them on a lined baking sheet, freeze until solid, and then transfer them to a heavy-duty freezer bag. They last great for about three months this way. Just pull them out, pop them straight onto a baking sheet (no need to thaw!), and add an extra minute or two to the baking time.
Warming Up Those Chewy Cookie Recipe Gems
If your cookies have been sitting out overnight, they might firm up just a little bit. That’s okay! Before serving, pop one or two onto a microwave-safe plate and hit it for just 8 to 10 seconds. They come out perfectly gooey again, the chocolate melts just right, and you’ve got that fresh-from-the-oven experience without having to turn the oven on. It’s a lifesaver on a busy Tuesday afternoon when you suddenly desperately need that rich nutty flavor!
Frequently Asked Questions About Soft and Chewy Brown Butter Chocolate Chip Cookies
I get so many wonderful messages about this recipe, and usually, they center around making sure the texture stays perfect! It’s natural to have questions when you’re trying a technique like browning butter for the first time. I’ve gathered a few of the common ones here to help guide you toward cookie perfection.
Can I skip browning the butter and still make these cookies?
Oh, you technically *can*, but honestly, why would you want to? If you just melt regular butter, you are going to end up with a completely different cookie. You’ll lose that signature depth. If you skip the browning step, you miss out on the incredible rich nutty flavor that makes this recipe famous. It’s the brown butter that elevates these cookies beyond the basic batch!
How do I ensure my cookies stay soft and chewy and don’t become cakey?
Chewiness comes down to ratios and baking time, sweet friend! We use a higher proportion of brown sugar to white sugar in this recipe, and that molasses in the brown sugar is a moisture-holding champion. The biggest thing, though, is pulling them out when the edges look set but the very center still looks slightly underdone. They finish baking on that hot pan, leading to that perfect soft center we are after.
What is the best way to measure flour for this chewy cookie recipe?
This is a massive tip for any great cookie, especially a chewy one! Never just scoop your measuring cup straight into the bag of flour. That compacts it, and you end up with way too much flour, making your cookies dry and cakey right away. You should gently spoon the flour into your measuring cup until it overflows slightly, and then use the back of a knife to level it off. It’s the only way to get the proper ratio for this chewy cookie recipe.
Serving Suggestions for Your Soft and Chewy Brown Butter Chocolate Chip Cookies
Once these masterpieces have cooled just enough to handle—or perhaps not quite enough, if you’re like me and grab one warm—you have to decide how to present them! Because these cookies have such a deep, toasted flavor profile from the brown butter, they pair beautifully with almost anything, but a few pairings just sing.
For the kids, nothing beats a tall, cold glass of whole milk. It helps balance the richness of the dark chocolate. Don’t you remember dipping those soft edges into the milk? Pure nostalgia!
If you’re serving these up for a get-together, try setting up a simple ice cream bar. A scoop of high-quality vanilla bean ice cream tucked between two slightly warm cookies makes a stunning, quick dessert. The gooey texture of the warm cookie against the cold ice cream is just divine.
For an elegant end to a dinner party, a dusting of powdered sugar or a couple of toasted pecans sprinkled on top while they are still warm adds a professional touch without any extra complicated steps. They look, and taste, like something completely gourmet!
Share Your Soft and Chewy Brown Butter Chocolate Chip Cookies Creations
Now that you’ve had a chance to bake up a batch of these unbelievably rich and chewy cookies, I really want to hear about them! Seriously, telling me how your kitchen smelled while the butter was browning is one of my favorite parts of running this blog.
Did you end up using dark brown sugar, or did you go for the softer light brown? Did they stay perfectly soft for three days, or did you devour them all on day one? I won’t judge—I’ve definitely been there!
Please, jump down to the comments section below and leave me a rating—five stars if they completely blew away your old go-to recipe! If you managed to snap a picture of those beautifully crinkled tops, share it on Instagram and tag me. Seeing your family enjoying these moments over a warm cookie makes all the testing and measuring totally worth it. Happy baking, my friends!
Soft and Chewy Brown Butter Chocolate Chip Cookies
Ingredients
Equipment
Method
- Preheat your oven to 350°F / 180°C. Line two sheet pans with parchment paper.
- Place the butter in a medium saucepan over medium heat. Cook until the butter melts, then continue cooking, swirling the pan often and stirring with a whisk, until the butter foams, turns golden brown, and smells nutty. This takes about 3-4 minutes.
- Weigh out 110g of the brown butter into a medium bowl and let it cool for 15-20 minutes so it does not scramble your eggs.
- Add the brown sugar and granulated sugar to the bowl with the brown butter and mix to combine.
- Add the egg and whisk well for 1-2 minutes, or use an electric mixer, until the mixture lightens in color and thickens.
- Add the vanilla and mix well.
- Add the flour, baking powder, baking soda, and salt. Mix with a rubber spatula until some flour streaks remain. This prevents you from overworking the dough.
- Add the chocolate and mix to incorporate using a rubber spatula.
- Scoop 6 cookies (about 55g per dough ball) using a 2 Tbsp cookie scoop onto the prepared baking sheet. If you want, flatten each dough ball, press more chocolate pieces on top, and roll it back into a ball. Arrange the dough balls evenly apart on the pan. Keep the rest of the batter lightly covered with plastic wrap.
- Bake the cookies for 11-13 minutes, until the edges are set. Bake longer if you prefer crispier cookies. Remove the pan from the oven and briefly bang it on the counter to help deflate the cookies. If you want perfectly round cookies, use a cookie cutter slightly larger than the cookie to shape them.
- Sprinkle the tops of the cookies with flaky sea salt.
- Allow the cookies to cool on the pan for 10 minutes, then transfer them to a wire rack to cool completely.
- Repeat the baking process with the remaining cookies. Store cookies in an airtight container at room temperature for up to 3 days.
Notes
Tried this recipe?
Let us know how it was!
Certified Family Nutrition Strategist
My path into family nutrition began working with Phoenix Area Family Services, where I saw how traditional nutrition advice often ignored real-world constraints like budget limitations, time crunches, and kids who refuse to eat anything green. That experience sparked my mission to develop meal planning systems that work with family realities, not against them.
Over eight years, I’ve helped hundreds of families reduce grocery spending by 25% while dramatically improving their nutrition. My meal planning frameworks have been adopted by local wellness centers because they actually work for busy parents juggling different ages, preferences, and dietary needs in one household.
As a bilingual first-generation Mexican-American and mother of three, I personally navigate the daily challenge of feeding a family nutritiously while honoring cultural traditions and managing a household budget. My “kid-friendly low-carb” protocols show families how to gradually introduce healthier options without triggering mealtime battles or abandoning beloved family recipes.
My “realistic wellness” philosophy is straightforward: health improvements must work within existing family dynamics and financial realities to be truly sustainable. When I’m not developing meal planning systems, I’m creating portable trail snacks for our weekend family hiking adventures – because healthy eating should fuel the life you want to live.
My personal low-carb journey started after pregnancy as a way to regain energy for active parenting, and that experience continues to inform my professional commitment to making healthy eating feel supportive rather than burdensome for busy families.