
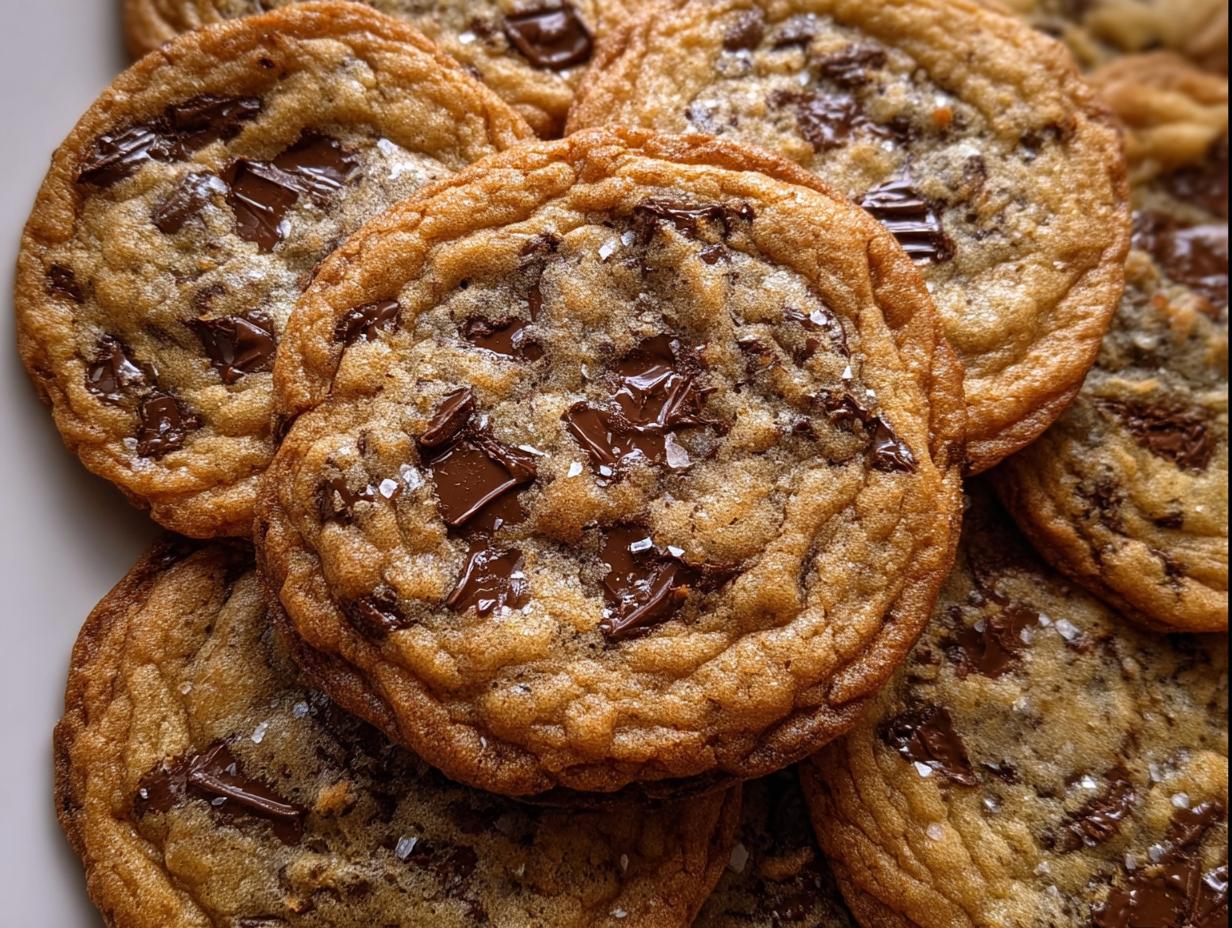
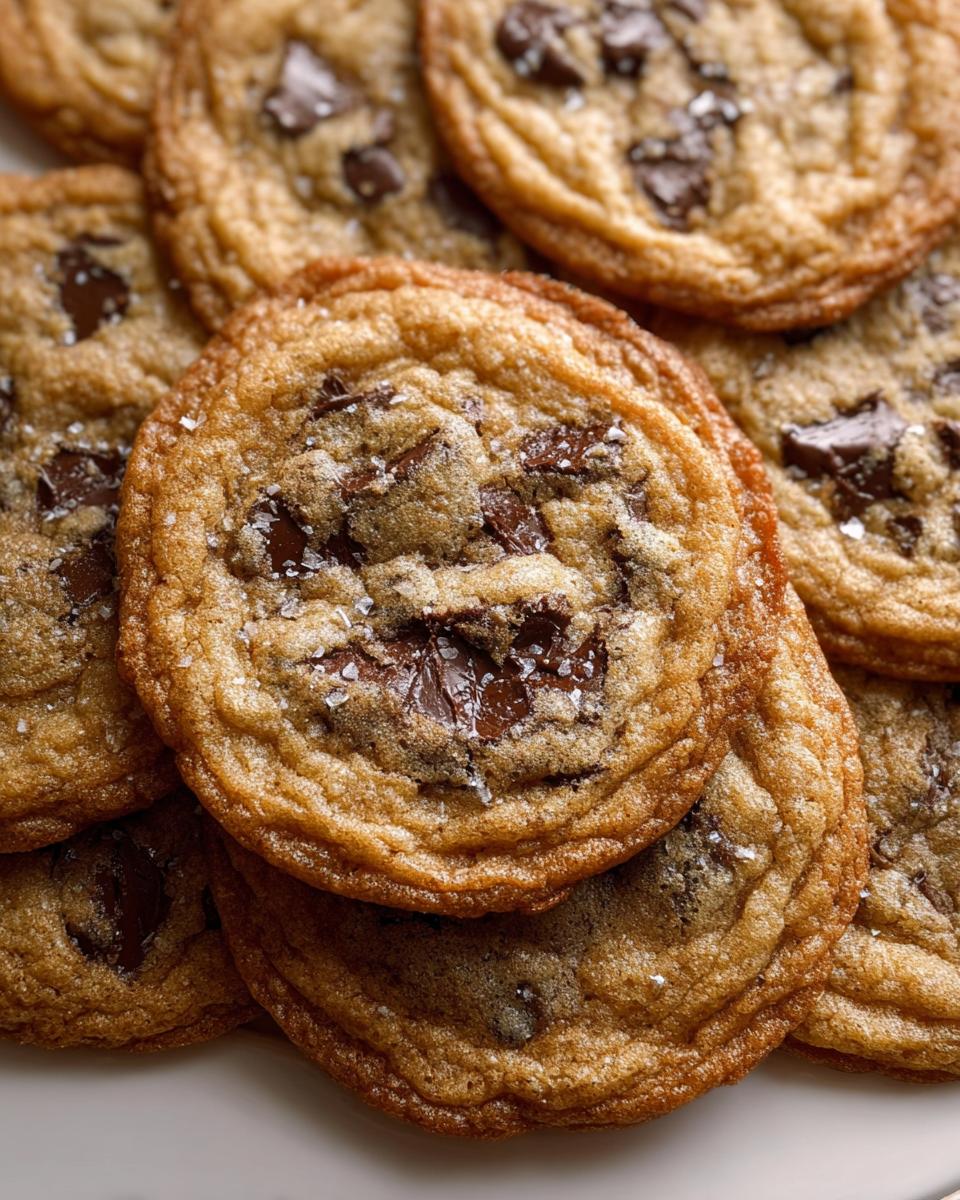
Oh, the eternal quest! We all know that truly perfect chocolate chip cookie hits that magical spot between a shatteringly crisp edge and a wonderfully soft, chewy middle. That’s what we are chasing today with what I proudly call my **Crispy Chewy Thin Chocolate Chip Cookies** recipe. Trust me, getting this balance right is everything.
I can still vividly remember the first time I baked a batch in my grandmother’s kitchen. That warm, sweet aroma—it was intoxicating! I was trying to learn her secret technique for achieving that ideal texture, soaking up every lesson. Being able to connect that memory to my Lebanese-Italian roots, where food is storytelling, just makes this recipe sweeter.
Years later, after tinkering endlessly, I turned that cherished moment into this recipe. You don’t need to complicate things to get perfection; you just need the right technique! So grab your mixer; we’re making magic.
Why These Crispy Chewy Thin Chocolate Chip Cookies Are Your Next Favorite
Honestly, these cookies are keepers! They aren’t fussy, but they deliver maximum flavor and that incredible texture we all dream about. They’re everything you want in a classic treat, just easier to achieve than you might think. You are going to love keeping these around.
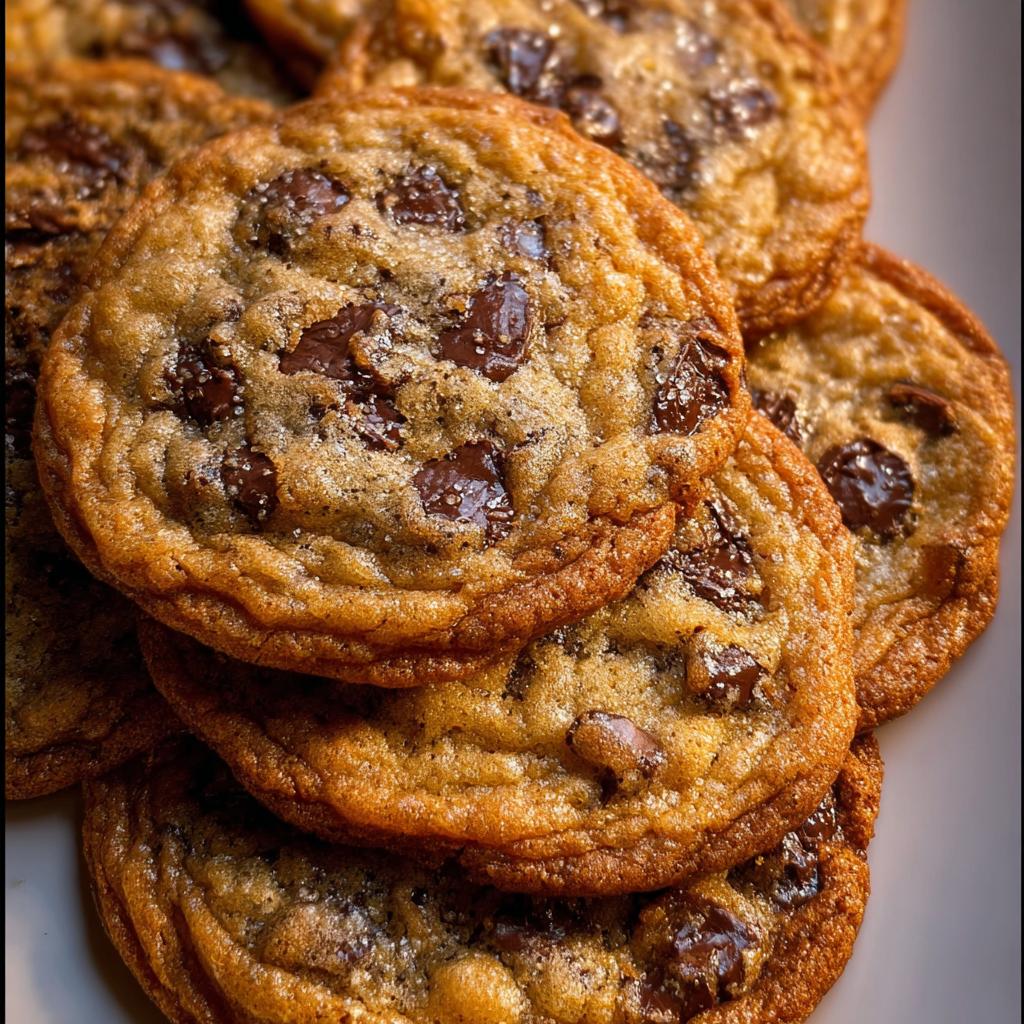
- They always spread just right into those beautiful, thin circles.
- They taste exactly like the cookies you remember from childhood visits.
Perfect Texture Guarantee
When I say crispy and chewy, I mean it! You get that satisfying little crunch around the immediate edge, but dig into the middle, and it’s soft, almost gooey! It’s the ultimate bite, never cakey, always perfect.
Nostalgia Baking Made Simple
One of my favorite things about this batch is how quickly they come together. It’s real nostalgia baking without needing hours in the kitchen. It feels exactly like being back in that old, warm kitchen, but now I can make them any Tuesday night!
Essential Equipment for Perfect Crispy Chewy Thin Chocolate Chip Cookies
Getting these cookies thin and crispy starts before you even touch the dough! You need the right tools ready to go. Don’t worry, it’s nothing fancy, but having these items handy makes sure everything goes smoothly.
You will definitely want a good stand mixer for the creaming step, which is key for spread. Having enough big baking sheets handy is also a lifesaver since these bake up fast!
- Large baking sheets (you need space for them to spread!)
- Parchment paper (my favorite time saver!)
- Medium bowl for mixing the dry bits
- Stand mixer with a paddle attachment
- Thin spatula for careful lifting
- A wire rack for cooling completely
Gathering Ingredients for Crispy Chewy Thin Chocolate Chip Cookies
Alright, ingredient prep! Getting everything ready beforehand is half the battle, especially with cookies that rely on specific ratios like these. The most important thing I’ve learned for these beauties is that your butter and eggs absolutely need to be at room temperature. That helps them mix into that perfect, spreadable dough.
If you’re looking for a great resource on what happens when you change ingredients for thin cookies, check out this guide on thin crispy chocolate chip cookies. But for now, let’s look at what we need:
Dry Ingredients
We keep this simple so the fats and sugars can do their job properly during the creaming stage.
- 2 cups all-purpose flour
- 1 teaspoon baking soda
- 1 teaspoon sea salt
Wet Ingredients
Make sure you let that butter and those eggs warm up on the counter first! It makes all the difference in creating the right consistency for a thin cookie.
- 10 ounces unsalted butter, at room temperature
- 1 and 1/3 cups granulated sugar
- 1/4 cup light brown sugar, packed
- 2 teaspoons vanilla extract
- 2 large eggs, at room temperature
- 1 Tablespoon milk, at room temperature
Mix-ins
When it comes to the chocolate, use the good stuff! Since this recipe is all about that pure chocolate chip flavor in every bite, quality semi-sweet chips really make these **Crispy Chewy Thin Chocolate Chip Cookies** sing.
- 2 cups semi-sweet chocolate chips
Step-by-Step Preparation of Crispy Chewy Thin Chocolate Chip Cookies
Okay, here is where we put the plan into action! If you follow these steps carefully, especially when it comes to mixing, you guarantee those beautiful, flat, **thin crispy cookies** you’re looking for. Don’t rush the creaming; that’s where we build texture.
Remember, this process is all about creating cookies that spread wonderfully! For more insight into the science of cookie spread, you can check out my thoughts on baking science here.
Preheating and Preparing Sheets
First things first: crank that oven up to 350 degrees Fahrenheit. You need it fully hot when those cookie balls hit the heat! Line two big baking sheets using parchment paper. Seriously, don’t skip this part—it helps them spread evenly and prevents sticking, which is exactly what we want when aiming for thinness.
Combining Dry Components
Grab that medium bowl. Whisk together your flour, baking soda, and salt until they look totally uniform. We just want them combined here, so the mixer doesn’t have to work too hard later on when we introduce the fats.
Creaming Butter and Sugars
Now for the most important part for achieving that spread! Put your room temperature butter and both sugars into the mixer bowl. Beat them together for a full two minutes on medium speed until it looks light and fluffy, almost pale. Make sure you scrape down the sides of the bowl too; you don’t want any unmixed sugar hiding!
Incorporating Wet Ingredients and Flour
Beat in your vanilla, then add those room-temperature eggs one at a time, beating well after each addition. Then, tap in the milk. Once those are mixed, drop your speed way down low. Add the reserved flour mixture slowly, beating only until you see the streaks disappear—seriously, stop mixing the second it comes together! Fold in those chocolate chips by hand after.
Baking and Cooling for Texture
Scoop out dough balls that are about 1 tablespoon in size and place them spaced far apart on your lined sheets. Bake them for only 10 to 11 minutes. They should be golden brown at the edges. The cooling stage is critical: let them sit right there on the hot baking sheet for a full 15 minutes before moving them gently to a wire rack to cool completely. This resting period lets those crispy edges set perfectly!
Expert Tips for Mastering Crispy Chewy Thin Chocolate Chip Cookies
You’ve got the instructions now, but let me share a couple of secrets that really push these over the edge from good to legendary. The magic for that ideal thin and chewy structure lies in how the sugar interacts with the fat, which is something I learned long ago!
If you are super interested in digging deeper into how ingredient combinations affect the final outcome, I highly recommend reading my guide on sugar ratios in baking. It really helps demystify why these numbers work.
The Role of Sugar in Crispy Chewy Thin Chocolate Chip Cookies
See how we use a lot more granulated sugar than brown sugar here? That is intentional! Granulated sugar melts cleanly during baking, which helps the cookies spread thinly and gives us those delicious, crisp edges we love. The little bit of brown sugar just sneaks in enough moisture for that satisfying chew in the center.
Achieving the Perfect Spread
I hammered this home earlier, but it bears repeating: your butter and eggs must be soft—room temperature! Cold ingredients don’t emulsify right with the sugar when you cream them. If the base isn’t creamy and light, the dough won’t spread properly in the oven, and you end up with little domes instead of flat, classic chips.
Serving Suggestions for Chocolate Chip Classics
These cookies don’t need any fancy additions, honestly! Because they are perfectly sized, they are truly the ultimate dunkable desserts. My favorite way to enjoy these **chocolate chip classics** is right out of the oven after they’ve cooled just a touch.
They hold up beautifully when dropped into an ice-cold glass of milk—that’s the way my grandmother always ate them. But honestly? A black cup of strong coffee pairs just as wonderfully, cutting through that sugary sweetness. Enjoy them warm!
Storage and Reheating Instructions for Your Crispy Chewy Thin Chocolate Chip Cookies
These cookies are best eaten the day we bake them, let’s be real, but they keep well enough for a few days if you need to stash some away! The key to keeping that crisp edge sharp is all about the container.
If you want maximum crispness, avoid super airtight containers for long periods. I usually stack them with parchment or wax paper in between layers in a regular cookie tin. This lets just a tiny bit of moisture escape, keeping things crisp. If you let them sit out too long, don’t worry! Just pop them back into a 300-degree oven for about 3 minutes to revive that fresh-from-the-oven heat and texture.
Frequently Asked Questions About Crispy Chewy Thin Chocolate Chip Cookies
I know you might have a few lingering questions, especially when chasing that elusive perfect texture! It’s totally normal; getting the balance right involves a little bit of personal feel. If you run into any hitches, jump over to my troubleshooting guide here for more in-depth fixes.
How do I make these cookies even thinner?
If you want them paper-thin—truly wafer-like—you have a couple of options! The easiest is gently flattening the dough balls slightly with the palm of your hand or the bottom of a glass right before they go into the oven. Another trick is using just *slightly* more butter than specified to encourage maximum spread, though be careful not to go too far, or they become greasy!
Can I use different types of chocolate chips?
Absolutely! While I love the semi-sweet for these **thin crispy cookies**, feel free to mix it up. If you swap them for milk chocolate chips, your cookies will be sweeter overall, and the chocolate might melt a bit more during the bake, maybe softening the center slightly. Dark chocolate chips give you a richer, deeper flavor that really cuts through the sweetness.
Why did my cookies not spread enough?
This is usually a temperature issue! If your cookies came out looking like little mounds, chances are your butter or eggs were too cold when you started the creaming process. Cold ingredients don’t emulsify right with the sugar when you cream them. If the base isn’t creamy and light, the dough won’t spread properly in the oven, and you end up with little domes instead of flat, classic chips.
Sharing Your Crispy Chewy Thin Chocolate Chip Cookies
Whew! That’s it—my absolute favorite way to make these **Crispy Chewy Thin Chocolate Chip Cookies**. But the fun isn’t over just because they are cooled, right?
I really, truly want to know what you think once you’ve had your first dunkable dessert moment with these treats. Did they come out thin like mine? Did the edges get perfectly crisp?
Please, please drop a comment below and tell me how your batch turned out! If you snap a photo while sharing them with friends or family—or eating them all yourself, I won’t judge—tag me on social media!
Happy baking, everyone. Enjoy those perfect **chocolate chip classics**!
Crispy Chewy Thin Chocolate Chip Cookies
Ingredients
Equipment
Method
- Preheat your oven to 350 degrees Fahrenheit. Line two large baking sheets with parchment paper and set them aside.
- In a medium bowl, whisk together the flour, baking soda, and salt. Set this mixture aside.
- In the bowl of a stand mixer fitted with the paddle attachment, beat the butter and both sugars on medium speed for about 2 minutes, or until the mixture looks light and fluffy. Scrape down the bowl as needed during mixing.
- Add the vanilla and beat until smooth. Add the eggs one at a time, beating well after each egg is added. Beat in the milk.
- On low speed, add the flour mixture, beating only until the ingredients are just combined. Beat in the chocolate chips.
- Drop 1 tablespoon sized balls of dough onto the prepared baking sheets. Leave 2 inches between each cookie to allow for spreading.
- Bake the cookies one tray at a time for 10 to 11 minutes. Rotate the baking tray halfway through the baking time.
- Let the cookies cool for 15 minutes on the baking sheet. Then, use a thin spatula to move them to a wire rack to cool completely. Repeat this process with the remaining cookie dough.
Notes
Tried this recipe?
Let us know how it was!
Master of Global Fusion Innovation
My culinary adventure reflects my Lebanese-Italian heritage and a decade spent in the dynamic fusion restaurant scenes of Miami and Barcelona. I’ve made it my mission to prove that beloved global comfort foods can be successfully adapted for low-carb living without losing their soul, their cultural authenticity, or their ability to comfort.
With advanced training in molecular gastronomy and experience spanning Mediterranean, Middle Eastern, and Latin American traditions, I’ve developed what I call “respectful innovation” – culinary creativity that honors traditional cooking wisdom rather than replacing it. My alternative ingredient substitution systems are now taught in specialty diet cooking schools throughout the region.
Drawing from my trilingual upbringing, I understand how deeply food connects to identity and memory. That’s why my flavor-bridging techniques allow classic dishes from around the world to maintain their comforting, familiar qualities while meeting contemporary nutritional standards. I regularly share these techniques at international culinary symposiums and innovation events.
When I’m not experimenting in my Miami fusion kitchen laboratory, you’ll find me at local salsa dance venues – the rhythm and improvisation skills translate directly to my creative cooking process! My role as a foster parent to rescue rabbits has unexpectedly inspired some of my most creative plant-based low-carb innovations.
My personal low-carb journey began as a way to maintain energy for my active lifestyle, but it’s evolved into a professional mission of proving that healthy eating can be globally adventurous rather than restrictively limiting. Every recipe I create is a passport to culinary adventure, transforming kitchens into laboratories for exploring healthy versions of the world’s most beloved comfort foods.