
There is just something magical about a slow Sunday morning, right? The smell of coffee mixing with the promise of a big, satisfying breakfast. For years, I chased that comforting aroma from my childhood kitchen. I’m Maria, and after having three kids running around, I realized I needed a pancake recipe that was both wildly delicious and fast—which is why I perfected Fluffy Pancakes: The Ultimate Recipe You NEED.
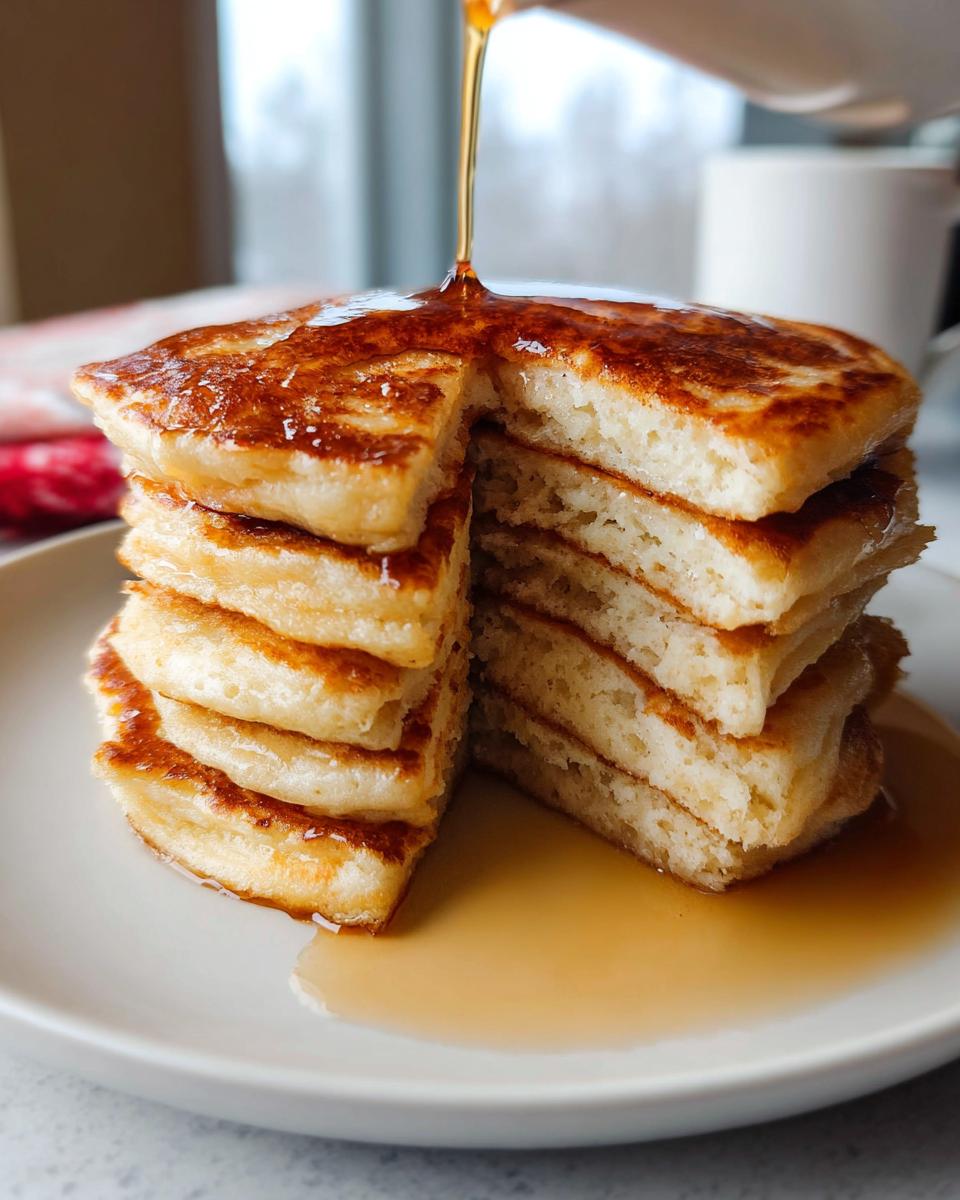
I still remember my mom whipping up her special treats; I wanted that exact fluffy, golden texture for my own kids. After way too many flat, sad attempts on busy weekdays, I finally cracked the code! Now we gather every weekend for our tall pancake stack, sharing syrup and smiles. Trust me, this recipe brings that cozy morning feeling right to your table, and it’s so easy, you’ll wonder why you didn’t make it sooner!
Why This Fluffy Pancakes: The Ultimate Recipe You NEED Works for Families
Look, I get it—mornings can be chaos! That’s why I designed this recipe specifically for parents who need big results without the big fuss. These aren’t your fussy, delicate crepe-style things; these stand up to syrup and thrive under the scrutiny of tiny critics. This is guaranteed to be a kid approved breakfast.
- Quick Prep for Busy Mornings: Seriously, we are talking 10 minutes of actual work here. You mix the wet things, you mix the dry things, then you pour them together. No complicated steps that require you to stop stirring to answer a kid question!
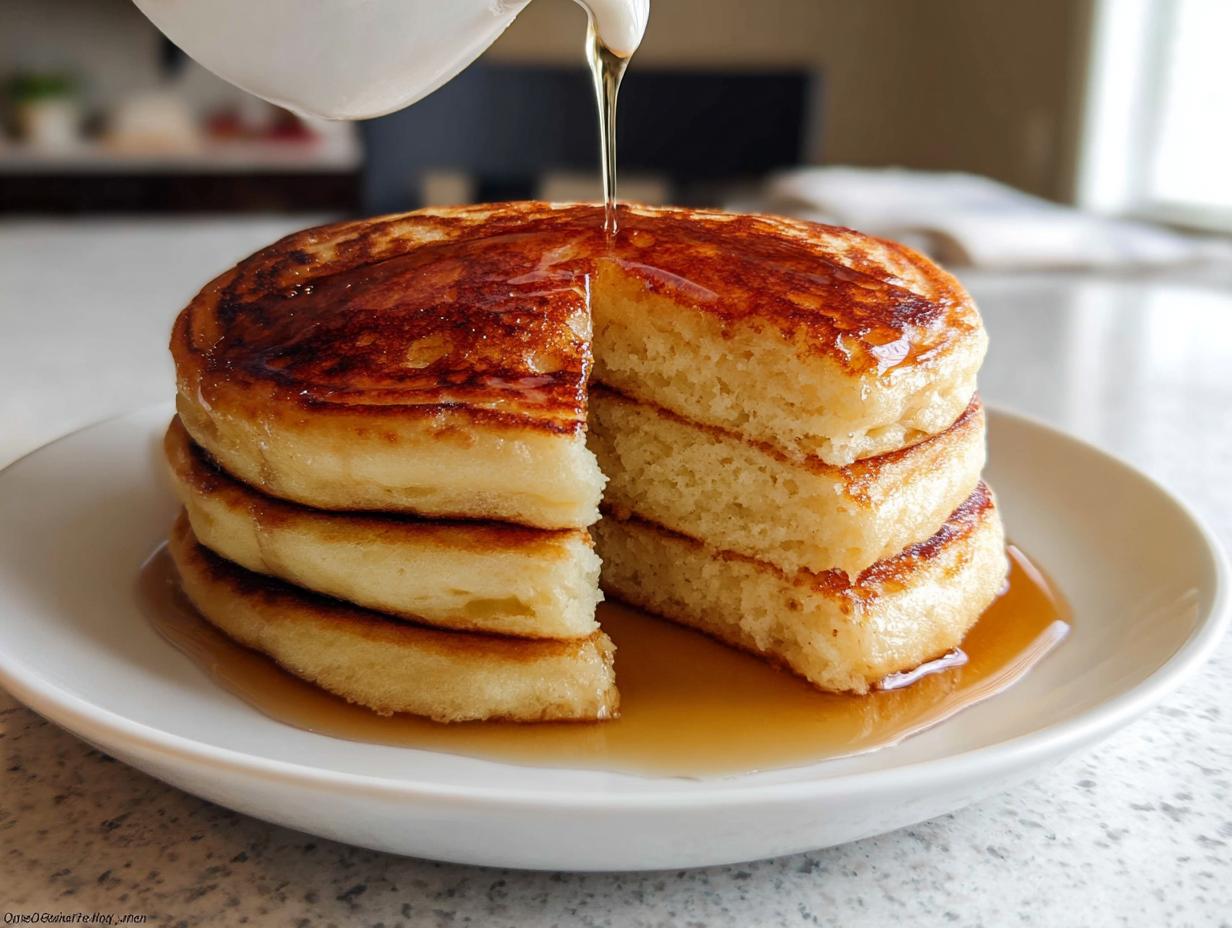
- Achieving That Tall Pancake Stack: The secret weapon here is using both baking powder *and* baking soda. That tiny double-punch reaction in the batter is what gives you the impressive height needed for that perfect tall pancake stack without needing a special technique. They just puff up on their own!
Gathering Your Ingredients for Fluffy Pancakes: The Ultimate Recipe You NEED
Okay, before we even think about pouring batter, we need to talk ingredients. This recipe relies on reacting properly, so fresh leavening agents—your baking powder and soda—are non-negotiable if you want those super extra fluffy pancakes! If your baking soda has been hiding in the back of the cabinet since last Christmas, go buy a fresh box first. Trust me, it makes all the difference in the height we are aiming for. If you want to know more about keeping your baking supplies fresh, check out this guide on baking soda freshness.
Essential Components for Perfect Fluffy Pancakes: The Ultimate Recipe You NEED
Here’s what you need to round up. Pay close attention to the little details, because that’s how we guarantee success:
First, grab 6 Tablespoons of unsalted butter. You need to let this melt completely, but then set it aside! It has to cool down just a bit before we add it to the eggs, otherwise, we’ll scramble them. For the dry stuff, get 2.25 cups of all-purpose flour, but please use the spoon-and-level method—don’t just scoop it right out of the bag! That keeps our measurements accurate. You’ll also need 1/3 cup of granulated sugar, 1.25 teaspoons of baking powder, and 1/2 teaspoon of salt. For the wet side, grab 2 large eggs, 2 full cups of buttermilk (that’s the magic player!), and a teaspoon of pure vanilla extract.
Expert Tips for Sourcing Key Ingredients
When you are aiming for those truly extra fluffy pancakes, the ingredients you choose matter just as much as how you mix them. I spent ages figuring out the subtle temperature tricks that seem to separate the fluffy ones from the flat ones. My biggest tip, one I learned from years of baking disasters? Temperature control!
Make sure everything is roughly room temperature except for that melted butter we discussed. Cold eggs or cold buttermilk hitting the creamed mixture can cause everything to seize up slightly, stopping the lift process before it even begins. I always pull my eggs and buttermilk out about 30 minutes before I even think about cracking an egg. It’s worth the wait, I promise!
If you need extra inspiration or want to dive deeper into high-quality recipes, I always check out Sally’s site for great inspiration, like her guide on buttermilk pancakes.
The Buttermilk Advantage in Fluffy Pancakes: The Ultimate Recipe You NEED
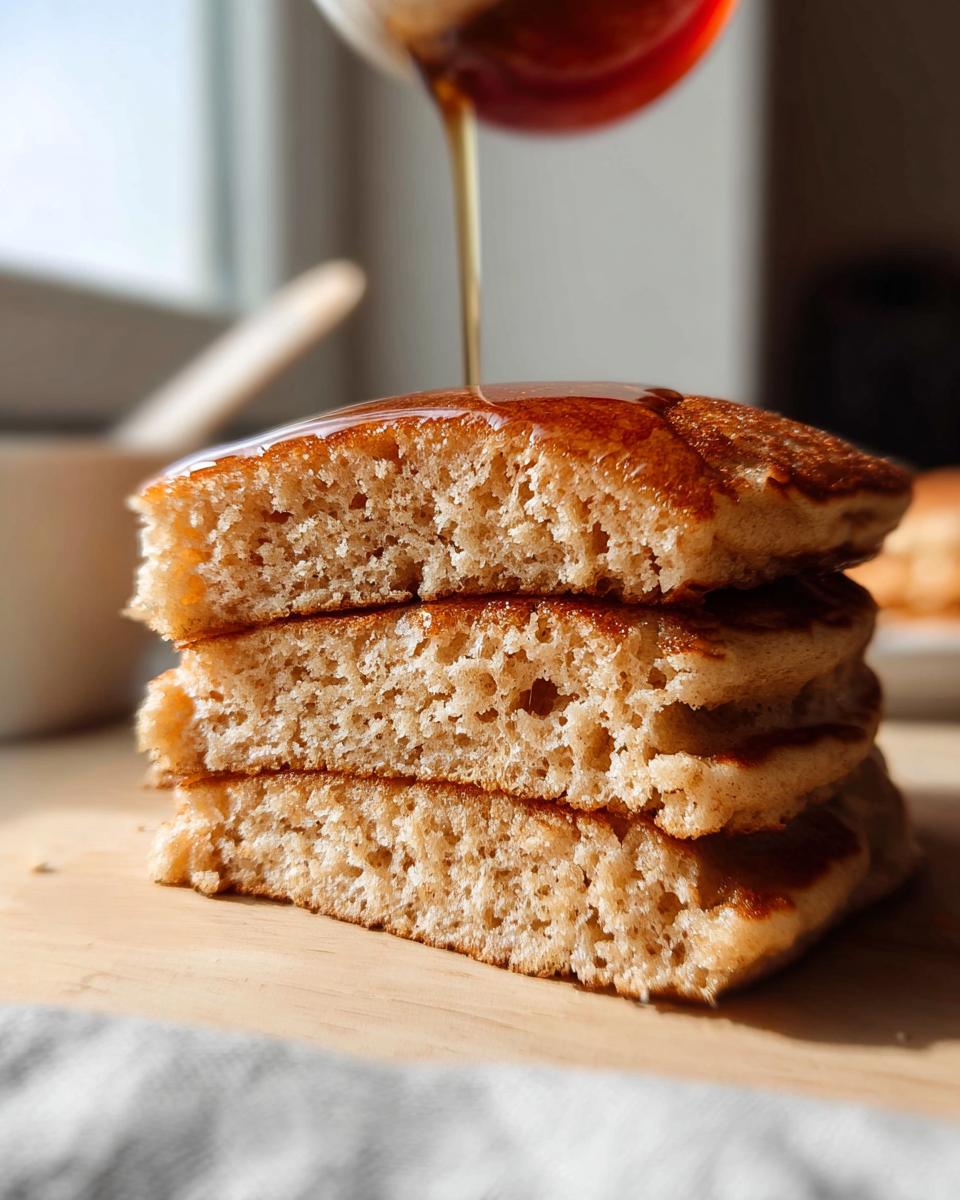
Buttermilk isn’t just there for flavor, bless its little tangy heart; it’s essential chemistry! See, we use baking soda in this recipe, and baking soda needs an acid to really activate. Buttermilk is perfectly acidic. When they meet, BAM! You get carbon dioxide bubbles—the same bubbles that help create that lofty rise for our extra fluffy pancakes.
Now, what if your fridge decides to be uncooperative and you’re out of buttermilk? Don’t stress! This is what I do when company shows up unannounced on a Sunday morning. Take 2 cups of regular whole milk—yes, the regular stuff—and stir in 2 Tablespoons of white vinegar or fresh lemon juice. Let that sit on the counter for about 5 minutes. It will look curdled and slightly gross, but that’s exactly what we want! It mimics buttermilk perfectly and gives you the necessary acid kick to keep your pancakes tall and tender.
Step-by-Step Instructions for Fluffy Pancakes: The Ultimate Recipe You NEED
This is where the magic happens, and I promise, it’s so straightforward that it perfectly fits into even the most chaotic Saturday morning schedule or your favorite cozy morning recipes rotation. The absolute number one rule you need to engrave in your brain for this recipe is: DO NOT OVERMIX. Seriously, stop whisking when you think you should keep going!
Mixing Wet and Dry Components
First things first, let’s get those boring dry ingredients together in that big bowl. Whisk the flour, sugar, baking powder, baking soda, and salt really well. We want those leavening agents distributed evenly, so give that a good 30 seconds. Next, in a separate bowl—yes, two bowls, standard procedure for fluffiness—whisk your eggs, buttermilk, and vanilla. Then, slowly stream in that melted butter that’s cooled down a touch. Pour the entire wet mixture right into the dry pile. Now, grab your whisk, but use it gently. You are just combining; you aren’t trying to make meringue! If you see a few streaks of flour or a tiny lump or two? That’s good! It means you haven’t beaten the gluten into submission.
Let that batter rest for about 5 minutes while you get your cooking surface ready. This short rest lets the flour absorb the liquid and gives the leavening agents a tiny head start. Don’t clean your bowl yet, though!
Griddle Temperature and Cooking Technique
Time to heat things up! You want your griddle or skillet set right over medium heat. Don’t go scorching hot, or the outside will burn before the inside cooks through. Lightly grease it with butter or spray—you want enough to see it sizzle, but not so much that it causes smoke. If you’re looking for tips on keeping your expensive griddle looking brand new after all this butter action, I’ve got a quick guide on griddle cleaning!
Pour out about 1/4 cup of batter per pancake. Wait patiently! You are looking for two things: the edges need to look completely dry and set, and little bubbles should start popping across the surface. Once you see that, slide your spatula underneath and flip. Cook the second side for just a minute or two until it’s golden brown.

If you’re cooking a big batch for the family, keep the finished ones warm! I pop them on a baking sheet in an oven set to a low 200°F (93°C). This keeps them warm and perfectly soft while you whip up the rest!
Troubleshooting Common Fluffy Pancakes: The Ultimate Recipe You NEED Issues
It happens to the best of us! Even trying to master the perfect tall pancake stack, sometimes things don’t go exactly to plan. Don’t throw that batter out! Usually, a pancake flop is just a hint about what went slightly wrong in the process. I’ve learned to diagnose my pancake issues quickly so I can fix Batch Two without wasting time worrying.
My Pancakes Are Flat and Sad
This is the number one heartbreak, right? You did everything beautifully, but they look more like silver dollars than fluffy clouds. Almost always, this comes down to your leavening agents. Baking powder and baking soda go stale sitting in the cupboard, and if they aren’t active, they can’t create the gas needed to lift your batter. If your pancakes are consistently flat, go check the dates on those canisters!
Another reason? You might have overmixed. I know I preached about not overmixing, but seriously, if you whisk until the batter is perfectly smooth, you’ve knocked out all the air we worked so hard to incorporate earlier when we mixed the butter and sugar. A few lumps visible mean you’re doing great!
They Stick to the Griddle No Matter What
You’re using butter, you’re using spray, but they still want to become concrete on your nice hot pan. This usually means two things. First, your heat is too high! If the bottom is scorching before the bubbles even form on top, the batter seizes up and glues itself to the pan surface before it has a chance to set properly. Turn that dial down to medium or medium-low.
Second, make sure you are re-greasing the pan lightly between *every* batch. That lovely melted butter we add to the batter is fantastic for flavor, but it burns off quickly on the hot surface, leaving behind sticky milk solids that cause the next batch to gum up. A quick swipe with a paper towel dipped in fresh butter between rounds solves this perfectly.
My Pancakes Burn on the Outside and Stay Raw Inside
This goes back to heat control, but in the opposite direction. If you cook them too long on the first side, the outside darkens too fast, and the heat never penetrates to the center. Remember the instructions: look for set edges and bubbles forming around the top. That’s the cue to flip! If you are waiting until the bubble on top *pops* before flipping, you’ve waited too long.
If you hit that sweet spot, the second side only takes 1 to 2 minutes. If you find you’re struggling with the timing, remember that low warming oven (200°F) is your best friend. Transfer the cooked pancakes there while you finish the rest. They stay perfectly hot and slightly soft while waiting, preventing the urge to overcook the next batch just to get them off the stove!
Making Ahead and Storing Your Fluffy Pancakes: The Ultimate Recipe You NEED
If you’re like me, sometimes you make a massive batch and you need them to last longer than one glorious weekend breakfast. Good news! These pancakes freeze beautifully, which means you can have quick, fluffy weekday breakfasts anytime you want. It’s perfect stability for a kid approved breakfast any day of the week.
First things first—and this is super important for that incredible lift we worked so hard for—you really shouldn’t mix the full pancake batter the night before. Remember how buttermilk and baking soda create that fizzy reaction? That reaction starts working the second they meet. If you mix it all up and leave it overnight, that gas escapes, and you end up with flat pancakes the next morning. Oops!
What you *can* do, which is great for busy mornings, is prep your ingredients separately. You can mix all the dry stuff together in one airtight container and all the wet stuff (minus the melted butter) in another. Keep them both in the fridge. Then, first thing in the morning, quickly melt your butter, let it cool for two minutes, and dump the wet into the dry. Mix gently, and you’re back in business!
Freezing and Reheating Leftovers
When you have leftover cooked pancakes, the freezer is your best friend. Don’t stack them warm, though! That just steams them together into one sticky mound. Let them cool completely on a wire rack first. Once they are totally cool—like room temperature cool—then you can stack them up, placing a small square of parchment paper or wax paper between each one. This stops them from sticking together!
Toss that stack into a freezer-safe bag or container. They stay perfect in the freezer for up to 3 months! When you’re ready to eat them, you have two great options:
- The Quick Microwave Way: For one or two pancakes, just put them on a microwave-safe plate. Zap them for about 30 to 45 seconds, maybe a little longer depending on your microwave power. They come out soft and ready for syrup.
- The Oven Method (The Best Way): If you’re warming up a big batch, the oven is superior because it revives that perfect, fluffy texture better. Set your oven to 350°F (177°C). Lay the frozen pancakes on a baking sheet lined with foil or parchment paper, cover them loosely with another piece of foil, and bake them for 6 to 8 minutes until they are piping hot all the way through. They taste almost freshly made!
If you’re interested in making your own topping to go with easy reheated pancakes, don’t forget to check out my recipe for homemade maple syrup!
Serving Suggestions for Your Fluffy Pancakes: The Ultimate Recipe You NEED
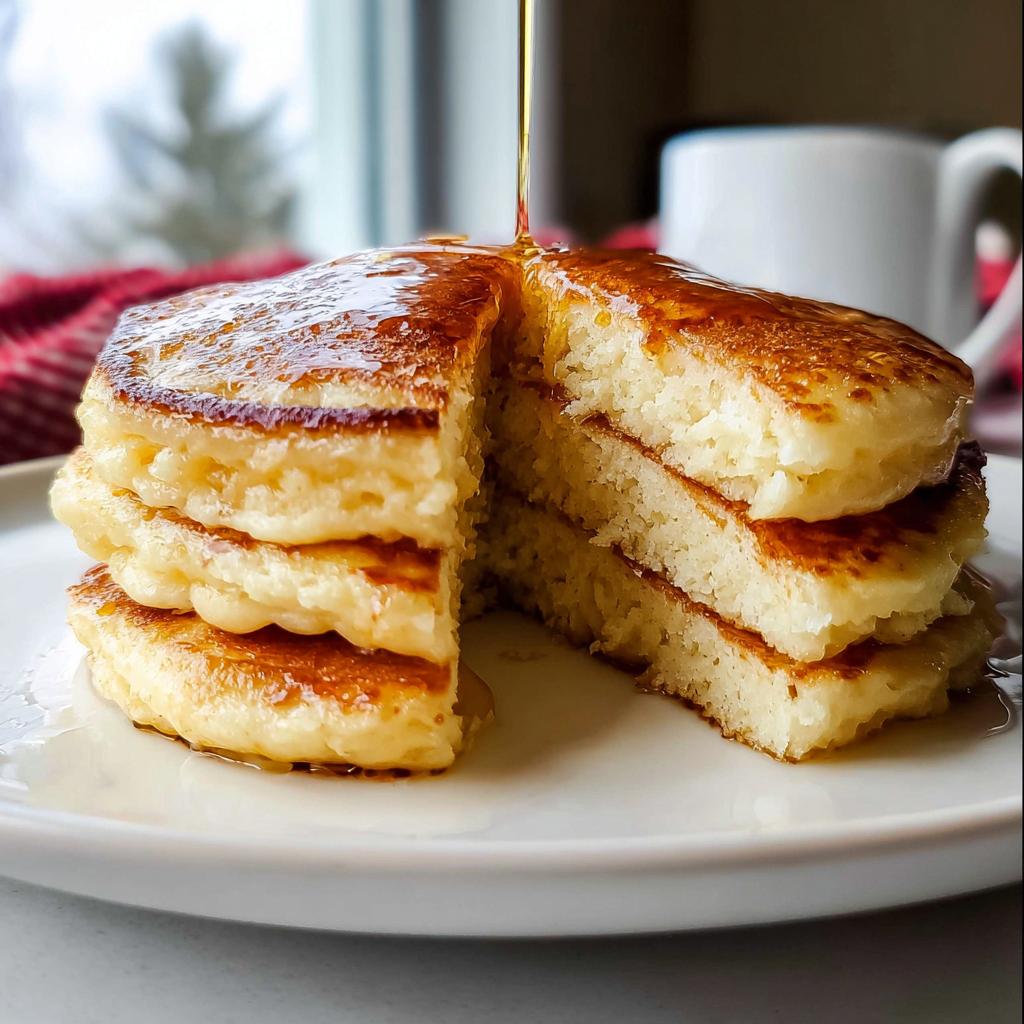
We’ve made the perfect, airy pancakes, so now we need to dress them up! While a drizzle of pure maple syrup—especially if you happen to make my easy homemade maple syrup recipe—is non-negotiable in our house, relying on just syrup can get a little boring (and maybe a bit too sugary for my nutrition-focused me!).
When I’m aiming for that kid approved breakfast title while sneaking in some good nutrition, I always default to fresh fruit. The natural sweetness and tang pair wonderfully with the buttermilk in the batter. It feels luxurious, but it’s actually super easy!
Simple Fruit Toppings That Work Wonders
You don’t need fancy sauces or reductions. Just a handful of fresh berries goes a million miles. My kids especially love when I arrange sliced bananas and fresh blueberries on top, creating little colorful towers. Strawberries, of course, are classic, but try mixing in some sliced peaches in the summer—wow, that’s a game-changer!
Since these pancakes are so tall and satisfying, you really don’t need a huge pile of toppings. A light sprinkle of cinnamon mixed with the whipped cream or yogurt brings out the vanilla we used in the batter, too. It’s about making it look special enough for the weekend but simple enough that you aren’t scrubbing stains off the counter for an hour!
Healthy Swaps for Grown-Ups
If you’re trying to keep things slightly lighter but still crave that rich topping feel, I have a couple of swaps I always use for myself. Instead of heavy whipped cream, I whip Greek yogurt with a tiny drizzle of honey until it’s light and fluffy. It adds protein, and honestly, the slight tang is amazing against the sweetness of the pancake.
Another idea that my husband loves is topping his stack with a tablespoon of toasted, chopped pecans and a sprinkle of hemp hearts for some extra crunch and omegas. It feels really hearty and keeps us full until lunch, which is essential for any good cozy morning recipe!
Frequently Asked Questions About Fluffy Pancakes: The Ultimate Recipe You NEED
I know you’re probably excited to start cooking, but sometimes a couple of little questions pop up right before you grab the whisk. That’s totally normal! I’ve pulled together the things I get asked most often about achieving that perfect texture so you don’t have to pause your weekend breakfast session wondering if you did something wrong.
Can I substitute regular milk for buttermilk in this Fluffy Pancakes: The Ultimate Recipe You NEED?
Yes, you totally can, but I’m going to be honest—you won’t get quite the same result! Buttermilk is acidic, and that acid reacts beautifully with the baking soda we use to create lift. If you use regular milk instead, your pancakes will still be good and they will still puff up because of the baking powder, but they won’t have that lovely, subtle tang, and they might be just a tiny bit denser. If you must substitute, use my trick: mix 2 cups of regular milk with 2 tablespoons of vinegar or lemon juice and let it sit for five minutes before using it!
What is the secret to getting truly extra fluffy pancakes?
Honestly, there are two superstar secrets here that work together to build that beautiful height for your tall pancake stack. First, make sure your baking powder and baking soda are fresh—if they’re old, they won’t create the gas needed for the puff! Second, and this is the hard one for most people: do NOT overmix the batter! Those lumps you see? They are pockets of air waiting to expand in the hot pan. The second you whisk them until everything is perfectly smooth, you are destroying those air pockets, and your pancakes will flatten right out!
Can I make these ahead without freezing them?
I wouldn’t recommend mixing the full wet and dry ingredients together more than 15 minutes before you intend to cook. The action starts right away when the buttermilk hits the baking soda. If you mix it the night before, by morning, all the lift (the fizz!) will have escaped, and you’ll end up with a thin, sad puddle on the griddle. Prep the dry ingredients ahead of time, keep them airtight, and only mix the wet things in right before you are ready to cook!
Share Your Fluffy Pancakes: The Ultimate Recipe You NEED Experience
Whew! We made it. Now you have the blueprint for those dreamy, sky-high pancakes that make weekend mornings totally worth waking up for. My goal with this recipe was always to bring back that cozy, classic comfort without adding extra stress to my week. I truly hope this becomes your family’s new favorite tradition!
I would absolutely love to hear how your pancakes turned out. Did they reach new heights? Did the kids approve of the tall pancake stack? Hearing your stories helps me keep making the best recipes for our community!
Please take a second after you stack those golden discs high and leave a rating right here on the page—it really helps other busy parents find this recipe. And if you snap a picture of your gorgeous plate, tag me on social media! I live for seeing your syrup-drizzled triumphs.
Let me know in the comments below: What is your absolute, non-negotiable pancake topping? Are you a pure maple syrup purist, or are you throwing on chocolate chips? I’m always looking for new ways to dress up these extra fluffy pancakes!
Fluffy Pancakes: The Ultimate Recipe You NEED
Ingredients
Equipment
Method
- Melt the 6 Tablespoons (85g) of butter. You can use a microwave or stovetop. Set the butter aside to cool slightly before you use it in step 3.
- In a large bowl, whisk the flour, sugar, baking powder, baking soda, and salt together until they are combined. Set this bowl aside.
- In another large bowl, whisk the eggs, buttermilk, and vanilla extract together. Whisk in the melted butter. Pour the wet ingredients into the dry ingredients. Gently whisk to combine. Do not overmix; a few lumps are acceptable. Make sure no dry flour remains at the bottom of the bowl. Set the batter aside while you heat the cooking surface.
- Heat a griddle or large skillet over medium heat. Coat the surface generously with butter or nonstick spray. Once hot, pour about 1/4 cup of batter onto the griddle for each pancake. Cook for about 2 minutes, or until the edges look set and you see holes forming around the border. Flip the pancake and cook the other side for 1–2 more minutes until done. Add butter or spray to the griddle as needed for each new batch.
- Keep the cooked pancakes warm in a preheated 200°F (93°C) oven until you finish cooking all the batter. Serve the pancakes right away with your chosen toppings.
Notes
Tried this recipe?
Let us know how it was!
Certified Family Nutrition Strategist
My path into family nutrition began working with Phoenix Area Family Services, where I saw how traditional nutrition advice often ignored real-world constraints like budget limitations, time crunches, and kids who refuse to eat anything green. That experience sparked my mission to develop meal planning systems that work with family realities, not against them.
Over eight years, I’ve helped hundreds of families reduce grocery spending by 25% while dramatically improving their nutrition. My meal planning frameworks have been adopted by local wellness centers because they actually work for busy parents juggling different ages, preferences, and dietary needs in one household.
As a bilingual first-generation Mexican-American and mother of three, I personally navigate the daily challenge of feeding a family nutritiously while honoring cultural traditions and managing a household budget. My “kid-friendly low-carb” protocols show families how to gradually introduce healthier options without triggering mealtime battles or abandoning beloved family recipes.
My “realistic wellness” philosophy is straightforward: health improvements must work within existing family dynamics and financial realities to be truly sustainable. When I’m not developing meal planning systems, I’m creating portable trail snacks for our weekend family hiking adventures – because healthy eating should fuel the life you want to live.
My personal low-carb journey started after pregnancy as a way to regain energy for active parenting, and that experience continues to inform my professional commitment to making healthy eating feel supportive rather than burdensome for busy families.