
Remember your very first baking attempt? Mine was for my daughter’s birthday, a simple vanilla sponge, and honestly, my kitchen looked like a flour bomb went off! I had zero experience, just a scribbled recipe and a whole lot of hope. I was so sure it would be a disaster, but when that cake came out of the oven, perfectly risen, it felt like magic. Decorating it with her was one of our favorite memories, and it showed me that baking isn’t just about following steps; it’s about connection and pride. That’s exactly the feeling I want to share with you through The Ultimate Cake Ideas Recipes Guide for Beginners. This isn’t about complicated techniques or fancy equipment; it’s about showing you that making delicious, beautiful cakes is totally within your reach, every single time.
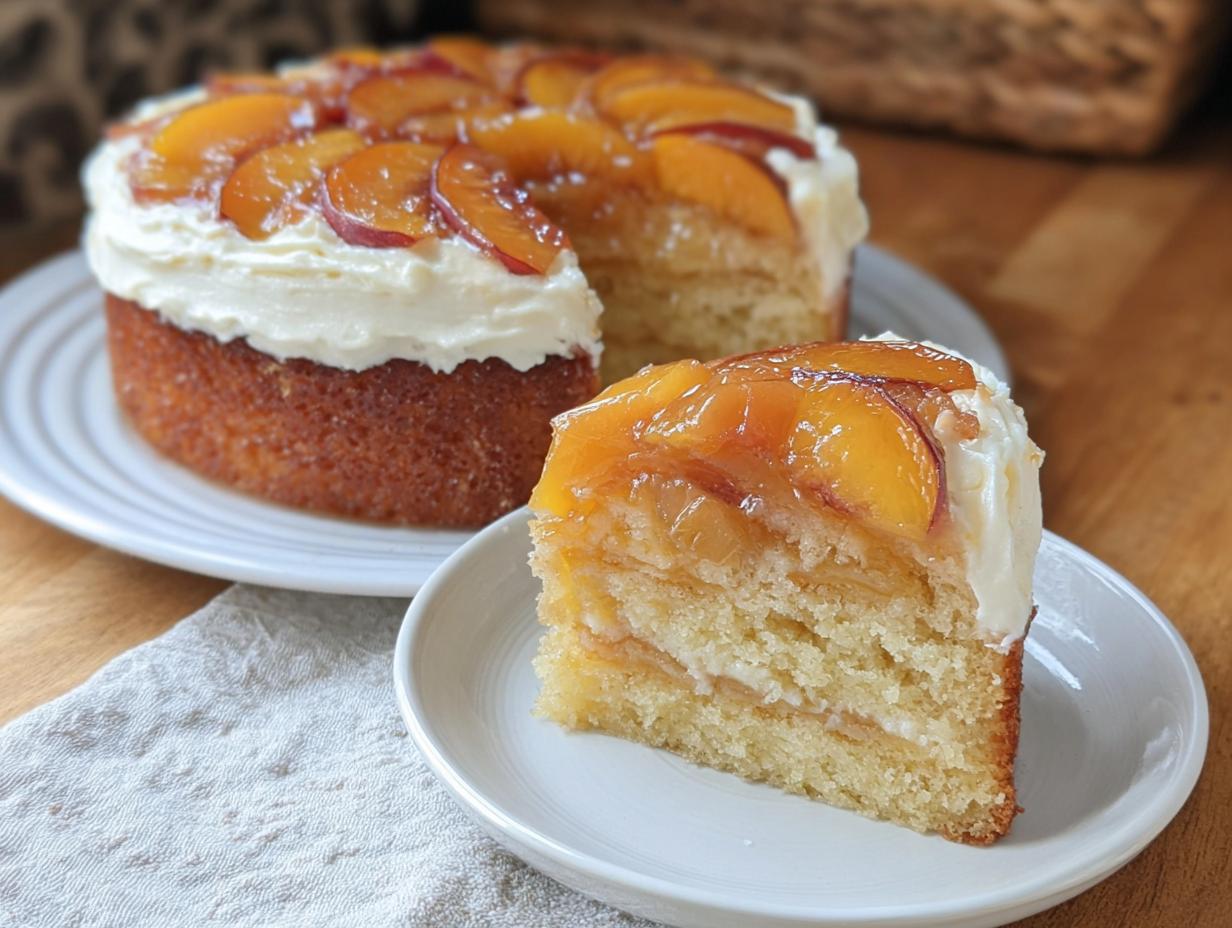
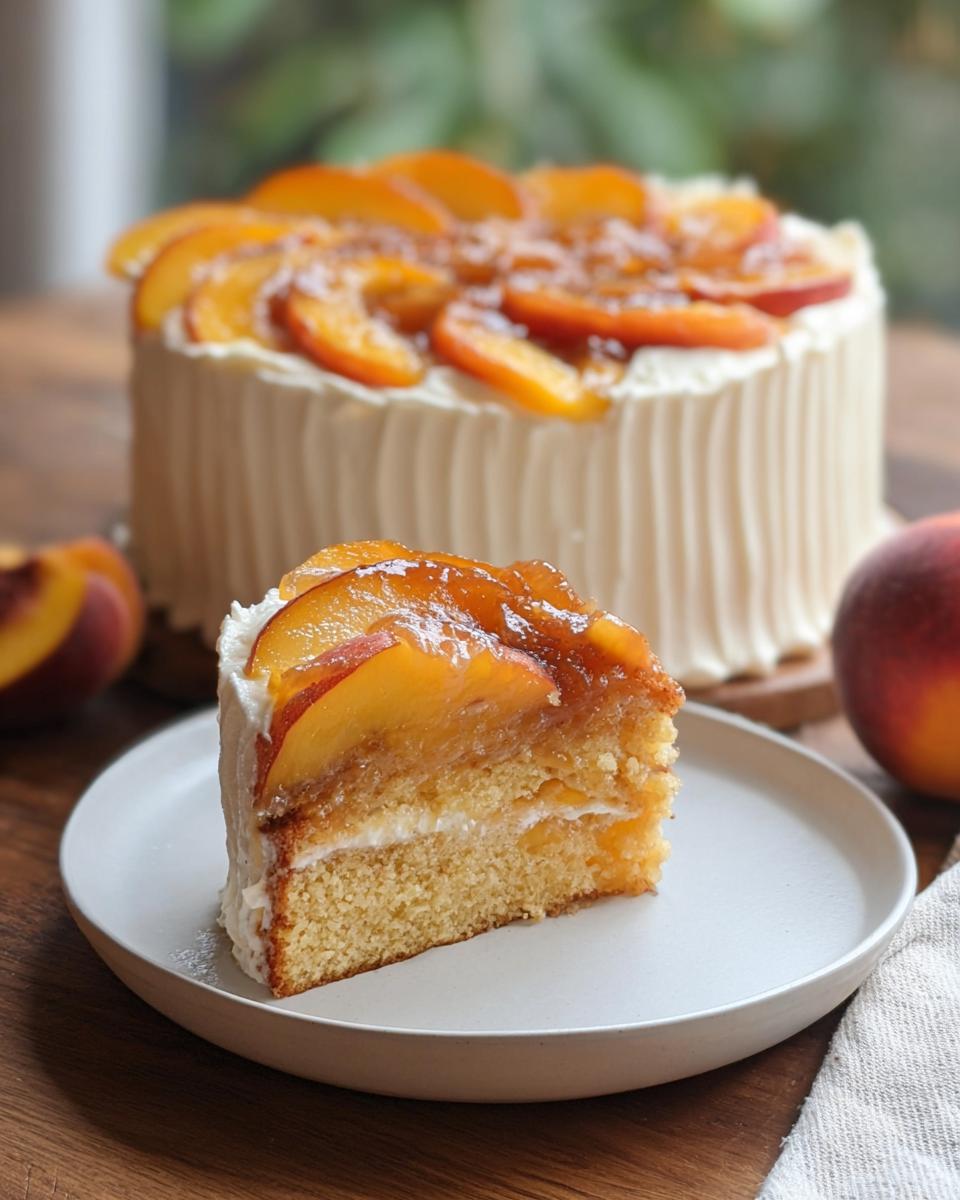
Why This Peach Upside Down Cake is Perfect for Your First Bake
Okay, so if you’re new to the whole baking scene, you want a recipe that’s going to give you a win right out of the gate. This Peach Upside Down Cake is totally that recipe!
- Super Simple Steps: Seriously, we’re not asking you to do anything crazy here. The instructions are broken down so clearly, you’ll feel like a pro.
- Impressive Results: Look, when this cake comes out of the oven with those gorgeous caramelized peaches on top, everyone will think you spent hours on it. It’s just that pretty!
- Common Ingredients: You probably already have most of what you need in your pantry. No weird, hard-to-find stuff here, just good old baking basics.
- Deliciously Rewarding: It tastes amazing, with that sweet, tender cake and that sticky, peachy topping. It’s a total crowd-pleaser and a great way to boost your baking confidence.
Gathering Your Ingredients for The Ultimate Cake Ideas Recipes Guide for Beginners
Alright, let’s get our game faces on for baking! Having all your ingredients prepped and ready makes the whole process so much smoother, trust me. For our fantastic Peach Upside Down Cake and that dreamy Vanilla Buttercream, here’s exactly what you’ll need. Don’t worry if you don’t have peach flavoring; it’s totally optional!
Peach Brown Sugar Layer
First up, for that gorgeous sticky topping:
- 1/4 cup unsalted butter, melted
- 2/3 cup brown sugar
- 3 large peaches, sliced (skins on or off, totally your call!)
Peach Yellow Cake
Now for the cake itself! Using a cake mix is our little secret to making this recipe super beginner-friendly.
- 3 whole eggs, make sure they’re at room temperature – it really helps!
- 2/3 cup sour cream, also room temperature
- 1/3 cup vegetable oil
- 2/3 cup buttermilk, room temperature (if you don’t have buttermilk, just put a tablespoon of vinegar or lemon juice in regular milk and let it sit for 5 minutes!)
- 1 teaspoon vanilla extract
- 1 teaspoon cinnamon
- 1/2 teaspoon peach flavoring (optional, but it’s nice!)
- 1 (15.25oz box) yellow cake mix (Duncan Hines works great, but most brands are similar!)
Classic Vanilla Buttercream
And for the fluffy, delicious frosting:
- 1 1/2 cups unsalted butter, softened (this means leave it out on the counter for about 10 minutes until it’s soft but not melty)
- A tiny pinch of salt to balance the sweetness
- 1 Tablespoon pure vanilla extract
- 1/4 cup heavy cream (you might need a splash more)
- 7-8 cups powdered sugar (this sounds like a lot, but it’s what gives us that perfect texture!)
Having everything measured out before you start mixing really makes a difference, turning what could be a stressful event into a fun baking adventure!
Step-by-Step Instructions: Your Beginner’s Guide to The Ultimate Cake Ideas Recipes
Alright, bakers, get ready to make some magic! Following these steps will turn you into a cake-making whiz. We’re going to walk through this Peach Upside Down Cake together, and trust me, it’s easier than you think. Remember that personal touch? It’s all about enjoying the process! For some fun ideas on making box mixes fancy, check out our tips on box mix upgrades.
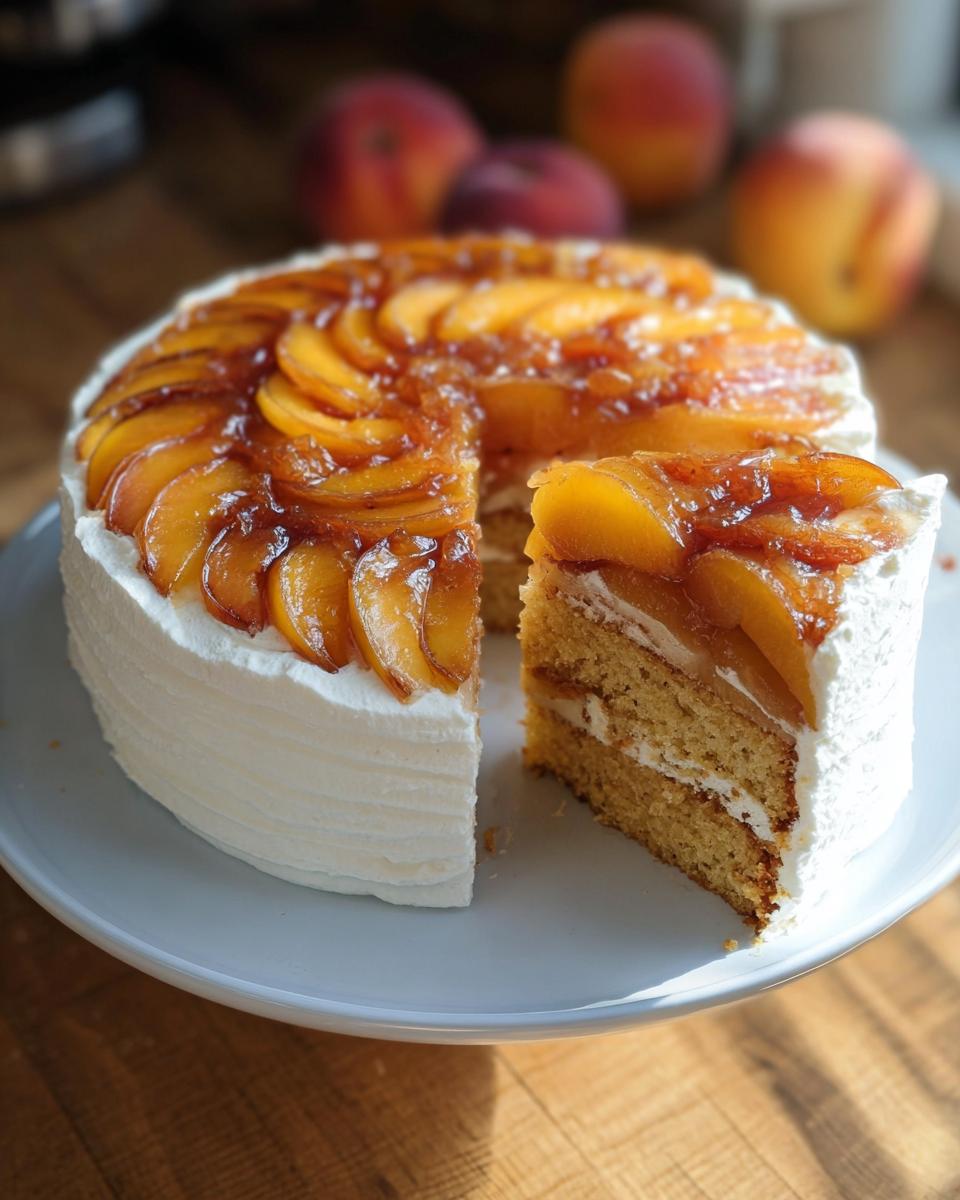
Preparing the Pans and Peach Layer
First things first, let’s get that oven warmed up to 325 degrees F (that’s 160 degrees C). Grab your two 8-inch cake pans. We need to grease them really well with shortening and then give them a good dusting of flour. This stops our beautiful cake from sticking. Now, take that melted butter and spread a thin layer evenly across the bottom of each pan. Then, sprinkle that brown sugar all over the butter. Gently arrange your peach slices on top of the sugar. They should make a nice, pretty layer. Set these gorgeous pans aside for a moment to prepare for a cake like this, inspired by great recipes like this one.
Mixing the Peach Yellow Cake Batter
Time for the cake part! Grab a big bowl. You’re going to whisk together all those ‘cake ingredients’ we listed, except for the actual yellow cake mix. Think of it as getting all the wet stuff ready to party. Once that’s mixed, just gently stir in the cake mix. Seriously, don’t go crazy here; just mix until you don’t see any dry patches. Divide this batter evenly between your two prepared cake pans. Easy peasy!
Baking and Cooling the Cake Layers
Pop those pans into your preheated oven. Let them bake for about 30 to 32 minutes. The best way to know they’re done is to stick a toothpick right into the middle – if it comes out clean, hooray! Carefully take the cakes out of the oven. Now, this is important: flip them over onto a wire rack to cool completely. Once they’re cool, wrap each layer really well in plastic wrap and pop them in the freezer for at least 30 minutes. Trust me, this step makes them so much easier to handle when we start decorating!
Creating the Classic Vanilla Buttercream
Now for the best part – the frosting! If you have a stand mixer, great! Put that softened butter in there with a little pinch of salt and that lovely vanilla extract. Whip it up until it’s nice and fluffy. Add in the heavy cream and give it another good whip. Now, turn the mixer speed down low and slowly add the powdered sugar, a cup at a time, until it starts to look like frosting. If it seems too thick, add a tiny bit more cream. Once all the sugar is in, turn the mixer high for about 2 minutes. You want it super light and airy – pure fluffy perfection!
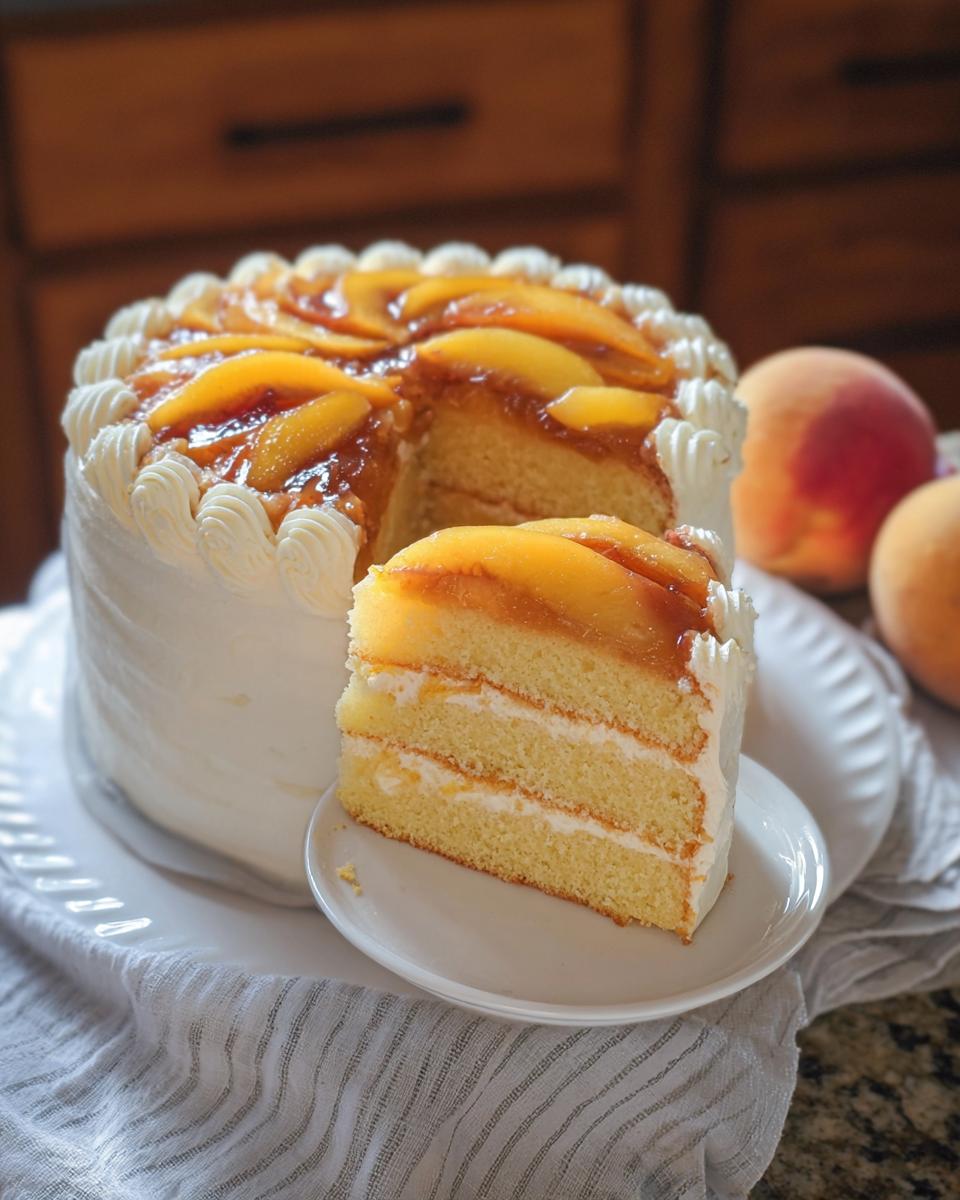
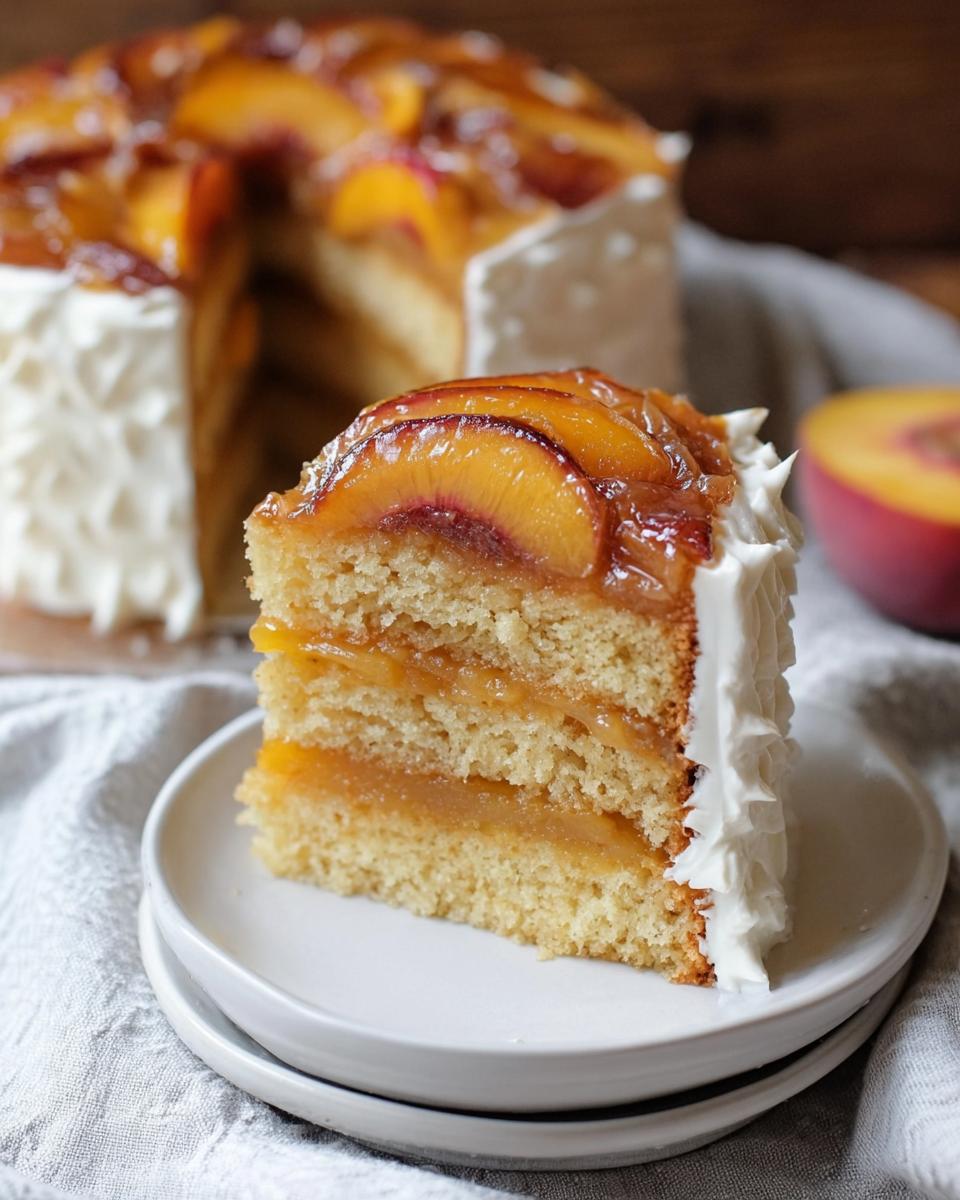
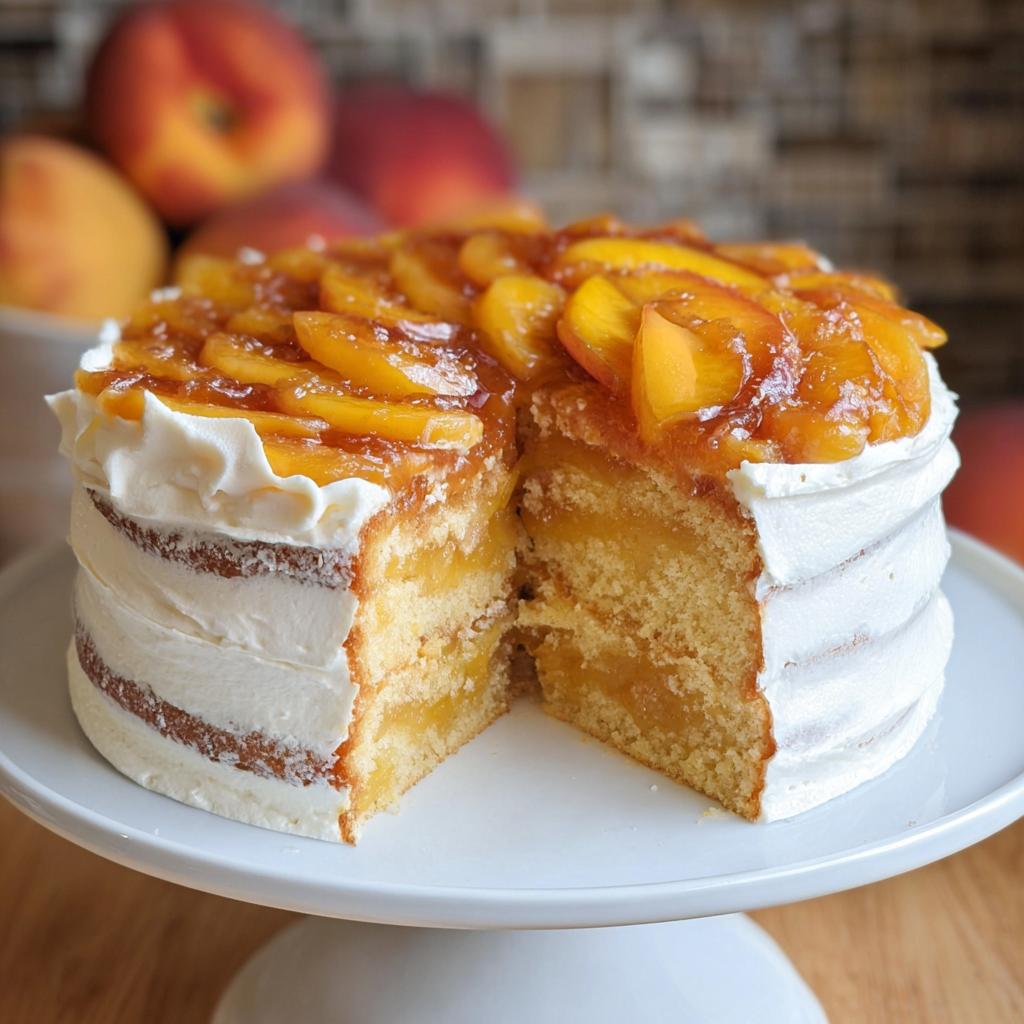
Assembling Your Beginner Cake
Okay, let’s put this masterpiece together! Grab your cake turntable and a cardboard round. Put a little blob of buttercream in the center of the cardboard – this is like glue for your cake. Carefully place one of your frozen cake layers on top, fruit-side up. Spread a nice, even layer of that delicious buttercream over the top. Now, we’re going to do a thin layer of frosting all over the whole cake, top and sides. This is called a crumb coat, and it seals everything up. Once that’s done, add a bit more frosting around the sides. Using your cake turntable and that cool scalloped scraper, gently smooth and create a textured finish on the sides. It looks so professional, doesn’t it?
Tips for Success in The Ultimate Cake Ideas Recipes Guide for Beginners
Baking can feel a little intimidating at first, but trust me, you’ve got this! A few little tricks can make all the difference and boost your confidence. For more info on temps and tips, check out our guide on ingredient temps. First off, make sure your eggs, sour cream, and buttermilk are at room temperature. It’s a small step, but it helps everything blend together so much smoother, making for a lighter cake. When you’re mixing the batter, remember: just stir until it’s combined. Overmixing is the enemy of a tender cake; it can make it tough. And for that beautiful buttercream? Be patient when creaming the butter. Letting it get really light and fluffy is key to that dreamy texture. Don’t be afraid to taste as you go and adjust sweetness or creaminess. You’re in charge of your delicious creation!
Frequently Asked Questions About Beginner Baking
Got questions? I’ve got answers! Baking this Peach Upside Down Cake is super straightforward, but it’s totally normal to wonder about a few things when you’re just starting out. Let’s clear the air!
Can I use fresh peaches instead of canned?
Absolutely! Fresh is often best. Just make sure they’re ripe but still a little firm so they hold their shape. You can use canned peaches, too, just drain them really well so you don’t add too much extra liquid. Whichever you choose, slice ’em up and they’ll be delicious!
How do I know if my cake is fully baked?
The easiest way is the toothpick test! Just carefully stick a toothpick (or a thin knife) into the center of the cake. If it comes out clean, with no wet batter clinging to it, you’re good to go! A few moist crumbs are fine, but no goo!
What if I don’t have a stand mixer for the buttercream?
No worries at all! You can totally make this buttercream by hand or with a hand mixer. It’ll take a little more elbow grease to get that butter super fluffy, but it’s doable. Just keep beating until it looks light and airy, and you’ll get that same delicious result. For more general tips on making things easier in the kitchen, check out our guide on easy recipes.
Nutritional Information for Your Peach Upside Down Cake
Just a little heads-up: the exact nutritional info can change based on the specific brands you use and how you made it. But, for a slice of this delightful Peach Upside Down Cake, you’re generally looking at around 400-450 calories. It’ll have a good mix of carbs and fats, with a bit of protein from the cake and frosting. It’s a treat, meant to be enjoyed!
Sharing Your Baking Journey
I’d absolutely LOVE to hear how your Peach Upside Down Cake turned out! Did you snap any photos? Are there any funny baking stories you want to share from your journey through The Ultimate Cake Ideas Recipes Guide for Beginners? Let me know in the comments below, or feel free to reach out anytime via my contact page. Happy baking!
Peach Upside Down Cake with Vanilla Buttercream
Ingredients
Equipment
Method
- Preheat your oven to 325 degrees F (160 degrees C). Prepare two 8-inch cake pans by greasing them with shortening and dusting with flour to prevent sticking.
- Divide the melted butter evenly between the two cake pans, brushing it to cover the bottom surface. Distribute the brown sugar over the butter layer in each pan. Arrange the peach slices in an even layer on top of the brown sugar. Set the prepared pans aside.
- In a large bowl, whisk together all the cake ingredients except for the cake mix. Add the cake mix and gently stir until just combined. Divide the cake batter evenly between the two prepared cake pans.
- Bake for 30-32 minutes, or until a toothpick inserted into the center comes out clean. Remove the cakes from the oven and invert them onto a wire rack to cool completely. Once cooled, wrap the cake layers carefully in plastic wrap and freeze for at least 30 minutes to make assembly easier.
- For the Vanilla Buttercream: In a stand mixer fitted with a paddle attachment, whip the softened butter until it is light and fluffy. Add the salt, vanilla extract, and heavy cream, and whip again. Scrape down the sides of the bowl. With the mixer on low speed, gradually add the powdered sugar. If the mixture is too thick, add 2-3 tablespoons more heavy cream to reach the desired consistency. Increase the mixer speed to high and beat for 2 minutes until the buttercream is light and fluffy.
- For Assembly: Place a small amount of buttercream on the center of a cardboard cake round on a cake turntable. This will act as glue. Place the first cake layer, fruit side up, onto the turntable. Spread a layer of buttercream over the cake. Apply a thin layer of buttercream over the entire cake (crumb coat), leaving the top exposed. Add a layer of buttercream around the sides of the cake. Using the cake turntable and a scalloped cake scraper, carefully create a textured finish on the sides of the cake.
- Slice and enjoy your homemade peach upside down cake!
Notes
Tried this recipe?
Let us know how it was!
Certified Family Nutrition Strategist
My path into family nutrition began working with Phoenix Area Family Services, where I saw how traditional nutrition advice often ignored real-world constraints like budget limitations, time crunches, and kids who refuse to eat anything green. That experience sparked my mission to develop meal planning systems that work with family realities, not against them.
Over eight years, I’ve helped hundreds of families reduce grocery spending by 25% while dramatically improving their nutrition. My meal planning frameworks have been adopted by local wellness centers because they actually work for busy parents juggling different ages, preferences, and dietary needs in one household.
As a bilingual first-generation Mexican-American and mother of three, I personally navigate the daily challenge of feeding a family nutritiously while honoring cultural traditions and managing a household budget. My “kid-friendly low-carb” protocols show families how to gradually introduce healthier options without triggering mealtime battles or abandoning beloved family recipes.
My “realistic wellness” philosophy is straightforward: health improvements must work within existing family dynamics and financial realities to be truly sustainable. When I’m not developing meal planning systems, I’m creating portable trail snacks for our weekend family hiking adventures – because healthy eating should fuel the life you want to live.
My personal low-carb journey started after pregnancy as a way to regain energy for active parenting, and that experience continues to inform my professional commitment to making healthy eating feel supportive rather than burdensome for busy families.