
Hey there, fellow holiday warriors! Thanksgiving is all about that cozy, delicious chaos, right? But let’s be real, sometimes the thought of getting *everything* done feels like a marathon. You’re juggling a dozen things, the turkey’s roasting, and suddenly you realize you forgot the appetizers! Believe me, I’ve been there! That’s exactly why I came up with this Thanksgiving Veggie Tray in 20 Minutes (Weeknight Win). It’s my secret weapon for adding a splash of color and freshness to the holiday table without adding *any* extra stress. Growing up in my loud, wonderful Mexican-American family, we always had a huge spread, but those last-minute appetizer scrambles were legendary! I learned tons of tricks for making things look impressive FAST, and this gorgeous veggie tray is a direct result of that kitchen hustle. As someone who loves making sophisticated food totally doable for busy folks, I promise this tray will be a showstopper.
Why This Thanksgiving Veggie Tray is a Weeknight Win
Seriously, who has hours to prep appetizers when the main event is calling? This veggie tray is a total game-changer for busy cooks:
- Super Speedy: We’re talking 20 minutes, start to finish. Boom!
- Gorgeous Presentation: It looks like you spent hours, but nope! Adds that festive flair.
- Healthy & Fresh: A fantastic way to balance out all those rich holiday flavors.
- Holiday Ready: Perfect for guests arriving early or as a light starter before the big meal. It truly is a weeknight win!
Gathering Your Thanksgiving Veggie Tray Ingredients
Okay, let’s get this party started! The beauty of this Thanksgiving Veggie Tray in 20 Minutes (Weeknight Win) is that it uses stuff you probably already have or can grab super easily. No fancy ingredients here, just fresh goodness that comes together in a flash. You can totally swap things out based on what you love or what’s in your fridge – that’s the whole idea of a quick win, right?
Raw Crudites for Your Thanksgiving Veggie Tray
These are your colorful stars, ready to go with minimal fuss:
- 1 cup broccoli florets
- 1 cup cauliflower florets
- 1 cup cucumber slices
- 1 cup radishes, halved or quartered
- 1 cup mini bell peppers, halved
- 1 cup celery sticks
- 1 cup carrot sticks
- 1 cup green onions
- 1 cup shishito peppers
- 1 cup endive leaves
- 1 cup cherry tomatoes
Optional Blanched Veggies for Your Thanksgiving Veggie Tray
Want that perfectly tender-crisp bite? A quick dip in hot water makes these pop:
- 1 cup asparagus spears
- 1 cup green beans
- 1 cup snap peas
Dips and Garnishes for the Veggie Platter
Don’t forget the flavor boosters! These are our little flavor bombs:
- 1 container hummus (spicy is my fave!)
- 1 container Greek or Ranch dip (or any creamy dip you adore)
- 1 container garlic cheese spread (Ooh, Boursin is amazing here!)
- 1 bunch fresh dill (for garnish, it looks so pretty!)
- 1 bunch fresh parsley (also for garnish, adds a pop of green!)
How to Assemble Your Thanksgiving Veggie Tray in 20 Minutes
Alright, ready to see how this magic happens so fast? It’s all about a few simple moves that make a big impact. We’re not going to spend all day in the kitchen, nope! This is about getting that gorgeous platter ready in a jiffy. So grab your sharpest knife and let’s get chopping and arranging!
Step 1: Prepare Your Vegetables
First things first, give all those lovely veggies a good wash. Then, chop everything into easy-to-grab, bite-sized pieces. For stuff like carrots, cucumbers, and peppers, just slice or stick ’em up. If you’re going for those optional blanched veggies – asparagus, green beans, snap peas – get a pot of water boiling super fast. Pop them in for just a minute or two until they’re bright and crisp-tender, then straight into an ice bath to stop the cooking and keep that vibrant color. Drain them really well so they don’t make your dip soggy! It’s all about making sure each piece is perfect for dipping, just like you’d see on the most elegant crudites platters.
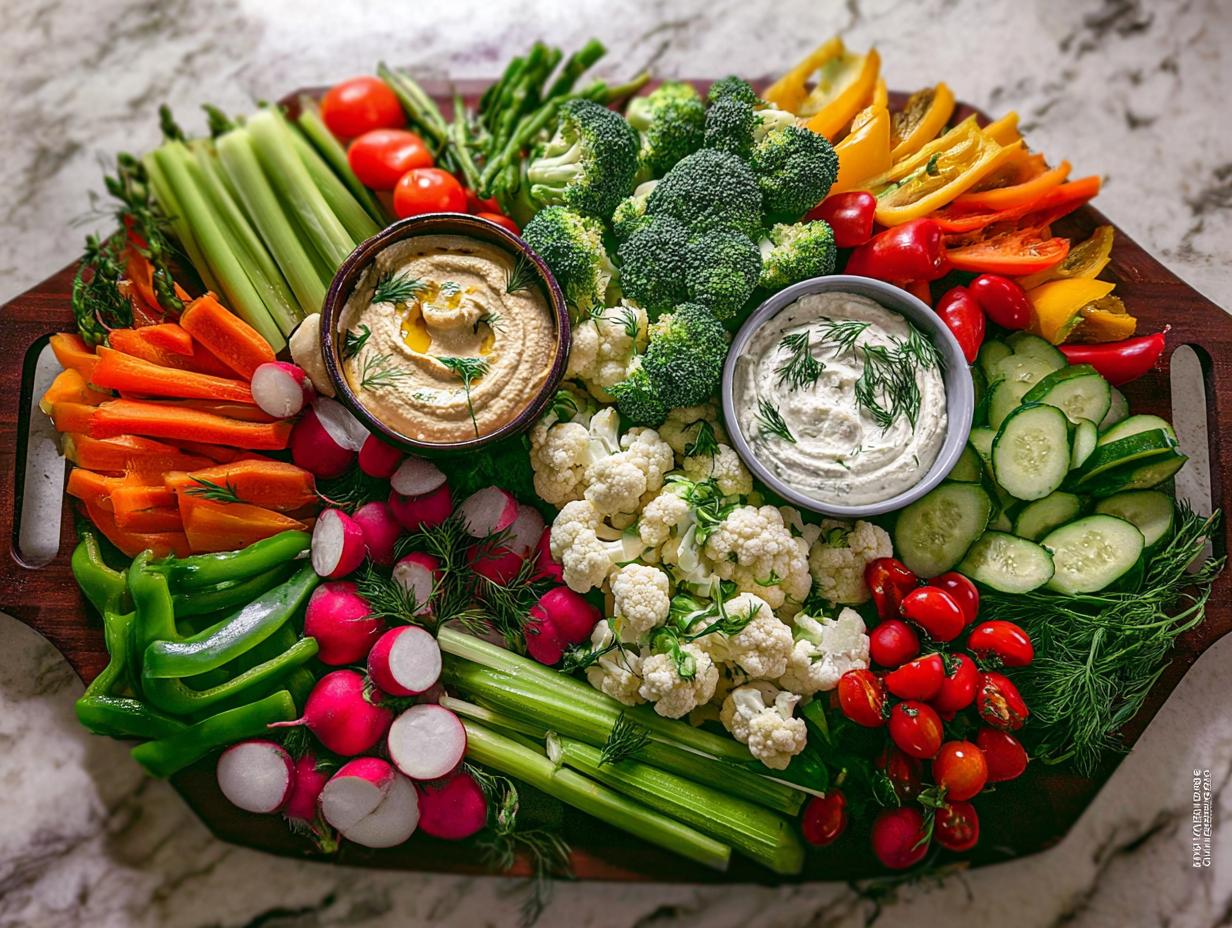
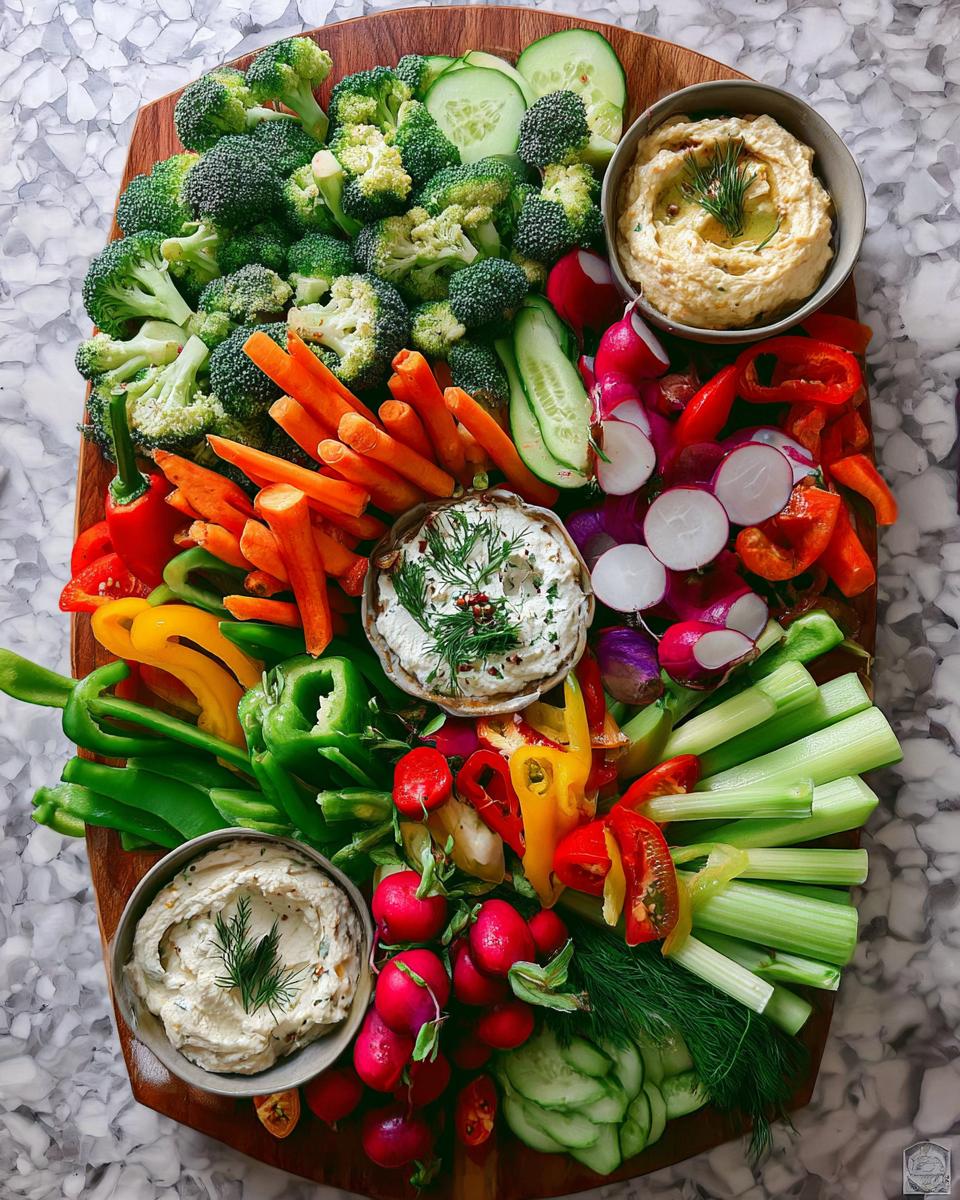
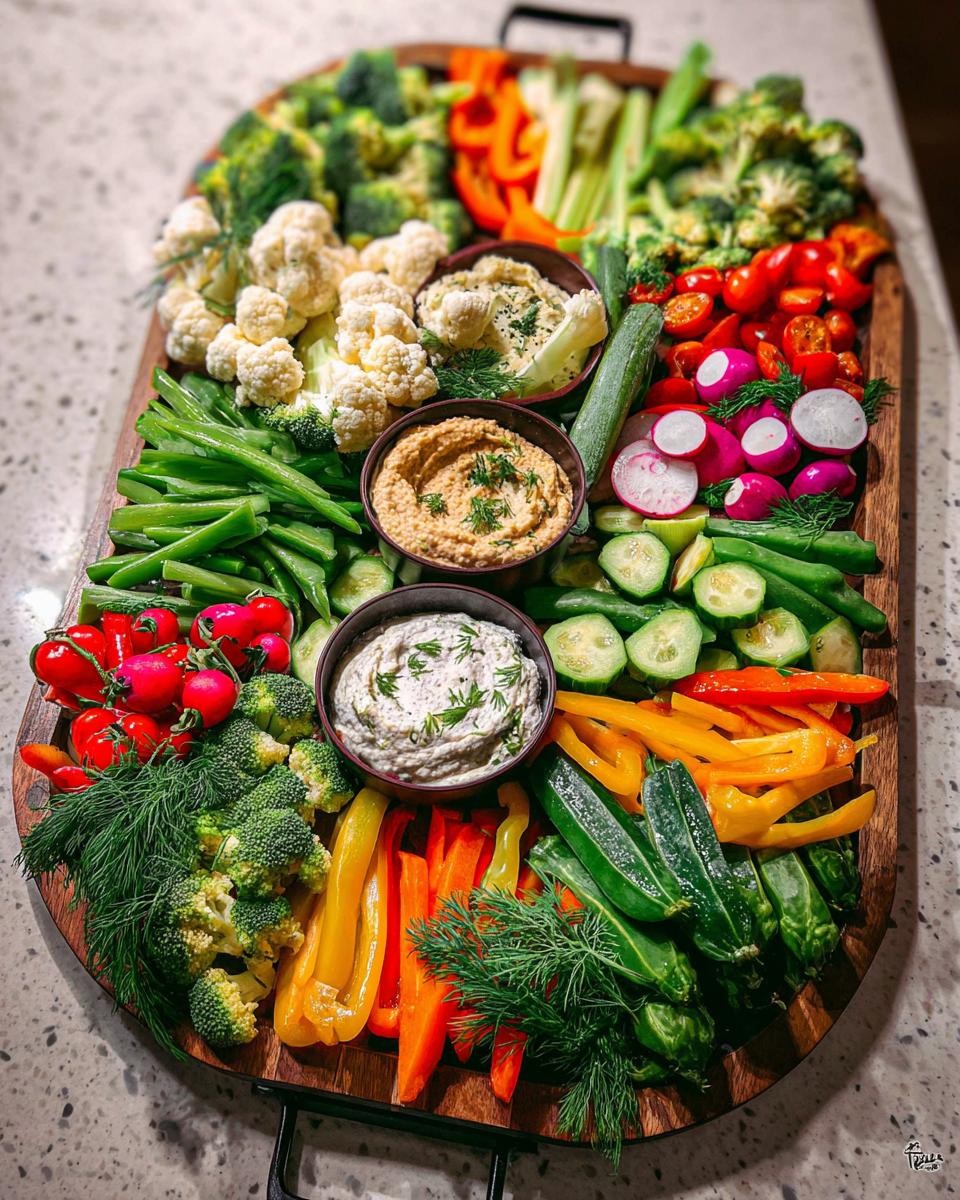
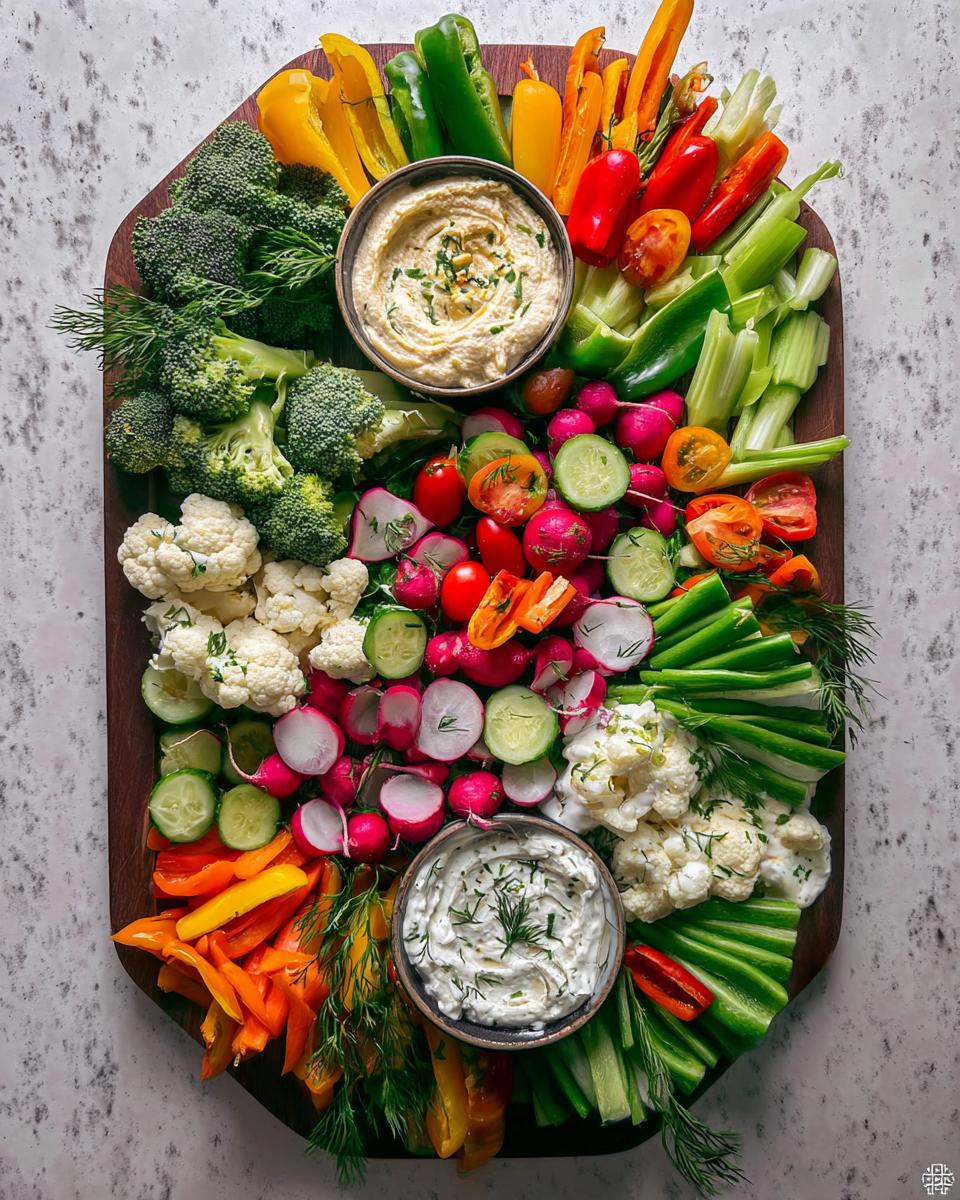
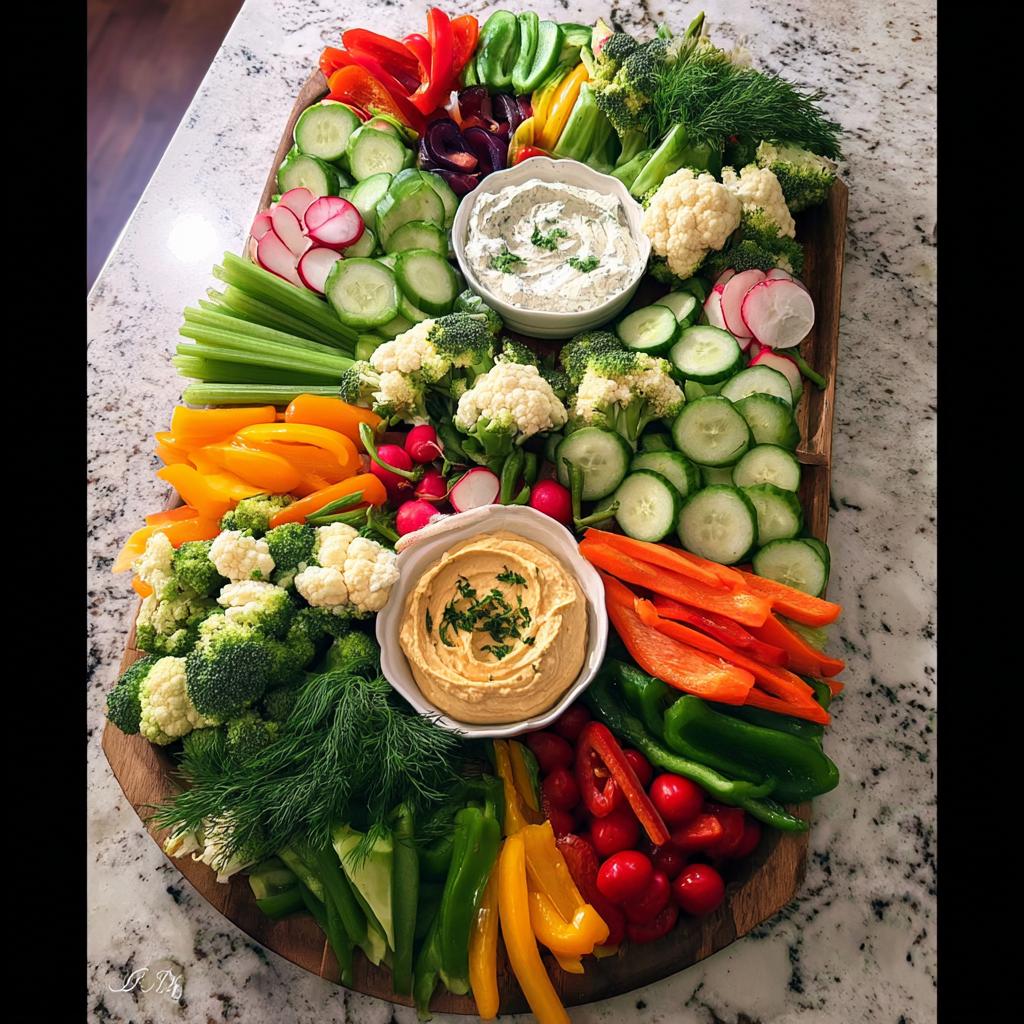
Step 2: Arrange the Thanksgiving Veggie Tray
Now for the fun part! Grab your biggest platter or a nice wooden board. Think about creating little groupings of each vegetable, or maybe a pattern that looks pretty. You can make it look like a turkey if you’re feeling extra festive (body in the middle, fan out the veggies like feathers!). Don’t forget to tuck in small bowls for your dips – they’ll be the anchors for your display.
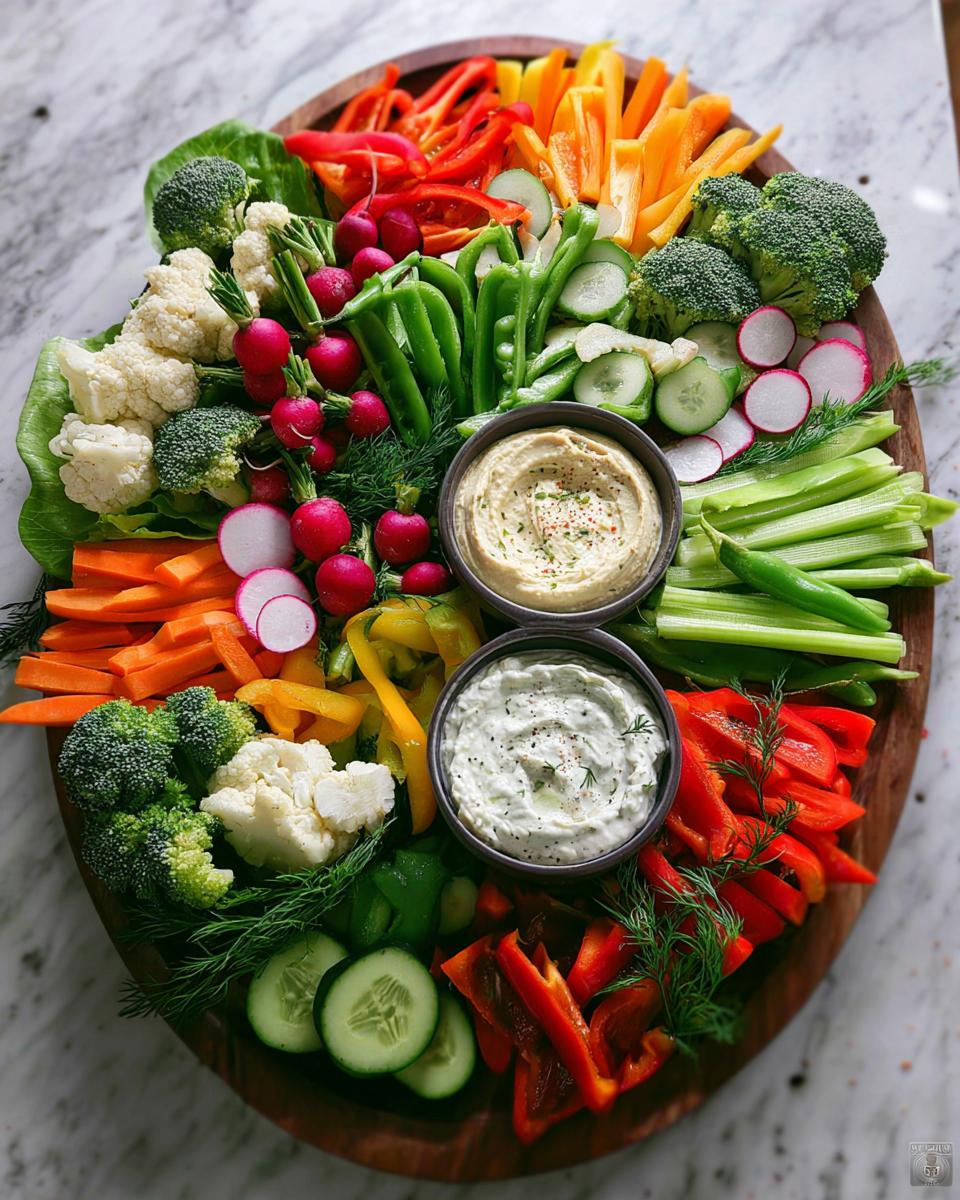
Step 3: Add Dips and Garnishes
Nestle those dip bowls into your arrangement. Spoon in your hummus, ranch, and garlic cheese spread. Time for the finishing touches! Scatter your fresh dill and parsley all over the place. It instantly makes everything look so much more professional and yummy!
Step 4: Serve Your Thanksgiving Veggie Tray
And that’s it! Your beautiful, healthy, and incredibly fast Thanksgiving appetizer is ready to wow everyone. Enjoy!
Tips for the Perfect Thanksgiving Veggie Tray
Okay, so you’ve got the basic idea down, but let’s sprinkle in a few more little secrets to make your Thanksgiving Veggie Tray in 20 Minutes (Weeknight Win) absolutely unforgettable. It’s all about those little touches that make a big difference, especially when you’re aiming for that ‘wow’ factor without the extended kitchen time!
Creative Presentation Ideas for Your Veggie Platter
Presentation is key, right? Forget just piling things on! For a *super* festive touch, try arranging your veggies into a fun turkey shape on the platter. Use carrot sticks for the body, bell peppers or cucumber slices for the ‘fan’ of tail feathers, and maybe some broccoli florets for the body’s texture. Or, just get creative with patterns – think rings of color, zig-zags, or little veggie ‘mountains’!
Make Ahead and Storage for Your Thanksgiving Veggie Tray
The best part about this tray? You can totally prep ahead! Chop all your raw veggies and store them in airtight containers in the fridge. Same goes for the dips – just pop them in little bowls or containers. Assemble the whole platter right before your guests arrive so everything stays super crisp and fresh. If you *do* end up assembling it a bit early, just cover it tightly with plastic wrap and keep it chilled!
Frequently Asked Questions about Thanksgiving Veggie Tray in 20 Minutes
Can I prepare the Thanksgiving Veggie Tray in advance?
Absolutely! You can chop all your veggies and store them in airtight containers in the fridge. The dips can also be prepped ahead. Just assemble the whole pretty platter right before guests arrive to keep everything super fresh!
What are the best dips for a holiday appetizer platter?
Beyond the hummus and ranch, think about a creamy French onion dip, a zesty spinach artichoke dip, or even a flavorful baba ghanoush. A homemade guacamole would be lovely too for a bit of a twist!
How do I create a turkey-shaped tray?
It’s easier than you think! Use a small bowl of dip for the turkey’s head, and fill it in with a beak and wattle made from a pepper or carrot. Arrange rows of colorful veggies like fanned-out bell pepper strips or carrot sticks for the ‘tail feathers’ behind it. Broccoli florets can make a cute body!
Estimated Nutritional Information
Now, nutrition can be a bit tricky since everyone uses different brands and dips, right? But as a general guide, a serving of this vibrant Thanksgiving Veggie Tray in 20 Minutes (Weeknight Win) is estimated to be around 150-200 calories, with about 8-12g of fat, 5-7g of protein, and 15-20g of carbohydrates. Remember, these numbers are just a rough idea – the actual values will depend on those dips you choose!
Share Your Thanksgiving Veggie Tray Creations!
I absolutely love it when you guys try out my recipes, and this Thanksgiving Veggie Tray in 20 Minutes (Weeknight Win) is no exception! Did you make it? Did you try my turkey shape idea, or maybe a different creative display? I’d be thrilled if you’d share your amazing photos and thoughts in the comments below. A quick rating would be awesome too!
Thanksgiving Veggie Tray in 20 Minutes (Weeknight Win)
Ingredients
Equipment
Method
- Prepare your vegetables. Wash and chop all raw vegetables into bite-sized pieces suitable for dipping. If blanching vegetables like asparagus, green beans, or snap peas, bring a pot of water to a boil, cook the vegetables for 1-2 minutes until tender-crisp, then immediately plunge them into an ice bath to stop the cooking. Drain well.
- Arrange the vegetables on a large platter or board. Create an appealing display by grouping similar vegetables or arranging them in a pattern. Consider using small bowls for the dips.
- Place the dips in small bowls on the platter. Garnish the dips with fresh dill and parsley if desired.
- Add the fresh dill and parsley as a garnish over the vegetables or around the dips.
- Serve immediately and enjoy with your guests.
Notes
Tried this recipe?
Let us know how it was!
Master of Culinary Visual Arts
My culinary journey started in the fast-paced kitchens of boutique coastal restaurants throughout Southern California, where I learned that beautiful food doesn’t have to be complicated. After nine years of professional cooking, I’ve made it my mission to prove that sophisticated, nutritionally sound meals can be accessible to busy home cooks who refuse to compromise on flavor or visual appeal.
What changed everything for me was watching talented home cooks feel intimidated by healthy cooking. That’s when I transitioned to private instruction, teaching busy professionals and families how to create restaurant-quality meals using simple techniques and ingredients they can actually find at their local grocery store. My “15-minute meal” frameworks are now used by several regional cooking schools!
As a third-generation Mexican-American, I love weaving vibrant Latin flavors into low-carb creations – proving that healthy eating can be both culturally authentic and visually spectacular. My “effortless elegance” philosophy is simple: nutritious food should look as stunning as it tastes, without requiring professional chef skills or expensive equipment.
When I’m not developing recipes in my San Diego coastal kitchen, you’ll find me surfing the local breaks with my Golden Retriever mix, Mango, who’s both my kitchen companion and unofficial taste-testing assistant. My personal low-carb lifestyle started as a way to maintain energy for my active coastal life, and it’s become the foundation for proving that healthy eating enhances rather than restricts life’s pleasures.