

There’s just something magical about a perfectly cooked plate of pasta, isn’t there? Whether it’s the comforting warmth of a creamy garlic pasta or the simple elegance of penne with just a sprinkle of parmesan, pasta is pure happiness. I vividly remember the first time I attempted to make homemade pasta from scratch. It was a rainy Saturday afternoon, and my kids were involved in their usual weekend activities—half of them wanted to help, while the other half were glued to their screens. With some flour dusting the kitchen counter and little hands eager to help, we turned the process into a fun family project. We ended up with a delightful mess, but the joy of eating that fresh pasta together made it all worthwhile. It reinforced my belief that cooking can be a shared experience, a way to connect, and a means to create memories—especially when it involves pasta. That’s why I put together this Ultimate Pasta Recipes Guide: Ingredients, Temps, Tips. As a Certified Family Nutrition Strategist, I wanted to create something genuinely helpful for busy home cooks and pasta enthusiasts alike, making delicious, homemade pasta accessible and enjoyable for everyone.
Why This Ultimate Pasta Recipes Guide: Ingredients, Temps, Tips is Your Go-To
Okay, so why another pasta guide? Because I know how hectic life gets, and sometimes you just want that amazing, fresh pasta experience without a whole production. This Ultimate Pasta Recipes Guide: Ingredients, Temps, Tips is designed to be your secret weapon! It’s packed with everything you need, whether you’re a total newbie who’s never touched pasta dough before or a seasoned pro looking to nail that perfect al dente bite. We’re talking about making delicious pasta that actually fits into your busy week. Plus, there’s just *nothing* like the feeling of pulling perfectly shaped noodles from your own pasta maker! It’s truly satisfying, and I promise it’s totally doable.
Perfect Pasta Every Time: Key Ingredients Explained
The heart of amazing homemade pasta starts with just a few simple ingredients, and honestly, using the good stuff makes all the difference. You’ve got your all-purpose flour – it’s the backbone, giving the pasta its structure. Then come the eggs; they add richness and help bind everything together beautifully. I always go for large ones, as they have the best ratio for what we need. A little bit of sea salt is crucial for flavor, just to wake everything up. And finally, a touch of extra-virgin olive oil. This isn’t just for flavor; it gives the dough a bit of suppleness, making it easier to work with and roll out. Trust me, you don’t need fancy pasta flour for these basic recipes; good quality pantry staples are what make this guide so accessible. For more amazing pasta inspiration, check out Love & Lemons’ homemade pasta recipe – they have some fantastic tips too!
Mastering Pasta Dough: Step-by-Step Preparation
Alright, let’s get our hands dirty! Making the dough is the fun part. First, pile your flour onto a clean counter and make a little well in the center – it’s like a little flour nest! Crack your eggs right into that nest, add your salt and olive oil. Now, gently start whisking the eggs with a fork, sort of pulling in a bit of the flour from the edges as you go. Keep those flour walls up as long as you can so nothing escapes! Once it starts forming a shaggy ball, it’s time for the real work. Knead that dough! It might feel super dry and unwieldy at first, and you might even think, “Oh no, what have I done?!” But stick with it, really work it for about 8 to 10 minutes. You’ll feel it transform under your hands, becoming smoother and more elastic. If it’s still a bit too dry, wet your hands slightly and keep kneading. If it’s too sticky, a whisper of flour on the counter works wonders. Once it’s smooth and cohesive, shape it into a ball, wrap it up tightly in plastic wrap, and let it take a little break at room temperature for 30 minutes. This resting period is super important; it lets the gluten relax, which makes rolling way easier. Trust me, don’t skip this part!
Essential Pasta Cooking Techniques and Temps
Okay, now that we’ve got our beautiful pasta dough made, it’s time to talk about cooking it. This is where the magic really happens, and honestly, it’s not as complicated as you might think! Getting that perfect al dente bite is the goal, and it all comes down to a few key things: lots of boiling water, a good amount of salt, and paying attention. Don’t be shy with the salt in your pasta water – it’s your only chance to season the pasta itself from the inside out! Think of it like seasoning meat; you want that flavor baked right in. As for temperature, make sure that water is at a rolling, tumbling boil before your pasta even *thinks* about jumping in. This keeps the pasta from clumping together and makes sure it cooks evenly. Different pasta shapes can take slightly different times, but fresh pasta? It’s a speedy wonder!
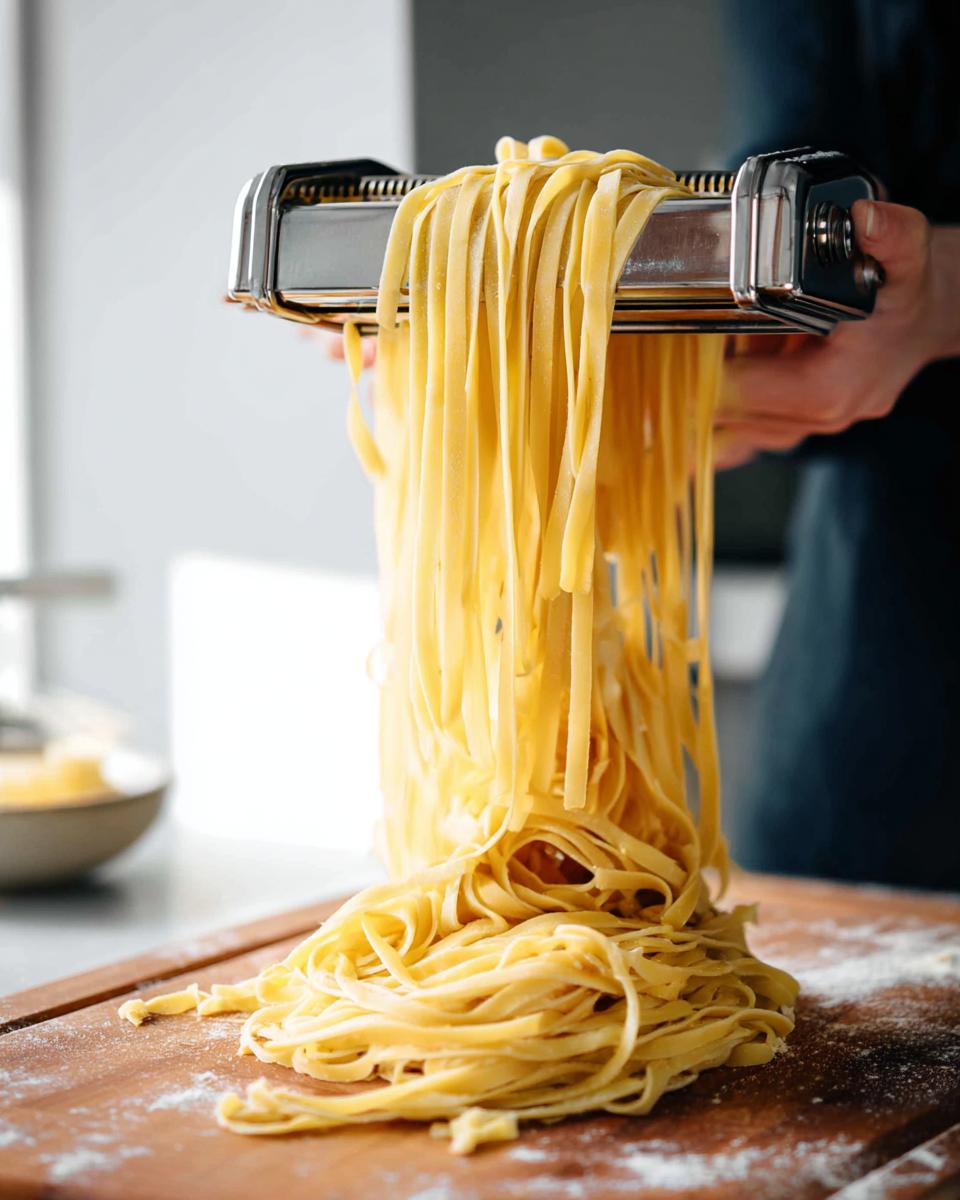
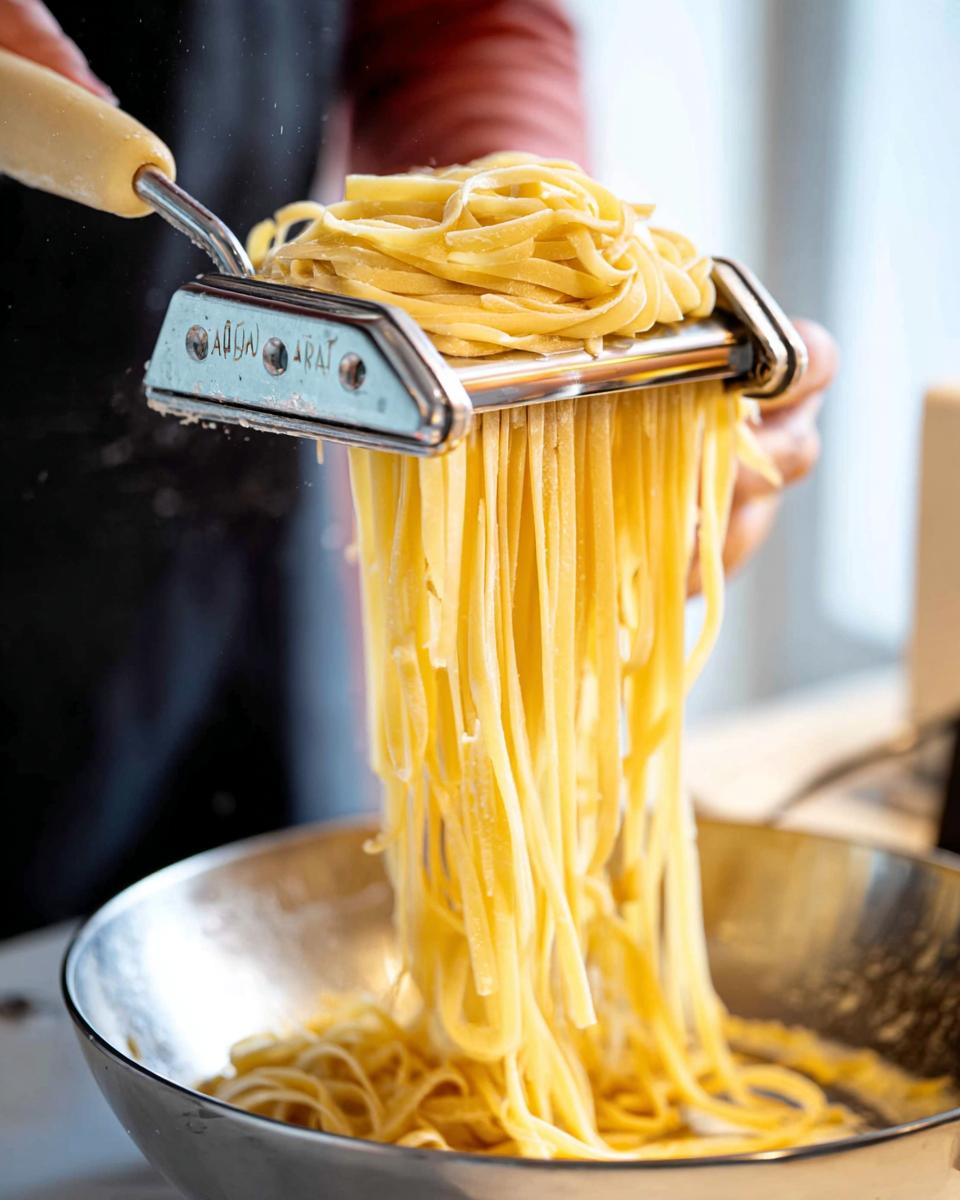
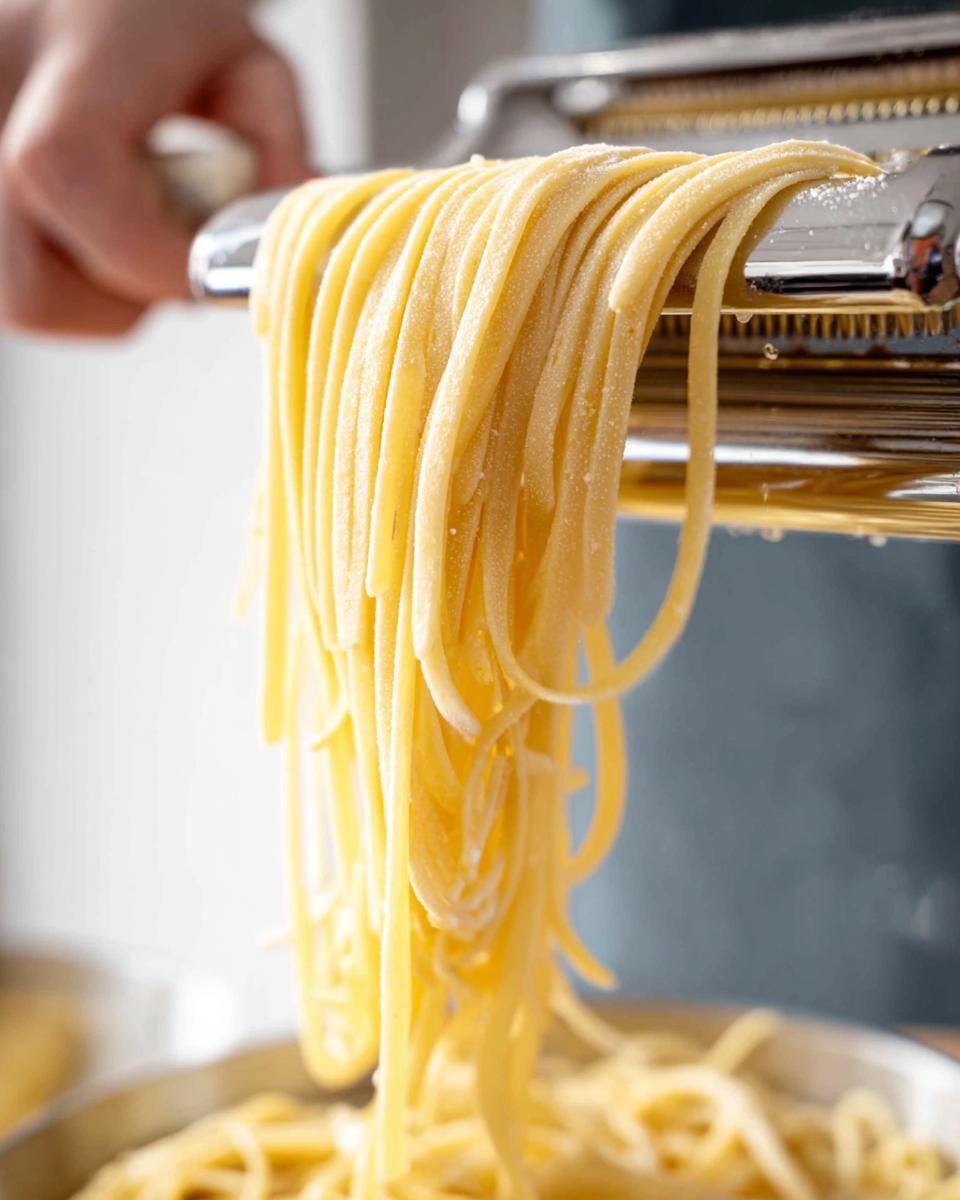
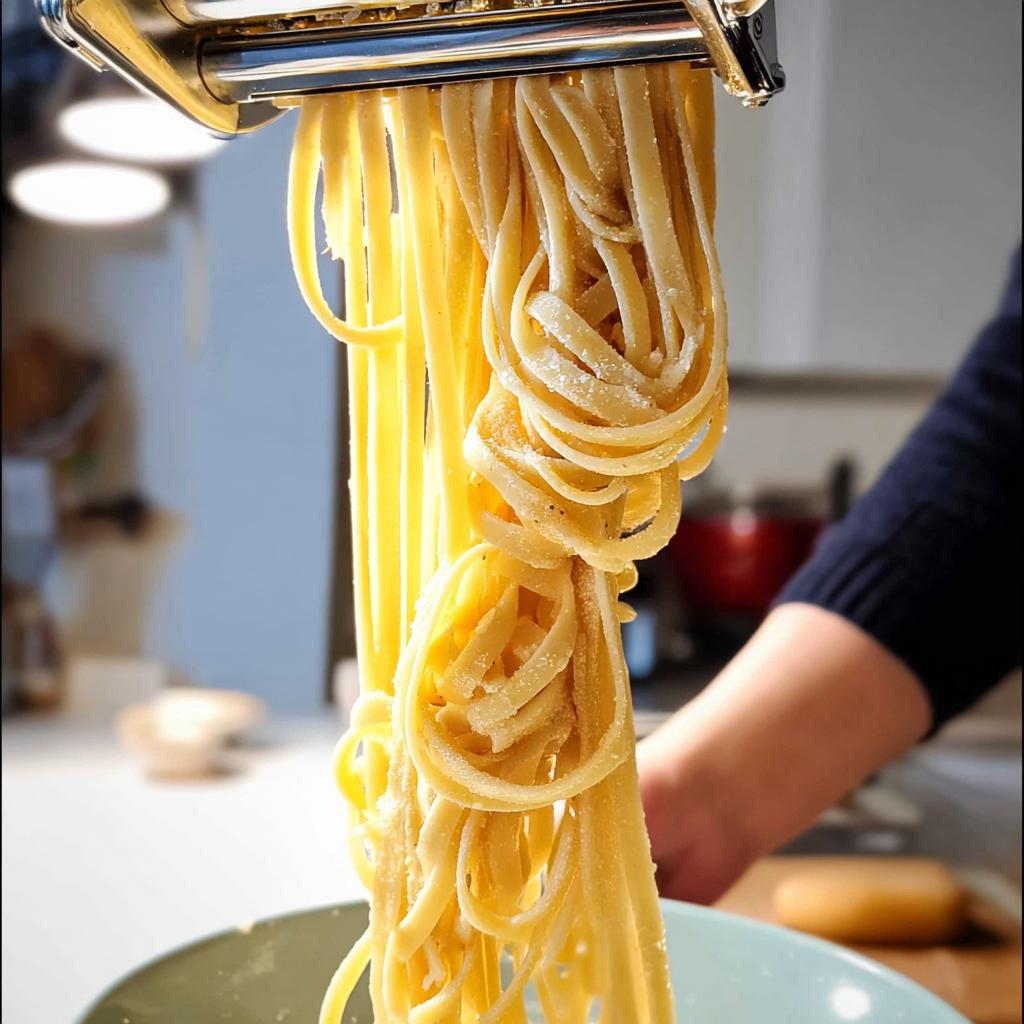
Rolling and Cutting Your Pasta
This is where your pasta maker (or a good old-fashioned rolling pin and some muscle!) really shines. We start with the widest setting on your roller, usually labeled ‘1’. Gently flatten a piece of your rested dough into an oval shape and feed it through. Fold it in half like a letter, then feed it through again on the same wide setting. Do this about three times – it really helps to smooth out the dough. Now, you’ll gradually work your way down the settings. I usually go through level 2, then level 3, maybe even level 4, and finish on level 5 or 6 depending on how thin I want it. The sheets should become progressively thinner and longer. Be sure to dust them lightly with flour as you work and feed them through, and also place them on a floured baking sheet. Once you have your perfect sheets, you can cut them! Attach your desired cutter (fettuccine, spaghetti, etc.) to your pasta maker and feed the sheets through. If you’re doing shapes by hand, just cut them freehand into ribbons or squares. Lay the cut pasta gently onto your floured baking sheets, making sure it doesn’t clump together. A little extra flour is your friend here!
Cooking Fresh Pasta: The 1-2 Minute Rule
Here’s the big secret about fresh pasta: it cooks *incredibly* fast. We’re talking about 1 to 2 minutes, tops! Seriously! Because it’s fresh and hasn’t been dried out, the water absorbs much quicker. As soon as your fresh pasta hits that glorious, salty, boiling water, it starts cooking. You’ll see it float to the top almost immediately. Once it floats, just give it another 30 seconds to a minute, and it’s usually done. How do you know for sure? The best way is to just fish out a piece and taste it! It should be tender but still have a slight bite – that perfect al dente texture. Overcooked fresh pasta can get a bit mushy really fast, so I always have a slotted spoon or spider strainer ready to go the second those bubbles start to disappear. It’s excitingly quick, and that’s part of the charm!
Tips for Ultimate Pasta Recipes Guide Success
So, you’ve made the dough, you’ve had fun rolling and cutting, and you’re ready to cook – amazing! But even with the best intentions, pasta can sometimes throw us a little curveball. That’s totally normal! This Ultimate Pasta Recipes Guide: Ingredients, Temps, Tips wouldn’t be complete without a few insider tricks to make sure your pasta dreams come true, every single time. Think of these as my little kitchen secrets that’ll help you navigate any pasta-making adventure. We all want that perfect plate, right? Let’s make sure you get it!
Troubleshooting Common Pasta Making Issues
Don’t you worry if your dough feels a little off – it happens to the best of us! If your pasta dough feels too dry and crumbly and just won’t come together, like it’s about to give up on life, just wet your hands a tiny bit with room temperature water and keep kneading. Those damp hands will help bring it all together. On the flip side, if it’s super sticky and feels like wallpaper paste, don’t panic! Just sprinkle a *little* bit of flour onto your work surface and your hands and knead it in gently. You’re aiming for smooth and elastic, never sticky. And if your cut pasta pieces seem determined to fuse into one giant noodle blob? Make sure you’re using enough flour on your work surface and the pasta sheets, and don’t let them hang out for too long before cooking. For more in-depth solutions, check out my pasta-making troubleshooting guide – it’s got the answers to all your noodle woes!

Pairing Your Pasta: Sauce and Serving Suggestions
Honestly, the pasta is just the canvas, and the sauce is the masterpiece! With fresh pasta this good, you don’t need anything too complicated. A simple yet decadent creamy garlic pasta sauce is divine – the garlic and cream just cling to the noodles perfectly. Or, keep it classic with a rich butter and parmesan sauce; you can never go wrong with a sprinkle of good quality parmesan cheese! If you’re aiming for something that brings the whole meal together in one go, of course, a one-pot pasta is always a winner for those super busy nights. Think about what flavors you love and let that guide you. Fresh pasta tastes amazing with pretty much anything, so have fun experimenting!
Frequently Asked Questions About Pasta
Got pasta questions? I’ve got answers! Making pasta from scratch is so rewarding, but it’s totally normal to have a few queries as you go. Don’t worry, these are the common ones that I get asked all the time and that I used to wonder about myself!
Can I make pasta dough ahead of time?
Oh yes, you absolutely can! Just wrap the dough really well in plastic wrap and pop it in the fridge. It’ll keep for about a day, maybe two if you’re lucky. Just let it come back to room temp for about 30 minutes before you try rolling it out – it makes life so much easier!
What’s the difference between fresh and dried pasta?
The biggest difference is texture and cooking time. Fresh pasta, like what we’re making here together, is so tender and delicate. It cooks super fast, usually just a minute or two! Dried pasta, on the other hand, is firmer and takes longer to cook, and it has a chewier bite. Both are delicious, but fresh is a whole other level of special!
How do I know when my pasta is done?
The best way? Taste it! Seriously. It should be tender but still have a slight resistance when you bite into it – that’s al dente. Fresh pasta cooks so quickly, so watch it closely. It’ll usually float to the top when it’s just about ready. A quick taste test is the foolproof method!
Estimated Nutritional Information
So, about the nutrition for this basic pasta dough itself: for roughly four servings, you’re looking at about 350-400 calories per serving, with around 12-15 grams of fat, 12-14 grams of protein, and about 45-50 grams of carbohydrates. Of course, this is just for the dough itself, and it can really change depending on your exact ingredients and how big you slice your portions. It’s a good baseline for your homemade pasta!
Share Your Pasta Creations!
And there you have it! Your very own homemade pasta adventures are ready to begin. Did you try a specific shape? Did a certain sauce become your new favorite? I’d absolutely LOVE to hear all about it! Drop your thoughts in the comments below, and if you snapped some photos, tag me on social media – I can’t wait to see your delicious pasta creations!
Ultimate Pasta Recipes Guide: Ingredients, Temps, Tips
Ingredients
Equipment
Method
- Place the flour on a clean work surface and make a nest. Add the eggs, olive oil, and salt to the center and use a fork to gently break up the eggs, keeping the flour walls intact as best as you can. Use your hands to gently bring the flour inward to incorporate. Continue working the dough with your hands to bring it together into a shaggy ball.
- Knead the dough for 8 to 10 minutes. At the beginning, the dough should feel pretty dry, but stick with it! It might not feel like it’s going to come together, but after 8-10 minutes of kneading, it should become cohesive and smooth. If the dough still seems too dry, sprinkle your fingers with a tiny bit of water to incorporate. If it’s too sticky, dust more flour onto your work surface. Shape the dough into a ball, wrap in plastic wrap, and let rest at room temperature for 30 minutes.
- Dust 2 large baking sheets with flour and set aside.
- Slice the dough into four pieces. Gently flatten one into an oval disk. Run the dough through the Pasta Roller Attachment or a pasta maker three times on level 1 (the widest setting).
- Set the dough piece onto a countertop or work surface. Fold both short ends in to meet in the center, then fold the dough in half to form a rectangle.
- Run the dough through the pasta roller three times on level 2, three times on level 3, and one time each on levels 4, 5, and 6.
- Lay half of the pasta sheet onto the floured baking sheet and sprinkle with flour before folding the other half on top. Sprinkle more flour on top of the second half. Every side should be floured so that your final pasta noodles won’t stick together.
- Repeat with remaining dough.
- Run the pasta sheets through the Pasta Cutter Attachment. Repeat with remaining dough. Cook the pasta in a pot of salted boiling water for 1 to 2 minutes.
Notes
Tried this recipe?
Let us know how it was!
Master of Global Fusion Innovation
My culinary adventure reflects my Lebanese-Italian heritage and a decade spent in the dynamic fusion restaurant scenes of Miami and Barcelona. I’ve made it my mission to prove that beloved global comfort foods can be successfully adapted for low-carb living without losing their soul, their cultural authenticity, or their ability to comfort.
With advanced training in molecular gastronomy and experience spanning Mediterranean, Middle Eastern, and Latin American traditions, I’ve developed what I call “respectful innovation” – culinary creativity that honors traditional cooking wisdom rather than replacing it. My alternative ingredient substitution systems are now taught in specialty diet cooking schools throughout the region.
Drawing from my trilingual upbringing, I understand how deeply food connects to identity and memory. That’s why my flavor-bridging techniques allow classic dishes from around the world to maintain their comforting, familiar qualities while meeting contemporary nutritional standards. I regularly share these techniques at international culinary symposiums and innovation events.
When I’m not experimenting in my Miami fusion kitchen laboratory, you’ll find me at local salsa dance venues – the rhythm and improvisation skills translate directly to my creative cooking process! My role as a foster parent to rescue rabbits has unexpectedly inspired some of my most creative plant-based low-carb innovations.
My personal low-carb journey began as a way to maintain energy for my active lifestyle, but it’s evolved into a professional mission of proving that healthy eating can be globally adventurous rather than restrictively limiting. Every recipe I create is a passport to culinary adventure, transforming kitchens into laboratories for exploring healthy versions of the world’s most beloved comfort foods.