
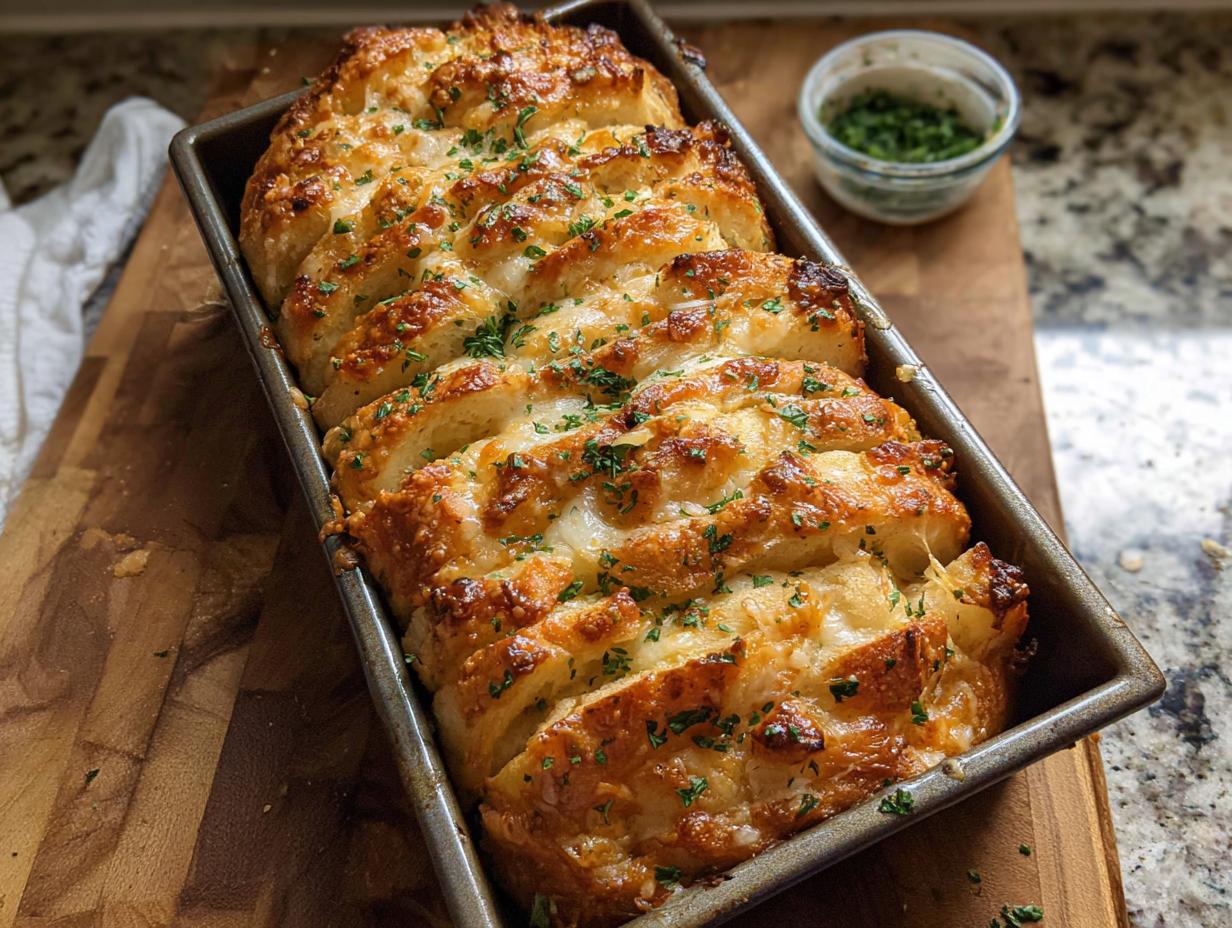
Oh my goodness, if you are looking for that ultimate comfort food that screams ‘I love you’ without me having to spend hours slaving over the stove, you’ve landed in the right spot! This recipe for Cheesy Pull-Apart Bread is honestly my absolute go-to for any gathering because it’s so incredibly easy but tastes like you tried *way* too hard. I still remember the first time I pulled that first gooey loaf out of the oven—my kids were actually excited to help tear pieces off. It’s become our Saturday night movie tradition!
As a Certified Family Nutrition Strategist, Maria Fernandez, I know that food bringing families together is what matters most. This bread proves you can have that incredible, shareable appetizer moment without sacrificing your busy schedule. Get ready for the best gooey cheese stretch you’ve ever seen!
Why This Cheesy Pull-Apart Bread is Your New Party Favorite (Shareable Appetizer)
Honestly, this bread checks every single box for busy parents like us. You get massive flavor with almost zero hands-on fuss. It truly lives up to its name as a perfect Shareable Appetizer!
- It’s ridiculously easy to assemble, getting you to the fun part fast.
- It guarantees happy faces because hello, melted cheese!
- It’s the perfect centerpiece for any casual get-together or game day spread.
Quick Assembly for Busy Weeknights
Don’t let the rising times scare you off! Most of that time is hands-off resting for the dough. Once you mix it, stuffing and stacking those cheesy layers takes maybe 15 minutes tops before it goes back in its cozy spot to nap again. Seriously, minimal effort for this level of reward.
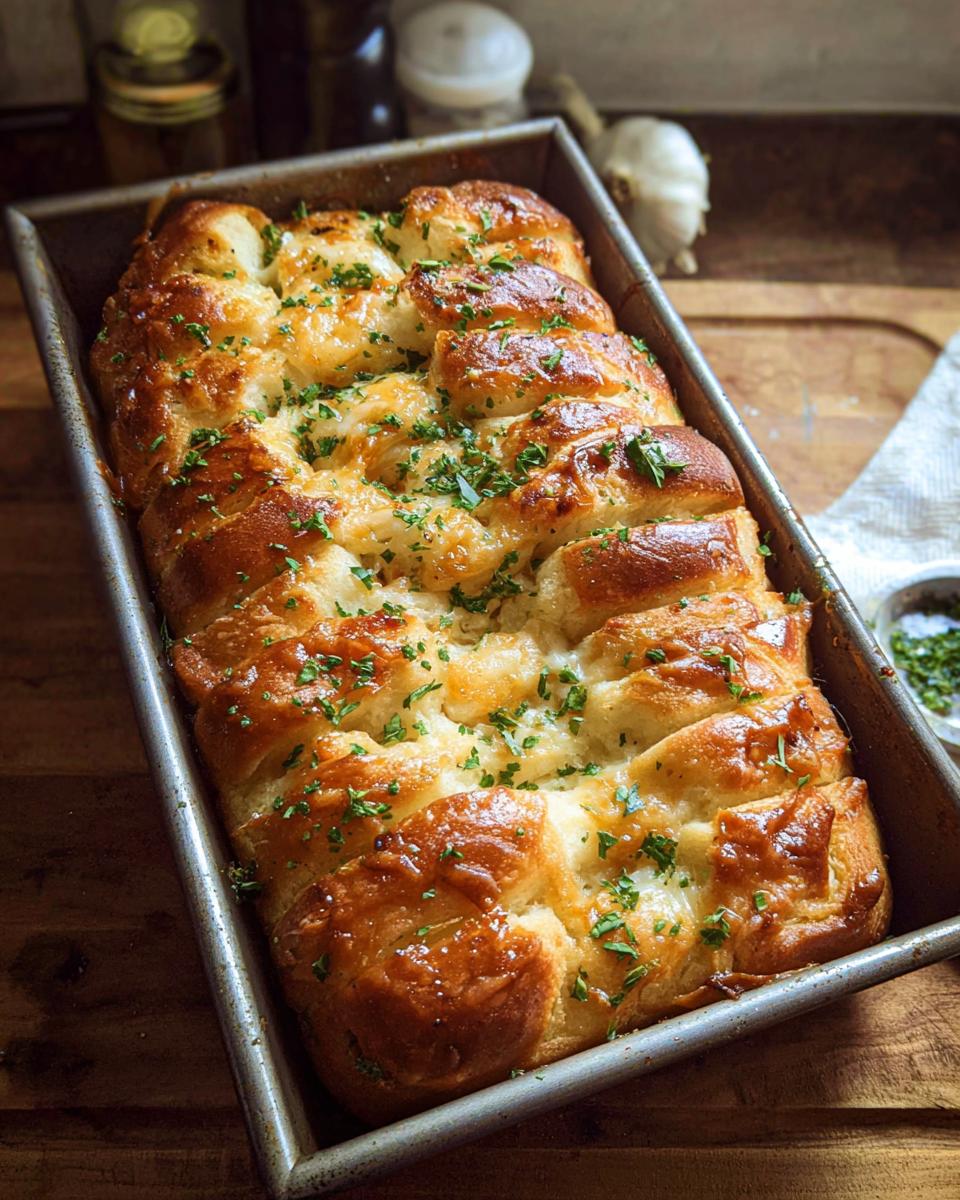
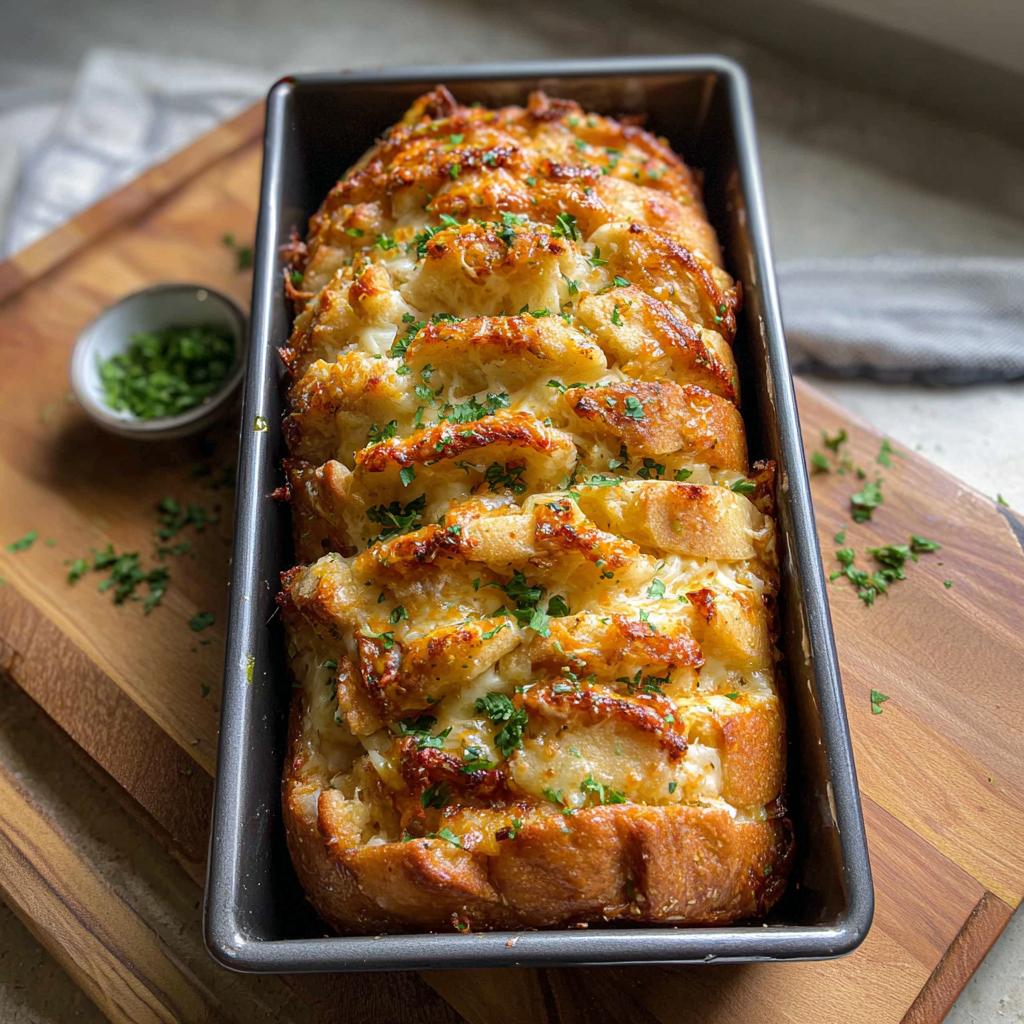
The Ultimate Gooey Cheese Experience
This is where the magic happens, folks. We use a fantastic blend of cheese to maximize that stretch factor. When you pull a piece apart? That Gooey Cheese ribbon is what makes kids (and adults, don’t lie!) go wild. It’s pure, unadulterated comfort food gold.
Gathering Ingredients for Your Cheesy Pull-Apart Bread
Okay, let’s talk about the goodies! Making bread from scratch might sound intimidating, but I promise, once you see these ingredients laid out, you’ll realize how straightforward this Pull Apart Bread really is. We’re going to break this down into three simple groups so you don’t miss a single thing. If you’re eyeing making this without the from-scratch dough, you can peek at some great alternative ideas too!
For the Dough
This is the base that gets soft and fluffy while it rests. Make sure that milk is just right!
- 2 1/4 cups all-purpose flour
- 2 tablespoons granulated sugar
- 2 teaspoons instant yeast
- 1 1/2 teaspoons kosher salt
- 3/4 cup whole milk, warmed so it’s between 105°F to 115°F – this is crucial for waking up the yeast!
- 3 tablespoons unsalted butter, softened
For the Garlic Butter Filling
This is the flavor powerhouse, so don’t skimp on the garlic and fresh parsley!
- 1/2 cup unsalted butter, softened beautifully
- 1 tablespoon garlic, minced very fine
- 1 tablespoon parsley, chopped (save a pinch for later!)
- 1/2 teaspoon kosher salt
For the Cheese and Topping
Here’s where we layer up the decadence. The blend of cheese gives us the best color and melt.
- 1 cup mozzarella cheese, shredded
- 1/2 cup sharp cheddar cheese, shredded
- 1 tablespoon melted unsalted butter (for brushing after baking)
- A little extra kosher salt for garnish
Essential Equipment for Making Cheesy Pull-Apart Bread
Okay, so before you dive headfirst into that amazing garlic butter smell, let’s make sure your kitchen is set up for success! Having the right tools makes all the difference, especially when dealing with yeasted dough. You don’t need a million fancy gadgets, but a few things are going to make this process smoother than the dough itself. We’re aiming for easy wins here, friend!
If you’re looking to stock up on some gear that makes baking less of a headache, you should definitely check out my favorite baking tools guide. But for this specific Pull Apart Bread, here’s what you absolutely need on your counter:
- A good stand mixer—trust me, anything this good deserves the dough hook attachment! Yes, you *could* knead by hand, but your arms will thank you for this one.
- One medium bowl for your initial mix. Simple enough!
- The star container: an 8 ½ x 4 ½-inch loaf pan. This specific size gives us those tall, thick stacks that bake up beautifully.
- Because dough can be sticky, grab a sheet pan lined with parchment paper. We use that for the initial stacking before transferring everything to the loaf pan.
- Finally, a wire rack for cooling down once it comes out of the oven. You never want a hot cake or bread sitting in its hot metal pan for too long!
See? Totally manageable! Prep your station, and you’re halfway to that glorious, gooey appetizer finish line.
Step-by-Step Instructions for Perfect Cheesy Pull-Apart Bread
Time to get our hands a little messy! While the stand mixer does a lot of the heavy lifting, the hands-on time here is so minimal, you’ll wonder why you didn’t make this Cheesy Pull-Apart Bread sooner. Remember, good bread takes patience, so stick with the timing for the yeast to do its wonderful work. If you need a refresher on keeping that yeast happy and active, check out my guide on yeast success! We’re working toward that perfect, soft interior!
Mixing and First Rise of the Dough
Grab that stand mixer and fit it with the dough hook. Toss in your flour, sugar, instant yeast, and salt first. Then, put it on low speed and slowly drizzle in that warm milk and the softened butter. Let it mix enough so everything just comes together—no big clumps!
Now, kick the speed up to medium and let it knead for about 5 to 6 minutes. You want it smooth and elastic, not shaggy. If your dough seems dry and won’t come together, add milk just one tablespoon at a time. If it’s too sticky, a tablespoon of flour helps. Once it looks right, move it to a greased bowl, cover it tightly, and find a warm spot. Let it hang out until it’s totally doubled, which usually takes around 1 hour and 30 minutes. Don’t rush this part!
Preparing the Filling and Assembling the Cheesy Pull-Apart Bread
While the dough is rising, you can whip up the flavor stuff! In a small bowl, mix that next half-cup of softened butter with the minced garlic, parsley, and salt until it’s a nice, fragrant spread. Keep that separate from your two cheeses—the mozzarella and cheddar—which should be mixed together in their own bowl.
Once the dough is rested, punch it down gently and divide it evenly into 12 pieces. Flatten each piece into a small, 4-inch disc. Now, spread a little of that garlic butter on each disc, sprinkle generously with the cheese mix, and then stack six discs on top of the other six. Carefully nest these two stacks into your prepared loaf pan. Cover it up again and let it proof for one more short nap—about 45 minutes this time.
Baking and Finishing Touches
About halfway through that second rise, go ahead and preheat your oven to 325°F. We want it warm and ready! Bake the loaf right there in the pan for about 45 to 50 minutes. If you notice the top is getting too dark too quickly—and it might, because of the cheese—just loosely drape a piece of aluminum foil over it for the last 15 minutes so it doesn’t burn.
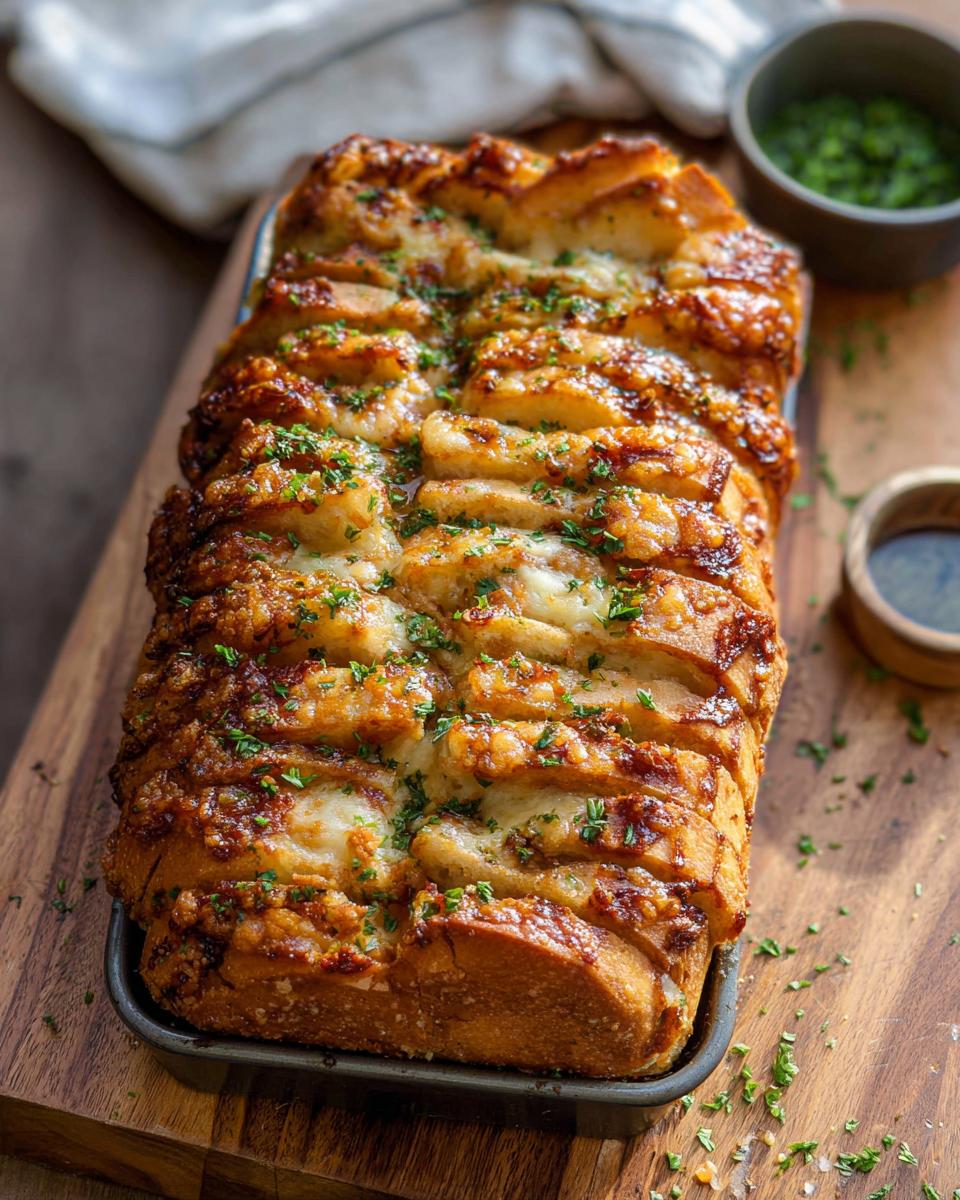
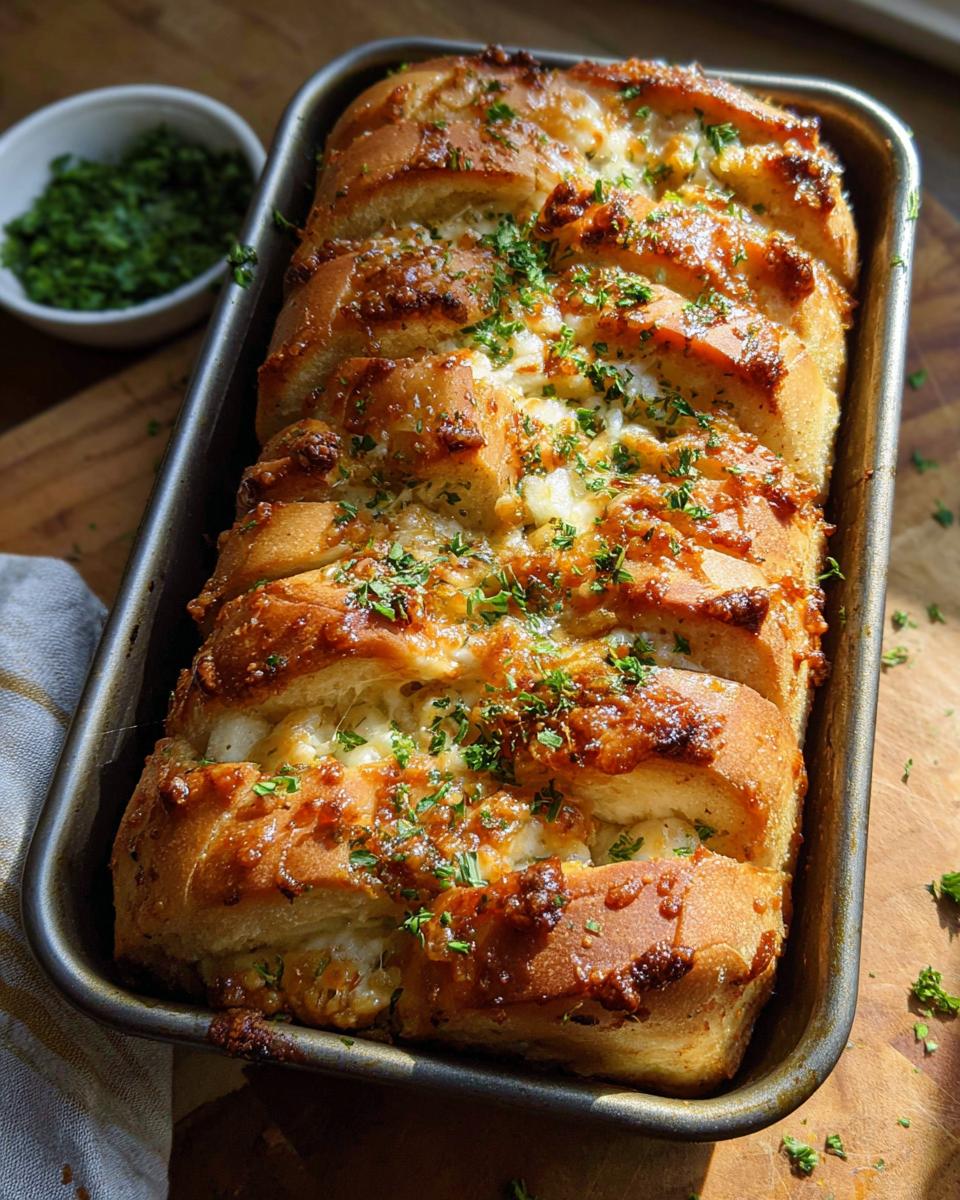
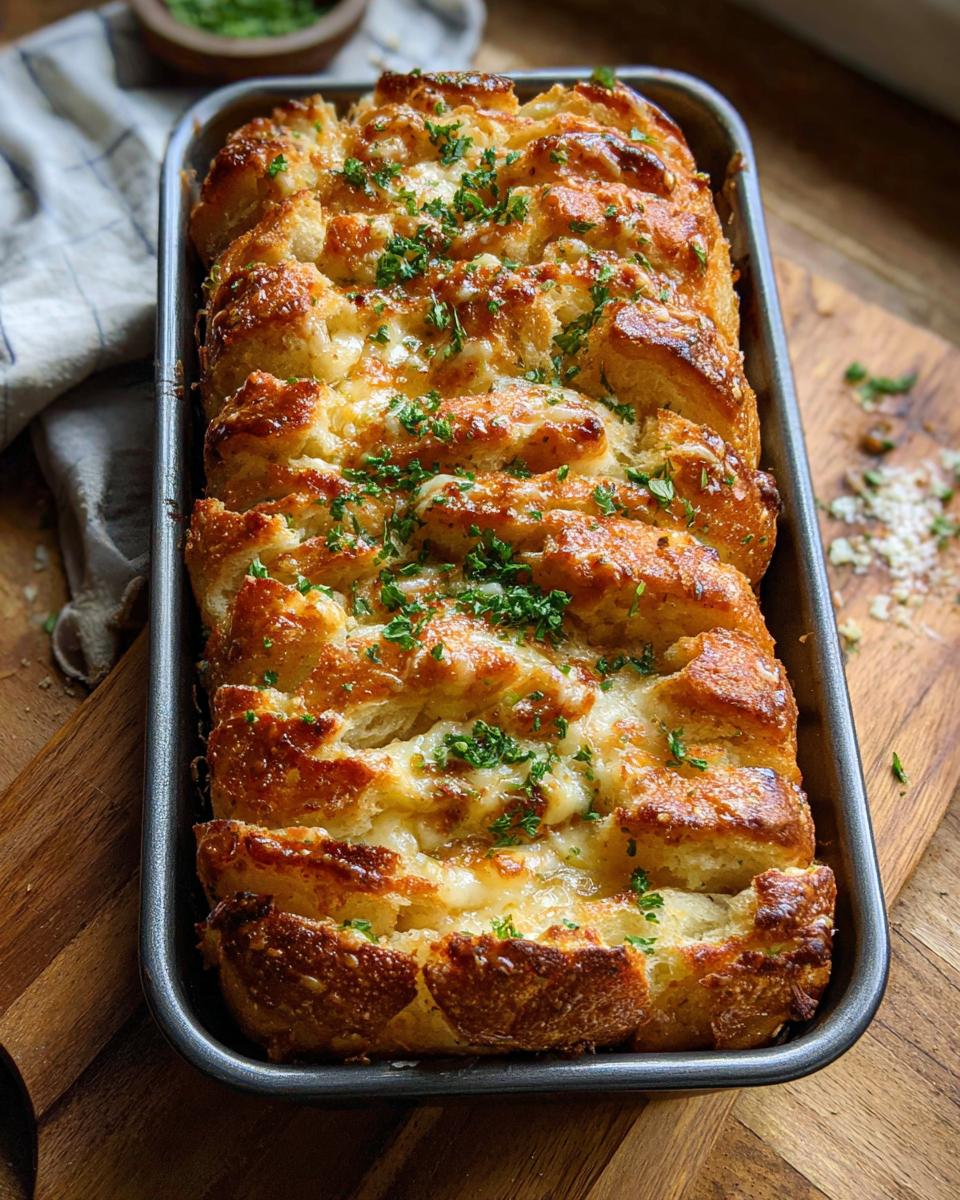
When it’s golden brown and done, pull it out and immediately set the whole pan on a wire rack to cool just a tiny bit. While it’s still screaming hot, brush that last tablespoon of melted butter all over the top, sprinkle with that extra pinch of salt, and maybe a tiny bit more parsley if you saved some. Let it set up for just 10 minutes before you dig in. Then, get ready to pull!
Tips for Success When Making Cheesy Pull-Apart Bread
Even with a simple template like this, little details can make the difference between good bread and *amazing* bread. Since we are dealing with a yeasted dough and a heavy cheese filling, getting the timing and temperatures right is key to that perfect fluffy interior and satisfying cheesy pull. Trust me, a few extra seconds here and there saves heartache later!
Temperature Control for Yeast Activation
I cannot stress this enough, especially when you are tempted to rush things! That warm milk absolutely has to be between 105°F and 115°F. If it’s too cold, your yeast just sleeps in; it won’t wake up, and your dough won’t rise. If it’s hotter than 120°F, you actually scorch the yeast and kill it dead! No rise, flat bread. So, grab a cheap thermometer or test it on your wrist—it should feel pleasantly warm, not hot. This one step guarantees you get that beautiful elasticity we need for the Pull Apart Bread.
Achieving Maximum Pull-Apart Separation
When you stack those 12 cheesy discs into the loaf pan, they are going to try to fuse together into one big brick of bread, and we don’t want that! After you carefully place those two stacks in there, use your fingertips to gently—and I mean *gently*—nudge the pieces apart a little bit. You want visible gaps between the sections standing up in the pan.
This separation is critical because it gives the dough room for that final rise, and when it bakes, the edges stay slightly distinct. That way, when you flip it out and serve it, everyone can easily grab their own piece without having to saw through the middle. It’s all about making this Party Favorite easy to share!
Serving Suggestions for This Pull Apart Bread
So, you’ve got this incredible, aromatic, cheesy masterpiece sitting on the counter—now what do you serve with it? Honestly, sometimes I think this Pull Apart Bread is a meal all on its own, especially when the kids are involved! But if you’re bringing this to a potluck or just want to round out family movie night, it pairs beautifully with just about anything hearty and casual.
Because this bread is so rich and full of gooey cheese and garlic butter, you want something that can cut through that richness a bit, or something that thrives on being dipped! If you’re planning ahead, check out my thoughts on great appetizer pairings that won’t steal the show but will complement it perfectly.
Here are a couple of ideas that always fly off the table when I bring this over:
- Marinara Sauce for Dipping: This melts the savory garlic butter right into a makeshift pizza experience. Warm up a simple jar of marinara—it’s fantastic!
- Hearty Chili or Stew: If you’re serving this in the cooler months, ripping off a piece of this cheesy goodness to soak up the last bits of chili from your bowl is just heaven.
- Simple Green Salad with Vinaigrette: For those times when you need a tiny vegetable victory, a light, acidic salad balances out how decadent this bread is. Keep the dressing light to contrast the heavy cheese.
- Game Day Spread: Alongside some chicken wings or veggie sticks, this bread disappears first every single time. It’s the ultimate relaxed party food!
It’s such a versatile Shareable Appetizer; honestly, you can just set it out and let people grab it as they please. That’s the beauty of a pull-apart recipe!
Storage and Reheating Instructions for Leftover Cheesy Pull-Apart Bread
Now, I hope there aren’t too many leftovers because this stuff is addictive! But if, by some miracle, you do have some of this amazing Cheese Bread hiding out the next day, we need to store it right so it doesn’t turn into a sad, stale hockey puck.
The absolute biggest mistake you can make is leaving it out on the counter. Since this bread has all that glorious cheese and dairy in the butter spread, you need to cover it up and get it into the fridge fairly quickly. Pop any remaining loaf into a truly airtight container. If you don’t have one big enough, wrap the slices tightly in plastic wrap first, and then seal them in a zip-top bag. It should keep reasonably well in the fridge for about three or four days.
Bringing Back the Gooey Magic
Here’s the critical part: when you reheat it, you absolutely must use the oven. I’m telling you, the microwave will turn the bread tough and chewy, and you’ll lose all that wonderful pull-apart texture you worked so hard to create in the layers.
Here’s my method for reviving that Gooey Cheese goodness:
- If you refrigerated it, let the loaf or slices sit on the counter for about 30 minutes just to take the deep chill off.
- Wrap the bread loosely in aluminum foil. This traps the moisture in while it heats up, making sure the insides steam slightly.
- Pop it into a preheated oven—around 350°F is perfect—for about 10 to 15 minutes.
If you unwrapped it for the last five minutes, you can get the exterior crust nice and crisp again. Trust me, reheating it gently in the oven brings back almost all the fresh-baked goodness. It’s still delicious the next day!
Frequently Asked Questions About Cheese Bread
I get so many questions every time I post this recipe because people want to make sure their Party Favorite turns out perfect! It’s totally normal to have questions, especially when you’re working with yeasted dough. Here are answers to the ones I hear the most often because I want everyone to succeed with this Cheese Bread!
Can I use pre-made dough instead of making the Cheesy Pull-Apart Bread dough from scratch?
Oh my gosh, yes, you absolutely can! I know sometimes time just gets away from us, and that’s okay! If you want to skip the 1 hour 30-minute initial rise, you can definitely grab a tube of refrigerated biscuit dough—you’ll probably need two cans, depending on the size. Just follow the steps where you flatten the pieces, spread the garlic butter, sprinkle the cheese, and stack them up. You can skip steps 1 through 4 completely and start right where we prepare the filling. You might need to adjust the second rise time, as the refrigerated dough sometimes needs a little longer to relax and puff up before baking, but go for it!
What is the best way to keep this bread warm before serving at a party?
When I’m expecting guests and this Cheesy Pull-Apart Bread comes out of the oven an hour before the party starts, I have a great trick. You want to keep it warm without letting the bottom soak up steam and get soggy. Once it’s cooled slightly on the rack (maybe 15 minutes), you can transfer it to a baking sheet and cover it loosely with foil. Then, set your oven temperature to the absolute lowest setting—like 170°F—and pop the covered bread in for a little warm bath. It stays beautifully warm, the cheese stays soft, and it’s ready to go when everyone arrives!
Can I substitute the cheese blend in this Pull Apart Bread?
Of course, it’s your bread! The combo of mozzarella (for stretch) and sharp cheddar (for bite) is my favorite, but feel free to experiment. Monterey Jack melts like a dream and is a fantastic swap for mozzarella if you want something milder. Pepper Jack is great if you enjoy a little kick! Just try to avoid hard, crumbly cheeses like fresh Parmesan in the filling layer, as they don’t melt and flow like we need them to in this recipe. Stick to good melting cheeses, and you cannot go wrong!
Share Your Cheesy Pull-Apart Bread Creations
Now that you’ve pulled apart your first loaf of this amazing, dreamy, cheesy bread, I just *need* to know what you thought! Seriously, leave me a comment down below—tell me if your family loved it as much as mine does, or if you managed to sneak a piece before the kids found it (I never do!). Hearing about your kitchen successes makes my whole day.
Did you tweak the cheese blend? Maybe you added some smoked paprika to the butter mix? I love seeing how you all make this recipe your own, and your feedback helps other cooks feel confident trying it out. If you took a picture of that glorious, stretching, gooey cheese moment, please tag me on social media! I usually save all those great cooking moments over on my main recipe page, so you can check out the full step-by-step card instructions there before you post your masterpiece.
Don’t be shy; rate the recipe five stars if you loved it! Happy baking, and I hope this Cheesy Pull-Apart Bread becomes a cherished tradition in your house, just like it is in mine!
Cheesy Pull-Apart Bread
Ingredients
Equipment
Method
- In the bowl of a stand mixer fitted with a dough hook, combine flour, sugar, yeast, and salt.
- With the mixer on low speed, mix in the warm milk and butter until just combined.
- Knead on medium speed for 5-6 minutes, or until smooth and elastic. If the dough is too dry, add more milk, 1 tablespoon at a time. Or, add more flour if too wet until the dough reaches the desired consistency.
- Transfer dough to a greased medium bowl. Cover with plastic wrap and let rise in a warm spot until doubled in size, about 1 hour and 30 minutes.
- While the dough rises, combine softened butter, minced garlic, chopped parsley, and salt in a small bowl. Set aside.
- In a separate bowl, combine mozzarella and cheddar cheese. Set aside.
- Spray an 8 ½ x 4 ½-inch loaf pan with nonstick cooking spray. Set out a sheet pan lined with parchment paper. Set aside.
- Punch down the risen dough and transfer to a clean surface. Divide the dough into 12 equal pieces.
- Flatten each piece into a 4-inch round disc and place onto the lined baking sheet.
- To each round disc of dough, spread the garlic butter mixture. Then, top each with an equal amount of the shredded cheese mixture.
- Create 2 stacks of 6 discs of dough. Carefully place the dough stacks horizontally into the prepared loaf pan. Gently separate the pieces slightly. Cover the pan and let rise again until almost doubled in size, about 45 minutes.
- While the dough rises for the second time, preheat the oven to 325°F.
- Bake the loaf for 45-50 minutes, or until golden brown. Cover the pan loosely with aluminum foil if the top starts to brown too quickly.
- Transfer the loaf pan to a wire rack and let cool slightly. Brush with melted butter, sprinkle with salt, and garnish with parsley before serving.
Notes
Tried this recipe?
Let us know how it was!
Certified Family Nutrition Strategist
My path into family nutrition began working with Phoenix Area Family Services, where I saw how traditional nutrition advice often ignored real-world constraints like budget limitations, time crunches, and kids who refuse to eat anything green. That experience sparked my mission to develop meal planning systems that work with family realities, not against them.
Over eight years, I’ve helped hundreds of families reduce grocery spending by 25% while dramatically improving their nutrition. My meal planning frameworks have been adopted by local wellness centers because they actually work for busy parents juggling different ages, preferences, and dietary needs in one household.
As a bilingual first-generation Mexican-American and mother of three, I personally navigate the daily challenge of feeding a family nutritiously while honoring cultural traditions and managing a household budget. My “kid-friendly low-carb” protocols show families how to gradually introduce healthier options without triggering mealtime battles or abandoning beloved family recipes.
My “realistic wellness” philosophy is straightforward: health improvements must work within existing family dynamics and financial realities to be truly sustainable. When I’m not developing meal planning systems, I’m creating portable trail snacks for our weekend family hiking adventures – because healthy eating should fuel the life you want to live.
My personal low-carb journey started after pregnancy as a way to regain energy for active parenting, and that experience continues to inform my professional commitment to making healthy eating feel supportive rather than burdensome for busy families.