

If there’s one little dish that screams “party time” at my house, it’s deviled eggs! Seriously, nothing disappears faster from a platter than these creamy, tangy bites. As a busy parent, I need appetizers that look impressive but don’t take up my whole afternoon. That’s why these Classic Deviled Eggs are my go-to recipe for everything from casual Sunday dinners to big holiday spreads. I still remember my first attempt making them for a family gathering. I was juggling nap times and last-minute grocery runs, but the excitement of serving my kids a dish that reminded me of my own childhood kept me going. I cracked those eggs open with total anticipation, mixing in what I thought was my grandmother’s secret blend. When I finally set that platter down, the look on my children’s faces was priceless—they couldn’t wait to dig in! Those little eggs sparked so much laughter and warmth in our home, reminding me that the simplest dishes make the best memories.
Why This Recipe for Classic Deviled Eggs is Your New Crowd Favorite
When you’re trying to coordinate nap schedules and soccer practice, you don’t need a fussy recipe. That’s the beauty of these eggs! They are designed for real life. If you need a guaranteed Crowd Favorite that always hits the spot, this is it. They look beautiful on any Holiday Tray but take almost no effort from start to finish.
- They are the quintessential Classic Appetizer—everyone knows them and everyone loves them!
- Zero baking required, which means your oven stays free for the main course.
- They travel wonderfully, making them perfect Picnic Food without collapsing halfway there.
Simple Steps for Perfect Classic Deviled Eggs
Honestly, what I love most is the speed. You only need about 15 minutes of active prep time before they are chilling out. It’s the perfect speed-run appetizer. You get that amazing, rich flavor without spending hours slaving over a fancy sauce or complicated dough.
Gathering Ingredients for Your Classic Deviled Eggs
Let’s talk about what you need! The beauty of this recipe is that everything is already in your fridge or pantry, most of the time. Forget hunting down crazy specialty items; these are just good, honest components delivering that nostalgic taste we all crave. We are making the filling and, if you are feeling extra fancy, a little crunchy topping that adds such a fun textural surprise. Remember, if you’re making these for a big crowd, you’ll want to double the recipe—trust me, they go fast!
Before we jump into the steps, take a peek at what you need. It’s simple, I promise! Check out this great resource if you need a refresher on what to look for when buying eggs, though any good quality large egg works wonders here.
Ingredients for the Deviled Eggs Filling
These are the core players for that creamy, perfect yolk mixture. Don’t skimp on the fresh pepper; it really wakes everything up!
- 6 large eggs
- 3 tablespoons mayonnaise
- 2 teaspoons yellow, Dijon, or horseradish mustard (Your choice here!)
- 1/4 teaspoon kosher salt (plus a little extra for tasting later)
- Freshly ground black pepper (to taste)
- 1 Paprika (just a dusting for that pretty color)
- 2 fresh chives, thinly sliced (these make it look professional!)
Ingredients for the Optional Breadcrumb Topping
This isn’t Grandma’s original way, but wow, panko adds the most amazing crackle! This totally elevates your snack from simple to spectacular.
- 1 tablespoon unsalted butter or olive oil
- 1/4 cup panko breadcrumbs
- 1/4 teaspoon garlic powder
- 1/4 teaspoon paprika
- 1 pinch kosher salt
Expert Equipment Needed for Classic Deviled Eggs
Okay, we don’t need fancy gadgets for these fantastic Classic Deviled Eggs, but having the right tools definitely makes cleanup way easier. You want things to move quickly, right? So let’s make sure your kitchen is set up before you even start boiling anything.
The most important thing is having a big enough bowl for mixing the yolks once they come out of the shell. If your mixing bowl is too small, you’ll end up wearing half the filling! Here is what you need lined up for the job:
- A good medium saucepan for boiling the eggs perfectly.
- A large bowl, reserved specifically for the ice water bath—this step is non-negotiable!
- A regular large bowl to mash your cooked yolks in.
- If you chose to make the crunchy topping, a small skillet is necessary to toast those panko breadcrumbs until they’re golden brown.
- A nice serving platter; you want something visually appealing to show off your finished Crowd Favorite!
- A simple fork for smashing those yolks until they are smooth.
- And finally, either a small plastic sandwich bag or a proper piping bag with a wide tip. Piping just makes them look so neat, but you can totally use two spoons if you’re in a pinch!
Step-by-Step Instructions for Classic Deviled Eggs
Alright, now for the fun part! I know boiling eggs can feel intimidating if you’ve ever had trouble peeling them, but I promise this method works like a charm every single time. The key here is timing. We aren’t simmering them gently; we are using heat shock to make them let go of the shell easily. Keep your timer handy, because missing that 10-minute mark can make all the difference!
Perfectly Boiling and Cooling the Eggs
First things first: get those 6 large eggs into your medium saucepan and just cover them with cold water. Crank that heat up high until it comes to a rolling boil. The second it starts boiling furiously, take the pan right off the burner, slap that lid on tight, and let them sit and steam peacefully for exactly 10 minutes. Don’t peek! Once the timer buzzes, immediately scoop those hot eggs out and into your ice water bath—and I mean immediately. They need that shock to stop cooking and separate from the shell. Let them chill there for at least 2 minutes. This cooling time is crucial; I sometimes leave them in there longer while I prep the filling. Once they are cool enough to handle, crack and peel them gently. Cut them nice and clean lengthwise and place those beautiful whites cut-side up on your platter; you’re ready for the next step!
Preparing the Flavorful Filling for Classic Deviled Eggs
Now we turn those cooked yolks into magic! Spoon every single one of those bright yellow yolks into your mixing bowl. Mash them up with a fork until they are as fine and crumbly as possible—no big chunks allowed! Once you have a nice sandy texture, add your creamy binder: 3 tablespoons of mayonnaise and 2 teaspoons of mustard. Mix that until it’s smooth. This is your moment to taste, my friend. Sprinkle in that 1/4 teaspoon of salt and a good few turns of black pepper. Go ahead, taste a little bit of the filling! Does it need more zing? More salt? Adjust it right now, because once it’s in the whites, it’s done! Don’t forget to quickly mix up that crunchy breadcrumb topping in a separate skillet if you’re using it now, toasting those panko until they smell nutty.
Assembling and Garnishing Your Deviled Eggs
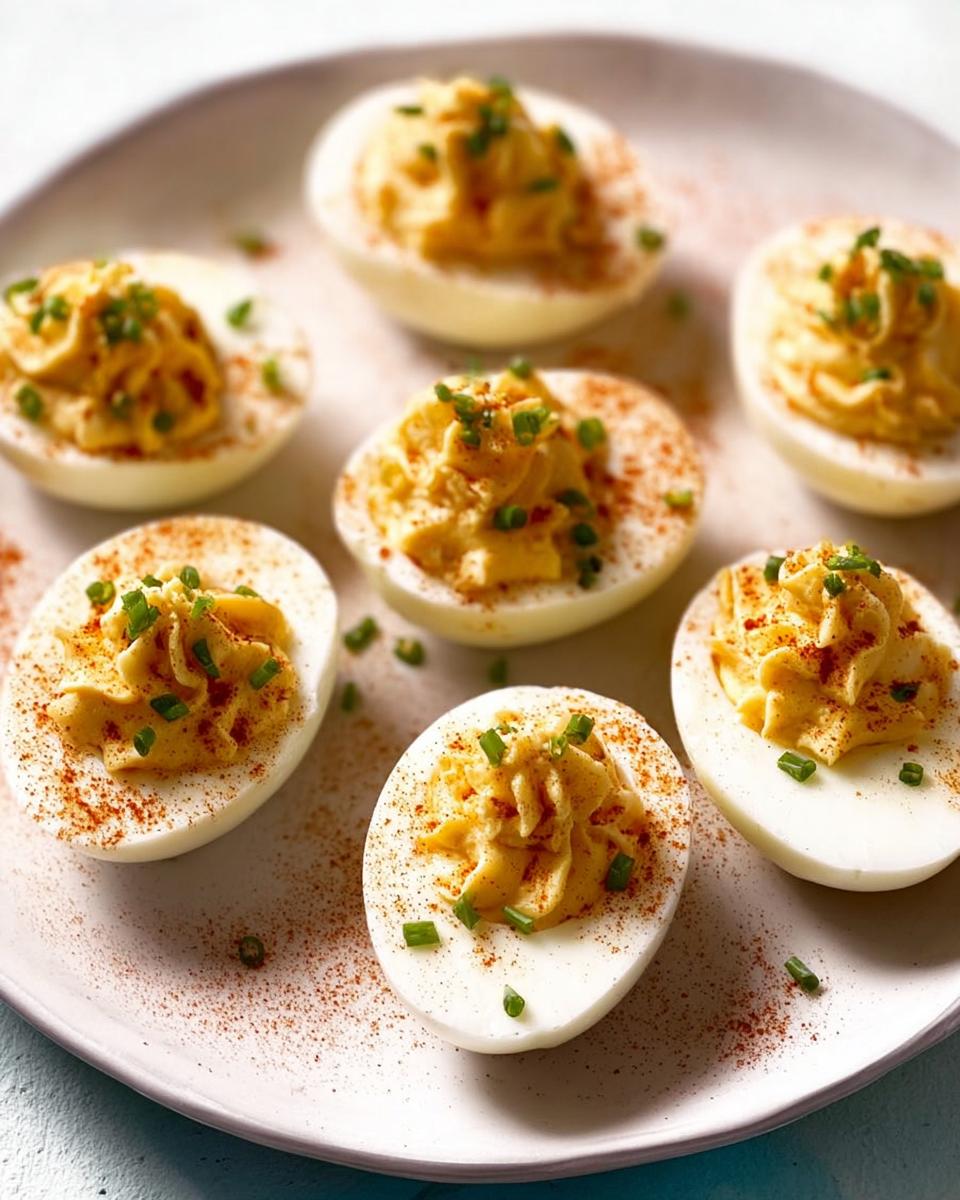
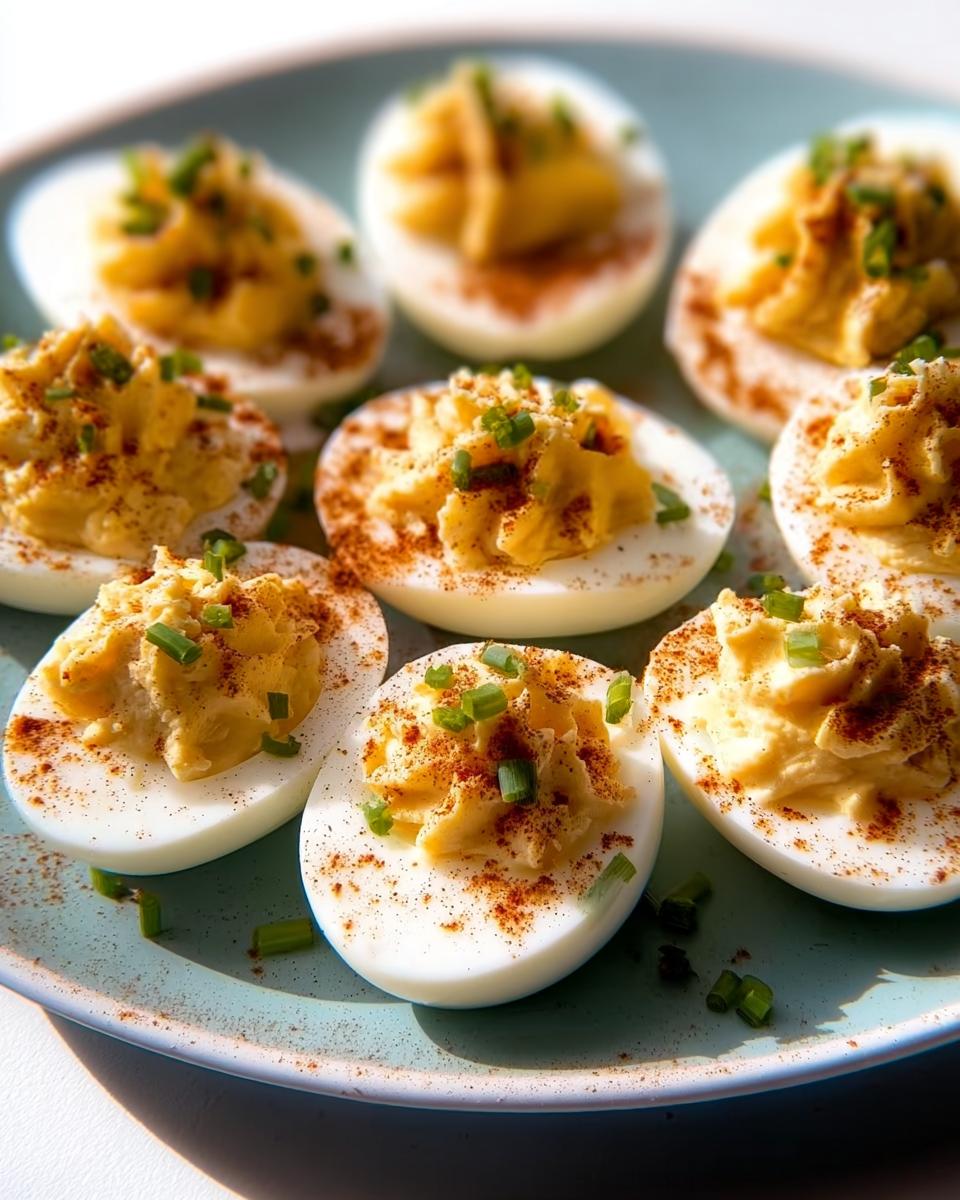
For the prettiest presentation, grab that plastic bag or piping bag you readied earlier. Spoon all that amazing filling into the bag and snip off a corner—a medium snip works fine. Squeeze a nice mound of filling back into each egg white cup. If you don’t have a piping bag, don’t panic; just use two spoons to make little nests of filling! Once they are all filled, it’s time for the finishing touches. Sprinkle the optional toasted breadcrumbs lightly over the top. Then, dust everything with a little bit of paprika for color and scatter your thinly sliced fresh chives over the top. I like to keep about half of mine plain, just relying on the paprika, because it reminds me of the really simple, old-school versions I grew up with! For a fun, slightly different flavor, you can check out some variations on filling mixes here: discover tasty deviled egg fillings.
Tips for Success When Making Classic Deviled Eggs
Listen, I’ve learned most of these tricks the hard way, usually by serving a platter that was slightly… off. The biggest pitfall is overcooking the eggs. Trust me, if you cook them past that 10-minute mark in the hot water, they get that nasty green ring around the yolk, and frankly, it ruins the whole vibe. That green stuff means rubbery whites, and nobody wants that!
For the smoothest filling, you cannot rush mashing those yolks. I try to press them through a fine mesh sieve once if they feel too lumpy—it’s extra work, but oh my goodness, the texture is like silk! I messed up once by only using yellow mustard; the filling was a bit flat. Now, I always mix yellow mustard with a tiny dab of Dijon for that necessary sharp kick. Try this blend—it makes a huge difference in balancing the richness of the mayo.

Serving Suggestions for Your Classic Appetizer
These little beauties might be the simplest Classic Appetizer you ever make, but don’t let that fool you—presentation is everything! I always arrange mine on a bed of crisp lettuce leaves, maybe a sprinkle of fresh dill if I have some on hand. It just looks so much more appealing and keeps them from sliding around on the platter. They are the perfect addition to any busy picnic basket because they hold up so well once they’re chilled. If you’re planning a big spring gathering or a summer BBQ, they are absolute required eats! You should absolutely check out some ideas for complementary appetizers here: dishes that pair well with deviled eggs.
Storage and Transport Tips for Classic Deviled Eggs
The crucial part about any great Picnic Food is how well it travels and how long it stays yummy! Since these Classic Deviled Eggs are mostly mayonnaise, they need to stay cold, plain and simple. Never, ever leave them sitting out on the buffet table for more than two hours—honestly, I aim for less than one hour if it’s a super hot day. That rich filling doesn’t like hanging out in the danger zone!
When I need to take them somewhere, like the Fourth of July BBQ, I have a specific system. First, I never garnish them right away. I pipe the filling, cover the whole platter loosely with plastic wrap, and seal it tight with a big rubber band around the edges. Then, I nestle the whole thing into a cooler packed tightly with ice packs underneath and around the sides. That keeps them safe and chilled right up until serving time. You can find some great specialized containers for transport here, which I highly recommend: check out my favorite transport solutions.
If you’re making these ahead of time—which you totally can, and I often do—here is my rule: You can boil and peel the eggs a day ahead, storing them airtight in the fridge. But please, please, please wait to mix up the yolk filling until the day you plan to serve them, or at the very latest, the morning of! That keeps the flavor bright and prevents the filling from getting too loose or watery. They stay absolutely perfect when assembled and kept cold for about 12 hours like that.
Frequently Asked Questions About Classic Deviled Eggs
I get so many questions about these things every time I bring them to a party! It seems like everyone has a slightly different way they remember their grandma making them. But don’t worry, these are the most common things folks ask me when they try out my recipe for the first time. I want your Classic Appetizer to be perfect! If you try this recipe and love it, please share your thoughts in the comments section below; your feedback helps others feel confident trying it out for their own family gatherings!
Can I make the filling for Classic Deviled Eggs ahead of time?
You absolutely can make the yolk filling! Like I mentioned before, you can actually make the filling two days ahead of time and keep it tightly sealed in the fridge. But here is the real secret, which I learned the hard way: don’t put the filling into the egg whites until you are ready to serve, or at least within a few hours. If you fill them early, the moisture from the filling can start to weep into the egg white, making the bottom a little soggy, and you definitely don’t want that when you’re trying to make a pretty Holiday Tray!
What is the best mustard to use for a classic flavor?
This is where great debate happens! The recipe calls for yellow, Dijon, or horseradish, and all three work. If you want that super traditional, bright yellow, slightly vinegary taste that you remember from childhood gatherings, you must use the yellow mustard. I personally love to mix it: I use two teaspoons of yellow mustard and just a half teaspoon of Dijon. It gives that classic look but adds a little sophisticated complexity, which balances the richness of the mayo perfectly. If you want a real kick, horseradish is your friend, but I save that for when I’m just making a small batch for us!

Estimated Nutritional Data for Classic Deviled Eggs
Now, I know when we’re whipping up beloved appetizers like these Classic Deviled Eggs, we aren’t exactly counting every single calorie—we are trying to enjoy the party! But since I’m a certified family nutrition strategist, I always like to give you a heads-up on what’s in these delicious bites. Keep in mind that these numbers are calculated based on the ingredients listed above, assuming 12 perfect servings, and they can change wildly depending on which brand of mayonnaise or mustard you happen to snag at the store.
Think of this as a good guideline to keep your picnic planning balanced! If you are very conscious of fat content, you can always swap half the mayo for plain Greek yogurt, but I won’t tell Grandma if you don’t! Here’s a ballpark estimate:
- Calories: Approximately 85-95 calories per egg half
- Fat: Around 7-8 grams (mostly from the yolk and mayo)
- Protein: About 3 grams (eggs are mighty!)
- Carbohydrates: Less than 1 gram
As you can see, they are high in healthy fats and protein, which actually makes them quite satisfying! Enjoy them guilt-free as the ultimate Crowd Favorite at your next event!
Share Your Favorite Holiday Tray Creations
I always feel so connected to all of you when I see photos of your finished dishes! Making these Classic Deviled Eggs isn’t just about following steps; it’s about making them your own. Did you swap in some smoked paprika? Did you use a fancy ruffled tip on your piping bag? Whatever fresh twist you tried on this recipe, I want to see it!
Please, take a minute to leave a star rating for this recipe right below. It helps other busy parents and home cooks feel confident taking the leap into making this classic appetizer. And if you have a moment, drop a comment telling me who you served them to and what the reaction was! I absolutely love hearing about them making an appearance on your family’s next big Holiday Tray or your summer picnic spread.
If you snap a picture while you’re garnishing or serving, tag me on social media! I’m always looking for sweet inspiration. You can find more fun ideas for simple but tasty party appetizers right here when you’re planning your next big event: see other must-make party food ideas. Happy cooking, everyone, and thanks for bringing these delicious memories into your own kitchens!

Classic Deviled Eggs
Ingredients
Equipment
Method
- Place 6 large eggs in a medium saucepan and add enough cold water to cover the eggs by 1 inch. Bring to a boil over high heat. Remove the saucepan from the heat. Cover and let sit for 10 minutes. Meanwhile, prepare an ice water bath by filling a large bowl halfway with ice and water. Make the breadcrumbs if desired.
- Melt 1 tablespoon unsalted butter or heat 1 tablespoon olive oil in a small skillet over medium heat. Add 1/4 cup panko breadcrumbs and cook, stirring constantly, until fragrant and toasted, 1 to 2 minutes. Remove the skillet from the heat. Add 1/4 teaspoon garlic powder, 1/4 teaspoon paprika, and 1 pinch kosher salt. Stir to combine and transfer to a small bowl.
- When the eggs are ready, remove them from the hot water. Tap each egg against the counter to crack the shell in a few places. Transfer to the ice water bath and let sit until cool, at least 2 minutes.
- Remove the eggs from the water and peel. Halve the eggs lengthwise. Carefully remove the yolks and transfer to a small bowl. Place the egg whites on a platter cut-side up.
- Use a fork to mash the yolks as finely as possible. Add 3 tablespoons mayonnaise; 2 teaspoons yellow, Dijon, or horseradish mustard; and 1/4 teaspoon kosher salt. Stir to combine. Taste and season with black pepper and more kosher salt as needed.
- Transfer the filling to a small plastic bag or piping bag fitted with a 1/2-inch tip. If using a plastic bag, snip off one bottom corner. Pipe the filling evenly among the egg whites (about 1 heaping tablespoon per deviled egg). Garnish with the toasted breadcrumbs if using, paprika, and thinly sliced chives.
Notes
Tried this recipe?
Let us know how it was!
Certified Family Nutrition Strategist
My path into family nutrition began working with Phoenix Area Family Services, where I saw how traditional nutrition advice often ignored real-world constraints like budget limitations, time crunches, and kids who refuse to eat anything green. That experience sparked my mission to develop meal planning systems that work with family realities, not against them.
Over eight years, I’ve helped hundreds of families reduce grocery spending by 25% while dramatically improving their nutrition. My meal planning frameworks have been adopted by local wellness centers because they actually work for busy parents juggling different ages, preferences, and dietary needs in one household.
As a bilingual first-generation Mexican-American and mother of three, I personally navigate the daily challenge of feeding a family nutritiously while honoring cultural traditions and managing a household budget. My “kid-friendly low-carb” protocols show families how to gradually introduce healthier options without triggering mealtime battles or abandoning beloved family recipes.
My “realistic wellness” philosophy is straightforward: health improvements must work within existing family dynamics and financial realities to be truly sustainable. When I’m not developing meal planning systems, I’m creating portable trail snacks for our weekend family hiking adventures – because healthy eating should fuel the life you want to live.
My personal low-carb journey started after pregnancy as a way to regain energy for active parenting, and that experience continues to inform my professional commitment to making healthy eating feel supportive rather than burdensome for busy families.