

Oh, when the occasion calls for something truly special, you just can’t rely on plain old chocolate chips, right? I live for those moments when baking steps up to meet the celebration head-on! That’s why I’m obsessed with sharing my recipe for the most elegant **Champagne Sugar Cookies**. I vividly remember the first time I discovered the magic of these cookies. It was a New Year’s Eve gathering, and I wanted something that would really elevate the party. As I mixed the flour, sugar, and just a splash of bubbly, I could hardly contain my excitement. The moment I pulled those golden, star-shaped beauties from the oven, their sweet champagne aroma filled my kitchen, and I knew I had a real hit on my hands. They truly turn simple baking into a delightful memory!
Why You Will Love These Champagne Sugar Cookies (Experience & Flavor)
Honestly, these aren’t just cookies; they’re little edible party favors! They bring a sophisticated touch to any table without demanding five hours of your day. Seriously, once you taste the subtle, bright note from the reduction in the dough, you’ll realize why these **Champagne Cookies** are so much more interesting than standard sugar cutouts.
Key Benefits of Making Champagne Sugar Cookies
- They offer a wonderfully light, crisp texture that melts in your mouth.
- The subtle bubbly flavor makes them truly unique for festive events.
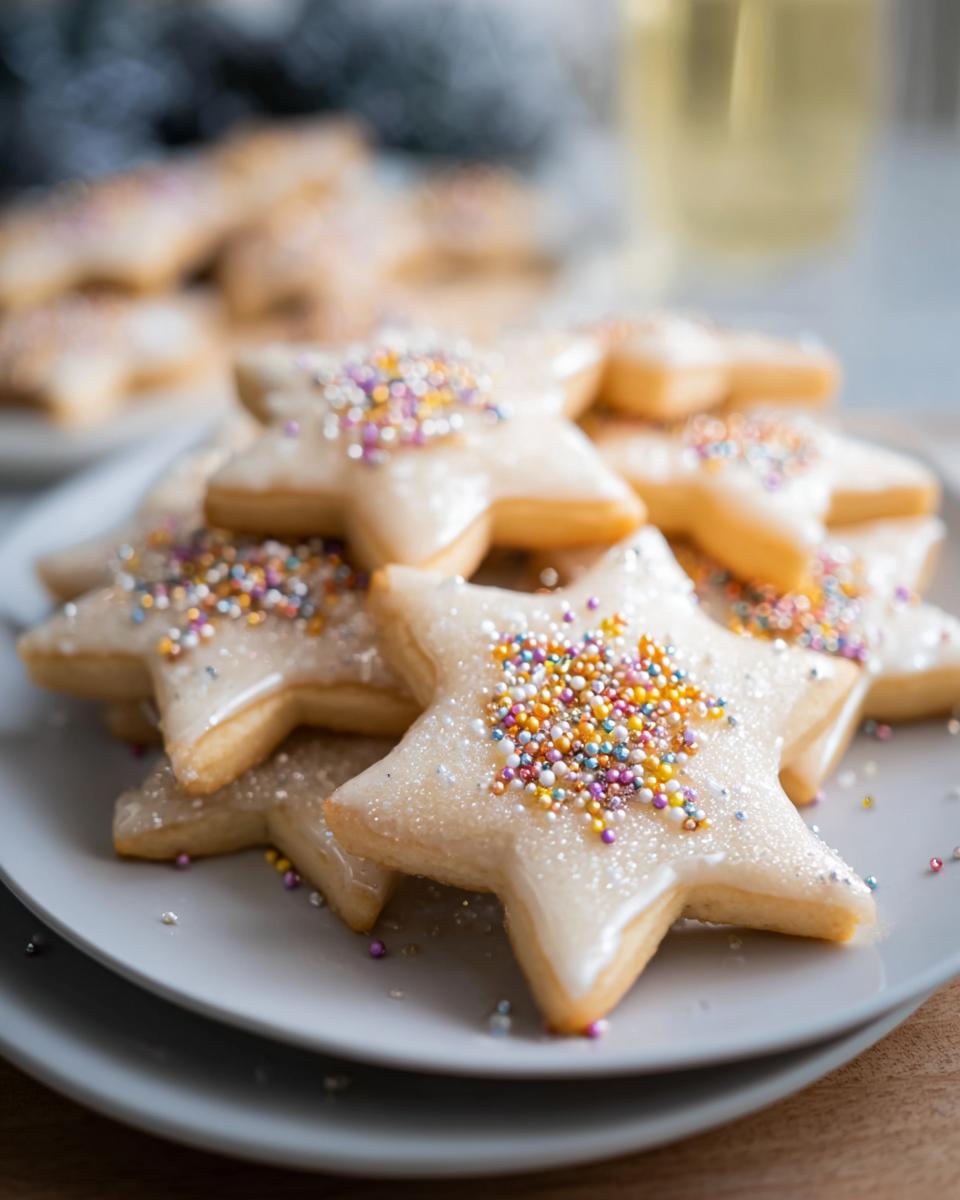
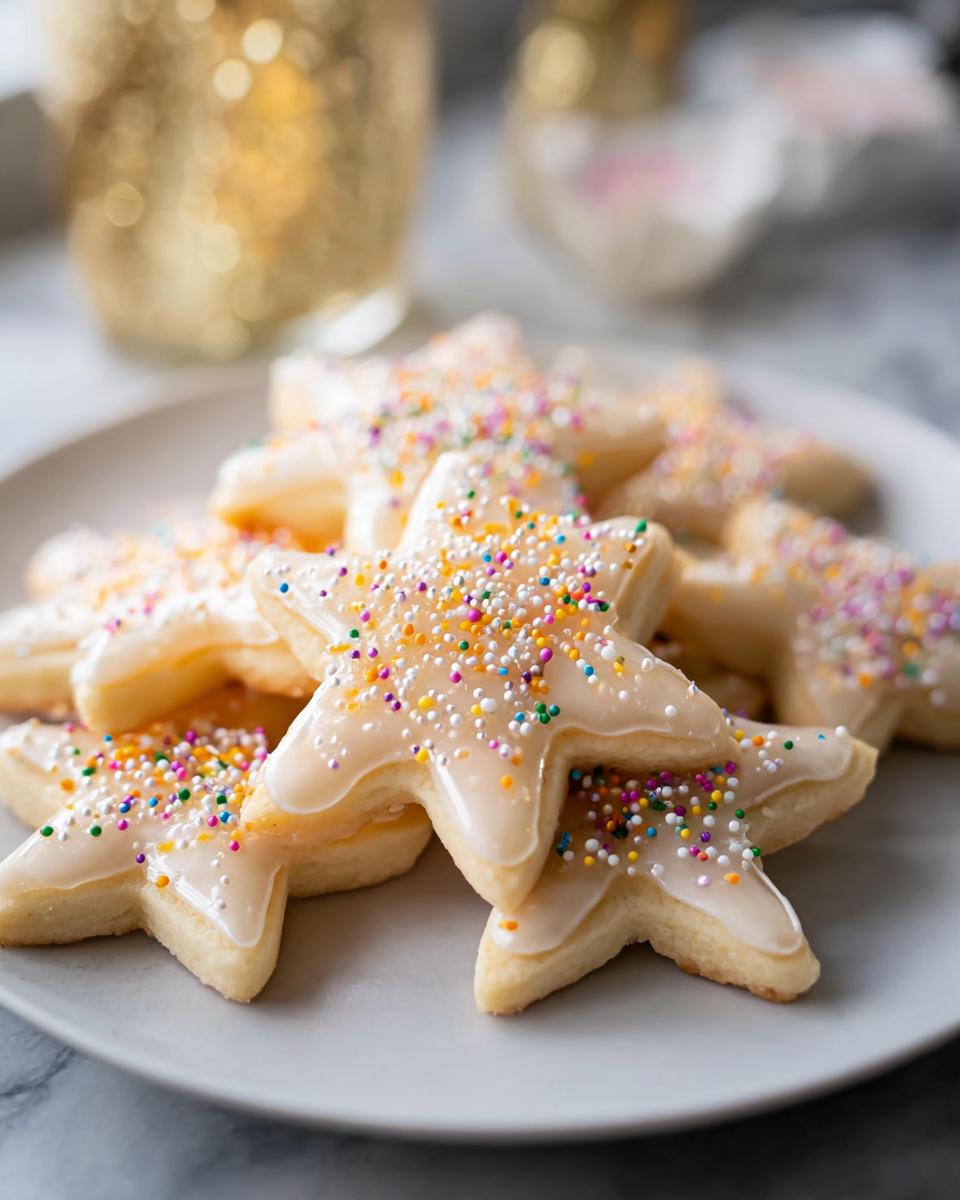
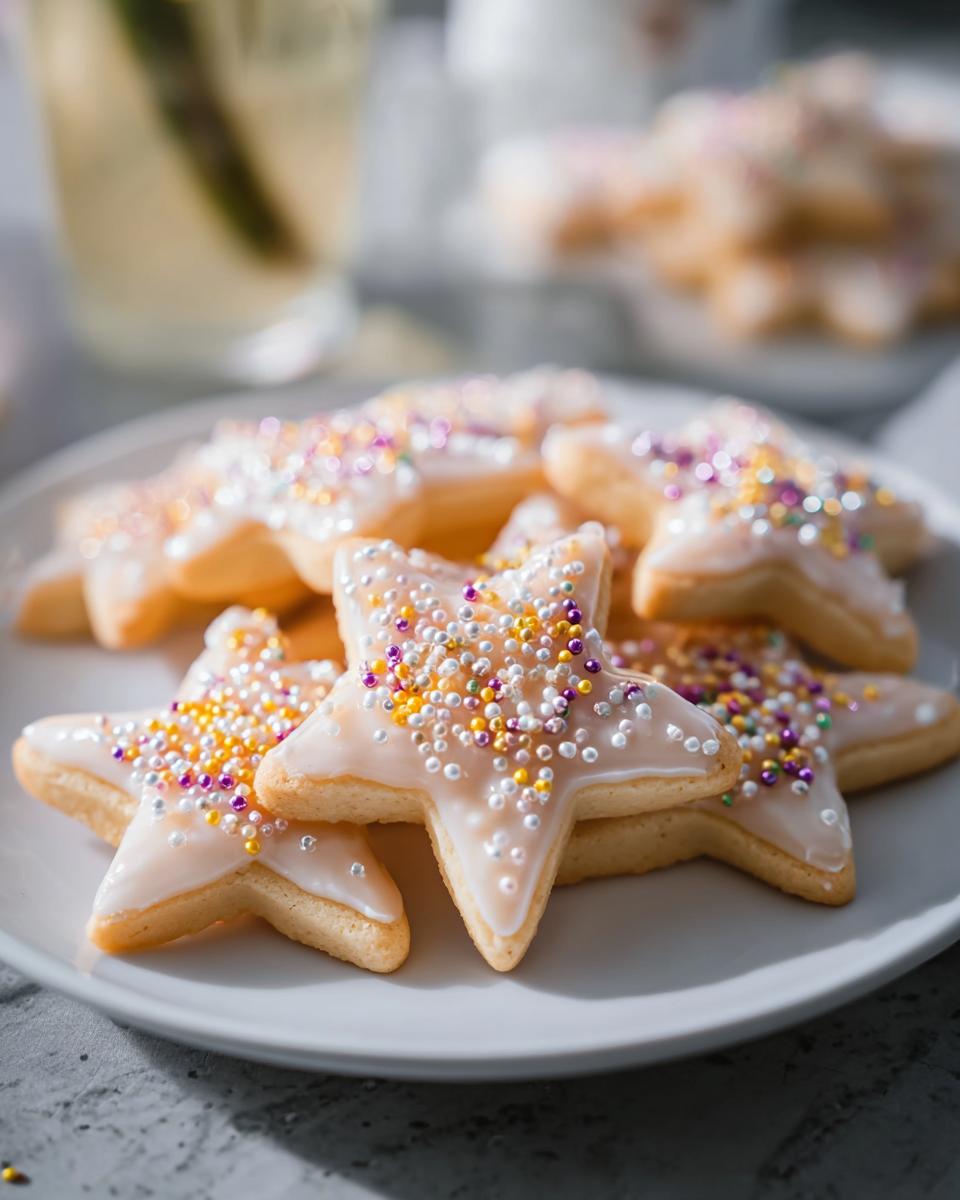
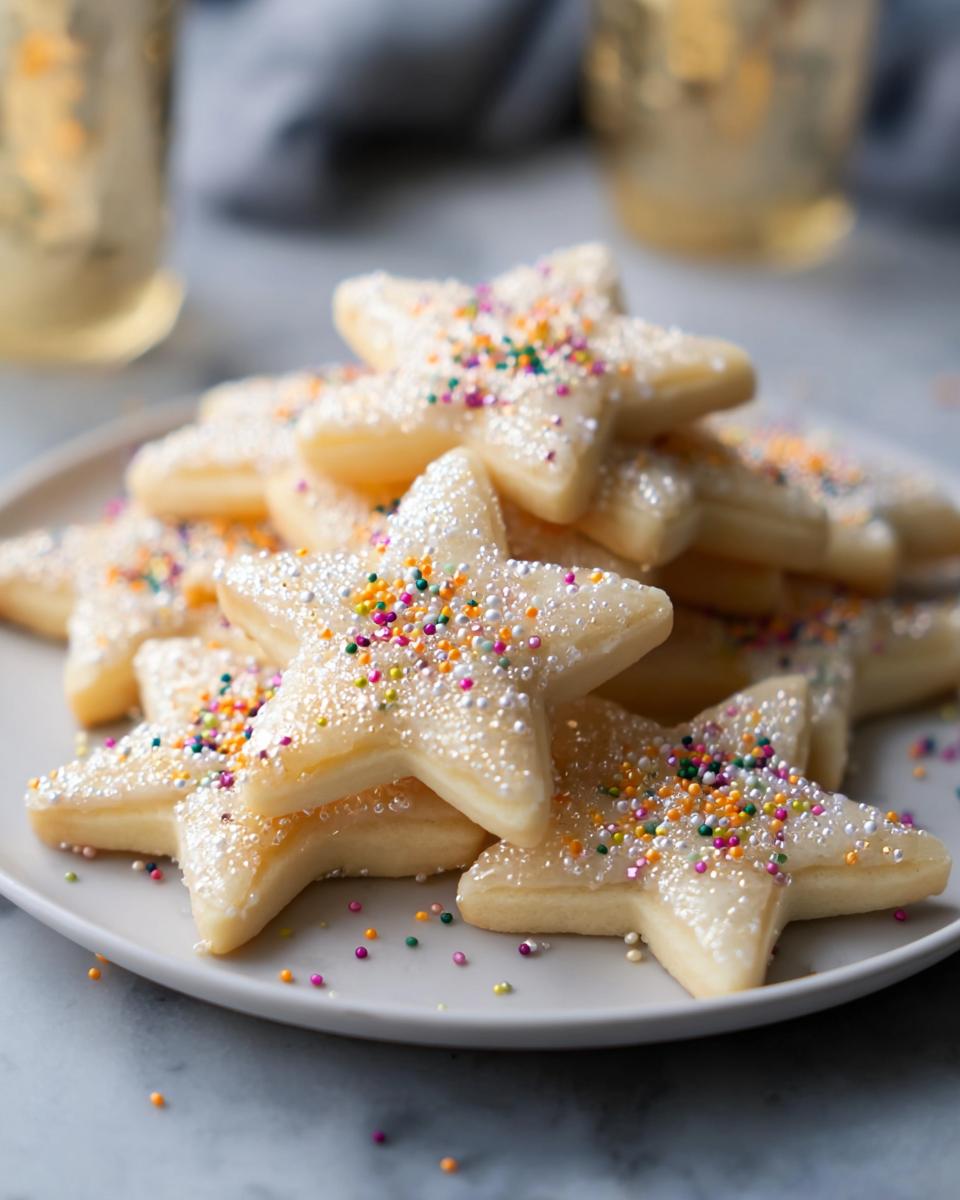
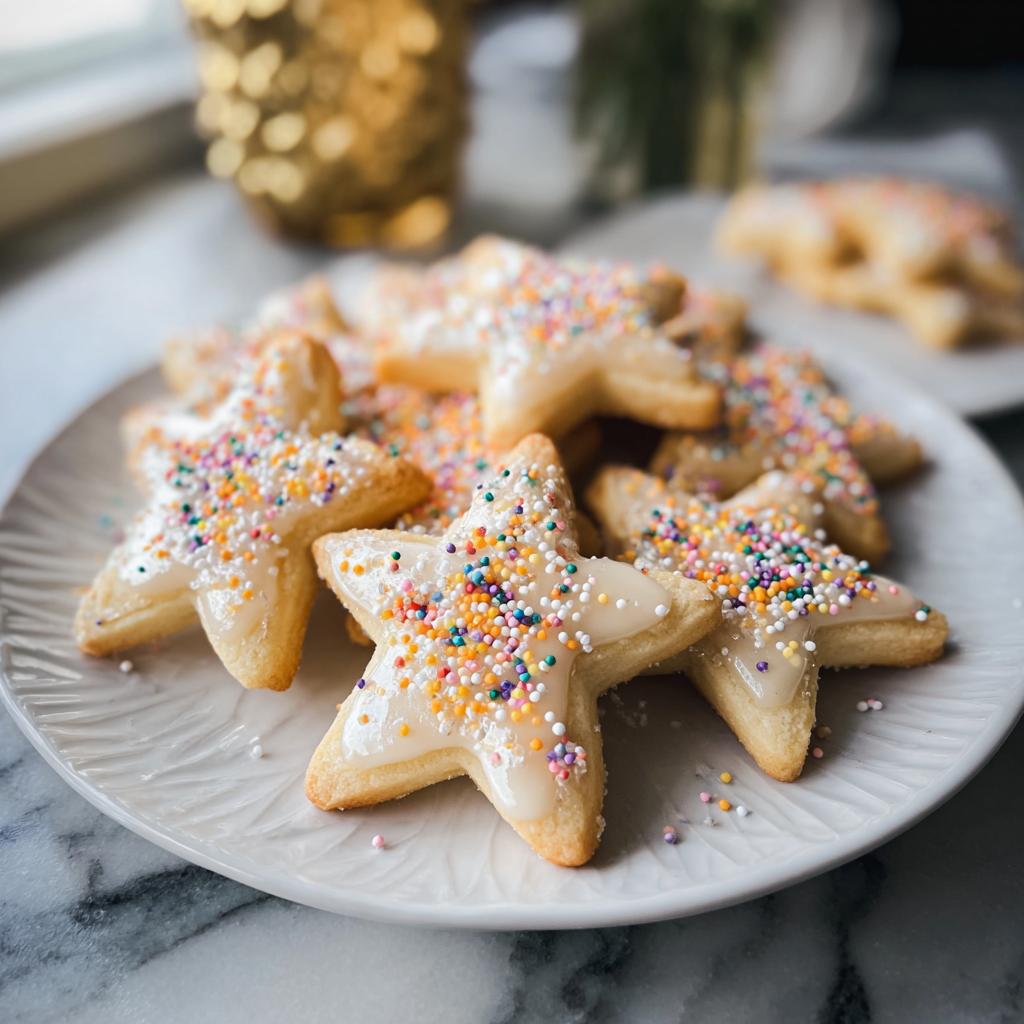
- They look stunningly elegant with just a thin layer of icing and sparkling sugar!
- The dough rolls beautifully and holds its shape perfectly when cut, which is a baker’s dream!
Gathering Ingredients for Your Champagne Sugar Cookies
Okay, gathering your supplies is half the fun! Since these cookies are all about that delicate flavor, you really want to make sure we start with good stuff. The secret weapon, that lovely bubbly flavor, comes from a little extra step where we reduce the wine. Don’t worry, it just concentrates the taste! I always keep my pantry stocked for when a celebration strikes unexpectedly. For the best result, make sure your butter is truly softened, but not melted—that’s key for the texture!
When you’re ready to shop, I sometimes find great deals on good sparkling wine, perfect for this recipe, because we’re using it twice: once for the reduction in the dough and again for the icing. If you need a little inspiration for shapes, I was looking at some amazing star cutouts recently, you can check them out here!
Ingredients for the Champagne Cookies Base
- Champagne or sparkling wine: We need 1.5 cups for the initial reduction.
- Unsalted butter: 1 cup, softened—remember, soft but not greasy!
- Granulated sugar: 0.75 cup of the good white stuff.
- Egg yolk: Just one large one for richness.
- Vanilla extract: 1 teaspoon brings out the sweetness.
- Salt: A tiny 0.25 teaspoon balances everything out.
- All-purpose flour: 2.25 cups, measured correctly, please!
Ingredients for the Champagne Icing
- Powdered sugar: 3 cups for that smooth, sweet finish.
- Butter: 2 Tablespoons, melted.
- Reduced champagne: 2 to 3 Tablespoons; this is where the magic goes for the final flavor pop!
Decorating Supplies for Fancy Cookies
To make these the ultimate **Fancy Cookies**, you just need a little sparkle. Keep it simple or go wild! You’ll need:
- Sprinkles or colored sugar (something gold or iridescent always looks fantastic!).
Essential Equipment for Perfect Champagne Sugar Cookies
Before you even think about mixing, pulling out the right tools makes the process so much smoother. You definitely don’t need ten different fancy gadgets for these **Champagne Sugar Cookies**, but having the basics ready means no frantic searching halfway through the chilling time!
Here’s my rundown of what you’ll need on your counter. Trust me, having these ready means you can focus on the fun part—the champagne flavor infusion!
- A dedicated Saucepan to simmer down that bubbly.
- A Heatproof container; you need somewhere safe for that hot reduction to cool off.
- Your trusty Mixing bowls—at least two, one for wet, one for dry assembly.
- An Electric mixer (handheld is fine, but the stand mixer is my baking best friend).
- A good set of Star-shaped cookie cutters; shape matters for a celebration dessert!
- Plenty of Plastic wrap for getting that dough perfectly chilled.
- A solid Rolling pin to get that even 1/4-inch thickness.
- At least one trusty Baking sheet.
- Parchment paper—I swear by this for non-stick success.
- A wire Cooling rack so the bottoms don’t steam and get soft.
- A small Whisk for whipping up that icing later on.
Step-by-Step Instructions for Making Champagne Sugar Cookies
Now that we have all our beautiful ingredients ready, let’s get down to the fun part: turning them into cookies! This process is really straightforward, but we have to respect the timing—especially that chilling phase. Trust me, a little patience here prevents a sticky, sad mess later on. I always put on my favorite happy music while I’m baking because these treats deserve a cheerful start!
Preparing the Champagne Reduction
First things first, we tackle the champagne! Pop that 1.5 cups of bubbly into a small saucepan right over medium-high heat. We need to gently simmer this until it cooks down significantly. You’re looking for it to reduce until you only have about 1/4 to 1/3 cup of liquid left. This usually takes a good 10 to 15 minutes. It’s concentrating all that lovely flavor into a potent little syrup! Once done, carefully pour the reduction into a heatproof container where it can cool completely before we even think about touching the dough.
Mixing and Chilling the Champagne Sugar Cookies Dough
While the champagne cools, we move onto the cookie base. Preheat your oven to 350 degrees F, that’s 175 Celsius. Grab your mixer and beat that softened butter with your granulated sugar until it looks light and creamy—it should be well-creamed. Next, mix in the egg yolk, vanilla, and salt until everything is happy together. Now, this is important: add the flour slowly, keeping the mixer speed low, just until it comes together. Don’t overmix or you’ll get tough cookies! Form the dough into a disk, wrap it up tightly in plastic wrap, and you absolutely must chill it for at least 15 minutes. If your kitchen is too warm and it feels sticky when you take it out: just pop it back in for 10 more minutes!
Rolling, Cutting, and Baking
Once chilled, place that dough on a lightly floured surface. Roll it out evenly to about 1/4-inch thickness. That thickness gives you a nice sturdy cookie that won’t crumble when you ice it. Now, use your star cutter—or whatever fun shape you chose—and get cutting! Place them onto your parchment-lined baking sheets.
They bake fast! Slide them into the preheated oven and watch them for 10 to 12 minutes. You want the edges to look just barely golden brown. Let them sit on the hot pan for about five minutes to set up slightly, and *then* move them over to the cooling rack. They need to be completely cool before icing!
Creating and Applying the Sparkling Sugar Icing
For the icing, it should look like a steady ribbon when you lift the whisk. Whisk your powdered sugar, the melted butter, and 2 to 3 tablespoons of that cooled champagne reduction. If it’s too thick, splash in a tiny bit more reduction until it flows nicely. Dip each cooled cookie right into that icing, letting the excess drip off. The key here is speed: immediately after dipping, you must decorate with your colored sugar or **Sparkling Sugar**! Set them on the cooling rack again and forget about them for a while. Seriously, allow 1 to 3 hours for that icing to fully harden before stacking them up for serving.
Tips for Success with Your Celebration Dessert
Making beautiful **Champagne Sugar Cookies** really comes down to a couple of small tricks I learned through trial and error. First, when handling the dough, if it feels too soft while you’re rolling, don’t panic or just dump in more flour! Just wrap it back up and give it another 15 minutes in the chilly air. That extra rest makes all the difference in avoiding stretched-out shapes.
When it comes to that wonderful champagne icing, remember that less is often more. We want that subtle bubbly hint, not a thick sugar shell. Add the reduced champagne *slowly* until you get that perfect ribbon consistency. This ensures your final **Celebration Dessert** has that delicate snap when you bite into it. Patience while drying is non-negotiable, too—if you stack them too soon, you’ll stick them together forever!
Ingredient Notes and Substitutions for Champagne Sugar Cookies
Let’s talk quick fixes, because sometimes the pantry doesn’t cooperate! If you’re baking for folks who aren’t having bubbly, absolutely use non-alcoholic sparkling cider for the reduction step. You still get that lovely acidity and effervescence, just without the buzz. Good to know, right?
Now, about that butter: if you forgot to take it out, don’t even try to microwave it! Softened butter is crucial for proper creaming. Microwave it in 5-second bursts until soft, but if it gets oily, you need to chill it down again before mixing, or your cookies will spread into thin, sad circles across your baking sheet.
Storing Your New Year’s Eve Dessert
So, you’ve managed to keep these gorgeous **Champagne Sugar Cookies** safe from hungry hands for more than five minutes? Congratulations! Because these are iced with a simple glaze, they are actually pretty sturdy, which is great news for planning ahead.
For the best experience, I always recommend storing them at cool room temperature—never the fridge! Putting them in the refrigerator can actually make the pretty icing get dull or slightly sticky because of the condensation. You want them crisp and sparkly, right?
Just grab a sturdy, airtight container. If you have parchment or wax paper handy, place small sheets between the layers of cookies. This stops the sparkling sugar from rubbing off onto the layer below. Honestly, these **Champagne Cookies** stay perfectly delicious for up to a full week this way, making them the perfect make-ahead **New Year’s Eve Dessert**!
Now, do you need to reheat them? Absolutely not! They are best enjoyed at room temperature. If they’ve been stored for a few days, just pull the container out about 30 minutes before you plan to serve them so the butter elements in the cookie soften just a tiny bit for that perfect bite.
Frequently Asked Questions About Champagne Cookies
When you’re baking something a little unique like this, questions always pop up! I totally get it. You want your **Champagne Cookies** to turn out absolutely flawless for whatever fabulous event you’re hosting. Here are the few things I get asked most often when I share this recipe!
Can I skip reducing the champagne in the dough?
Oh gosh, please don’t skip this step! If you just dump the straight champagne into the dough, you’re adding way too much liquid. This messes up the texture we worked so hard to achieve, and it might not even bake properly. The reduction process gets rid of most of the alcohol while locking in that fantastic, bright flavor we want. It’s non-negotiable for good texture!
How do I get the icing to dry faster?
I know waiting for that icing to set when you’re excited to serve them feels impossible! The best way, other than having a low-humidity day, is airflow. If you have one of those small USB desk fans, point it gently toward the cookies while they are on the cooling rack. It circulates the air over the glaze and helps the moisture evaporate a bit quicker. That, and having lots of extra **Sparkling Sugar** on hand to decorate immediately, keeps things moving!
Are these Champagne Sugar Cookies suitable for children?
This is such an important question! Since we fully reduce the champagne in the dough, technically most of the alcohol cooks off during the baking time, but if you want zero concerns, you can swap the full 1.5 cups of champagne for a good quality non-alcoholic sparkling cider—the crisp apple variety works beautifully! You still get that nice acidity that mimics the bubbly, but they are completely family-friendly!
Estimated Nutrition for Champagne Sugar Cookies
Okay, let’s talk figures! When you’re whipping up something this delicious, you always wonder where exactly it fits in the day, right? Since these **Champagne Sugar Cookies** are made to serve 24 people—one absolutely perfect cookie per person—I’ve pulled the estimates for you below.
Now, I have to be super honest here: This table is based on standard calculator software using the main ingredients. Actual counts can wiggle around depending on the brand of butter you use or how much icing you generously pile on! These numbers are a great guideline for serving, but think of them as estimates for your beautiful batch of 24.
- Calories: About 101 per cookie
- Fat: Roughly 4 grams
- Saturated Fat: About 3 grams
- Carbohydrates: Around 15 grams
- Sugar: Approximately 10 grams
- Protein: Just 1 gram
- Cholesterol: Around 15mg
They might be on the lighter side for calories because we are keeping the cookie base pretty simple, allowing that icing and the sparkling sugar to really shine! Enjoy every single bite, knowing you made something elegant and festive!
Share Your Celebration Dessert Experience
Whew! We did it! We’ve baked these gorgeous, bubbly **Champagne Sugar Cookies** together, and I really hope they make your next celebration sparkle even brighter. Honestly, seeing my readers create these elegant treats is the best part of my baking life!
I would absolutely LOVE to hear how they turned out for you. Did you stick with the classic star shape, or did you get creative with other cutters? Did you use gold sprinkles or edible glitter for that extra wow factor?
Please, don’t be shy! Pop down below right now and leave a comment telling me your favorite part of the process—maybe it was smelling the champagne reduction, or perhaps seeing the final sparkle when the icing set. If you have photos, tag me on social media so I can see your beautiful finished **Champagne Sugar Cookies** shine!
If this recipe brought you a little bit of festive joy, please consider leaving it a quick rating at the top of the page. Happy baking, and here’s to many more wonderful celebrations!
Champagne Sugar Cookies
Ingredients
Equipment
Method
- Champagne Reduction: Pour 1.5 cups of champagne into a small saucepan over medium-high heat. Simmer until reduced to 1/4 to 1/3 cup (60-80ml). This will take about 10-15 minutes. Pour the reduced champagne into a heatproof container and let it cool completely.
- Cookies: Preheat your oven to 350F (175C). In a large bowl, beat the softened butter and granulated sugar with an electric mixer until well-creamed.
- Add the egg yolk, vanilla extract, and salt. Mix well, scraping the sides and bottom of the bowl as needed.
- With the mixer on low speed, gradually add the all-purpose flour until just incorporated. Scrape the bowl periodically. The dough will be dry and may require some stirring to come together. Avoid over-mixing.
- Transfer the dough to a clean surface, form it into a 1-inch thick disk, cover with plastic wrap, and chill in the refrigerator for at least 15 minutes.
- On a lightly floured surface, roll out the dough to about 1/4-inch thickness. If the dough is sticky, chill it longer or add a little more flour.
- Use a star-shaped cookie cutter to cut out shapes. Place the cookies on a baking sheet lined with parchment paper.
- Bake for 10-12 minutes, or until the edges are lightly golden brown. Let the cookies cool on the baking sheet for 5-10 minutes before transferring them to a cooling rack to cool completely.
- Champagne Icing & Assembly: In a bowl, whisk together the powdered sugar, melted butter, and 2-3 tablespoons of the reduced champagne. Add more reduced champagne, a little at a time, until the icing reaches a ribbon consistency.
- Dip each cooled cookie into the champagne icing. Place the cookie back on the cooling rack and immediately decorate with sprinkles or colored sugar. Allow the icing to harden completely, which typically takes 1-3 hours.
Nutrition
Notes
Tried this recipe?
Let us know how it was!
Master of Global Fusion Innovation
My culinary adventure reflects my Lebanese-Italian heritage and a decade spent in the dynamic fusion restaurant scenes of Miami and Barcelona. I’ve made it my mission to prove that beloved global comfort foods can be successfully adapted for low-carb living without losing their soul, their cultural authenticity, or their ability to comfort.
With advanced training in molecular gastronomy and experience spanning Mediterranean, Middle Eastern, and Latin American traditions, I’ve developed what I call “respectful innovation” – culinary creativity that honors traditional cooking wisdom rather than replacing it. My alternative ingredient substitution systems are now taught in specialty diet cooking schools throughout the region.
Drawing from my trilingual upbringing, I understand how deeply food connects to identity and memory. That’s why my flavor-bridging techniques allow classic dishes from around the world to maintain their comforting, familiar qualities while meeting contemporary nutritional standards. I regularly share these techniques at international culinary symposiums and innovation events.
When I’m not experimenting in my Miami fusion kitchen laboratory, you’ll find me at local salsa dance venues – the rhythm and improvisation skills translate directly to my creative cooking process! My role as a foster parent to rescue rabbits has unexpectedly inspired some of my most creative plant-based low-carb innovations.
My personal low-carb journey began as a way to maintain energy for my active lifestyle, but it’s evolved into a professional mission of proving that healthy eating can be globally adventurous rather than restrictively limiting. Every recipe I create is a passport to culinary adventure, transforming kitchens into laboratories for exploring healthy versions of the world’s most beloved comfort foods.