
Sometimes, the most special treats are rooted in the simplest foundations, and that’s definitely true for shortbread! We all love a perfectly buttery cookie, but why stop at classic when you can achieve pure elegance? This recipe isn’t just one batch; it’s your master key to four incredibly distinct, sophisticated flavor variations of Gold-Dusted Shortbread. I still remember the first time I made them for a family gathering after moving into my coastal home. As I delicately brushed the shortbread with edible gold dust, it felt like I was adding the finishing touch to a masterpiece. Watching my family marvel at those shimmering, buttery beauties truly reminded me that even small creations can bring such joy and elevate an ordinary afternoon into something unforgettable.
Why You Will Love These Gold-Dusted Shortbread Cookies
Honestly, these cookies are my go-to when I need something that looks completely show-stopping without needing a ton of last-minute fuss. They really are designed for people who want that elegant dessert feel but don’t want to live in the kitchen all day. Trust me on these points—they are why I keep coming back to this base recipe!
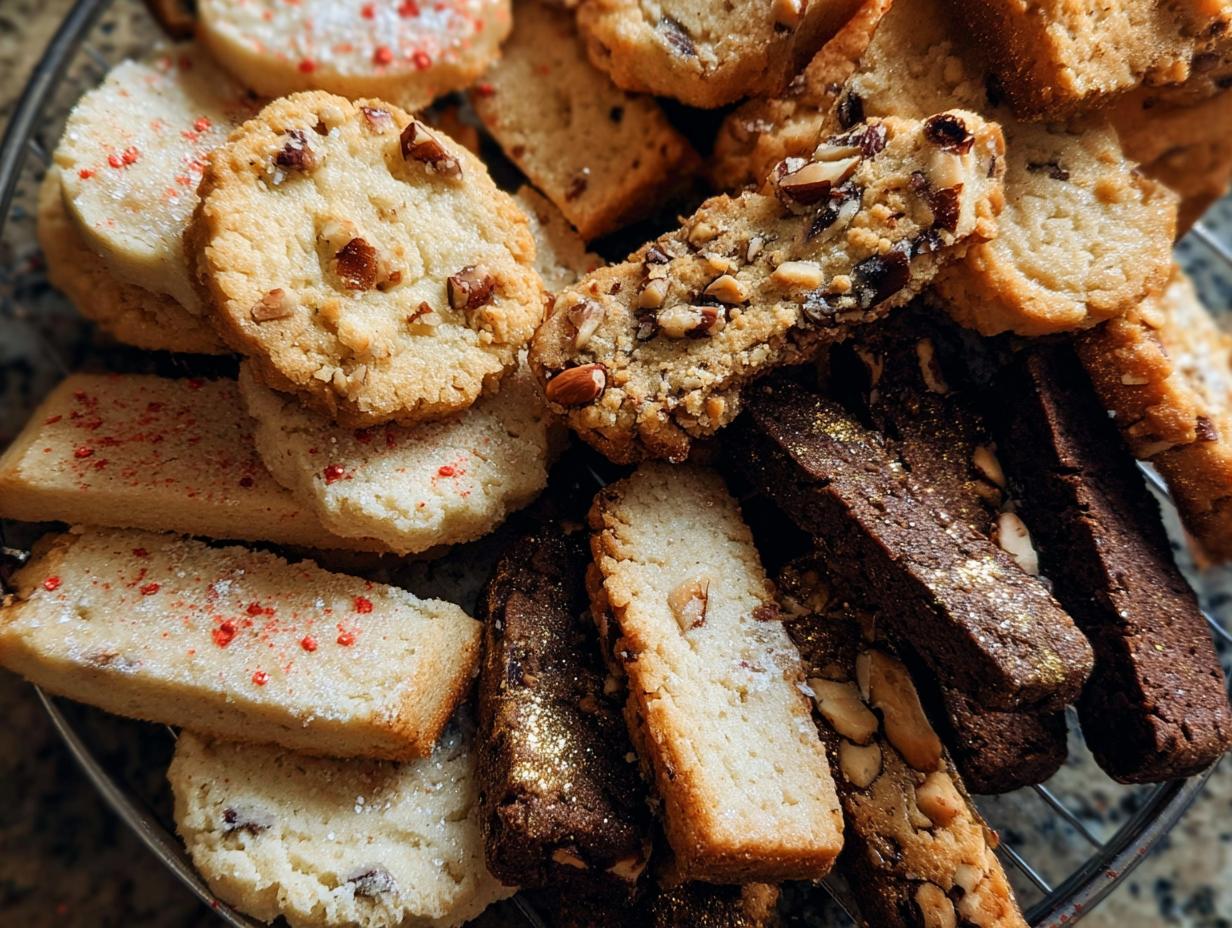
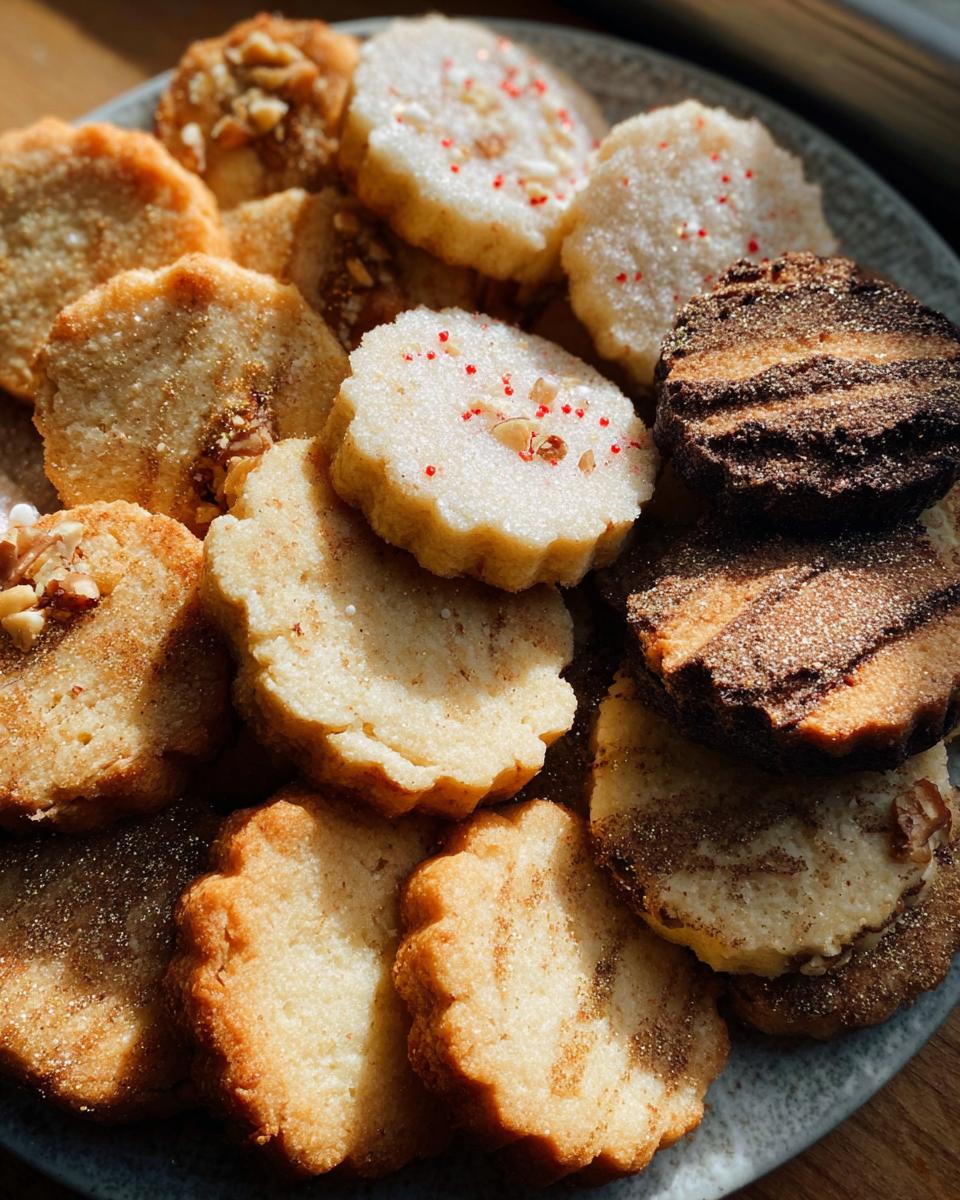
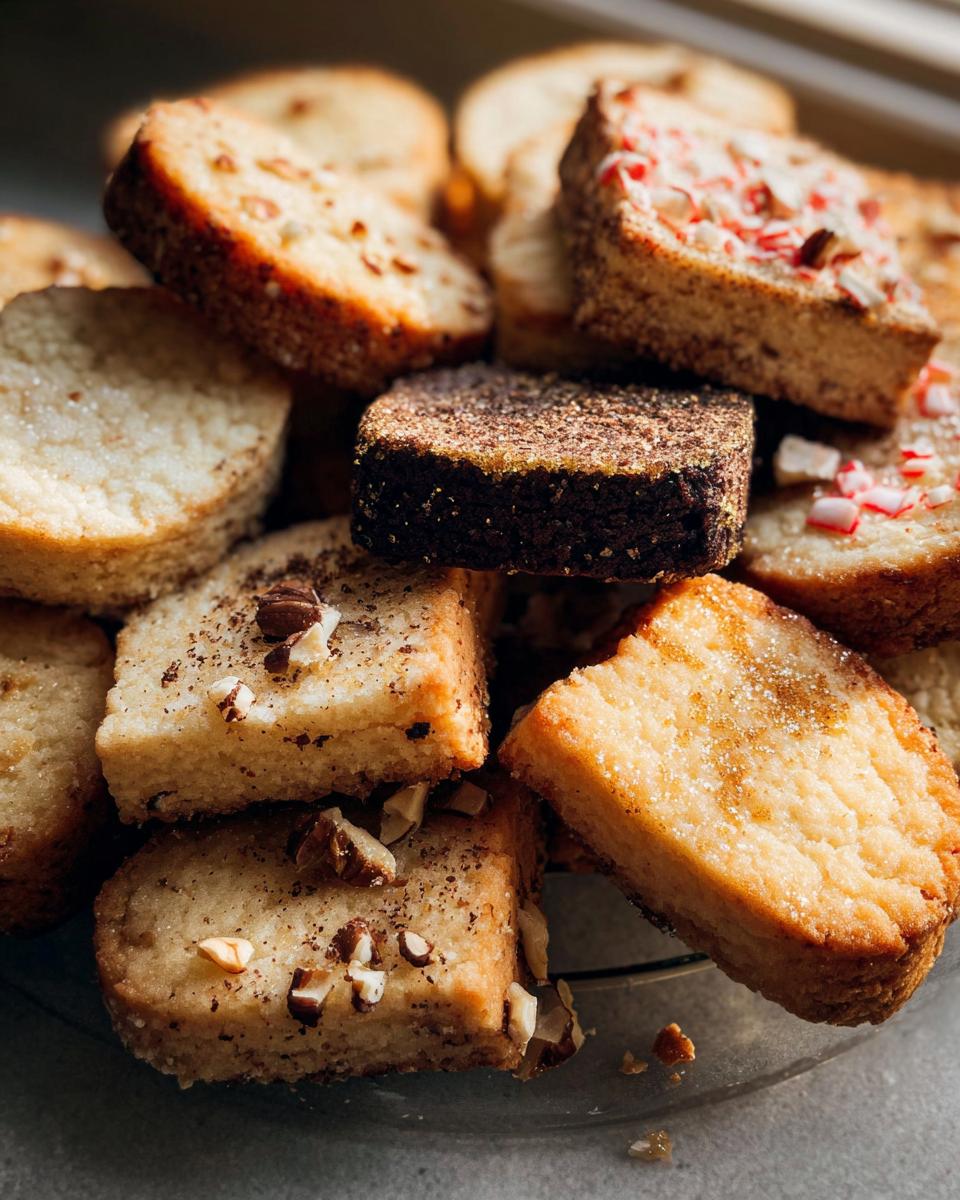
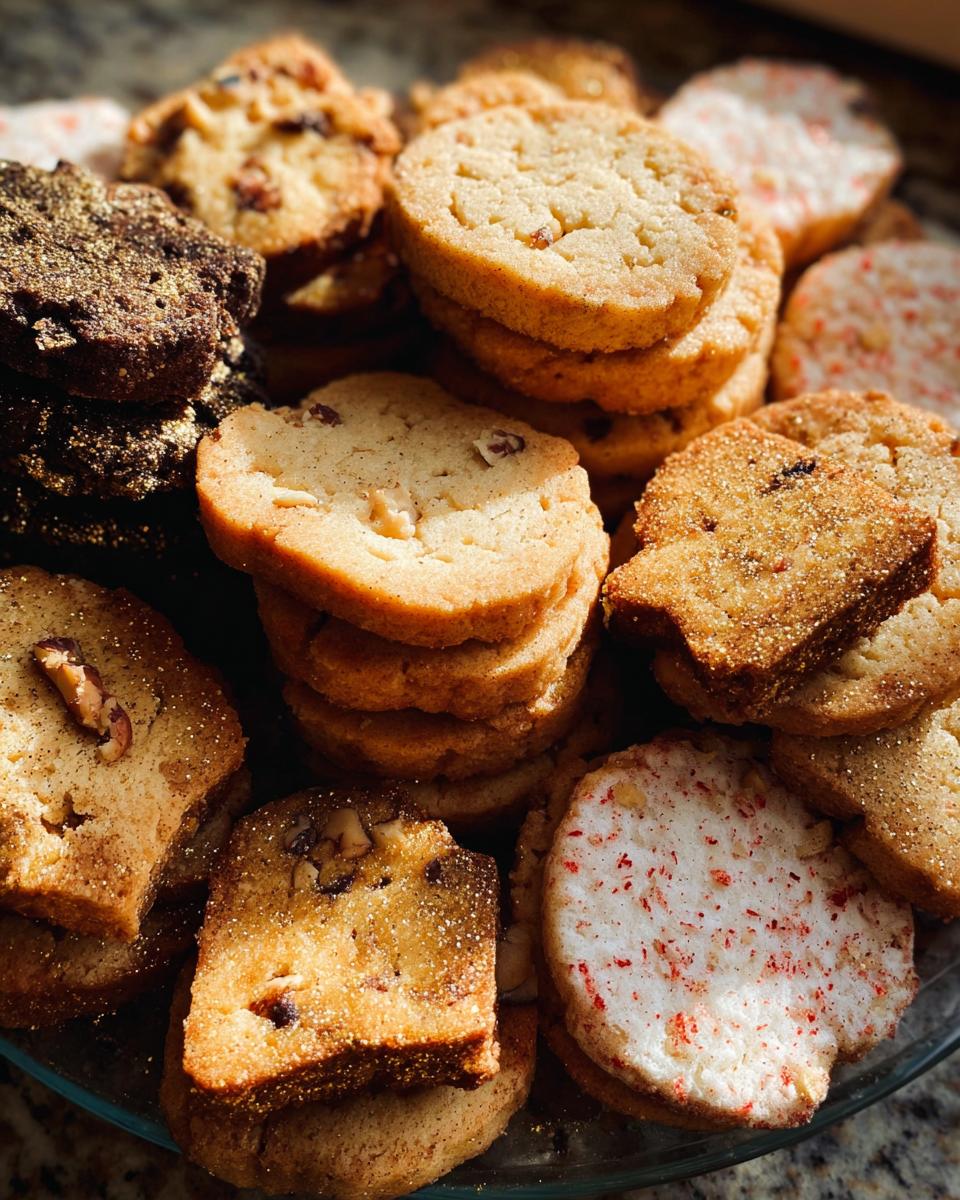
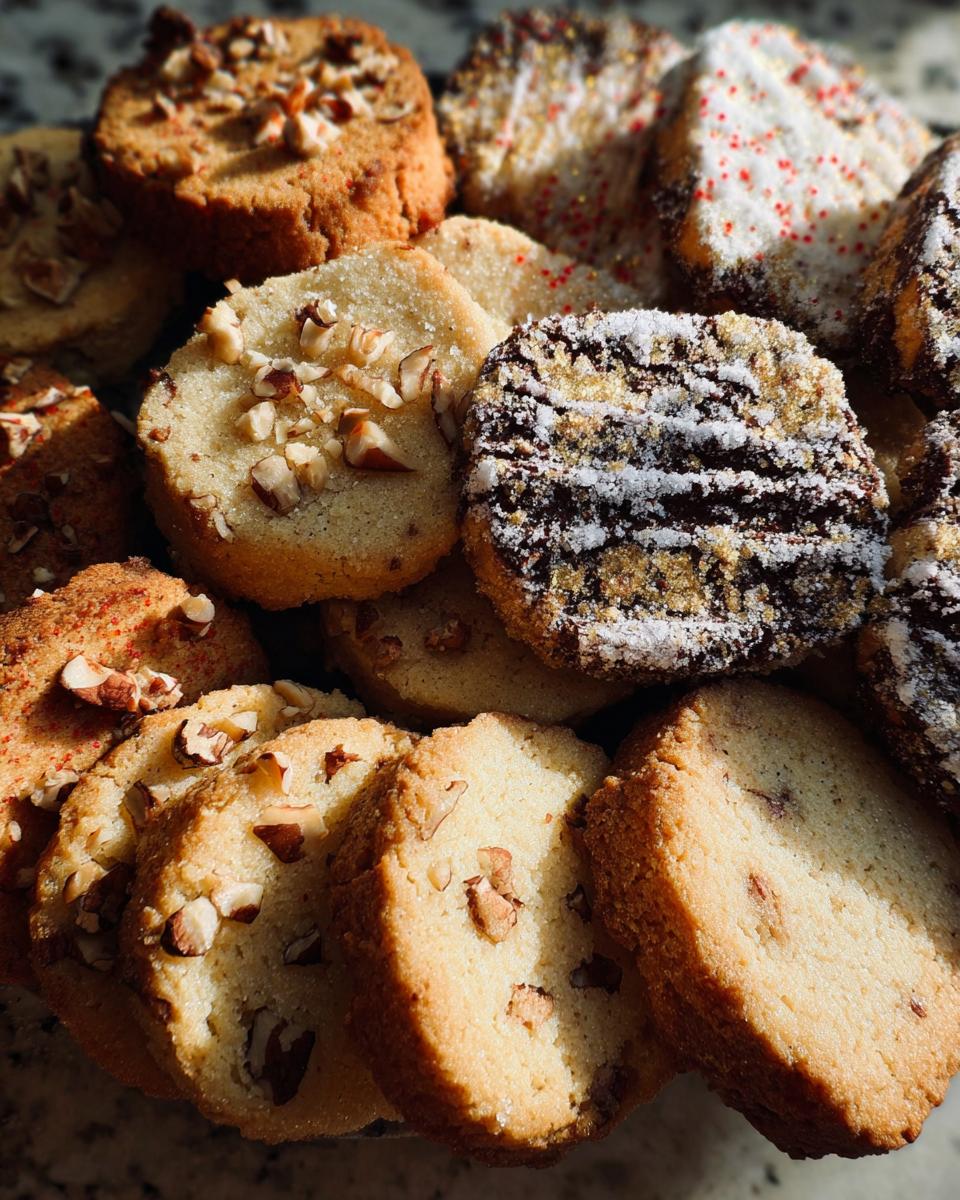
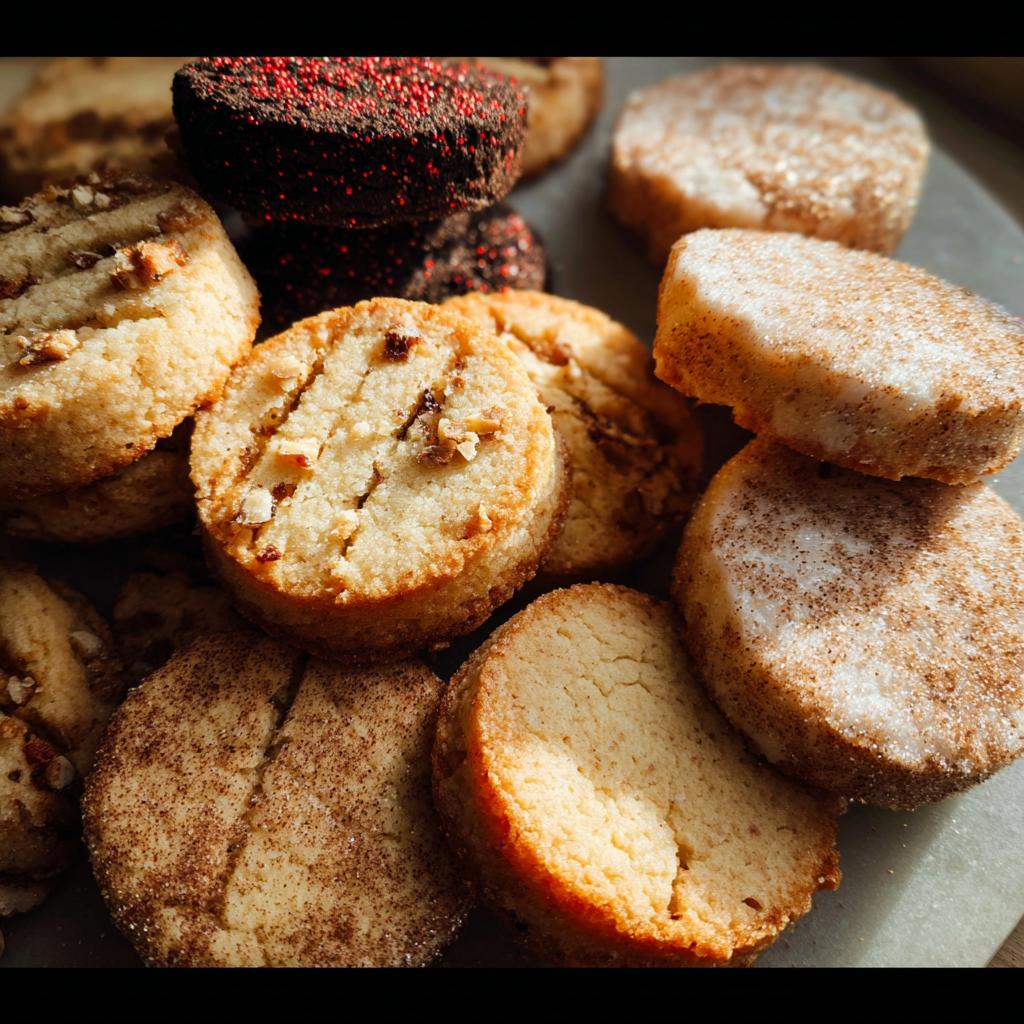
- Four Flavors in One Dough: You get four completely unique, sophisticated flavor profiles—Chai Spice, Dark Chocolate Cherry, Chocolate Hazelnut, and Chocolate Peppermint—all from just two base doughs. So much variety for gifting!
- Ultimate Make Ahead Treat: Since the dough needs to chill for hours anyway, you can whip up all four logs days ahead of time. Pop them in the fridge, and when you need cookies, it’s just slice, bake, and dust.
- Pure Buttery Bliss: Shortbread should taste like butter, and these do. The high ratio of quality butter ensures that irresistible, melt-in-your-mouth texture that makes these Buttery Cookies so addictive.
- Visually Stunning: Adding that shimmer of edible gold to a crisp, vanilla or dark chocolate cookie transforms it from a simple snack to a true centerpiece for any special occasion. They look expensive, but they aren’t!
- Perfect for Gifting: Because they are sturdy, slice-and-bake beauties, they package up wonderfully. They make beautiful, personalized homemade gifts that feel incredibly luxurious.
Essential Equipment for Perfect Gold-Dusted Shortbread
Okay, achieving that signature melt-in-your-mouth texture for Shortbread Cookies really does depend on using the right tools. We aren’t making drop cookies here; we’re aiming for uniform shape and that perfect dense-yet-tender crumb, so precision matters!
Luckily, you probably have most of this stuff already. I lean heavily on my trusty mixer for the creaming stage, which is non-negotiable for that rich base.
Mixing Tools for Creaming and Blending
This is where we build the structure of our Buttery Cookies. Pay attention to the attachments!
- Stand Mixer or Hand Mixer: You absolutely need one of these for creaming the butter and sugars properly. Getting that light, fluffy texture is the foundation for a successful shortbread.
- Paddle Attachment: This is the workhorse for creaming. It incorporates the air needed for the right texture without making the dough tough, unlike a whisk attachment might.
- Rubber Spatula: This might seem simple, but I use this constantly! Once the flour goes in, put the mixer away. The spatula is crucial for gently folding dry ingredients in by hand. We want to avoid overmixing the flour, which leads to tough cookies, so be mindful here!
Preparation and Finishing Tools
These tools help us get those clean edges and perfect presentation required for an Elegant Dessert.
- Small Dish: Perfect for mixing up your flavor dustings, like that amazing Chai Spiced Cinnamon Sugar or crushing candy canes for the peppermint batch.
- Plastic Wrap: Absolutely necessary for forming those crisp, uniform logs. The dough needs thorough chilling to hold its shape when we slice it later—no shrinking allowed!
- Baking Sheet and Parchment Paper: Always line your sheets! Shortbread has a lot of butter, and we don’t want any sticking or burning around the edges. Parchment paper guarantees an easy release.
- Cooling Rack: You need air flow underneath the cookies as they cool to stop them from steaming and becoming soft where they sit on the sheet.
- Heat Safe Bowl: This is essential specifically for melting down the white chocolate needed to finish the peppermint cookies before dusting them with those festive candy cane pieces.
Having these items ready means the process flows so smoothly. It’s always easier to bake when you aren’t hunting for a spatula mid-creaming!
Ingredients for Four Variations of Gold-Dusted Shortbread
Alright, let’s talk about what goes into these amazing cookies. Because we are making four different flavors—Vanilla/Chai, Chocolate Cherry, Chocolate Hazelnut, and Chocolate Peppermint—we break the list down by what they contribute to the final dough. Remember, the quality of your base ingredients really shines through in such a simple cookie like shortbread. Seriously, don’t skimp on the butter!
Vanilla Dough Base Ingredients
This is the foundation for two of our flavor profiles. For the creaming step, you absolutely must have room temperature butter; if it’s cold, it won’t whip up correctly to trap those necessary air pockets. It should give just a little when you press on it.
- 1 cup unsalted butter, room temp
- 1/3 cup light brown sugar, packed
- 1/2 cup granulated sugar
- 1 tsp vanilla bean paste (or 2 tsp vanilla extract)
- 1/4 tsp salt
- 2 1/4 cups all purpose flour
Chai Spiced Cinnamon Sugar Components
These ingredients are added to one half of the vanilla dough to create that warmly spiced swirl. The other half of the vanilla dough will stay plain for the base when slicing.
- 1/2 tsp cinnamon, 1/4 tsp cardamom, 1/4 tsp ginger, and 1/8 tsp allspice (for swirling into the dough)
- 3 tbsp sparkling sugar + 3 tbsp granulated sugar (for coating the plain vanilla dough portion)
- 2 tsp cinnamon (for coating—this is separate from the spice blend!)
Dark Chocolate Cherry Components
These get mixed right into the smaller portion of the vanilla dough. Make sure you roughly chop those dried cherries; we want noticeable bits of fruit, not mush!
- 2 oz dark chocolate, chopped
- 1/2 cup dried cherries, roughly chopped
- 1/2 cup raw sugar (for coating the resulting log)
Chocolate Dough Base and Flavor Additions
This is the second main base dough. Remember, it uses less flour than the vanilla base because we are adding in dense cocoa powder. We split this base up for the last two flavor combinations.
- Chocolate Base: 1 cup unsalted butter (room temp), 3/4 cup granulated sugar, 1 tsp vanilla bean paste, 1/4 tsp salt, 1 3/4 cup all purpose flour, and 1/2 cup unsweetened dark cocoa powder.
- Chocolate Hazelnut Additions: 1/2 cup hazelnuts, roughly chopped (for mixing in), plus another 1/2 cup finely chopped (for coating the hazelnut log).
- Chocolate Peppermint Additions: 1/2 tsp peppermint extract and 2 oz dark chocolate, chopped (for mixing in). For finishing, you’ll need 1/2 cup white melting chocolate + 2 tsp oil (for dipping) and 3 crushed candy canes (for sprinkling).
Step-by-Step Instructions for Gold-Dusted Shortbread Doughs
Okay, deep breath! This seems like a lot of dough, but we process them in stages, and honestly, the mixing goes pretty fast if you have your ingredients prepped. The biggest secret to achieving those perfectly crisp, buttery cookies is making sure everything is wonderfully cold before it hits the oven.
Preparing the Vanilla Dough Base and Flavor Swirls
First up, grab your vanilla base ingredients. In your mixer, cream together the butter, brown sugar, and granulated sugar until it looks pale and fluffy—this takes a few good minutes, but it’s essential for that melt-in-your-mouth texture we want. Mix in the vanilla and salt, then switch to your spatula and carefully mix in the flour just until everything comes together. Don’t overwork it; we want that tender crumb!
Now we split it. Take the larger portion and gently fold in the spice mixture (cinnamon, cardamom, etc.). Remember, this is a swirl! We aren’t aiming for uniform color. The rest of the vanilla dough stays plain. For the chocolate cherry version, mix those cherries and chocolate into the smaller vanilla portion.
Here’s where we lock the shape in: Lay out plastic wrap for both doughs. Form each into an 8 or 9-inch log—make the logs as straight as you can! Wrap them tightly and send them to the fridge for a long nap. You absolutely need a minimum of two hours, but I always let them chill overnight. This firm dough is the key to clean slices!
These slice-and-bake cookies rely on that chilling process.Creating the Chocolate Dough Base Variations
Wipe out your mixing bowl—we’re starting fresh with the chocolate base ingredients. Cream the butter and sugar exactly as you did before until it’s light and fluffy. Then, carefully mix in the salt, vanilla, flour, and that rich cocoa powder. Again, switch to the spatula for the final mix by hand to keep things tender.
This chocolate base also gets split in two. Fold the rough-chopped hazelnuts into the first half. For the second half, mix in the peppermint extract and chopped dark chocolate. You’ll notice these chocolate doughs feel a bit stiffer right away, which is normal because of the cocoa.
Just like the vanilla logs, you need to shape these two chocolate varieties into tight 8 or 9-inch logs using plastic wrap. Wrap them securely and place them right next to the vanilla dough in the refrigerator. They all need a solid chill—at least 120 minutes—before we can move on to the glorious part: baking!
Baking and Decorating Your Gold-Dusted Shortbread
Now for the truly exciting payoff! Once your logs are rock solid from chilling, we get to slice and bake. This is when those plain dough rounds start transforming into show-stopping Gold-Dusted Shortbread.
First things first: Preheat your oven to 350F. While it’s heating up, go ahead and get your baking sheets lined with parchment paper. Remember how we rolled some logs in sugars or nuts? That coating step needs to happen right before we slice them, so make sure you’ve prepped your raw sugar, cinnamon sugar, or chopped hazelnuts.
Slicing and Coating the Logs
Take one log at a time out of the fridge—keep the others chilling until you need them! You want to use a good, sharp knife to slice each dough log into about 12 even cookies. If the dough is properly chilled, the slices will be neat and hold their shape perfectly. If they start getting sticky, just pop the log back in the fridge for 15 minutes! It’s all about temperature management.
Roll those fresh slices right into their designated coatings. The chocolate cherry dough gets a nice crunch from the raw sugar. The peppermint and plain vanilla logs are left nude for now, ready for their finishing touches later. Keep the raw dough chilled until it hits the hot oven—this helps prevent spreading and keeps those beautiful edges sharp.
Baking Cues and Finishing Touches
Place the coated cookies about two inches apart on your parchment-lined sheets. Bake them for about 15 to 18 minutes. Don’t look for a deep golden color; that is not shortbread language! You are looking for the edges to just *barely* turn a pale, soft golden brown, and the tops should look matte and set. They will firm up as they cool, so don’t worry if they seem a little fragile coming off the pan.
Once they’re out, carefully move them to a cooling rack. Now we decorate the specials! For the Chocolate Peppermint ones, melt your white chocolate with that tiny bit of oil until it’s smooth. Dip about half of the cookie, then immediately sprinkle those crushed candy canes on top before the chocolate sets. Pop those onto a clean sheet to set up in the fridge.
When everything is completely cool—and I mean cool, not even warm—this is where the magic happens. Grab your favorite edible gold dust—I prefer a soft, fine powder brush for the best effect. Lightly dust the tops of all your vanilla and chocolate cookies. That subtle shimmer is what turns these into the perfect Elegant Dessert. It really catches the light, and trust me, everyone will ask how you did it!
Tips for Success When Making Gold-Dusted Shortbread
Even though these are simple Buttery Cookies in concept, shortbread dough can throw a little tantrum if you treat it rough! I’ve learned a few tricks over the years to make sure every batch comes out perfectly consistent so you can rely on it every time you need an impressive plate.
The Golden Rule: Don’t Overmix the Flour
This is the number one mistake I see people make when baking Shortbread Cookies. Once you add the flour to the creamed butter and sugar, you’ve introduced the gluten. If you keep mixing—especially with a machine—you toughen that gluten up, and suddenly, your buttery cookie turns into something chewy or crumbly in a bad way.
As soon as you see the last streaks of flour disappear, STOP! You should switch to your rubber spatula and do a few gentle folds by hand just to be sure. It’s better to have a tiny, pea-sized bit of flour left over than to activate too much gluten. That tiny bit will bake out fine, but the tough gluten stays!
Keep It Cold, Cold, Cold Before Baking
We talked about chilling the logs, which is crucial for slicing neatly, but don’t forget to chill the slices too! Once you cut your logs, that warmth transfers from your hands to the cookies, and the butter starts to soften immediately. If you throw warm cookies into the oven, they will spread out into sad, flat puddles.
Seriously, if you’re baking more than one sheet’s worth, keep the remaining cut cookies right back in the refrigerator or even the freezer while the first sheet is in the oven. That blast of cold ensures they hold their beautiful, crisp shape all the way through baking. This is critical for keeping those defined edges!
Handling Edible Gold Dust Like a Pro
When it comes time to add that luxurious shimmer that makes these Gold-Dusted Shortbread so special, the application matters. You want a dusting, not a heavy coating—unless you are going for a super glamour look!
I always use a clean pastry brush (one specifically just for food, of course!) and barely dip the tip into the edible gold powder. Then, hold the brush maybe an inch above the completely cooled cookie and gently tap the handle against your finger or another brush handle over the cookie. This creates a fine, elegant mist that catches the light beautifully and gives that high-end look. Less is definitely more when it comes to the dust!
Achieving that Perfect Creamed Base
We cannot stress this enough because it makes or breaks the texture. Your butter *must* be at true room temperature—soft enough to easily make a dent with your finger but not greasy or shiny.
When you cream that butter with the sugars, you are building air into the dough. You need to look for a real color change—it should go from a deep yellow to a pale, almost white-yellow color. That visual cue means you’ve incorporated enough air to keep these Elegant Dessert cookies tender on the inside, even though they are very dense.
Storage and Gifting Gold-Dusted Shortbread
One of the absolute best hacks for these Gold-Dusted Shortbread is just how wonderfully they hold up! This truly is the perfect recipe when you need to prepare ahead for big parties or when you want to package up some beautiful Gold-Dusted Shortbread Gift Ideas. Because they are low-moisture, they stay delicious for ages, making them a reliable choice for any Elegant Dessert platter.
Keeping Your Shortbread Fresh in the Pantry
The baked and cooled cookies—especially the ones without the white chocolate dip—are quite hardy! Store them in an airtight container at room temperature. I mean, airtight! If air gets in, they lose that perfect crunch. Seriously, they should stay wonderfully crisp for a full week, maybe even ten days if your house isn’t too humid. They’re marvelous Make Ahead treats for this reason.
For the peppermint cookies that have been dipped in white chocolate, they don’t mind room temperature storage either, but try to keep them away from direct heat or bright sunlight, just so the chocolate coating doesn’t get fussy.
Freezing Gold-Dusted Shortbread for Later
If you really want to plan far ahead, you can absolutely freeze these Buttery Cookies, and I actually find freezing the dough logs easier sometimes! You have two great options here, based on when you plan to bake.
Freezing the Dough Logs: If you’ve formed your vanilla and chocolate doughs into logs, make sure they are wrapped super tightly in plastic wrap first. Then, wrap that tightly wrapped log again in aluminum foil—think of it as double armor! You can store these like this for up to a month. When you want cookies, just let the log sit on the counter for about 20 minutes until you can slice it, then proceed with chilling the slices before baking, as usual.
Freezing Sliced Cookies: This is my favorite for quick baking sessions. Once you slice the logs, lay the individual Shortbread Cookies on a baking sheet, freeze them until solid (maybe an hour), then transfer them into a heavy-duty, freezer-safe bag or container. They freeze beautifully for up to a month this way too! Pop them straight from the freezer into the fridge while the oven preheats, or even bake them from barely thawed if you have the patience.
Shipping and Packaging Your Elegant Dessert
These cookies ship like a dream, which is perfect for sending your famous treats across the country. The key here is grouping them carefully to avoid flavor mingling, especially the peppermint!
- Grouping Flavors: For the best results, group the similar flavors together in small batches (like 3 or 4 cookies). Wrap these small flavor groups tightly in plastic wrap first. This keeps them snugly together and prevents crumbs from falling everywhere.
- The Peppermint Priority: Pay special attention to those chocolate peppermint cookies. Wrap those individually in plastic wrap, then maybe use a little aluminum foil over the plastic wrap. We really don’t want that peppermint aroma drifting over and making your chai spiced cookies taste minty!
- Boxing Securely: Place your tightly wrapped flavor groups into a sturdy gift tin or box. Fill any gaps with crumpled parchment paper or tissue paper so the cookies can’t rattle around during transit. A little movement means breakage, and we want those perfect edges intact!
With this sturdy nature, you can send out these beautifully dusted cookies weeks ahead of a holiday, making them the ultimate Make Ahead gift.
Frequently Asked Questions About Shortbread Cookies
I get so many questions about these shortbreads because people are worried about messing up the beautiful toppings! Don’t panic! Here are the things folks ask me about most often when they are trying to master this recipe.
Can I skip the required dough chilling time?
Oh, please don’t try to skip it! I know waiting 120 minutes (or overnight!) feels like forever when you want to bake, but chilling is absolutely necessary for these Gold-Dusted Shortbread to work correctly. If you try to slice the dough logs when they are soft, they will squish, spread out in the oven, and you won’t get those lovely clean edges that make them such an Elegant Dessert.
If you’re really in a rush, you can put the cut slices almost directly into the freezer for 30 minutes. That super-cold environment prevents the butter from melting too quickly when they hit the heat, ensuring you keep that perfect, crisp, Buttery Cookies texture.
What is the best type of butter to use for shortbread?
For true Buttery Cookies, you need the highest quality, full-fat, unsalted butter you can find. Since butter is the star ingredient here, every bit of flavor carries through to the final product. Unsalted allows you to control the salt level perfectly, which is important when we add those flavor variations.
Make sure it is softened to true room temperature! If you use cold butter, it won’t cream properly, and if you use melted butter, the dough will be greasy and won’t hold its log shape. Room temperature is the sweet spot for trapping air for a tender cookie!
How exactly should I apply the edible gold dust?
This is my favorite topic! Applying the edible gold correctly separates a nice cookie from an amazing one. You don’t want to paint it on thick; you want a delicate shimmer.
What works best is using a very fine, clean pastry brush. Dip just the very tip of the bristles into the gold powder. Then, hold the brush about an inch over the cooled cookie and gently tap the back of the brush handle with your other hand. This creates a very light, almost ethereal mist that settles onto the surface. It catches the light beautifully without looking heavy or artificial.
Do I have to use both brown and white sugar in the vanilla base?
Yes, you really do! That combination is key to the flavor and texture of those vanilla-based Shortbread Cookies. The granulated sugar helps with creaming and aeration, giving us a little lightness. But the light brown sugar brings those beautiful, subtle molasses notes that add depth and a slight chewiness. If you used only white sugar, the cookie would taste flatter and might bake up a bit too crisp instead of remaining perfectly tender.
Nutritional Estimates for Gold-Dusted Shortbread
Now, I know some of you wonderful bakers are curious about the numbers, and believe me, I totally get it! When something is this delicious and looks this fancy, you start wondering about the breakdown. However, when dealing with four different flavor variations—Chai Spice, Chocolate Cherry, Chocolate Hazelnut, and Chocolate Peppermint—the macronutrient profiles get wildly different!
Because this recipe uses different amounts of chocolate, nuts, and sugar coatings across the four separate dough types, giving you one single, accurate estimate just doesn’t feel right. Plus, the specific brands of butter, flour, and even the type of edible gold you use totally throw the calculations off.
For accuracy, especially when making these gorgeous Gold-Dusted Shortbread cookies for gifting or careful tracking, I highly recommend inputting the specific measurements of the ingredients you use into your favorite recipe calculator if you need precise details. For my purposes, I focus on the joy of serving these beautiful Buttery Cookies, and I count the smiles as the best nutritional metric!
Share Your Elegant Dessert Creations
I am genuinely so excited for you to try your hand at these flavor combinations! Whether you stuck to the classic vanilla base, braved the festive peppermint dip, or went all-in on the deep, rich chocolate cherry, I absolutely want to hear all about it. Baking is a conversation, after all!
When you finish dusting those beauties with that final touch of gold—which I hope sparkled exactly how you imagined—please come back and tell me what you thought. Did the chai spice swirl surprise you? Was the chocolate hazelnut too decadent (if that’s even possible)?
Leaving a rating really helps other bakers see that this recipe for Gold-Dusted Shortbread delivers on its promise of being an easy yet elegant treat. And honestly, comments are the best part! Sharing your decorating successes, or even a little trick you discovered while working with the dough, helps our whole community of bakers level up their game.
Take a picture, share your favorite batch on social media, and tag me! Let’s celebrate this simple, luxurious, and unbelievably Buttery Cookie together. I can’t wait to see your glamorous results!
Gold-Dusted Shortbread
Ingredients
Equipment
Method
- For the Vanilla Dough Base: In a large mixing bowl, cream together the butter, brown sugar, and granulated sugar until pale and fluffy using a hand or stand mixer with the paddle attachment.
- Mix in the vanilla and salt, then the flour. Switch to a rubber spatula and mix by hand to ensure all flour is incorporated.
- For the Chai Spiced Cinnamon Sugar: Split the vanilla dough into two portions, with one slightly larger for the chai spiced cookies.
- In a small dish, combine the cinnamon, cardamom, ginger, and allspice. Add this mixture to the larger dough portion and fold gently a few times to swirl the spices. Do not fully mix.
- For the Dark Chocolate Cherry: To the smaller dough portion, add the chopped chocolate and cherries. Mix to combine.
- Lay out two sheets of plastic wrap. Place each dough portion in the center of a sheet and form into an 8-9 inch log. Tightly wrap the logs and chill for at least 2 hours or overnight.
- For the Chocolate Dough Base: Scrape the mixing bowl clean. Cream together the butter and sugar until pale and fluffy.
- Mix in the salt and vanilla, followed by the flour and cocoa powder. Use a rubber spatula to mix by hand, ensuring all dry ingredients are incorporated.
- For the Chocolate Hazelnut: Split the chocolate dough in half and add one half to a separate bowl. Mix in the roughly chopped hazelnuts.
- For the Chocolate Peppermint: To the dough remaining in the original bowl, add the peppermint extract and chopped dark chocolate. Mix well.
- Lay out two sheets of plastic wrap. Place each chocolate dough portion in the center of a sheet and form into an 8-9 inch log. Wrap tightly and chill with the vanilla dough for at least 2 hours or overnight.
- Coating & Baking: Once the dough logs are firm, roll them in their respective coatings. Roll the dark chocolate cherry dough in raw sugar. Roll the chai spiced cookies in the cinnamon sugar mixture. Roll the hazelnut cookies in finely chopped hazelnuts. The peppermint cookies are left plain.
- Slice the ends off each log and then slice each log into approximately 12 cookies. Preheat your oven to 350F and chill the sliced cookies in the refrigerator while the oven heats.
- Line a baking sheet with parchment paper. Place the chilled cookies on the prepared sheet, about 2 inches apart. Keep the remaining dough chilled. Bake for 15-18 minutes, or until the edges are pale golden brown and the tops are matte.
- Transfer cookies to a cooling rack and bake the remaining dough. Once cooled, dunk half of each peppermint cookie into melted white chocolate and sprinkle with crushed candy canes. Refrigerate for 15 minutes to set.
Notes
Tried this recipe?
Let us know how it was!
Master of Culinary Visual Arts
My culinary journey started in the fast-paced kitchens of boutique coastal restaurants throughout Southern California, where I learned that beautiful food doesn’t have to be complicated. After nine years of professional cooking, I’ve made it my mission to prove that sophisticated, nutritionally sound meals can be accessible to busy home cooks who refuse to compromise on flavor or visual appeal.
What changed everything for me was watching talented home cooks feel intimidated by healthy cooking. That’s when I transitioned to private instruction, teaching busy professionals and families how to create restaurant-quality meals using simple techniques and ingredients they can actually find at their local grocery store. My “15-minute meal” frameworks are now used by several regional cooking schools!
As a third-generation Mexican-American, I love weaving vibrant Latin flavors into low-carb creations – proving that healthy eating can be both culturally authentic and visually spectacular. My “effortless elegance” philosophy is simple: nutritious food should look as stunning as it tastes, without requiring professional chef skills or expensive equipment.
When I’m not developing recipes in my San Diego coastal kitchen, you’ll find me surfing the local breaks with my Golden Retriever mix, Mango, who’s both my kitchen companion and unofficial taste-testing assistant. My personal low-carb lifestyle started as a way to maintain energy for my active coastal life, and it’s become the foundation for proving that healthy eating enhances rather than restricts life’s pleasures.