
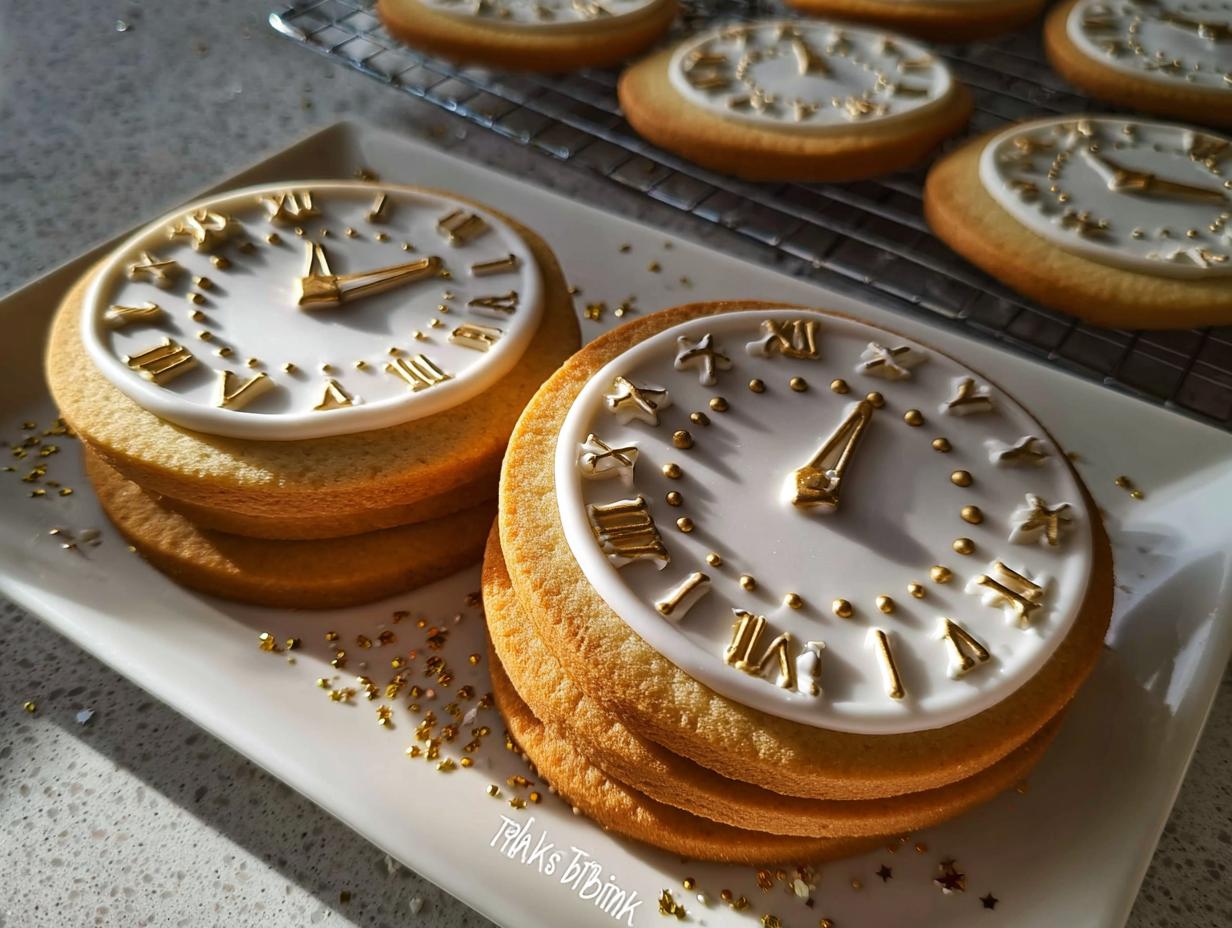
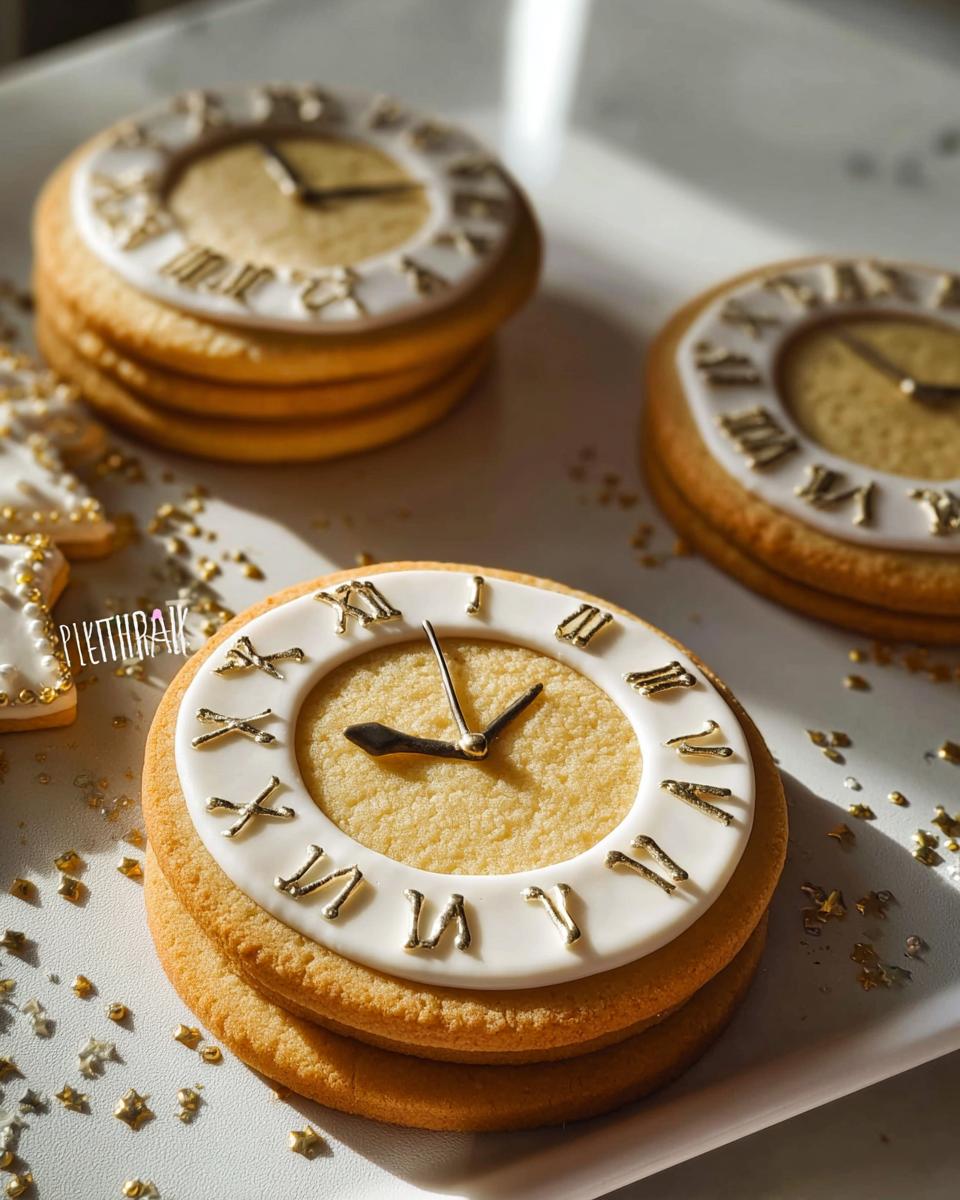
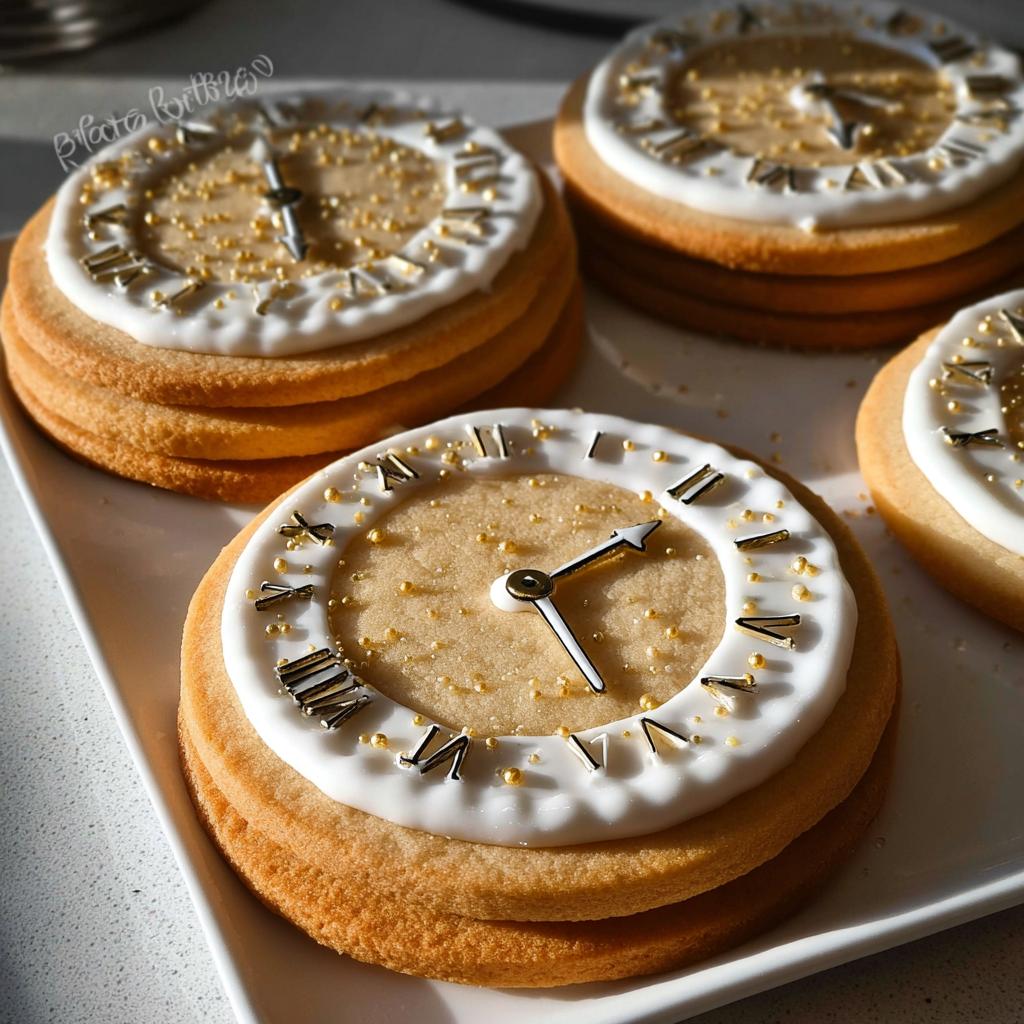
Oh, I absolutely *love* baking with my kids, especially when the activity doubles as a fun lesson! There’s nothing quite like the smell of sugar cookies mixing up on a Saturday afternoon. My absolute favorite thing to do, which has since become a cherished tradition in our house, is making Clock Face Countdown Cookies. We use this wonderfully simple, reliable recipe to create the perfect canvas for decorating.
I still remember the excitement buzzing in our kitchen the day we decided to bake these for my son’s birthday party. With the party looming, we turned a basic sugar cookie recipe into clock faces, each cookie marking an hour leading up to the big moment. As we frosted them with vibrant icing, I was reminded of my own childhood where baking brought our family together. This activity not only taught my kids about counting down the hours with eager anticipation but also sparked a tradition I hope they’ll carry on. Wow, the cookies were a hit, but the joy we shared while making them was the sweetest part of all!
This recipe provides a fantastic, tasty base for any celebration or impromptu family teaching session. Trust me, you’re going to adore how easily these come together. I’m Maria Fernandez, Certified Family Nutrition Strategist, and I guarantee this simple sweetness is going to be a new staple in your home!
Why You’ll Love These Clock Face Countdown Cookies
For us busy parents, finding an activity that’s fun *and* productive can feel like finding a unicorn! But these cookies deliver exactly that. They are so versatile for everything from holidays to quick after-school lessons.
- They use a super sturdy, straightforward sugar cookie base that’s easy for beginner young bakers to handle. No weird ingredients here!
- It’s a fantastic, hands-on way to teach kids how to tell time or practice counting, making learning feel like a total treat.
- The required chilling time (sixty whole minutes!) gives you a perfect natural break—maybe for cleaning up the flour explosion or just having a cup of coffee.
- They hold their shape beautifully once baked, which means those detailed icing drawings won’t get all warped and sad.
- Cleanup isn’t too bad since the dough stage is pretty contained, especially if you use parchment paper from the start.
- Twenty-four cookies is a great batch size—enough for school, enough for party favors, and enough for the family to snack on too!
Essential Equipment for Perfect Clock Face Countdown Cookies
When you’re making these cookies for a specific theme, having the right gear makes all the difference. You don’t need fancy gadgets scattered all over, but a few key items ensure your cutting and baking go smoothly. Since we are aiming for precise clock shapes, you might need to run out and grab a few things if your drawer is looking a little bare!
When shopping for cutters, think round! Circular cutters are your best friend here, mimicking a real clock face perfectly. If you don’t have perfect circles, an overturned nice glass or jar rim works in a pinch, but getting a good set of round cutters will make the decorating phase so much easier down the line. You’ll want the shapes to be fairly uniform so your countdown looks organized, even if the little hands on the clock are slightly wobbly!
We actually found some great tips on making other countdown treats over at countdown cookies in general, which always helps when prepping for a big event!
Key Tools for Preparing Your Clock Cookies
Here is what I pulled out of my kitchen cabinets when making this batch. If you have a stand mixer, use it; if not, your trusty hand mixer or even a sturdy wooden spoon will do the trick!
- Stand mixer: This makes the creaming step so mindless, which is exactly what I need when I have kids waiting to dump in the flour.
- Rolling pin: Essential for getting that perfect, even 1/4 inch thickness.
- Cookie cutters: Primarily round shapes for the clock face. Having a couple of different sizes is fun for variety!
- Baking sheets: You’ll want two or three ready to go because this recipe makes 24 cookies.
- Plastic wrap: Non-negotiable! This keeps the dough happy and cold while it rests in the fridge.
- Wire cooling rack: We need these to cool the cookies completely before we even *think* about touching them with icing.
Gathering Ingredients for Your Clock Face Countdown Cookies Dough
Honestly, the best part about this whole recipe is that the base dough is just a dynamite sugar cookie. It doesn’t depend on weird flavorings or strange spices, which means it’s incredibly reliable for holding its shape! When you’re counting down to an event, the last thing you need is a cookie that spreads out into a flat, sad puddle in the oven. This base is sturdy, delicious, and ready to be painted!
We need to make sure we have all our components ready before we even turn on the electric mixer. Having things measured out beforehand keeps that mixer from running too long while you’re scrambling for the baking powder. It’s a simple classic recipe, so don’t let those measurements scare you; they are exactly what your beautiful Clock Face Countdown Cookies need to succeed.
For the Cookies: Base Dough Components
Everything listed below goes into the mixer bowl until our dough comes together. Remember, the butter needs to be truly softened—not melted! If your butter is too hard, it won’t cream properly, and that’s the first step where things can go wrong.
For the Cookies:
- 1/2 cup butter, softened
- 2/3 cup white sugar
- 1 egg
- 1 egg white (this extra white helps create a slightly crisper edge for decorating!)
- 1/4 tsp vanilla extract
- 1 2/3 cup all-purpose flour
- 3/4 tsp baking powder
- 1/4 tsp salt
See? Simple, right? Once you have these pantry stars gathered, we move straight into the mixing stage. Don’t worry about the chilling time just yet—that comes right after we form the dough!
Step-by-Step Instructions for Making Clock Face Countdown Cookies
This is where the magic starts! Follow these steps closely, and you won’t have any trouble getting those precise clock shapes. I always try to make the dough the day before because, honestly, chilling it overnight makes the rolling process so much easier. Plus, it breaks up the baking time when you have little helpers bouncing off the walls waiting for cookie time!
Mixing and Chilling the Clock Cookies Dough
First things first, get that stand mixer humming! Cream together your softened butter and that white sugar until the texture gets light and fluffy—it should look paler than when you started. Then, beat in your egg and vanilla until everything is just mixed in. Don’t overbeat it here, we don’t want too much air yet; we’re saving that excitement for the rolling part!
Now, in a separate bowl, whisk your flour, baking powder, and salt together. Gently add this dry mix to your wet ingredients. Mix it just until a proper dough starts to form—seriously, once the flour disappears, stop the machine! Cover that whole beautiful ball with plastic wrap right away. Pop it in the fridge for a minimum of one hour. Seriously, don’t even try to roll it when it’s warm; you’ll just end up with sticky frustration. It’s so important to get that chill time right, just like when I read about other great ideas for planning fun countdown treats!
Rolling, Cutting, and Baking Your Clock Face Countdown Cookies
Once chilled, preheat your oven to a nice, hot 400 degrees Fahrenheit (that’s pretty hot for cookies, but it helps us bake fast!). Line those baking sheets with parchment paper—it saves you so much scrubbing later.
Lightly dust your counter with flour. Take out half your dough (keep the other half resting in the fridge!). Roll it out until it’s about 1/4 inch thick—you need that thickness so the clock hands you draw on later don’t punch right through the cookie. Cut out those perfect circles! Place them onto your prepared sheets. Bake them for 7 to 8 minutes. Watch closely! They’re done when the edges turn just a tiny bit golden. Let them chill on the sheet for a few minutes before carefully moving them over to a wire rack to cool totally. Decorations happen only when they are rock hard and completely cool!
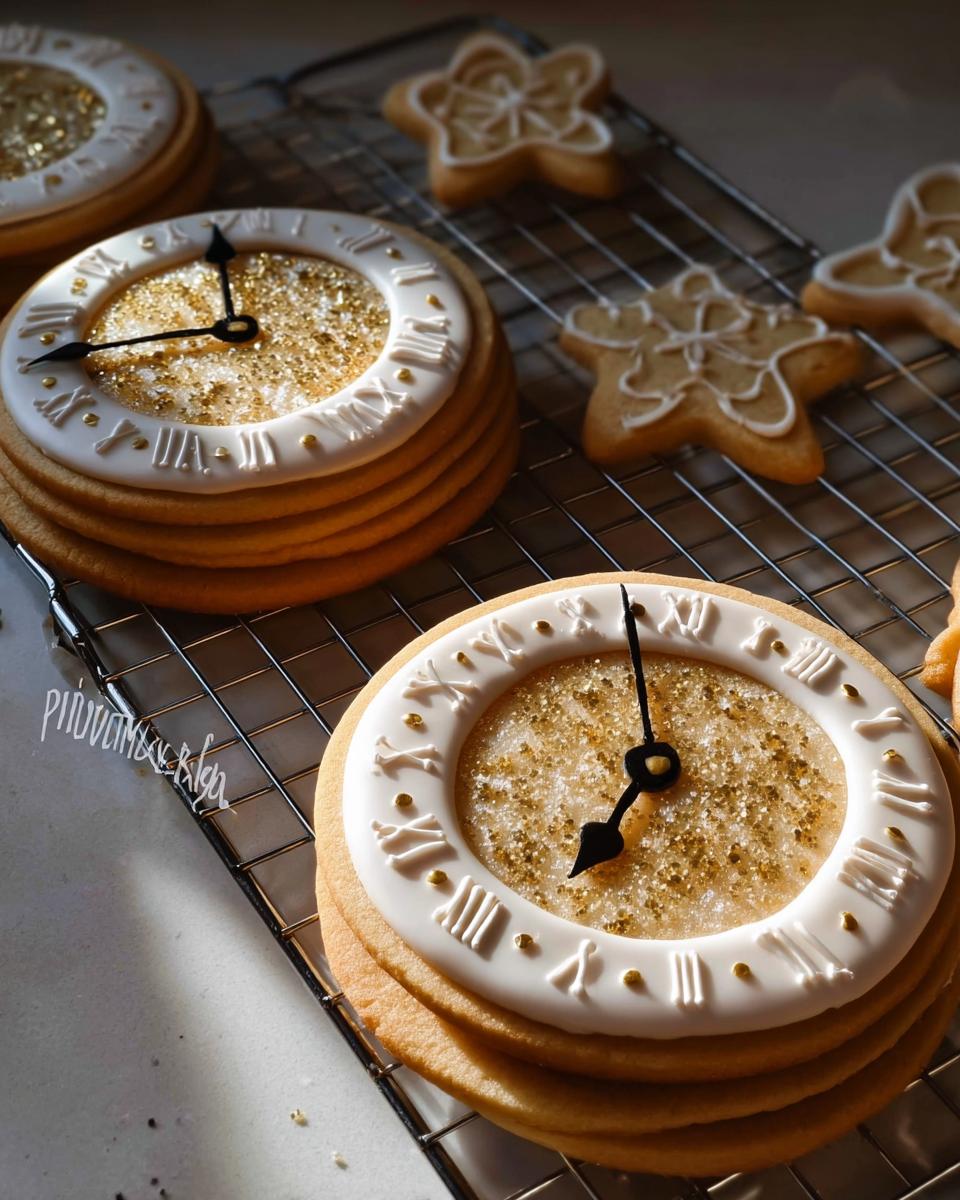
Decorating Your Clock Face Countdown Cookies with Royal Icing
Okay, the cookies are baked, cooled, and smelling heavenly—now for the truly fun part! Since this base recipe is so neutral and sturdy, it’s practically begging for some color. We absolutely have to use royal icing here. Forget that watery glaze you might use on a quick batch of chocolate chips; royal icing is the hero when you need crisp lines and details, which is exactly what you need to make a readable clock face!
The key to success with royal icing is having two main consistencies ready to go. You’ll need a thicker icing, which I call the ‘outline’ consistency—think toothpaste thickness. This is what you’ll use to pipe the *edge* of your clock circle and those crucial hands. Then you need your ‘flood’ consistency, which is runnier, almost like thick honey. This smooths out the center beautifully!
Tips for Perfect Royal Icing Application on Countdown Cookies
If you rush the icing, you’ll sabotage all that hard work you did on the dough! Patience during decorating is everything. You want those clock numbers—1 through 12—to look crisp, not like they melted into a puddle before they dried.
Consistency is King: Always do your outline first using that thick icing. Let that border dry for a good twenty minutes—or until it’s firm to the touch. Only then should you go in with your flood icing. Try to pipe the flood icing right up to the border line, but don’t let it touch, or it might bleed out! You can gently tap the cookie on the counter to help the flood settle flatly.
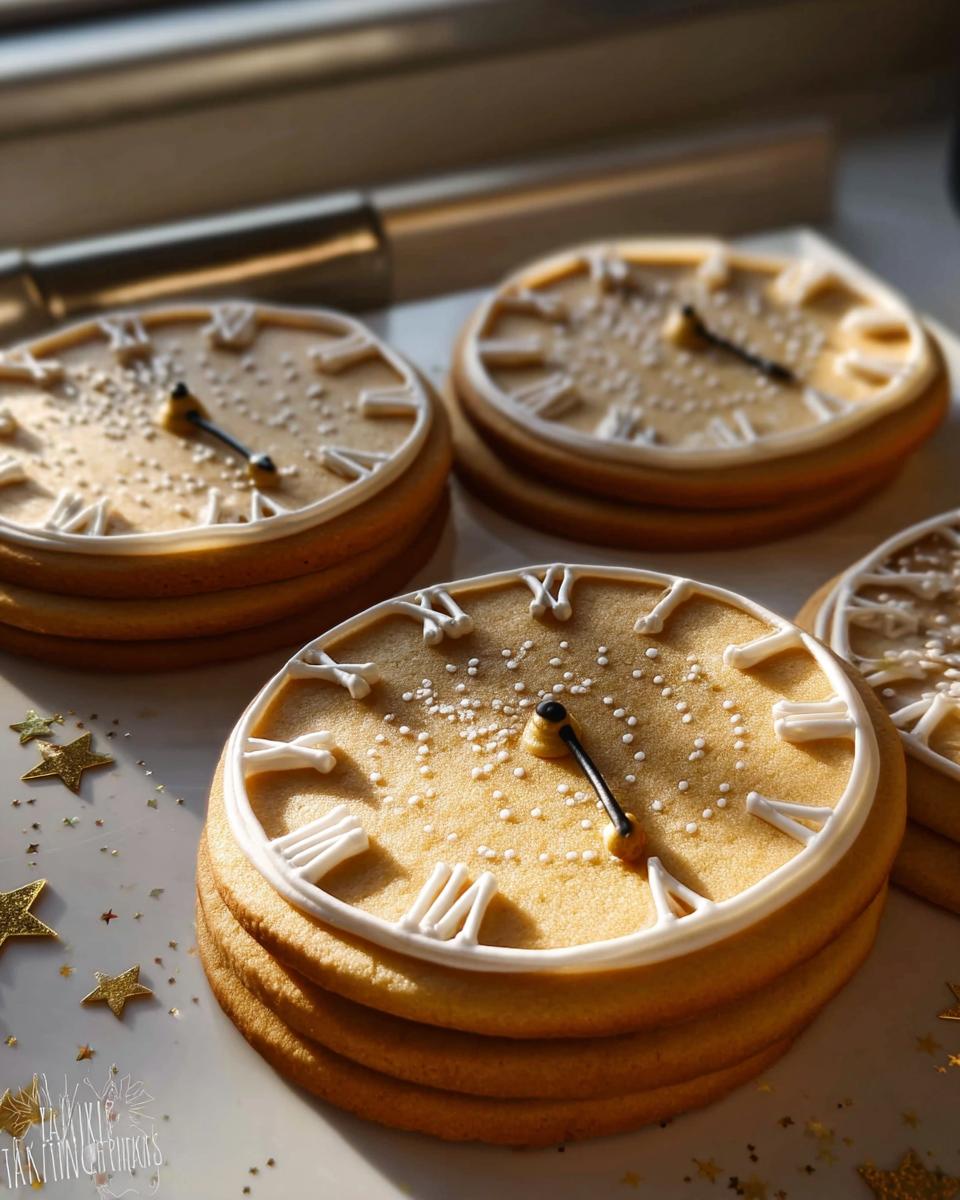
Drawing the Numbers: For clear, readable Countdown Cookies, keep the numbers small, especially around the edges of the cookie. I usually outline the ’12,’ ‘3,’ ‘6,’ and ‘9’ dots first with the thick icing. These are your main reference points! Then, you can use a toothpick or a scribe tool to gently pull the flood icing into place if it starts to wander.
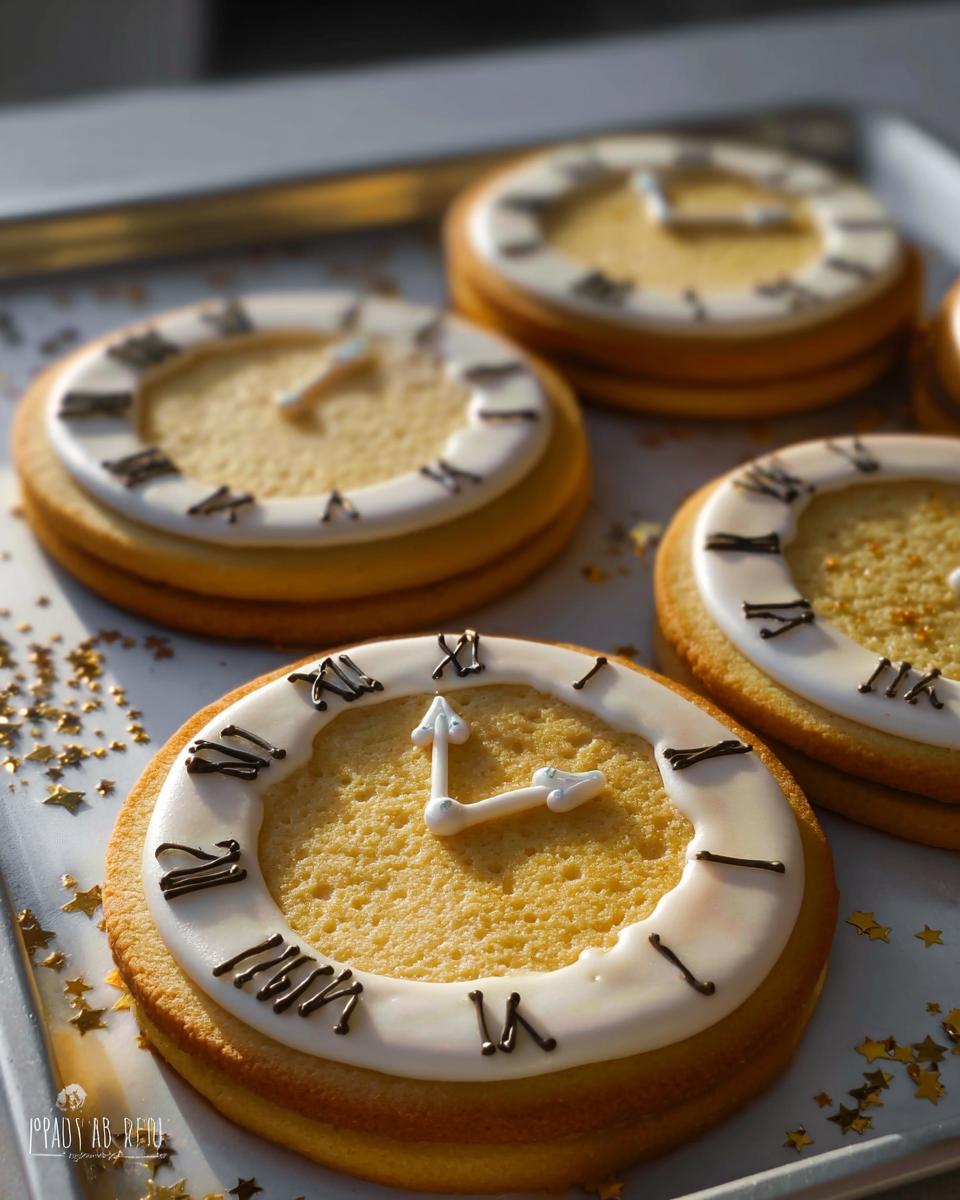
The Hands: Draw the hour hand and the minute hand with that stiff outline icing. For a countdown theme, you can decorate each cookie slightly differently. Maybe one cookie has the hands marking 1 hour left, another marks 30 minutes left. Let everything dry completely! Seriously, if you are using these for a party, outline everything one day, let it dry overnight, and flood and detail the next day. This prevents smudging, and trust me, smudged icing ruins the educational look of these Clock Face Countdown Cookies!
Tips for Success When Making Clock Face Countdown Cookies
You’ve got the recipe, you’ve got the inspiration, but I want to make sure this batch is absolutely perfect for you! Baking these precision-cut cookies is all about temperature control and handling the dough gently. I’ve learned a few tricks over the years that keep these from turning into sad, misshapen blobs, so pay attention to these next few points!
First, let’s talk about flour—don’t pack it! When you measure your all-purpose flour, make sure you spoon it lightly into the measuring cup and then level it off. If you scoop straight from the bag, you end up with way too much flour, and that is a direct path to stiff, crumbly cookies that crack when you roll them out. A heavy flour content will ruin that beautiful 1/4 inch thickness we are aiming for.
My second huge piece of advice is honestly about the chilling time. That minimum of one hour is not a suggestion from me; it’s an absolute necessity! If your dough is too warm when you cut those circles, the butter softens, and guess what happens in the oven? Spreading! The edges of your clocks will look puffy and soft, making it impossible to draw clear hour markers later. Seriously, if you can manage it, chill the dough overnight. It just makes the dough so much easier to handle.
Also, don’t be afraid to re-chill your cutouts! If you happen to cut a whole batch of circles and notice your kitchen has gotten warm, or your fingers have warmed up the dough between your hands, just slide the entire tray of cut-out, unbaked cookies into the freezer for 10 minutes before they go into the oven. A super cold cookie going into a hot oven is the secret to keeping those sharp edges defined. This is a trick I learned when baking for those tricky New Year’s countdowns!
Finally, when applying the royal icing, remember that the base cookie has a little bit of flavor from the vanilla, but it’s a relatively plain backdrop. Don’t rush the drying process between layers. If you seal wet icing under wet icing, you’re just inviting moisture that will cause the cookie to get soggy right at the decorating stage. Be patient, let each layer set, and those details on your Clock Face Countdown Cookies will shine!
Storing and Keeping Your Clock Cookies Fresh
We put so much work into rolling, baking, and then decorating these beautiful Clock Face Countdown Cookies, so we definitely need to know how to keep them fresh! The good news is that because we used a nice, sturdy sugar cookie base and royal icing, these hold up really well. They aren’t like those soft bar cookies that go stale in a day; these are built for admiring!
It’s important to separate how you store the plain baked cookies versus the ones covered in beautiful edible art. Trust me, if you try to stack freshly decorated cookies, you’ll end up with a beautiful, sticky mess all over your counter!
Storing Unfrosted Cookie Bases
If you’re a planner like me (and you probably are if you’re making specialized themed cookies!), you can totally knock out the cookie base days ahead of time. Once the cookies are completely cooled—and I mean completely cool, not even slightly warm—you can stack them carefully in an airtight container. I use cookie tins or large Ziploc bags. If you are worried about breakage, you can place a layer of wax paper between stacks, but honestly, these sugar cookies are pretty tough!
Kept in an airtight container at cool room temperature, your un-iced Clock Cookies will be perfectly good for about a week. If you need them to last longer than that, you can freeze them! Just double-bag them, press out as much air as you can, and they’ll be just fine in the freezer for up to three months. When you’re ready to decorate, just thaw them right in the container on the counter so condensation doesn’t form on the cookie surface.
Keeping Decorated Countdown Cookies Fresh
Once you’ve put all that hard work into your royal icing clocks, you need to take special care. The biggest enemy here is humidity, which can make the icing soft and sometimes sticky, even after it’s dry. Just like the un-iced ones, an airtight container is your best friend. However, you must let the icing dry fully—and I mean *fully* dry—before you seal them up. I usually give them at least 12 to 24 hours sitting out on the rack just to cure before packing them away.
Fully decorated Countdown Cookies are best enjoyed within 3 to 5 days for peak flavor and decoration crispness. If you’ve used standard royal icing consistency, they can last up to a week at room temperature. Keep the container away from direct sunlight or any heat source, like the top of the fridge! While you *can* freeze decorated cookies, I usually don’t recommend it unless they are sealed perfectly. The intense cold can sometimes cause the icing to sweat a little when you bring them back out, so fresh is best for viewing those fancy clock hands!
Frequently Asked Questions About Clock Face Countdown Cookies
I get so many questions after people see pictures of these fun treats! It’s totally normal; when you mix education with party food, you end up with a few logistics to figure out. I’ve gathered the questions I hear most often, especially from parents planning themed events or trying to teach time management to their little ones.
Can I make these Clock Cookies ahead of time?
Oh, absolutely! I highly recommend it, actually. That secret ingredient to success—the chilling time—is often best stretched into an overnight rest anyway. You can make the plain, un-iced cookie bases up to a week in advance, storing them in an airtight container at room temperature. If you want to save even more time on party day or baking day, go ahead and frost them too, but make sure the icing has dried for a solid 12 hours first. This lets you focus on the fun part—the countdown decoration—without stressing over the baking!
What is the best icing for detailed Countdown Cookies?
If you are going to put in the effort to make your cookies look like actual clocks, you cannot skimp on the icing! My answer is always, always, *always* use royal icing. Glazes or buttercream just won’t give you those sharp, thin lines you need for drawing the small numbers (like the 1 through 12 marks) or for piping those tiny, precise clock hands.
Royal icing dries hard and smooth, which means your meticulous drawing won’t smear or smush when little hands pick them up. Remember what I said earlier? You need one thicker consistency for outlining the edges and a slightly thinner one for flooding the center. That contrast is what makes the hands and numbers really pop off the surface of your beautiful Countdown Cookies!
Sharing Your Clock Face Countdown Cookies Creations
I really, truly hope these instructions have convinced you to try making these Clock Face Countdown Cookies with your family! Honestly, the best payoff for all that mixing and chilling is seeing how proud kids get when they look at the little edible clocks they made themselves.
Whether you used these to count down the minutes until a birthday cake, spent an afternoon teaching time concepts, or just made a fun batch because you love tasty treats, I want to know how they turned out for you! Did your royal icing hands cooperate? Were your cookies perfectly round?
Please, take a quick second and leave a comment below letting me know your experience. Tell me the occasion you baked these for! Did you use them as party favors or just as a fun Saturday afternoon project? Five-star ratings are always appreciated, of course, but the honest feedback about how the recipe worked in *your* kitchen means the most to me. Happy baking, and enjoy those sweet, timely treats!
Clock Face Countdown Cookies
Ingredients
Equipment
Method
- In a stand mixer, cream together the softened butter and white sugar until well combined. Add the egg and vanilla extract, then stir until incorporated.
- Stir in the all-purpose flour, baking powder, and salt until a dough forms.
- Cover the dough with plastic wrap and chill in the refrigerator for at least 1 hour, or preferably overnight.
- Preheat your oven to 400 degrees Fahrenheit (200 degrees Celsius). Line baking sheets with parchment paper.
- On a lightly floured surface, roll out the chilled dough to 1/4 inch thickness. Use cookie cutters to create your desired shapes, such as circles for clock faces.
- Place the cut-out cookies onto the prepared baking sheets, leaving some space between them.
- Bake for 7-8 minutes, or until the edges are lightly golden.
- Allow the cookies to cool on the baking sheets for a few minutes before transferring them to a wire rack to cool completely. Decorate as desired.
Notes
Tried this recipe?
Let us know how it was!
Certified Family Nutrition Strategist
My path into family nutrition began working with Phoenix Area Family Services, where I saw how traditional nutrition advice often ignored real-world constraints like budget limitations, time crunches, and kids who refuse to eat anything green. That experience sparked my mission to develop meal planning systems that work with family realities, not against them.
Over eight years, I’ve helped hundreds of families reduce grocery spending by 25% while dramatically improving their nutrition. My meal planning frameworks have been adopted by local wellness centers because they actually work for busy parents juggling different ages, preferences, and dietary needs in one household.
As a bilingual first-generation Mexican-American and mother of three, I personally navigate the daily challenge of feeding a family nutritiously while honoring cultural traditions and managing a household budget. My “kid-friendly low-carb” protocols show families how to gradually introduce healthier options without triggering mealtime battles or abandoning beloved family recipes.
My “realistic wellness” philosophy is straightforward: health improvements must work within existing family dynamics and financial realities to be truly sustainable. When I’m not developing meal planning systems, I’m creating portable trail snacks for our weekend family hiking adventures – because healthy eating should fuel the life you want to live.
My personal low-carb journey started after pregnancy as a way to regain energy for active parenting, and that experience continues to inform my professional commitment to making healthy eating feel supportive rather than burdensome for busy families.