
Oh, you know those days! You want to host, you want lovely treats, but the oven timer feels like it’s mocking you. I totally get it. That’s why I’m sharing this absolute sanity-saver: my recipe for Slice-and-Bake Party Cookies. They are the dream because they’re simple to mix, ready to chill, and honestly, the best part is how easy they are to decorate later. I vividly remember a vibrant summer afternoon when I had friends dropping by unexpectedly. Time was tight, so I whipped this dough up on the spur of the moment. We rolled the logs, enjoyed the laugh of chilling them (a little forced patience!), and then sliced our way to cookie perfection. As that sweet, buttery aroma filled my kitchen, I felt such a blend of nostalgia and pure creativity. These cookies instantly became the highlight of that whole gathering, proving that baking should be a celebration in itself—simple, joyous, and full of love!
Why These Slice-and-Bake Party Cookies Are Your New Celebration Go-To
Honestly, who has hours to spend rolling out dough and using cookie cutters for every single party cookie? Not me! That’s why I preach about the magic of pre-planning these beauties. They save your sanity when you’re planning a big event.
- They eliminate stress because the dough does most of the work ahead of time.
- You get professional-looking results even when you’re rushing.
- The texture is incredibly consistent every single time you bake them.
Make Ahead Dough Simplicity
This is where your secret weapon lies. You mix up the dough, shape it into logs, and tuck those logs away. Think of the 240 minutes of chilling time as your personal downtime! This Make Ahead Dough means the mess is finished days before the party, leaving you calm when guests arrive.
Quick Bake Finish for Last-Minute Needs
When party time hits, all you need is 14 minutes! Seriously, that’s just enough time to put on some music and get the drinks ready. This Quick Bake feature lets you pull a fresh batch out of the oven right when people walk in the door. Who doesn’t love that smell?
Essential Ingredients for Perfect Slice-and-Bake Party Cookies
Okay, let’s talk about what goes into these treats because, trust me, the quality here matters for that perfect slice. I always keep my ingredients handy; I linked to a great source that reminds me of my own pantry staples, which is helpful when you’re running low! Getting these few things right ensures your Slice-and-Bake Party Cookies don’t spread out into giant, sad puddles. You can check out my recommendations for the best sprinkles over here: sprinkle slice-n-bake cookies!
For the Slice-and-Bake Party Cookies Dough
For the actual cookie dough, you need the basics, but pay attention to the specifics I put in the recipe. You absolutely must use butter that is properly softened—not melted! That’s key for creaming. And if you can remember to pull your egg out early, that also helps build a smooth, sturdy dough structure that holds up beautifully when sliced.
- Unsalted butter, softened (That’s 12 Tablespoons, don’t guess!)
- Packed light brown sugar (I love the molasses flavor it adds here.)
- One large egg, kept at room temperature
- Pure vanilla extract AND almond extract (Don’t skip the almond!)
- All-purpose flour, spooned and leveled
- Salt
- About 2/3 cup of your favorite sprinkles (the more colorful, the better!)
- Optional: Coarse sugar if you want a crunchier exterior when you roll the logs.
For the White Chocolate Drizzle and Garnish
We keep the topping simple so the cookie flavor shines through. White chocolate is lovely because it sets up beautifully and lets those sprinkles pop. A quick word of advice here: make sure that white chocolate is coarsely chopped, or it’ll take forever to melt evenly!
- 8 ounces of white chocolate, coarsely chopped
- Extra sprinkles for garnishing the wet chocolate
Mastering the Slice-and-Bake Party Cookies Dough
Okay, here is where the magic starts—we’re turning soft ingredients into perfect, sliceable logs! Honestly, the best part about this recipe is knowing that once this dough is made, you’re set. It is genuinely Freezer-Friendly, so you can stop anytime you like! The key here isn’t just throwing things in a bowl; it’s about creating structure so these don’t turn into flat puddles in the oven, which is the number one fear with slice-and-bake cookies.
Creaming and Combining Wet Ingredients
Grab your handheld mixer—though my grandma always did this by hand with a wooden spoon, bless her heart! We start by beating that softened butter for just one minute until it looks creamy. Then, add your brown sugar and really whip it! You want it fluffy and pale yellow, like a slightly richer whipped cream. This step incorporates the air we need! Next, drop in that room temperature egg, vanilla, and almond extract. Mixing these at room temperature helps everything emulsify smoothly. If your egg is too cold, it can shock the butter and make the whole mixture look curdled. Don’t worry if it looks a little grainy at first; just keep mixing!
Forming and Chilling the Make Ahead Dough
Once the flour is mixed in—don’t overmix once the flour gets involved!—it’s time for the sprinkles! I turn the speed up just to blast those colorful bits through the dough until everything is distributed. Then, turn it out onto plastic wrap. You need to divide that dough into two equal parts and shape each one into a tight 8-inch log. Really squeeze that wrap around it—we want density! These logs must chill in the fridge for at least 4 hours; that’s non-negotiable for clean slicing. This Make Ahead Dough phase is what makes the final Quick Bake possible!
Baking Instructions for Perfect Slice-and-Bake Party Cookies
Alright, the dough is perfectly chilled and firm—that’s half the battle won! Now we get to the fun, fast part. First things first, crank your oven up to 350°F (177°C). Remember, everything needs to be hot when these cold logs go in. While it’s preheating, line two big baking sheets with parchment paper. I learned the hard way that silicone mats work too, so use whatever you have handy to prevent sticking!
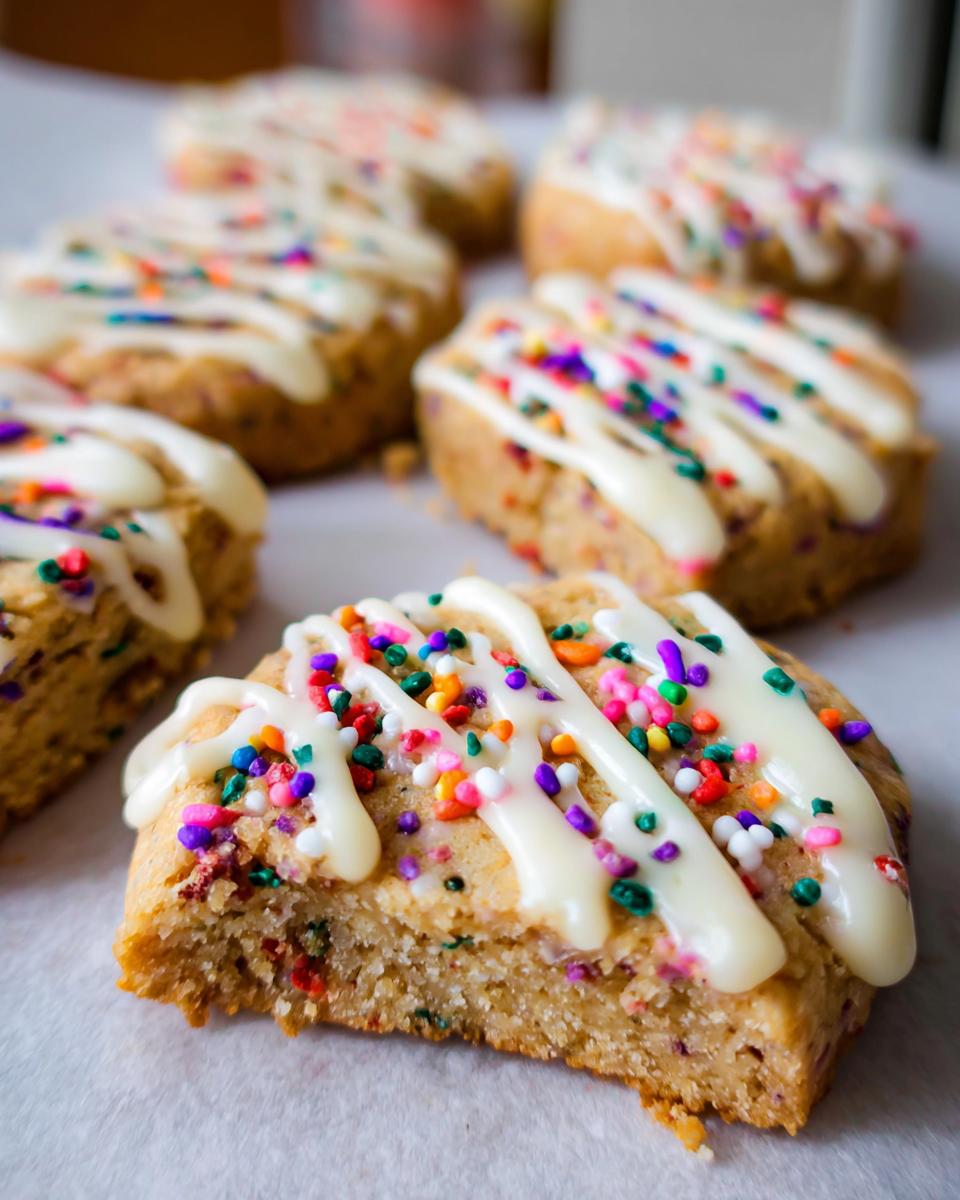
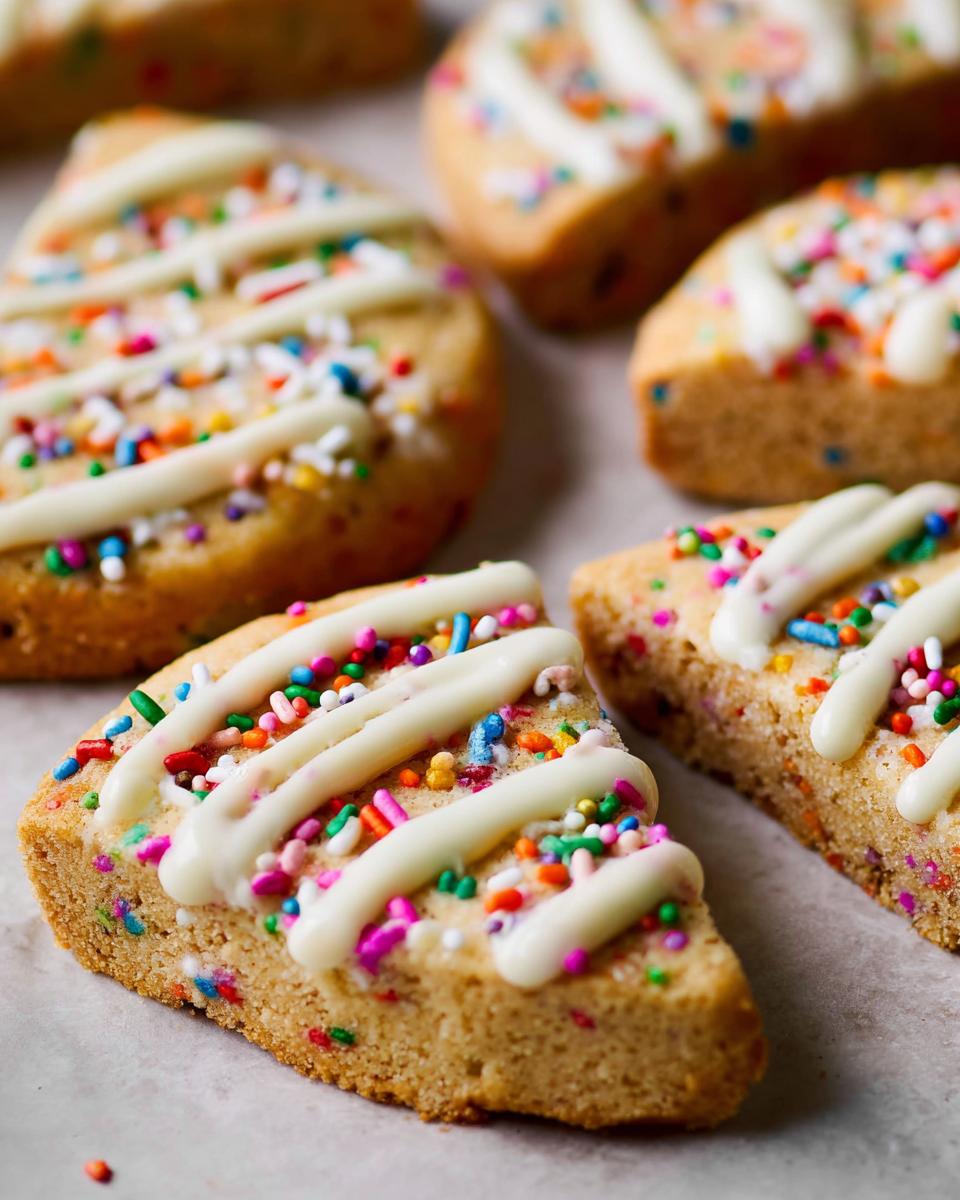
Pull those logs out and slice them up into cookies that are about the same thickness—around half an inch is usually perfect. If they are too skinny, they bake too fast; too thick, and they won’t cook through. Place your slices on the prepared sheets about 2 inches apart so they have room to breathe when they bake.
They only need 12 to 14 minutes in the oven. Don’t walk away! You’re looking for the edges to turn that lovely golden brown shade. That visual cue is your best friend. Let them sit right there on the hot sheet for about 5 minutes once they come out; this lets them firm up. Then—carefully!—move them over to a cooling rack to chill completely before you even think about dipping them in chocolate.
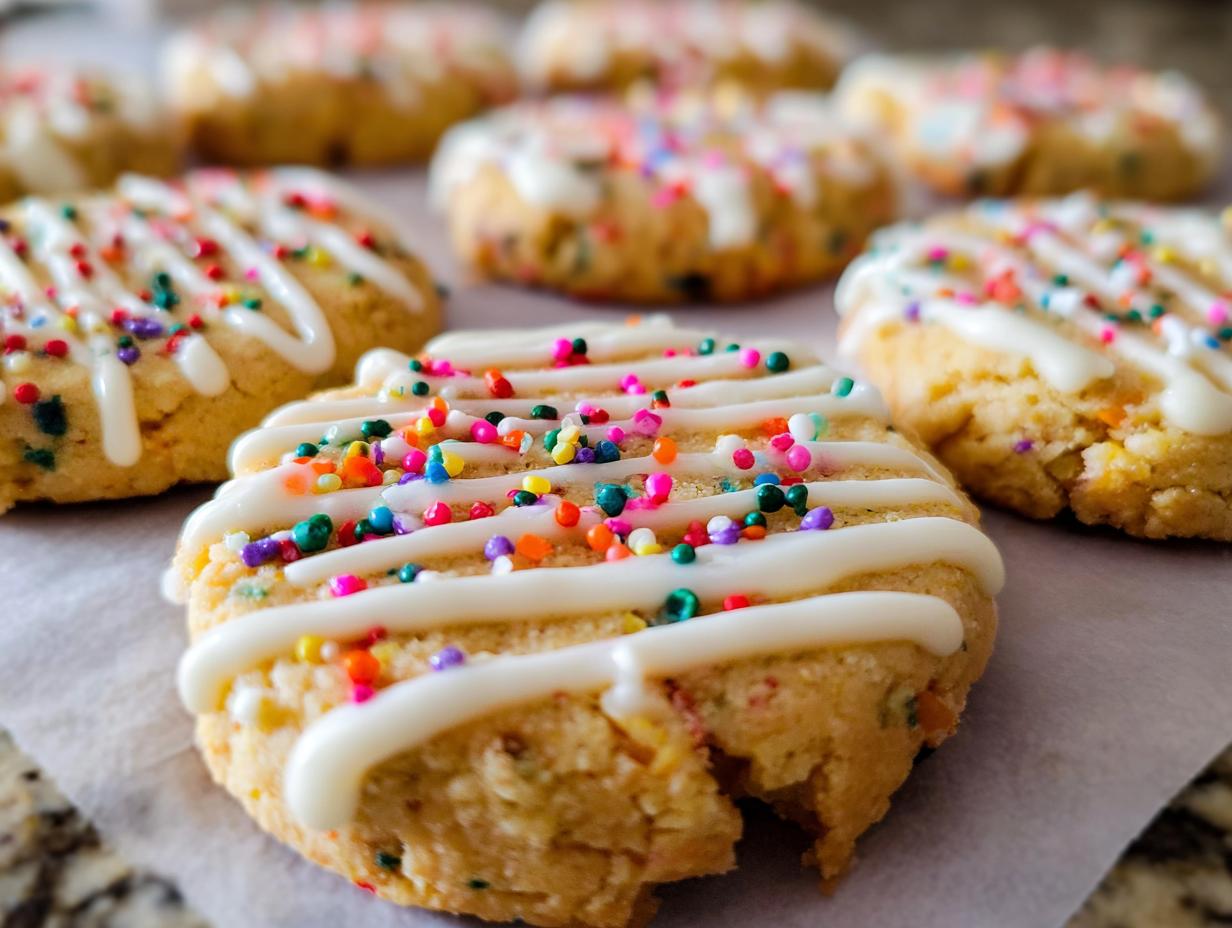
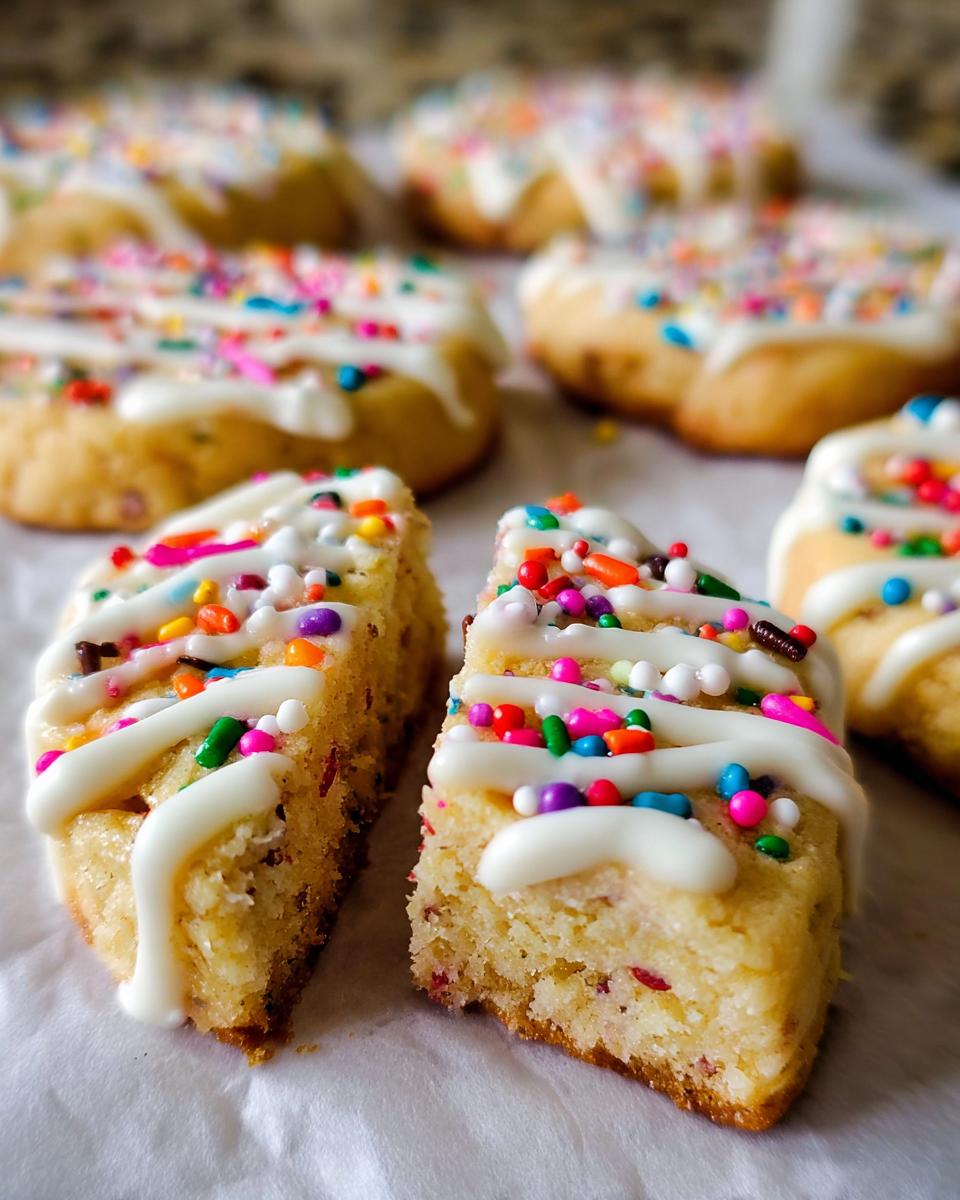
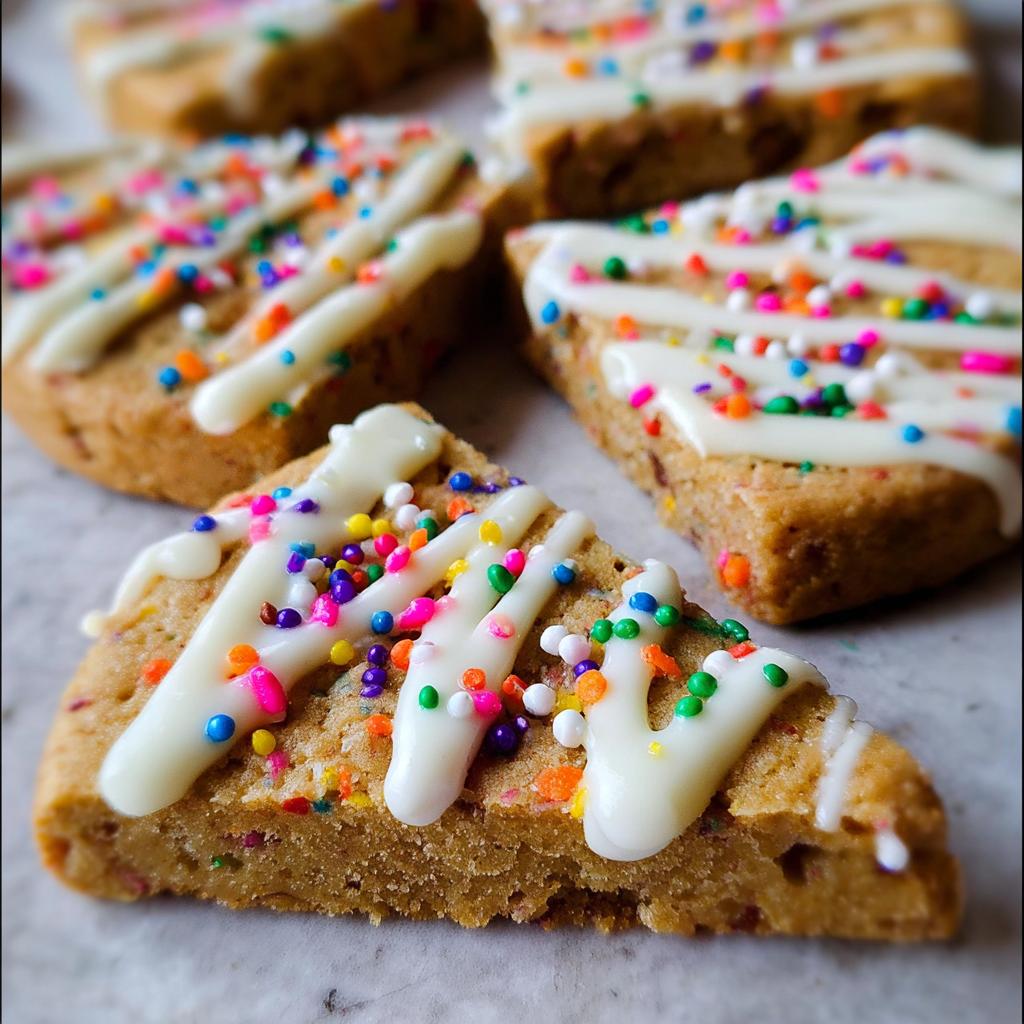
Decorating Your Slice-and-Bake Party Cookies with Drizzle
Once these cookies are fully cooled, they are just begging for some decoration! This next step turns a good cookie into a full-blown celebration centerpiece. We’re keeping the decoration relatively simple because we made the dough simple, remember? A white chocolate drizzle looks so classy, but you have to treat that chocolate right, or it gets grainy and lumpy—and nobody wants seized chocolate!
The safest way, the way I swear by, is using a double boiler. You just need a heat-safe bowl sitting over a saucepan that has a little bit of simmering (not boiling!) water underneath. Don’t let the bottom of the bowl touch the water, or you’ll scorch it for sure. Toss in your coarsely chopped white chocolate and just stir gently until it’s smooth and glossy. If you are in a real hurry, microwave it in 15-second blasts, stirring well between each blast. Seriously, stir after every 15 seconds, or you risk ruining it.
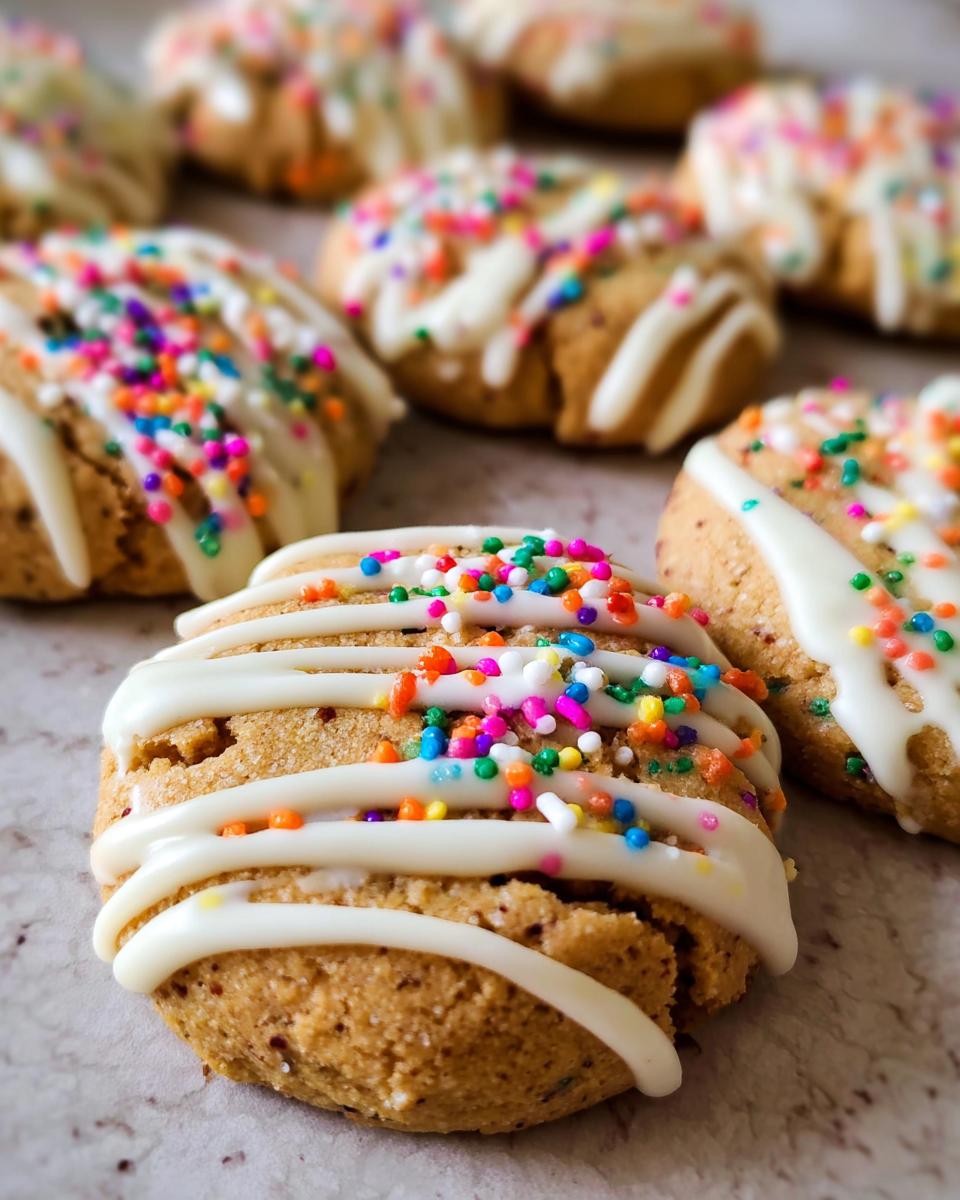
Now for the fun part: dipping! Once the chocolate is perfectly smooth, take a completely cooled cookie and dip about half of it straight down into the bowl. My little trick for getting a nice, even line is to gently pull the cookie up and slightly twist it as you lift it out. This helps drip off the excess.
Lay that dipped cookie onto a piece of fresh parchment paper. While the chocolate is still wet, give it another sprinkle of those colorful bits you love so much! Then, you just need patience. Pop the tray into the fridge for a little while to let that chocolate set up hard. Once they are set, they are done, folks! They look so beautiful, and nobody even knows you made the dough three days ago!
Tips for Success with Slice-and-Bake Party Cookies
You know, even with the best recipe, sometimes things go a little sideways in the kitchen, right? Don’t you worry about that! These cookies are incredibly forgiving, but I’ve picked up a few tricks over the years, especially when dealing with dough that needs a good long nap in the fridge. We want these to be perfect Party Cookies every time, not melty messes!
Handling Freezer-Friendly Dough Logs
If you’re anything like me and you bake ahead for the holidays or big events, this tip is gold. This dough is totally Freezer-Friendly! Once you’ve wrapped those logs nice and tight in plastic wrap, tuck them into a freezer-safe bag. They hold up beautifully for about three months. Seriously, three months! Just remember, if you pull one out on a Tuesday when you want cookies on Friday, you need to plan its thaw time.
The best method is patience: move the frozen log from the freezer to the refrigerator overnight. Letting it thaw slowly in the cold keeps the butter firm enough that it won’t get sticky or start spreading when you slice it the next morning. Don’t try to rush it on the counter, or you’ll end up with soup!
Achieving Uniform Cookie Thickness
Spreading is usually caused by two things: not enough chilling, or slicing the cookies unevenly. If one slice is fat and the next is skinny, the skinny ones are going to burn before the fat ones are done baking. It drives me crazy!
Here’s my simplest trick: After you’ve wrapped the log, use a ruler (yes, seriously!) to make sure the log is perfectly cylindrical before you shrink the plastic wrap onto it. Then, when you go to slice, use a long, thin, sharp knife. I often wipe the blade clean between every third slice, too. That little bit of extra effort ensures every single one of those 24 cookies bakes at the same rate. Consistency is everything when you’re trying to hit that perfect 12-to-14-minute bake time!
Storage and Keeping Your Party Cookies Fresh
Phew, the hard part is over! Now you have a beautiful batch of decorated Party Cookies. It’s important to store them correctly so they stay crisp around the edges and chewy in the center. Baked cookies, once the chocolate is fully set, do great stored in a simple airtight container at room temperature. Honestly, they taste best within three days, but they usually last a solid week hanging out on the counter.
Now, let’s talk about that extra dough you might have tucked away. If you only chilled the dough logs for five days, keep them wrapped tight in the fridge. If you didn’t get to them after five days, pop them in the freezer right away! That’s the best plan for long-term baking success.
Frequently Asked Questions About Slice-and-Bake Party Cookies
It’s totally normal to have questions when tackling a recipe for the first time, especially when you are relying on the dough to do the heavy lifting later! I’ve gathered the ones I get asked most often about keeping these Slice And Bake Cookies perfect for any celebration.
Can I skip the chilling time for the cookie dough?
Oh, please don’t try this! I know waiting those 4 hours seems cruel when you just want cookies, but chilling is absolutely mandatory for the slice-and-bake method to work. If you skip it, the butter in the log will be too soft, and when you slice it, the dough will smear, not cut cleanly. When you bake soft dough, it melts out instantly onto your baking sheet, and you’ll end up with one giant, flat cookie instead of individual beautiful Party Cookies. Patience here means perfect shapes later!
What other decorations work well on these Slice And Bake Cookies?
The white chocolate drizzle is my favorite because it sets up so nicely, but you have so many options! If you want something really fun, try rolling the raw logs completely in colored sanding sugar before you chill them—that gives you a fantastic sparkle and crunch right from the oven. Another thing I love is using colored royal icing after they cool. If you use royal icing instead of chocolate, you can pipe cute little designs or even write initials on them for a personalized touch!
How long do these Party Cookies stay fresh?
Because the fat content is high and we aren’t heavily relying on fresh eggs in the final dough structure being exposed to the air, they actually keep really well! Once they are fully baked and decorated (if you choose to decorate them), just store them in an airtight container at room temperature. They taste absolutely divine within the first three days, but honestly, they stay perfectly good for a full week. If you freeze the dough logs later, remember to thaw them completely before slicing so they don’t get too sticky!
Estimated Nutritional Data for Slice-and-Bake Party Cookies
Now, let’s talk about the hard truths—the numbers! I always tell people that I bake for joy, not for label reading, but if you need the general idea of what you’re munching on when you enjoy these amazing Slice-and-Bake Party Cookies, here’s a rough breakdown.
Remember, this is based on 24 cookies, and since everyone measures butter and sprinkles slightly differently (I know I usually throw in a few extra sprinkles!), these figures are just an estimate. It’s truly a good reference, but if you’re weighing everything perfectly, your final numbers might vary a smidge. Trust me, the taste is the real win here!
- Calories: Approximately 200 to 220 per cookie
- Total Fat: Around 10g per cookie (Those wonderful butter and white chocolate contents!)
- Protein: About 2g per cookie (Mostly from the flour and the egg.)
- Carbohydrates: Roughly 25g per cookie (Thanks to the sugar and flour base.)
See? Not too bad for something that tastes like pure celebration! You get a decent little treat without needing a whole second baking session just to feel guilty. Enjoy them with a tall glass of milk!
Share Your Joyful Slice-and-Bake Party Cookies Creations
Whew! I genuinely hope you loved making these cookies as much as I love sharing them with you all. We’ve turned simple dough into stunning, easy-to-manage, festive treats! That’s what baking is all about, isn’t it?
Now that your kitchen smells like victory and happiness, I really want to hear from you. Did you stick to the white chocolate drizzle, or did you get creative with your own custom colors? Did you have a kitchen party while rolling the logs? Please, let me know!
Head down to the comments section below. I read every single one, and I love seeing your decorating successes! If you snap a picture of your beautiful Slice-and-Bake Party Cookies all set up for a gathering, tag me on social media! It just warms my heart to see my recipes making their way into your celebrations. Happy baking, friends—you totally nailed it!
Slice-and-Bake Party Cookies
Ingredients
Equipment
Method
- In a large bowl, beat the softened butter for 1 minute until smooth. Add the brown sugar and beat until fluffy. Beat in the egg, vanilla extract, and almond extract until fully combined.
- Beat in the flour and salt until combined. Switch to high speed and beat in the sprinkles. Turn the dough onto a floured surface, divide into two, and shape each half into an 8-inch log. Tightly wrap the logs in plastic wrap and chill in the refrigerator for at least 4 hours, or up to 5 days.
- Preheat your oven to 350°F (177°C). Line two large baking sheets with parchment paper or silicone baking mats.
- Remove the chilled logs from the refrigerator. If desired, roll them in coarse sugar. Slice each log into about 12 equally thick cookies. Place the cookies on the prepared baking sheets, about 2 inches apart.
- Bake the cookies for 12-14 minutes, or until the edges are brown. Let them cool on the baking sheets for 5 minutes before transferring them to a cooling rack to cool completely.
- Melt the chopped white chocolate using a double boiler or in the microwave in 15-second increments, stirring after each, until smooth. Dip each cooled cookie halfway into the melted chocolate. Place the dipped cookies onto a parchment-lined baking sheet. Sprinkle extra sprinkles onto the wet chocolate. Refrigerate the baking sheet to help the chocolate set.
Notes
Tried this recipe?
Let us know how it was!
Master of Culinary Visual Arts
My culinary journey started in the fast-paced kitchens of boutique coastal restaurants throughout Southern California, where I learned that beautiful food doesn’t have to be complicated. After nine years of professional cooking, I’ve made it my mission to prove that sophisticated, nutritionally sound meals can be accessible to busy home cooks who refuse to compromise on flavor or visual appeal.
What changed everything for me was watching talented home cooks feel intimidated by healthy cooking. That’s when I transitioned to private instruction, teaching busy professionals and families how to create restaurant-quality meals using simple techniques and ingredients they can actually find at their local grocery store. My “15-minute meal” frameworks are now used by several regional cooking schools!
As a third-generation Mexican-American, I love weaving vibrant Latin flavors into low-carb creations – proving that healthy eating can be both culturally authentic and visually spectacular. My “effortless elegance” philosophy is simple: nutritious food should look as stunning as it tastes, without requiring professional chef skills or expensive equipment.
When I’m not developing recipes in my San Diego coastal kitchen, you’ll find me surfing the local breaks with my Golden Retriever mix, Mango, who’s both my kitchen companion and unofficial taste-testing assistant. My personal low-carb lifestyle started as a way to maintain energy for my active coastal life, and it’s become the foundation for proving that healthy eating enhances rather than restricts life’s pleasures.