
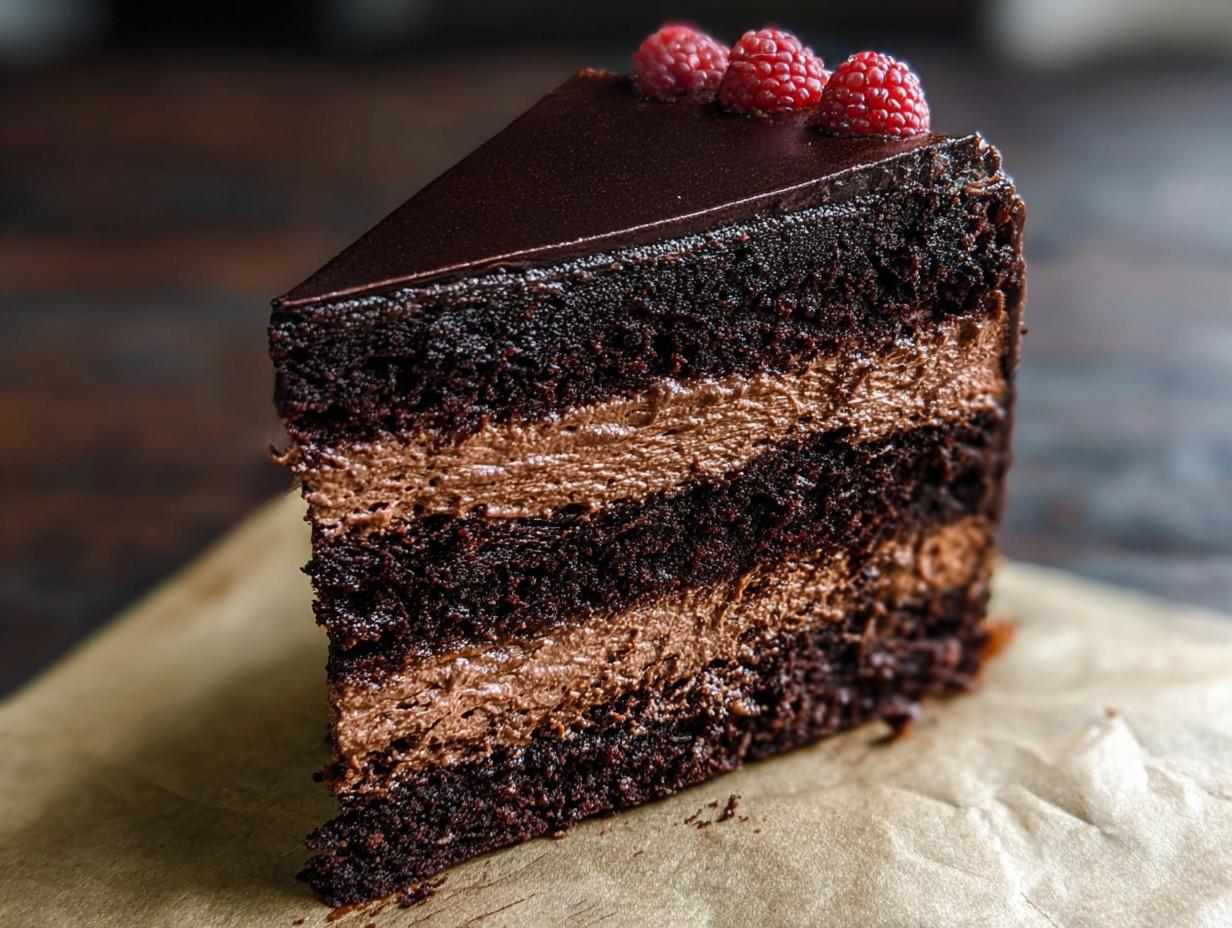
When you need a dessert that absolutely screams elegance and indulgence, nothing beats biting into a rich, creamy slice of Chocolate Mousse Layer Cake. Seriously, this is the ultimate show-stopper, but here’s the secret I learned the hard way: it doesn’t have to crush your soul to make it! The first time I attempted this for my daughter’s birthday, I was so stressed about keeping the layers straight, but once that chocolate aroma filled my kitchen while whipping up the mousse, all the worry just melted away. Seeing the wide-eyed smiles when that glossy final cake hit the table? Priceless! That moment is why I bake. I’m Maria Fernandez, a Certified Family Nutrition Strategist, and I promise you, this layered dessert is totally doable.
Why This Chocolate Mousse Layer Cake is Your Next Go-To Dessert
If you’re looking for that show-stopping centerpiece without spending all day stressing over it, this is it! This Chocolate Mousse Layer Cake is pure luxury, but it’s designed for real life. It’s incredibly satisfying for everyone who tries it, and the best part? You can totally get ahead of the game.
Key Benefits of Our Chocolate Mousse Layer Cake
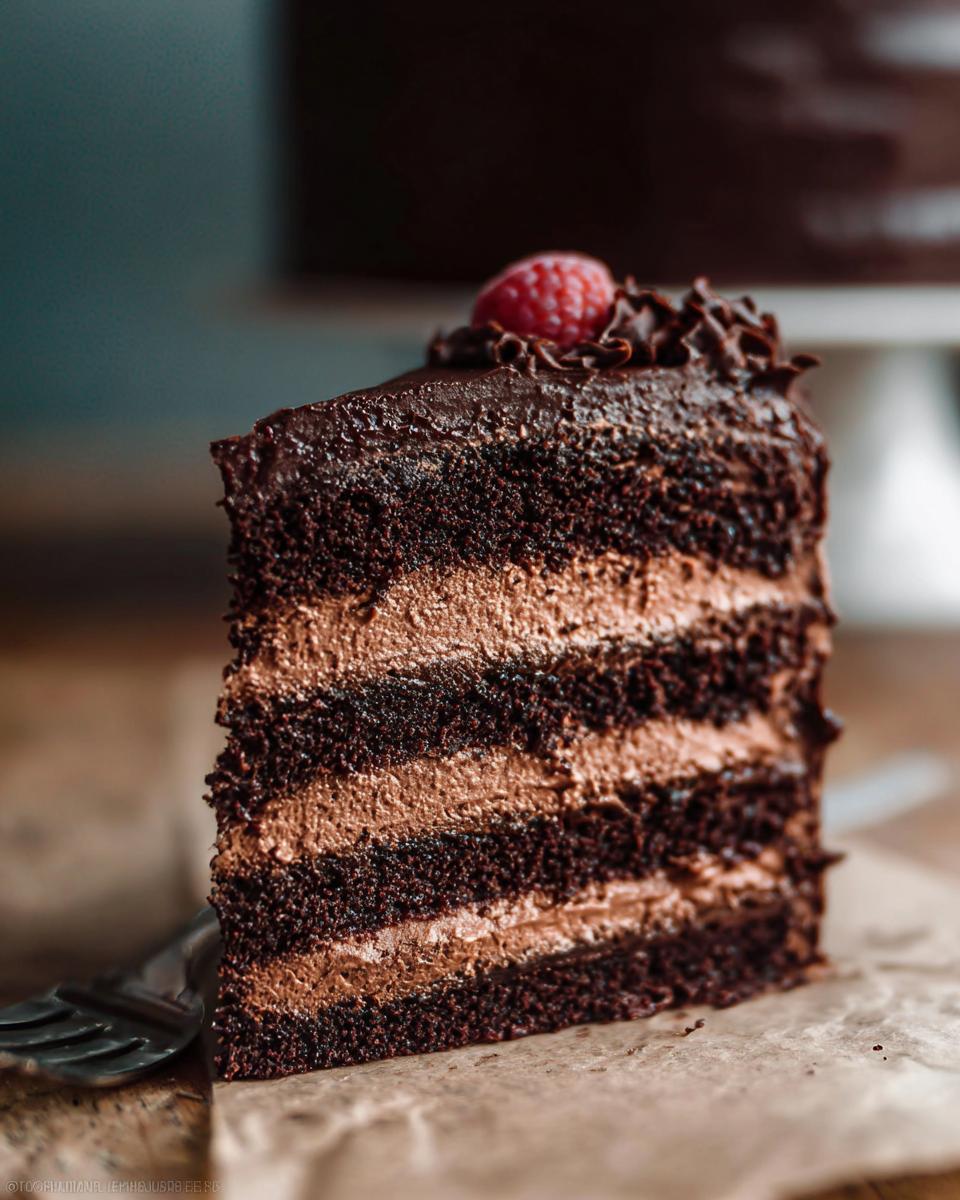
- It tastes unbelievably decadent—a true homemade chocolate mousse cake experience!
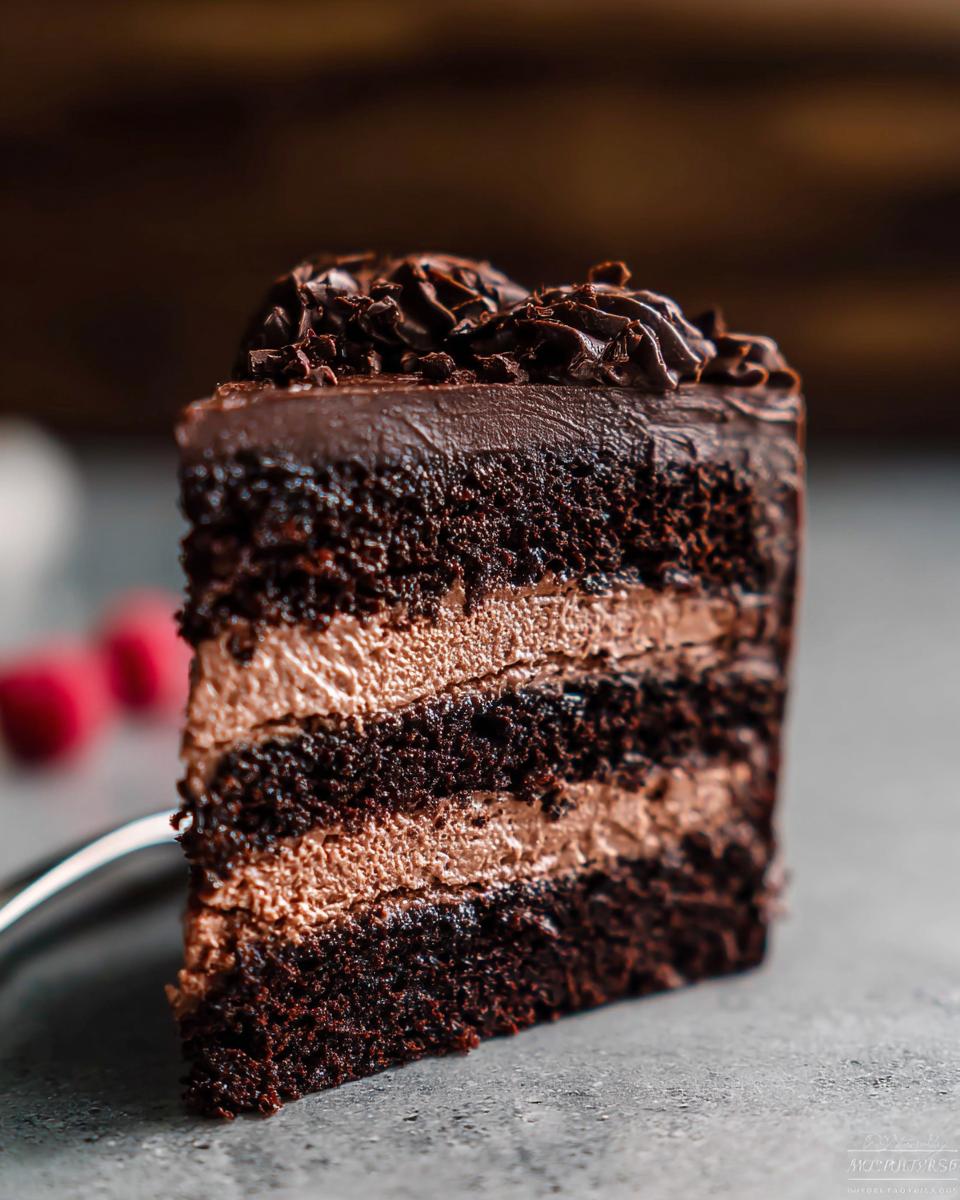
- The layers stack beautifully, making it an incredibly elegant cake without fancy tricks.
- It’s definitely a crowd pleaser; expect every single slice to disappear fast.
- You can make the components ahead of time, easing the pressure on big family days.
- It impresses everyone but is surprisingly straightforward for home bakers.
Essential Equipment for Your Chocolate Mousse Layer Cake
Before we even look at the ingredients, let’s gather our game plan. Having the right tools ready means everything goes smoother, trust me! When I first started baking layered desserts, I’d find myself running around mid-recipe looking for the right pan or bowl, and that’s exactly how you end up with a messy kitchen and a slightly sunken cake. Don’t let that happen to you!
For a stunning result like this Chocolate Mousse Layer Cake, you’ll need a few key players. Make sure your pans are ready to go before you even think about turning on the oven. Here’s the list of what made my life easy when I was assembling this magnificent layered dessert:
- Your oven, obviously! Gotta bake those layers.
- The right size pans—I always use 8-inch or 9-inch cake pans; consistency here is vital!
- Parchment paper is your best friend for non-stick insurance.
- You’ll need a large bowl for the cake batter, and a separate big bowl for whipping that mousse cream.
- Whisk and a mixing bowl, perhaps your trusty handheld or stand mixer for the batters and the cream.
- A simple cooling rack to let those layers take a breath after baking for an hour.
- A good sharp knife for leveling the cakes later—we want flat surfaces for stacking, not hills!
- A small bowl for melting the chocolate for both the mousse and the ganache.
- You need a heat-proof bowl, ideally one that sits nicely over a saucepan if you’re going the double boiler route for melting chocolate.
- A medium saucepan for heating the cream for the ganache.
- A spatula for folding and scraping down the sides of bowls.
- Finally, for that professional finish, grab an icing spatula and a bench scraper to get those mousse sides looking sleek before the ganache goes on.
Gathering Ingredients for the Perfect Chocolate Mousse Layer Cake
Okay, now that we have the tools ready, let’s talk about the fun part: the goodies! Because this is a complex layered dessert, it needs a few different components, but don’t let the list scare you. They all come together beautifully. When I made my daughter’s cake, I realized the quality of the chocolate really makes or breaks this Chocolate Mousse Layer Cake. Pay attention to the specific notes here—like needing room temperature items for the cake or crushing chocolate finely for the mousse—it makes such a difference! If you want that show-stopping elegance, stick to the list. I found this wonderful guide online that also talks about using dark chocolate, which really deepened the flavor of my layers. Check out this tip on boosting your chocolate flavor!
We’re breaking the ingredients down into four manageable groups. Once you have everything measured out, assembly feels way less intimidating, I promise you.
For the Chocolate Cake Layers
- 1.75 cups all-purpose flour (always spooned & leveled!)
- 1.75 cups granulated sugar
- 0.75 cup unsweetened natural cocoa powder (check those recipe notes!)
- 2 teaspoons espresso powder (optional, but wow, it boosts the chocolate!)
- 2 teaspoons baking soda
- 1 teaspoon baking powder
- 1 teaspoon salt
- 0.75 cup full-fat sour cream (must be at room temperature!)
- 0.5 cup vegetable oil
- 2 large eggs (also need to be at room temperature)
- 0.5 cup buttermilk (make sure this is room temperature too!)
- 2 teaspoons pure vanilla extract
- 0.5 cup hot water or black coffee (this wakes up the cocoa!)
- 1 cup semi-sweet mini chocolate chips (tossed in 1 Tbsp flour, totally optional if you skip them)
For the Chocolate Mousse Filling
- 0.5 cup hot water
- 0.25 cup unsweetened natural or Dutch-process cocoa powder
- 8 ounces quality semi-sweet chocolate (make sure this is finely chopped)
- 2 cups heavy cream (must be cold for whipping properly!)
- 2 Tablespoons confectioners’ sugar
- 0.5 teaspoon pure vanilla extract
For the Chocolate Ganache Topping
- 8 ounces quality semi-sweet chocolate (finely chopped again)
- 1 cup heavy cream (this will be heated for pouring)
Optional Garnish Ingredients
- fresh berries and/or chocolate shavings (just for that extra pretty touch)
Step-by-Step Instructions for Your Chocolate Mousse Layer Cake
Alright, deep breaths! We are moving into the construction phase, and this is where the magic happens. I know seeing four cake layers can feel intense, but we take this one component at a time, just like making that birthday cake for my daughter. The key is patience, especially waiting for things to cool down. If you rush the cooling, the mousse melts, and then you have sad, soupy layers. Don’t let that happen! Follow these steps exactly, and you’ll have that incredible, elegant cake ready in no time.
Baking the Rich Chocolate Cake Layers
First things first, let’s get these chocolate sponges baked perfectly. You’ll want to start by preheating your oven right up to 350°F (177°C). This needs to be hot and ready! Prep four 8-inch or 9-inch cake pans—don’t skip the parchment paper rounds on the bottom, or you might struggle later. Grease that paper well, too!
- Whisk all your dry cake ingredients—flour, sugar, cocoa, soda, powder, and salt—together in a big bowl. Set that aside for a minute.
- In a separate bowl, mix the room temperature sour cream, oil, eggs, buttermilk, and vanilla until they are happy and blended.
- Now, bring the two bowls together! Pour the dry mix into the wet mix. Start on low speed, and add that hot water or coffee last. Mix just until everything barely comes together—we don’t want tough cake! Fold in those optional chocolate chips now.
- Divide the batter evenly among your four prepared pans. Bake them for only 19 to 23 minutes. Seriously, watch them closely! Test with a toothpick; it needs to come out clean.
- Let those cakes rest in their pans for a full hour on the cooling rack. This slow cool-down prevents cracking. Once they are cool enough to handle, run a knife gently around the edge, pop them out, peel off that blessed parchment, and let them cool completely on the rack.
Preparing the Silky Chocolate Mousse
This mousse filling is luxurious! We need to melt the chocolate really carefully so it stays smooth. Make a concentrated cocoa slurry first in a small bowl by whisking the cocoa powder into the hot water until it’s totally lump-free.
- Melt your finely chopped semi-sweet chocolate. I prefer using a double boiler (a heat-proof bowl set over a simmering saucepan) because it’s gentle, but rapid bursts in the microwave work in a pinch—just stir every 20 seconds!
- Once the chocolate is smooth, stir in your cocoa slurry mixture until everything is thick and glossy. Set this aside to cool down slightly. It shouldn’t be hot when it hits the whipped cream!
- In your large, *cold* bowl, whip the heavy cream with the confectioners’ sugar and vanilla until you get nice medium peaks. You want it fluffy but not stiff, around 3 minutes with the mixer.
- This is important: Gently fold the slightly cooled chocolate mixture into the whipped cream using a spatula. Use slow, deliberate motions. Stop mixing the second you see no more white streaks. Over-mixing means flat mousse, and we want fluffy!
- Cover the mousse and pop it into the fridge to chill for at least two hours. This firms it up so it holds those layers beautifully.
Assembling the Chocolate Mousse Layer Cake
If your cake layers aren’t flat yet, grab your serrated knife and level them off now! A flat top makes stacking this elegant cake so much easier. This layered dessert needs stability!
- Place one cake layer down on your serving plate—this base cake should be right side up. Scoop about 1.5 cups of your chilled mousse onto it and spread it evenly to the edges with your offset spatula.
- Gently place the second layer on top. Repeat: another 1.5 cups of mousse, spread it out. Add the third layer, gently spread all the remaining mousse over the top and sides. This light layer is just a crumb coat, so don’t stress about perfection!
- You *must* chill the cake now for at least an hour, or until the mousse is firm to the touch. This sets the structure before we add the heavy ganache.
Finishing with the Glossy Chocolate Ganache
This ganache is what gives the cake that incredible, shiny finish that screams celebration. Get your chopped chocolate ready in a heat-proof bowl before heating the cream.
- Pour the heavy cream into your saucepan and heat it—we want it just simmering around the edges, not boiling furiously.
- Pour that hot cream directly over the chopped chocolate in the bowl. Don’t touch it for 2–3 minutes! Give the heat time to work.
- After waiting, start stirring slowly from the middle outward until it becomes one gloriously smooth batch of chocolate goodness.
- Let that ganache cool down and thicken up a bit—about 30 minutes in the fridge usually does the trick.
- Pour the slightly thickened ganache right over the top center of your chilled cake. Use your icing spatula to encourage it to drip down the sides naturally. A bench scraper helps smooth the top!
- For the best final look, serve it soon, or chill it uncovered for up to 4–6 hours before slicing. Enjoy watching everyone devour this impressive creation!
Expert Tips for a Perfect Chocolate Mousse Layer Cake
Look, I’ve been down the road where this beautiful Chocolate Mousse Layer Cake turned into a leaning tower of chocolate goo, and let me tell you, it was totally because I tried to rush one little step. Baking is science, but assembling a layered dessert is heart, and using these pro tips makes sure the science supports the heart!
Here are a few pointers I learned, especially after that first birthday disaster. I tried using cold eggs in the cake batter because I was rushing, and the whole thing looked curdled before it even hit the oven. Never again! Stick to room temperature ingredients for the cake part—it’s non-negotiable for that smooth crumb.
Also, when you fold that precious whipped cream into the chocolate, you have to be so gentle, like you’re tucking in a sleepy child! If you stir too vigorously, bam! All the air you just whipped in vanishes, and your mousse will be heavy instead of light and airy. That’s how you risk a sad, flat layer in the middle of your elegant cake.
Ingredient Temperature and Texture Secrets
This is the core secret for the cake layers achieving that lovely, tender texture, not a dense brick. When your eggs, buttermilk, and sour cream are at room temperature, they emulsify with the fats (like the oil and butter substitutes) much more easily. Room temperature ingredients mix together seamlessly to create a unified, stable batter.
If you use cold ingredients, they try to fight the fat, causing the mixture to separate or curdle. You end up with little pockets of unmixed liquid and fat, which bakes into uneven spots in your Chocolate Mousse Layer Cake. It might still taste okay, but it won’t have that luxurious, consistent crumb we are aiming for in an impressive layered dessert.
So, my general rule of thumb is: take out the eggs, buttermilk, and sour cream for the *cake* at least an hour before you start. It seems like extra work, but trust me, it guarantees you win against a sad, separated batter!
Make Ahead and Storage for Your Layered Dessert
This is seriously the section that elevates this Chocolate Mousse Layer Cake from a special occasion bake to a weeknight hero! Because we are dealing with a few components—the cake, the mousse, and the final pour of ganache—being able to prepare things ahead of time is a lifesaver, especially if you’re aiming for that elegant cake presentation on a busy day.
I always tell people that this layered dessert is practically begging you to break up the work. You don’t have to tackle everything in one marathon session! Planning ahead helps everything set up perfectly too, which is crucial when dealing with a delicate mousse filling.
Preparing Components in Advance
You can totally bake those chocolate cake layers days ahead! Once they are completely cooled, wrap each one extremely tightly in plastic wrap—like mummy-wrapping them! I usually do three layers of plastic wrap to keep all the moisture locked in. These wrapped layers can stay happily chilling in the refrigerator for up to two days. If you need more time, they freeze fantastically for about three months. Just let them thaw overnight in the fridge still wrapped up.
The chocolate mousse filling is another superstar make-ahead item. Once it’s made and thickened, store it in an airtight container in the fridge for up to two days. Same rules apply for freezing if you’re really planning far out, though I find keeping the mousse cold works best for texture.
Assembling and Storing the Finished Cake
For assembly, you want those chilled cake layers, the somewhat firm mousse, and the room-temperature ganache ready to go. After you assemble the whole structure and smooth that crumb coat, give it at least an hour in the fridge to firm up before you pour the ganache. This sets everything so your final icing doesn’t shift everything around.
Once the ganache is set on your finished Chocolate Mousse Layer Cake, you can store leftovers tightly covered in the refrigerator up to five days. It keeps brilliantly because the mousse and ganache are quite stable! If you want to freeze the entire assembled cake, wrap it super tightly in plastic wrap and then foil. Thaw it slowly overnight covered in the fridge; this prevents any condensation from ruining that beautiful ganache finish.
Serving Suggestions for This Elegant Cake
Now that you’ve conquered this glorious Chocolate Mousse Layer Cake, half the battle is deciding how to present it! This cake is so rich and decadent on its own, you really don’t need to overcomplicate things. Remember, it’s already an elegant cake, so let the glossy ganache and those perfect layers do all the talking.
My absolute favorite pairing, especially after a big meal, is a simple, strong cup of black coffee. The bitterness cuts right through the sweetness of the chocolate mousse layers, creating this perfect sophisticated balance. It’s how we always ended our holiday dinners!
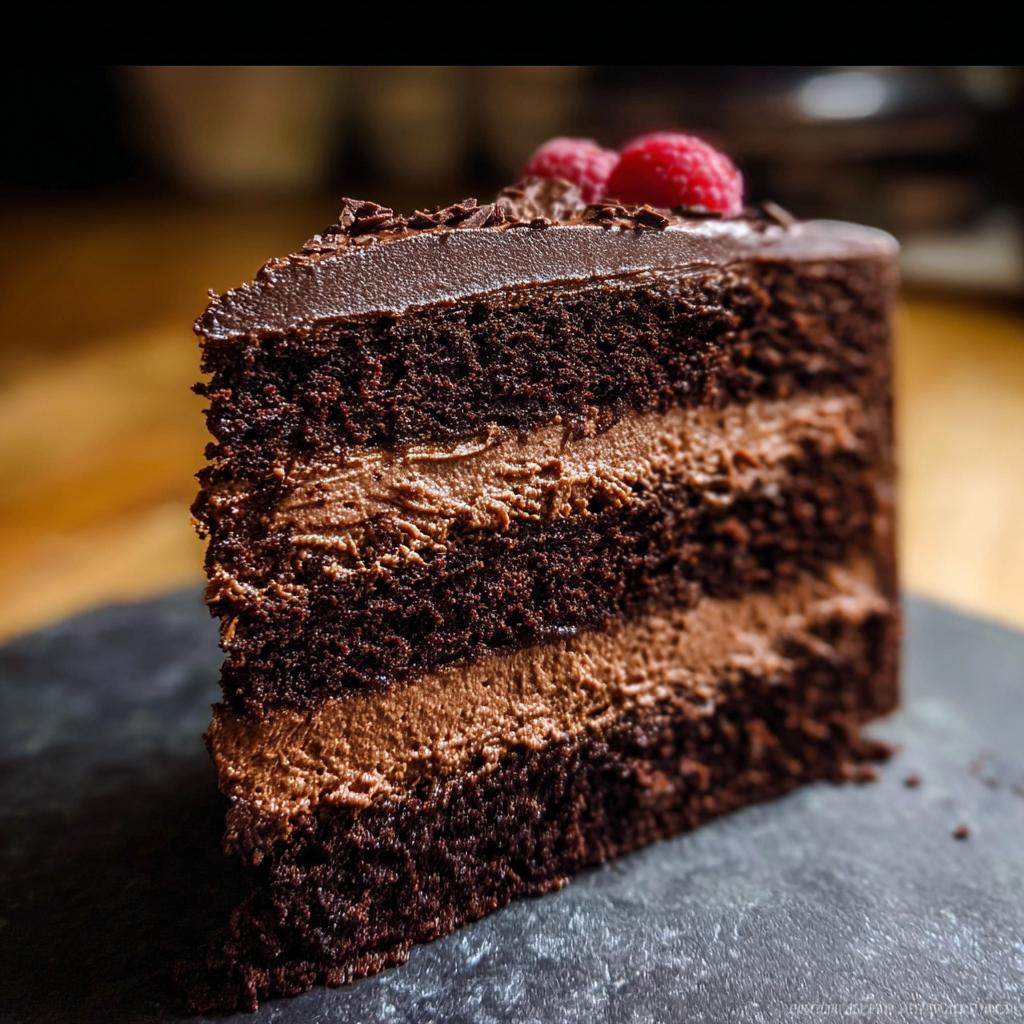
If you want something fresh on the plate to brighten things up visually, you can’t beat fresh berries. Don’t worry about making compotes or sauces—just a small cluster of bright red raspberries or maybe a few sliced strawberries next to the slice is all it takes. The pop of color against that dark chocolate is stunning, and the slight tartness is just the counterpoint needed for this incredibly rich layered dessert. Honestly, keeping the garnish simple lets the quality of the Chocolate Mousse Layer Cake really shine through!

Frequently Asked Questions About the Chocolate Mousse Cake
I know that when you tackle a show-stopping dessert like this, questions are bound to pop up. Don’t worry; we’ve all been there! Whether you are wondering about substitutions or are worried about keeping those delicate mousse layers perfect, I’ve gathered the most common things people ask about making this Chocolate Mousse Layer Cake. I want this to be the simplest, most enjoyable route to an elegant cake for you!
Can I use different sized pans for this Chocolate Mousse Layer Cake?
Yes, you absolutely can adjust the pan sizes, but you have to watch your baking time! If you use smaller pans, it means the batter is deeper, so they will definitely take longer than the 23 minutes listed. Conversely, if you spread the batter into larger pans, they’ll bake much faster, maybe closer to 17 minutes. Always bake until that toothpick comes out clean! Remember, the whole point of dividing the batter across pans is to keep the layers thin for stacking your layered dessert.
How do I prevent my chocolate mousse from deflating?
This is all about technique when turning the mousse into the perfect filling! The secret is twofold: first, make sure your melted chocolate isn’t warm when you fold it into the whipped cream. If it’s too hot, it will immediately deflate all those beautiful air bubbles you created in the heavy cream. Second, use a very light hand when folding. Use a spatula and cut down the center, sweep up the side, and gently turn the mixture over itself. You’re aiming only to combine, not stir! This gentle action keeps it fluffy, earning you the title of a true crowd pleaser.
Is this recipe suitable for a large crowd?
Oh, absolutely! This is one of my favorite desserts to make when I know we have a lot of people coming over—it’s a huge crowd pleaser for a reason! Since this recipe yields four cake layers, you can easily get 12 generous slices, but if you cut them a little more conservatively, you could stretch it to 16. If you still need more, just double the recipe and bake the cake layers in half-sheet pans instead of round pans. You can then cut the sheet cake into squares for easy serving!
Estimated Nutritional Data for the Chocolate Mousse Layer Cake
Okay, let’s talk about the hard facts—the numbers! I know when I’m making something this gloriously decadent, I always wonder what I’m getting myself into nutritionally. This Chocolate Mousse Layer Cake is certainly a treat, not an everyday snack, especially since it’s loaded with rich chocolate and cream.
Because every brand of cocoa powder, every type of heavy cream, and even how much ganache clings to the sides of your slice changes things, these figures are just general estimates based on the standard calculations for this kind of layered dessert. Think of this as a guideline for your planning, not gospel!
When I made this for my daughter’s birthday, I focused more on the smiles than the carbs, but if you want the general breakdown for one generous slice (assuming 12 servings total), here’s what you’re probably looking at. Remember, this is the full package: cake, mousse, and ganache!
- Calories: Approximately 650–750 per slice
- Fat: Around 45g–50g (Yes, it’s rich!)
- Protein: Roughly 8g
- Carbohydrates: Approximately 60g–70g
A quick note from me: Please take these numbers with a grain of salt, or perhaps a grain of confectioners’ sugar! Since this involves baking from scratch, your specific ingredient measurements—especially how much you use for the chocolate mousse to slather on those layers—will tweak these totals. Enjoy it for what it is: a truly incredible, elegant cake meant for celebrating!
Share Your Beautiful Chocolate Mousse Layer Cake Creations
Okay, that’s it! You’ve made the Chocolate Mousse Layer Cake, and I bet it looks absolutely breathtaking. Seriously, you should be so proud of yourself for tackling such an elegant cake. Now, this amazing journey doesn’t end just because you cut that first slice!
I truly want to hear all about it! Did the ganache shine just right? How did your family react to this amazing layered dessert? Don’t keep all that success to yourself!
Please take a moment to leave a quick star rating for this recipe below. Your feedback helps everyone else feel confident about trying this Chocolate Mousse Cake next time. It only takes a second, but it means the world to me!
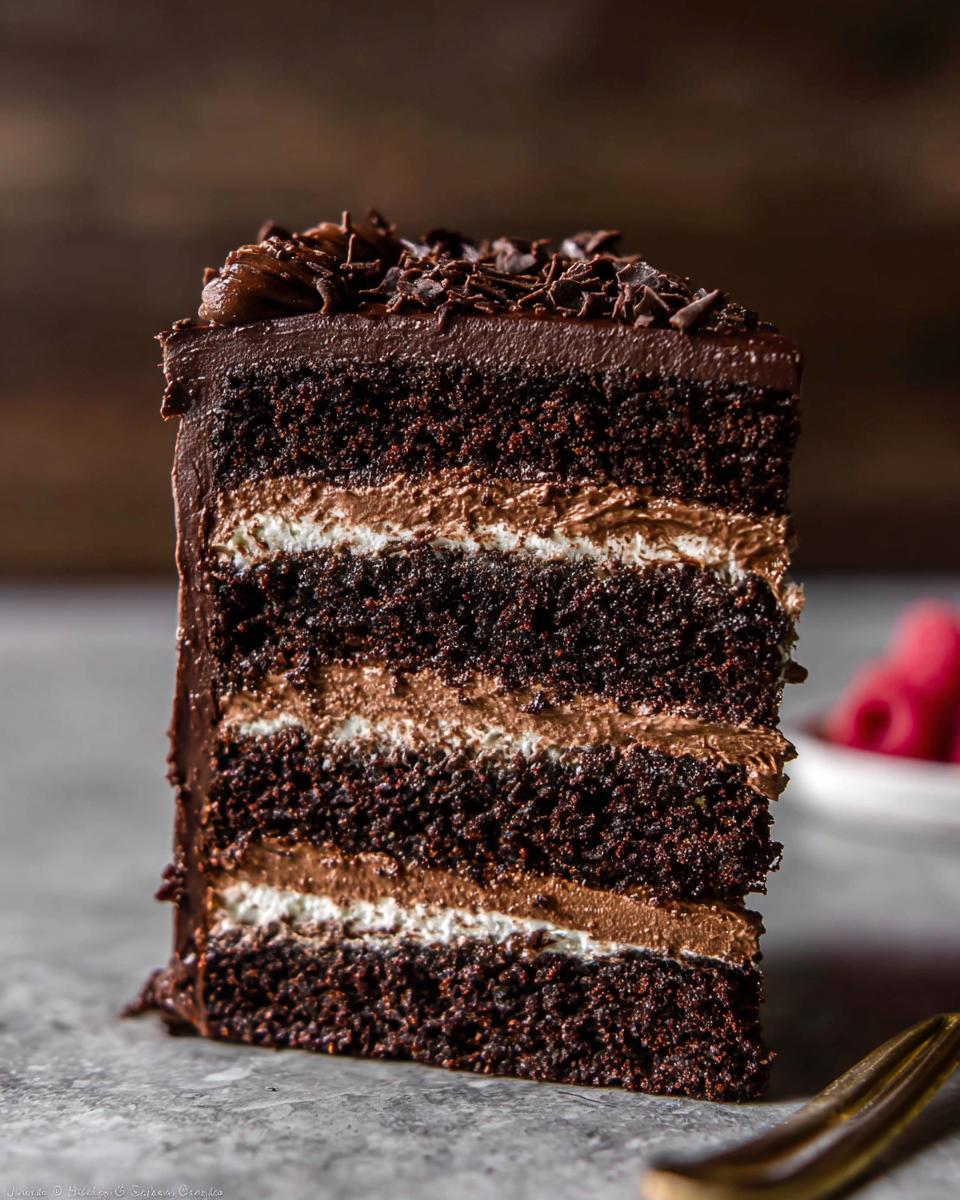
And if you snapped a picture of your gorgeous creation—maybe a slice showing off those perfect mousse layers—please share it! Tag me on social media so I can see your beautiful work. Seeing your success is the best motivation for me to keep sharing these recipes!
Chocolate Mousse Layer Cake
Ingredients
Equipment
Method
- Preheat your oven to 350°F (177°C). Grease four 8-inch or 9-inch cake pans. Line the pans with parchment paper rounds and grease the parchment paper. This helps the cakes release easily.
- In a large bowl, whisk together the flour, sugar, cocoa powder, espresso powder (if using), baking soda, baking powder, and salt. Set this dry mixture aside.
- In another large bowl, use a mixer to combine the sour cream, oil, and eggs on medium-high speed until blended. Add the buttermilk and vanilla extract and mix until combined. Pour the dry ingredients into the wet ingredients. Add the hot water or coffee and whisk or beat on low speed until just combined. Gently fold in the floured mini chocolate chips, if you are using them. Divide the batter evenly among the prepared pans.
- Bake for 19–23 minutes. Baking times can vary, so check for doneness by inserting a toothpick into the center; it should come out clean. Let the cakes cool in the pans on a cooling rack for 1 hour. Run a knife around the edges to loosen the sides, then remove the cakes from the pans. Peel off the parchment paper and place the cakes on the rack to finish cooling completely. The cakes might sink slightly in the middle as they cool, which is normal.
- To make the chocolate mousse: In a small bowl, whisk together the hot water and cocoa powder until smooth. Melt the chopped chocolate in a double boiler or in the microwave. If using the microwave, heat in 20-second increments, stirring after each, until melted and smooth. Pour the hot water/cocoa mixture into the melted chocolate and stir until thick and smooth. Set aside. In a large bowl, whip the heavy cream, confectioners’ sugar, and vanilla extract with a mixer until medium peaks form, about 3 minutes. Gently fold the chocolate mixture into the whipped cream until just combined; do not overmix. Cover the mousse and refrigerate for at least 2 hours or up to 2 days.
- Assemble the cake before making the ganache. If needed, level the cakes by slicing off the tops with a serrated knife to create a flat surface. Place one cake layer on your serving plate. Spread about 1.5 cups of chocolate mousse evenly over the top. Place the second cake layer upside down on top of the mousse and spread another 1.5 cups of mousse. Add the third cake layer, right side up, and spread with mousse. Top with the final cake layer. Spread the remaining mousse over the top and sides of the cake for a crumb coat. Use a bench scraper to smooth the sides. Refrigerate the cake for at least 1 hour and up to 4 hours.
- To make the chocolate ganache: Place the chopped chocolate in a heat-proof bowl. Heat the cream in a small saucepan over medium heat until it just begins to simmer. Pour the warm cream over the chocolate and let it sit for 2–3 minutes. Stir slowly with a metal spoon or spatula until the chocolate is melted and the mixture is smooth. Refrigerate the ganache for at least 30 minutes or up to 1 hour to thicken.
- Pour or spoon the thickened ganache over the chilled cake. Use an icing spatula to smooth the top and sides. Add optional garnishes like fresh berries or chocolate shavings. Serve the cake immediately or chill, uncovered, for up to 4–6 hours before serving. The cake can be served at room temperature or chilled. Cover any leftover cake tightly and store in the refrigerator for up to 5 days.
Notes
Tried this recipe?
Let us know how it was!
Certified Family Nutrition Strategist
My path into family nutrition began working with Phoenix Area Family Services, where I saw how traditional nutrition advice often ignored real-world constraints like budget limitations, time crunches, and kids who refuse to eat anything green. That experience sparked my mission to develop meal planning systems that work with family realities, not against them.
Over eight years, I’ve helped hundreds of families reduce grocery spending by 25% while dramatically improving their nutrition. My meal planning frameworks have been adopted by local wellness centers because they actually work for busy parents juggling different ages, preferences, and dietary needs in one household.
As a bilingual first-generation Mexican-American and mother of three, I personally navigate the daily challenge of feeding a family nutritiously while honoring cultural traditions and managing a household budget. My “kid-friendly low-carb” protocols show families how to gradually introduce healthier options without triggering mealtime battles or abandoning beloved family recipes.
My “realistic wellness” philosophy is straightforward: health improvements must work within existing family dynamics and financial realities to be truly sustainable. When I’m not developing meal planning systems, I’m creating portable trail snacks for our weekend family hiking adventures – because healthy eating should fuel the life you want to live.
My personal low-carb journey started after pregnancy as a way to regain energy for active parenting, and that experience continues to inform my professional commitment to making healthy eating feel supportive rather than burdensome for busy families.