
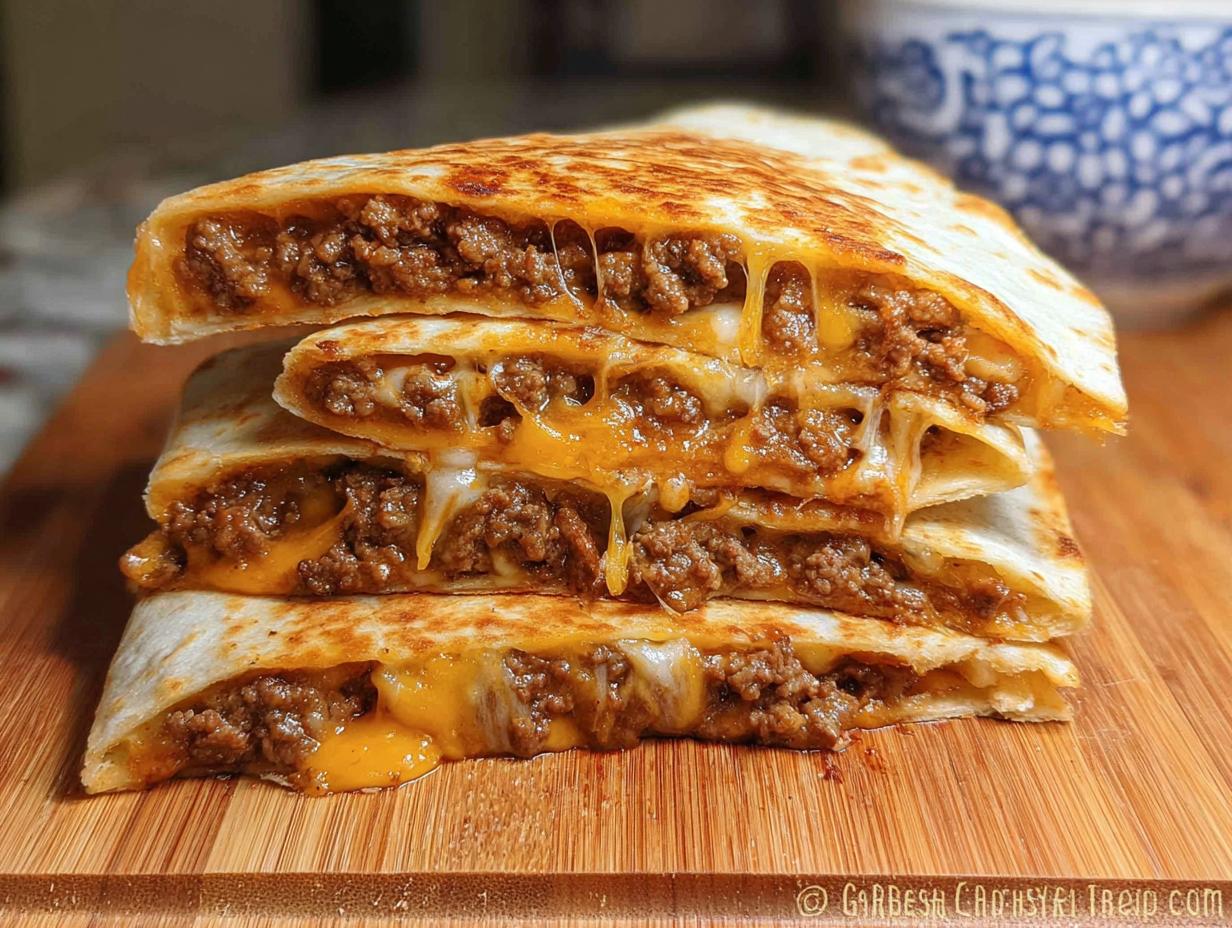
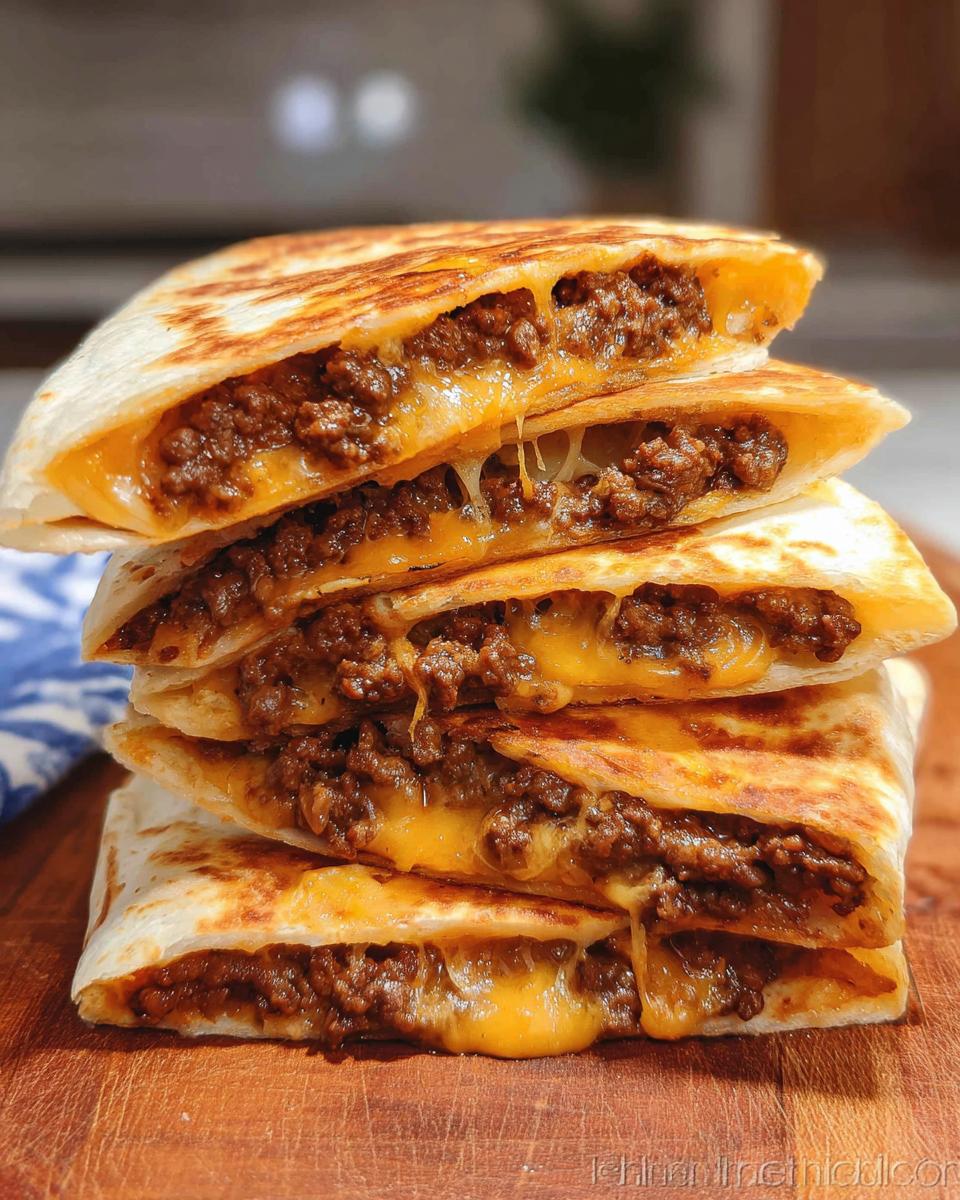
You know those nights? The clock is ticking, the little stomachs are rumbling, and you just need something deeply satisfying without resorting to takeout? That’s exactly where my ultimate Cheesy Beef Quesadillas swoop in to save the day! Seriously, these are the weeknight fix you didn’t know you needed. I still remember the first time I made these for my extended family; I wanted to impress them fast! As the fragrant spiced beef sizzled and the cheese melted into pure, gooey perfection, the whole kitchen filled with that amazing, comforting aroma. Seeing their faces light up with every cheesy bite was just pure joy. That night, these quesadillas became a tradition, a delicious reminder that the simplest meals create the best memories—and I cherish that every time I cook them!
Why These Cheesy Beef Quesadillas Are Your New Weeknight Staple
Honestly, these aren’t just for dinner; they are a total lifesaver! When I whip these up, I know I’m serving something hearty that everyone, no matter their age, is going to love. I always keep the ingredients stocked because you never know when you’ll need that 30-minute magic meal.
- They come together faster than running to the grocery store for last-minute ingredients.
- The flavor payoff is huge—all those spices make the beef taste like it simmered for hours.
- They are infinitely adaptable, which means less stress for me!
Quick Lunch and Easy Snack Dinner Ready in Under 40 Minutes
If you time it right, you’re looking at maybe 15 minutes prep and 20 minutes cooking, so we’re done in under 40 minutes total. That leaves you plenty of time to set the table or just collapse on the couch! They make an incredible Quick Lunch the next day, too, though they disappear fast. Seriously, this recipe is the definition of an Easy Snack Dinner for those days when cooking feels impossible.
The Ultimate Kids Favorite Flavor Profile
My little ones lose their minds for these, and I totally get why! It’s comfort food, right? Savory, perfectly seasoned ground beef hidden under a blanket of gooey, stretchy cheese inside a crispy tortilla. That combination is pure magic. If you are looking for something that instantly becomes a Kids Favorite, ditch the chicken nuggets and make these instead. They practically beg for seconds!
Gathering Your Ingredients for Cheesy Beef Quesadillas
Okay, the fun part starts here—gathering our supplies! Before we even think about heating up the skillet, laying everything out makes the whole cooking process feel organized and not rushed. We want this to be relaxing, right? Trust me, having everything pre-measured means you won’t be frantically hunting for the cumin while your beef burns! We need a solid list for the filling and then the assembly bits.
If you are looking for more inspiration on beef fillings, I found some great ideas over at this site, but let’s stick to my perfect blend for now!
Ingredients for the Savory Beef Filling
This is where all the flavor comes from, so don’t skimp on the spices! We are building a rich base here.
- We need about half a tablespoon of good olive oil to start things off.
- One pound of ground beef—I really prefer using extra lean so we don’t have a greasy mess later.
- For our spice kick, get ready: one teaspoon of chili powder, one teaspoon of ground chipotle chili pepper for smoky heat, half a teaspoon of dried oregano, half a teaspoon of ground cumin, half a teaspoon of garlic powder, and half a teaspoon of onion powder.
- Don’t forget the basics: half a teaspoon of salt and half a teaspoon of black pepper. If you like it spicy, toss in a quarter teaspoon of ground cayenne pepper, but that’s optional!
- Finally, stir in one tablespoon of tomato paste and two tablespoons of beef stock or broth to keep it nice and saucy.
Components for Assembling the Cheesy Beef Quesadillas
These are the structural elements! The cheese needs to be portioned correctly, or things get sloppy!
- We need 12 ounces of shredded cheese blend total—that’s about three cups! This is important: we are splitting this up.
- You’ll need six medium flour tortillas, about 7 to 8 inches across is perfect for folding.
- We also need about two tablespoons of vegetable oil reserved just for greasing that pan between batches—don’t use the filling oil!
Optional Toppings for Serving
These totally complete the experience, perfect for dipping or dolloping!
- Scoops of your favorite salsa.
- Creamy guacamole.
- A big dollop of sour cream to cool things down.
Mastering the Beef Filling for Perfect Cheesy Beef Quesadillas
This is the heart of the whole operation, truly! If you nail the beef filling, you’ve already won half the battle. We aren’t just browning meat here; we are building layers of smoky, savory flavor that makes these Cheesy Beef Quesadillas taste legendary. My biggest piece of advice? Use medium heat. If you crank it too high, the spices burn before the beef even browns nicely, and we definitely don’t want that scorched taste!
Once the beef is nicely crumbled and browned in that gorgeous Cheesy Skillet, we hit it with the flavor bombs. Make sure you sprinkle every single spice right over the meat—chili powder, cumin, oregano, everything! Give it a good stir for about 30 seconds until you can smell them waking up. If you want to learn more about balancing those smoky flavors, check out my thoughts on building the perfect spice blend.
Sautéing and Seasoning the Beef
After the spices are fragrant, it’s time for the secret glue that pulls the texture together: the tomato paste. Stir that in well until it coats the meat—it deepens the color beautifully. Then, just a splash of beef stock or broth helps deglaze the pan and ensures the filling isn’t dry. That liquid cooks off fast, leaving you with rich, seasoned beef that’s ready to marry that melted cheese. Before you move to assembly, make sure you drain off that extra grease! A paper towel pressed lightly over the meat works wonders to keep things tight without getting soupy.
Step-by-Step Assembly of Cheesy Beef Quesadillas
Time to build these beauties! This is where the magic happens, layer by layer. Remember what I said about keeping things sturdy? We need cheese everywhere to hold this deliciousness together. We are working with six tortillas, so let’s divide our ingredients evenly between them as we go.
First things first: lay out your six tortillas. Take about two-thirds of your shredded cheese—that’s roughly two cups worth—and sprinkle it evenly across one half of each tortilla. Don’t go right to the edge, leave a little border so it doesn’t ooze out immediately.
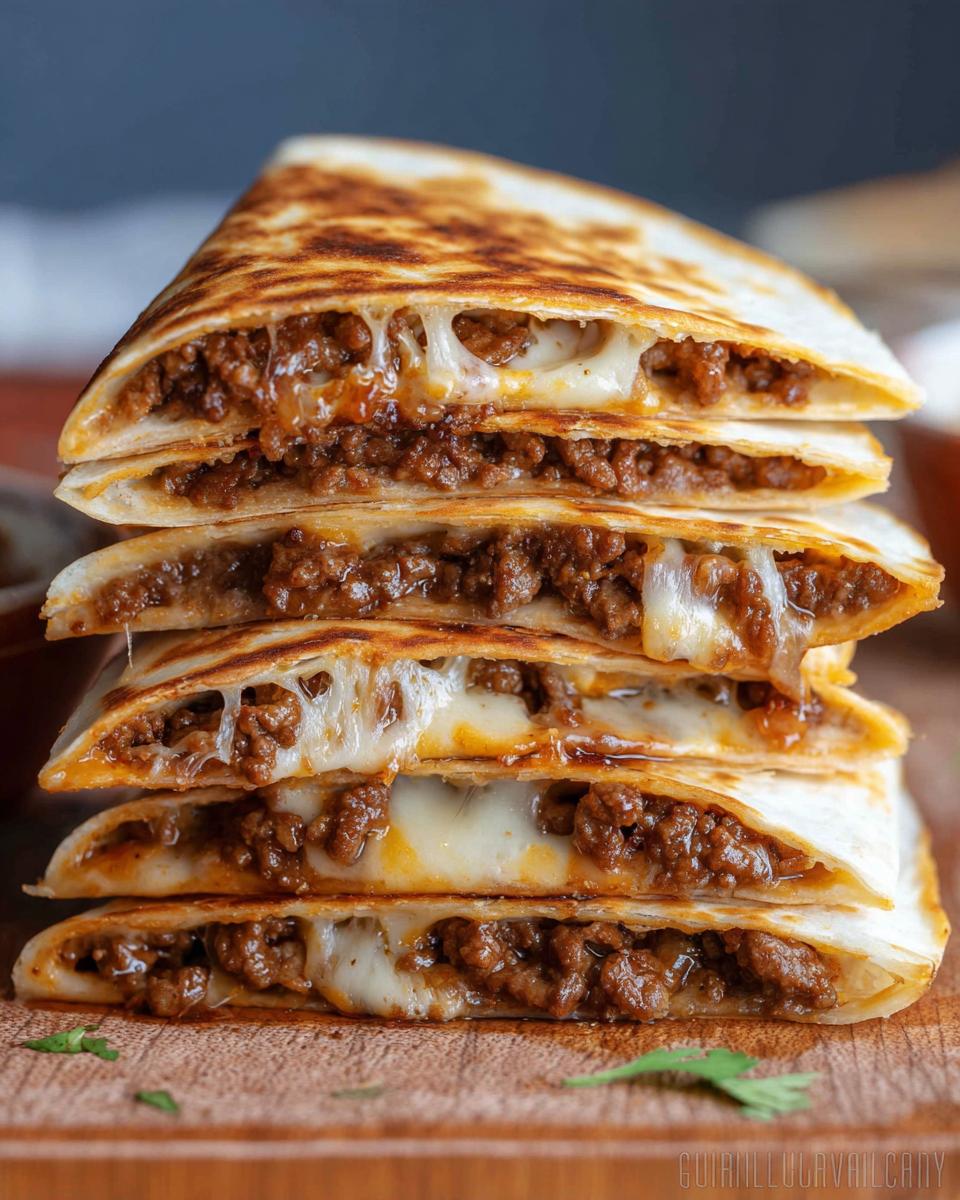
Next, we spoon that perfectly seasoned beef right on top of the cheese layer. Don’t overfill them, or cutting them later gets messy! Then, take that remaining cheese and sprinkle a little bit right over the beef topping. This double layer guarantees maximum melt factor!
Finally, you just gently fold the empty half right over the filling to create that perfect half-moon shape. Press down lightly with your hand. See? That little bit of cheese on the edge acts like glue once it hits the heat!
The Best Method for Cooking Your Cheesy Beef Quesadillas
Okay, we’ve got our cheesy beef packets ready to go! Now, pay close attention here, because this cooking technique separates a good quesadilla from a truly great one. The biggest mistake people make when cooking these is using heat that’s too high. We want that cheese to get completely gooey and liquid before the tortilla turns black, so we need some patience!
Grab that non-stick pan again—the one you wiped clean—and add just a teaspoon or two of vegetable oil. Set the heat to medium-low. This lower temperature gives the cheese time to melt all the way through while the outside gets that beautiful, golden, crispy crunch. It’s worth the extra minute or so, trust me!
We are cooking these Beef Quesadillas in batches, usually two at a time, so the pan isn’t overcrowded. Pop two folded quesadillas in the warm oil and let them sizzle. You should start hearing that gentle crisping sound right away. Once you see the bottom starting to turn that lovely light brown—usually about two minutes—it’s time to flip!
Achieving Golden Perfection in the Cheesy Skillet
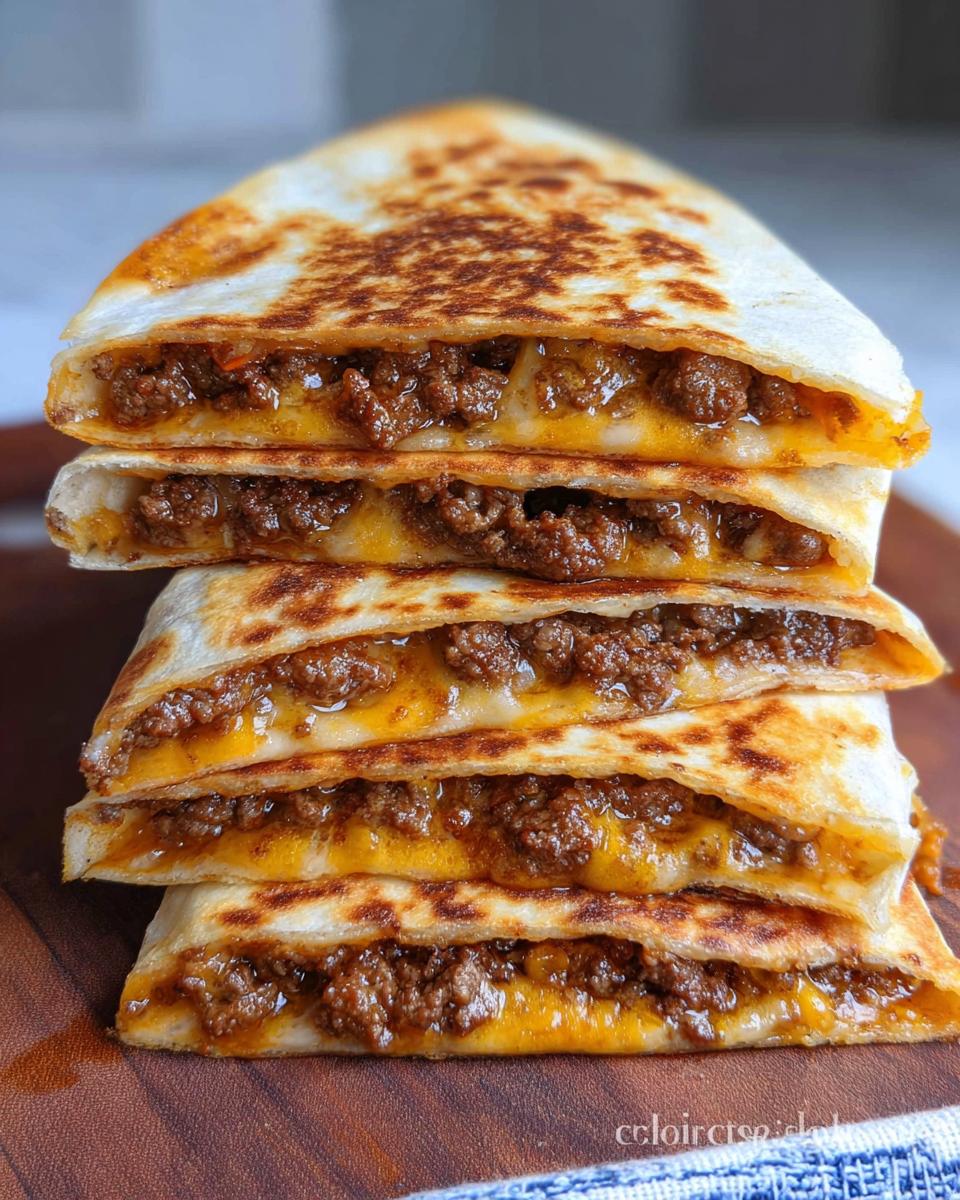
Flipping takes confidence, but you can do it! Use a wide spatula and go slow. You want the first side to be perfectly golden—that usually takes right around two big minutes. Flip it, and cook the second side for another two minutes until it matches. If you stack them up on a sheet pan while you work on the rest, make sure that oven is preheated to 200 degrees Fahrenheit. That little bit of warmth stops the first few from getting cold while you finish the next batch. It’s my favorite little trick for serving a whole family at once!
When you take them out, they should feel firm but give just a little when you press them softly. If they feel floppy, they need another minute! Don’t rush this final stage; that crispy exterior is what makes these Cheesy Beef Quesadillas so addictive.
Tips for Success When Making Cheesy Beef Quesadillas
Even though these are super easy, there are just a couple of little insights that will take your Cheesy Beef Quesadillas from good to absolutely spectacular. I’ve learned these the hard way over the years, especially that time I thought I could rush the skillet heat—spoiler alert, I ended up with burnt tortillas and cold centers! Don’t let that happen to you!
My number one rule, which I touched on earlier, is heat management. You are basically trying to melt cheese quickly while crisping a tortilla wrapper. If the heat is too high, the tortilla burns before the cheese even starts to sweat. Keep that burner on medium-low; it’s your best friend here. If you find yourself running into any issues, I’ve got a whole troubleshooting guide on fixing common cooking dilemmas, but let’s focus on the essentials right now.
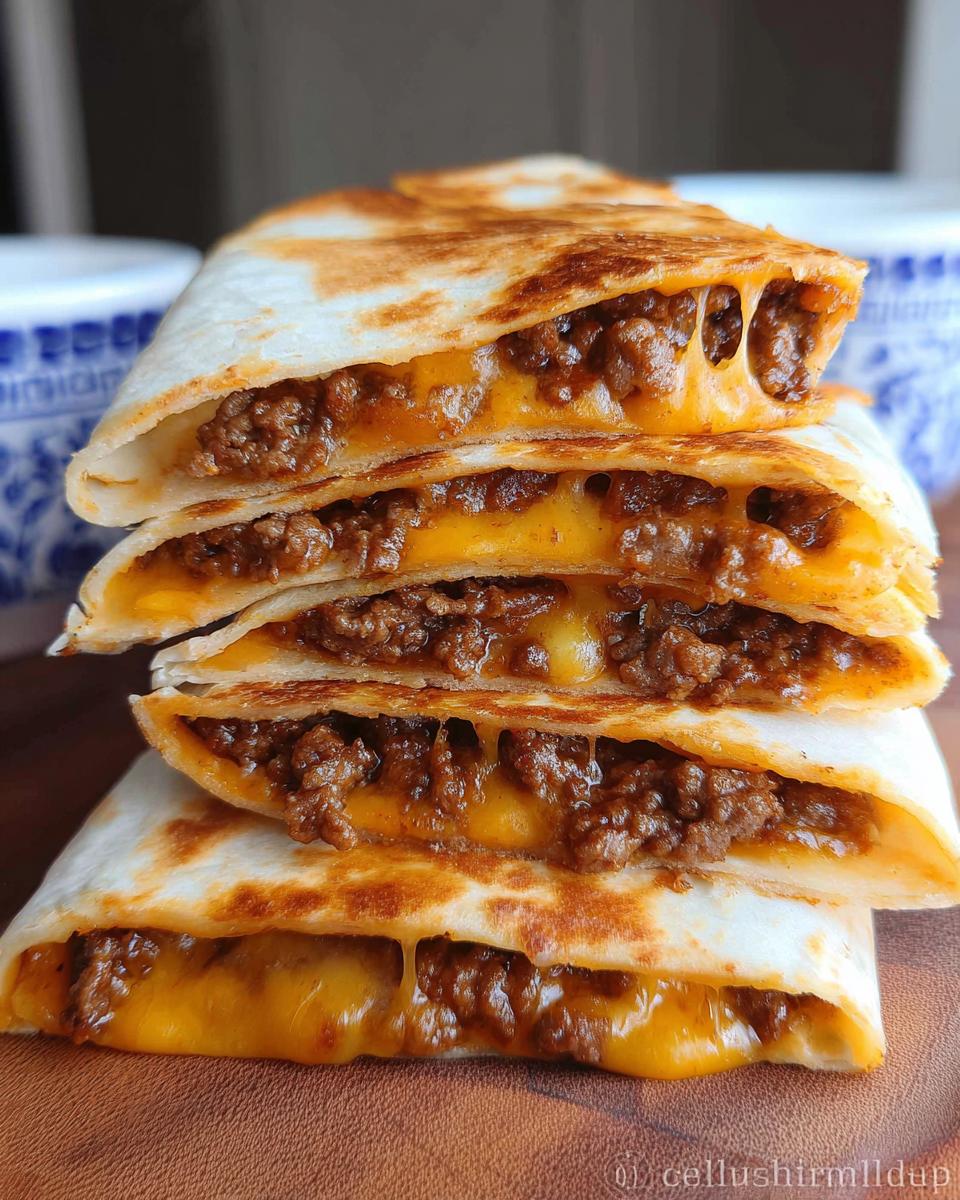
Another huge confidence builder is how you handle the cheese distribution. Remember how I told you to put cheese both under *and* over the beef? That’s not just for flavor; it’s for structural integrity! The bottom layer of cheese acts as your adhesive to the tortilla, and the top layer melts and seals the whole thing shut. Think of it like edible mortar holding your delicious beef filling in place.
Also, don’t press down too hard when you’re flipping them in the pan. I know everyone wants that super flat, diner-style quesadilla, but pressing too aggressively pushes the cheese and beef out toward the edges, and that’s where you get the dreaded greasy spillover that burns onto your pan. Just a gentle press with the spatula to ensure contact is all you need. You want them puffed up slightly, loaded with filling, and crispy on the outside!
Ingredient Notes and Substitutions for Cheesy Beef Quesadillas
Now, I absolutely love sticking to my tried-and-true recipe because it works perfectly every single time, but I know kitchens aren’t always stocked perfectly! Life happens, you run out of something, or maybe you just fancy a little change. That’s completely fine! These Cheesy Beef Quesadillas are incredibly flexible. Don’t stress if you need to swap things out; we just need to respect the flavor profile.
When it comes to the beef, if you’re out of ground beef or just want to switch things up, ground turkey works really well, though you might need to add a touch more oil since turkey is leaner. Ground chicken is another fantastic option! Just make sure whatever meat you use gets seasoned up just as thoroughly. Those spices are non-negotiable, even if the protein changes!
The cheese blend is another area where you can really play around. I usually go for a mix of Monterey Jack and Cheddar because Jack melts like a dream and Cheddar brings that lovely, sharp tang. If you only have Mozzarella, use it! It will be incredibly gooey, maybe slightly less flavorful than my blend, so you might boost your spice mix a tiny bit to compensate. Colby Jack is the ultimate easy swap, too, since it melts beautifully and has a really balanced flavor. Just try to stay away from hard cheeses like Parmesan in the main melting layers, as they tend to get grainy instead of stretchy. We want that glorious cheese pull!
For the tortillas, they really need to be flour ones, sturdy enough to hold all that beefy goodness. Corn tortillas just don’t have the same flexibility and tend to crack when you fold and fry them this way. Stick to the standard 7 or 8-inch size; the super large ones just get floppy and hard to manage in a standard skillet. If you only have the small taco-sized ones, just use two per quesadilla, slightly overlapping the filling area, if that makes sense!
Storing and Reheating Your Leftover Beef Quesadillas
This is my favorite part of making a big batch: having leftovers! These **Cheesy Beef Quesadillas** keep incredibly well, which is why they make such a fantastic Quick Lunch option for the next day. The key to enjoying them later is storing them properly so they don’t turn soggy by morning.
When you have extras, make sure they have cooled down just a touch before you pack them away. Don’t put warm food right into an airtight container, or you’re just inviting steam to make everything limp! Once they are at room temperature, wrap each half-quesadilla tightly in plastic wrap, or just place them layered between sheets of parchment paper inside a sturdy airtight container. Storing them this way keeps the edges from getting squished.
You can safely keep these in the refrigerator for up to three to four days. Honestly, they rarely last that long in my house, especially if I make a double batch!
The Best Way to Bring Back That Freshly Cooked Crunch
Now, reheating is where we make the crucial decision: speed versus texture. If you microwave them, yes, they’ll be hot in about 45 seconds, but the tortilla will be soft and chewy—not crispy how we want them! For the best results, you need to bring back that lovely golden crunch we worked so hard to create in the **Cheesy Skillet**.
My favorite method is using the oven or even a toaster oven. Preheat it to about 350 degrees Fahrenheit. Lay the leftover quesadillas directly on a baking sheet—no oil needed! Pop them in for about 8 to 10 minutes. This low, dry heat gently warms the beef filling all the way through while drying out the tortilla just enough to crisp it up again. They taste almost exactly like they did fresh off the pan!
If you are in a real pinch and need an Easy Snack Dinner *right now*, you can use an air fryer! Set it to 325 degrees and cook for about 3 to 4 minutes. That works wonders too, giving you that crispy texture much faster than the conventional oven. Just watch them closely, because air fryers can go from perfect to burnt in seconds!
Can I freeze these for later?
Yes, you absolutely can freeze them! This is great for emergency meals. Once the quesadillas are completely cooled, wrap each piece individually in plastic wrap, then tuck those wrapped bundles into a heavy-duty freezer bag. They will keep well for about two months in the freezer.
When you’re ready to eat them straight from the freezer, skip the microwave entirely. Place them right on a baking sheet, cover them lightly with foil so they don’t dry out completely, and bake at 375 degrees for about 20 to 25 minutes, removing the foil halfway through for extra crispness. They reheat beautifully from frozen this way!
Frequently Asked Questions About Cheesy Beef Quesadillas
It’s funny how simple recipes always seem to spark the most questions! I absolutely love hearing what you all are wondering about while you’re assembling your own batches. A little bit of prep work ahead of time can make weeknights so much smoother, and when you need a fast meal, these are perfect.
Can I make the beef filling ahead of time for a faster Cheesy Beef Quesadillas assembly?
Oh, you totally can! This is one of my favorite time-saving hacks. You can absolutely cook the entire beef filling mixture (spices, tomato paste, the whole deal) up to two days ahead of time. Just cook it exactly as the recipe states, let it cool completely, and store it in a covered, airtight container in the fridge. When you’re ready to turn it into an Easy Snack Dinner, you just need to gently reheat the beef mixture—maybe a quick minute in the microwave or a warm-up in the skillet—before layering it onto your tortillas. It speeds up the process so much!
What is the best cheese blend for melting in these Beef Quesadillas?
For me, the perfect melt involves a tag team! I highly recommend using a blend of sharp Cheddar for that classic, flavorful cheese taste, mixed with good old Monterey Jack. Jack is the secret to that incredible, stretchy, gooey pull we all dream about when we bite into one of these Beef Quesadillas. If you don’t have both, stick to a good quality mild or sharp Cheddar, but maybe add just a tiny bit more oil to your cooking pan to make sure it melts evenly. Avoid anything too crumbly!
How can I make these Cheesy Beef Quesadillas spicier?
If you’re like me and love a little fire, there are a few easy ways to turn up the heat when making these Cheesy Beef Quesadillas. First, double the amount of ground chipotle chili pepper since that adds a wonderful smoky heat. That little quarter teaspoon of cayenne I mentioned? Go ahead and bump that up to half a teaspoon, or even a full one if you’re brave! Also, skip the mild salsa for serving and grab a hot bottle or use a dash of your favorite hot sauce tossed right into the beef mixture at the very end. It really kicks things up for a spicy Quick Lunch!
Sharing Your Cheesy Beef Quesadillas Experience
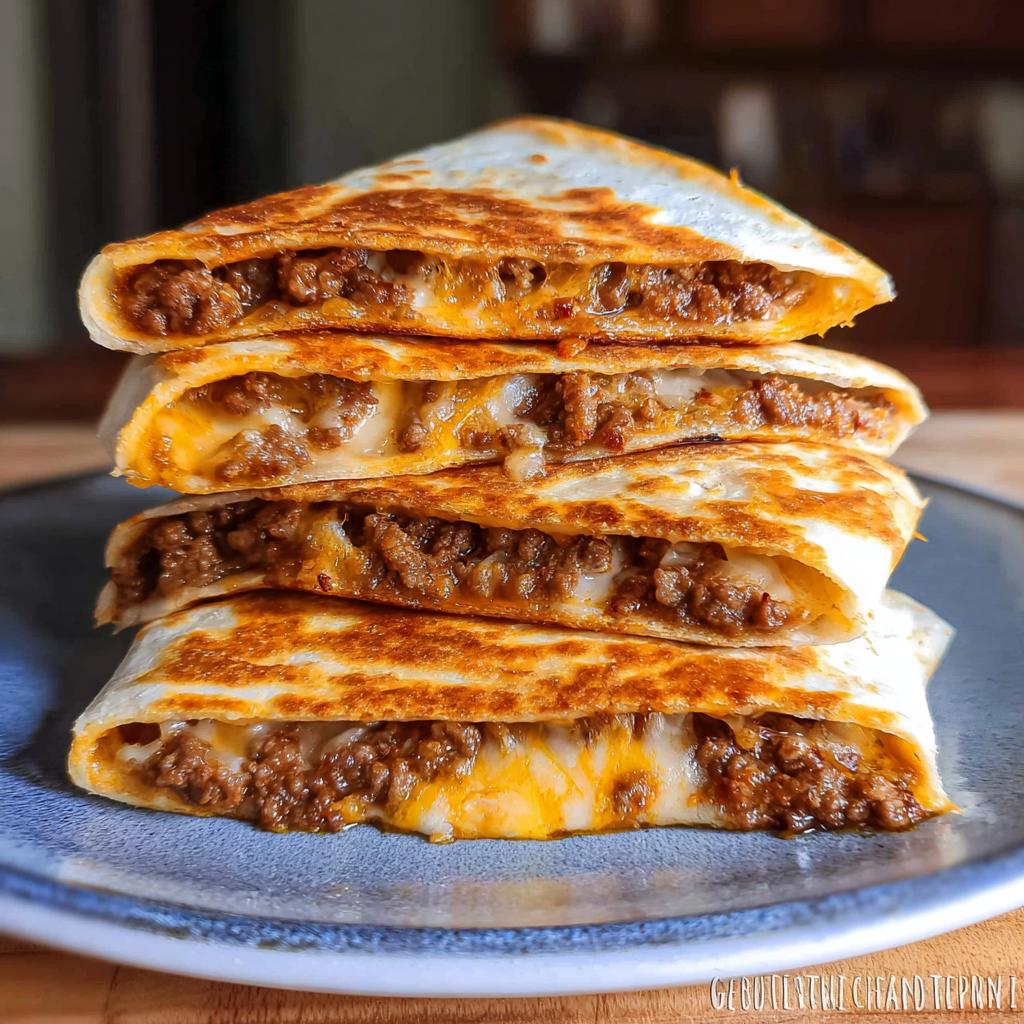
And there you have it! The secret to turning a busy weeknight into a mini fiesta with the most delicious, satisfying, and unbelievably easy Cheesy Beef Quesadillas you’ll ever make. I truly hope that making these brings as much laughter and joy to your kitchen as it does to mine. Seeing those golden-brown tortillas stuffed with savory beef and molten cheese—it just makes evenings better, doesn’t it?
Now that you’ve tried this recipe for your next Easy Snack Dinner or Quick Lunch, I’m dying to know what you thought! Did your family devour them as fast as mine does? Did you stick to the classic serving style, or did you try some crazy topping I haven’t even considered yet?
Please, don’t keep all that delicious feedback to yourself! Head down to the comments section below and leave me a star rating—it helps other busy folks find this recipe. If you snap a picture of your perfectly cooked Beef Quesadillas, tag me on social media! I love seeing your creations and hearing your stories about making this recipe a new family favorite. You can drop all your thoughts and comments right here. Happy cooking, my friends!
Cheesy Beef Quesadillas
Ingredients
Equipment
Method
- Preheat your oven to 200 degrees Fahrenheit. This will keep the quesadillas warm as you cook them in batches.
- Heat the olive oil in a large non-stick frying pan over medium heat. Add the ground beef and all the spices: chili powder, chipotle pepper, oregano, cumin, garlic powder, onion powder, salt, black pepper, and cayenne pepper if using. Cook, breaking the beef into small pieces, until it is fully browned, about 8 to 10 minutes.
- Stir in the tomato paste and beef stock or broth. Cook for another 1 to 2 minutes. Remove the beef mixture from the pan and place it in a bowl. Drain off any excess grease.
- Spread about 8 ounces (2 cups) of the shredded cheese evenly over one side of each of the 6 tortillas. Reserve the remaining 4 ounces of cheese.
- Spoon the cooked beef mixture over the cheese on each tortilla. Sprinkle the remaining 4 ounces of cheese over the beef. Fold each tortilla in half to create a half-moon shape.
- Heat about 2 teaspoons of vegetable oil in a large non-stick frying pan over medium-low heat. Swirl the oil to coat the pan. If you are using the same pan from cooking the beef, wipe it clean before adding oil.
- Cook the quesadillas in batches, two at a time. Add more oil to the pan between batches as needed. Place two folded quesadillas in the pan and cook for about 2 minutes on the first side.
- Carefully flip the quesadillas and cook for another 2 minutes, or until they are golden brown and crispy on the outside and the cheese is melted inside. Watch them closely to prevent burning. Transfer the cooked quesadillas to the preheated oven on a sheet pan to keep warm while you cook the rest.
- Repeat the cooking process with the remaining quesadillas.
- Once all quesadillas are cooked, cut each one in half. Serve warm with your favorite salsa, guacamole, or sour cream.
Nutrition
Notes
Tried this recipe?
Let us know how it was!
Master of Global Fusion Innovation
My culinary adventure reflects my Lebanese-Italian heritage and a decade spent in the dynamic fusion restaurant scenes of Miami and Barcelona. I’ve made it my mission to prove that beloved global comfort foods can be successfully adapted for low-carb living without losing their soul, their cultural authenticity, or their ability to comfort.
With advanced training in molecular gastronomy and experience spanning Mediterranean, Middle Eastern, and Latin American traditions, I’ve developed what I call “respectful innovation” – culinary creativity that honors traditional cooking wisdom rather than replacing it. My alternative ingredient substitution systems are now taught in specialty diet cooking schools throughout the region.
Drawing from my trilingual upbringing, I understand how deeply food connects to identity and memory. That’s why my flavor-bridging techniques allow classic dishes from around the world to maintain their comforting, familiar qualities while meeting contemporary nutritional standards. I regularly share these techniques at international culinary symposiums and innovation events.
When I’m not experimenting in my Miami fusion kitchen laboratory, you’ll find me at local salsa dance venues – the rhythm and improvisation skills translate directly to my creative cooking process! My role as a foster parent to rescue rabbits has unexpectedly inspired some of my most creative plant-based low-carb innovations.
My personal low-carb journey began as a way to maintain energy for my active lifestyle, but it’s evolved into a professional mission of proving that healthy eating can be globally adventurous rather than restrictively limiting. Every recipe I create is a passport to culinary adventure, transforming kitchens into laboratories for exploring healthy versions of the world’s most beloved comfort foods.