
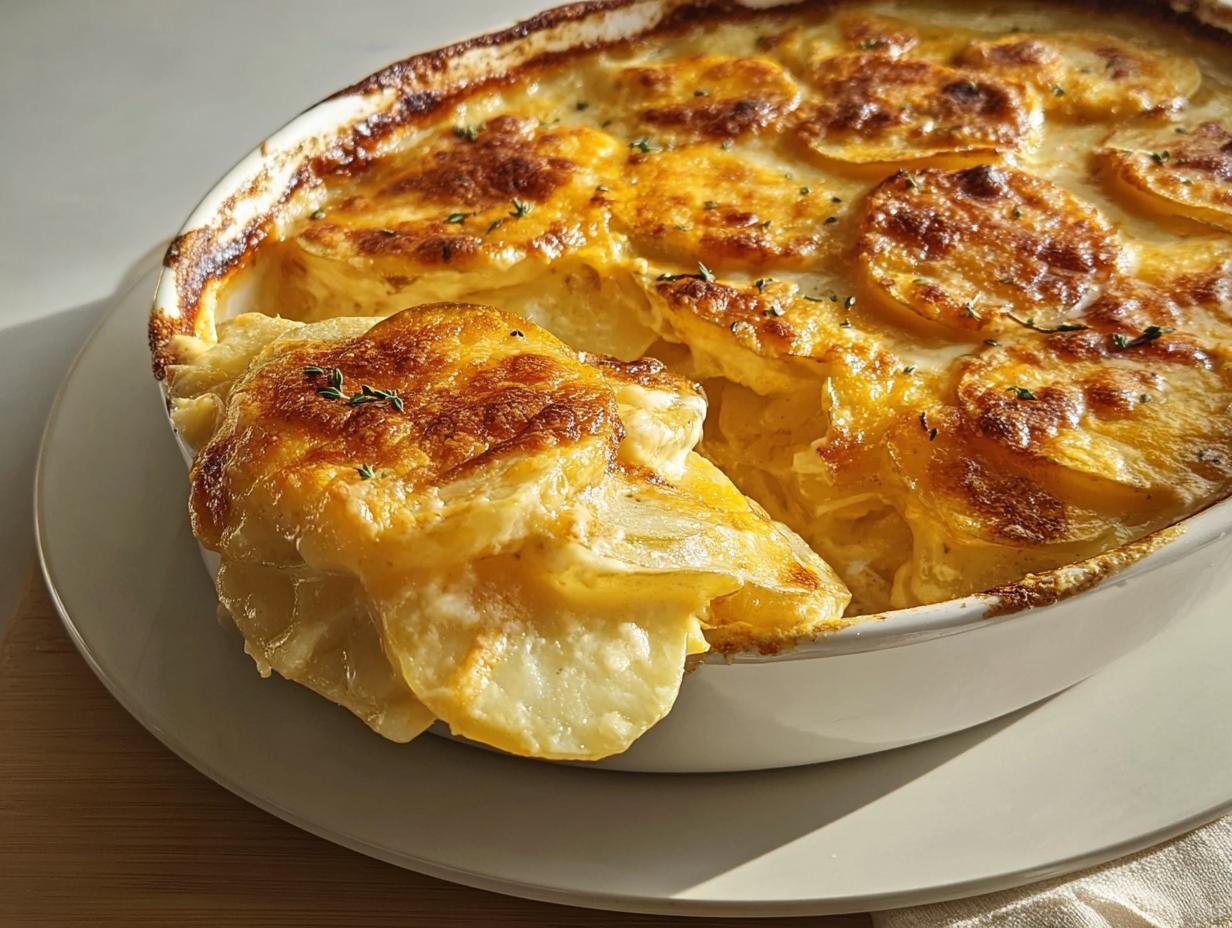
You know those meals that just wrap you up like a warm, cheesy blanket? For me, nothing says ultimate comfort food quite like rich, decadent potatoes. And when it comes to the gold standard, we have to talk about Au Gratin Potatoes (Classic). This isn’t some fancy, fussy restaurant dish; this is the real deal—the one that makes everyone at the table sigh contentedly!
I still remember the first time I served my version of Au Gratin Potatoes (Classic) at a family gathering. My mother had always made them for special occasions, and when I attempted the recipe from her handwritten notes, I hoped to recreate that sense of warmth and togetherness. As I layered the potatoes, cheese, and cream, my kitchen filled with the rich, buttery aroma that instantly transported me back to childhood. When I finally served my creation, my family gathered around the table, and their smiles as they dug in reminded me that food is so much more than just nourishment—it’s a way to connect and share love through tradition.
If you’re looking for that perfect side for Thanksgiving, Christmas, or just a Tuesday that needs cheering up, this recipe is it. We’re going back to basics for those heavenly, cheesy layers!
Why This Au Gratin Potatoes (Classic) Recipe is a Holiday Favorite
You might think a recipe this delicious has to be complicated, but honestly, this is what I turn to when things get hectic. It looks incredibly fancy, but once you get the rhythm down, it’s simple layering and waiting for the magic to happen. It’s the ultimate crowd-pleaser for busy families!
- It brings that deep, nostalgic comfort that only a classic side dish can offer.
- The texture is unbeatable—no one can resist those thick, Cheesy Layers soaking up the Creamy Sauce.
- Because it bakes for a long time, I can focus on the turkey or the ham! Less last-minute stove-top drama for me!
Achieving Perfect Cheesy Layers
The secret to those gorgeous, distinct layers in your Au Gratin Potatoes (Classic) isn’t just throwing things in haphazardly. I make sure to slice my potatoes whisper-thin and season every single layer of potato and onion before the sauce goes on top. That early seasoning means flavor permeates every slice, not just the top layer!
Essential Ingredients for Au Gratin Potatoes (Classic)
Okay, let’s talk ingredients. You want the magic to really happen in your Au Gratin Potatoes (Classic), and that means picking the right stuff. Since this is the classic version, we aren’t messing around with fancy cream or Gruyère—we’re sticking to pantry staples that deliver big flavor. Remember, preparation here is key; thinly sliced potatoes are non-negotiable for a tender final product!
For the Potatoes and Onions
This is the heart of the dish, so pay attention to your taters! I always go for Russets because they hold their shape but still get wonderfully tender after that long bake. Get your mandoline out, or just take your time with a sharp knife.
- 4 medium russet potatoes, and I mean you need them thinly sliced, trust me on this!
- 1 medium onion, sliced into nice, even rings.
- Salt and ground black pepper to taste—be generous on this layer!
For the Creamy Sauce Base
This is where we build that famous creamy sauce. We are making a quick roux here to keep things thick and velvety without it separating. Make sure your Cheddar is actually shredded; the pre-shredded stuff sometimes has anti-caking agents that can make things gummy.
- 3 tablespoons butter
- 3 tablespoons all-purpose flour
- 1/2 teaspoon salt
- 2 cups milk—whole milk works best for richness here!
- 1 1/2 cups shredded Cheddar cheese. Get the good stuff!
Step-by-Step Guide to Making Au Gratin Potatoes (Classic)
If you’ve got your prep done—potatoes sliced thin and your cheese ready—then we’re on the home stretch! The cooking process for your Potatoes Au Gratin is really about building layers of flavor and giving things enough time in that oven to meld together beautifully. Don’t rush that bake time; it’s what makes them tender!
Preparing the Potatoes and Oven Setup
First things first, preheat that oven to 400 degrees F (200 degrees C). While it heats up, take your butter and give that 2-quart casserole dish a good greasing. Now, layer those beautiful thin slices. You’re going to divide your seasoned potatoes and onions into two batches. Put half the potatoes down first, sprinkle them lightly with salt and pepper—remember, flavor every layer! Top that with all your onion slices, and then finish with the remaining seasoned potatoes. They should nestle in there nicely.
Creating the Rich, Creamy Sauce
Next up is the sauce, and we are making it the old-school way starting with a roux. Grab your medium saucepan and melt those 3 tablespoons of butter over medium heat. Whisk in the flour and that 1/2 teaspoon of salt furiously. You have to cook out that raw flour edge, so give it a minute of constant whisking until it smells a little nutty, not bitter. Now, and this is important: slowly whisk in your milk a little bit at a time. If you dump it all in at once, you get lumps, and nobody wants sad, lumpy potatoes. Keep whisking until that mixture gets thick enough to coat the back of a spoon—that takes about 3 to 5 minutes of focused attention.
Assembly and Baking for Tender Au Gratin Potatoes (Classic)
Once that sauce is thick, take it off the heat immediately! Stir in all that heavenly Cheddar cheese until it melts into a smooth pool of orange gold. Pour this glorious sauce evenly over your layered potatoes in the dish. Make sure it sneaks down into all those crevices! Cover that dish tightly with foil—we don’t want any dry edges—and pop it in the oven. It needs a good 1.5 hours in there until the potatoes are totally tender and the sauce is bubbling away. If you want that gorgeous, golden crust, check out the full cooking instructions, but I always pull the foil off for the last 15 minutes for that perfect finish. Trust me, the aroma alone is worth the wait!
Tips for Success with Au Gratin Potatoes (Classic)
Sometimes, even when following the recipe perfectly, things can go a little sideways in the kitchen. Don’t you worry! These are the little tricks I’ve picked up over the years serving this Au Gratin Potatoes (Classic) recipe at every major holiday. We want tender potatoes and a sauce that clings beautifully, not one that runs everywhere.
Potato Selection and Slicing Depth
I know I mentioned Russets earlier, but let’s dig into why. Russet potatoes have a higher starch content, which is exactly what we want! When they bake, they break down just enough to help thicken the sauce naturally as they cook. If you use a waxy potato, like a red potato, they tend to hold their shape too firmly and can feel waxy instead of melting into the cheesy layers.
As for slicing, forget anything thicker than about 1/8 of an inch. I aim for the thickness of a standard nickel, maybe even a tiny bit thinner if your knife skills (or mandoline!) allow. If the slices are too thick, the center potatoes will still be hard as rocks while the top is burnt to a crisp. That long bake time needs thin slices to ensure everything cooks evenly.
Troubleshooting Common Issues
If you pull your dish out and everything looks… off, here are the two biggest gremlins I always hear about:
- The Sauce Separated: This usually happens when you add the cheese while the sauce is still boiling hot, or if you didn’t whisk the milk in slowly enough earlier. If you see the fat splitting from the solids, don’t panic! Take the dish off the heat immediately and whisk in a tablespoon of fresh, cold milk or even a splash of water. That little shock often brings the emulsion back together.
- Potatoes Aren’t Tender: If you poke a slice and it still feels firm, it just needs more time. Cover it back up tightly with foil and put it back in the oven for another 15 to 20 minutes. The longer, slower bake time underneath the foil is key to breaking down the starch. Next time, just commit to checking them right around the 90-minute mark!
Serving Suggestions for Your Classic Side
Now that you’ve got this amazing, rich Au Gratin Potatoes (Classic) ready to go, the big question is: what should we eat it with? Since this is such a decadent, heavy side dish, you want main courses that can stand up to that wonderful creaminess. This side deserves the star treatment!
Because this is the ultimate Classic Side, it pairs perfectly with roasted mains. Think about a beautiful slow-roasted ham or a simple herb-crusted roast beef. If you’re doing a weeknight dinner and need something way faster, even some simple baked chicken breasts tossed with thyme will shine right next to these cheesy layers. Trust me, anything saucy needs these potatoes nearby for soaking up every last drop!

Storing and Reheating Au Gratin Potatoes (Classic)
Even though this dish disappears fast when I serve it—seriously, people go wild for these Potatoes Au Gratin—sometimes you have leftovers. And you absolutely should save them! You put in all that work making the perfect rich sauce and cheesy layers, so we need to treat those leftovers right so they taste almost as amazing the next day.
For refrigeration, the key is keeping moisture in. Once the dish has cooled down a bit (leave it on the counter for maybe an hour, but don’t let it sit out for hours, safety first!), cover that casserole dish tightly with plastic wrap, or scoop the leftovers into an airtight container. They’ll keep great in the fridge for about 3 or 4 days. If you try to push it past that, the texture starts to get a little sad, trust me.
The Best Way to Reheat
I never, ever microwave big portions of this classic side. It just heats the moisture unevenly and ends up making the edges tough. The oven is your best friend here. Scoop out what you need into a smaller, oven-safe dish—don’t use the original big dish unless you are reheating the whole thing.
Cover that small dish tightly with foil again. This is crucial because it steams them back to life! Heat it in a 350-degree oven until it’s piping hot all the way through—this usually takes 20 to 30 minutes depending on the size of your scoop. If it looks a little dry when you pull the foil off, just stir in a tiny splash—maybe a teaspoon—of milk or even plain cream over the top before you serve it up. That little bit of liquid will bring back the velvety texture we worked so hard for!
Can I freeze this Au Gratin Potatoes (Classic)?
Yes, you absolutely can sneak some of these cheesy layers into the freezer for future emergencies! Once cooled completely, portion the potatoes into freezer-safe containers. I try not to use glass unless I know it’s freezer-safe plastic or foil pans, just in case of cracking. It freezes well for about two months.
When you are ready to eat the frozen batch, you need to thaw it first! Moving it to the fridge overnight is the safest way. Then, reheat it following the same method as above: covered in the oven at 350°F. Thawed potatoes take longer, maybe 40 to 50 minutes total, but they come out beautifully creamy. This is lifesaver when you suddenly realize you need a Holiday Favorite ready in an hour!
Frequently Asked Questions About Potatoes Au Gratin
I get so many questions about this recipe—which thrills me! It means you’re all making happy memories around the dinner table. Here are the things I hear most often when folks are tackling their first batch of Potatoes Au Gratin!
Can I make the creamy sauce ahead of time?
Oh yes, you totally can, and I highly recommend it if you are trying to juggle a big holiday meal! You can absolutely make the rich, Creamy Sauce base (butter, flour, milk, cheese) a day ahead of time. Just cook it until it thickens and the cheese melts, then cool it completely.
When you transfer it to a storage container, make sure to press a piece of plastic wrap right onto the surface of the sauce. This stops that annoying skin from forming on top! When you are ready to assemble your Au Gratin Potatoes (Classic) the next day, you’ll need to gently reheat the sauce on the stovetop over low heat until it’s smooth and pourable again before topping those layered potatoes. It saves so much frantic whisking right before baking time!
What is the difference between Potatoes Au Gratin and Scalloped Potatoes?
This is the question that starts arguments in my family! They look similar, right? Both are thinly sliced potatoes baked in cream or milk. But the difference is right there in the name—Au Gratin means “with a crust” or, in our modern kitchens, “with cheese.”
Scalloped Potatoes—the purists will tell you—are made with just milk or cream and often thickened slightly, but they usually skip the heavy cheese component in the sauce. Our recipe for Au Gratin Potatoes (Classic) screams cheesy goodness, making it richer and creating those amazing Cheesy Layers on top. If it’s got plenty of Cheddar in the sauce soaking through every layer, you’ve got gratin!
Do I need to pre-cook the potatoes before assembling?
Nope! And that’s one of the beautiful things about this classic recipe. Because we slice them so thin—remember, nickel-thin—and we bake them covered for that long 90-minute period, the potatoes steam perfectly right in the sauce. If you pre-cook them, they tend to disintegrate during the long bake time, and you lose that wonderful structure in your layers. Stick to thin slices and let the oven do the work; the payoff is so much better!
Nutritional Estimate for Au Gratin Potatoes (Classic)
Now, let’s talk numbers. I like to keep this dish just for special occasions because, let’s be honest, smothering potatoes in butter and cheese isn’t exactly a diet staple! But it’s important to know what you’re digging into when you serve up this wonderful Classic Side. It’s rich, it’s satisfying, and it’s worth every single calorie when shared with family.
These figures are just an estimate based on the ingredients listed for four generous servings. Realistically, if you substitute whole milk for a lower-fat version, or use less cheese, your numbers will shift. But for the pure pleasure of genuine Au Gratin Potatoes (Classic), these are the numbers you’re looking at:
- Calories: 499
- Fat: 25g
- Protein: 20g
- Carbohydrates: 49g
Keep in mind that this estimate doesn’t account for leftovers or seconds—and trust me, there are usually seconds! This is comfort food, pure and simple, designed to fuel happy memories rather than track every single micro-nutrient. Enjoy it guilt-free when the holidays roll around!
Share Your Experience with This Classic Side
Well, that’s it for this journey into the perfect, rich, and utterly necessary Au Gratin Potatoes (Classic)! I hope seeing my mom’s handwritten notes translate onto your plate brings as much joy to your kitchen as it does to mine.
Now, I need your help! I live for hearing your stories. Did you manage to get those potatoes slice thin enough? Did your family inhale the entire dish before the main course was even ready? Tell me everything!
Please leave a rating for this recipe right down in the comments below—five stars if it brought the comfort food magic you were looking for! Even better, share a picture of your beautiful, bubbly, cheesy layers on social media and tag me! I love seeing my favorite Holiday Favorite show up on your tables. Happy cooking, and may your next gathering be filled with amazing food and great company!
Au Gratin Potatoes (Classic)
Ingredients
Equipment
Method
- Preheat your oven to 400 degrees F (200 degrees C). Grease a 2-quart casserole dish with butter.
- Layer half of the sliced potatoes in the bottom of the prepared casserole dish. Season this layer with salt and pepper.
- Layer the onion slices over the potatoes, then top with the remaining potatoes. Season this top layer again with salt and pepper.
- Melt the butter in a medium saucepan over medium heat. Whisk in the flour and 1/2 teaspoon of salt. Cook, whisking constantly, until the raw flour flavor has cooked off, about 1 minute.
- Gradually whisk in the milk. Cook, whisking constantly, until the mixture has thickened, which should take 3 to 5 minutes.
- Remove the saucepan from the heat. Stir in the shredded Cheddar cheese all at once. Cook, stirring constantly, until the cheese is completely melted, about 30 to 60 seconds.
- Pour the cheese sauce evenly over the potatoes in the casserole dish. Cover the dish tightly with aluminum foil.
- Bake in the preheated oven until the potatoes are tender and the sauce is bubbly, about 1 1/2 hours.
Nutrition
Notes
Tried this recipe?
Let us know how it was!
Certified Family Nutrition Strategist
My path into family nutrition began working with Phoenix Area Family Services, where I saw how traditional nutrition advice often ignored real-world constraints like budget limitations, time crunches, and kids who refuse to eat anything green. That experience sparked my mission to develop meal planning systems that work with family realities, not against them.
Over eight years, I’ve helped hundreds of families reduce grocery spending by 25% while dramatically improving their nutrition. My meal planning frameworks have been adopted by local wellness centers because they actually work for busy parents juggling different ages, preferences, and dietary needs in one household.
As a bilingual first-generation Mexican-American and mother of three, I personally navigate the daily challenge of feeding a family nutritiously while honoring cultural traditions and managing a household budget. My “kid-friendly low-carb” protocols show families how to gradually introduce healthier options without triggering mealtime battles or abandoning beloved family recipes.
My “realistic wellness” philosophy is straightforward: health improvements must work within existing family dynamics and financial realities to be truly sustainable. When I’m not developing meal planning systems, I’m creating portable trail snacks for our weekend family hiking adventures – because healthy eating should fuel the life you want to live.
My personal low-carb journey started after pregnancy as a way to regain energy for active parenting, and that experience continues to inform my professional commitment to making healthy eating feel supportive rather than burdensome for busy families.