
Oh, friends, if you’ve ever dreamt of biting into something so intensely, gloriously rich that it feels like a five-star bakery creation but comes right out of your own kitchen, then have I got the recipe for you today! We’re talking about transforming simple ingredients into a magnificent Dark Chocolate Truffle Cake. It sounds daunting, I know, but trust me when I say this luxurious dessert is completely manageable for us home bakers. It’s all about technique, not fuss!
I still remember the first time I decided to bake a “Dark Chocolate Truffle Cake” for my husband’s birthday. It was a whirlwind week—kids had back-to-back activities, and I was juggling grocery lists and meal prep. But when I finally found the time to create this cake, my kitchen transformed into a haven of chocolatey bliss. The rich aroma filled the air, and as I presented the cake at the birthday dinner, the smiles on my family’s faces were priceless. That moment reminded me why I love baking; it’s about creating memories as much as it is about enjoying delicious food.
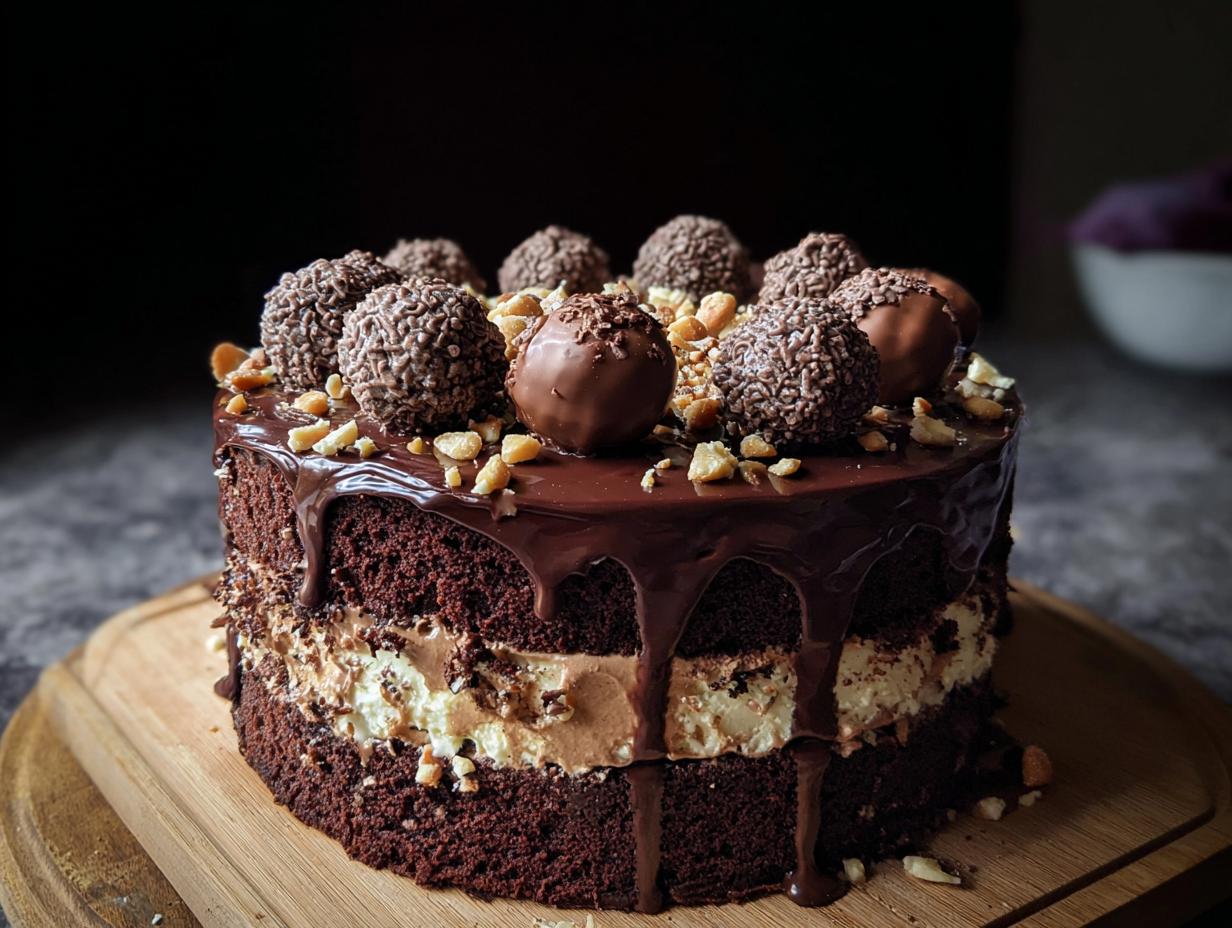
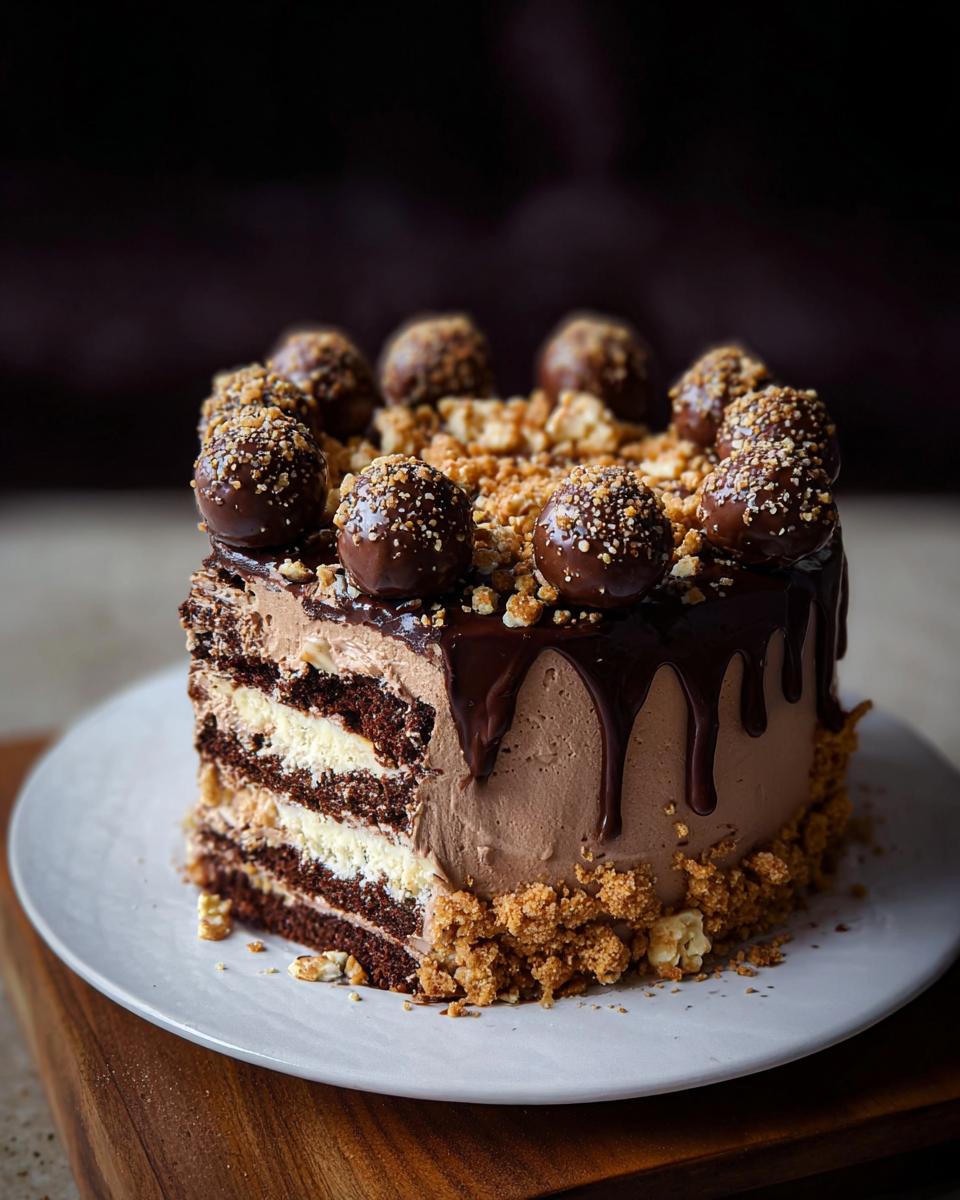
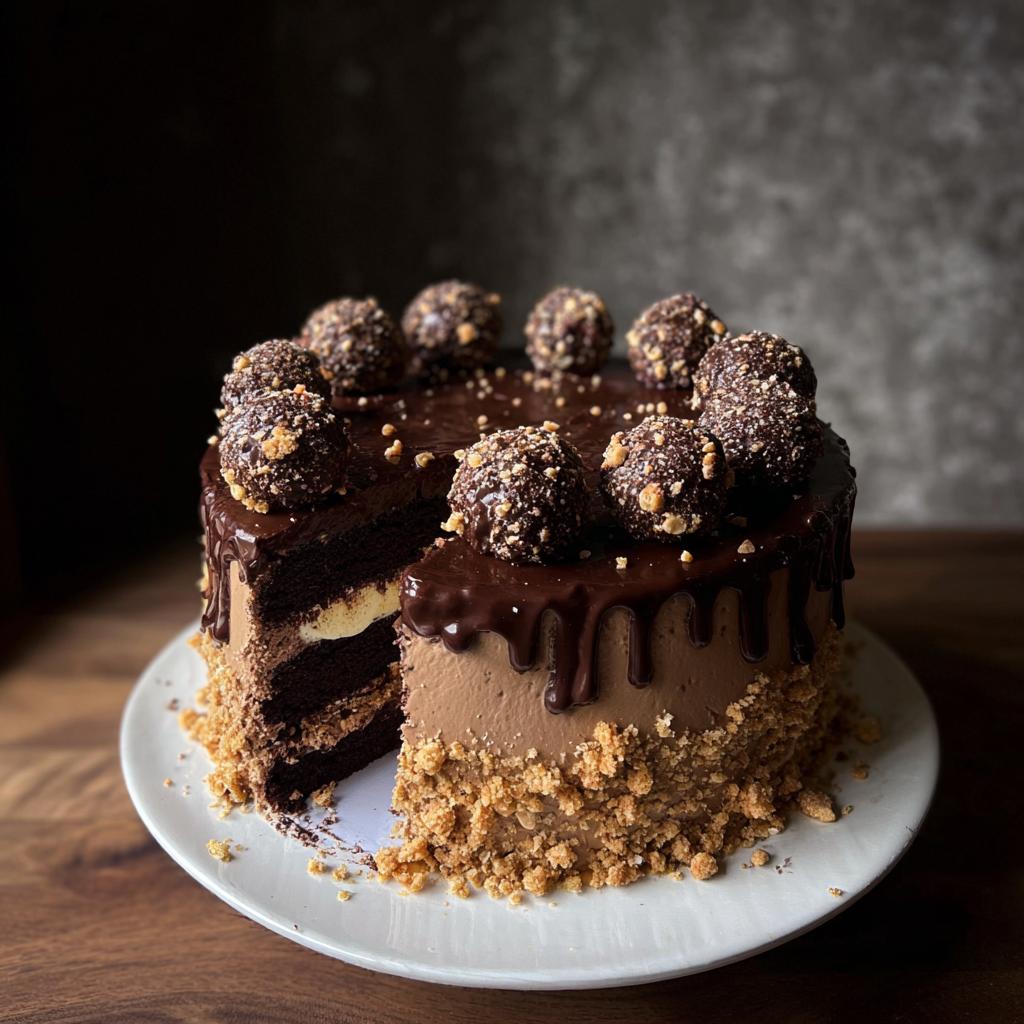
This isn’t just another chocolate cake, folks; this is the ultimate crowd-pleaser for any celebration. We are building layers of moist, deep chocolate cake, filling them with creamy buttercream, and topping it all off with a mirror-like ganache. You absolutely have to try this! Let’s grab our aprons, shall we?
Why This Dark Chocolate Truffle Cake is Your Next Showstopper
I know you look at pictures of massive, glossy cakes and think, "There’s no way I can pull that off after a long Tuesday." But hear me out! This Dark Chocolate Truffle Cake is designed to deliver that incredible visual impact without stressing you out. It’s the perfect balance of gourmet results and accessible method, giving you the confidence of a professional baker.
This cake is truly a showstopper because it tastes just as decadent as it looks. Every component plays a part in creating that deep, rich chocolate experience we all crave on a special occasion.
Key Benefits of Our Dark Chocolate Truffle Cake
- Incredibly moist cake layers thanks to the hot coffee trick.
- The buttercream filling is dreamy and holds up beautifully for stacking.
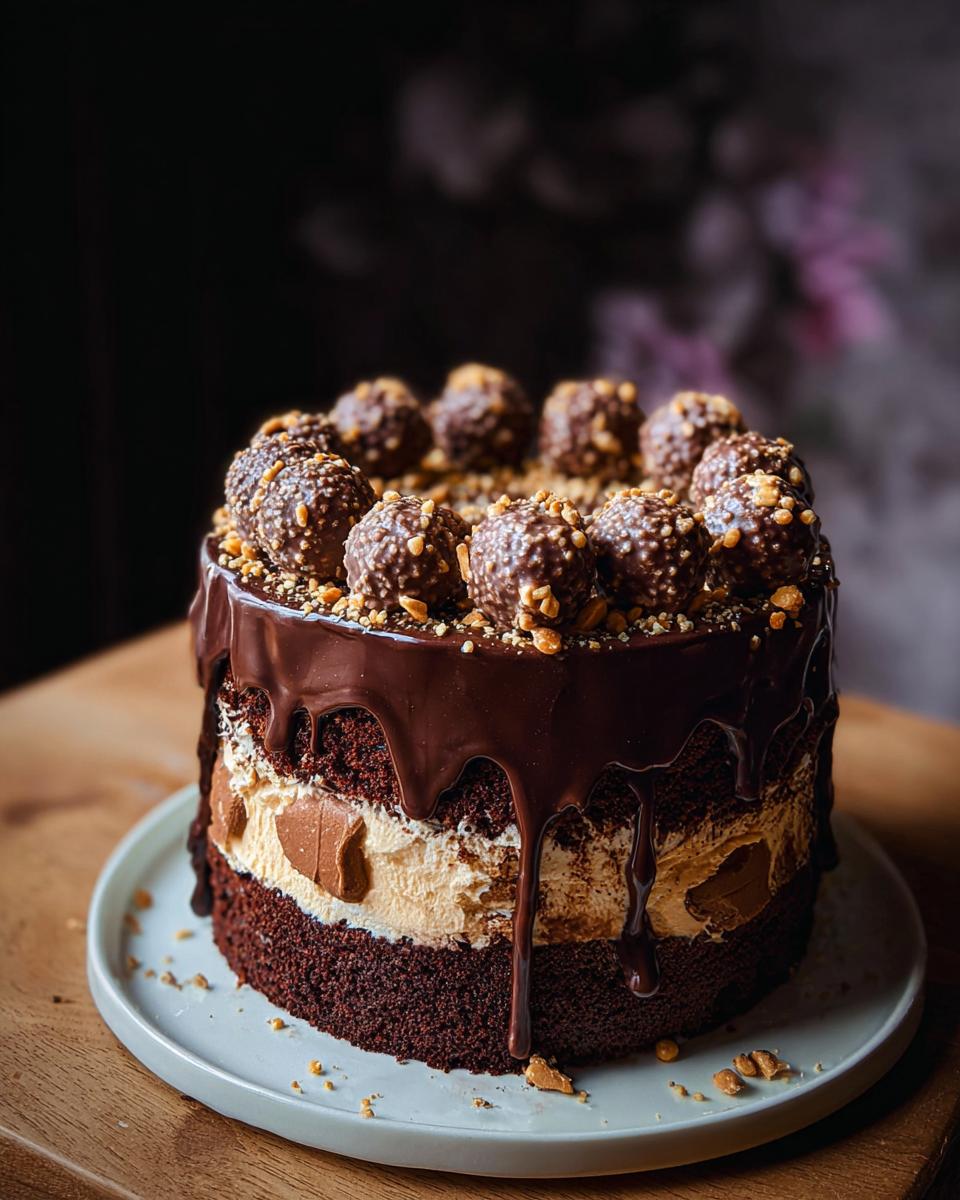
- The ganache gives you that professional, glossy, drip-down look—it’s easier than you think!
- It’s designed for straightforward assembly, even with three different components (cake, filling, topping).
- It stands tall and proud, making it a true centerpiece for any gathering.
Essential Equipment for Your Dark Chocolate Truffle Cake
Before we dive into the glorious mixing and baking, let’s make sure your kitchen is ready for action! Having the right tools on hand means you won’t have to stop mid-pour wondering where your cooling rack went. This recipe relies on a few pieces of equipment that really help achieve that perfect smooth finish and flat layers. Don’t worry if you don’t have everything; most of these are essentials for baking anyway!
Having everything set up before you start mixing the dry ingredients saves so much headache when dealing with a batter that sets fast, like this incredibly rich chocolate one.
Tools Needed for Perfect Layers
You’ll want to lay out everything near your mixing station. Here’s the list of what I pull out every time for this cake:
- Your trusty Oven, set to the correct temperature, of course!
- Two 8-inch round cake pans – these are crucial for even baking.
- Plenty of Parchment paper to line those pans perfectly.
- A Large bowl for combining all those dry goodies together first.
- Your Electric mixer – hand-held or stand mixer, whatever you have!
- A good sturdy Spatula for scraping down the sides, believe me, you don’t want cocoa powder hiding down there!
- Wire cooling racks are mandatory for letting the cakes cool down properly without getting soggy bottoms.
- A Cake board or serving platter ready for assembly.
- An Icing spatula for getting that buttercream smooth.
- And finally, a Food processor—this is specific if you are processing your own nuts for decoration, as noted in the recipe tips!
Ingredients for the Ultimate Dark Chocolate Truffle Cake Layers
Alright, let’s talk about what makes the cake layers themselves so unbelievably moist and chocolatey. Since this is the base of our entire Dark Chocolate Truffle Cake structure, we can’t cut corners here, but we also don’t need fancy imported things! We are using familiar ingredients, just combined in a way that brings out maximum flavor.
The key to that deep, dark color and flavor lies in the cocoa powder. You absolutely must use unsweetened natural cocoa powder—not the Dutch processed stuff! Dutch process has been treated differently and won’t react properly with our baking soda, leading to texture issues. Take it from me, double-checking that label is worth it!
We’re also using plain, full-fat Greek yogurt instead of buttermilk. It keeps the crumb tender and provides the necessary acid to activate the baking soda for a perfect rise. And yes, we use hot, strong-brewed coffee. Don’t worry, your cake won’t taste like a latte; the coffee just unlocks the deepest flavors in the cocoa powder. It’s magic!
Ingredient Notes and Substitutions for the Dark Chocolate Truffle Cake
A few pointers here will really cement your success with this recipe, especially regarding ingredient temperature and type. Remember, quality ingredients make a quality cake!
- The Powders: Always sift your flour, sugar, cocoa powder, baking powder, and baking soda together first. This prevents small clumps of baking soda hiding in the batter, which nobody wants!
- The Fat and Tang: Stick to the full-fat Greek yogurt; low-fat varieties can thin out the batter too much.
- The Liquid: That hot coffee is essential. Feel free to use hot water if you absolutely cannot do coffee, but I promise the coffee intensifies the rich chocolate profile beautifully.
My biggest quality tip for any decadent cake like this Dark Chocolate Truffle Cake? Invest in good vanilla extract. You use a full two teaspoons, so using that cheap, imitation stuff really shows. Real vanilla lifts all those deep cocoa notes and makes the whole cake taste brighter and more complex. It’s a small detail that makes a huge difference to the final flavor profile!
Preparing the Frosting and Decoration Components
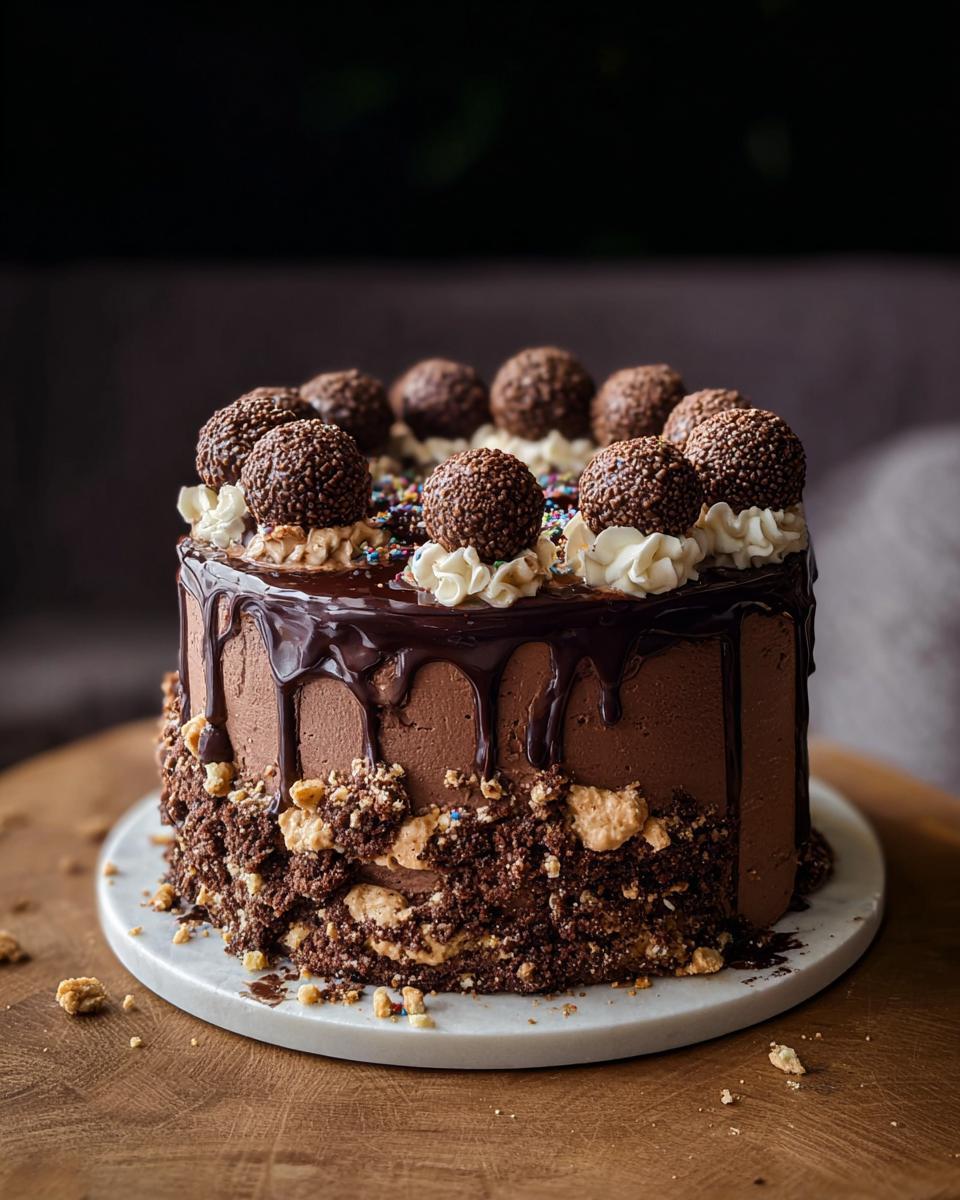
Now that our stunning chocolate cake layers are cooling completely—don’t you dare rush them!—it’s time to tackle the parts that truly make this a Dark Chocolate Truffle Cake: the fillings and the dazzling finish! We have three main stars here that we need to get ready before assembly begins: our creamy milk chocolate buttercream, the gorgeous dark chocolate ganache, and finally, the little bit of crunch we add for texture and flair with ground nuts and truffles.
Think of this stage as prepping all your jewelry before putting on the main outfit. Getting these ready ensures that once the cakes are cool, the assembly process flies by, and you can spend more time admiring your handiwork!
Making the Milk Chocolate Buttercream and Ganache
The buttercreams and ganaches are usually where people get nervous, but honestly, they are just glorified, super-rich puddings if you follow the instructions. For the buttercream filling, you’ll use the recipe steps for spreading it thickly between the layers. Remember, we want this to be sturdy enough to hold up the top layer, so make sure it’s well-beaten and smooth!
The true star of the show, though, is that ganache. This is what sinks down the sides and gives you that professional, high-end, rich chocolate coating for your Chocolate Truffle Cake. The most important thing to watch here, as noted in the instructions, is the consistency. It needs to be pourable—kind of like thin pancake batter—but not hot! If it’s too hot, it will melt all the lovely buttercream underneath. If it sets up too much, it won’t flow over the sides nicely for that perfect drip effect we are aiming for. You might need to warm your prepared ganache ever so slightly in the microwave in 5-second bursts until it reaches that perfect, drippy texture.
We also need to prepare our decorations: the ground nuts go straight into a food processor (careful not to turn them to paste!), and if you’re making your own truffles, those need to be prepped and chilled so they stay firm before we place them on top of the finished cake.
Step-by-Step Baking Instructions for Your Dark Chocolate Truffle Cake
Okay, deep breaths! We’ve got the ingredients ready and the toppings prepped. Now it’s time to bring this beautiful beast to life! This is the most rewarding part, watching all those separate elements come together into one glorious, decadent Dark Chocolate Truffle Cake. I’ve broken down the baking and assembly into two clear parts so you can focus on one thing at a time. Just follow along, and honestly, you can’t go wrong.
Baking the Moist Cake Layers
First things first: let’s get that oven heated up! Preheat your oven right now to 325 degrees F (163 degrees C). This lower temperature helps prevent the outside from setting before the inside layers—which are pretty dense—have a chance to cook through properly. While it heats, prepare your pans; that means greasing them well, placing that parchment liner down, and giving them a little flour dusting. This step is non-negotiable, or you’ll be crying over stuck cake later, trust me!
Step one in the mixing bowl is combining all your dry ingredients: both sugars, flour, that crucial natural cocoa powder, baking powder, baking soda, and salt. Give it a good whisk around just to make sure everything is evenly distributed. Don’t skip this dry mix; it ensures proper leavening!
Now for the wet items! You’re going to mix your eggs, yolk, oil, yogurt, and vanilla right into that dry mixture. Start slow with the mixer, just to incorporate. Once it looks mostly combined, bump it up to medium speed and beat it for a solid two minutes. This builds just a little bit of structure. The final liquid addition is the star: the hot coffee! Turn the mixer down to low and slowly pour in that cup of hot coffee until everything is smoothly combined into a very thin, dark batter. Don’t overmix at this stage! Pour it evenly into your prepared 8-inch pans.
Into the oven they go for about 55 to 65 minutes. This time frame is important because of the high sugar and fat content, so keep an eye on them after the 50-minute mark. Use the toothpick test—you want moist crumbs clinging to it, not wet sludge. Once they pass the test, pull them out and let them cool in the pans for just five small minutes before flipping them onto cooling racks. They must be completely, totally cool before we even think about frosting.
Assembling the Rich Chocolate Truffle Cake
Once those layers are cool—and I mean cool to the touch, not just lukewarm—we move to assembly. This is when your beautiful Dark Chocolate Truffle Cake starts looking like a masterpiece! Place the first cake layer right side up on your serving platter or cake board. Now, spread that lovely milk chocolate buttercream generously across the top. You need a good, thick layer here because this is doing the heavy lifting!
Carefully top it with your second cake layer, but lay this one upside down. Why? Because the bottom of a cake layer is usually the flattest surface, giving you a perfectly level top for the finale. Now, cover the entire cake—top and sides—with the rest of the buttercream. Try to smooth it out as best you can with your icing spatula. It doesn’t need to be *perfectly* smooth yet; it just needs to be fully encased.
Here’s a crucial stop for the temperature control we learned about: put the cake into the refrigerator for at least 1 hour. This chilling step firms up that entire frosting shell, which is absolutely necessary before we pour on the warm ganache. If you skip this, the ganache will just melt right off, and you’ll have a soupy mess!
After chilling, it’s ganache time! Make sure your dark chocolate ganache is at that sweet spot—pourable but slightly thick. Pour it right onto the center of the chilled cake. Use your spatula to gently coax it towards the edges so it starts to drip down naturally. Don’t try to force it all the way down the sides; let gravity do the work! Once the drips are looking good, quickly press those ground nuts around the bottom edge. Finally, dot the top center of your cake with those beautiful chocolate truffles.
Back into the fridge it goes for final setting before you serve that showstopper! You did it!
Tips for a Perfect Dark Chocolate Truffle Cake Finish
You’ve baked the layers, you’ve assembled the whole thing, and now it’s sitting there, looking a little nervous before its big reveal, right? This is where a few tiny tricks can take your Dark Chocolate Truffle Cake from ‘really good’ to ‘I can’t believe you made this!’ It’s all about managing temperature and texture in these final steps.
Don’t rush the chilling process! I cannot stress this enough when dealing with layered, ganache-topped cakes. If you try to pour that ganache over a warm or even room-temperature buttercream shell, you’ve essentially signed up for a melting disaster. You need that buttercream rock solid before the ganache touches it. That hour chill time is your best friend for a clean finish!
Here are my top secrets for achieving that perfect, glossy, professional look on your Dark Chocolate Truffle Cake:
- The Ganache Temperature Test: Before you even think about pouring the ganache over the entire cake, test a small spoonful on a piece of parchment paper. If it immediately runs and pools flat, it’s too hot. If it plops down like thick peanut butter, it’s too cold. You want it to flow slowly and coat the back of the spoon nicely—like warm honey. A few seconds less in the microwave can save your entire presentation!
- The Spatula Trick for Ganache Edges: When you pour the ganache onto the center, let it run naturally to the edge. Once it gets close to the side, use the offset icing spatula you used for the buttercream. Hold it still, tilted slightly downwards, right at the edge of the cake. This gentle guiding motion encourages the drip to form naturally rather than dragging the ganache down in thick blobs.
- Embrace the Cocoa Dust Finish: If your ganache drips ended up a bit messy, or you just want an extra layer of richness, don’t panic! Before the ganache sets completely, take a fine-mesh sieve and gently dust the very top surface of the cake (avoiding the sides where the drip is showing) with a little extra unsweetened cocoa powder. It adds a beautiful matte depth that contrasts wonderfully with the glossy drips below. It’s my go-to fix for any minor imperfection on a rich chocolate cake!
Follow these three things—chill hard, check the drizzle temperature, and use the spatula guide—and your homemade Chocolate Truffle Cake will absolutely look like it belongs in a bakery window!
Storage and Serving Suggestions for This Holiday Dessert
So, we’ve created this towering masterpiece, this magnificent Dark Chocolate Truffle Cake. The big question now is: how do we keep it tasting fantastic until the very last slice? Since this baby is loaded with butter, eggs from the cake, and chocolate in the ganache, we have to think about storage carefully. This isn’t something you leave sitting out on the counter for days!
Because of the buttercream filling and the ganache topping, this cake absolutely needs to stay chilled. If you’ve already gone ahead and decorated it, place it carefully under a cake dome or loosely tented with foil in the refrigerator. It’s going to hold up beautifully in there for about four or five days. If you’re making this for a big event, like a Holiday Dessert centerpiece, you can definitely bake the layers ahead of time, as the notes mentioned. Once cooled, wrap those layers tightly in plastic wrap and then foil, and they’ll be perfect in the freezer for up to three months. Just let them thaw overnight in the fridge before you plan to frost!
When it comes time to serve, you want to pull the cake out of the fridge about an hour before you plan on cutting into it. Why? Because that rich chocolate flavor and the texture of the buttercream really bloom when they’re slightly warmer than refrigerator temperature. If it’s rock hard, the cake layers can taste a little dry, and the ganache might shatter when you slice it.
Now for the fun part: pairing suggestions! This cake is so intense and decadent, it really only needs a simple counterpoint. Forget heavy sauces; the sweetness of the milk chocolate buttercream is already plentiful. For me, the absolute best thing to serve alongside a slice of this Rich Chocolate goodness is a tart fruit element. A simple homemade raspberry coulis—just mashed raspberries with a tiny bit of sugar—cuts through the richness perfectly. If you prefer drinks, a strong, black cup of coffee or an espresso shot is the classic winner.
If you’re serving this as the main event for a Special Occasion, maybe offer a scoop of high-quality vanilla bean ice cream on the side, but honestly, this Dark Chocolate Truffle Cake stands tall enough on its own. Just make sure everyone has a large glass of water nearby, because you’re going to need it for all that decadent chocolate goodness!
Frequently Asked Questions About the Dark Chocolate Truffle Cake
I always get so many questions about this cake! It’s a project, I know, but asking questions is the smartest way to make sure everything goes perfectly when you bake something this important. Here are a few things I hear all the time from folks getting ready to tackle their own Dark Chocolate Truffle Cake.
Can I make the cake layers ahead of time?
Absolutely, you totally can! That’s one of the best tricks for making these big Special Occasion desserts less stressful. As I mentioned in the storage section, you can bake the layers, let them cool completely, wrap each one individually in plastic wrap, and then wrap that bundle in foil. Pop those into the freezer, and they are good for up to three months. Trust me, having those perfectly baked, frozen layers ready in the fridge the night before you plan to assemble your Rich Chocolate creation is a lifesaver!
What does ‘Special Occasion’ mean for this recipe?
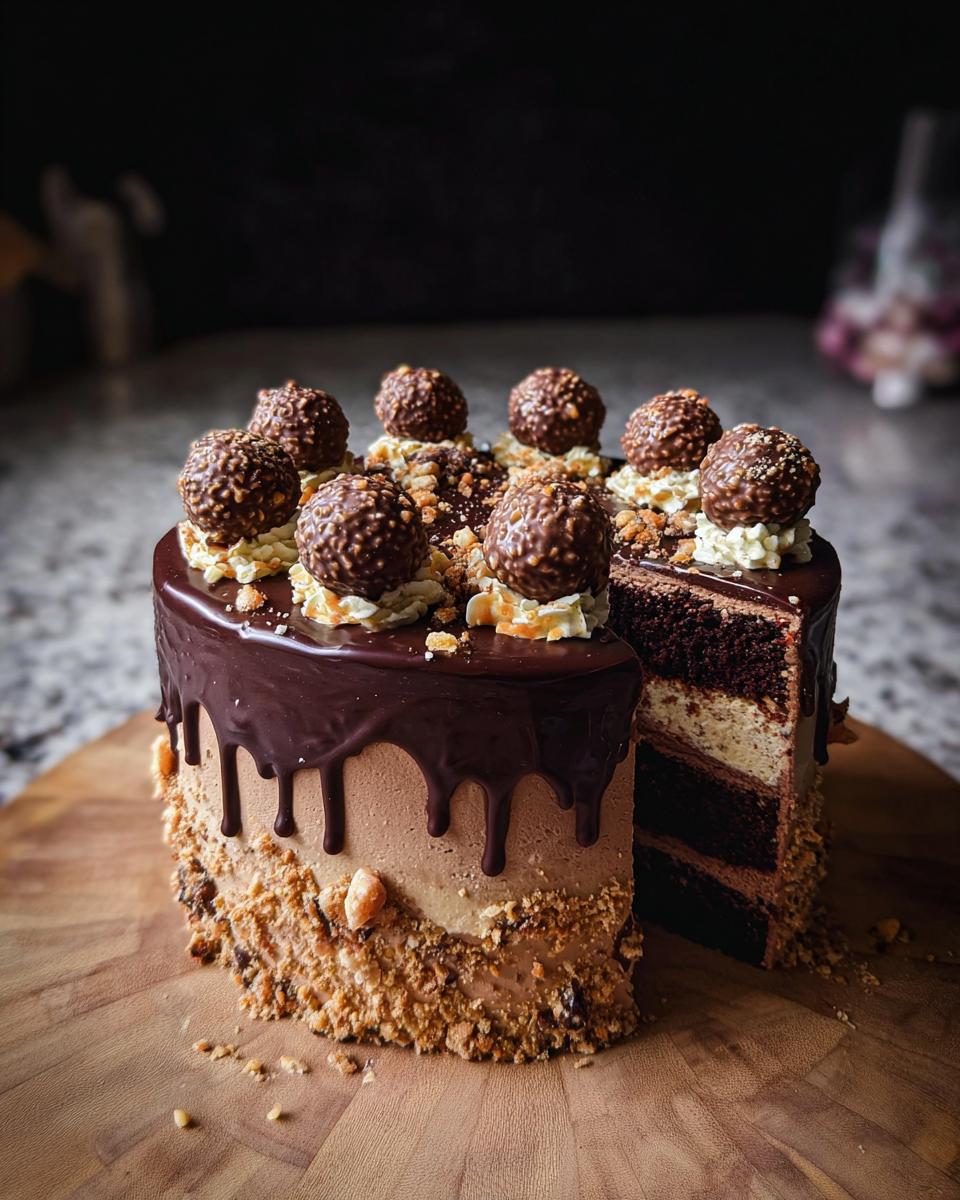
When I say Special Occasion, I mean this cake deserves a bow and applause! Because it involves three main components—the cake, the buttercream filling, and the ganache topping—it takes a little more coordinated effort than a simple snack cake. It is rich, it is layered, and it looks incredibly impressive when you slice into it and see all those distinct textures. It’s the perfect ‘wow factor’ dessert for birthdays, anniversaries, or just celebrating that you made it through a really busy month! It’s a proper Showstopper Dessert that truly feels earned.
As for common baking worries—oh, I have answers for those too! Here are a couple of bonus things folks ask:
Why do I need hot coffee if I don’t like coffee flavor?
This one pops up constantly! You’re right, you won’t taste the coffee when this Dark Chocolate Truffle Cake is done, I promise. Think of the hot coffee as a secret flavor enhancer. Cocoa powder, especially the natural kind we use, needs liquid to fully bloom its complex, deep chocolate flavor notes. The heat helps that process tremendously. If you absolutely can’t bring yourself to use coffee—maybe you’re caffeine sensitive—you can use hot, plain water instead, but you lose a little bit of that depth only coffee can provide to the Rich Chocolate base.
My ganache seems thin—how do I get thick truffles later?
That’s the dual power of ganache! Right now, while it’s liquid for pouring, it is designed to be thin so it drizzles nicely. If you’re planning ahead and want actual filling truffles, that’s a different story! To get that thick, rollable consistency for homemade truffles (as mentioned in the notes), you just use the same chocolate-to-cream ratio but chill that mixture until it’s completely firm, like fudge. Then you scoop and roll! For decorating the top of the cake, though, thin and pourable is the goal here!
Nutritional Estimates for Your Dark Chocolate Truffle Cake
Okay, so let’s talk numbers for a minute, because I know many of you are curious about the fueling side of things, especially when you’re making something this intensely delicious and obviously rich. When you look at a massive showstopper like this Dark Chocolate Truffle Cake, it’s natural to wonder where it falls on the nutrition scale.
Here’s my honest take, baking friends: because this recipe is so focused on using high-quality real butter, rich cocoa, and dense layers, the nutritional breakdown can vary quite a bit depending on the exact brands you grab at the grocery store—like the fat content in your specific brand of Greek yogurt or the type of chocolate melting chips you choose for the ganache.
Because of all those delicious variables that make this cake so special, I intentionally skip giving hard, fast calorie or fat counts here. Instead, please treat this as an indulgence meant for celebrating those grand Special Occasion moments! If you need precise data for dietary tracking, I always recommend plugging your *exact* purchased ingredients into a reliable online food calculator, but honestly, for a slice of this magnificent Chocolate Truffle Cake, I try not to look too closely at the math!
Just know that for being a truly Rich Chocolate dessert, every single bite is worth the effort and the enjoyment!
Share Your Dark Chocolate Truffle Cake Creations
And there you have it, friends! You’ve conquered the layers, tamed the ganache, and presented what I hope is the most spectacular Dark Chocolate Truffle Cake anyone in your family has ever seen. Seriously, you should be so proud of yourself for taking on such a decadent bake!
Now comes the best part for me—seeing what you all create in your kitchens. Food is meant to be shared, and I absolutely live for seeing your creations pop up online. Did you get a perfect drip? Did your kids devour their slice in about ten seconds flat? Tell me everything!
Please take a minute when you have a spare moment to leave a rating down below. Your feedback truly helps other home bakers decide if this is the perfect rich dessert for their next celebration. Let me know how the whole process went for you. Did the frosting smooth out easily? Were those layers as moist as promised?
And if you snapped a picture of your magnificent final product—maybe it’s sitting ready to blow everyone away at a birthday, or perhaps it’s just you enjoying a quiet moment with a cup of coffee—please tag me on social media! Use the recipe name so I can find it easily. Seeing your beautiful Dark Chocolate Truffle Cake photos is the sweetest reward after all that hard work. Happy baking, and enjoy every single luxurious bite!
Dark Chocolate Truffle Cake
Ingredients
Equipment
Method
- Preheat your oven to 325 degrees F (163 degrees C). Prepare two 8-inch round cake pans by coating them with vegetable shortening or butter. Line the bottom of each pan with parchment paper, also coating the paper with shortening or butter. Sprinkle flour inside the pans, shake to coat, and tap out the excess.
- In a large bowl, combine granulated sugar, brown sugar, flour, cocoa powder, salt, baking powder, and baking soda. Stir to mix.
- Add the eggs, egg yolk, vegetable oil, yogurt, and vanilla extract to the dry ingredients. Beat on low speed with an electric mixer until just blended, then increase to medium speed and beat for 2 minutes, scraping down the sides as needed.
- Reduce mixer speed to low. While mixing, slowly pour in the hot coffee until blended. Stop the mixer and use a spatula to ensure the batter is well combined.
- Divide the batter evenly between the two prepared cake pans.
- Bake for 55-65 minutes, or until the cake tops are set and pulling away from the sides. Insert a toothpick into the center; if it comes out with moist crumbs but no raw batter, the cakes are done. Remove from oven and place on wire cooling racks.
- Let the cakes cool in their pans for 5 minutes. Invert the pans onto cooling racks to remove the cakes. Allow the cakes to cool completely before frosting.
- To assemble, place one cake layer right side up on a cake board. Spread a generous amount of milk chocolate buttercream over the top. Place the second cake layer upside down on top of the buttercream. Cover the entire cake with a thick layer of buttercream, smoothing the top and sides.
- Press ground nuts around the bottom edge of the cake.
- Refrigerate the cake for 1 hour to firm up the buttercream.
- Prepare the chocolate ganache. Ensure it has a pourable consistency, like pancake batter. Thicken if too runny or warm slightly if too thick.
- Pour the ganache over the top of the chilled cake, allowing it to drip down the sides.
- Decorate the top of the cake with chocolate truffles.
- Refrigerate until ready to serve.
Notes
Tried this recipe?
Let us know how it was!
Certified Family Nutrition Strategist
My path into family nutrition began working with Phoenix Area Family Services, where I saw how traditional nutrition advice often ignored real-world constraints like budget limitations, time crunches, and kids who refuse to eat anything green. That experience sparked my mission to develop meal planning systems that work with family realities, not against them.
Over eight years, I’ve helped hundreds of families reduce grocery spending by 25% while dramatically improving their nutrition. My meal planning frameworks have been adopted by local wellness centers because they actually work for busy parents juggling different ages, preferences, and dietary needs in one household.
As a bilingual first-generation Mexican-American and mother of three, I personally navigate the daily challenge of feeding a family nutritiously while honoring cultural traditions and managing a household budget. My “kid-friendly low-carb” protocols show families how to gradually introduce healthier options without triggering mealtime battles or abandoning beloved family recipes.
My “realistic wellness” philosophy is straightforward: health improvements must work within existing family dynamics and financial realities to be truly sustainable. When I’m not developing meal planning systems, I’m creating portable trail snacks for our weekend family hiking adventures – because healthy eating should fuel the life you want to live.
My personal low-carb journey started after pregnancy as a way to regain energy for active parenting, and that experience continues to inform my professional commitment to making healthy eating feel supportive rather than burdensome for busy families.