
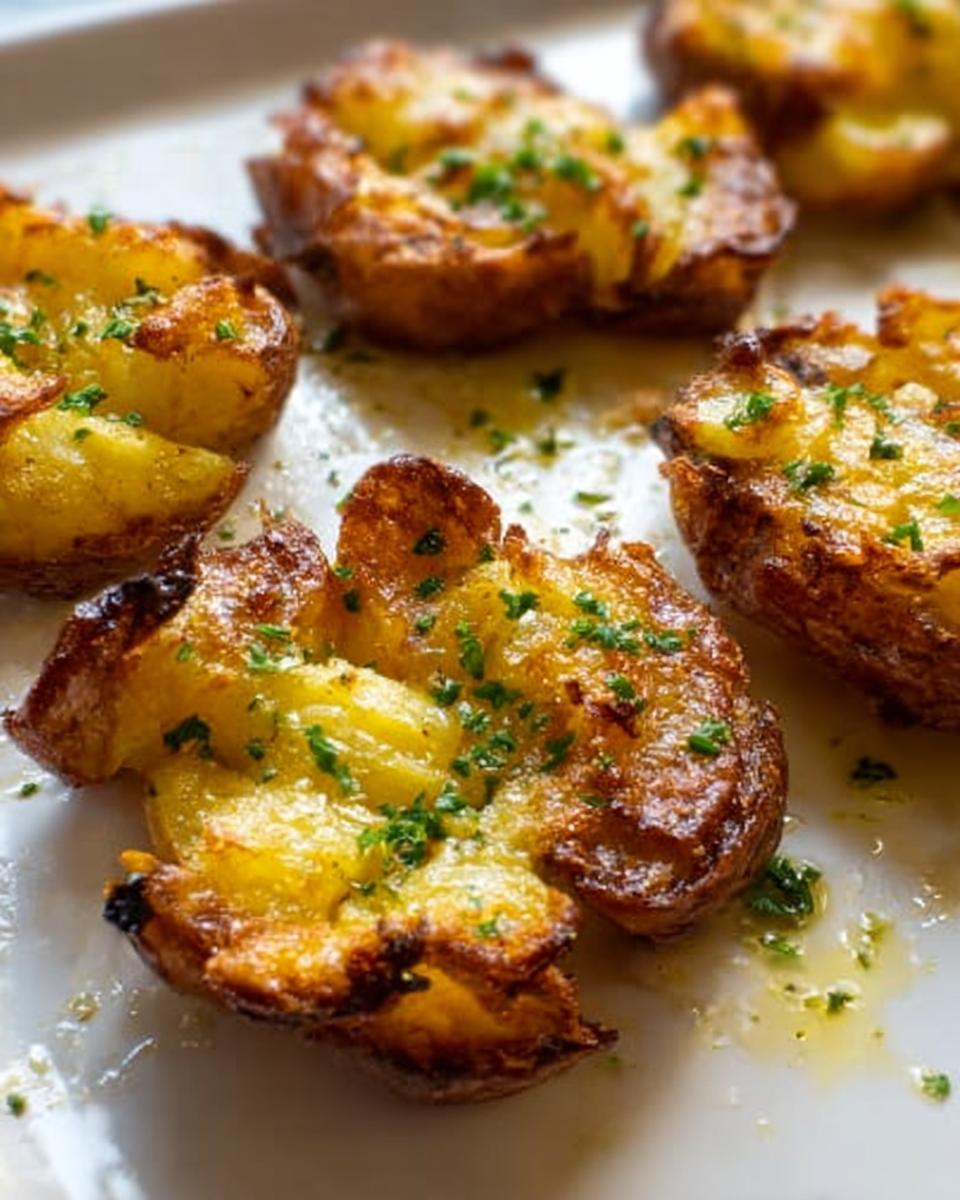
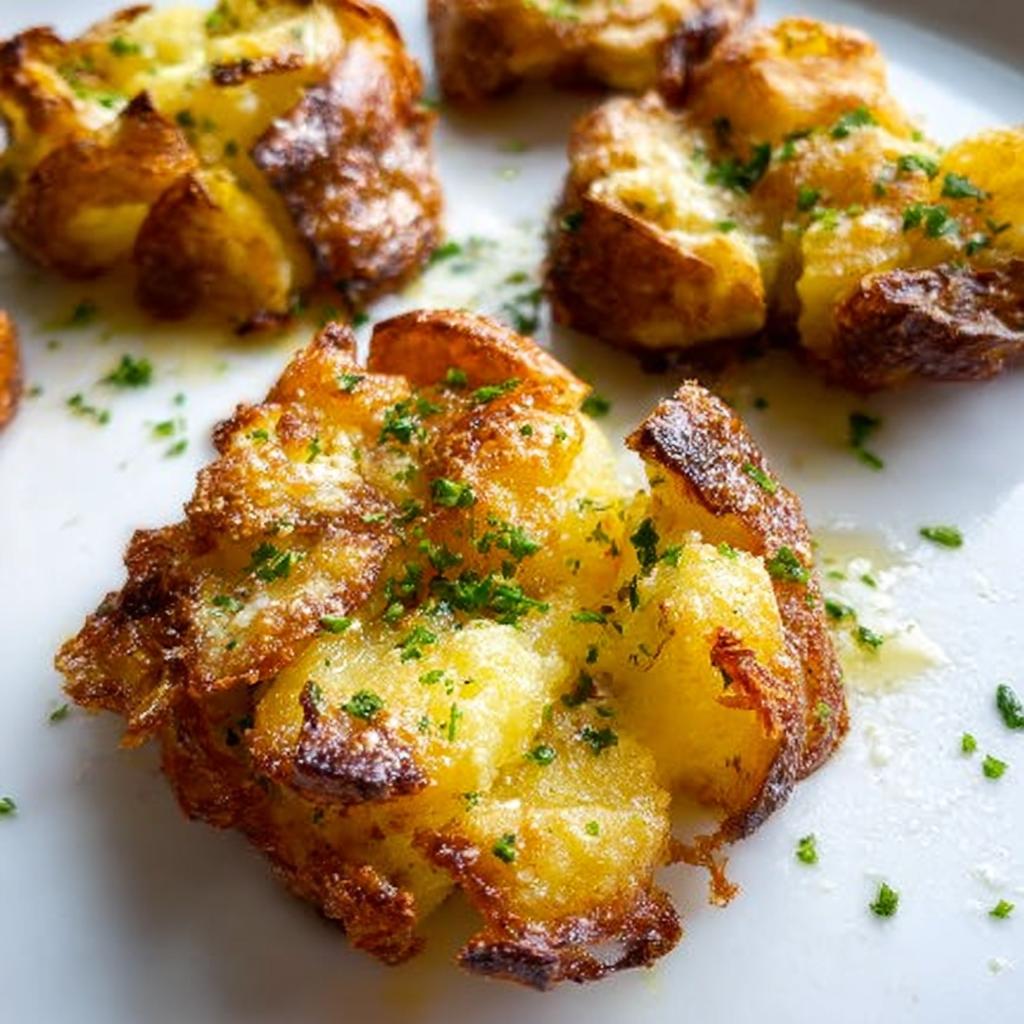
Oh my goodness, have I got a game-changer for your dinner table! We all know potatoes are humble, right? They just sit there, waiting to be baked or mashed. Well, I’m here to tell you how to transform those simple spuds into something wildly addictive: my glorious Crispy Smash Potatoes. Seriously, these aren’t your grandma’s bland boiled potatoes; these are oven-baked until they scream with crispy edges and fluffiness inside.
The first time I made these, chaos was reigning supreme in my kitchen—three kids demanding snacks and trying to figure out dinner after a marathon day. I grabbed some leftover boiled potatoes, gave them a good squash, tossed them with oil, and hoped for the best. When I pulled out that pan, golden and crackling, the kids forgot their complaints instantly! That’s when I knew that my Crispy Smash Potatoes were going to be a weekly staple around here. They are just so fun to eat!
Why You Will Love These Crispy Smash Potatoes
If you need convincing that these simple potatoes are worth the minimal effort, here’s the quick scoop:
- They are incredibly easy. Seriously, it’s just a boil, a squash, and a roast!
- The texture is unbeatable—all those fantastic, crunchy bits are the best part.
- They transform dinner into a fun event; kids absolutely adore them.
- They’re the ultimate Easy Side Dish that doubles perfectly as a year-round Party Favorite.
Selecting the Best Potatoes For Crispy Smash Potatoes
Choosing the right potato is really half the battle when aiming for those perfect Crispy Smash Potatoes! You can technically use any potato, but my experience tells me high-starch types are the fluffiest inside, which gives you a better contrast against the crust.
Waxy potatoes are creamier, which is great, but they don’t get as much airy fluff when they steam dry. Really, the size matters most. Golf-ball sized little potatoes are fantastic for parties because you can eat them like crunchy finger food. If you use bigger ones, you get more soft potato inside compared to the crispy surface bits, which is also delicious, just different!
Ingredient Clarity: What You Need for Crispy Smash Potatoes
When you’re ready to make your amazing Crispy Smash Potatoes, grab these things. I always measure everything out first; it just makes the process way smoother!
For the Potatoes, you’ll need about 700g of small potatoes (like 12 to 14) or about 1kg of medium ones (6 to 8 potatoes). For Cooking, just grab 1 tablespoon of salt for that boiling water. Then, for the essential Topping, you’ll want 30g of unsalted butter melted, 1 tablespoon of olive oil, and for sprinkling, 3/4 teaspoon of salt and 1/4 teaspoon of black pepper. Don’t forget optional fresh parsley if you want it looking fancy!
Step-by-Step Guide to Perfect Crispy Smash Potatoes
Ready to turn those boiled spuds into crispy gold? This is where the magic actually happens for making amazing Crispy Smash Potatoes! First things first: get your oven preheated to 200°C/390°F (or 180°C fan). We want it piping hot!
Boil your potatoes in water seasoned with about 1 tablespoon of salt until they are super tender. Small ones take about 20 to 25 minutes, but the medium guys might need closer to 30 minutes. Once soft, drain them really well in a colander and let them sit for about 5 minutes—this is our first drying step!
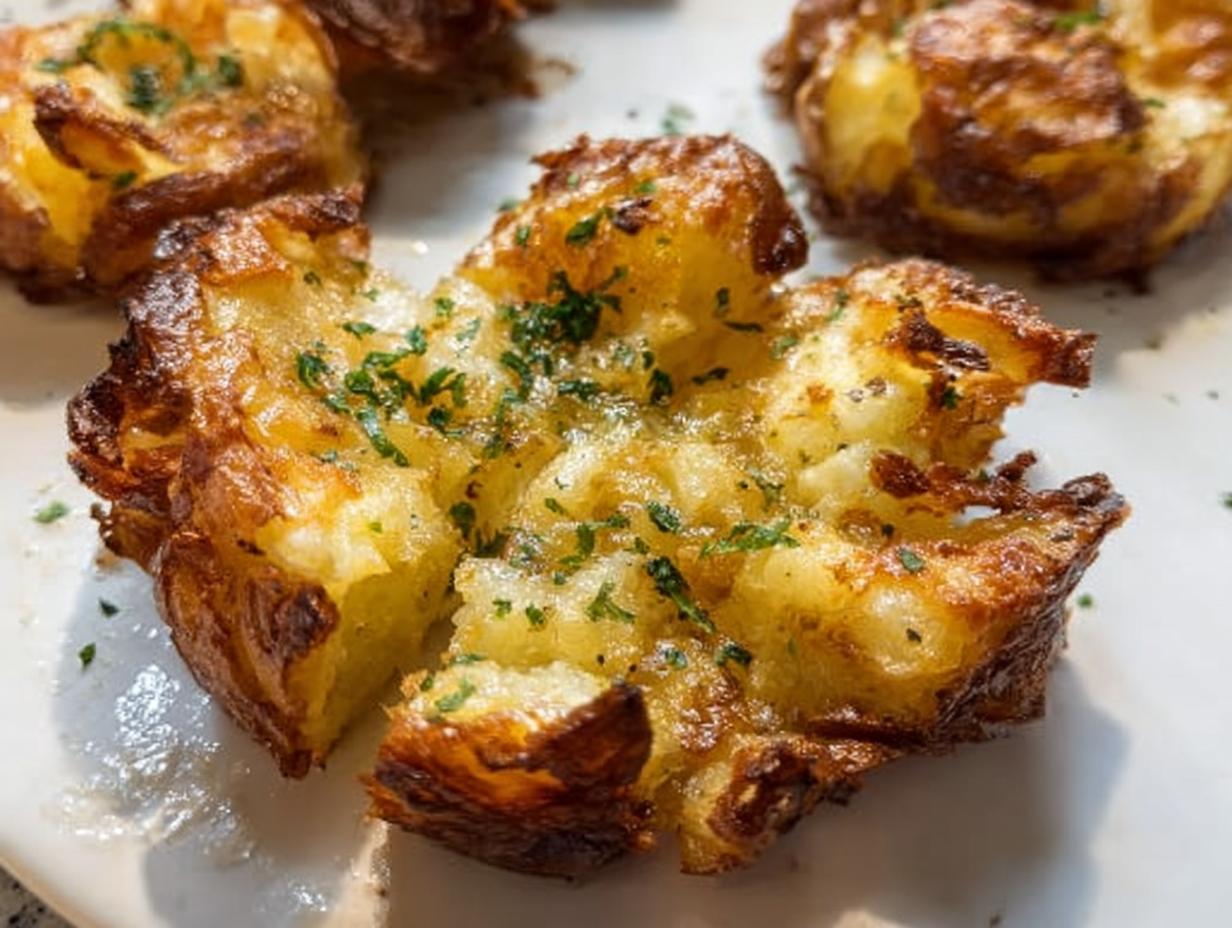
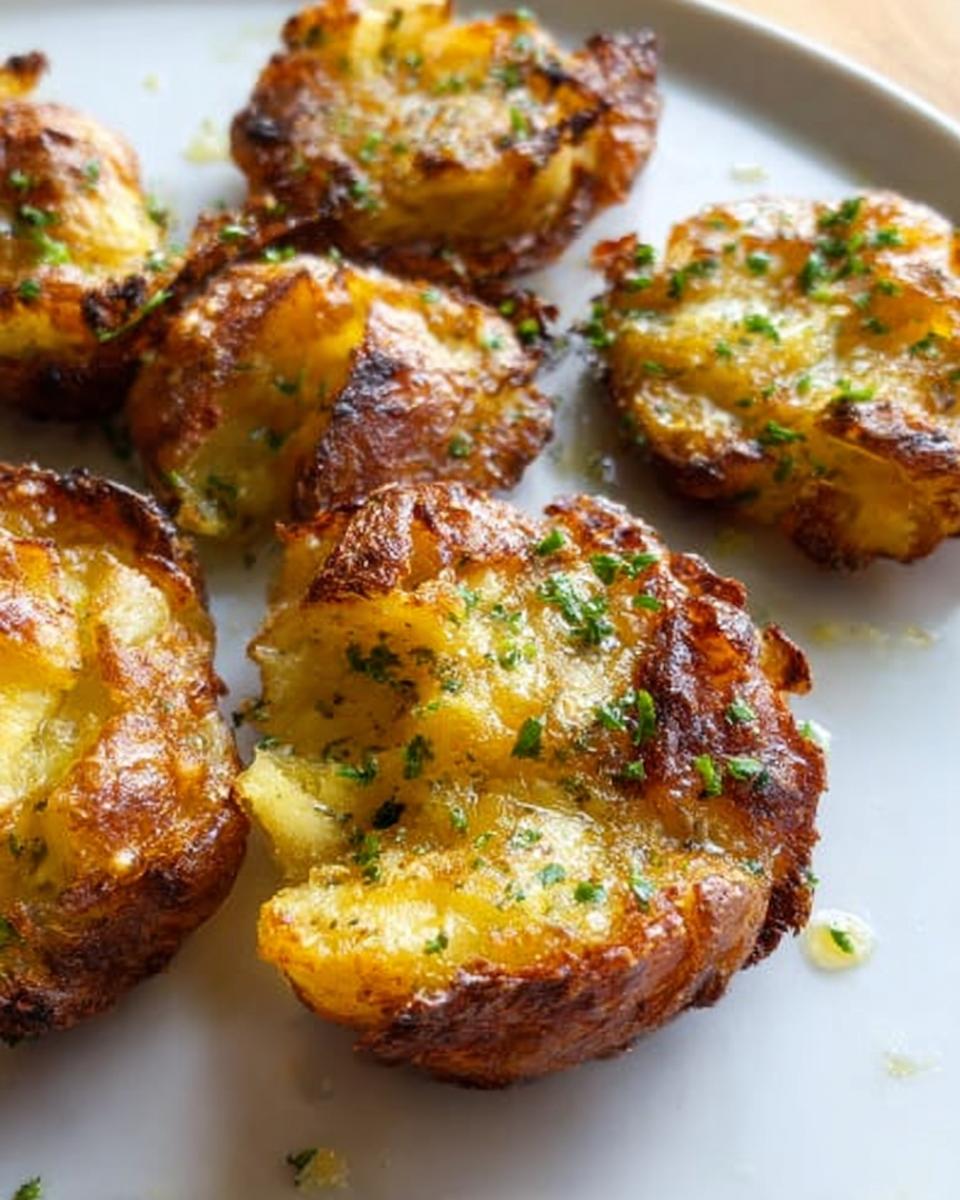
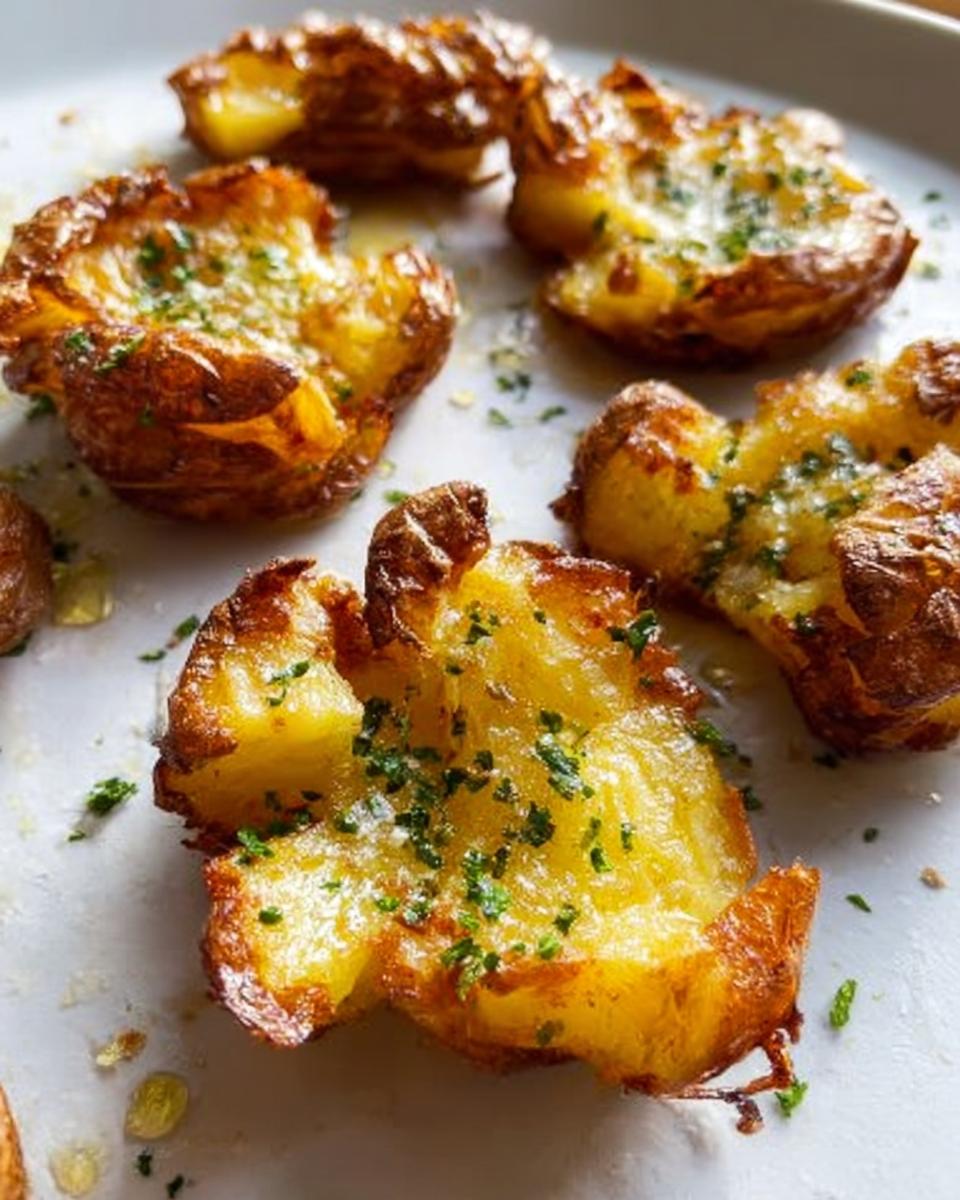
Next, put them on your baking sheet. Now, smash time! Use a fork or masher to flatten them slightly, but try to keep them in one piece. You aren’t making mashed potatoes here! You want lots of nubs and edges showing. Then, let them sit right there on the sheet for another 5 minutes to steam dry—that’s key!
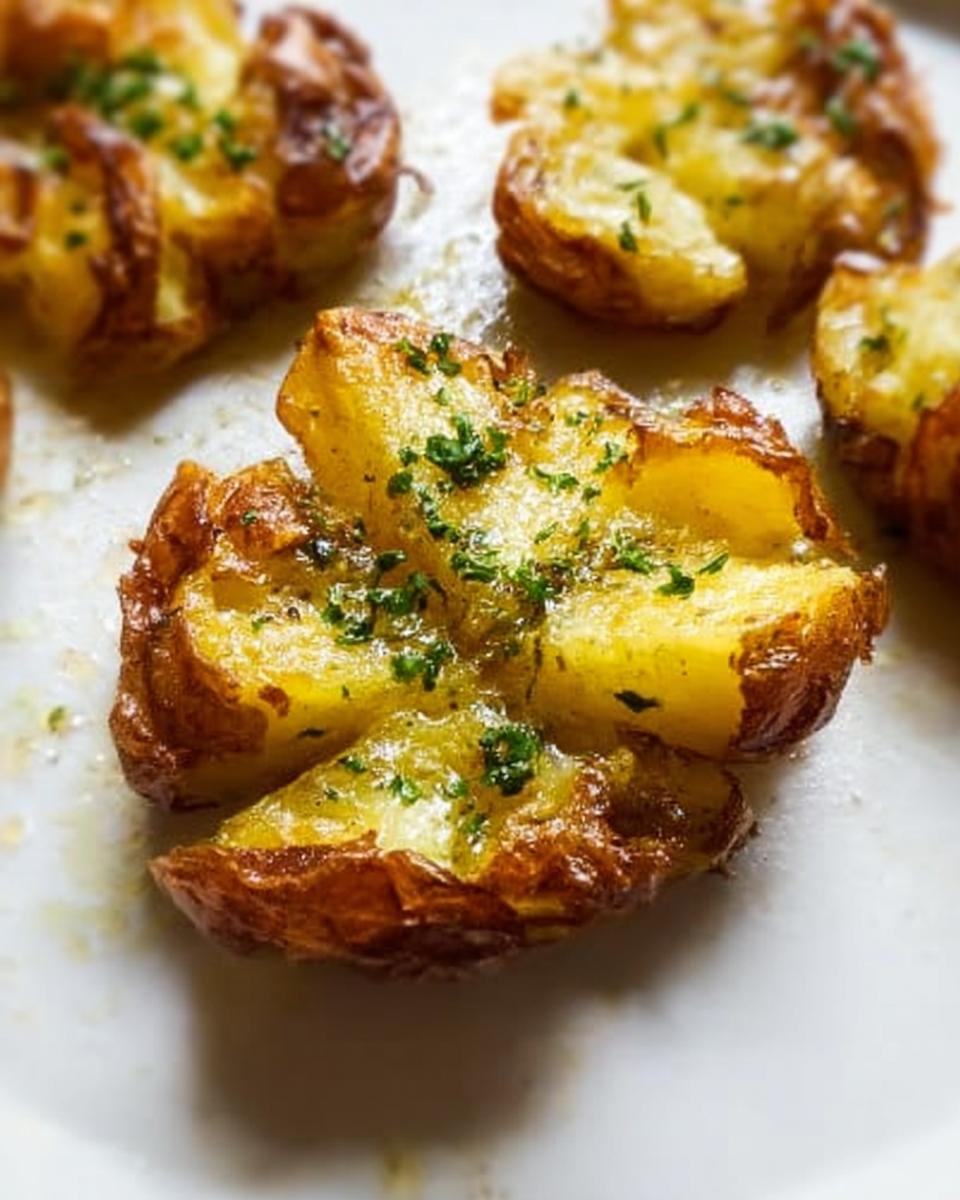
Drizzle them generously with that melted butter and olive oil mix, and sprinkle on your salt and pepper. Now, bake them—this takes 45 minutes for the little ones or up to 55 minutes for the medium ones until they are deep golden. Trust me, don’t flip them!
Cooking Techniques for Ultimate Crispy Edges
The boiling stage has one main job: tenderizing. You want them soft enough to collapse a bit when you press, but not so mushy they turn to soup when you drain them. Make sure you drain them completely! That ten minutes of drying time, split before and after smashing, is non-negotiable for me.
When you finally toss them with the fats, make sure every little edge is coated. Then, the big secret for those incredible Crispy Edges: you leave them alone in the oven! Seriously, fight the urge to touch them or flip them halfway through. That contact with the hot metal pan while they bake undisturbed is what builds that perfect, addictive crust. Check out some tips over at RecipeTin Eats if you want another view on technique!
Toppings and Seasonings Ideas for Your Crispy Smash Potatoes
Okay, so the base recipe for Crispy Smash Potatoes is amazing all on its own—that golden crunch combined with the fluffy middle is just wonderful. But why stop there when we can take these potatoes to the next level?
Once they come out of the oven, that’s when you get really creative! If you have picky eaters, keep the basic salt and pepper topping. But if you’re feeling bold, try tossing them with fine Parmesan cheese right before the very last five minutes of baking so it melts beautifully. Sour cream, chives, maybe even a sprinkle of smoky paprika? Those toppings make these potatoes feel like a fancy restaurant side dish without any fuss!
Simple Variations on Crispy Smash Potatoes
I love how easily you can switch things up without much extra effort. Remember those notes about infusing flavor? That’s a must-try!
For a quick garlic punch, melt your butter with a couple of smashed garlic cloves for a minute before drizzling it over the smashed potatoes—just ditch the garlic bits before you pour. Another favorite is adding mixed dried Italian herbs right into the boiling water with the salt. By the time they are baked, those herbs perfume the whole batch. They are so versatile, which is why they are always the first side dish gone at any gathering!
Tips for Success When Making Oven Baked Crispy Smash Potatoes
Listen, I’ve had batches that were just *okay*—a little soft, a little sad. But these little tricks I’ve picked up while making these Oven Baked Crispy Smash Potatoes turn disappointment into success every time. The absolute biggest rookie mistake is overcrowding the pan!
If you pile them close together, they steam instead of roast, and you lose that beautiful crust we are chasing. Give those potatoes space to breathe on that baking sheet; if you have to use two sheets, please do it! Also, remember that 10 minutes of drying time after boiling and smashing? That’s crucial. If they are wet when the oil hits them, you just end up with soggy potato instead of glorious crunch.
Storage and Reheating Instructions for Leftover Crispy Smash Potatoes
Now, let’s be real—sometimes we make too much of these ridiculously good Crispy Smash Potatoes! If you have any leftovers, treat them gently. Pop them into an airtight container and keep them in the fridge. Try not to leave them out at room temperature for too long, especially since they have butter on them.
The game-changer for reheating is skipping the microwave entirely—microwaves turn everything soft and sad! You *must* use the oven or, even better, an air fryer. Spread them out in a single layer on a baking sheet at about 400°F for about 8 to 10 minutes. That blast of dry heat coaxes that wonderful crust right back to life. They’ll taste almost freshly made!
Frequently Asked Questions About Crispy Smash Potatoes
When I first started making these, I had a million questions swirling around my head! It’s always good to check, so here are a few things readers often ask about getting that perfect result with their Smashed Potatoes.
Can I use sweet potatoes instead of regular potatoes?
Oh, what a fun texture switch! You absolutely can use sweet potatoes, but be warned: they bake up softer and don’t get quite the same aggressive crust as the regular starchy ones. They also tend to brown faster because of their sugar content, so keep a close eye on them when you bake!
Can I prep these ahead of time to save evening time?
Yes, this is a great hack for busy nights! You can boil the potatoes completely, drain them, and let them cool. Store them in the fridge following my storage tips above. When you’re ready to eat, just set them on the sheet, give them a drizzle of oil/butter, and bake them as usual. They might need 5 or 10 extra minutes in the oven, but it works perfectly!
What size potato guarantees the ultimate crispy edges?
If maximum crunch is your goal for those Crispy Edges, aim for small potatoes, like the size right around a golf ball or even slightly smaller if you can find them. They smash thinner overall, so more surface area gets that amazing blast of oven heat. That’s why these are such a wonderful Party Favorite!
Do I have to use both butter AND oil for my Crispy Smash Potatoes?
You don’t *have* to, but I strongly, strongly recommend it! The butter gets you that incredible classic flavor that you just can’t beat. The oil, though, has a higher smoke point and helps repel water, which is critical for roasting and getting that gorgeous golden color and crisp exterior on your Crispy Smash Potatoes.
Serving Suggestions for This Easy Side Dish
Honestly, these Smashed Potatoes are so delicious they could be the star of the show! But they make the absolute best partner for just about anything you’re whipping up. They are the perfect Easy Side Dish when you’re serving up something classic.
Think about a big Sunday roast chicken—these potatoes soak up all those beautiful pan juices. They are phenomenal alongside grilled burgers or juicy steak. Even just serving them with some homemade meatballs makes the whole meal feel instantly elevated. They are guaranteed to disappear first!
Sharing Your Family Favorite Crispy Smash Potatoes
I really hope you give this recipe a go and see why these Crispy Smash Potatoes have taken over our dinner rotation! Let me know how they turn out in the comments below, especially if you try a wild new topping. Snap a picture and tag me on social media—seeing your family enjoy this Party Favorite makes my day!
Crispy Smash Potatoes
Ingredients
Equipment
Method
- Boil the potatoes: Bring a pot of water to a boil, add 1 tbsp salt. Cook potatoes until soft. Small ones take about 20 to 25 minutes, medium ones about 30 minutes. The skin may split, which is okay.
- Preheat your oven to 200°C/390°F (180°C fan).
- Drain the potatoes and let them dry in the colander for about 5 minutes.
- Place the potatoes on a baking sheet. Use a large fork or potato masher to squish them, keeping them in one piece. Aim for thin for crispier edges, or thicker for fluffier insides. More surface nubs create better crunch.
- Let the potatoes steam dry on the baking sheet for another 5 minutes to help them crisp up.
- Drizzle the potatoes with melted butter, then olive oil. Sprinkle with salt and pepper.
- Bake for 45 minutes for small potatoes or 55 minutes for medium potatoes, or until they are deep golden and crispy. Do not flip them during baking.
- Serve hot, sprinkled with parsley if desired.
Nutrition
Notes
Tried this recipe?
Let us know how it was!
Certified Family Nutrition Strategist
My path into family nutrition began working with Phoenix Area Family Services, where I saw how traditional nutrition advice often ignored real-world constraints like budget limitations, time crunches, and kids who refuse to eat anything green. That experience sparked my mission to develop meal planning systems that work with family realities, not against them.
Over eight years, I’ve helped hundreds of families reduce grocery spending by 25% while dramatically improving their nutrition. My meal planning frameworks have been adopted by local wellness centers because they actually work for busy parents juggling different ages, preferences, and dietary needs in one household.
As a bilingual first-generation Mexican-American and mother of three, I personally navigate the daily challenge of feeding a family nutritiously while honoring cultural traditions and managing a household budget. My “kid-friendly low-carb” protocols show families how to gradually introduce healthier options without triggering mealtime battles or abandoning beloved family recipes.
My “realistic wellness” philosophy is straightforward: health improvements must work within existing family dynamics and financial realities to be truly sustainable. When I’m not developing meal planning systems, I’m creating portable trail snacks for our weekend family hiking adventures – because healthy eating should fuel the life you want to live.
My personal low-carb journey started after pregnancy as a way to regain energy for active parenting, and that experience continues to inform my professional commitment to making healthy eating feel supportive rather than burdensome for busy families.