
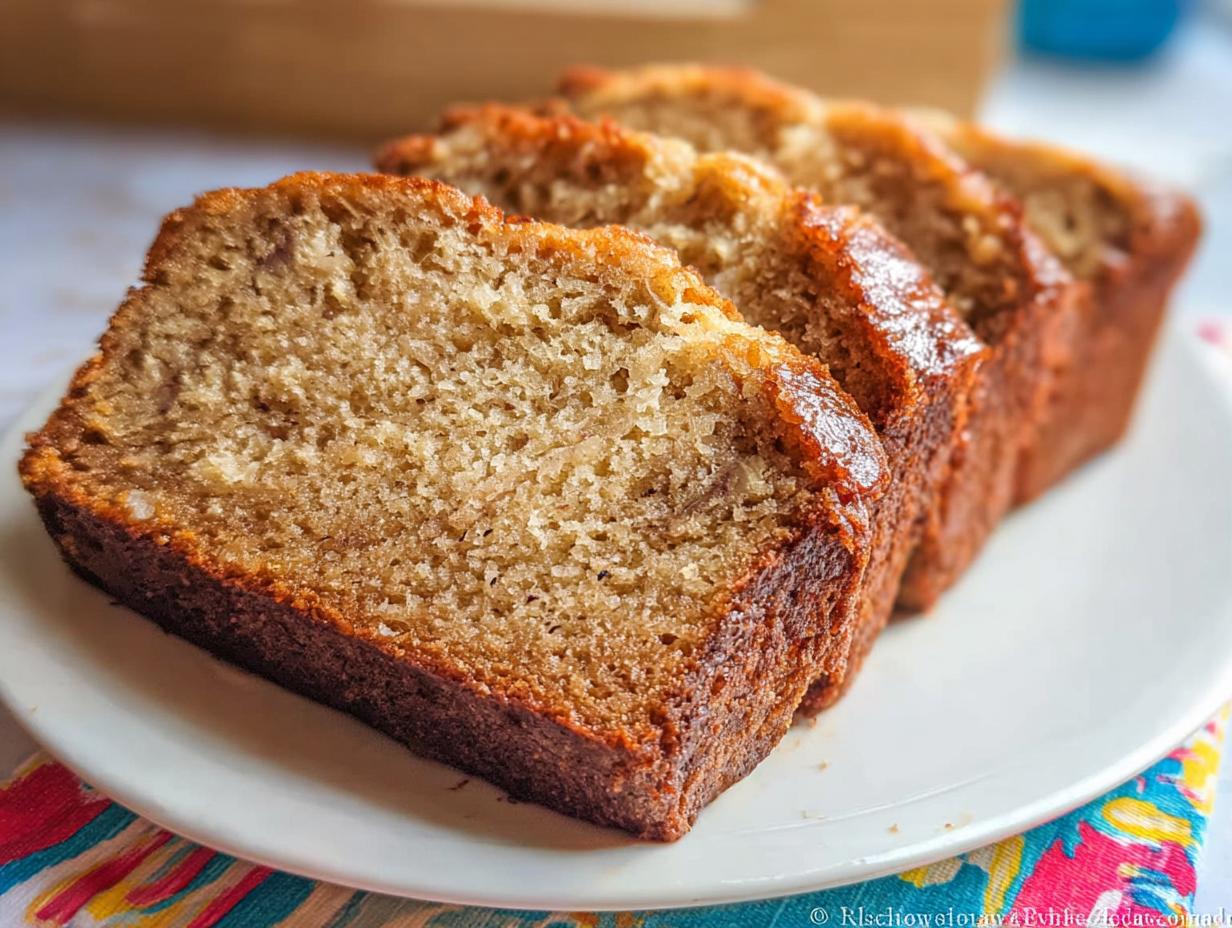
Oh, you know that moment? When you look on the counter and realize your bananas have gone from yellow to practically black? Don’t you dare throw them out! That’s pure baking gold sitting right there, waiting to become the most incredible Banana Bread with Sour Cream you’ve ever tasted. I figured out long ago that the secret to getting that famous, unbelievably soft, tender crumb that makes bakery loaves jealous is plain old sour cream.
I still remember the first loaf I made with my little ones on a drizzly afternoon. We wanted something quick to use up those brown bananas, and when we stirred in that cool sour cream, I could already tell it was going to be different. Laughter filled the kitchen as we mashed everything, and soon, the whole house smelled incredible. That bread turned out so soft, and seeing my kids excited about helping made it taste even better. It’s honestly become our most treasured recipe because turning simple ingredients into a nourishing hug is just what we do in my kitchen.
Why This Banana Bread with Sour Cream is Your New Favorite Easy Recipe
You are going to wonder why you didn’t start baking with sour cream sooner! This isn’t just another quick bread recipe; this is the one your family will ask for again and again. It’s so simple—truly an Easy Recipe—but the results punch way above their weight class. Seriously.
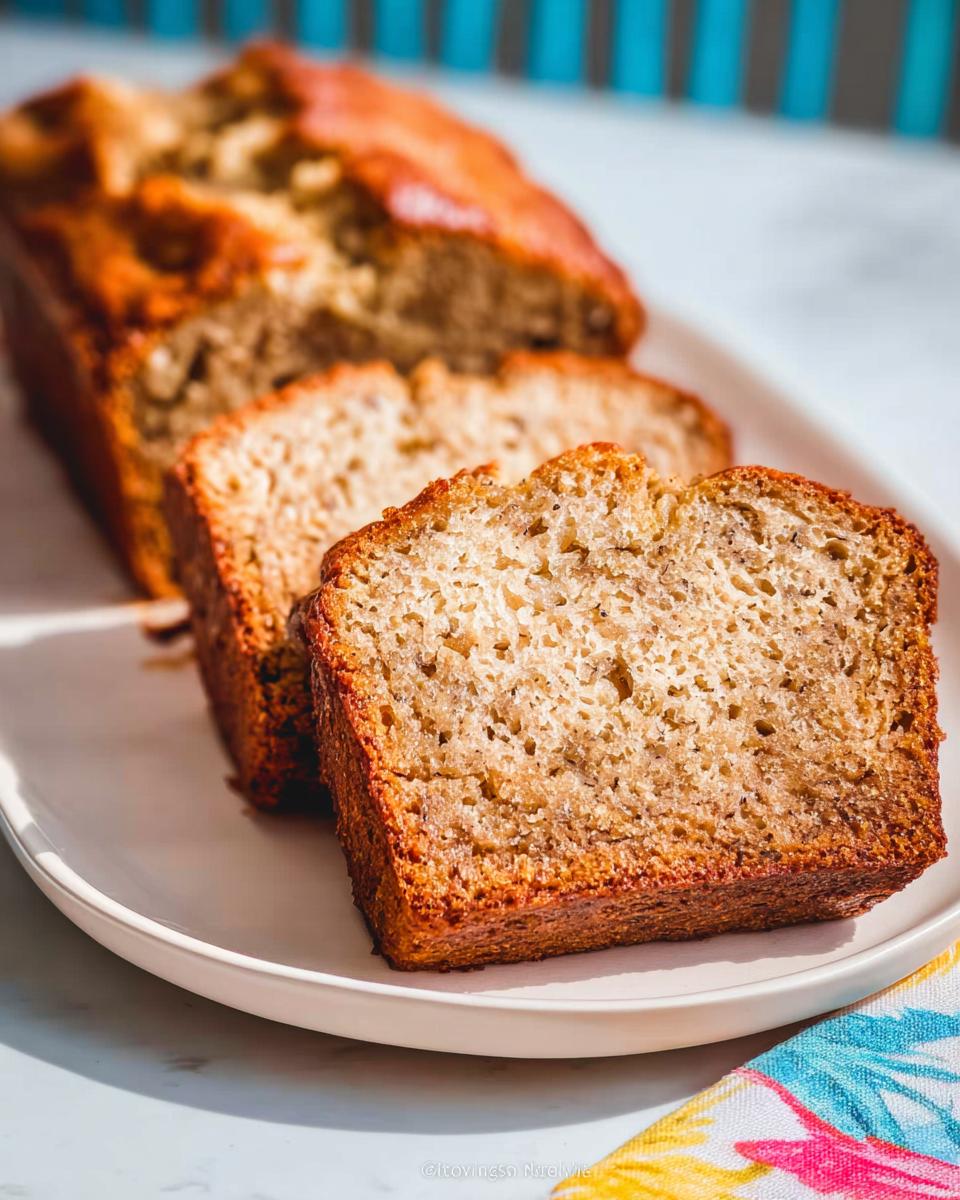
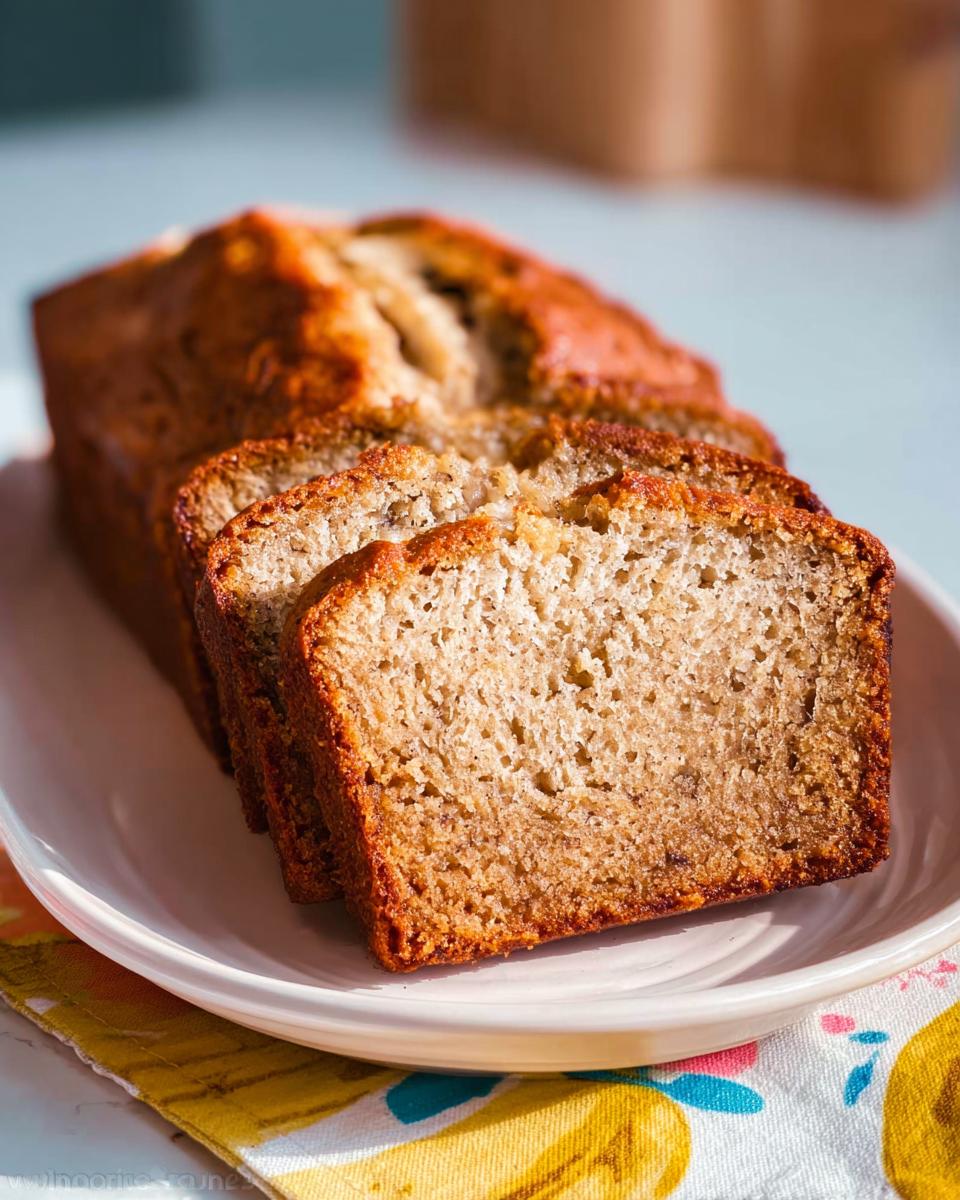
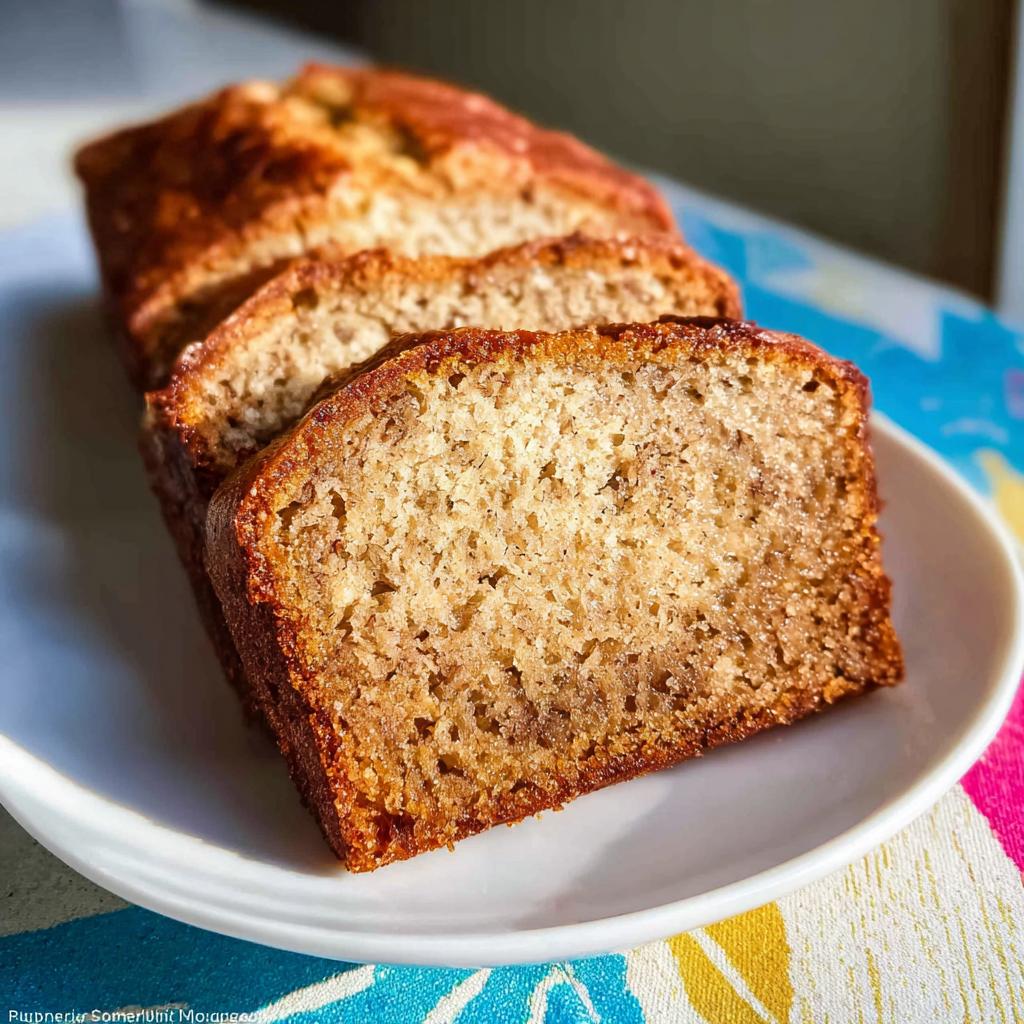
- It delivers that dreamy Bakery Texture we all chase.
- Every slice has an unbelievably soft and Tender Crumb.
- It keeps wonderfully, always tasting fresh the next day.
Achieving That Signature Extra Moist Texture
The magic really starts when you mix in that sour cream. It’s the powerhouse ingredient that keeps everything incredibly soft. That slight acidity reacts beautifully with the baking soda, creating the fluffiest interior. This ensures your loaf stays Extra Moist, not dense or crumbly, for days after you pull it out of the oven.

Gathering Ingredients for Perfect Banana Bread with Sour Cream
Okay, let’s talk about what you need. The most important thing, seriously, the absolute make-or-break ingredient for this Banana Bread with Sour Cream? Your bananas have to be past their prime. I mean the kind that are almost entirely black and smell intensely sweet on the counter. That’s where the flavor lives!
As a Certified Family Nutrition Strategist, I always look for ways to maximize flavor and nutrition without adding a ton of fuss. This recipe balances that rich sweetness perfectly. Remember, we are aiming for that soft, melt-in-your-mouth feel, so don’t skimp on the sour cream!
Wet Ingredients for Your Sour Cream Banana Bread
Get these measured out first. You’ll need:
- 1/3 cup of softened butter—let it sit out for a bit so it creams nicely.
- 1 1/4 cups of white sugar to balance the tartness.
- Two eggs, just regular size is fine.
- Four very ripe bananas, mashed up really well.
- A full 1 cup of sour cream—this is our moisture anchor!
- 1 teaspoon of vanilla extract for that familiar warm smell.
Dry Ingredients and Optional Mix-ins
In a separate bowl, whisk these together. I often use all-purpose flour, but feel free to swap for white whole wheat if you want a little extra nutrition boost.
- 2 1/2 cups of flour (all purpose or white whole wheat).
- 1 teaspoon of cinnamon—don’t skip this spice!
- 2 teaspoons of baking soda, which does most of the heavy lifting here.
- 1/2 teaspoon of salt to wake up all those sweet flavors.
- 1 cup of chopped walnuts, only if you’re feeling nutty and want them in there.
Step-by-Step Instructions for Your Easy Recipe
This is where the magic happens, and I promise it’s quick! We only need about 15 minutes of actual work time before this gorgeous batter goes into the oven to bake for about an hour. Focus on gentle mixing, and you’ll be rewarded with that heavenly Tender Crumb.
Prepping the Oven and Pans
First things first: get your oven warming up to 325 degrees F. This bread likes a moderate heat! You need two loaf pans, and since this makes quite a bit of batter, aim for pans around 8 1/2 x 4 1/2 inches. Now, go heavy on the greasing, or use a bit of parchment; we want a clean exit later! This recipe generously yields about 12 satisfying slices, perfect for packing lunches.
Mixing Wet and Dry Components for Banana Bread with Sour Cream
Grab that big bowl. Start by creaming your softened butter and sugar until they look light. Now, beat in your two eggs until everything is happy. Then, slowly fold in the sour cream, the well-mashed bananas, and that vanilla extract until it’s just smooth. Don’t worry about perfection here, just make sure it’s blended!
In a separate bowl, whisk together your dry stuff—flour, soda, salt, and cinnamon. Listen closely: add this dry mixture to the wet ingredients, and mix it only until you see *just* the last few streaks of flour disappear. If you stir too much once the flour is in, you risk getting tough bread, and we worked hard for that dreamy Tender Crumb!

Baking Time and Checking for Doneness
Divide that beautiful batter evenly between your two prepared pans. Pop them into the oven for roughly 60 minutes. Since every oven is a little different, start checking around the 50-minute mark. Insert a toothpick right into the center of one loaf; if it comes out clean or maybe with just a few moist crumbs clinging to it, you’re done! Pull them out and let them cool before slicing.
Expert Tips for Bakery Texture in Your Banana Bread with Sour Cream
Getting that perfect Bakery Texture often comes down to tiny adjustments, even when the recipe itself is super simple. We want that soft, luxurious crumb that melts in your mouth, right? I’ve played around with this recipe enough times over the years—especially when I was trying to sneak in more whole grains for the kids—to know exactly what works and what spells disaster for that Tender Crumb!
Ingredient Substitutions for Banana Bread with Sour Cream
If you’re out of something, don’t panic! If you want to swap out the flour, you can definitely use white whole wheat flour instead of all-purpose; it still works great, though the crumb might be slightly heartier. Now, for the sour cream: that’s tricky because it’s key to the moisture. If you absolutely must swap it, plain Greek yogurt works in a pinch, but be warned—it’s a bit tangier and might make the batter slightly denser than this perfect Banana Bread with Sour Cream. For general technique advice, I sometimes look around, and I found a great variation over at Love From The Oven.
The Secret to a Tender Crumb: Do Not Overmix
I cannot stress this enough, especially after you add the dry ingredients! Once that flour hits the wet stuff, your mission is survival, not perfection. You only want to gently fold everything together until you can barely see the white streaks remaining. If you keep stirring away trying to get it perfectly smooth, you are developing gluten. Gluten is great for chewy pizza dough, but it turns quick bread into a heavy, tough mess. Stop mixing the second the flour disappears if you want that wonderfully soft, Tender Crumb.
Storing Your Extra Moist Banana Bread with Sour Cream
Good news! Because of all that glorious sour cream we added, this bread stays Extra Moist longer than almost any other quick bread I know. Once the loaves are completely cooled—and I mean totally cool, otherwise you get sogginess—wrap each one tightly in plastic wrap, and then tuck that into a piece of foil. That double layer locks in freshness wonderfully.
It keeps on the counter for about three days, which is never how long they last around here anyway! If you have more self-control than I do, they freeze like a dream for up to three months. To reheat a slice, just pop it in the microwave for about 15 or 20 seconds. It comes out tasting like it just came out of your oven!
Frequently Asked Questions About Sour Cream Banana Bread
I get so many questions about this recipe because once people try it, they never want to go back to plain old banana bread! Here are the handful of things I hear most often about getting that perfect slice of Sour Cream Banana Bread.
Can I make this recipe without sour cream?
You technically can, but I wouldn’t recommend it if you’re looking for the best outcome! The sour cream is what guarantees that unbelievably soft bite and that fantastic moisture level, helping you hit that perfect Bakery Texture. If you leave it out, the bread will still work, but it will definitely be denser and prone to drying out much faster. You’d need to substitute the volume with milk or yogurt, but you lose that special richness.
How do I know when my Banana Bread with Sour Cream is done?
Visual cues are your best friend here! While the recipe calls for that classic toothpick test—insert it into the center, and it should come out clean or with just a few moist crumbs clinging to it—watch for the edges too. When the loaf starts pulling slightly away from the sides of the pan, that’s a huge signal that it’s ready to come out. If you’re curious about general timing and technique, check out my baking tips here!
What is the best way to freeze this bread?
Freezing is easy! Wait until the entire loaf has cooled down completely—honestly, completely cooled is essential so you don’t trap steam. Then, wrap the entire loaf or individual slices very tightly with plastic wrap first, then aluminum foil. Keep it sealed up, and it will hold that Extra Moist quality for months. Thaw on the counter or zap a slice for 20 seconds!
Estimated Nutritional Snapshot for Banana Bread with Sour Cream
When I developed this recipe, I definitely wasn’t aiming for a diet food, but I wanted to make sure that even with the richness from the butter and sour cream, we could still enjoy a reasonable slice. Since this recipe makes 12 servings, we can easily calculate what’s going into each lovely piece of our Banana Bread with Sour Cream.
Keep in mind that these numbers are just estimates, you know? They change depending on how perfectly ripe your bananas were or if you decided to toss in those optional walnuts. But for a standard slice, here’s what you’re looking at:
Calories: Around 292 per slice
Fat: About 12 grams
Protein: Roughly 5 grams
Carbohydrates: Approximately 43 grams
It’s a satisfying treat that keeps you fueled, especially if you’re baking with the kids and need a little energy boost! Just enjoy it—it’s worth every delicious bite.
Share Your Baking Success
Well, that’s it! That’s everything you need to know to turn those sad, spotty bananas into the most fantastic, moist, and tender loaf of Banana Bread with Sour Cream. Honestly, when you pull those pans out of the oven, I hope you get that same happy sigh of relief that I do every single time.
Now comes my favorite part: hearing from you! I absolutely love seeing your baking adventures, especially when the kids get involved in the mashing process. Did this turn out to be your new go-to Easy Recipe? Don’t be shy!
Please, hop down below and leave me a quick rating—how many stars are you giving this recipe for moisture and ease? Even better, if you snap a picture of your golden-brown loaves, share it in your favorite social spot and tag me! Knowing that this recipe is ending up on your family table, making memories just like it did for mine, is the best reward. Happy baking, friends!
Banana Bread with Sour Cream
Ingredients
Equipment
Method
- Preheat your oven to 325 degrees F. Generously grease two loaf pans, approximately 8 1/2 x 4 1/2 inches in size.
- In a large bowl, cream the butter and sugar together. Add the eggs and mix well.
- Add the sour cream, mashed bananas, and vanilla extract. Stir until combined.
- Add the flour, salt, cinnamon, and baking soda to the wet ingredients. Stir until just combined. Do not overmix.
- Fold in the chopped walnuts, if you are using them.
- Divide the batter evenly between the prepared loaf pans.
- Bake for 1 hour or until a toothpick inserted into the center of the loaf comes out clean.
Nutrition
Notes
Tried this recipe?
Let us know how it was!
Certified Family Nutrition Strategist
My path into family nutrition began working with Phoenix Area Family Services, where I saw how traditional nutrition advice often ignored real-world constraints like budget limitations, time crunches, and kids who refuse to eat anything green. That experience sparked my mission to develop meal planning systems that work with family realities, not against them.
Over eight years, I’ve helped hundreds of families reduce grocery spending by 25% while dramatically improving their nutrition. My meal planning frameworks have been adopted by local wellness centers because they actually work for busy parents juggling different ages, preferences, and dietary needs in one household.
As a bilingual first-generation Mexican-American and mother of three, I personally navigate the daily challenge of feeding a family nutritiously while honoring cultural traditions and managing a household budget. My “kid-friendly low-carb” protocols show families how to gradually introduce healthier options without triggering mealtime battles or abandoning beloved family recipes.
My “realistic wellness” philosophy is straightforward: health improvements must work within existing family dynamics and financial realities to be truly sustainable. When I’m not developing meal planning systems, I’m creating portable trail snacks for our weekend family hiking adventures – because healthy eating should fuel the life you want to live.
My personal low-carb journey started after pregnancy as a way to regain energy for active parenting, and that experience continues to inform my professional commitment to making healthy eating feel supportive rather than burdensome for busy families.