
Oh, you know those days, right? You’re craving that deep, golden, crunchy comfort food that just screams ‘Southern feast,’ but you look at the clock and realize you’ve got about thirty minutes before the little angels start melting down. Traditional fried chicken sounds like a marathon, not a Tuesday night. Well, stop dreaming about it and welcome to the game-changer: my recipe for Buttermilk Baked Fried Chicken!
Trust me when I say this is my absolute secret weapon for busy parents. We get that incredible tenderness from the buttermilk soak, and thanks to a little oven magic, we get a satisfying crunch without drowning everything in oil. It’s comfort food without making you feel guilty the next morning.
I remember the first time I introduced this to my crew. It was a totally hectic weeknight, and I needed a meal that would actually pass the kid test. I soaked the chicken—that thick buttermilk seriously works miracles—and then I coated it just right. When I took that first bite of the crispy, baked goodness, I couldn’t believe how much my three little ones gobbled it up. They even asked for seconds! That evening wasn’t just about dinner; it was about creating a new family favorite, and it reminded me that healthy eating can indeed be both delicious and fun. Signed, Maria Fernandez, and I’ve tested this recipe a hundred times so you don’t have to!
This recipe is designed to deliver that classic taste and texture you love, only made healthier because we’re bringing it right into your trusty oven. Say hello to your new favorite weeknight hero.
Why This Buttermilk Baked Fried Chicken Is Your New Weeknight Hero
I know what you’re thinking—baked chicken can never taste like the real thing. But honestly, this oven fried chicken recipe is such a winner, I barely even pull out the deep fryer anymore. It’s my go-to when I need something delicious fast, but I’m trying to sneak in a little more nutrition for the clan.
This isn’t just a slightly better option; it’s genuinely fantastic. Why? Because while it gives you that satisfying, crunchy exterior, we skip the heavy oil bath. It’s just easier, cleaner, and smarter for those busy evenings when everyone’s running from practice to homework.
- Speedy Setup: Once the 30-minute mandatory marinade is done, it’s just a quick coat and straight into the oven. Total time is under an hour!
- Healthier Balance: This is where we get those ‘Healthy Alternatives To Fried Chicken’ wins. Baking drastically cuts down on unhealthy fats without sacrificing the mouthfeel we all crave. It’s sensible comfort food.
- Family Approved: If my picky eaters stamp this with their approval—and oh boy, they do—then you know it’s a guaranteed hit for your southern style dinners rotation. Check out more of my family-friendly recipes for other quick wins!
Essential Components for Perfect Buttermilk Baked Fried Chicken
Okay, now that you’re excited about how easy this is, we need to talk about the components. Seriously, the magic in this Buttermilk Baked Fried Chicken doesn’t just happen; it comes from treating your ingredients right. For that ultimate texture that gives you the feel of Southern style dinners without the grease, the quality of these few items is everything. Don’t skip the marinating step!
Chicken and Marinade Ingredients
This is where the tenderness starts! You need boneless, skinless chicken breasts—and you’ll want to flatten them out for even cooking, but more on that later. The real MVP here is the buttermilk. You need a full cup, and listen close: this isn’t just for moisture!
- 2-3 pounds chicken breast boneless skinless
- 1 cup buttermilk
That buttermilk soak is non-negotiable for a successful buttermilk chicken recipe. It breaks down the proteins just enough so the meat stays unbelievably tender even after baking. It’s the key to keeping this from tasting dry.
Creating the Crunchy Coating Ideas for Buttermilk Baked Fried Chicken
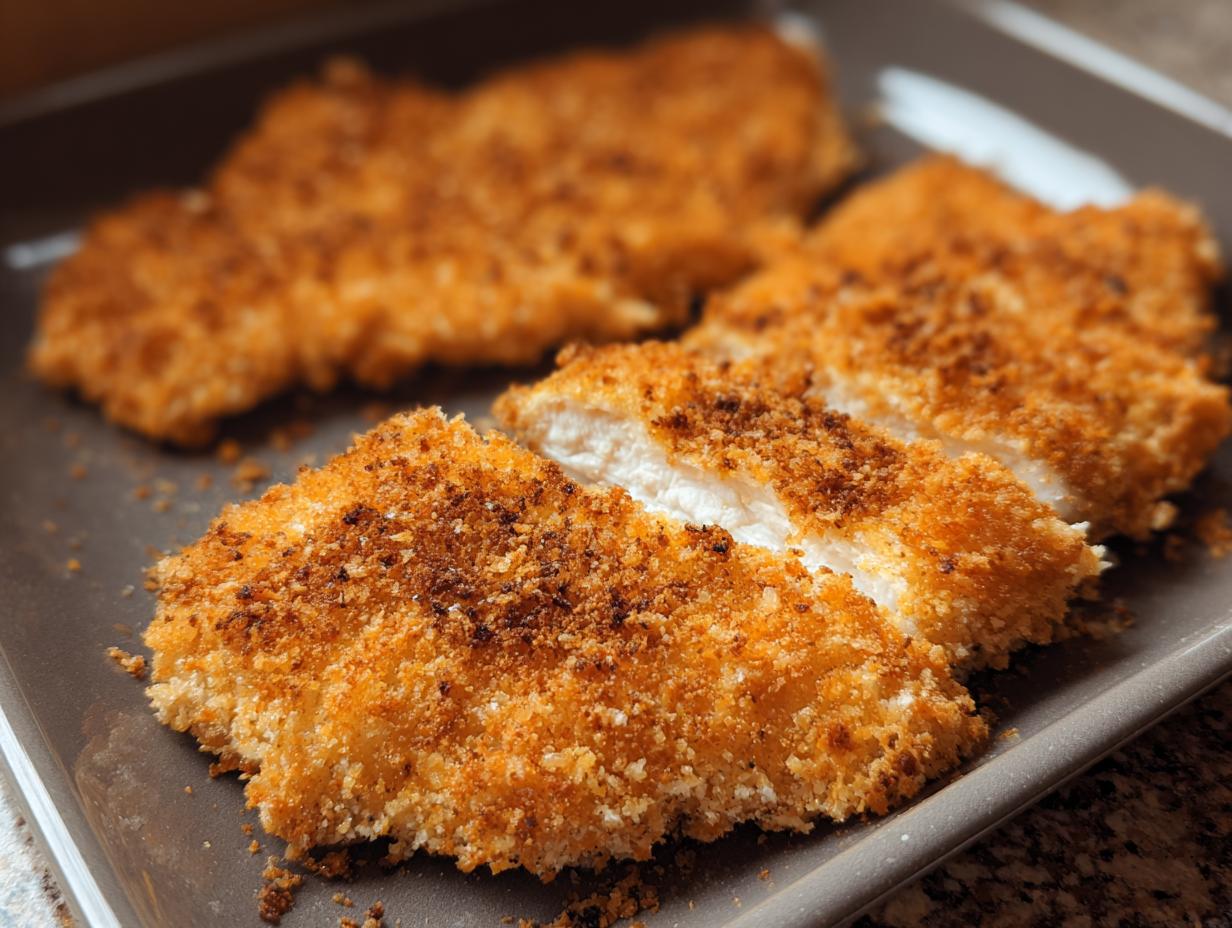
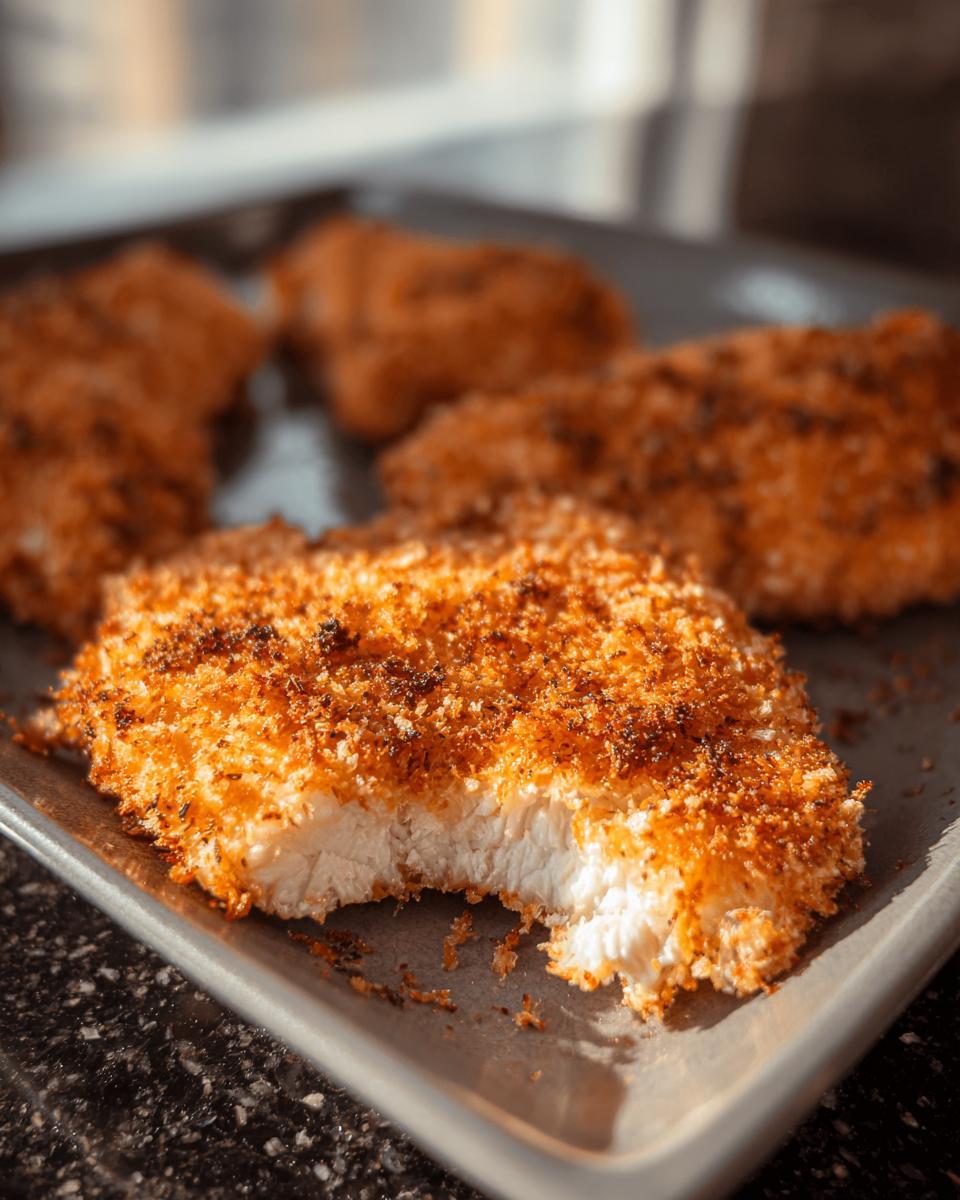
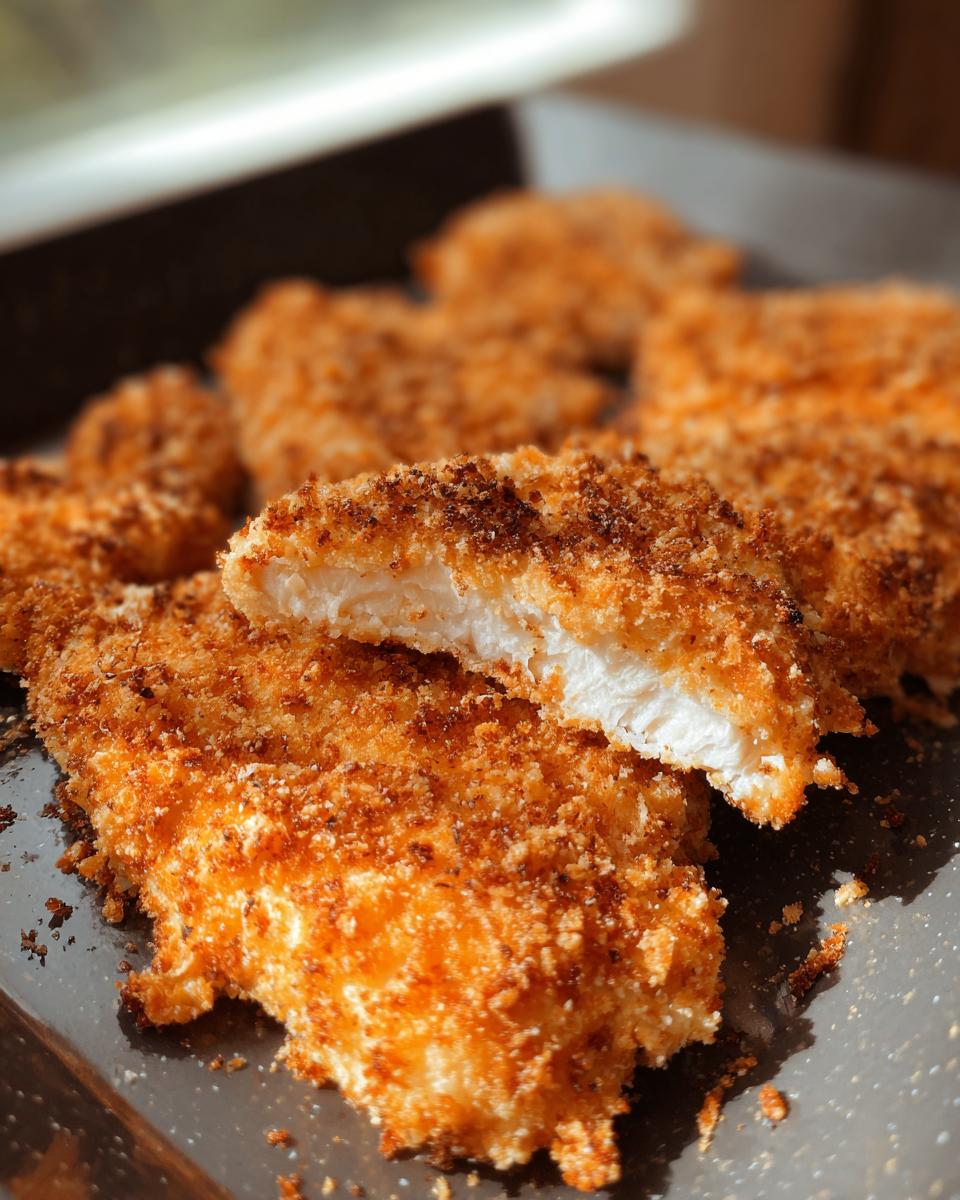
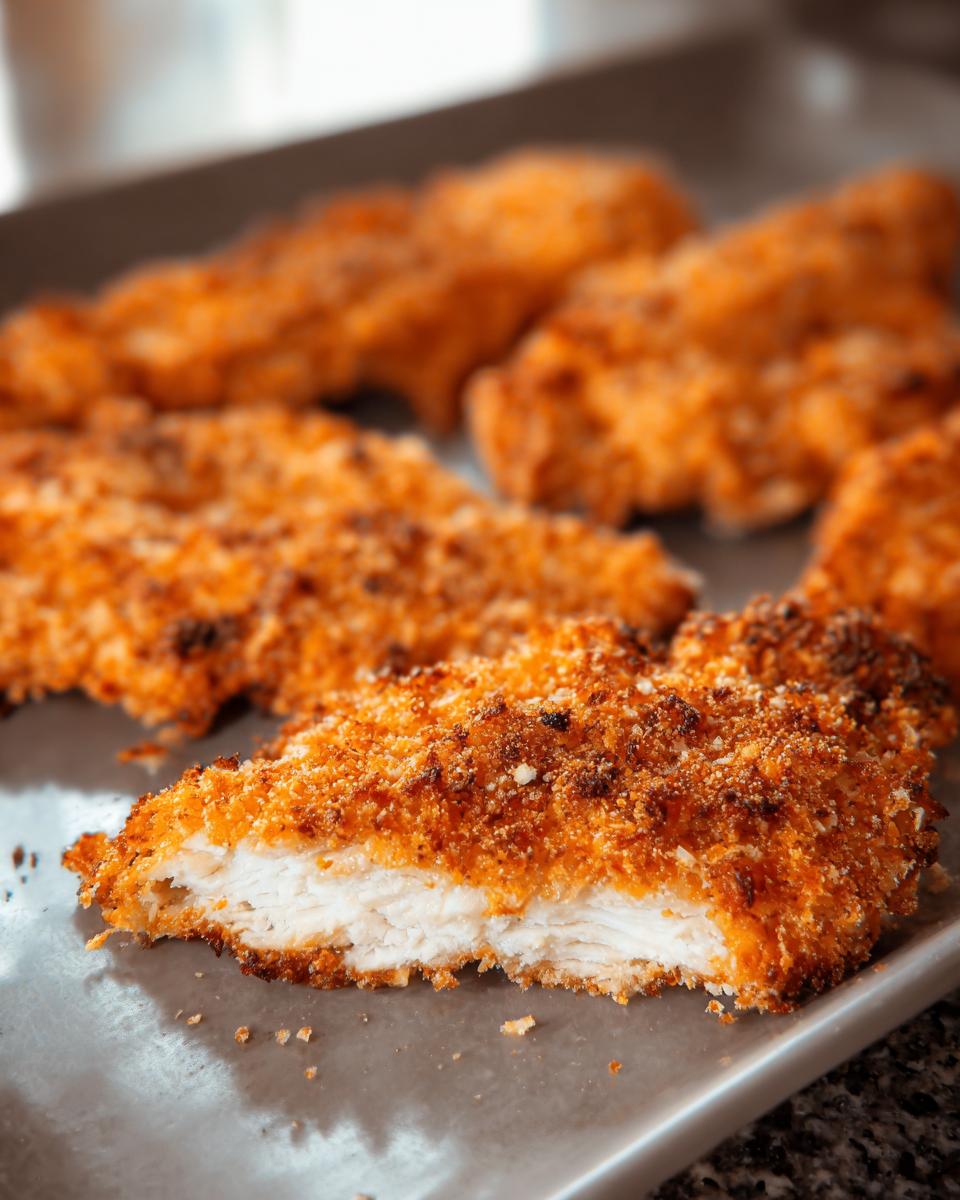
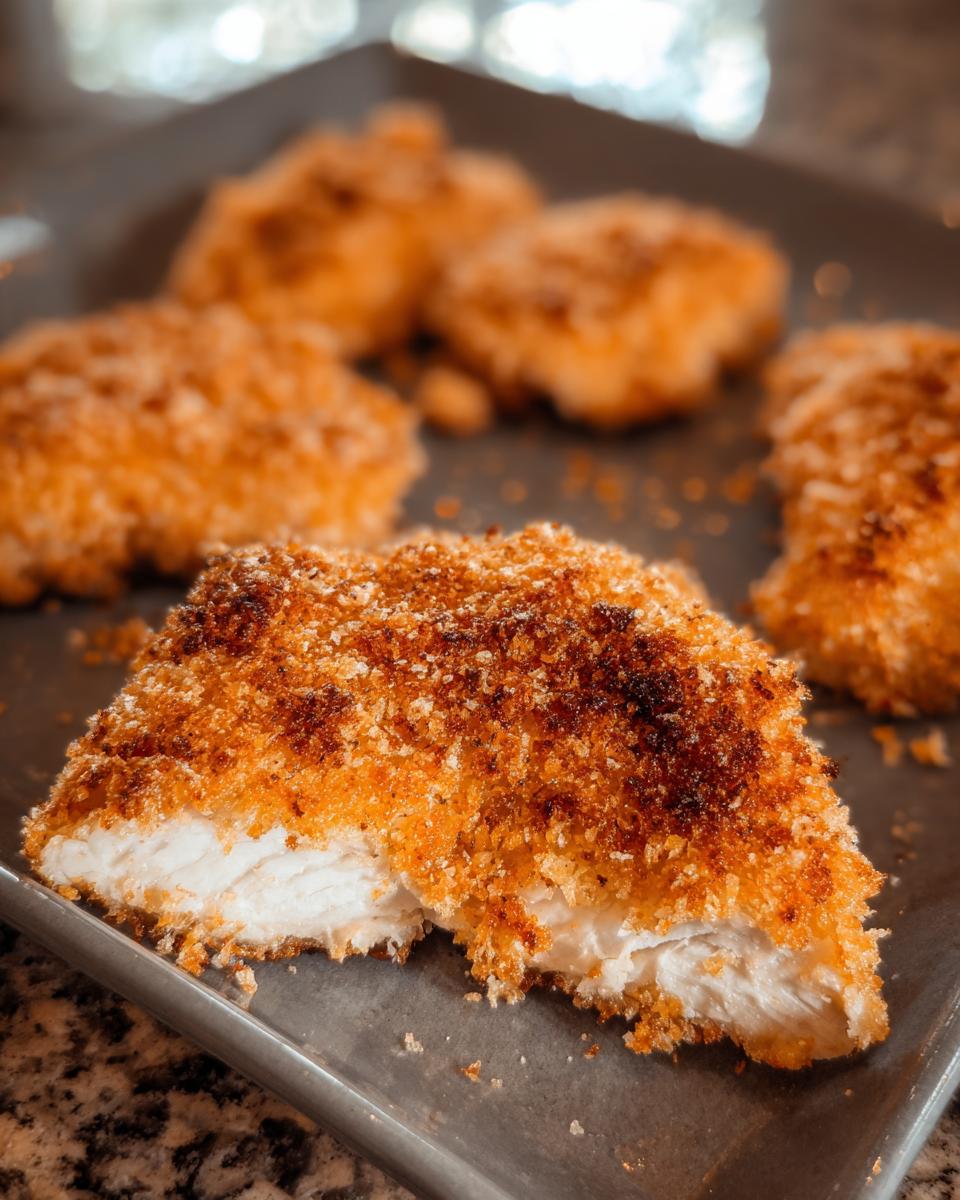
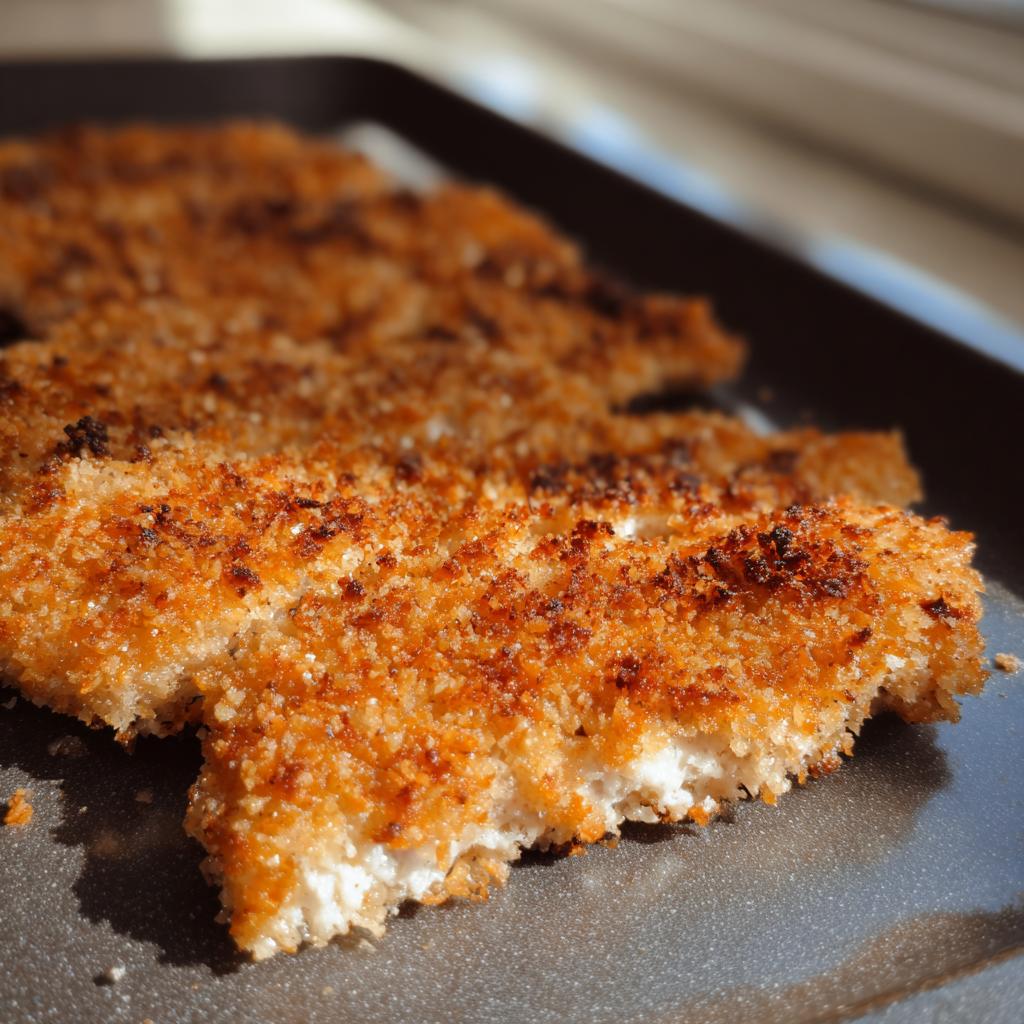
Forget throwing standard flour at this; we are aiming for premium crunch! This mixture is what turns simple chicken into an oven-fried masterpiece. We’re using panko because those airy flakes crisp up beautifully in the oven, giving us excellent crunchy coating ideas. Measure these out precisely!
Coating Mixture:
- 1 cup panko bread crumbs
- 1 cup parmesan cheese (freshly grated is best, but pre-grated works in a pinch!)
- 1 teaspoon garlic powder
- 1 teaspoon paprika
- 1 teaspoon dried thyme
Mixing these all together ensures every piece of soaked chicken hits that baking sheet already decked out in flavor and ready to turn golden brown!
Step-by-Step Instructions for Buttermilk Baked Fried Chicken
Alright, let’s get cooking! This is the fun part, and honestly, the process is so straightforward that you’ll be shocked this is an elevated, healthier version of fried chicken. We aren’t messing around with complicated dips or frying stations here. We are using technique, not vats of hot oil, to get fantastic results. Keep your eye on the goal: tender, flavorful chicken with a genuinely crispy exterior—one of the best Cooking Tips For Crispy Baked Chicken involves preparing the chicken properly first!
Preparing the Chicken for the Buttermilk Baked Fried Chicken Marinade
First things first, we need even thickness! Those thick breast pieces cook unevenly, right? You end up with dry edges and raw centers, and nobody has time for that drama. Grab your chicken breasts and place one between two sheets of plastic wrap. Then, pull out that heavy mallet or, if you’re feeling rustic, a rolling pin. Gently, but firmly, pound them down until they are all about 3/4 of an inch thick.
Why do we do this for this oven fried chicken? Because even pieces cook at the same speed! Once they are uniformly flattened, they go directly into that buttermilk bath for at least 30 minutes. I often let mine sit for two hours if I have time, just to really soak up that tang and tenderness.
Coating and Setting Up for Baking
Once that marinade time is up, it’s coating central—and this is where you have to be a little quick! Pull one piece of chicken out of the buttermilk. You want to let the excess drip off; don’t shake it violently, but let the heavy drips fall away. Too much buttermilk makes your crumb mixture soggy before it even hits the pan, and we absolutely cannot have that!
Next, dredge that damp piece right into your assembled Panko and Parmesan coating mixture. Press it down gently to make sure every single surface is covered. I mean *every* surface. Once it’s coated, lay it out on your prepared baking sheet. Make sure they are in a single layer, people! Crowding them traps steam, and steam is the enemy of crispiness. You need air circulating around every side. If you need more space, grab a second baking sheet. Finally, crank your oven up to 400°F and let it preheat while you finish coating the last few pieces.
Expert Tips for Crispy Buttermilk Baked Fried Chicken
So, you’ve flattened, soaked, and coated—bravo! But we need to make sure it achieves that perfect crunch when it comes out of the oven. These little tricks are what separate ‘okay’ baked chicken from genuinely crave-worthy chicken. If you want unbeatable Cooking Tips For Crispy Baked Chicken, listen up!
First, I always use parchment paper on my baking tray—it helps, but it doesn’t solve everything. My biggest secret for avoiding soggy bottoms is using a wire cooling rack placed directly on top of the baking sheet before laying the coated chicken on it. This lifts the chicken, allowing hot air to circulate underneath, drying out that bottom crust beautifully.
Also, don’t open that oven door until the 20-minute mark! Peeking lets out the heat, and frankly, the chicken doesn’t appreciate the interruption. Trust the initial timing. We want golden, crispy perfection, not warm disappointment!
Meal Ideas With Buttermilk Fried Chicken
Now that you’ve nailed the main dish, the next question busy parents ask me is, “What goes with that?” Since this Buttermilk Baked Fried Chicken is so versatile, it fits perfectly into any lineup of southern style dinners you can think of! This isn’t just a one-note meal; it’s the star of the show. Having a few go-to sides ready means you’ve got dinner sorted for the whole week.
When planning Meal Ideas With Buttermilk Fried Chicken, think about balancing that savory, salty coating with something bright or comforting. The beauty of this baked version is that it pairs nicely with lighter sides, too, if you’re keeping things on the healthier track!
Here are a few combinations that my family absolutely adores:
- The Classic Comfort: You can’t beat mashed potatoes—bonus points if you make ours with roasted garlic! Pair that with quick-steamed green beans tossed lightly in butter and salt. It’s pure nostalgia.
- Lighter & Brighter: If you made this on a warmer evening, try a big, vibrant slaw. I love one that uses a little apple cider vinegar in the dressing instead of heavy mayo. It cuts through the richness of the chicken coating perfectly.
- Southern Potluck Style: For a fuller spread, whip up a batch of cheesy baked mac and cheese (a little indulgence is allowed!) and some simple oven-roasted corn on the cob. The smokiness of the paprika in the chicken coating really sings next to sweet corn.
Having these meal ideas ready means less scrambling and more enjoying that delicious, guilt-free crunch with your family!
Storing and Reheating Your Buttermilk Baked Fried Chicken
I know what you’re thinking: this is so good, I hope there are leftovers! And yes, there almost always are, because this chicken feeds a crowd or makes for amazing lunches the next day. But the trick with any crunchy coating, even one we work so hard to perfect in the oven, is keeping that crunch alive after it chills out.
You want to handle leftovers with care. Don’t just toss it in a regular plastic container! As soon as the chicken is completely cool—and I mean *completely*—you need to store it properly. I use an airtight container, but here’s the crucial step for any oven fried chicken: line the bottom layer with a paper towel.
That paper towel’s job is to wick away any residual moisture that tries to condense overnight. If you skip that, you’ll wake up to sogginess. It lasts great in the fridge for about three to four days, which is usually how long it takes my family to devour the rest!
Now, for the reopening ceremony—reheating! You absolutely cannot use the microwave if you value that crispy coating. Microwaving is just steaming your beautiful crust back into mush. We need that high heat again!
The absolute best method is popping it back onto a wire rack set over a baking sheet and baking it at about 375°F for about 8 to 10 minutes. Think of it like giving the chicken a quick jump start in the oven. It brings the heat back into the center while re-crisping that Panko coating we layered on so carefully. Seriously, I promise you, a quick reheat like this makes it taste almost fresh-made. Don’t fight it; just trust the process!
Frequently Asked Questions About This Buttermilk Chicken Recipe
I get so many messages after people try this recipe, which is wonderful! It shows how much everyone loves a good buttermilk chicken recipe that doesn’t require standing over a hot stove. Here are a few things folks ask me most often when they’re getting ready to dive into making the best oven fried chicken they’ve ever had at home.
Can I use bone-in chicken for this Buttermilk Baked Fried Chicken?
That is a fantastic question! Yes, you absolutely *can* use bone-in thighs or drumsticks, but you have to adjust your timeline. Because bone-in pieces are thicker and the bone slows heat transfer, you’ll need to bake them longer. I’d suggest starting at the 20-minute mark, but plan on easily needing 30 to 40 minutes total, depending on the thickness of the cuts. Always use a meat thermometer—you’re looking for that safe 165°F internal temperature right next to the bone.
What if I don’t have Panko bread crumbs for the crunchy coating?
Oh, don’t panic if the Panko isn’t in your pantry! Panko is my favorite because it gives the best air pockets for crunch, but you have other great options for developing those crunchy coating ideas. If you have regular dried bread crumbs, use those, but you might want to double the depth by adding about 1/4 cup of cornmeal to the mix. Cornmeal adds a little grit and helps things crisp up nicely in the oven. It won’t be *quite* as airy as Panko, but it will still be delicious and crunchy!
Understanding the Nutrition in This Buttermilk Baked Fried Chicken
Now, I know some of you are balancing out those weeknight meals with making sure everyone is getting balanced nutrition, and that’s smart cooking! While we talked about how this is healthier than its deep-fried cousin, I always want to be transparent with my readers about figures.
I’ve crunched the numbers based on the ingredients listed above—and remember, every brand of buttermilk, every type of Parmesan cheese, and even the size of the chicken breast you use will change things just a little bit. So, please take this next bit of information as a very helpful estimate, not a strict medical guarantee.
The nutritional data provided for this recipe is based on specific product assumptions and serving sizes. If you change out the buttermilk for yogurt or decide to swap the Panko for crushed cornflakes, those numbers will shift! Think of this as a general guide that shows you you’re still making a much smarter choice for your family’s dinner table compared to traditional frying. Cooking should feel good, and knowing you’re making a reasonable swap already puts you miles ahead!
Share Your Family’s Experience with Buttermilk Baked Fried Chicken
That’s it! You’ve made it through the steps, and I truly hope you’re pulling a tray of golden, crisp, tender Buttermilk Baked Fried Chicken out of your oven right now. This recipe is a staple in my kitchen because it proves that you don’t have to sacrifice flavor or texture just because you’re moving away from the fryer.
Now, the best part: hearing from YOU! I made this because I needed an easier, happier weeknight meal, and I’m just bursting to know if it worked its magic on your family table too. Did your picky eater actually ask for seconds? Did you try a different side dish that was absolutely perfect?
Don’t be shy! Drop your ratings below—a simple five stars lets me know this recipe is working its magic for others. Even better, snap a photo of your beautiful oven-fried creation and tag me on social media! Seeing your family enjoy this healthier take on a classic comfort food is what keeps me buzzing in the kitchen every single day. Let’s keep sharing these simple, joyful moments together!
Buttermilk Baked Fried Chicken
Ingredients
Equipment
Method
- Place each chicken breast between two layers of plastic wrap. Use a mallet or rolling pin to flatten the chicken to 3/4 inch thickness.
- Soak the flattened chicken in 1 cup of buttermilk for at least 30 minutes.
- In a shallow dish, combine the panko bread crumbs, parmesan cheese, garlic powder, paprika, and dried thyme.
- Shake the excess buttermilk off each piece of chicken and coat it thoroughly in the bread mixture.
- Lay the coated chicken in a single layer on a baking sheet. Bake in a preheated 400°F oven for about 20 minutes, or until the internal temperature reaches 165°F.
Nutrition
Notes
Tried this recipe?
Let us know how it was!
Certified Family Nutrition Strategist
My path into family nutrition began working with Phoenix Area Family Services, where I saw how traditional nutrition advice often ignored real-world constraints like budget limitations, time crunches, and kids who refuse to eat anything green. That experience sparked my mission to develop meal planning systems that work with family realities, not against them.
Over eight years, I’ve helped hundreds of families reduce grocery spending by 25% while dramatically improving their nutrition. My meal planning frameworks have been adopted by local wellness centers because they actually work for busy parents juggling different ages, preferences, and dietary needs in one household.
As a bilingual first-generation Mexican-American and mother of three, I personally navigate the daily challenge of feeding a family nutritiously while honoring cultural traditions and managing a household budget. My “kid-friendly low-carb” protocols show families how to gradually introduce healthier options without triggering mealtime battles or abandoning beloved family recipes.
My “realistic wellness” philosophy is straightforward: health improvements must work within existing family dynamics and financial realities to be truly sustainable. When I’m not developing meal planning systems, I’m creating portable trail snacks for our weekend family hiking adventures – because healthy eating should fuel the life you want to live.
My personal low-carb journey started after pregnancy as a way to regain energy for active parenting, and that experience continues to inform my professional commitment to making healthy eating feel supportive rather than burdensome for busy families.