

Okay, so you know those nights? The ones where dinner just wrapped up, the kids are buzzing with leftover energy, and suddenly everyone’s hit with that undeniable sweet tooth craving? You want something special, a real treat, but the clock is ticking, and the thought of a complicated baking project feels like… well, a lot. Trust me, I’ve been there! That’s exactly why I’m so excited to share my go-to recipe for Cake Ideas Recipes in 12 Minutes: Weeknight Winner. It’s a game-changer! We’re talking a genuinely delicious, crowd-pleasing cake that comes together in a blink. I remember one chaotic Tuesday evening, I whipped this up with my little ones practically supervising, and that simple act of baking together turned a regular night into pure magic. As a Certified Family Nutrition Strategist, I know how important it is to have those easy, joyful moments, and this cake delivers on all fronts!”
Why This Cake Ideas Recipes in 12 Minutes is a Weeknight Winner
Honestly, if you’re looking for a dessert that’s going to taste amazing without taking up your entire evening, this is it! Seriously, it’s a lifesaver.
- Speed Demon: We’re talking 12 minutes of actual prep. That’s faster than ordering pizza! You can whip this up right after dinner clean-up and still have time to relax before bed.
- Barely Any Effort: Forget fancy techniques! This recipe uses a simple cake mix and just a few other ingredients you probably have in your pantry. Anyone can make this, no professional baker skills needed!
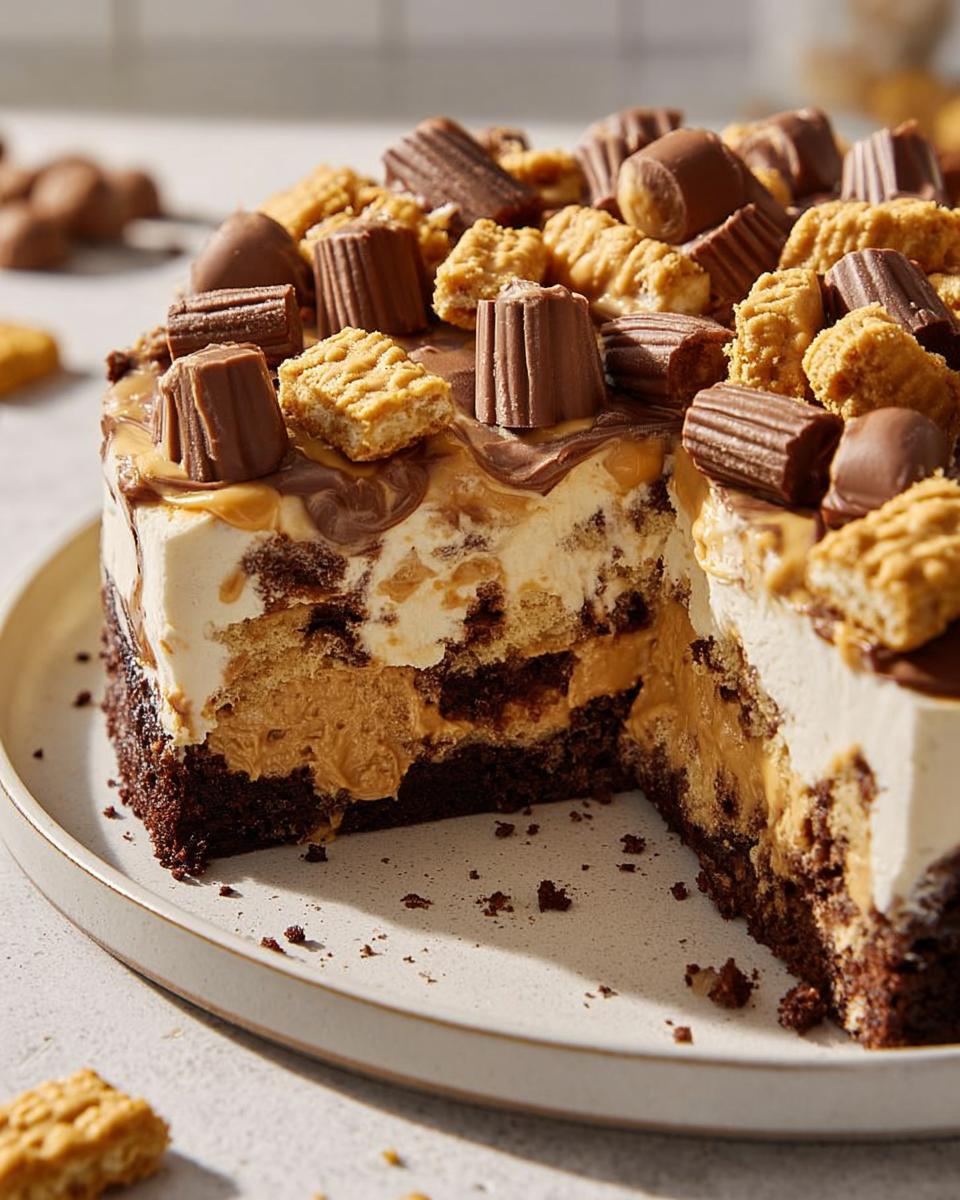
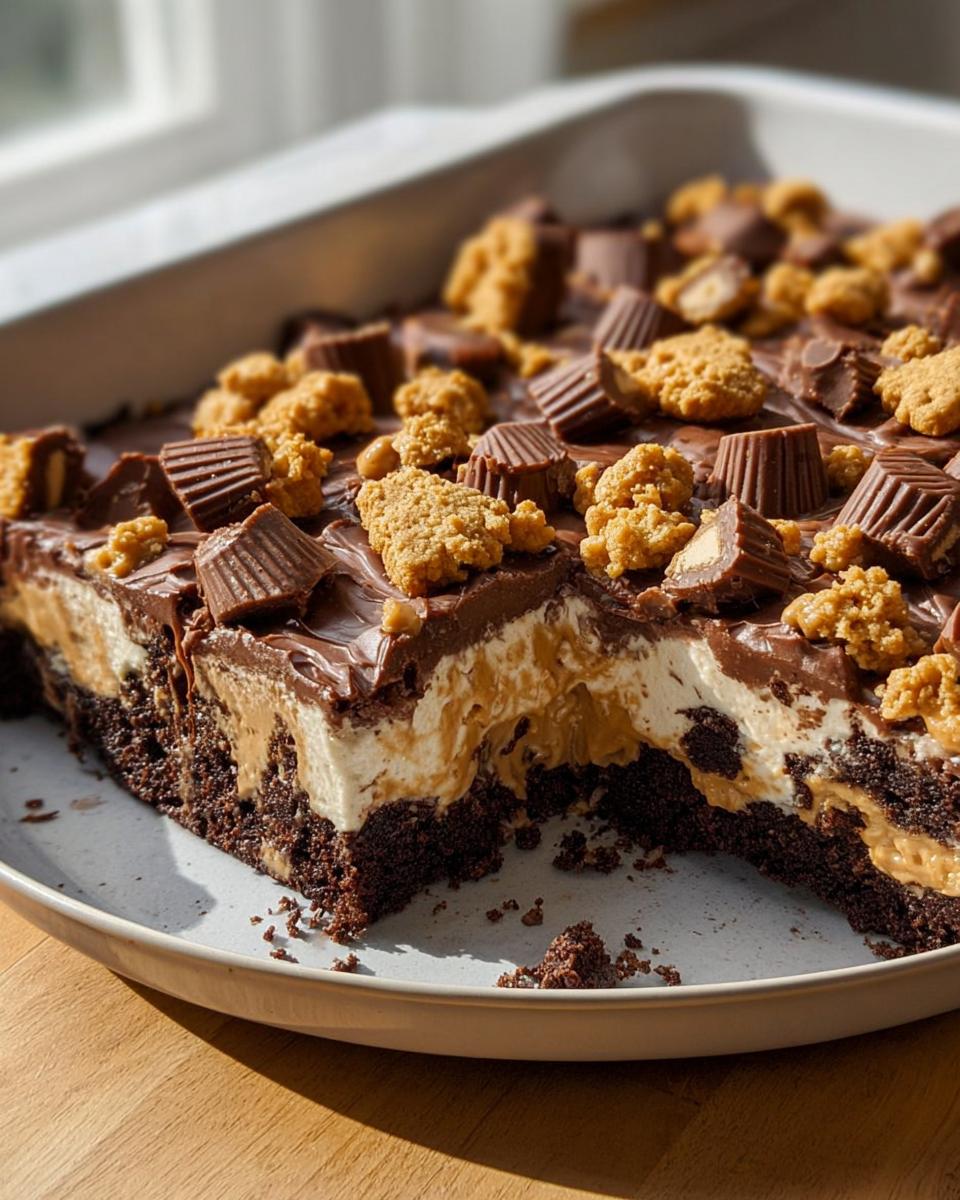
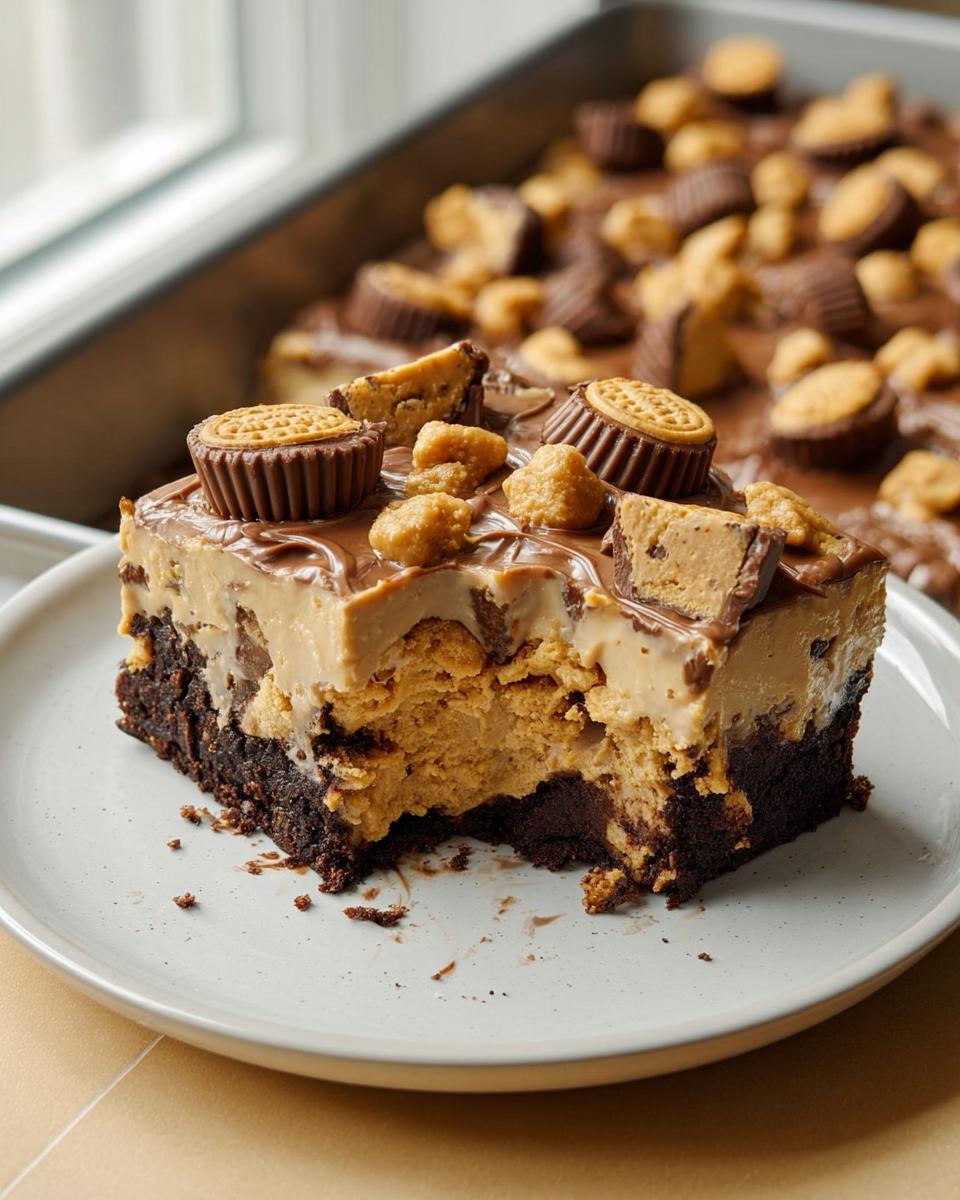
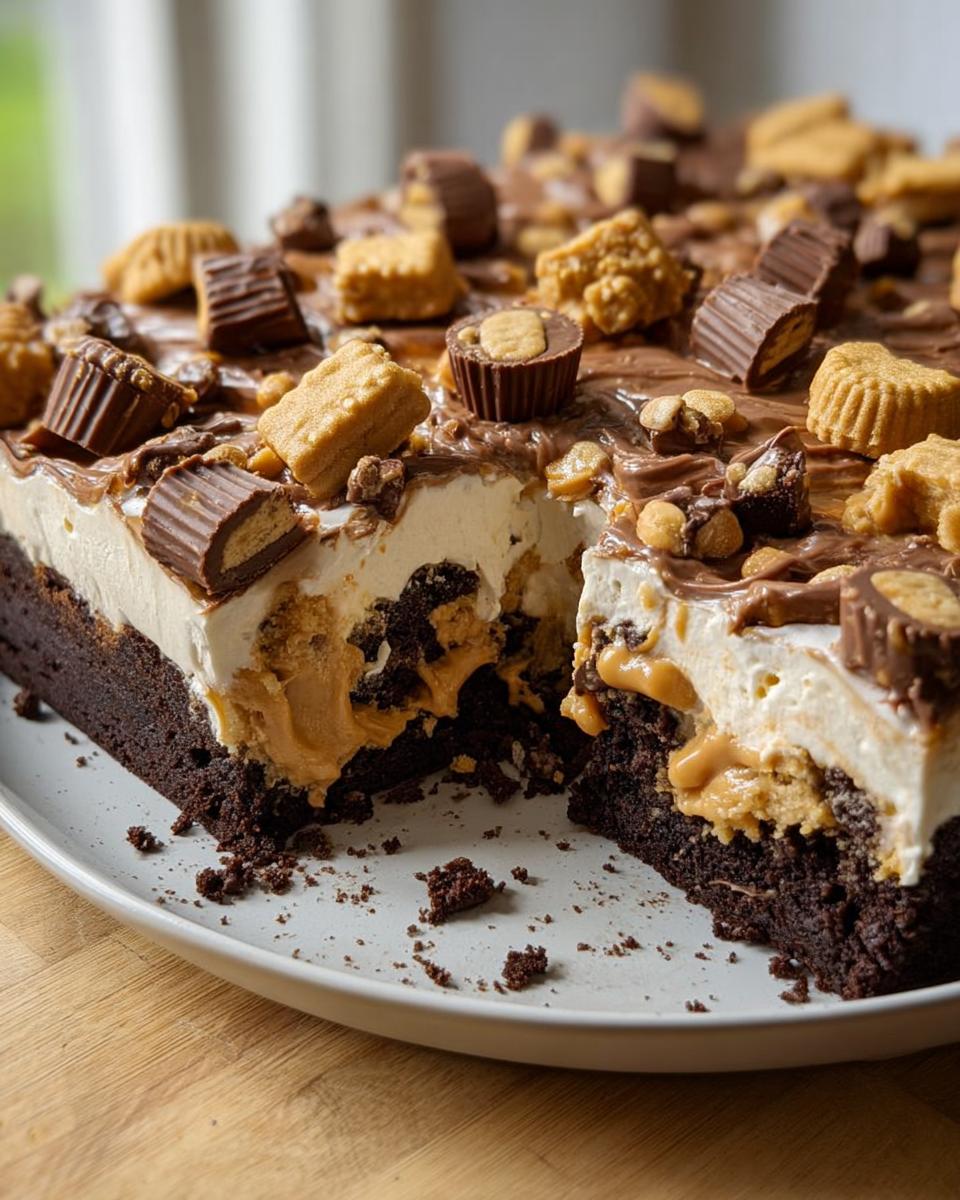
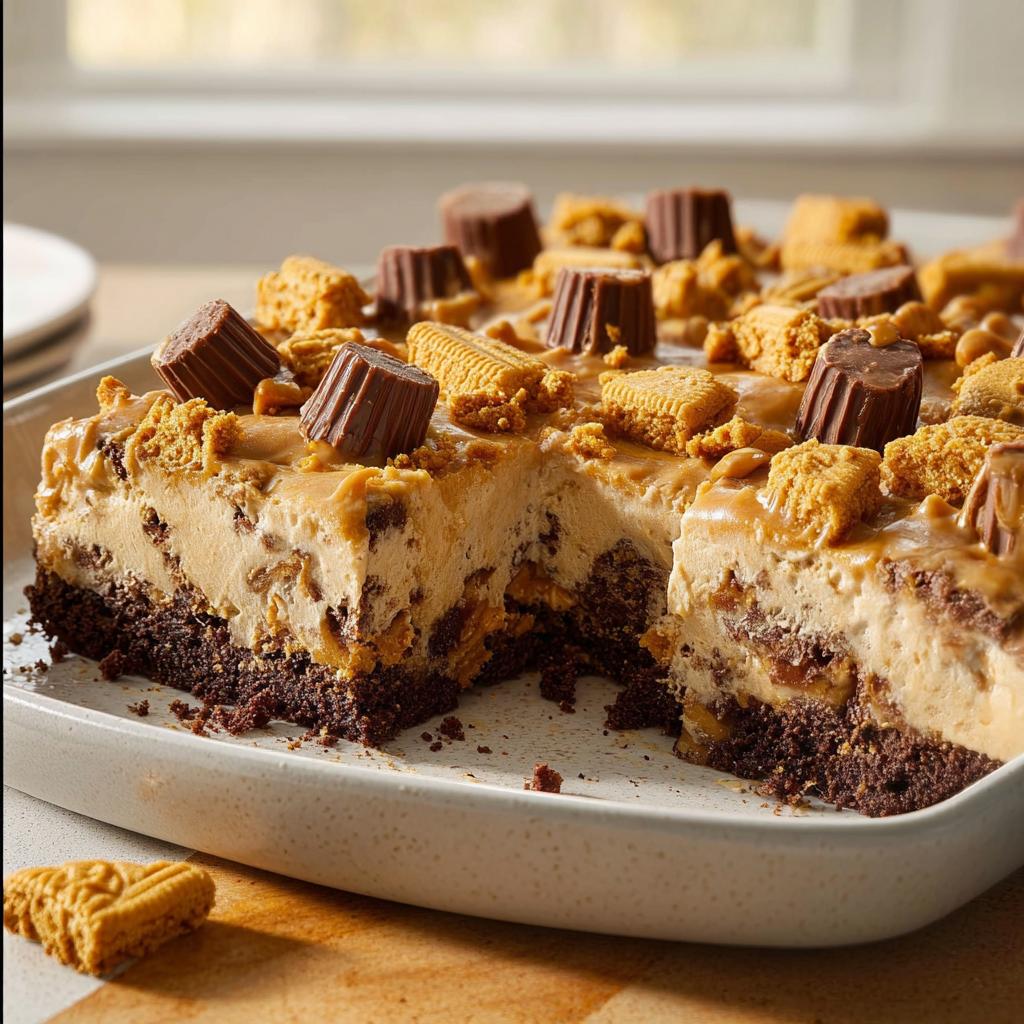
- Flavor Explosion: Don’t let the quick prep fool you – this cake is SO good. The combination of chocolate cake, creamy peanut butter, and sweet frosting is a total crowd-pleaser. It’s rich, decadent, and oh-so-satisfying.
- Family Fun Approved: The kids absolutely love helping with this one. From poking the holes to pouring the peanut butter goodness, it’s a simple way to get everyone involved in the kitchen. Plus, everyone gets a slice of pure joy!
Gather Your Ingredients for Your 12-Minute Cake
Alright, let’s get this party started! The beauty of this recipe is how easily accessible everything is. You probably have most of this sitting in your pantry right now! And honestly, using a cake mix makes it super budget-friendly, so you don’t have to break the bank for a delicious dessert. Here’s what you’ll need:
For the Cake:
- 1 package chocolate cake mix (regular size – the kind you usually find on sale!)
- 2 teaspoons vanilla extract, divided (this little flavor booster makes a difference!)
- A dash of salt (just a tiny pinch to balance everything out)
For the Peanut Butter Mixture:
- 2/3 cup creamy peanut butter (your favorite brand works perfectly here)
- 2 cans sweetened condensed milk (14 ounces each – these are the magic makers for that creamy texture!)
For the Frosting:
- 1 cup confectioners’ sugar (also known as powdered sugar)
For the Toppings (Optional, but highly recommended!):
- Chopped peanut butter-filled sandwich cookies (think Oreos, but the PB kind!)
- Peanut butter cups, chopped
See? Super simple stuff. Grab these, and we’re almost there!
Simple Steps for Your Cake Ideas Recipes in 12 Minutes
Alright, ready to make some magic happen? Following these simple steps is how we get from “what’s for dessert?” to “wow, this is amazing!” in practically no time at all. Remember, the actual hands-on part is super short, leaving you plenty of time for chilling – both for the cake and for yourself!
Preparing the Cake Base
First things first, crank up that oven to 350°F (175°C). Grab your trusty 13×9-inch pan and get it greased. Now, whip up that chocolate cake mix just like the box says, but remember to add in 1 teaspoon of that lovely vanilla extract and that tiny pinch of salt. Pour that yummy batter into your prepared pan and bake it until it’s done. Once it’s out, let it cool COMPLETELY. Trust me on this one – a warm cake and peanut butter mixture is a recipe for a goopy mess, not a masterpiece!
Creating the Peanut Butter Mixture
While your cake cools, let’s make the gooey center! In a bowl, whisk together that creamy peanut butter and both cans of sweetened condensed milk until it’s nice and smooth. It’s going to look super thick and luscious. Once the cake is totally cool, grab the handle of a wooden spoon (or literally anything that can make holes!) and poke holes all over the cake, about 2 inches apart. Now, slowly pour about 2 cups of that peanut butter mixture over the top, letting it sink into all those holes you just made. It’s like a flavor injection!
Chilling for Flavor Fusion
This step is key for letting all those wonderful flavors get to know each other. Cover the cake and the remaining peanut butter mixture tightly. Pop them into the refrigerator for at least 2 to 3 hours. This makes sure the cake is nice and cold, and the peanut butter mixture has time to sort of soak in and set up just a bit.
Making the Creamy Frosting
Almost there! While the cake is chilling, take the rest of that leftover peanut butter mixture. Stir in the remaining 1 teaspoon of vanilla extract. Now, it’s time to make the frosting! Gradually beat in the confectioners’ sugar until you get a nice, spreadable consistency. It should be smooth and creamy, not too stiff and not too runny. Once your cake is perfectly chilled, spread this delicious frosting evenly all over the top.
Adding the Finishing Touches
This is where you can really have fun! Sprinkle on those chopped peanut butter sandwich cookies and peanut butter cups, or any other toppings you love. It adds that extra crunch and peanut butter punch! Pop any leftovers back in the fridge. Easy peasy, right?
For more ideas on how to elevate simple cakes, check this out!
Seriously, if you want to see the original amazing recipe this is inspired by, check out this incredible peanut butter chocolate poke cake!
Tips for Your Best Cake Ideas Recipes in 12 Minutes
Okay, so you’ve got the recipe, you’ve got the ingredients – woohoo! But to make sure this quick cake is absolutely, positively amazing every single time, here are a few little things I’ve learned along the way:
First off, don’t skimp on letting that cake cool COMPLETELY before you start poking holes and pouring on the peanut butter mixture. Seriously, it’s the one step that can make or break the texture. A warm cake will just dissolve into a mush, and nobody wants that!
Also, feel free to play around with the peanut butter. Creamy is great, but if you love a little texture, a crunchy peanut butter is fantastic too! And when it comes to the cake mix, don’t be afraid to try different brands – they all work, but sometimes one might give you a slightly fudgier texture, which is never a bad thing!
For more ideas on how to up your cake game, check this out!
Ingredient Notes and Substitutions for Quick Cake
Sometimes you’re in the kitchen and realize you’re missing *one* thing, right? I get it! Let’s talk about a few ingredients here to make sure you’re covered. For the cake mix, any regular-sized chocolate cake mix works like a charm. If you can’t find chocolate, a devil’s food or even a dark fudge cake mix would be delicious alternatives. And for the peanut butter? Creamy is what the recipe calls for, making it super smooth, but if you’re feeling adventurous, crunchy peanut butter adds a nice little texture surprise. Just make sure it’s a standard creamy variety, not a natural one that separates easily, as that can affect how it blends with the condensed milk.
Serving and Storage for Your Weeknight Winner Cake
This cake is honestly amazing served chilled, straight from the fridge. That cold, dense texture is just perfection with the rich peanut butter frosting! If you want to get fancy, a scoop of vanilla ice cream on the side is always a winner, or maybe a little dollop of whipped cream. As for storing leftovers? Just pop any extra slices back in the fridge, well covered, and it should stay delicious for about 3-4 days. It’s almost always gone by then, though!
Need more make-ahead dessert ideas? This chocolate mousse is another fantastic option!
Frequently Asked Questions about 12-Minute Cake Recipes
Got questions about this super speedy cake? I totally get it! It sounds almost too good to be true, right? Here are answers to some common ones I get:
Can I use a different cake mix besides chocolate?
Absolutely! While chocolate is seriously divine with peanut butter, don’t be afraid to experiment. A yellow cake mix or even a spice cake mix could be a fun twist. Just follow the package directions for baking and remember that the flavor profile might change a bit. It’s all about finding what you love!
How long does the cake last?
This cake is best enjoyed within 3-4 days. Because it’s served chilled and has that rich peanut butter mixture, it holds up well in the refrigerator. Just make sure it’s covered tightly to keep it fresh. Honestly, though, it usually disappears much faster than that!
Is this recipe good for beginners?
Oh, 100%! This recipe is practically designed for beginners or anyone who’s short on time and confidence in the kitchen. Using a cake mix means half the work is already done. The steps are super straightforward – mix, bake, poke, pour, chill, frost, and enjoy. If you can follow package directions, you can totally nail this!
Estimated Nutritional Information
Just a heads-up, the nutritional info below is an estimate based on the ingredients listed. Keep in mind that exact amounts can vary a bit depending on the brands you use and how you measure things out. But generally, for about 1/12th of this yummy cake, you’re looking at roughly 360 calories, 16g of fat, 7g of protein, 49g of carbs, and around 40g of sugar. Totally delicious for a weeknight treat!
Cake Ideas Recipes in 12 Minutes: Weeknight Winner
Ingredients
Equipment
Method
- Preheat your oven to 350°F (175°C). Prepare the chocolate cake mix according to the package directions, adding 1 teaspoon of vanilla extract and the salt before mixing the batter. Pour the batter into a greased 13×9-inch baking pan. Bake and cool the cake completely as directed on the package.
- In a bowl, whisk together the peanut butter and sweetened condensed milk until blended. Using the end of a wooden spoon handle, poke holes in the cooled cake about 2 inches apart. Slowly pour 2 cups of the peanut butter mixture over the cake, filling each hole.
- Refrigerate the cake and the remaining peanut butter mixture, covered, for 2 to 3 hours, or until the cake is cold.
- In a separate bowl, combine the remaining 1 teaspoon of vanilla extract with the reserved peanut butter mixture. Gradually beat in enough confectioners’ sugar until the mixture reaches a spreadable consistency. Spread this frosting evenly over the chilled cake.
- Add your desired toppings, such as chopped peanut butter-filled sandwich cookies or peanut butter cups. Refrigerate any leftovers.
Nutrition
Notes
Tried this recipe?
Let us know how it was!
Certified Family Nutrition Strategist
My path into family nutrition began working with Phoenix Area Family Services, where I saw how traditional nutrition advice often ignored real-world constraints like budget limitations, time crunches, and kids who refuse to eat anything green. That experience sparked my mission to develop meal planning systems that work with family realities, not against them.
Over eight years, I’ve helped hundreds of families reduce grocery spending by 25% while dramatically improving their nutrition. My meal planning frameworks have been adopted by local wellness centers because they actually work for busy parents juggling different ages, preferences, and dietary needs in one household.
As a bilingual first-generation Mexican-American and mother of three, I personally navigate the daily challenge of feeding a family nutritiously while honoring cultural traditions and managing a household budget. My “kid-friendly low-carb” protocols show families how to gradually introduce healthier options without triggering mealtime battles or abandoning beloved family recipes.
My “realistic wellness” philosophy is straightforward: health improvements must work within existing family dynamics and financial realities to be truly sustainable. When I’m not developing meal planning systems, I’m creating portable trail snacks for our weekend family hiking adventures – because healthy eating should fuel the life you want to live.
My personal low-carb journey started after pregnancy as a way to regain energy for active parenting, and that experience continues to inform my professional commitment to making healthy eating feel supportive rather than burdensome for busy families.