
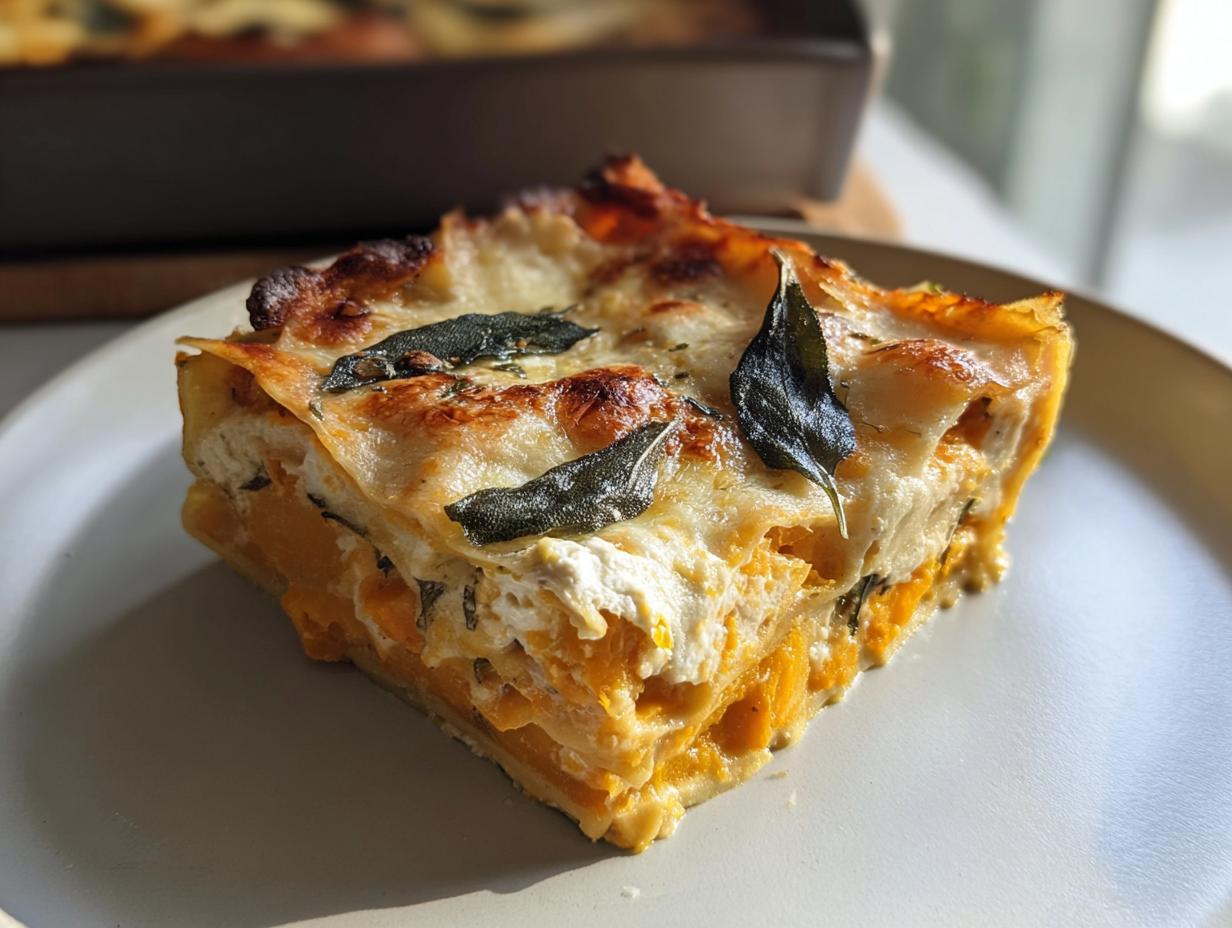
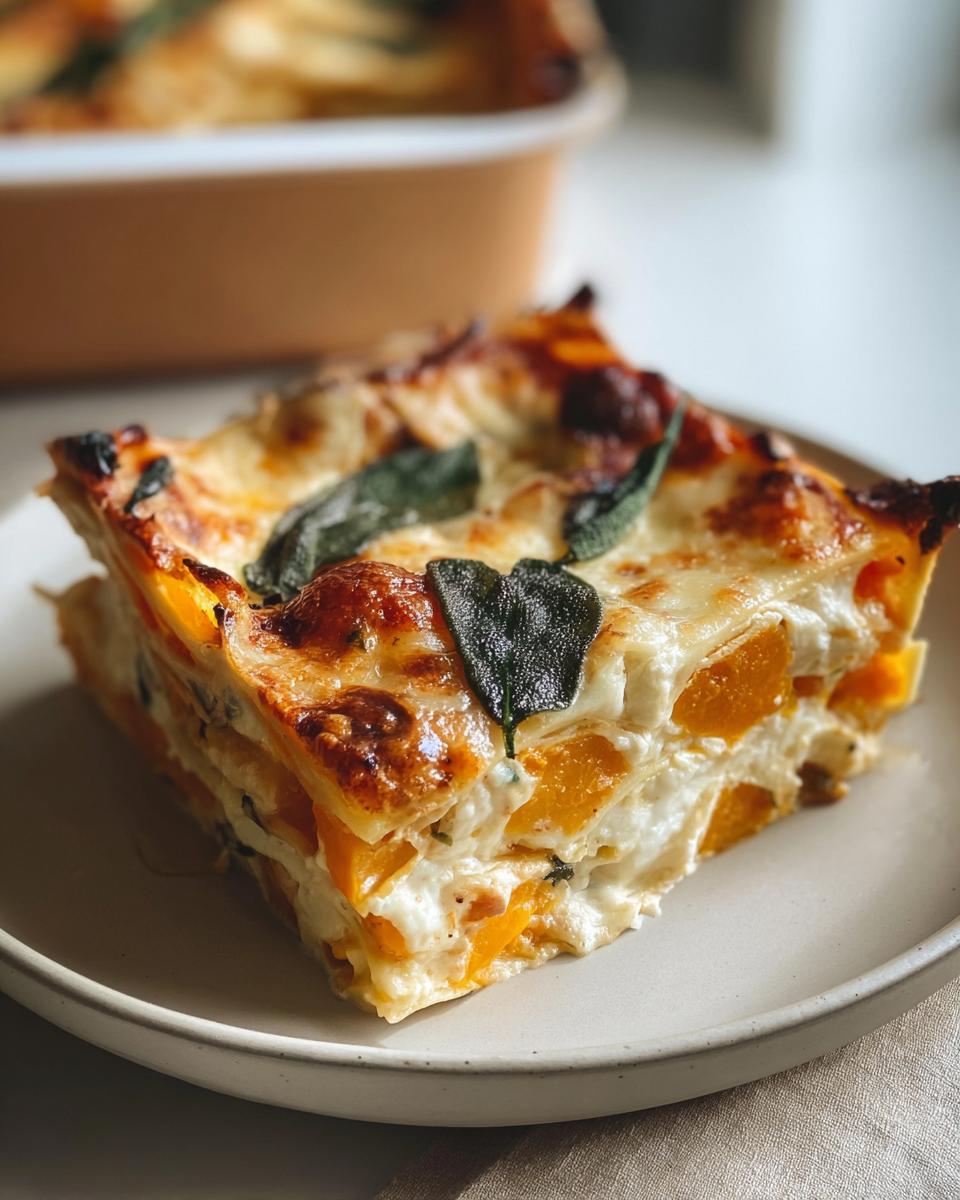
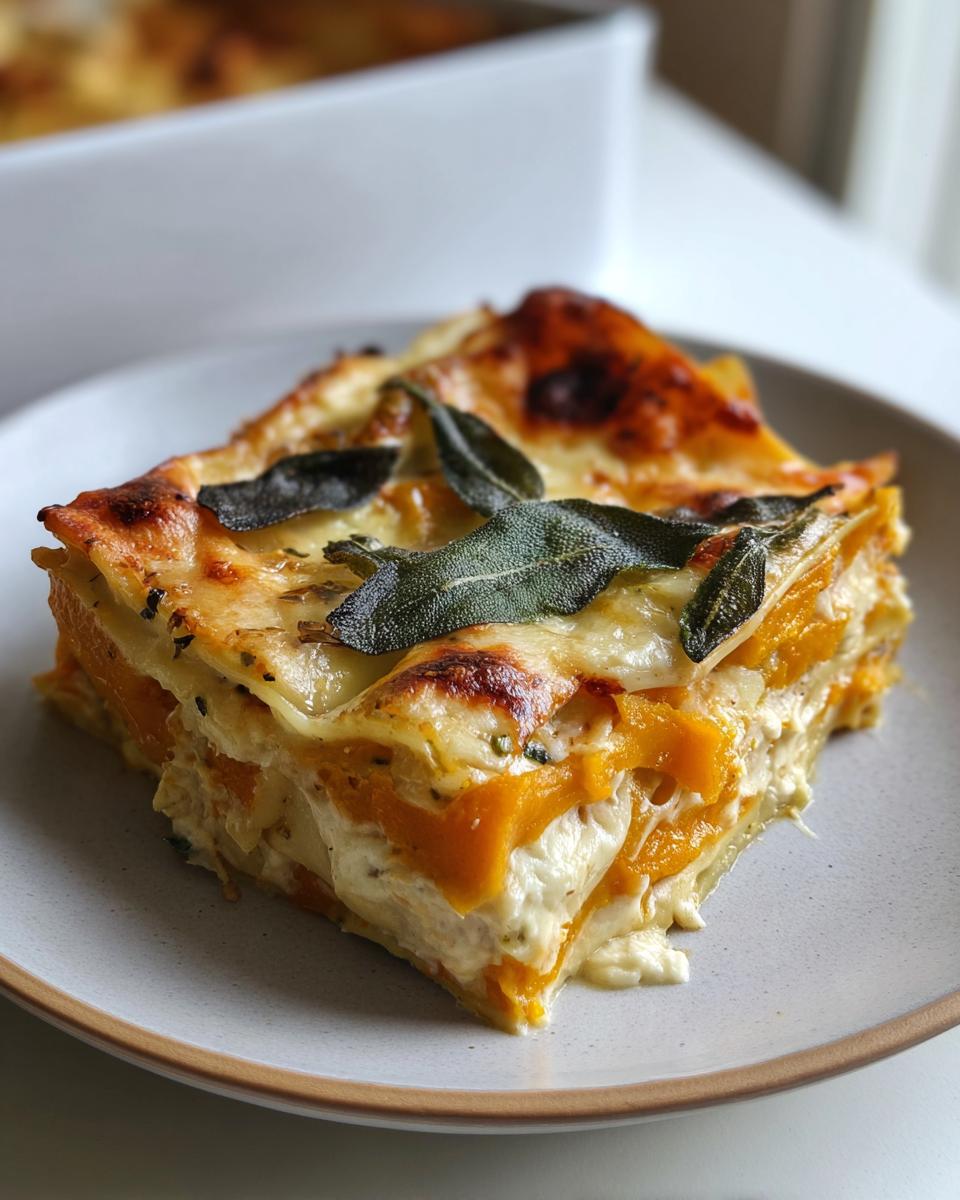
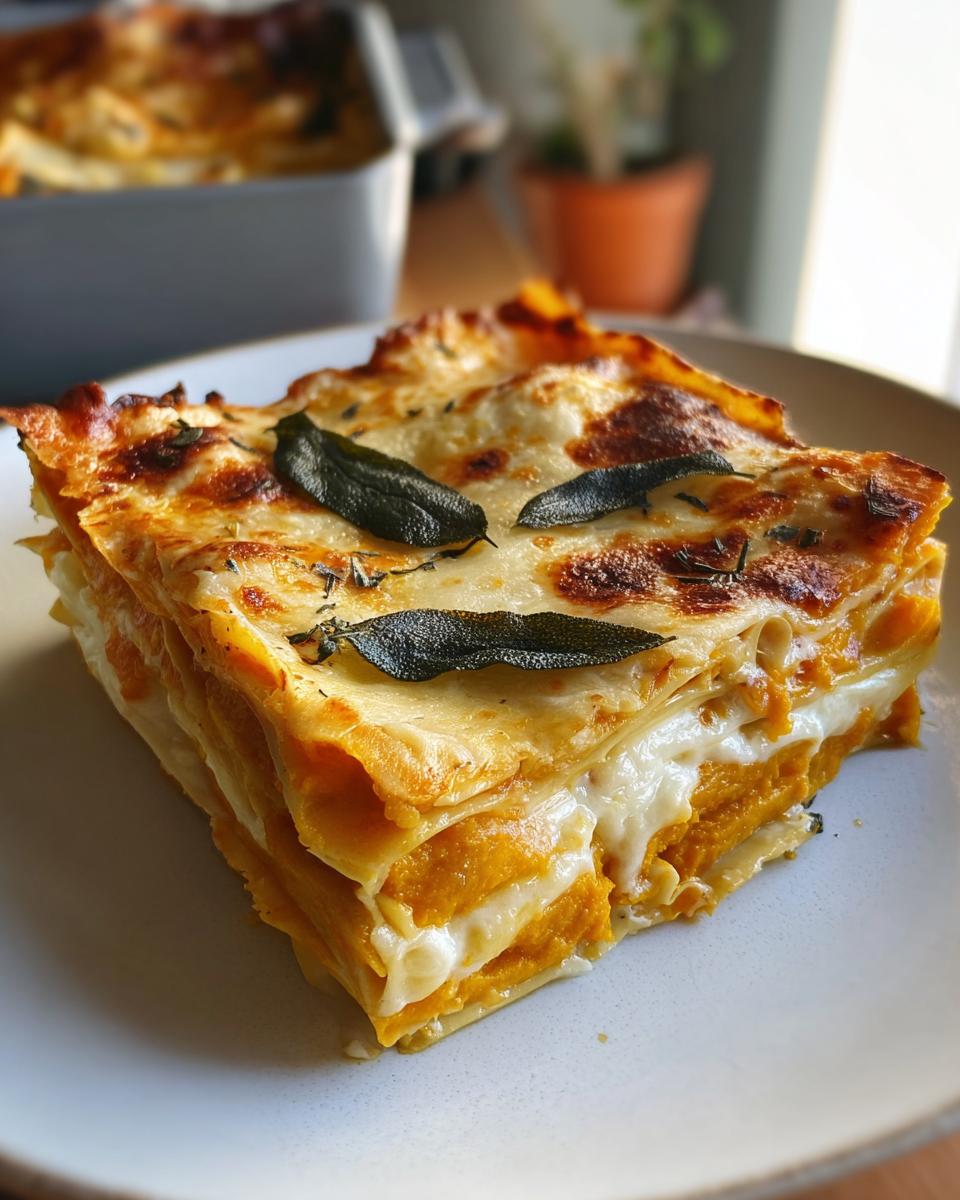
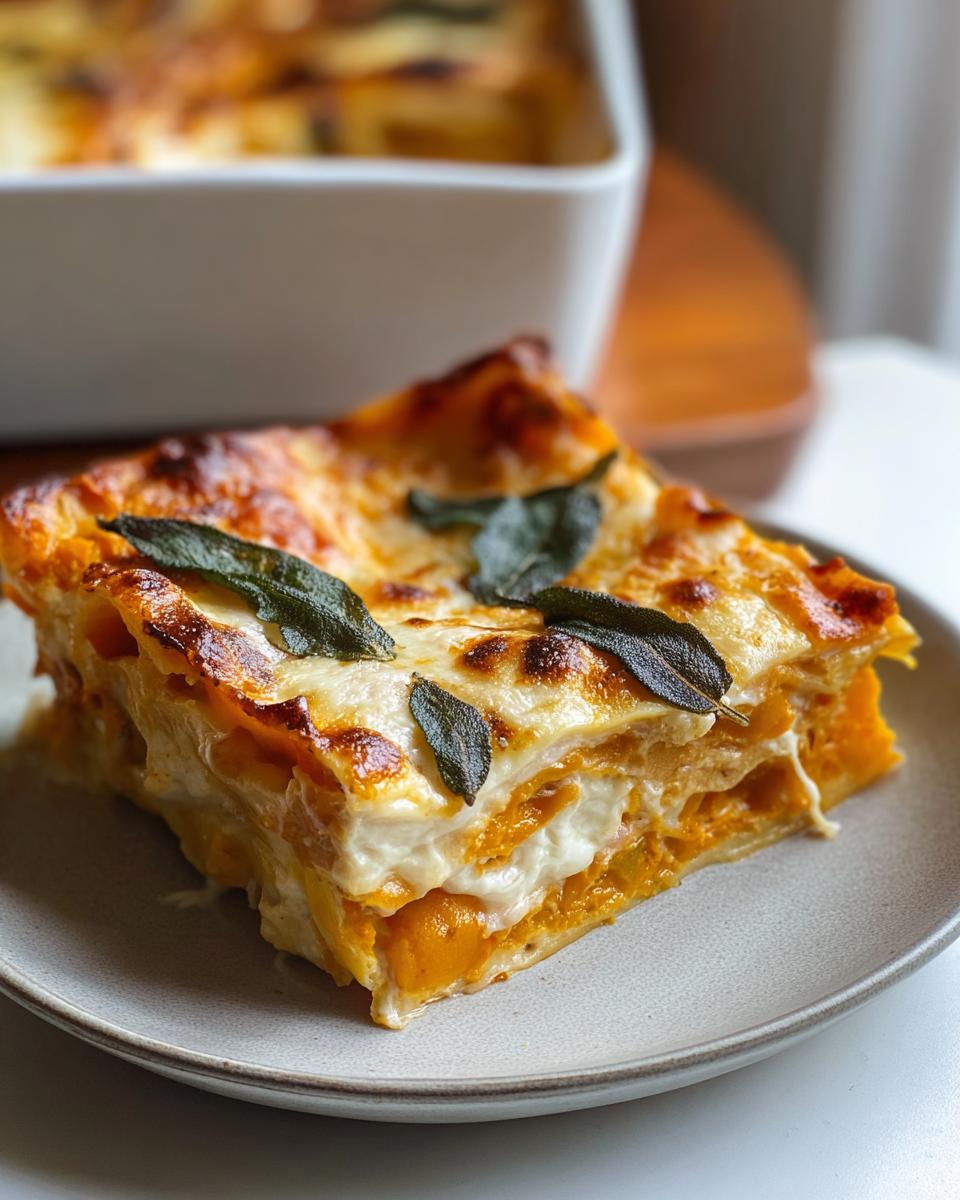
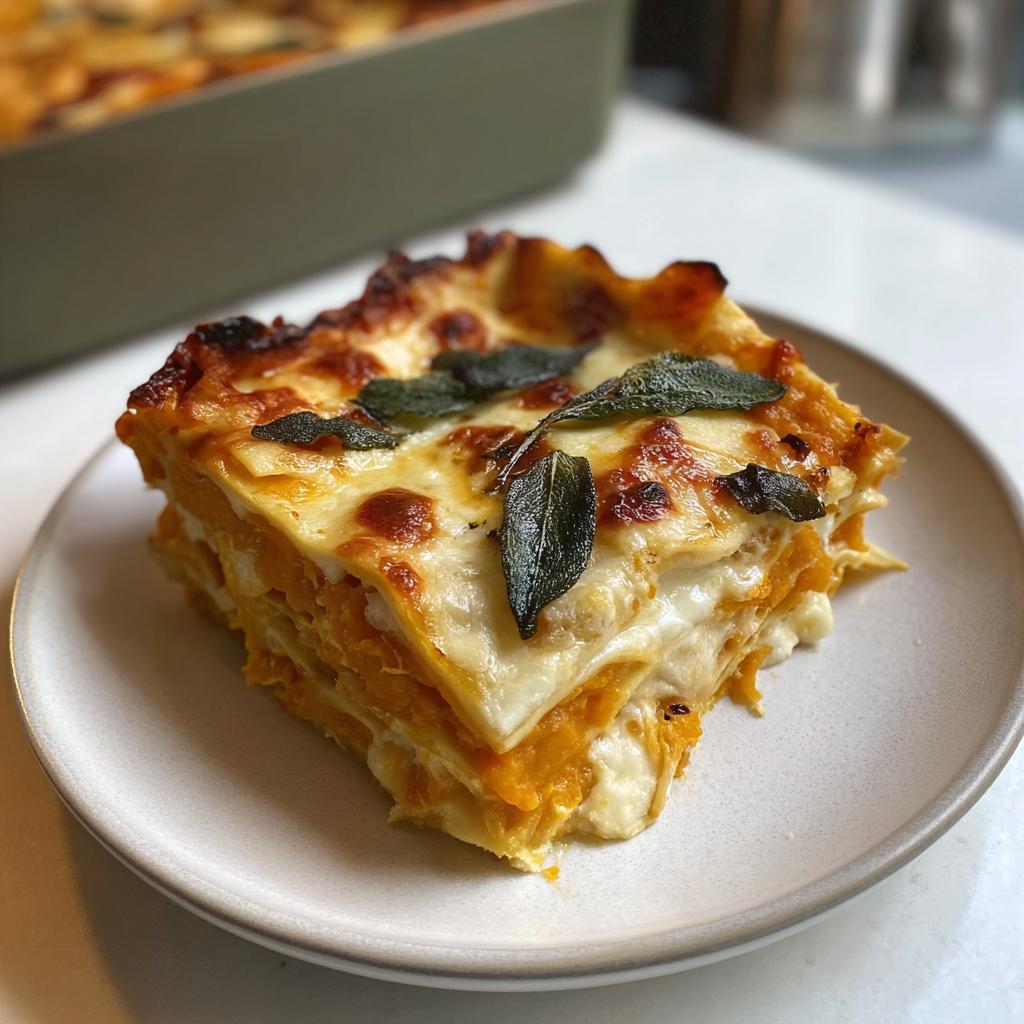
Oh, when those first chilly breezes start blowing in during the fall, you just crave something warm, cozy, and stick-to-your-ribs, right? Forget thin soups; we need substance! That’s exactly why I’m sharing my absolute favorite comfort creation: the Butternut Squash and Sage Lasagna. This isn’t just a recipe; it’s proof that a rich, filling vegetarian main dish can totally win over a crowd.
I vividly remember the first time I pulled this thing out of the oven. My kids were eyeing the orange layers with serious suspicion, I won’t lie! But the second they took a bite of that sweet squash puree married to the nutty sage sauce, their faces just lit up. It instantly became a staple. Cooking this dish reminds me that the best meals are the ones that bring everyone together and create those little home memories.
Why This Butternut Squash and Sage Lasagna Is Your New Family Favorite
Look, I know you’re busy. Who has time for overly fussy dinners when the kids have homework and you just want to put your feet up? This lasagna is the answer to that problem! It’s hearty enough for a huge Sunday dinner but straightforward enough that you can prep it after school lets out. It’s truly the perfect vegetarian holiday main without hours of fuss.
- It’s a flavor bomb! The sweetness of the roasted squash paired with the earthy, nutty notes from the browned butter and crisp sage is just divine. Seriously, it tastes like autumn exploded into a cheesy, wonderful dish.
- It secretly sneaks in veggies! Don’t tell the kids, but they are devouring a mountain of squash without even noticing because of that creamy béchamel sauce.
- It’s wonderfully filling without being heavy. Unlike those greasy, multi-meat versions, this one sits nicely, making it ideal for your upcoming holiday table where you want people feeling satisfied, not stuffed.
- It’s a great make-ahead option! Trust me, assembling this the night before and just popping it in the oven when company arrives is the key to looking totally calm and collected.
Making the Ultimate Butternut Squash and Sage Lasagna
So, how do we get this magic to happen? Don’t let the word ‘lasagna’ scare you. We break it down into three simple, big steps: roasting and pureeing the squash, making a quick sauce, and then layering it all up beautifully. What I love is that even though it takes a little time—about 135 minutes total for 8 generous servings—most of that is hands-off baking time!
As a Certified Family Nutrition Strategist, I’ve made sure this recipe is packed with good stuff, but most importantly for you busy parents, it’s designed to be manageable. We aren’t doing complicated rolling or stuffing; we’re layering for maximum creamy flavor right into that 9×13 pan. It’s wholesome comfort food made friendly!
Gathering Ingredients for Butternut Squash and Sage Lasagna
Okay, let’s talk about what you need! Getting your ingredients ready before you start chopping or heating up pans is half the battle won—I learned that the hard way years ago when I almost burned my roux while frantically searching for the nutmeg. Don’t let that happen to you! This recipe breaks down neatly into three main teams: the lush filling, the unbelievable sauce, and what we use to stack it all up.
When you’re shopping, make sure you grab a nice big butternut squash, about three pounds should do it, and a whole head of garlic—we roast that right alongside the squash, which is a total game-changer for depth.
For ingredient storage tips down the road, you can check out my guide, though I promise, this lasagna is so good it probably won’t last long enough to need storing! If you want to know how to store leftover squash, bookmark that article later.
Ingredients for the Butternut Squash Filling
This is where the sweetness and body come from! Roasting the squash first, whole, brings out this incredible caramelized flavor that you just can’t get from pre-cooked stuff. It’s worth the 45 minutes in the oven, honestly!
- You’ll need one large butternut squash, about 3 pounds.
- One whole head of garlic—don’t skip this; it gets wonderfully sweet!
- Olive oil, just for roasting it up nice and seasoned.
- Kosher salt to taste for the roasting process.
Ingredients for the Browned Butter Béchamel (Sage Cream Sauce)
This sauce is what makes people ask for the recipe over and over again! We aren’t just making a white sauce; we are *browning* the butter first. That step adds a beautiful, nutty complexity that makes this happenin’ sauce feel fancy. It’s the backbone of our sage cream sauce.
- 6 tablespoons of unsalted butter—this is for browning, so make sure it’s good quality.
- 1/3 cup of all-purpose flour to make our roux thick.
- 2 and a half cups of whole milk. Keep it whole; trust me, the richness matters here!
- Just a tiny pinch of nutmeg—it’s the secret handshake of all good béchamel sauces.
- 1 1/4 teaspoons of Kosher salt to season it perfectly.
Ingredients for Assembly and Crispy Sage Topping
Now for the structure and that beautiful finish! We need the pasta, of course, and plenty of cheese. I insist on grating your mozzarella yourself—pre-shredded has anti-caking agents that melt weird, and you want gooey perfection here!
- One pound of pasta—if you are using dried sheets, you might have to par-cook them a bit first unless you grab the oven-ready ones.
- 16 ounces of mozzarella cheese, grated very fine.
- 2 cups of Parmesan cheese. Seriously, use a microplane here for that fluffy texture!
- 2 tablespoons of unsalted butter for frying the topping.
- One bunch of fresh sage leaves; these get tossed in that hot butter at the very end to become crispy little flavor bombs! This really nails that fall lasagna recipe vibe.
Step-by-Step Instructions for Butternut Squash and Sage Lasagna
Okay, deep breath! I know this looks like a lot of steps, but trust me, they all flow one right after the other, and you’ll be flying through it once you get going. This is where the real magic happens that turns those ingredients into the cozy, cheesy dream we’ve been aiming for! If you’re putting this in a fancy 9×13 pan, make sure you have it ready to go.
Roasting the Squash and Garlic
First things first, let’s get some amazing flavor developing! Crank your oven way up to 400 degrees F. You need to cut your butternut squash right down the middle, scoop those seeds out, and lay it cut-side up on a sheet tray. Drizzle the inside with olive oil and a good shake of kosher salt—rub it around a bit. Now, take that whole head of garlic, slice the top off so the cloves show, drizzle that with oil too, and wrap the whole head up tight in foil!
Toss both onto that tray and back into the hot oven they go for about 40 to 45 minutes. You’ll know it’s done when a small knife slides into the thickest part of the squash like it’s nothing. Let them cool down enough so you don’t burn your fingers when you scoop out that gorgeous, tender squash flesh.
Creating the Smooth Butternut Squash Pasta Filling
Once cool enough to handle, scoop out all that beautiful roasted squash into your blender. Don’t forget the garlic! Just squeeze the soft cloves right out of their papery skins and into the blender with the squash. Add about a teaspoon and a half of kosher salt. Now, blend! You want this to be nice and smooth, like a thick paste, but if your blender is struggling, add just a tiny splash of water at a time until it blends. This creamy blend is what makes this butternut squash pasta so luscious.
Preparing the Browned Butter Béchamel
Time for the famous sauce! Put your 6 tablespoons of butter in a saucepan over medium heat. Let it melt, and then keep watching it—it will start to foam, and then you’ll see little brown bits start forming on the bottom. That’s the nutty flavor kicking in! As soon as you smell that rich aroma, drop the heat to low and quickly whisk in the flour. Let that cook for just one minute.
Now, pour in the milk, a little bit at a time, whisking like mad so you don’t get lumps! Once it’s all in, bring it back up to a simmer, whisking constantly. It thickens up fast. When it coats the back of a spoon well, knock the heat off, stir in your nutmeg, and set it aside. That’s your dreamy sage cream sauce base!
Assembling Your Butternut Squash and Sage Lasagna
Okay, preheat the oven again, this time lower, to 350 degrees F. Take your 9×13 pan and spread the tiniest bit of squash puree on the bottom—this keeps the first layer of noodles from sticking. Now we go layer by layer! Noodles first, then 1/3 of the remaining squash puree. Spoon over 1/4 of the béchamel, then sprinkle 1/4 of your mozzarella and 1/4 of your Parmesan. Repeat that whole sequence two more times! Finish the very top with your final layer of noodles, the last of the béchamel, and the last bit of cheese. Don’t forget to include that excellent recipe pointer from this other lovely recipe if you need extra inspiration!
Baking and Finishing the Fall Lasagna Recipe
Slide that pan right into the 350-degree oven and let it bake for a good 45 minutes, maybe up to an hour. You’re waiting for it to get bubbly all over and beautifully golden brown on top. While that’s going, let’s make the crispy topping! Melt those last 2 tablespoons of butter in a skillet, toss in your fresh sage leaves, and fry them gently until they crisp up—about 30 seconds per side. They’ll turn dark green and brittle. Pull your amazing fall lasagna recipe out of the oven, sprinkle those crispy sage leaves right over the melted cheese, let it rest for ten minutes, and trust me, dinner is served!
Tips for Perfect Butternut Squash and Sage Lasagna
Even the best recipes have little quirks, right? When you’re making something as special as this lasagna, you want it to be absolutely perfect. Honestly, the two biggest potential tripping points are your noodles and the texture of that squash puree. Get those two things right, and you’ve nailed it for the whole family!
If you didn’t manage to grab oven-ready sheets, you *have* to par-cook your dried noodles following the package directions until they are just shy of al dente. If they are too soft going into the oven, they turn mushy under all that heavy sauce and cheese. If you are looking for the best advice on handling pasta, I keep all my best tips in this guide on the best lasagna noodle guide.
Also, don’t rush the puree blending! If your puree is too watery, it will seep out the sides when you cut into the lasagna instead of holding its shape. Aim for that thick, spreadable texture we talked about. If it’s runny, just put the lid back on and let the blender work its magic a little longer!
Ingredient Substitutions for Butternut Squash and Sage Lasagna
I love customizing things based on what’s in my fridge or what’s on sale! This recipe is very kind to substitutions, which is great for busy weeknight cooking.
If you can’t find fresh sage—or you just don’t want to fry it up—you can totally swap it out using dried herbs. Use about 1 tablespoon of dried rubbed sage mixed into your béchamel sauce instead. It won’t give you that amazing crispy texture on top, but the flavor will still be wonderful.
Some people aren’t huge fans of that strong Parmesan kick, or maybe you just ran out. You can easily swap out some of that Parmesan for Gruyère cheese. Gruyère melts like a dream and brings a slightly nutty, sweeter flavor that plays beautifully with the roasted squash. If you replace the mozzarella, though, make sure you still use sharp Parmesan or Pecorino in the layers for that salty bite!
Storing and Reheating Your Vegetarian Holiday Main
Now for the truly important part: making sure this glorious vegetarian holiday main tastes just as good the next day! Because this lasagna has a lot of moisture from that creamy squash filling, how you tuck it away and reheat it makes a huge difference.
If you have leftovers—which, let’s be honest, you probably will because this makes a huge pan—let the lasagna cool down to room temperature first. Don’t put a piping-hot pan directly into the fridge; it traps steam and makes everything soggy! Once it’s cooled slightly, cover the whole baking dish tightly with plastic wrap, and then maybe another layer of aluminum foil on top of that. This traps the moisture in. It keeps beautifully in the fridge for up to four days.
When you’re ready for seconds, you must reheat it low and slow. I hate how the top layer dries out if you try to zap it in the microwave! Transfer a slice (or the whole pan) to an oven-safe dish. Cover it tightly with foil—this creates a little steam tent to keep that béchamel from cracking or drying out.
Pop it back into a 350-degree oven for about 20 minutes covered. Once it’s heated through, take the foil off for the last 5 to 10 minutes. That final blast of heat will crisp up those top cheese edges just like you want! The texture holds up incredibly well this way, so you don’t have to worry about serving up sad leftovers!
Frequently Asked Questions About Butternut Squash Pasta
I totally get it! When you’re making a showstopper like this, you always have a few last-minute questions, especially around cheeses and timing. Don’t stress! This recipe is forgiving, but I want to make sure your butternut squash pasta turns out perfect for your table!
Can I make the Butternut Squash and Sage Lasagna ahead of time?
Yes, and honestly, I highly recommend it if you’re serving a crowd! This is one of those dishes that really benefits from sitting. You have two options. Option one: Assemble the *entire* lasagna, cover it tightly, and keep it in the fridge for up to a day. When you are ready to bake, just add about 15 extra minutes to the baking time since it’s starting cold. Option two, which I prefer for the best flavor: Roast your squash and make your béchamel sauce ahead of time and store them separately. Then, the day you want to serve it, just assemble and bake as directed. That way, the sauce is freshly warming up, mixing everything perfectly.
What cheese works best besides mozzarella and Parmesan?
That’s a fantastic question! While the mozzarella and Parmesan combo gives you the perfect melt and salty zing, you can absolutely mix in other flavors if you want. Fontina melts beautifully and has a slightly earthy, creamy flavor that complements the sage perfectly. If you use Fontina, swap out about half of the mozzarella for it. Another great choice is Provolone, especially if you grate a little bit on top for that final cheese layer. Provolone gets a little stringier and has a lovely, subtle sharpness that cuts through the richness of the squash. Just make sure whatever you choose, you’re grating it fresh!
Estimated Nutritional Breakdown for Butternut Squash and Sage Lasagna
I always get asked about the nutrition breakdown when something tastes this indulgent, right? Even though this is decadent comfort food, it’s still packed with good things from that lovely roasted squash. Since this recipe serves 8 people, I’ve broken down the *estimated* numbers per serving for you. Please remember that these are just guidelines!
Don’t forget, your actual numbers will change based on the exact brands of cheese and butter you end up using, but this gives you a great idea of what you’re looking at for this rich Butternut Squash and Sage Lasagna.
- Calories: Roughly 550-600 calories per slice
- Fat: Around 30 grams (That browned butter béchamel adds up! But it’s worth it!)
- Protein: Approximately 25 grams
- Carbohydrates: About 45-50 grams (Mostly from the pasta and squash, which is great fiber!)
As your Certified Family Nutrition Strategist, I always tell families: food should taste amazing first! This lasagna certainly checks that box. Use these numbers as a guide, but mostly, just enjoy making incredible memories around the dinner table with this wonderful fall lasagna recipe!
Share Your Butternut Squash and Sage Lasagna Experience
Whew! We did it! We took a humble squash and turned it into this magnificent, cheesy, aromatic masterpiece. Now, the most important part happens: I want to hear from YOU! This is what home cooking is all about—sharing what works around our family tables.
When you make this Butternut Squash and Sage Lasagna for your crew, please come back and tell me how it went. Did your kids instantly love it? Did your husband ask for seconds right away? I always get a little thrill reading your comments!
If you followed along and ended up with this incredible fall lasagna recipe, please take a moment to leave a quick rating down below. A five-star review lets me know I’m on the right track helping you feed your families delicious, wholesome food!
And if you got some beautiful, bubbling photos of your finished dish—especially with that crispy sage topping—tag me on social media! I absolutely adore seeing our recipes popping up in home kitchens everywhere. Happy cooking, friends!
Butternut Squash and Sage Lasagna
Ingredients
Equipment
Method
- Pre-heat your oven to 400 degrees F.
- Cut the butternut squash in half lengthwise and place it on a sheet tray. Drizzle the flesh side with olive oil and a generous pinch of kosher salt, rubbing to distribute the seasoning.
- Cut about 1/4 to 1/2 of an inch from the top of the head of garlic, exposing the cloves. Drizzle with olive oil, sprinkle with a pinch of kosher salt, and wrap the head tightly in aluminum foil. Place the garlic on the baking sheet with the butternut squash.
- Bake for 40 to 45 minutes, or until the butternut squash flesh is tender and the garlic is soft and golden brown. The squash is done when a paring knife enters the thickest part easily.
- Allow the squash to cool for 15 to 20 minutes. Use a spoon to remove the seeds from the center of the butternut squash.
- Scoop the squash flesh into a blender. Squeeze the roasted garlic cloves from their skins and add them to the blender. Add 1.5 teaspoons of Kosher salt and about 1/2 cup of water. Blend until the mixture is smooth and uniform, adding more water if needed until the mixture is thick but spreadable. Set this mixture aside.
- Brown the butter in a saucepan over medium heat.
- Add the flour to the browned butter and cook for 1 more minute over low heat to cook out the raw flour taste.
- Slowly stream in the milk while whisking constantly to prevent lumps. The mixture will thicken initially but will thin out as you add all the milk.
- Bring the mixture to a simmer over medium heat. Once simmering, cook for another 2 minutes while whisking until the mixture has thickened substantially and coats the back of a spoon. Finish with a pinch of nutmeg. Turn off the heat and set the béchamel aside.
- Pre-heat your oven to 350 degrees F.
- In a 9×13 inch baking pan, spread a thin layer of the butternut squash mixture to coat the bottom of the pan.
- Layer the lasagna: Top the squash with one layer of noodles, 1/3 of the remaining butternut squash mixture, 1/4 of the béchamel, 1/4 of the mozzarella, and 1/4 of the parmesan. Repeat this layering process two more times (noodles, squash, béchamel, cheeses).
- Top the final layer with one more layer of noodles, the last 1/4 of the béchamel, and the last 1/4 of each of the cheeses.
- Transfer the pan to the oven and cook for 45 minutes to 1 hour, or until the lasagna is bubbling and golden brown on top.
- While the lasagna bakes, heat 2 tablespoons of butter in a large skillet and add the sage leaves. Fry the sage leaves on both sides until they become crispy.
- Finish the lasagna by topping it with the crispy sage leaves. Serve the lasagna warm.
Notes
Tried this recipe?
Let us know how it was!
Certified Family Nutrition Strategist
My path into family nutrition began working with Phoenix Area Family Services, where I saw how traditional nutrition advice often ignored real-world constraints like budget limitations, time crunches, and kids who refuse to eat anything green. That experience sparked my mission to develop meal planning systems that work with family realities, not against them.
Over eight years, I’ve helped hundreds of families reduce grocery spending by 25% while dramatically improving their nutrition. My meal planning frameworks have been adopted by local wellness centers because they actually work for busy parents juggling different ages, preferences, and dietary needs in one household.
As a bilingual first-generation Mexican-American and mother of three, I personally navigate the daily challenge of feeding a family nutritiously while honoring cultural traditions and managing a household budget. My “kid-friendly low-carb” protocols show families how to gradually introduce healthier options without triggering mealtime battles or abandoning beloved family recipes.
My “realistic wellness” philosophy is straightforward: health improvements must work within existing family dynamics and financial realities to be truly sustainable. When I’m not developing meal planning systems, I’m creating portable trail snacks for our weekend family hiking adventures – because healthy eating should fuel the life you want to live.
My personal low-carb journey started after pregnancy as a way to regain energy for active parenting, and that experience continues to inform my professional commitment to making healthy eating feel supportive rather than burdensome for busy families.