
You know, I sometimes think we get stuck in a sandwich rut. We grab the same old ham and cheese, or maybe turkey on white, and call it lunch. But what if I told you that making truly impressive, pro-level sandwiches is totally within your reach, even if you’re rushing around like I usually am? It’s all about a few smart tricks and a little bit of love! I remember the first time I decided to create a sandwich masterpiece for a family picnic. I wanted to impress my loved ones with something colorful and nutritious, but time was of the essence. I grabbed some fresh veggies, lean proteins, and whole-grain bread, and within minutes, I had whipped up a delightful spread that turned ordinary lunch into a memorable experience. Watching my family enjoy each bite, I realized that making beautiful, tasty sandwiches could be quick and easy—just like my culinary philosophy of effortless elegance. That’s exactly what this is all about: learning How to Make Sandwich Ideas Recipes Like a Pro (2025) to seriously up your sandwich game.
Why You’ll Love These Sandwich Ideas Recipes Like a Pro
You’re going to adore these sandwich recipes because they’re actually your new secret weapon for weeknight dinners and packed lunches! Here’s why they’re a game-changer:
- Super Easy to Whip Up: Seriously, these are designed for busy people like us. You spend more time enjoying than slaving away.
- Lightning Fast: From assembly to the oven, we’re talking minutes, not hours. Perfect for when hunger strikes fast.
- Endlessly Versatile: Don’t be afraid to swap things out! These are a fantastic base for whatever you’ve got in the fridge.
- That ‘Pro’ Touch: They look and taste like you spent ages crafting them, giving you that effortless elegance Clara always talks about.
- Deliciously Satisfying: Who doesn’t love a fantastic sandwich? These are hearty, flavorful, and guaranteed to please everyone.
Gather Your Ingredients for How to Make Sandwich Ideas Recipes Like a Pro
Alright, let’s get our game faces on and gather everything we need to make these fabulous sandwiches! It’s all pretty straightforward, and you might already have most of it on hand. Remember, the beauty of these is how adaptable they are, but here’s the core list to get you started:
For the Sandwiches
- 1 dozen buns or rolls: Think slider buns, brioche rolls, or even nice crusty ones.
- 1/2 to 3/4 lb. thinly sliced meat: Ham, turkey, roast beef, chicken – whatever you love!
- 12 slices cheese: Swiss, cheddar, provolone, mozzarella – go wild!
For the Flavorful Sauce
- 1/2 cup melted butter: Real butter is key for that amazing flavor.
- 2 Tbs. honey or brown sugar: For a touch of sweetness.
- 1 Tbs. mustard: Dijon or yellow, your pick!
- 1 Tbs. Worcestershire sauce: This adds a fantastic savory depth.
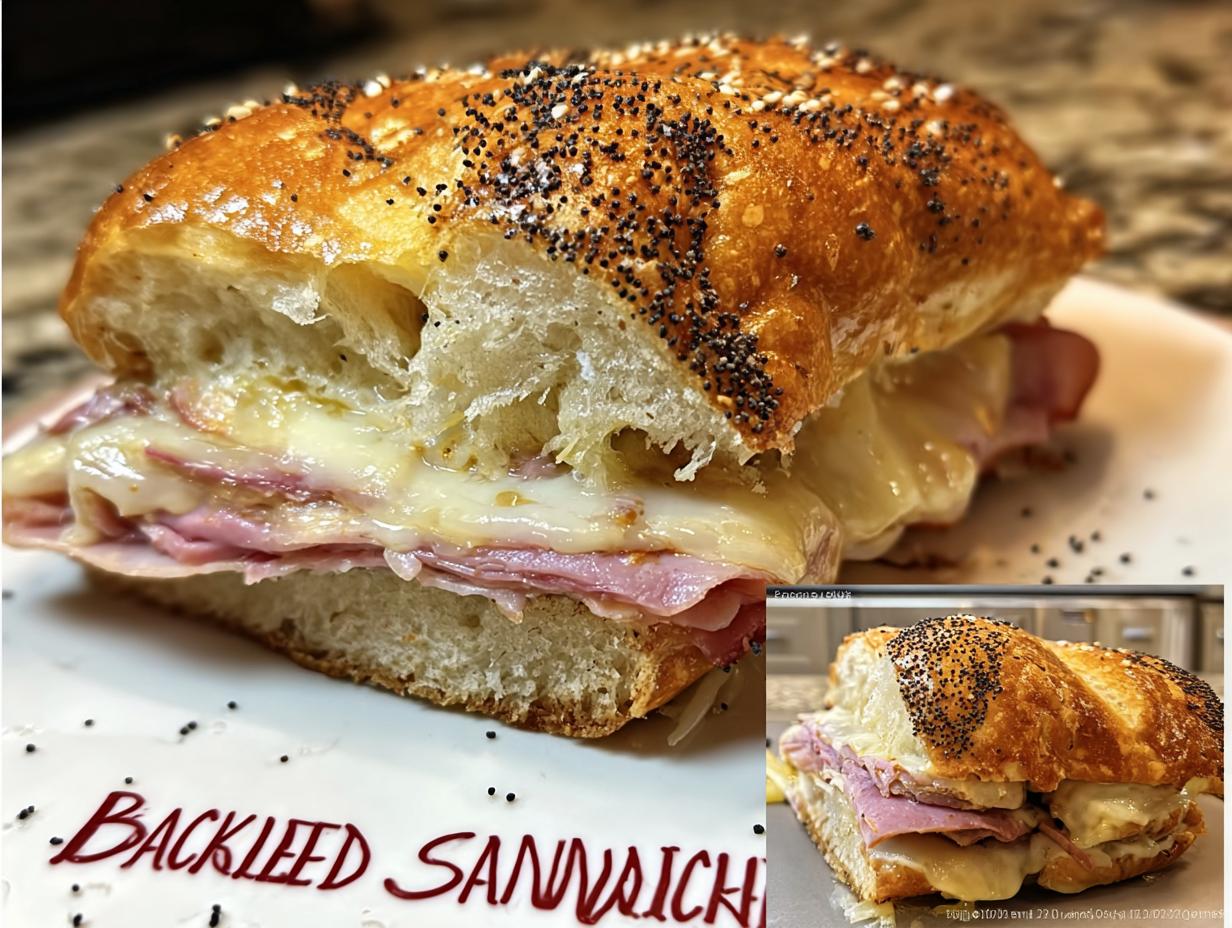
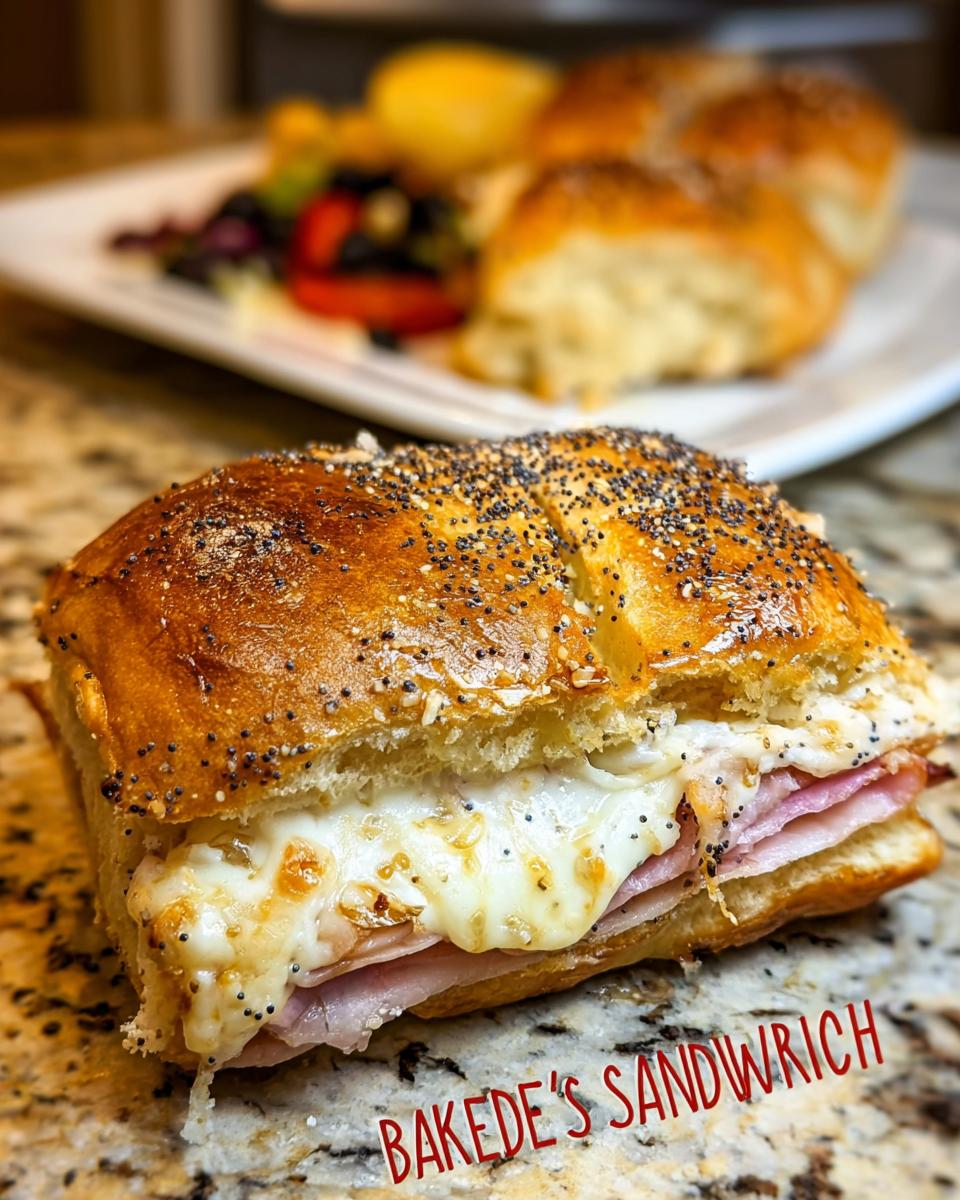
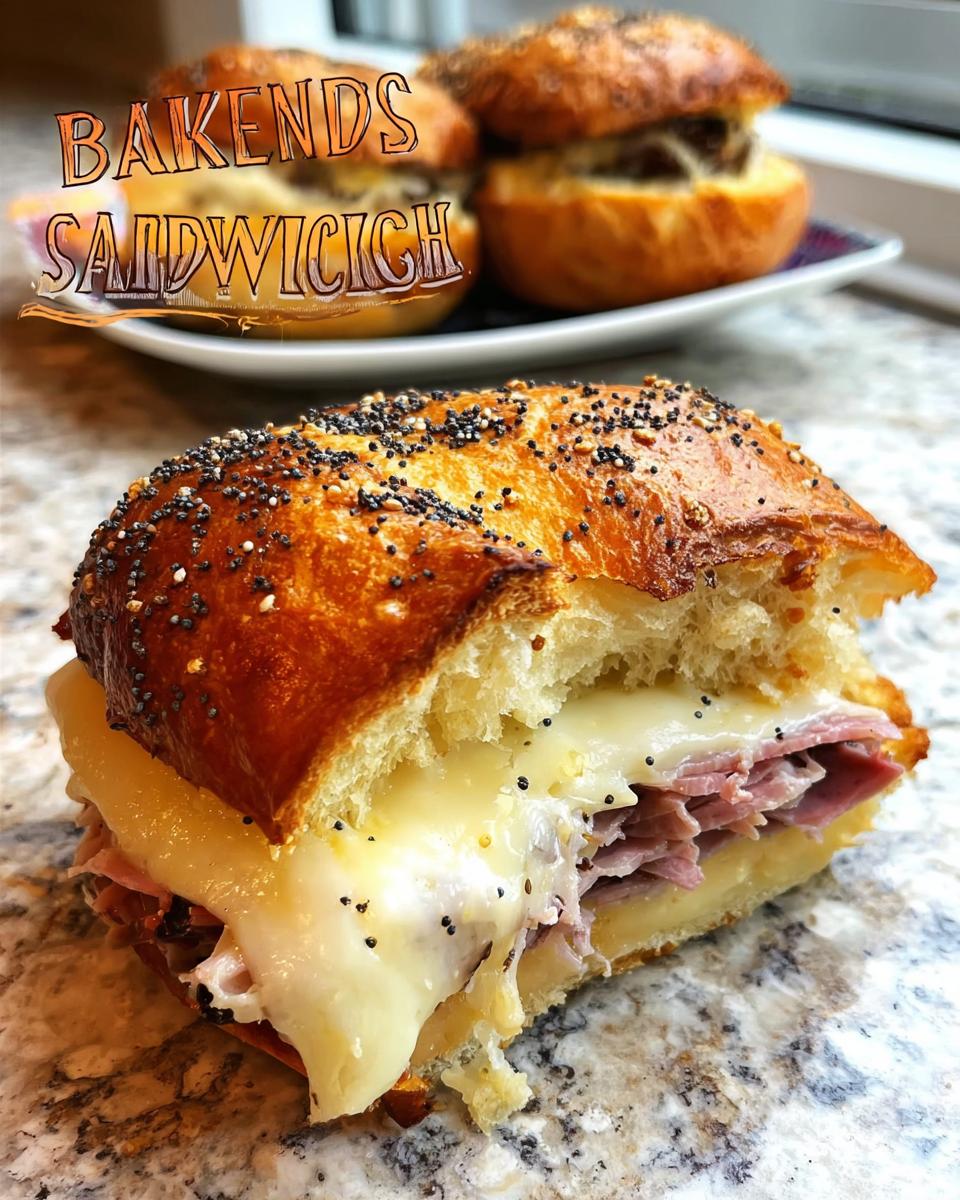
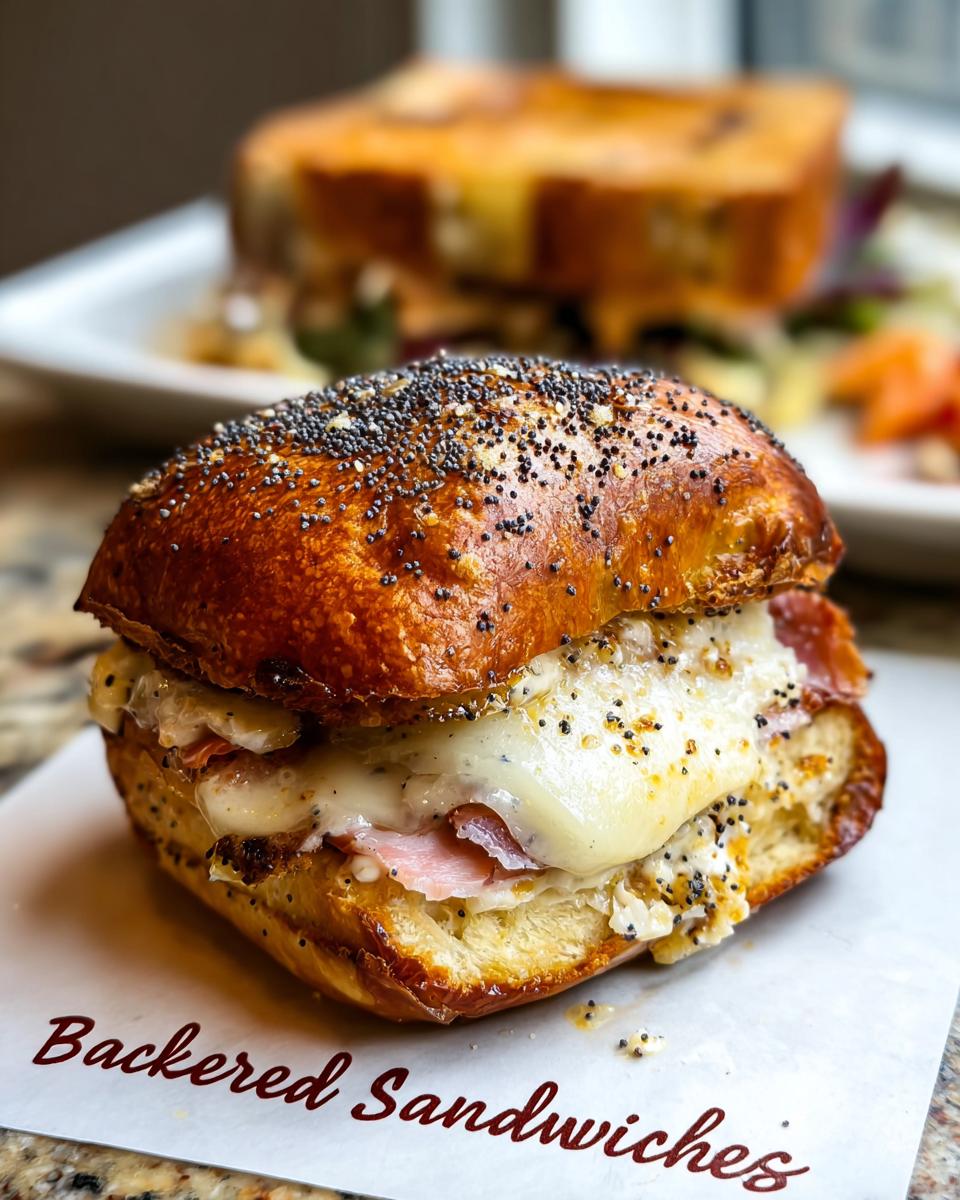
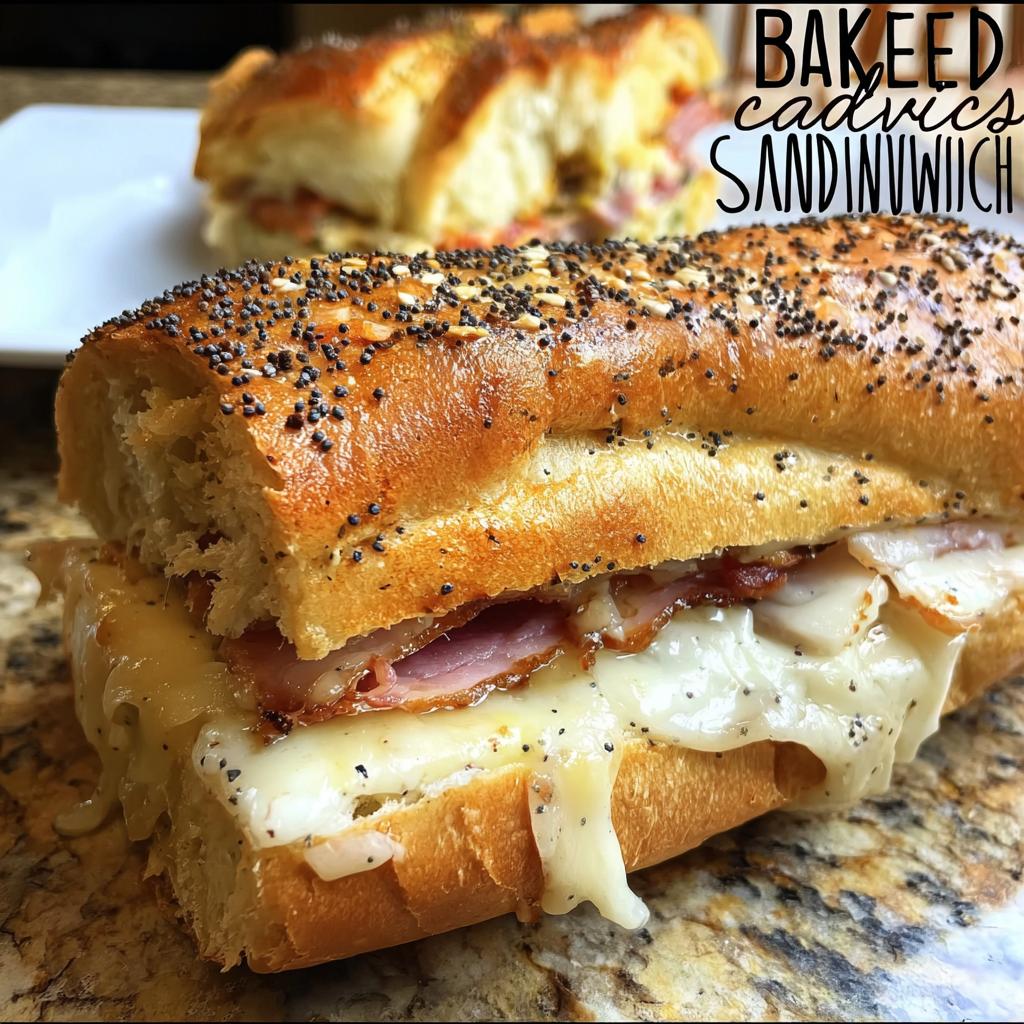
- 1 Tbs. poppy seeds: For that classic bakery look and a little pop!
Step-by-Step Guide: How to Make Sandwich Ideas Recipes Like a Pro
Okay, so we’ve got our ingredients ready, and now comes the fun part – putting it all together! Don’t worry, this is where the magic happens, and it’s surprisingly quick. Just follow these easy steps, and you’ll be amazed at what you create!
Assembling Your Sandwich Creations
First things first, grab your buns or rolls. We’re going to layer those delicious meats and cheeses right onto them. Think of it like building little flavor towers! Just place your favorite thinly sliced meat on the bottom half of each bun, then top it generously with a slice of cheese.
Preparing the Flavorful Sauce
Now, for that dreamy sauce that makes these sandwiches *sing*. Grab a small saucepan or a microwave-safe glass measuring cup. Melt that butter until it’s nice and liquid. Then, whisk in the honey or brown sugar, mustard, and Worcestershire sauce. Give it a good stir until everything is beautifully combined. If you’re using a saucepan, just heat it gently until it’s all mixed; if you’re microwaving, a quick zap (about 30 seconds) should do the trick.
Saucing and Topping Your Sandwiches
This is where it all comes together! Carefully pour that wonderful, buttery sauce all over your assembled sandwiches in the baking pan. Make sure to get it into all those nooks and crannies. Then, give them a good sprinkle of poppy seeds – they look so pretty and add a lovely little texture!
Baking for Golden Perfection
Now, pop that pan into a preheated oven at 350ºF. Let them bake for about 20 to 25 minutes. You want to see those tops get nice and golden brown, and the cheese all melty and gooey. If you prefer a lighter topping, or if things are browning too fast for your liking, just loosely cover the pan with foil. This is key for that perfect, just-right finish!
Pro Tips for Your Sandwich Ideas Recipes Like a Pro
Okay, so you’ve mastered the basics, right? But what if you want to really take these sandwiches from tasty to *wowza*? I’ve got a few insider tricks up my sleeve that’ll make your sandwiches truly shine. Trust me, these little tweaks make all the difference!
First off, don’t be shy with the fillings! If you’re using a hearty meat like roast beef or chicken, you might want to toast your buns lightly before assembling. This gives them a bit more structure, especially if your sauce is on the thinner side. And speaking of chicken, have you tried making air fryer crispy chicken for your sandwiches? It’s a game-changer if you want that extra crunch and depth of flavor. Just shred it up and toss it with the sauce – absolute perfection!
Another little secret? Thinly sliced red onions or a handful of peppery arugula can add a fantastic fresh bite that cuts through the richness of the cheese and sauce. For presentation, think about how they look! If you’re making these for a party, consider cutting them in half diagonally or even serving them open-faced. It just makes them feel a bit more special. And for a truly amazing baked sandwich experience, check out some other creative ideas over at andreadekker.com – they’ve got some seriously mouth-watering inspiration!

Ingredient Notes and Substitutions for Sandwich Ideas
You know, the beauty of these sandwiches is that they can be whatever you *want* them to be! Think of the ingredient list as more of a friendly suggestion than a strict rulebook.
When it comes to the meat, get creative! Ham and Swiss are a classic for a reason, but don’t be afraid to try turkey and cheddar, roast beef with provolone, or even piled-high pepperoni and salami for a Italian-inspired twist. If you’re using chicken, shredded rotisserie chicken is a total lifesaver for speed. For the cheese, really any melty cheese will do the trick. And for the buns? Slider buns are fantastic for parties, but a nice brioche roll, a sturdy sourdough, or even classic sandwich bread works like a charm. If you’re feeling adventurous, try using croissants – they get wonderfully flaky and buttery when baked!
Serving Suggestions for Your Pro Sandwiches
Now that you’ve got these amazing sandwiches ready, what should you serve alongside them? Honestly, these bad boys are pretty spectacular on their own, but a few perfect pairings will really make your meal sing! Think about a vibrant, fresh salad – maybe a simple green salad with a light vinaigrette to cut through the richness. Or, go for some classic comfort food like crispy oven fries or a creamy coleslaw. For even more inspiration on what to serve with your main dish, check out these awesome side dish ideas and load up on even more deliciousness from this huge list of 100 side dish recipes!
Make-Ahead and Storage for Your Sandwich Ideas
One of the best things about these sandwiches? You can totally make them ahead of time! That’s the real ‘pro’ move, right? You can assemble them all and pop them into the baking pan, cover them tightly with plastic wrap, and pop them into the fridge for several hours, or even overnight. They actually get better that way because the sauce really sinks into the buns, making them super flavorful and tender. When you’re ready to serve them, just pop them into a 350ºF oven and bake until they’re heated through and the cheese is bubbly. If you’re worried about them getting too brown, just cover them loosely with foil as the instructions say. Leftovers? They’re still pretty yummy the next day, either cold or gently reheated!
Frequently Asked Questions About Sandwich Ideas Recipes
Got questions about whipping up these amazing sandwiches? I totally get it! It’s always good to have a few answers handy. Let’s dive into some common ones:
Can I freeze these sandwiches?
You know, I don’t really recommend freezing them *after* they’ve been baked. They tend to get a bit soggy. However, you can totally assemble them, keep them in the fridge, and bake them whenever you’re ready! They hold up beautifully in the fridge for a day or two.
What are the best meats for these sandwiches?
Honestly, the sky’s the limit! Classic choices like ham, turkey, and roast beef are always winners. But if you want to get a little fancier, shredded rotisserie chicken tossed with a bit of the sauce is divine. For a crowd-pleaser, thinly sliced Italian deli meats like pepperoni and salami with some provolone cheese are fantastic.
How long can I refrigerate them before baking?
This is where the ‘pro’ magic really happens! You can refrigerate the assembled, unbaked sandwiches for a good 6-8 hours, or even overnight. The sauce really does wonders seeping into the buns, making them wonderfully soft and flavorful. Just make sure they’re covered tightly.
Can I make these with chicken if I want something crispy?
Absolutely! If you’re craving that crispy texture, try using shredded chicken that you’ve cooked in an air fryer until it’s perfectly crispy. Then, just toss those crispy chicken bits with your sauce and assemble your sandwiches. They’ll bake up wonderfully, and you’ll have that delightful crunch everyone loves!
Nutritional Information Estimate
Just a heads-up, this is a rough estimate for one sandwich, and it can totally change depending on the exact meats, cheeses, and buns you use. But generally, you’re looking at around 391 calories, with about 23g of fat, 19g of protein, and 28g of carbs. It’s a pretty satisfying meal!
Sandwich Ideas Recipes Like a Pro
Ingredients
Equipment
Method
- Assemble sandwiches by layering your choice of meat and cheese on buns or rolls.
- Place assembled sandwiches in a baking pan.
- In a small saucepan or glass measuring cup, mix all ingredients for the sauce. Boil or microwave until the butter is melted.
- Pour the sauce over the sandwiches.
- Sprinkle poppy seeds over the sandwiches.
- You can bake the sandwiches now, or refrigerate them for several hours, even overnight.
- Bake at 350ºF for 20-25 minutes, or until the tops are brown and the cheese is melted. Cover loosely with foil if you prefer less browning.
Nutrition
Notes
Tried this recipe?
Let us know how it was!
Master of Culinary Visual Arts
My culinary journey started in the fast-paced kitchens of boutique coastal restaurants throughout Southern California, where I learned that beautiful food doesn’t have to be complicated. After nine years of professional cooking, I’ve made it my mission to prove that sophisticated, nutritionally sound meals can be accessible to busy home cooks who refuse to compromise on flavor or visual appeal.
What changed everything for me was watching talented home cooks feel intimidated by healthy cooking. That’s when I transitioned to private instruction, teaching busy professionals and families how to create restaurant-quality meals using simple techniques and ingredients they can actually find at their local grocery store. My “15-minute meal” frameworks are now used by several regional cooking schools!
As a third-generation Mexican-American, I love weaving vibrant Latin flavors into low-carb creations – proving that healthy eating can be both culturally authentic and visually spectacular. My “effortless elegance” philosophy is simple: nutritious food should look as stunning as it tastes, without requiring professional chef skills or expensive equipment.
When I’m not developing recipes in my San Diego coastal kitchen, you’ll find me surfing the local breaks with my Golden Retriever mix, Mango, who’s both my kitchen companion and unofficial taste-testing assistant. My personal low-carb lifestyle started as a way to maintain energy for my active coastal life, and it’s become the foundation for proving that healthy eating enhances rather than restricts life’s pleasures.