
Ever wonder what happens when the savory goodness of Korean bulgogi meets the tangy punch of kimchi, all piled high on a classic cheesesteak? Well, you’re about to find out! I’m SIMO MIMO, and I live for creating those unforgettable flavor explosions that spice up your kitchen routine. This Spicy Kimchi Bulgogi Cheesesteak Recipe is my answer to that glorious culinary “what if.” I still remember the very first time I threw some kimchi into my bulgogi marinade back in my Miami fusion kitchen – pure magic! It was inspired by those incredible food stalls in Barcelona, and I thought, why not stuff that amazingness into a hoagie? Trust me, this isn’t your average cheesesteak; it’s an adventure on a bun!
Why You’ll Love This Spicy Kimchi Bulgogi Cheesesteak Recipe
You’re going to absolutely adore this recipe because:
- Flavor Fusion Heaven: It’s a wild, delicious mix of savory bulgogi, spicy kimchi, and cheesy goodness.
- Totally Unique: Forget boring cheesesteaks; this is an adventure for your taste buds!
- Surprisingly Easy: Seriously, even with all those amazing flavors, it comes together super fast.
- Bold & Satisfying: It hits all the right notes – a little spicy, a little sweet, super savory, and oh-so-comforting.
- Perfect for Sharing: Or not! Make it for yourself when you need a serious flavor kick.
Gather Your Ingredients for the Spicy Kimchi Bulgogi Cheesesteak
Alright folks, ready to whip up this flavor bomb? You’ll need to grab a few things. Don’t worry, they’re all worth it for the amazing taste you’re about to create!
- 8 ounces marinated bulgogi meat, uncooked (you can totally use leftover cooked bulgogi if you have it – just heat it up!)
- 1/2 cup packed, sliced kimchi (this is where the magic tang comes from!)
- 1/4 medium onion, thinly sliced (this is totally optional, but adds a nice sweetness)
- 1/2 cup shredded cheese or 2 slices (mozzarella, American, provolone – your pick!)
- 2 hamburger buns or hoagie rolls (or even 4 slices of good bread works!)
- 1 tablespoon butter or olive oil (for toasting those buns!)
- 2 lettuce leaves (for a little freshness on the bottom)
- 2 tablespoons mayonnaise
- 1 teaspoon gochujang (this is the spicy Korean chili paste – adjust to your heat preference, or even use sriracha!)
Step-by-Step Guide to Making Your Spicy Kimchi Bulgogi Cheesesteak
Alright, let’s get this flavor party started! It’s honestly super simple, you just gotta follow these steps and soon you’ll be chowing down on the best cheesesteak you’ve ever had. If you’re looking for more amazing fusion ideas, definitely check out some restaurant-style pizza recipes for inspiration. For a deep dive into this specific masterpiece, you can always peek at this Kimchi Bulgogi Cheesesteak recipe.
Toast Your Buns
First things first, let’s get those buns ready for all that deliciousness. Get your pan nice and warm over medium heat. Spread a little butter or drizzle some olive oil on the cut sides of your buns, then pop them cut-side down in the pan. Toast them until they’re golden brown and smell amazing. Then, just pull them off and put ’em on a plate, ready for action.
Cook the Bulgogi
Now for the star of the show! Crank that pan up to high heat. If you’re using uncooked marinated bulgogi, just toss it in there. Loosen it up with your spatula and flip it once or twice until it’s cooked through and smells incredible. If you happen to have leftover cooked bulgogi, no worries – just heat it up in the pan until it’s nice and warm.
Stir-Fry the Kimchi and Onion
Lower the heat just a tiny bit to medium-high and toss in a couple of teaspoons of cooking oil. Now, add your kimchi and those optional onion slices. Give them a good stir-fry for about 3 to 4 minutes. You want the kimchi to soften up a little and get this gorgeous, deeper color. It’s gonna smell SO good.
Melt the Cheese
Okay, this is where the “cheese” part of cheesesteak really comes in! Sprinkle your shredded cheese right over that beautiful kimchi mixture in the pan. Cover the pan right away and let it cook on medium-low heat. Just give it a few minutes until all that cheese is melted into gooey perfection. Don’t rush this bit!
Prepare the Gochujang Mayo (Optional)
If you’re going for that extra kick, it’s super easy! Just grab a small bowl, add your mayonnaise and that teaspoon of gochujang. Give it a good mix until it’s all combined into one delicious, spicy sauce. Easy peasy!
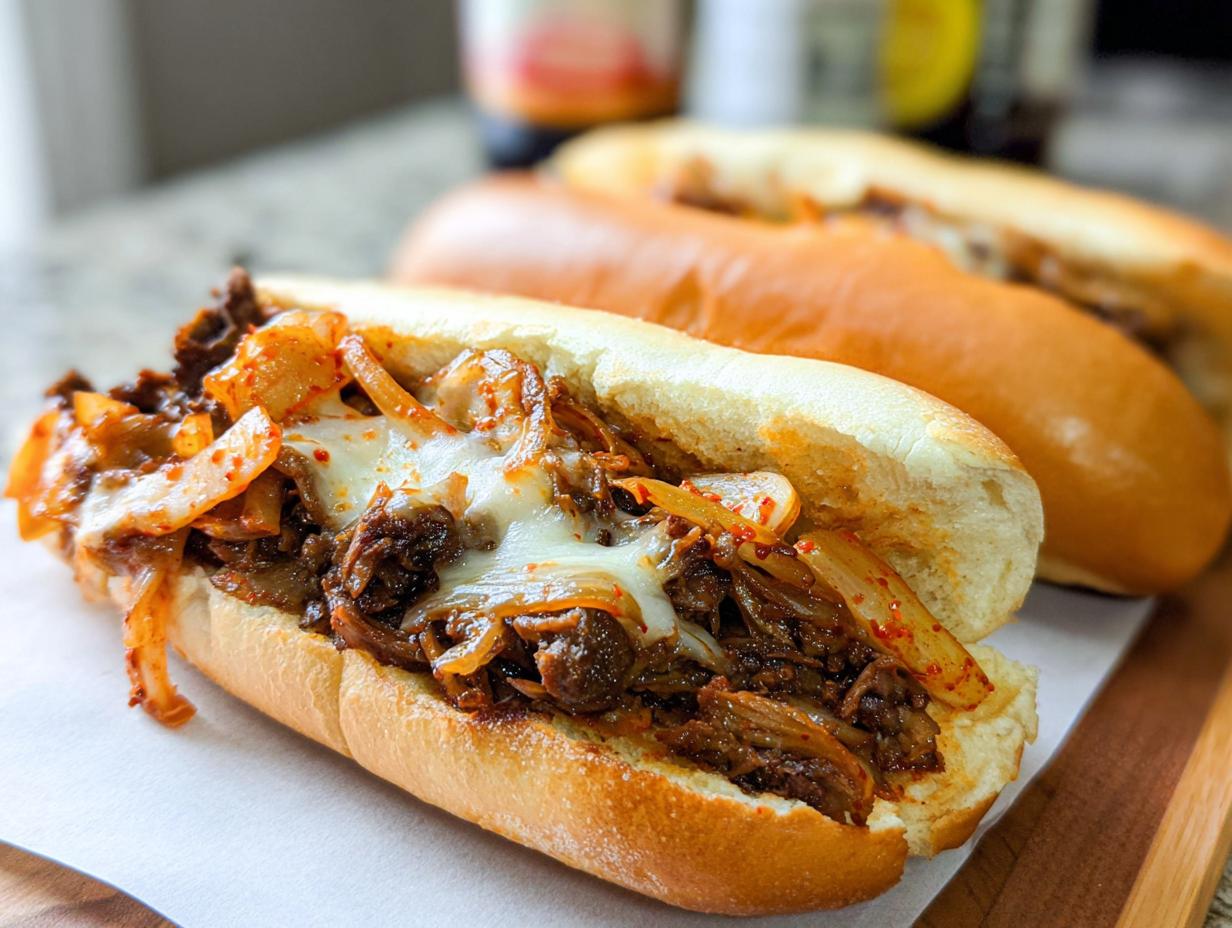
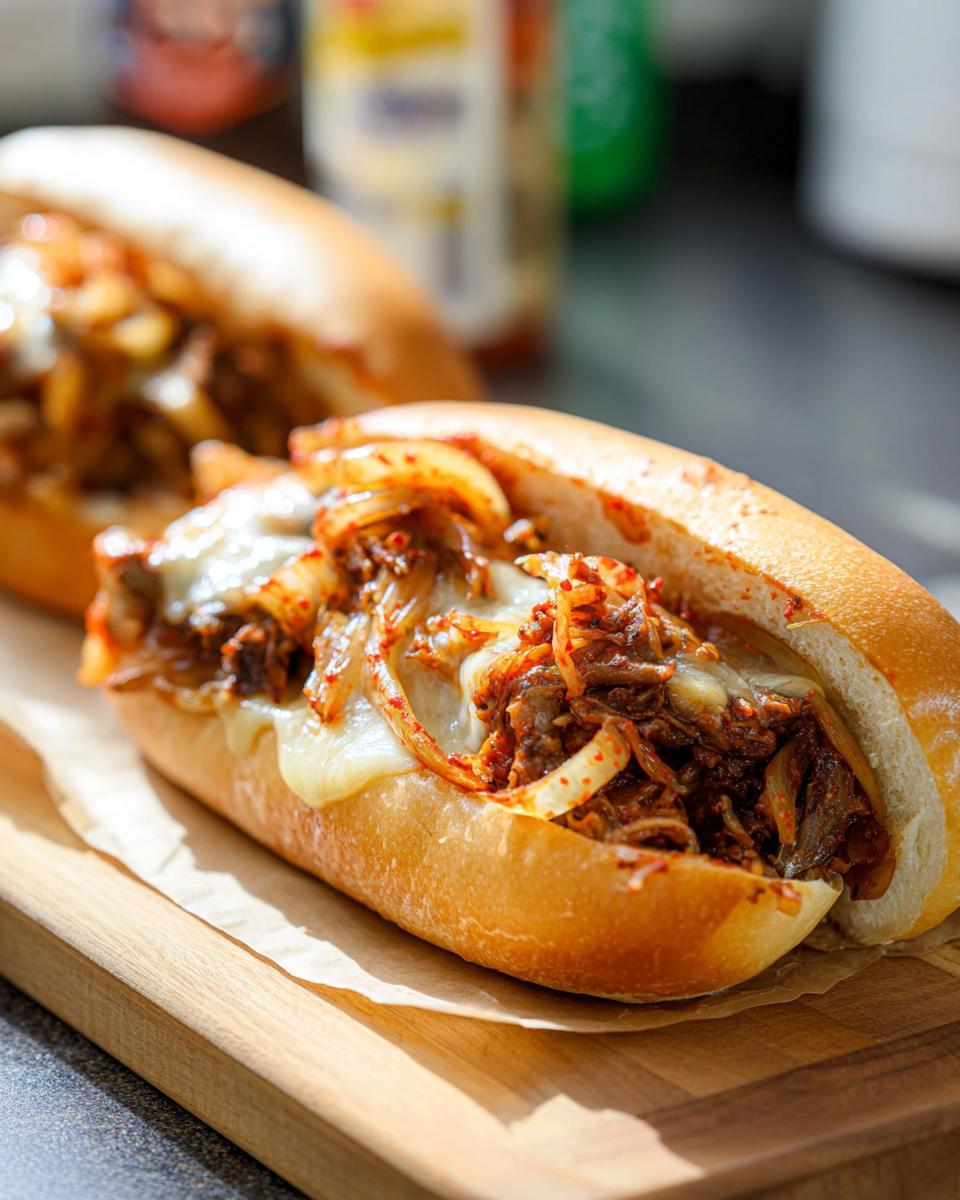
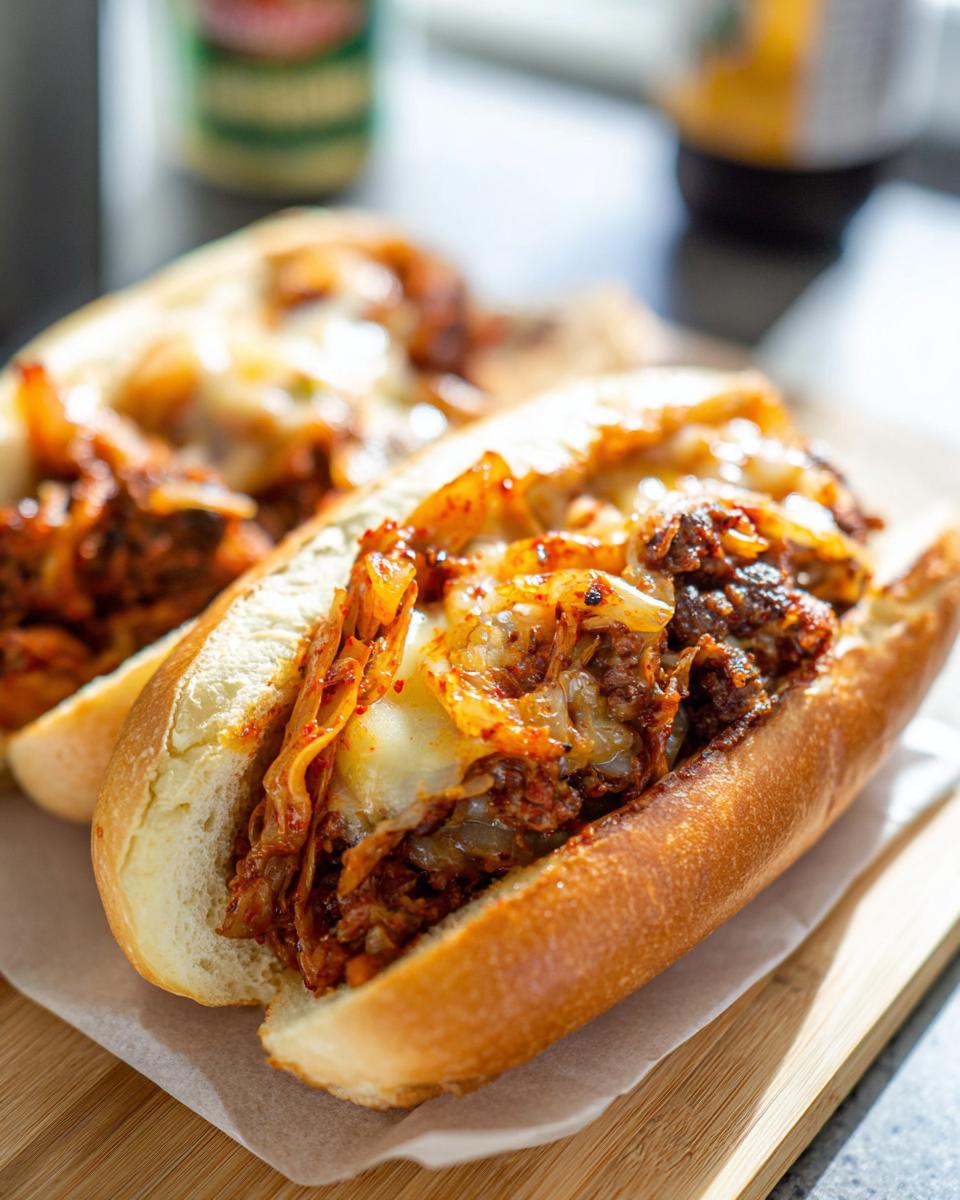
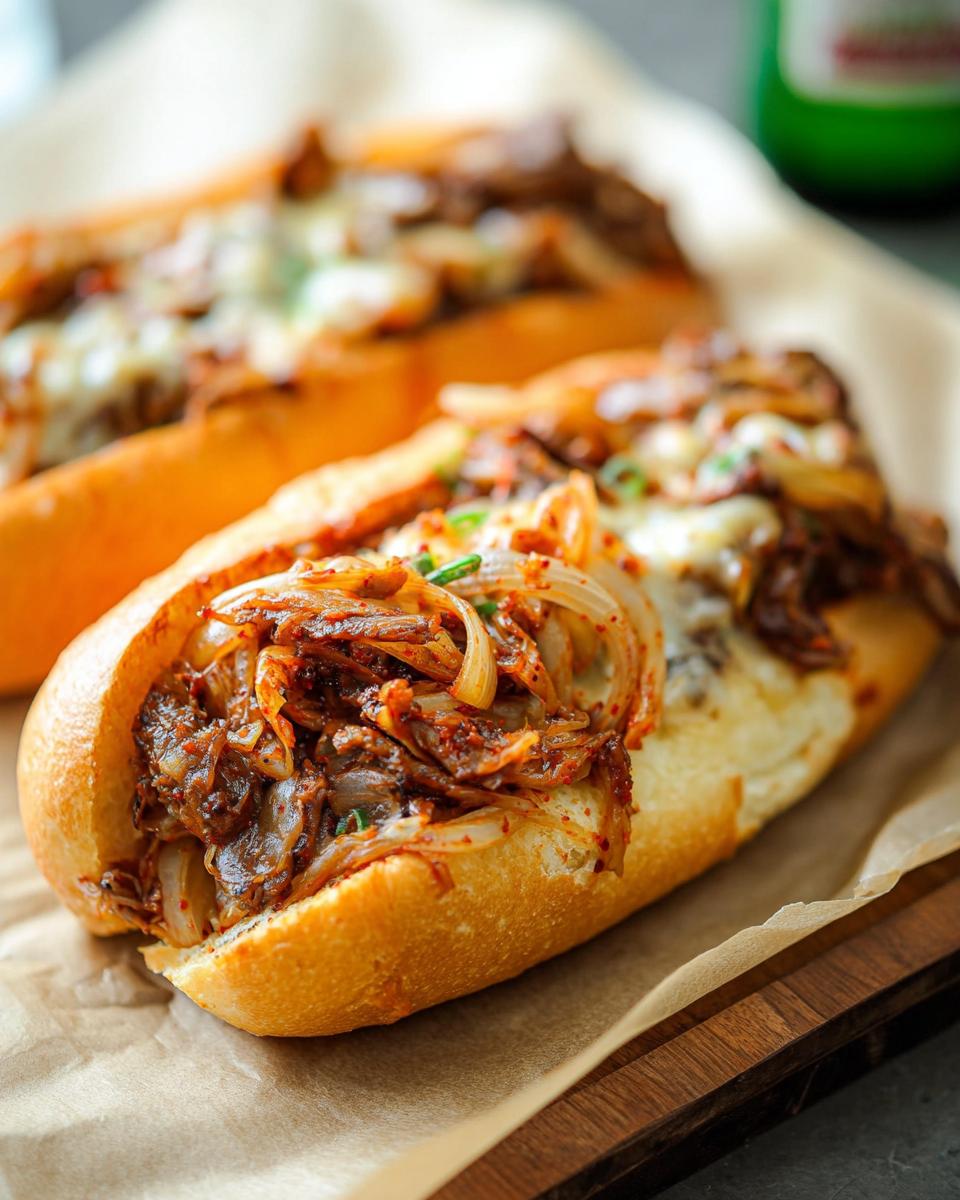
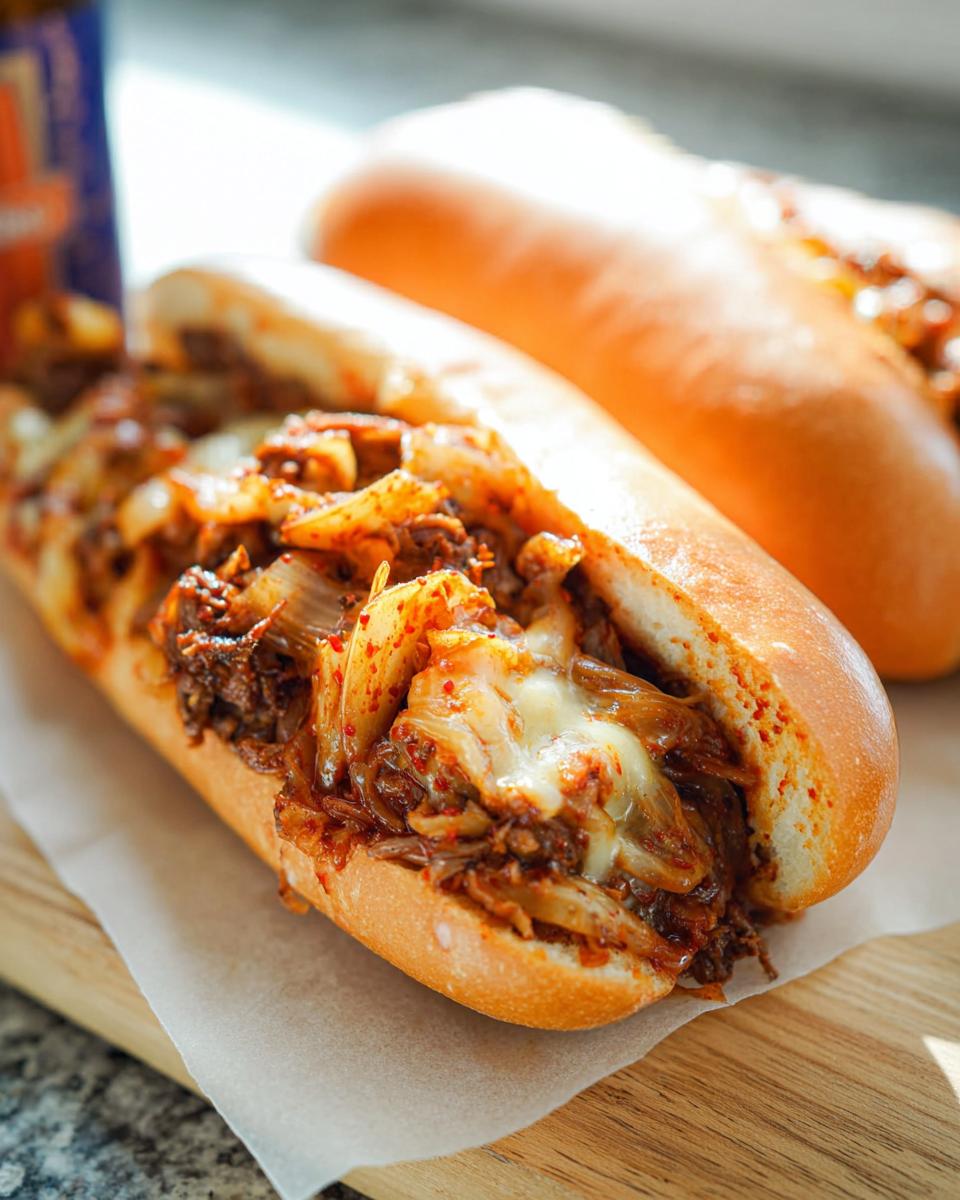
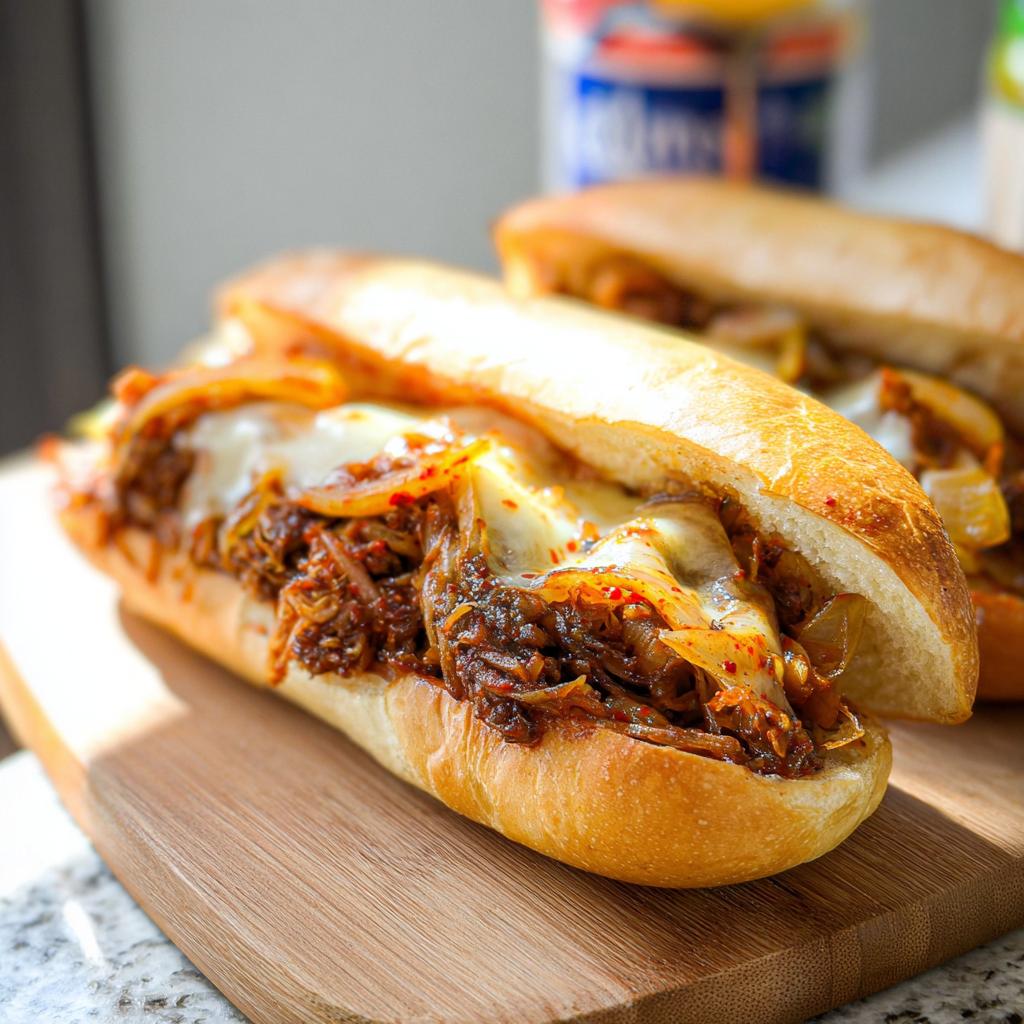
Assemble Your Spicy Kimchi Bulgogi Cheesesteak
Time for the grand finale! Lay one crisp lettuce leaf on the bottom half of each of your toasted buns. Then, pile on that gorgeous bulgogi, followed by the cheesy kimchi mixture. Drizzle with that gochujang mayo if you made it, and BAM! You’ve got yourself a Spicy Kimchi Bulgogi Cheesesteak ready to devoured.
Tips for the Perfect Spicy Kimchi Bulgogi Cheesesteak
Oh, making this Spicy Kimchi Bulgogi Cheesesteak? It’s all about a few little secrets to make it truly sing. First off, don’t skimp on the quality of your kimchi! A good, fermented kimchi makes all the difference in that tangy kick. And for the bulgogi, if you can get thinly sliced ribeye or sirloin – go for it! It cooks up so tender. When you’re cooking the meat, remember the pan should be hot! You want it to sear quickly, not steam. Also, don’t crowd the pan; cook the bulgogi in batches if you need to. This just ensures everything gets that lovely caramelization. For more amazing home cooking ideas, you might want to check out this guide to pizza night recipes. It’s all about building layers of flavor!
Ingredient Substitutions and Notes
Now, I know sometimes you might be missing an ingredient or just want to tweak things a bit, and that’s totally fine! If you can’t find gochujang, no worries. Sriracha or another hot sauce will give it a yummy kick, just go easy at first and add more to taste. For the cheese, I used Provolone here because it melts beautifully, but feel free to use classic American, melty mozzarella, or even a sharp cheddar if that’s what you’ve got. And if you’re using pre-cooked bulgogi, just make sure it’s flavorful to begin with!
Frequently Asked Questions about Spicy Kimchi Bulgogi Cheesesteaks
Got questions about this awesome fusion? I’ve got answers! And hey, if you’re looking for more fun meal prep ideas, you should definitely check out pizza night recipes and meal prep – it really does taste great!
Can I make this vegetarian?
Absolutely! If you’re looking for a meatless option, try using some firm or extra-firm tofu. Press it really well to get out as much water as possible, then cut it into thin strips and pan-fry it until it’s nice and golden. You can toss it with a little soy sauce and sesame oil to get that bulgogi vibe before adding it to the pan with the kimchi. It’s a delicious way to enjoy this flavor combo!
What kind of bulgogi meat is best?
For that classic tender texture, thinly sliced ribeye or sirloin is usually the way to go. That beautiful marbling just melts in your mouth. But honestly, if you can find thinly sliced beef that’s good for stir-frying, you’re golden. The key is *thin* slices so it cooks up fast and gets wonderfully tender. And remember, if you have leftover cooked bulgogi, it’s perfect for this recipe too!
How spicy is this recipe?
This Spicy Kimchi Bulgogi Cheesesteak is designed to have a nice kick, but it’s totally adjustable! The spice mostly comes from the kimchi and the gochujang in the mayo. If you like it milder, use less gochujang or swap it out for a milder hot sauce like sriracha, or even just a tiny pinch of cayenne. If you want it super fiery, add more gochujang or even use a spicy kimchi. You’re the boss of your spice level!
Can I use store-bought bulgogi marinade?
Sure can! If you’re short on time or don’t have all the marinade ingredients handy, a good quality store-bought bulgogi marinade will work just fine. Just make sure it’s one you really like the flavor of. You’ll still want to thinly slice your meat and cook it in the pan as directed. It’s a great shortcut for getting those fantastic bulgogi flavors into your cheesesteak!
Serving Suggestions for Your Fusion Cheesesteak
This Spicy Kimchi Bulgogi Cheesesteak is a whole meal on its own, but if you’re looking for some tasty sides, keeping it light is usually best! Try a simple, crisp Asian slaw or some quick pickled cucumbers to balance the richness. And for a drink? A crisp, cold lager or a bubbly sparkling water with a lime wedge would be absolutely perfect. For more great ideas on veggie sides, check out these veggie sides recipes!
Storage and Reheating
Leftover Spicy Kimchi Bulgogi Cheesesteaks are best enjoyed fresh, but if you do have some, let them cool completely before storing. Pop them in an airtight container in the fridge for up to 2 days. To reheat, gently warm the filling mixture in a pan over low heat, and toast fresh buns or bread separately.
Nutritional Information
Just a heads-up, the nutrition facts for this Spicy Kimchi Bulgogi Cheesesteak are estimates, and they can totally change depending on the specific ingredients you use, especially the type of cheese and how much gochujang you add. But generally, you’re looking at around 400-500 calories per serving, with a good balance of protein, healthy fats, and carbs. It’s all about that amazing flavor!
Spicy Kimchi Bulgogi Cheesesteak Recipe
Ingredients
Equipment
Method
- Toast the buns. Melt butter or add olive oil to a preheated pan over medium heat. Spread butter or drizzle oil on the cut sides of the buns, then toast them cut side down until golden brown. Transfer to a serving plate.
- Cook the bulgogi. Reheat the pan over high heat. Cook the marinated meat, loosening and flipping it once or twice. Transfer to another plate. If using pre-cooked bulgogi, simply heat it in the pan.
- Stir fry the kimchi. Reduce heat to medium-high and add a couple of teaspoons of cooking oil to the pan. Stir fry the kimchi and optional onion slices until the kimchi softens slightly and deepens in color, about 3 to 4 minutes.
- Melt the cheese. Top the kimchi mixture with cheese. Cover the pan and continue to cook over medium-low heat until the cheese is melted.
- Make the gochujang mayo (if using). Mix the mayonnaise with gochujang until well combined.
- Assemble the cheesesteaks. Place a lettuce leaf on the bottom half of each bun. Add the bulgogi and kimchi cheese mixture on top.
Notes
Tried this recipe?
Let us know how it was!
Master of Global Fusion Innovation
My culinary adventure reflects my Lebanese-Italian heritage and a decade spent in the dynamic fusion restaurant scenes of Miami and Barcelona. I’ve made it my mission to prove that beloved global comfort foods can be successfully adapted for low-carb living without losing their soul, their cultural authenticity, or their ability to comfort.
With advanced training in molecular gastronomy and experience spanning Mediterranean, Middle Eastern, and Latin American traditions, I’ve developed what I call “respectful innovation” – culinary creativity that honors traditional cooking wisdom rather than replacing it. My alternative ingredient substitution systems are now taught in specialty diet cooking schools throughout the region.
Drawing from my trilingual upbringing, I understand how deeply food connects to identity and memory. That’s why my flavor-bridging techniques allow classic dishes from around the world to maintain their comforting, familiar qualities while meeting contemporary nutritional standards. I regularly share these techniques at international culinary symposiums and innovation events.
When I’m not experimenting in my Miami fusion kitchen laboratory, you’ll find me at local salsa dance venues – the rhythm and improvisation skills translate directly to my creative cooking process! My role as a foster parent to rescue rabbits has unexpectedly inspired some of my most creative plant-based low-carb innovations.
My personal low-carb journey began as a way to maintain energy for my active lifestyle, but it’s evolved into a professional mission of proving that healthy eating can be globally adventurous rather than restrictively limiting. Every recipe I create is a passport to culinary adventure, transforming kitchens into laboratories for exploring healthy versions of the world’s most beloved comfort foods.