
Oh, there’s just something magical about fruit desserts, isn’t there? Especially when the weather starts to warm up, or even on a chilly evening when you want a little taste of sunshine. And if you’re anything like me, you probably love a dessert that’s both comforting and a little bit fancy, without taking hours in the kitchen. That’s where these amazing Peach Recipes for Crumble Bars With Buttery Oat Topping come in! They’re precisely what you need – that perfect harmony of sweet, juicy peaches nestled under a generous, irresistible buttery oat topping. I remember the first time I made them; the smell drifting through my kitchen was pure bliss, and my family devoured them in minutes. Seriously, these aren’t just bars; they’re little bites of happiness.
Why You’ll Love These Peach Recipes for Crumble Bars With Buttery Oat Topping
Seriously, if you’re looking for a dessert that hits all the right notes without a ton of fuss, these peach crumble bars are IT. Here’s why you’ll be making them again and again:
- Super Easy to Whip Up: Forget complicated steps! The crust and topping are basically the same mixture, and the filling just needs a quick toss. You can have these ready for the oven in less than 20 minutes.
- The Perfect Flavor Combo: You get that sweet, slightly tart burst of juicy peaches against the rich, buttery, slightly chewy oat topping. It’s pretty much dessert perfection.
- So Versatile: Serve them warm with a scoop of vanilla ice cream for a decadent treat, or enjoy them at room temp with your morning coffee. They’re great for picnics, potlucks, or just a cozy afternoon snack.
- Crowd-Pleaser Guaranteed: Honestly, who doesn’t love a good crumble bar? The texture is just right, and the familiar flavors appeal to everyone, from kids to grandparents.
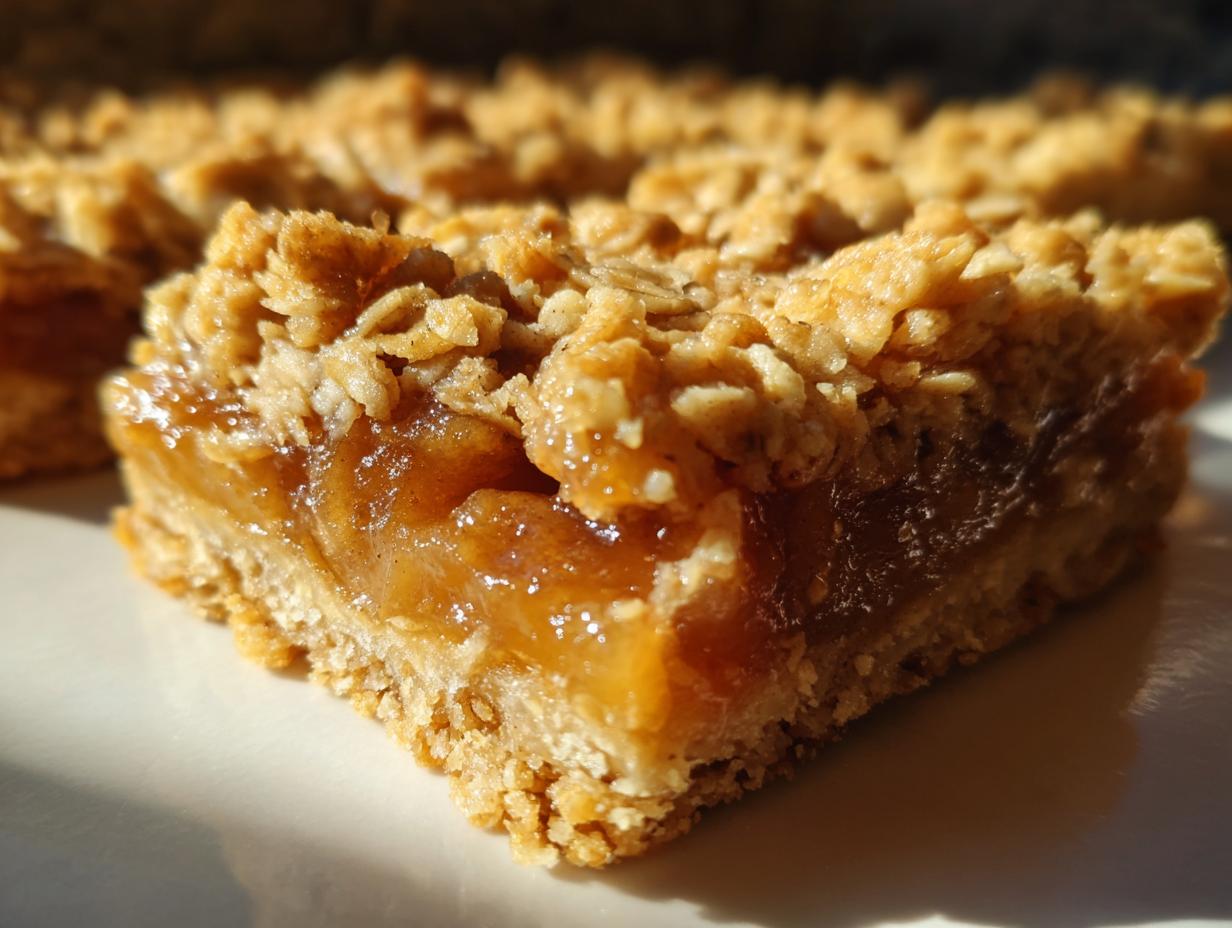
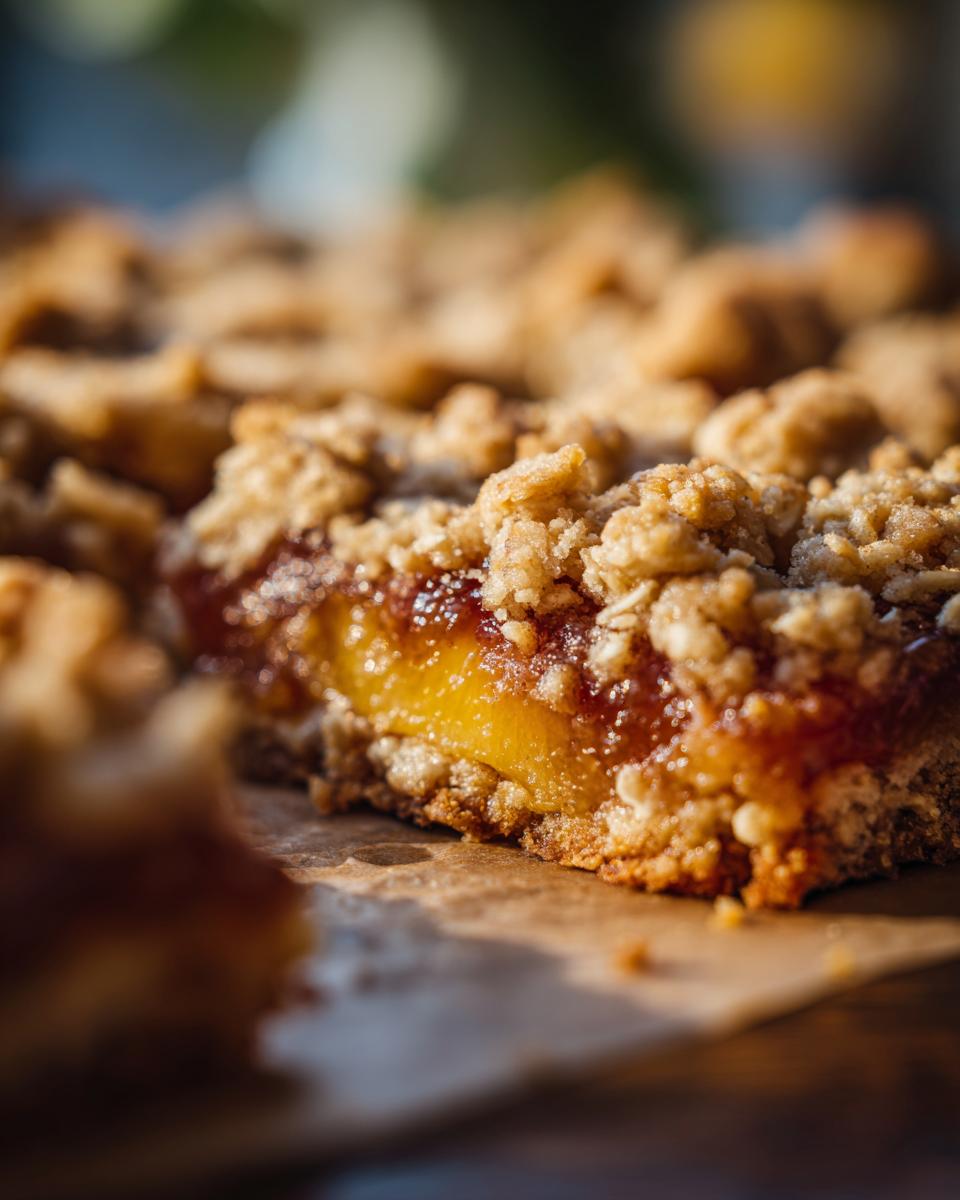
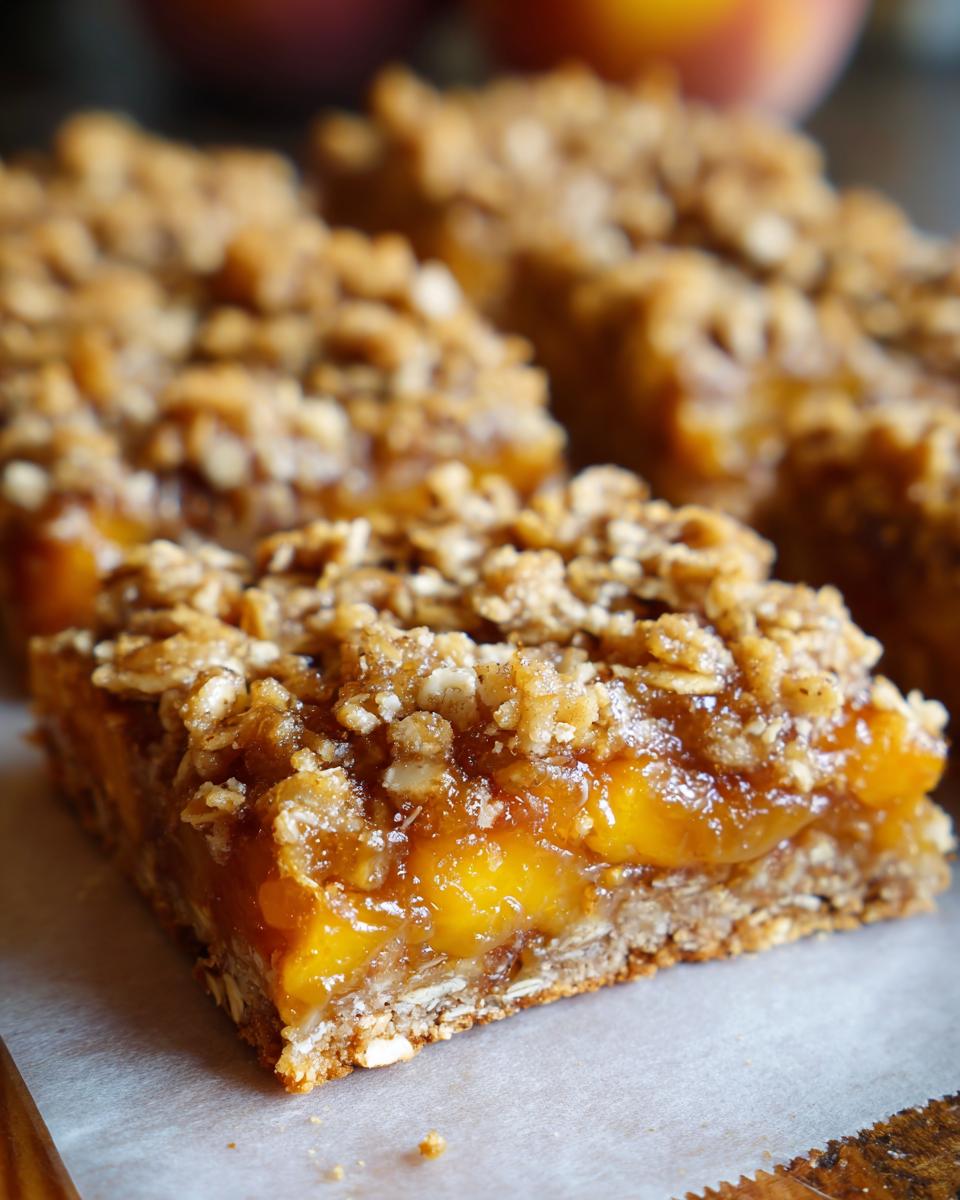
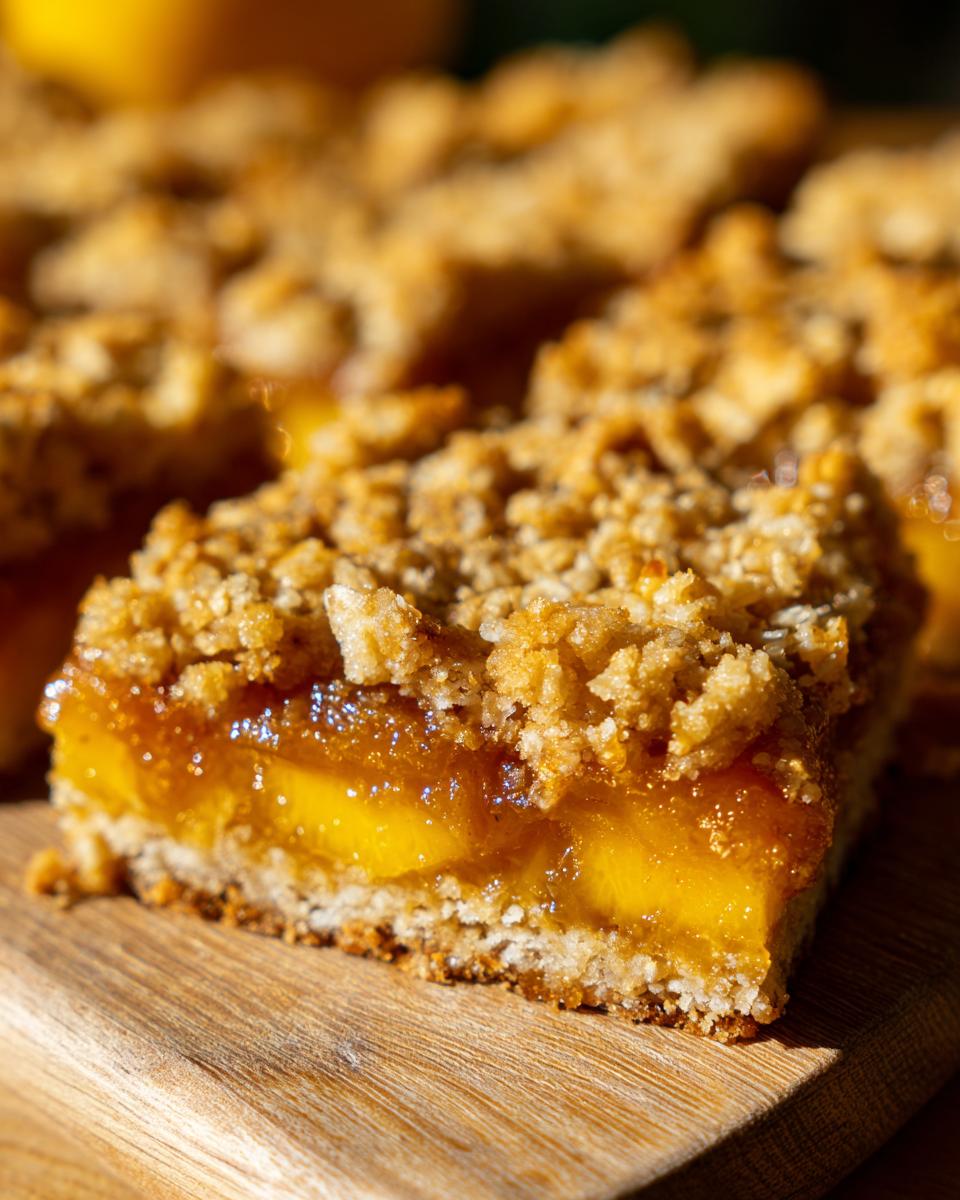
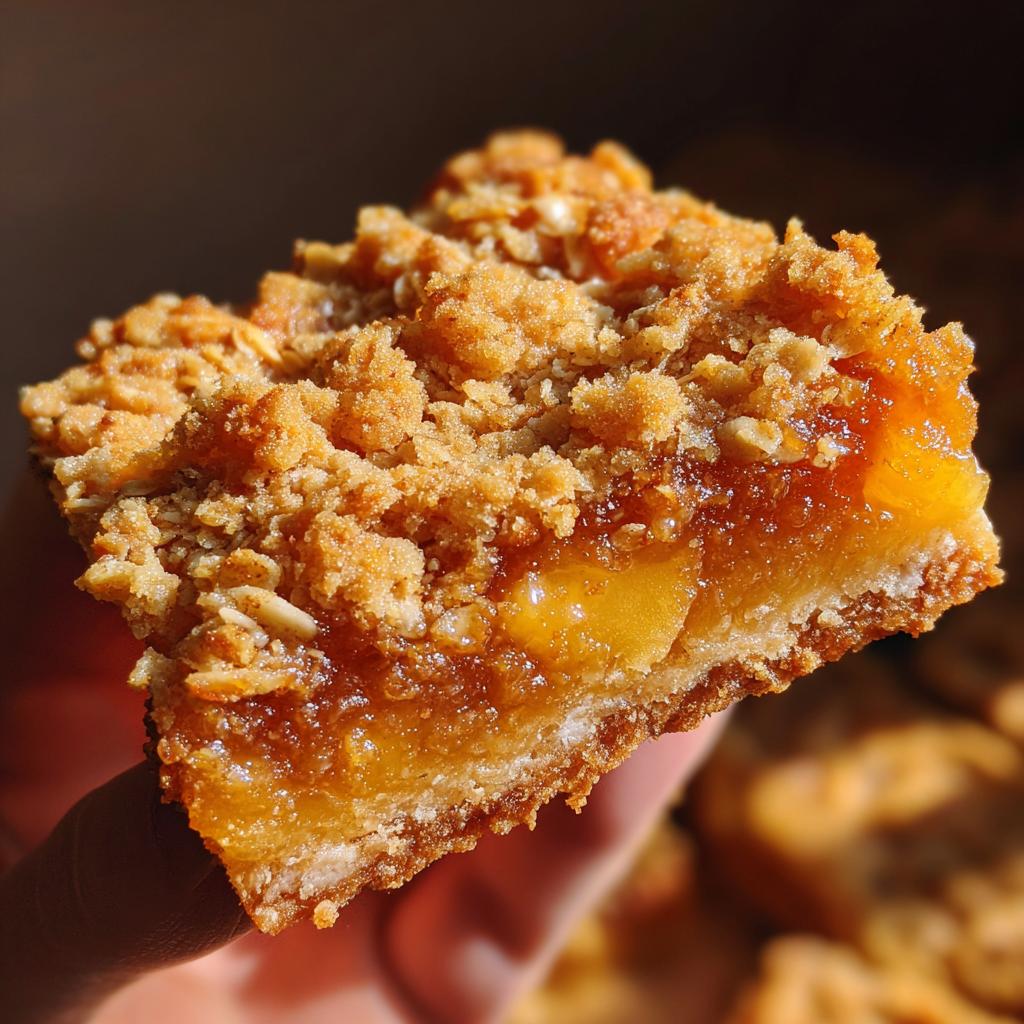
- Utterly Delicious Texture: The contrast between the soft, bubbly peach filling and that delightfully crisp yet tender oat topping is just divine. It’s a textural dream!
- Uses Fresh (or Frozen!) Peaches: You can totally adapt these bad boys to whatever peaches you have on hand. Freshly picked are amazing, but frozen work like a charm too, especially when you can’t get your hands on the good stuff.
Gather Your Ingredients for Peach Crumble Bars
Alright, let’s get down to business and talk about what you’ll need to make these incredible peach crumble bars. Trust me, the ingredient list is pretty straightforward, and that’s part of why they’re so fantastic to make! We’re going to break it down into two main parts: the stuff for that amazing crust and topping, and then the goodies for the sweet, juicy peach filling.
For the Crust and Topping
- 1.5 cups all-purpose flour: This is our base for that lovely crumbly texture.
- 1 cup rolled oats: These give the topping that perfect chewiness and nutty flavor. Old-fashioned rolled oats work best here!
- 0.75 cup granulated sugar: For a touch of sweetness in the crust and topping.
- 0.5 teaspoon baking soda: Just a little lift for our crumble.
- 0.25 teaspoon salt: To balance out all that sweetness and make the flavors pop.
- 0.75 cup unsalted butter, cold and cubed: This is super important! Using cold butter is key to getting that perfect crumbly texture. Don’t skimp on this; cut it into small cubes so it incorporates nicely.
For the Peach Filling
- 4 cups fresh peaches, peeled, pitted, and sliced: This is the star of the show! Make sure they’re ripe but still a little firm so they hold their shape. If you can’t find fresh, frozen work too, just don’t thaw them before tossing with the other ingredients.
- 0.5 cup granulated sugar: To sweeten up those gorgeous peaches. You might adjust this a bit depending on how sweet your peaches are naturally.
- 2 tablespoons cornstarch: This little helper is going to thicken up the peach juices as they bake, preventing a soggy bottom.
- 1 tablespoon lemon juice: A little zing to brighten up the peach flavor and help prevent browning.
- 0.5 teaspoon cinnamon: Because, well, peaches and cinnamon are just *meant* to be together, right? It adds that warm, cozy spice note.
Step-by-Step Guide to Making Peach Crumble Bars
Alright, let’s get these glorious peach crumble bars into the oven! It’s really straightforward, honestly. You’ll feel like a pro baker in no time. Just follow along with these simple steps, and you’ll have yourself a tray of pure deliciousness.
Preparing the Crust and Buttery Oat Topping
Okay, first things first! Grab a big mixing bowl. Toss in your flour, those lovely rolled oats, the sugar, baking soda, and salt. Give it a quick whisk to combine them all. Now, for the butter! Make sure it’s cold and cubed. You can either use a pastry blender or just your fingertips to cut that butter into the dry stuff. You want it to look like coarse crumbs, kind of like wet sand. This is the magic base that becomes both your crust and your delicious topping!
Creating the Sweet Peach Filling
In a separate bowl, gently toss your sliced peaches with the remaining sugar, cornstarch, lemon juice, and that pinch of cinnamon. Be nice and gentle here! You don’t want to mash up your peaches too much. You just want everything to be lightly coated. This little mix is going to turn into the most amazing, bubbly, sweet peach filling while it bakes.
Assembling and Baking Your Peach Crumble Bars
Now for the assembly line! Take about two-thirds of that crumb mixture you made and press it evenly into the bottom of your prepared 9×13 inch baking pan. This is your delicious crust. Then, carefully spread that sweet peach filling all over the crust. Don’t worry if it looks a little mounded in the middle. Finally, sprinkle the rest of that crumb mixture evenly over the top of the peaches. Pop it into your preheated oven at 375°F (190°C) and let it bake for about 30-35 minutes. You’re looking for that topping to be beautifully golden brown and the peach filling underneath to be all bubbly and gorgeous.

Cooling and Cutting the Bars
This next step is the hardest: waiting! You absolutely, positively NEED to let these bars cool completely in the pan before you even think about cutting them. If you try to cut them while they’re hot or even warm, they’ll just fall apart. Patience, my friend! Once they’re totally cool, you should be able to cut them easily into 12 perfect bars. You can peek at this classic apple crisp with oat crumble for a similar technique!
Tips for Perfect Peach Crumble Bars
Making these peach crumble bars is pretty foolproof, but there are a few little tricks I’ve learned that really make them shine. First off, don’t skimp on using cold butter for the crumble! Seriously, it’s the secret to getting that perfect, tender, crumbly texture. If your butter gets too warm, your topping might turn out more greasy than crumbly. Also, when you’re dealing with the peaches, ripeness is key. You want them to be sweet and juicy, but not so mushy that they turn into baby food when baked. If they are a little firmer, that’s totally fine, they’ll just soften up beautifully in the oven. And remember that banana bread recipe I shared? The creaming method there is kind of similar in importance to using cold butter here – it all affects the final texture!
Ingredient Notes and Substitution Ideas
So, let’s chat about some of these ingredients for our peach crumble bars! If you can’t find fresh peaches, don’t sweat it! Frozen peaches work like a charm, but here’s the trick: don’t thaw them first. Just toss them in with the other filling ingredients as they are. This helps prevent them from getting too mushy. For the oats, old-fashioned rolled oats are my go-to for that perfect texture, but quick oats can work in a pinch, though you might lose a little bit of chewiness. If you’re out of granulated sugar for the filling, light brown sugar would be a delicious substitute, adding a lovely caramel note!
Serving and Storage Suggestions
These peach crumble bars are just begging to be enjoyed! Honestly, they’re heavenly served warm, maybe with a dollop of vanilla ice cream or a swirl of whipped cream. Yum! If you have any leftovers (which is unlikely, let’s be real!), they store beautifully. You can keep them at room temperature in an airtight container for up to 2 days, or pop them in the fridge for up to 4 days. If you want to freeze them, just wrap individual bars tightly. They’ll last in the freezer for about 2-3 months. They’re perfect for those one-pan dinner recipes nights when you want an easy dessert afterwards!
Frequently Asked Questions About Peach Crumble Bars
Got questions about these delish peach crumble bars? I’ve got answers! Honestly, sometimes the simplest recipes bring up the most common queries, and I’m here to help you nail it every single time. Remember all those foolproof dinner ideas we talked about? Well, these bars are just as easy!
Can I use canned peaches instead of fresh?
You absolutely can! If fresh peaches aren’t in season, canned ones are a great substitute. Just make sure you drain them really well. You’ll want to skip the ‘do not thaw’ step since they’re already processed. Honestly, frozen peaches are usually a better alternative than canned because they tend to hold their shape better and have a fresher flavor, but go with what you have!
How do I prevent the topping from burning before the filling is bubbly?
Ah, the classic crumble dilemma! If you notice your topping is getting too dark but the filling isn’t quite ready, don’t panic! Just loosely tent your baking pan with aluminum foil. This will help shield the topping and allow the center to heat through without burning. You can usually remove the foil for the last few minutes if you want it extra golden.
Can these peach crumble bars be made gluten-free?
Yes, you can totally make these gluten-free! The easiest way is to simply swap out the all-purpose flour for a good quality gluten-free all-purpose baking blend that contains xanthan gum. For the oats, make sure you use certified gluten-free rolled oats to avoid any cross-contamination. The texture might be slightly different, but they’ll still be super yummy!
What if my peaches are really tart?
No problem! If your peaches are on the tarter side, you’ll just want to add a little more sugar to the filling. Taste a small slice of peach before you mix everything and adjust the sugar accordingly. You can start with the 0.5 cup and add another tablespoon or two if needed. A little extra lemon juice can also help balance out sweetness, but be careful not to make it too lemony!
Estimated Nutritional Information
Alright, let’s talk numbers! While these peach crumble bars are pure joy, it’s always good to have a rough idea of what you’re diving into. Keep in mind, these are just estimates per serving (and remember, we cut them into 12!), and they can totally wiggle around based on the exact ingredients and brands you use. But generally, you’re looking at a wonderful balance of carbs, fats, and a little bit of protein. Enjoy!
Peach Crumble Bars
Ingredients
Equipment
Method
- Preheat your oven to 375°F (190°C). Grease and flour a 9×13 inch baking pan.
- In a large bowl, combine the flour, rolled oats, 0.75 cup sugar, baking soda, and salt for the crust and topping. Cut in the cold butter using a pastry blender or your fingers until the mixture resembles coarse crumbs.
- Press about two-thirds of the crumb mixture evenly into the bottom of the prepared baking pan to form the crust.
- In a separate bowl, gently toss the sliced peaches with 0.5 cup sugar, cornstarch, lemon juice, and cinnamon until evenly coated.
- Spread the peach filling evenly over the crust in the baking pan.
- Sprinkle the remaining crumb mixture evenly over the peach filling.
- Bake for 30-35 minutes, or until the topping is golden brown and the peach filling is bubbly.
- Let the bars cool completely in the pan before cutting into 12 bars.
Notes
Tried this recipe?
Let us know how it was!
Master of Culinary Visual Arts
My culinary journey started in the fast-paced kitchens of boutique coastal restaurants throughout Southern California, where I learned that beautiful food doesn’t have to be complicated. After nine years of professional cooking, I’ve made it my mission to prove that sophisticated, nutritionally sound meals can be accessible to busy home cooks who refuse to compromise on flavor or visual appeal.
What changed everything for me was watching talented home cooks feel intimidated by healthy cooking. That’s when I transitioned to private instruction, teaching busy professionals and families how to create restaurant-quality meals using simple techniques and ingredients they can actually find at their local grocery store. My “15-minute meal” frameworks are now used by several regional cooking schools!
As a third-generation Mexican-American, I love weaving vibrant Latin flavors into low-carb creations – proving that healthy eating can be both culturally authentic and visually spectacular. My “effortless elegance” philosophy is simple: nutritious food should look as stunning as it tastes, without requiring professional chef skills or expensive equipment.
When I’m not developing recipes in my San Diego coastal kitchen, you’ll find me surfing the local breaks with my Golden Retriever mix, Mango, who’s both my kitchen companion and unofficial taste-testing assistant. My personal low-carb lifestyle started as a way to maintain energy for my active coastal life, and it’s become the foundation for proving that healthy eating enhances rather than restricts life’s pleasures.