
You know those nights? When you think you’re just having a quiet Tuesday, and then suddenly—BAM!—the doorbell rings and you have guests staring at you, expecting snacks? Those moments used to give me total panic attacks, I won’t lie. But not anymore! Now I just whip out what I call my Cheese Board in 10 Minutes, and suddenly I look like the hostess with the mostess. I remember one time friends dropped by completely unexpectedly, and I had maybe five things in the fridge. I threw together a quick platter using what I had—some cheese, some nuts, those grapes—and honestly, it was the highlight of the whole evening! We laughed so hard. That’s the secret: great entertaining doesn’t need hours; it just needs a little creativity to make a beautiful, simple grazing board.
Why You Will Create a Cheese Board in 10 Minutes
Seriously, if you love hosting but hate the prep work—and who doesn’t sometimes?—this is your new secret weapon. We’re cutting out all the fuss but keeping all the impressive vibes. You’ll be dashing to grab these ingredients for so many reasons:
- It’s a true 10 Minute Appetizer; you can assemble this before the first guest even finds a coaster.
- No cooking whatsoever! We are talking zero heat involved, which means zero cleanup related to cooking equipment.
- It looks way more gourmet and complex than the actual ten minutes you spent putting it together.
- It requires almost no culinary skill. If you can open packages, you can master this Simple Grazing Board.
- The required ingredients offer a fantastic flavor variety—creamy, sharp, salty, and sweet—all on one board.
- It’s flexible! You can easily scale this recipe up or down depending on how many people drop by unexpectedly.
Essential Components for Your Cheese Board in 10 Minutes
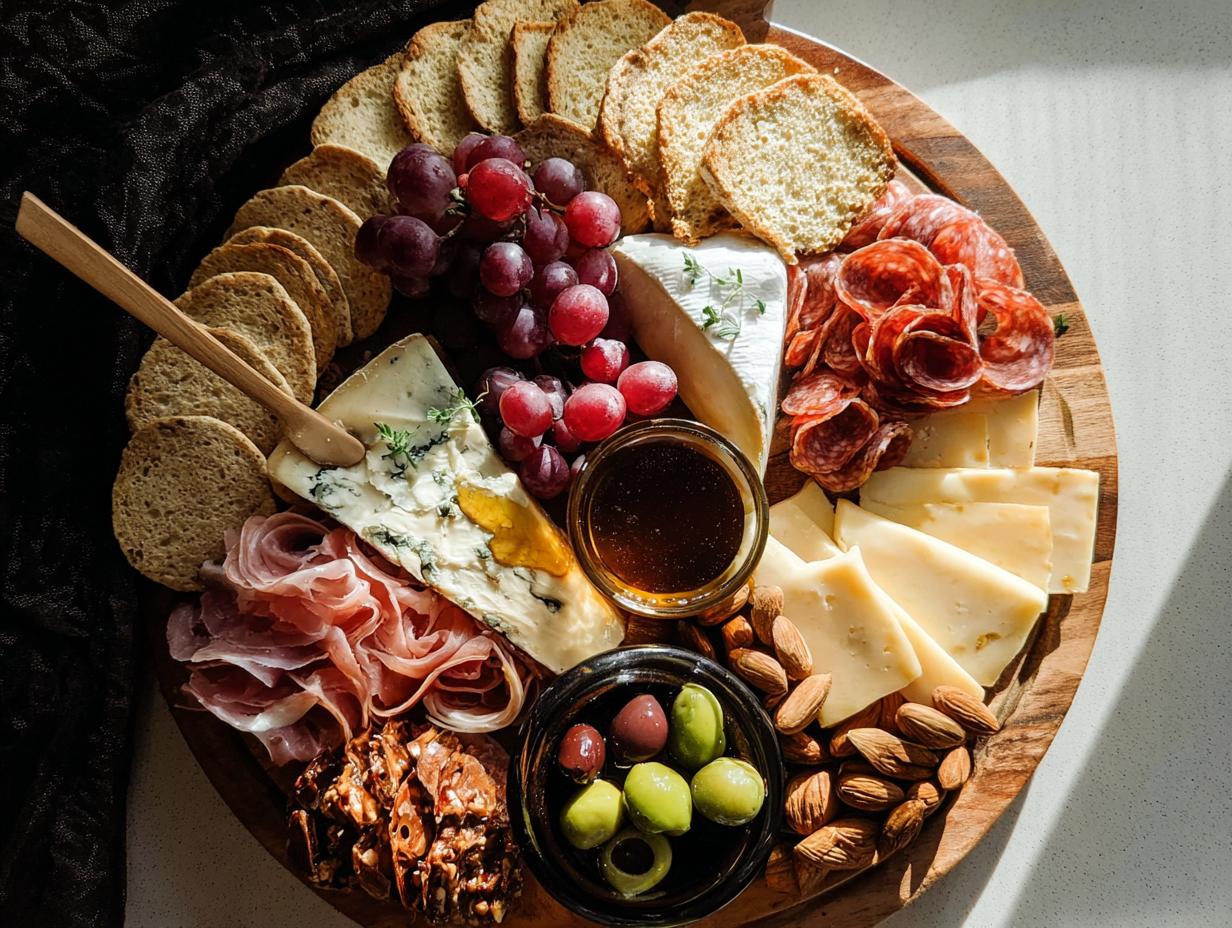
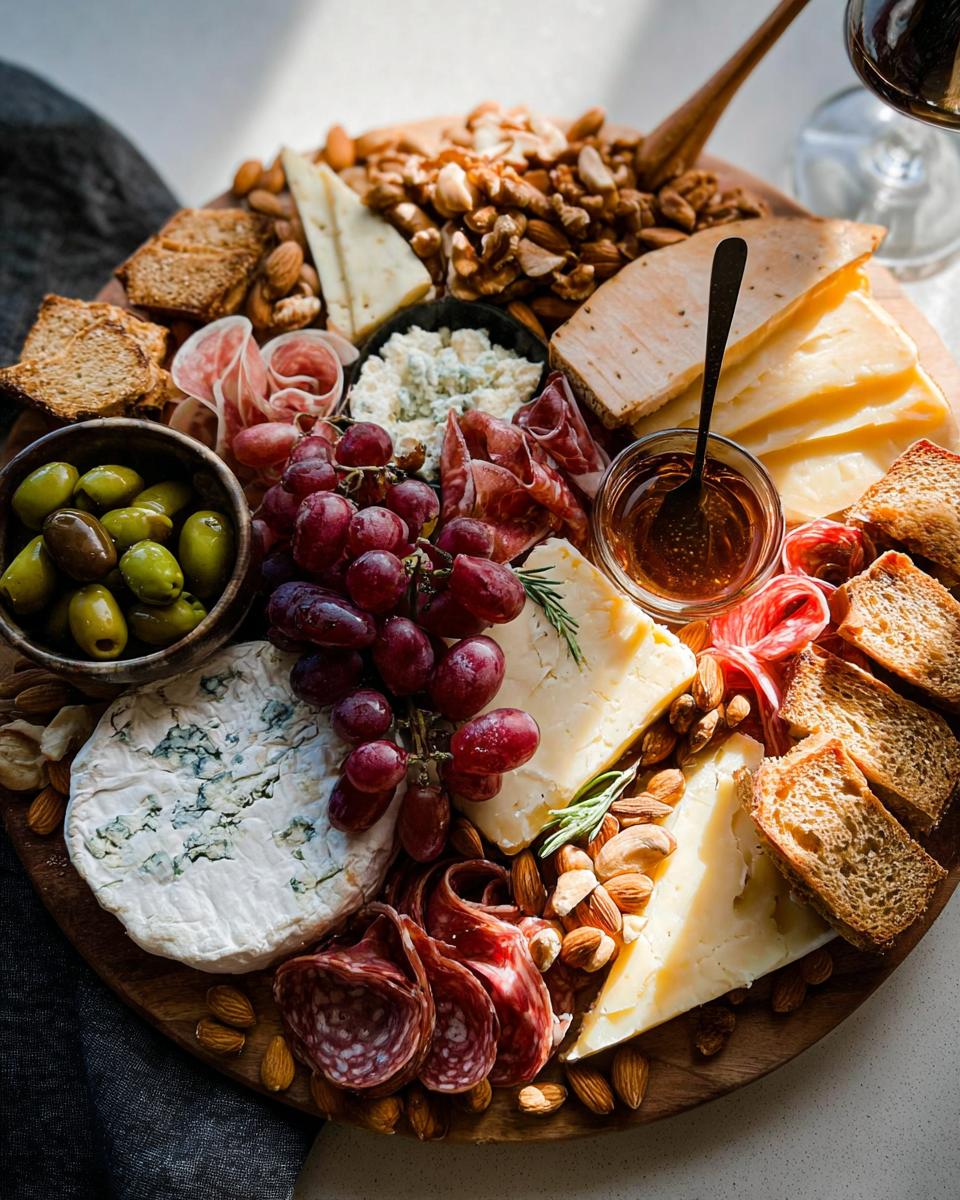
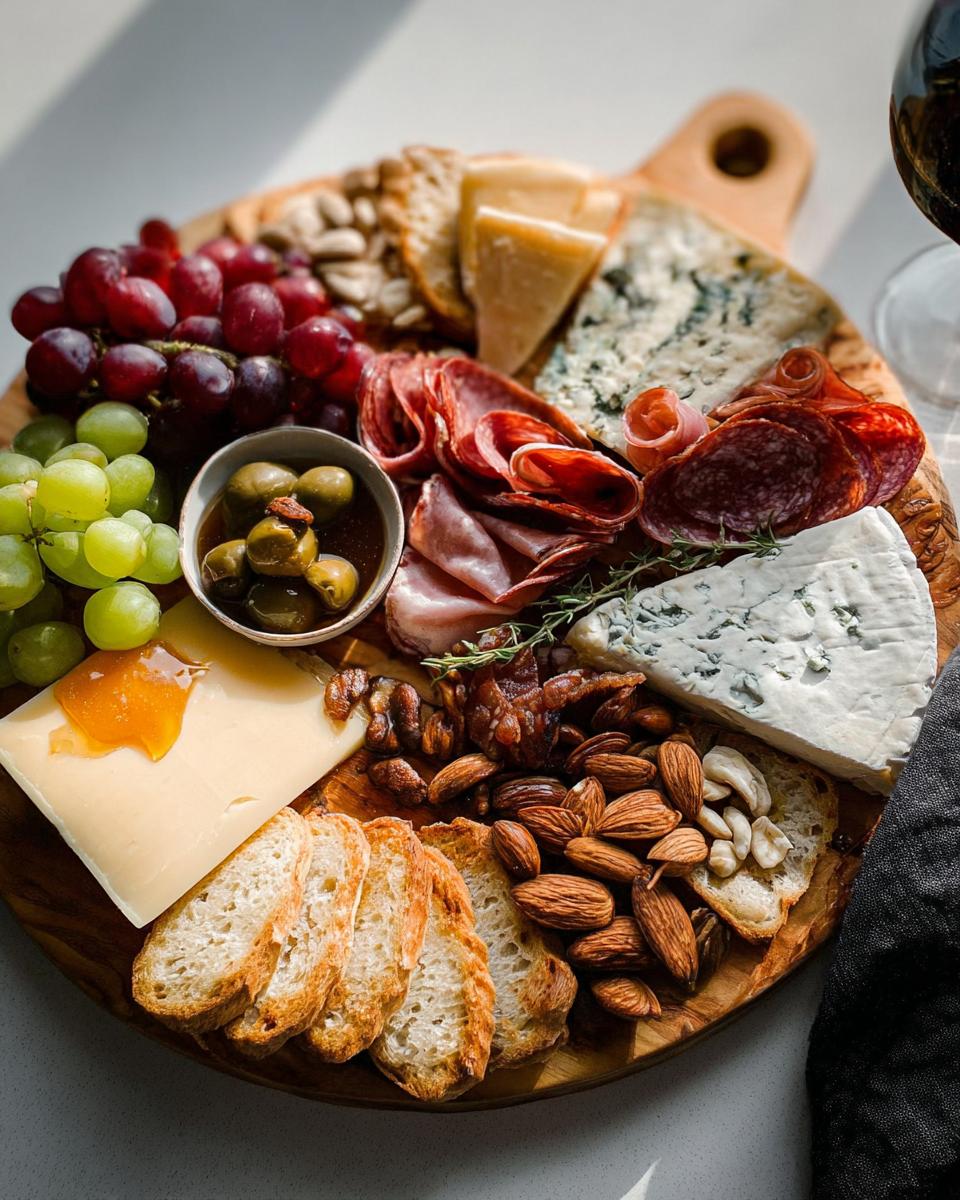
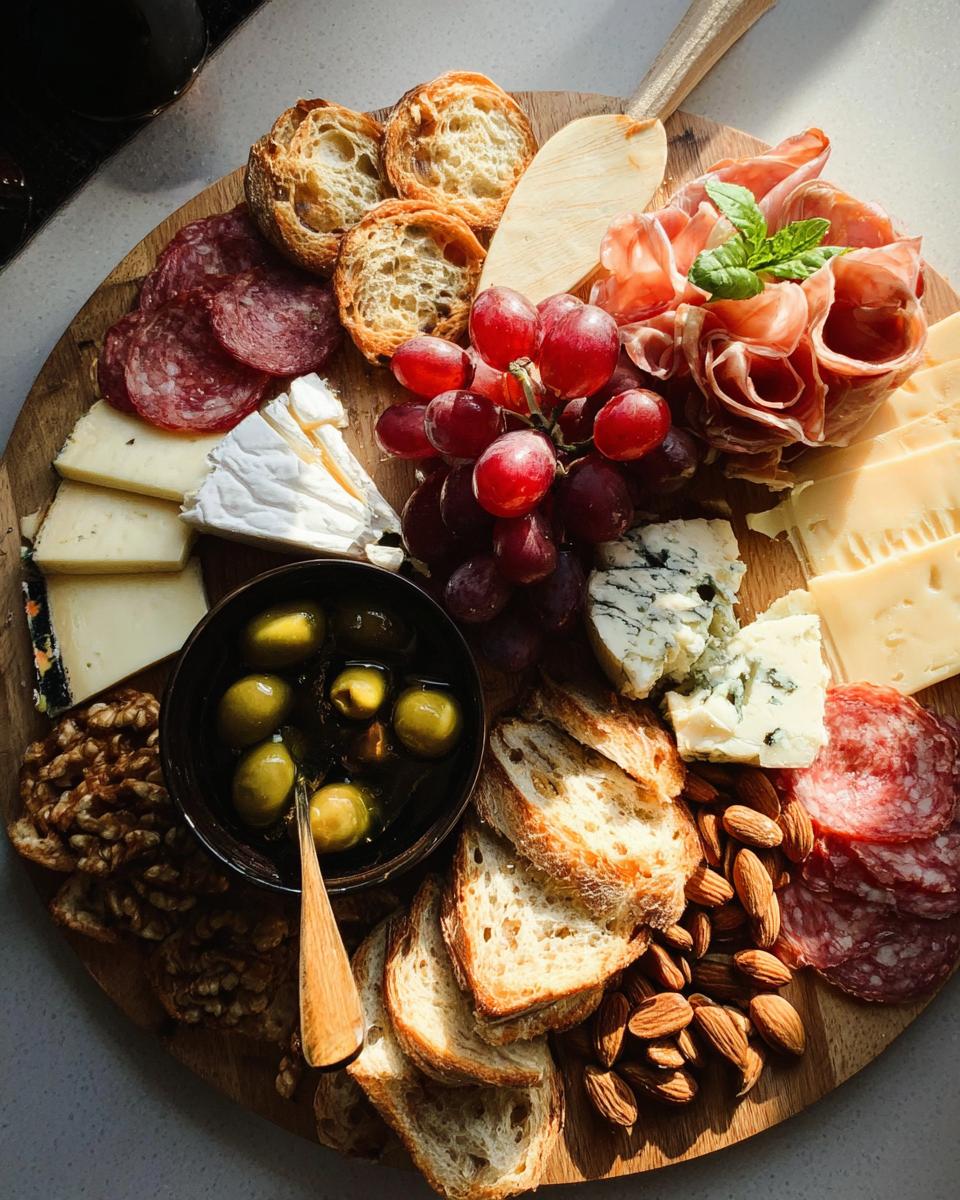
When time is ticking, the magic isn’t in complicated prep; it’s in smart shopping! For our Cheese Board in 10 Minutes, we rely on items that are already mostly done for us. We want texture and flavor contrast, but every item needs to require minimal handling—no slicing, no peeling, just arranging. This selection guarantees you get a fantastic spread that screams elegance without demanding you slave over a hot stove. Grab your platter; we’re filling it quickly! For more ways to think about plate composition, check out this great guide on how to make a cheese plate.
Selecting Your Cheeses for a Quick Assembly
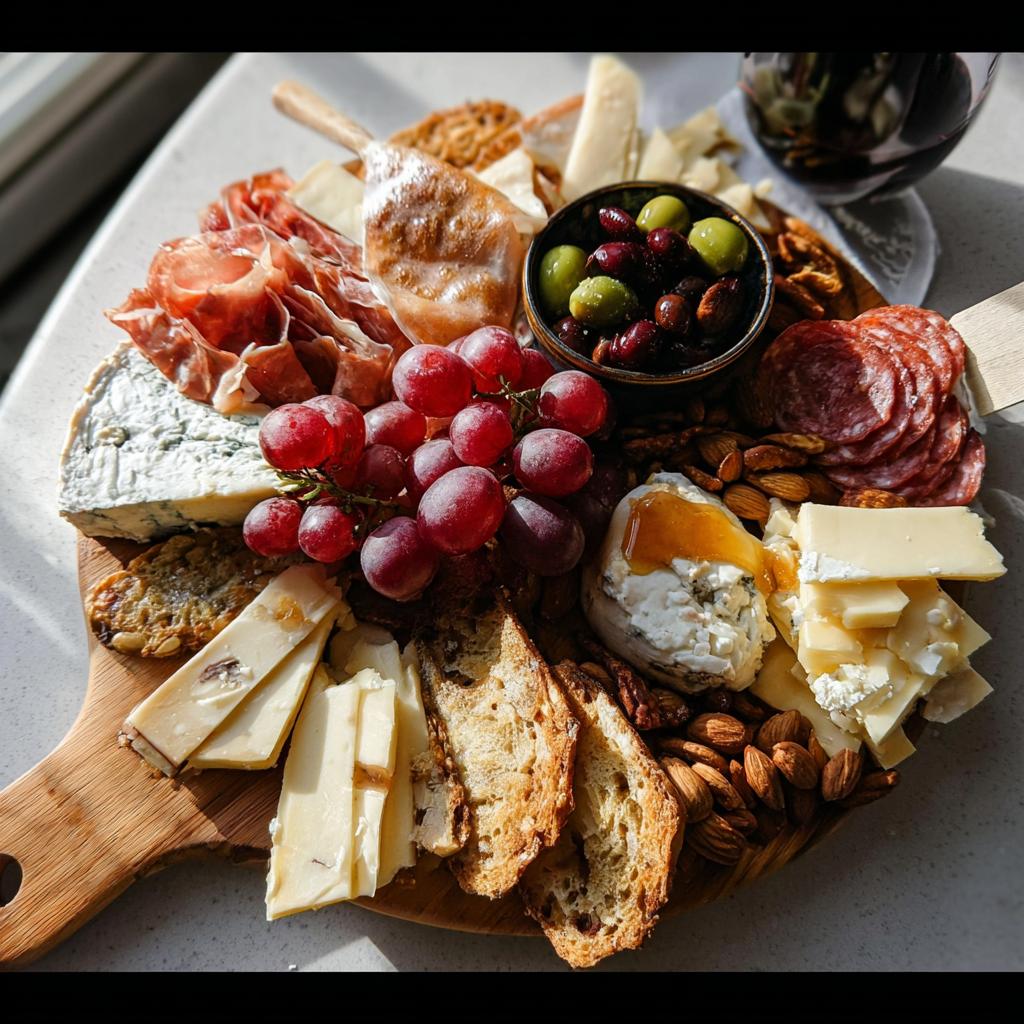
Variety is your best friend when you’re moving fast. You need a couple of textures! Grab yourself one creamy choice—like that gorgeous soft Brie—and one sharp hard cheese, maybe an aged white Cheddar or some brittle Parmigiano Reggiano. Don’t forget a funk factor, so bring in that Blue or Gorgonzola! And for something tangy, a log of Goat Cheese is perfect because you can just plop it down as is. It’s these five simple profiles that make our Cheese Board in 10 Minutes truly impressive.
The Perfect Pairings: Meats, Nuts, and Fruits
We need savory blankets for flavor, right? Open up the packages of salami and prosciutto. For presentation—this is important for those Fast Cheese Presentation Tips—gently fold the prosciutto slices into little ribbons or loosely stack the salami rounds in a small fan shape. Then toss in those almonds, walnuts, and a bunch of red grapes right onto the board for color. We are just scattering these bits around the bigger items to fill any empty space!
Carriers and Sweet Accents for Your Cheese Board in 10 Minutes
You can’t serve cheese without something to put it on! Stick to simple water crackers or those pre-made toasted baguette slices—our homemade crostini are great, but if you’re racing the clock, store-bought is totally fine. The sweet hit comes from a drizzle of honey. Honey bridges the gap between the salty meats and the tangy goat cheese beautifully. Just make sure you have a little spreader ready for that honey!
Equipment Needed for a Simple Grazing Board
Okay, let’s talk tools—which, thankfully, is super simple for this Quick Assembly! You don’t need fancy risers or special domes. The true magic happens on whatever you already own.
You basically just need:
- A big, beautiful cutting board—wood is best, but honestly, any large platter or even a clean dinner plate works like a charm.
- A couple of different knives—at least one dedicated knife for soft cheese like Brie.
- Some small butter spreaders for anything creamy or for scooping that honey.
Step-by-Step Guide to Building Your Cheese Board in 10 Minutes
Alright, deep breath! We’re now in the execution phase. This is where you start seeing that gorgeous presentation come to life, even though you’re barely moving past a brisk walk. We need a system to stay under that 10-minute countdown once the cheese is ready. Remember, we are placing things, not cooking them, so speed comes from thoughtful placement rather than frantic chopping!
Pre-Assembly Tip: Bringing Cheese to Room Temperature
Listen, this is the *only* part that takes a bit longer, but trust me, you have to do it. Pull all your lovely cheeses out of the fridge about 30 minutes to a full hour before anyone gets here. Serving cheese straight from the cold dulls every single flavor note. When they warm up just a touch, they get creamy, soft, and their real personality shines through. It’s a small step, but it shows you respect the ingredients!
Arranging Elements for a Beautiful Cheese Board in 10 Minutes
Timer starts now! First, anchor your whole setup by placing your cheeses around the board in roughly even triangles. This gives you natural starting points. Next, drape or fold those salami and prosciutto slices and tuck them in near the cheeses. This is where the meat acts as a nice divider! Now, start filling in the gaps—and I mean *really* fill them in—with those crunchy crackers, olives in a little bowl, and handfuls of the nuts and grapes. Scatter the fresh arugula over everything at the very end; it’s like throwing on a vibrant green scarf. Wow, look at that quality 10 Minute Appetizer!
Pro Tips for Elevating Your Cheese Board in 10 Minutes Presentation
You’ve got the items down, but presentation is what makes people think you worked for hours! Don’t let those last two minutes of your Cheese Board in 10 Minutes slip away without adding a little *pop*. These tricks are purely visual and take zero extra time.
First, you must use small bowls or ramekins for your wet items, like those lovely olives. Even if it’s just a tiny dish, it corrals the brine and looks incredibly intentional. Second, if you have any soft cheese, like the Brie, sprinkle a tiny pinch of Flakey Sea Salt right on top just before serving. It catches the light and looks stunning. Finally, use large clusters of grapes to create height in one corner. That vertical dimension makes the whole Simple Grazing Board look instantly more professional. See? Instant elegance!

Variations for Your Next Simple Grazing Board
I use this exact recipe setup all the time because it’s reliable, but you absolutely shouldn’t serve the exact same board every week! If folks are coming back for seconds (or thirds!) next month, we need to keep things exciting. The easiest upgrade for your next Simple Grazing Board is swapping out one cheese. Instead of the Brie, maybe try a creamy Camembert, or perhaps a smoked Gouda if you want a richer profile. That only takes an extra minute!
Since the core layout is so fast, you can afford to grab one more colorful item if you have an extra five minutes sometime. A little dollop of fig jam next to the sharp Cheddar works absolute magic. Or, place a small spread of apricot preserves near the goat cheese. These little additions really bump up the flavor profile without turning this into a complicated charcuterie project. It’s all about small, impactful changes!
Storing Leftovers from Your Cheese Board in 10 Minutes
Phew, we made it! If by some miracle you have leftovers from your fantastic Cheese Board in 10 Minutes, don’t just shove it all back in one container. The crackers will get soggy overnight, and that’s just sad.
Wrap each cheese type separately in fresh parchment or wax paper, not plastic wrap, if you can manage it—cheese needs to breathe a little. Pop the meats into a tightly sealed bag. Keep the honey and any fruit on the side. Next time you need a quick snack, you’ll have components ready to go for another Quick Assembly!
Frequently Asked Questions About Making a Cheese Board in 10 Minutes
I know you’re trying to stick to that super-fast timeline, so here are a few quick answers to keep your entertaining flow smooth. Don’t let a tiny question derail your Quick Assembly!
Can I skip letting the cheese warm up for this 10 Minute Appetizer?
Technically, yes, you can skip it if guests are literally walking in the door right this second. But please don’t make it a habit for your next 10 Minute Appetizer! Serving cheese cold mutes the flavor completely—it’s like listening to music underwater. When you let it sit out for those 30 minutes we mentioned, the fats soften, and you actually taste the complex flavors of that Blue cheese or Cheddar. It’s worth the wait if you have it!
How many people does this specific Cheese Board in 10 Minutes serve?
That ingredient list is set up to make one truly generous display board, perfect for maybe 2 to 4 people enjoying it as a substantial snack. If you’re hosting a larger group, say six or eight people, you should plan on doubling the quantities—especially the crackers! Or, even better for a bigger crowd, make two smaller, separate boards so you can spread them out as part of your Entertaining Ideas.
What is the easiest way to cut the hard cheeses quickly?
For the hard stuff like the Parmigiano Reggiano or that aged Cheddar, forget neat slices! That takes too long. The easiest trick for a fast presentation on your Cheese Board is to use the tip of a sharp knife to ‘shard’ the cheese. Just press down firmly and slightly twist the knife; the cheese will break off into beautiful, rustic, uneven chunks. It looks fancy, and it takes literally two seconds!
Share Your Quick Assembly Entertaining Ideas
Whew! That’s it! We did it. You’ve successfully created an absolutely stunning Cheese Board in 10 Minutes, and I bet it looks more incredible than you even thought possible. Aren’t spontaneous gatherings the best when you’re prepared?
Now, I absolutely have to know what happened next! Did your guests rave about how quickly you threw this 10 Minute Appetizer together? Please, please leave a comment below and let me know what your favorite part was—was it that tangy goat cheese, or maybe the salty prosciutto folded just right?
If you snapped a picture of your finished Simple Grazing Board, I’d be so honored if you shared it! Tag me on your social media so I can see your beautiful work. These kinds of Entertaining Ideas are meant to be shared, and seeing what combinations you come up with inspires me for my next spontaneous get-together. Happy snacking, friends!
Cheese Board in 10 Minutes
Ingredients
Equipment
Method
- Take cheese out of the fridge and let it come to room temperature for 30 minutes to 1 hour. Cheese should be served at room temperature.
- Assemble all ingredients on a large cutting board or platter. Enjoy!
Nutrition
Notes
Tried this recipe?
Let us know how it was!
Master of Global Fusion Innovation
My culinary adventure reflects my Lebanese-Italian heritage and a decade spent in the dynamic fusion restaurant scenes of Miami and Barcelona. I’ve made it my mission to prove that beloved global comfort foods can be successfully adapted for low-carb living without losing their soul, their cultural authenticity, or their ability to comfort.
With advanced training in molecular gastronomy and experience spanning Mediterranean, Middle Eastern, and Latin American traditions, I’ve developed what I call “respectful innovation” – culinary creativity that honors traditional cooking wisdom rather than replacing it. My alternative ingredient substitution systems are now taught in specialty diet cooking schools throughout the region.
Drawing from my trilingual upbringing, I understand how deeply food connects to identity and memory. That’s why my flavor-bridging techniques allow classic dishes from around the world to maintain their comforting, familiar qualities while meeting contemporary nutritional standards. I regularly share these techniques at international culinary symposiums and innovation events.
When I’m not experimenting in my Miami fusion kitchen laboratory, you’ll find me at local salsa dance venues – the rhythm and improvisation skills translate directly to my creative cooking process! My role as a foster parent to rescue rabbits has unexpectedly inspired some of my most creative plant-based low-carb innovations.
My personal low-carb journey began as a way to maintain energy for my active lifestyle, but it’s evolved into a professional mission of proving that healthy eating can be globally adventurous rather than restrictively limiting. Every recipe I create is a passport to culinary adventure, transforming kitchens into laboratories for exploring healthy versions of the world’s most beloved comfort foods.