
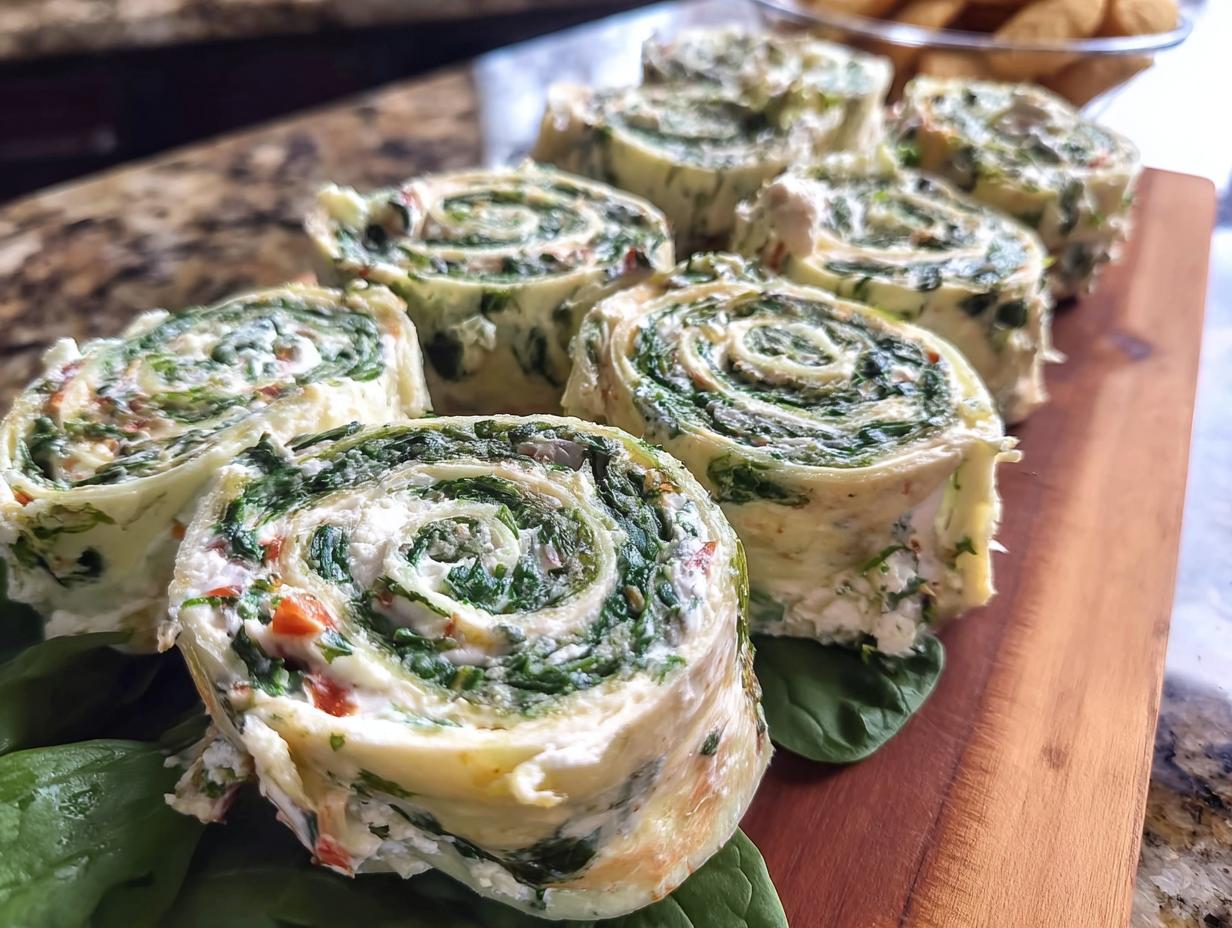
If you’re anything like me, you love hosting, but the thought of complicated appetizers sends you straight to the takeout menu. We need food that looks like we spent hours fussing, but really didn’t, right? That’s exactly why these Spinach Dip Pinwheels became my absolute favorite last-minute lifesaver. Seriously, these little bites are stunning on a platter!
I remember the first time I made them for a family gathering. It was a total rush job, but when everyone kept grabbing them, I knew I had nailed it. They are impressive, bite-sized perfection that disappears fast. I didn’t even need to turn on the oven; they set up in the freezer for just a few minutes!
These pinwheels deliver all that creamy, savory spinach dip flavor wrapped up in a neat little package. Plus, because they use tortillas instead of pastry, they’re actually really fast to pull together. Trust me; these will be your new go-to party snack!
Why These Spinach Dip Pinwheels Are Your New Go-To Party Snack
If you’re looking for party appetizer ideas that don’t involve standing over an oven timer for an hour, you’ve found your match. These pinwheels solve the biggest hosting headache: looking impressive without breaking a sweat. They shine because they’re flavorful, easy on the assembly line, and look fancy even though they are shockingly simple.
- They deliver that rich, creamy spinach dip taste everyone loves.
- They are perfectly portioned—no messy serving required!
- They require almost zero actual cooking time—winning!
Quick Prep for Effortless Entertaining
Honestly, if you can stir ingredients in a bowl, you can make these. Prep time clocks in at just fifteen minutes. That’s faster than it takes most people to find matching serving plates! We aren’t *baking* in the traditional sense; we’re just chilling them slightly to make them sliceable. Speed equals success when entertaining, so rejoice!
Make Ahead Magic for Stress-Free Hosting
This is where the magic happens for busy cooks! You roll them up, you chill them, and suddenly, your party day is totally relaxed. Knowing these little gems are tucked away in the fridge means you can focus on the main course or, you know, actually greeting your guests when they arrive. It’s the ultimate ‘Make Ahead’ party snack secret weapon.
Essential Ingredients for Perfect Spinach Dip Pinwheels
You know I’m all about keeping things simple, but simple ingredients demand respect! For truly fantastic Spinach Dip Pinwheels, you can’t skimp on the quality or the prep for these bits and pieces. Everything needs to be ready to go because we are assembling quickly once the filling comes together. We’re focusing on that creamy, tangy base flavor here.
First up, you absolutely need 8 ounces of cream cheese, and listen closely: it must be fully softened. If it’s cold, you’ll end up fighting lumps, and nobody has time for that when you’re trying to make a smooth filling pool. For the spinach, take 1 cup of frozen chopped spinach, but this is key: you must thaw it completely and then squeeze every bit of excess water out! Soggy spinach equals sad, weak pinwheels. I use my clean hands, squeezing until none drips out.
Next, we want 1 cup of artichoke hearts that are diced up. These add a wonderful bite. If you’re curious about preparing artichokes, check out some great tips over here for artichoke preparation. Then, for creaminess and tang, we fold in 1/4 cup of sour cream. And for that sharp, cheesy background note, sprinkle in 1/4 cup of freshly grated Parmesan cheese. Please grate it yourself! Pre-shredded cheese never melts or mixes as beautifully.
Finally, we layer in the flavor boosters: 1/2 teaspoon of red pepper flakes for a tiny sneaky kick, 1/4 teaspoon of garlic powder, and just a pinch of salt. That’s it for the filling!
Ingredient Notes and Substitutions for Your Spinach Dip Pinwheels
Because presentation matters, I always insist on using full-fat cream cheese here. Using light versions can thin out the mixture too much, and you want that thick spread that hugs the tortilla perfectly. If you’re out of sour cream or just prefer a slightly healthier boost, Greek yogurt works like a charm as a direct 1:1 swap; stirred in well, nobody will even notice the difference!
Speaking of the wrap, this recipe calls for smooth flour tortillas because they roll up tight without cracking. If you try to use those low-carb, whole-wheat ones that are super stiff, they might crack when you tightly roll that rich filling inside. Keep them supple for tight rolls—that’s how you get those beautiful spiral party snacks!
Step-by-Step Instructions to Create Your Spinach Dip Pinwheels
Alright, putting it all together is the fun, fast part! Remember how we stressed squeezing the moisture out of that spinach? Do not skip that step. A wet filling means we’ll be fighting leaks later, and we want neat little spirals, not sloppy wraps.
Once your ingredients are prepped, grab that small bowl and get mixing. We are aiming for a texture that’s thick enough to stay put when rolled but smooth enough that you don’t get big lumps of cream cheese when you bite into the final product.
Mixing the Flavor Base for the Spinach Dip Pinwheels
Toss everything we talked about—that softened cream cheese, the squeaky-dry spinach, the diced artichoke hearts, sour cream, Parmesan, and all those spices—right into your bowl. Use your sturdy spoon or a spatula and mix it well until it’s completely uniform. You shouldn’t see any pockets of white cream cheese hiding anywhere. It should look like perfectly seasoned, thick green spread. Easy, right?
Next, grab your two large flour tortillas. Spread that luscious mixture evenly across both wraps. I try to get near the edges, but leave about a half-inch border bare so the filling doesn’t squirt out when you start rolling. If you want extra coverage on your wraps, check out some great rolling guides right here.
Rolling and Chilling for Clean Cuts
Now, roll each tortilla up as tightly as you possibly can, like rolling up a yoga mat! The tighter the roll, the prettier the final pinwheel slice will look. Once they are snugly rolled into logs, put them straight into the freezer for just ten minutes. Why the freezer? Because trying to slice a soft log gets messy and stretches the tortilla unevenly. That quick chill firms everything up just enough so your knife glides through cleanly, giving you perfect, crisp edges for that impressive presentation!
After ten minutes, pull them out and slice them into half-inch thick rounds. Serve them right away so they stay nice and cool!
Expert Tips for Perfect Spinach Dip Pinwheels Every Time
I’ve made batches of these Spinach Dip Pinwheels for everything from casual Sunday football get-togethers to my cousin’s engagement party. And trust me, after making what feels like a thousand logs, I’ve learned a few tricks that take these from ‘good’ to ‘why did you only bring one platter?’
The biggest rookie mistake people make is overloading the tortilla. I know you want those thick, glorious spirals, but if you pile the filling too high, the very tight roll required will force the mixture right out of the ends when slicing. It’s a disaster for presentation! When I was figuring this out for the first time, my rolls looked more like messy snails than elegant pinwheels.
Here’s my Clara Martinz advice for an even spread: use an offset spatula if you have one, but if not, the back of a regular metal spoon works wonders. Spread the filling out gently to cover about 80% of the surface area, leaving that small border bare near the edges. That border is your seal!
To prevent leaks when slicing, work quickly once the log comes out of that ten-minute chill. Don’t press down hard with the knife; use a gentle sawing motion. Also, I highly recommend wiping your knife clean between every three or four slices—especially if the filling starts getting slightly warm. A clean blade prevents the soft filling from sticking and dragging, keeping those edges crisp and professional-looking every single time. These simple little adjustments really make all the difference!
Serving Suggestions for Your Spinach Dip Pinwheels
Okay, so your Spinach Dip Pinwheels are sliced and looking gorgeous—now how do we make them shine on the party table? Presentation is everything when it comes to appetizers, and these little guys really want to stand out!
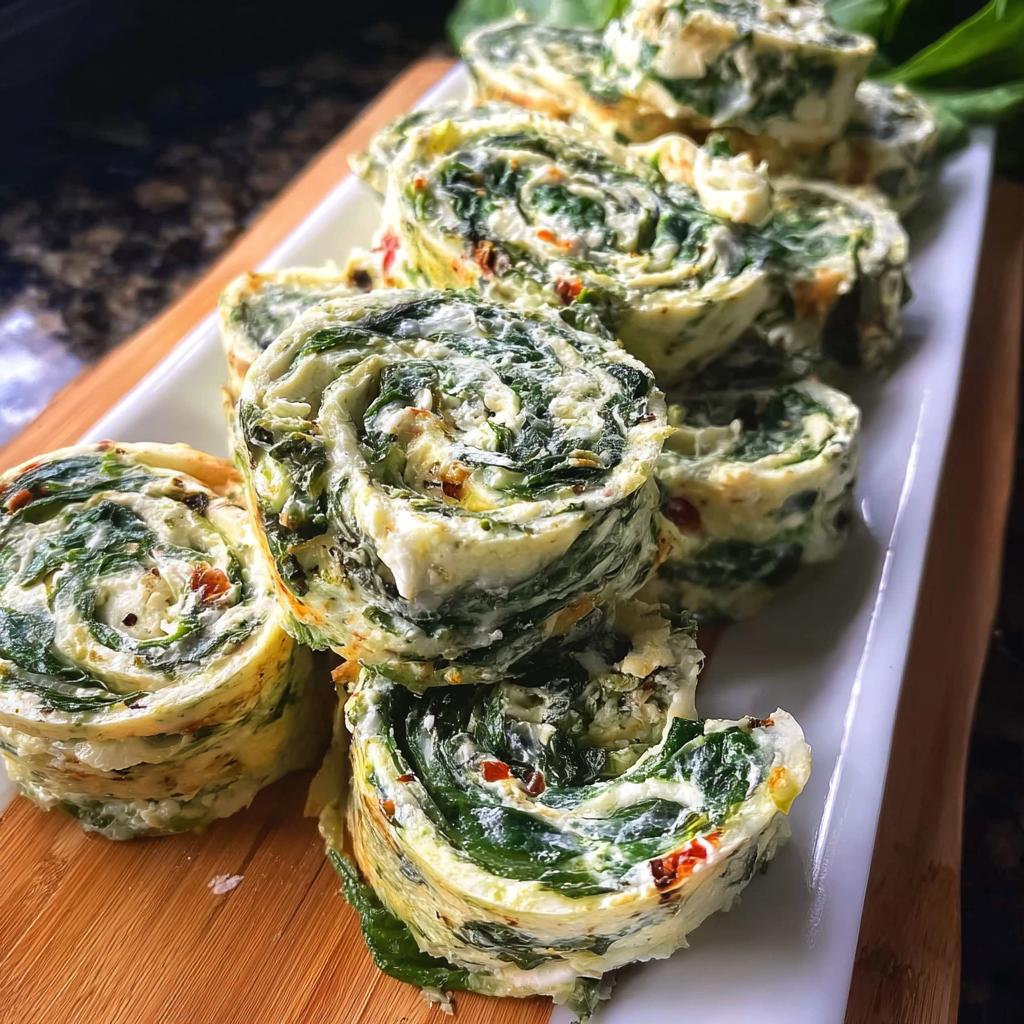
Since the filling is already super rich, creamy, and tangy from that gorgeous spinach and artichoke combo, you don’t want to drown them in heavy sauces. Instead, think light, bright, or textural contrast. I love arranging them on a crisp white platter—the green and cream swirl really pops against the white background, don’t you think?
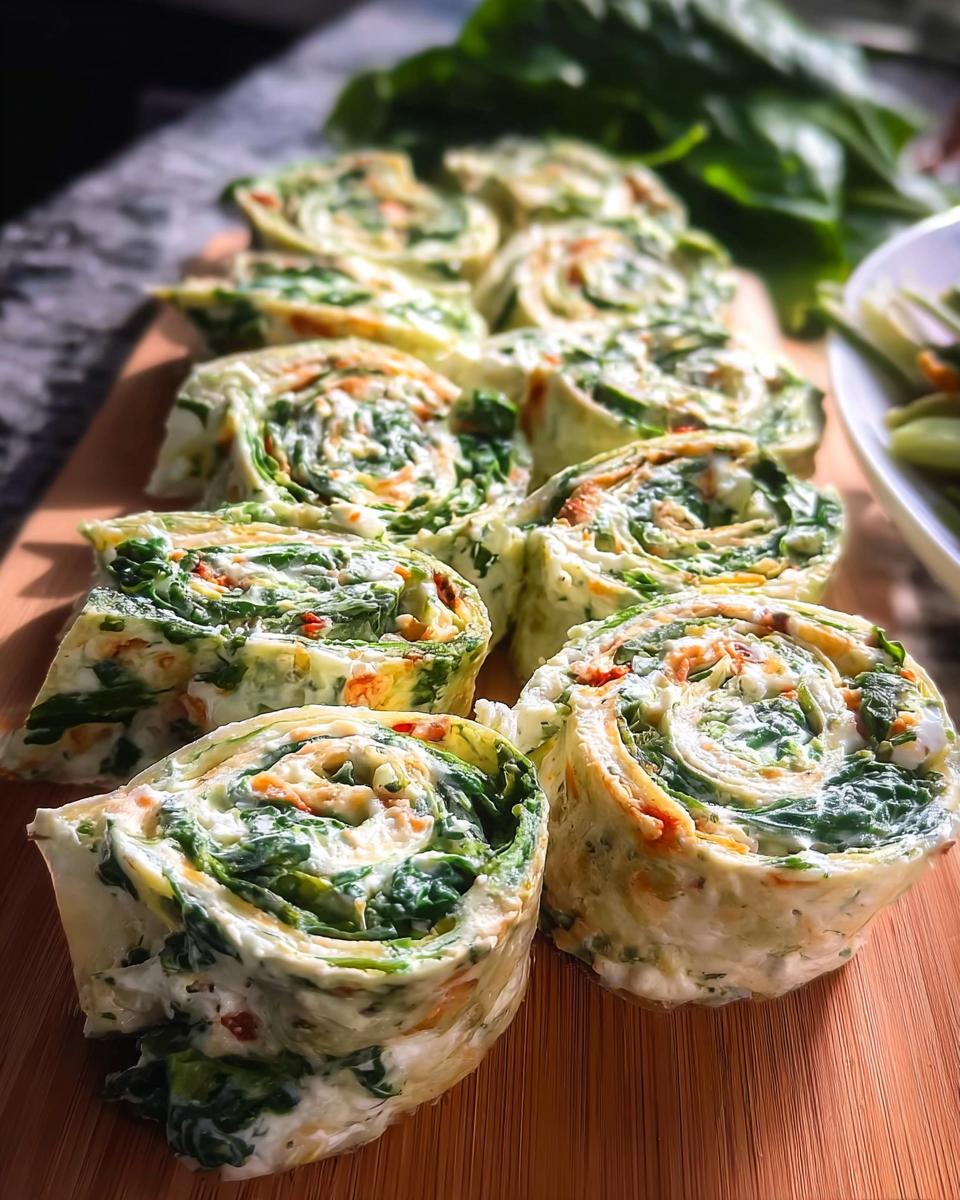
For visual appeal, try stacking them slightly rather than laying them all flat in one layer. A small mound in the center of the plate looks abundant and inviting. If you have some fresh chopped parsley or red pepper flakes handy, a tiny, light sprinkle right over the top just before serving adds a professional finish!
When pairing, think about adding something fresh on the side. A small bowl of bright, chunky salsa or maybe even some thinly sliced cucumbers works perfectly for dipping or just munching alongside. Or, if you want to go heavy on the dip theme, a simple side of plain hummus really balances the richness of the cream cheese. If presentation is really on your mind, you can always check out ideas from folks who have done fantastic plating work—I saw some incredible ways to present them after checking out a great article here!
However you serve them, these pinwheels are the perfect flavor bridge between the crunchy snacks and the heartier main dishes. They’re ready to please a crowd!
Storage and Make Ahead Instructions for Spinach Dip Pinwheels
One of the best things about these incredible Spinach Dip Pinwheels is that they are built for planning ahead! Believe me, when you’re hosting a big party, anything that lets you sneak a task in the day before is a recipe for success. This recipe is totally forgiving, whether you’re chilling leftovers or prepping them for a party next week.
First up, let’s talk about the leftovers. If you’ve sliced them and you have some remaining triangles, store them in an airtight container in the refrigerator. Because the filling is so rich with cream cheese and sour cream, they stay perfectly good for about three to four days. They might lose a tiny bit of that fresh-from-the-parchment crispness, but the flavor is still spot on. Just pop them out about fifteen minutes before serving to take the chill off.
But here is the real trick for that ‘Make Ahead’ keyword success: freezing the logs *before* you slice them! Remember that ten minutes of freezer time we used just to firm them up for cutting? You can extend that significantly.
Once you have tightly rolled your filled tortillas, wrap each log individually and tightly in plastic wrap. Then, wrap that bundle again in a piece of foil or put it inside a freezer bag. This double wrap is super important to keep freezer burn away from your lovely tortillas.
These logs are happy to hang out in the deep freeze for up to a month! When you need them for a party, just pull one log out, unwrap it, and let it thaw in the refrigerator overnight. Once it’s soft enough to slice—usually about 4 to 6 hours depending on how cold your fridge is—sliced to your preferred thickness, and you’re ready to serve them up as if you just made them! It’s pure hosting heaven.
Frequently Asked Questions About Spinach Dip Pinwheels
I get so many questions about these little guys because they are so versatile! People always want to know how to adapt them or how long they last, which is fair—we all want to maximize our party prep time. Here are the top things folks ask about when making their own Spinach Dip Pinwheels.
Can I use puff pastry instead of tortillas for these Spinach Dip Pinwheels?
That’s a fantastic question because everyone loves Puff Pastry Pinwheels! You absolutely *can* switch it up, but be warned: the process changes completely. Tortillas give us that smooth, neat roll that sets up in the freezer and is ready to eat without turning on a single burner. If you use puff pastry, you are entering ‘Easy Bake’ territory!
Puff pastry needs to be thawed, filled, rolled, and then baked until golden brown and flaky. It comes out so much puffier and richer, almost like a little savory croissant bite rather than a creamy roll. If you go that route, remember to pre-bake them according to the pastry package directions and let them cool a bit before slicing. They are delicious, but they aren’t as quick as our no-bake tortilla stars!
How long can I keep the rolled Spinach Dip Pinwheels logs in the refrigerator before slicing?
If you’re prepping a day ahead—which I highly recommend—you can keep those tightly rolled logs (wrapped well in plastic) in the main part of your refrigerator for up to two full days. I usually aim for overnight storage, which allows the filling to really meld nicely with the tortilla without making it soggy.
The crucial thing is that the filling must be thick when you roll it up, as I stressed earlier. If the mixture is too loose, that moisture from the spinach will seep into the tortilla overnight, and you’ll end up with a soft, slightly gummy wrap instead of a firm log that slices cleanly. Two days is my safe bet for the fridge!
Estimated Nutritional Profile for Spinach Dip Pinwheels
Now, I know we aren’t making these Spinach Dip Pinwheels for a bodybuilding competition, but it’s always good to have a rough idea of what we are serving, especially when guests ask! These little snacks pack a big flavor punch, but since they are quite small and use flour tortillas instead of heavy pastry dough, the numbers aren’t too scary.
Based on the ingredients listed for this recipe, which serves 20 pieces, here is what you can generally expect per one pinwheel serving:
- Calories: About 63 per piece
- Fat: Around 5 grams
- Carbohydrates: Roughly 4 grams
- Protein: About 2 grams
Keep in mind, this is just an estimate straight from my kitchen calculations! The exact nutritional data can swing a little bit depending on the exact brand of cream cheese you use, whether you opt for full-fat sour cream, or how thickly you slice your final serving. If you use those low-carb wraps, those carb counts will drop, too! As always, treat these numbers as a handy guideline rather than gospel truth. But trust me, the flavor far outweighs any minor variations!
Share Your Favorite Party Snack Creations
Whew! That’s it! You’ve made incredible, impressive, delicious Spinach Dip Pinwheels, and now you have the best party appetizer on the block. I truly hope they bring as much joy and last-minute relief to your hosting duties as they do to mine!
I really want to know what you thought! Did the kids go crazy for them? Did the log hold together nicely when you sliced it? Please don’t be shy! Drop a comment below and let me know how your assembly line went and what you served them with. Ratings are also super helpful—if you loved how easy this was, give it a star rating so other busy hosts can find their new favorite recipe!
And if you snap a quick picture of your beautiful platter of spirals—which I fully expect you to do!—tag me on social media. It honestly makes my whole day seeing how you bring my favorite recipes to life for your own celebrations. If you are looking for even more brilliant appetizers to round out your spread, I’ve gathered up some of my absolute favorites right here in my roundup post.
Happy entertaining, and enjoy every single bite of those gorgeous pinwheels. You earned it!
Spinach Dip Pinwheels
Ingredients
Equipment
Method
- Mix the cream cheese, spinach, artichoke hearts, sour cream, Parmesan cheese, red pepper flakes, garlic powder, and salt in a small bowl until well combined.
- Spread the mixture evenly over the flour tortillas. You can make the dip layer as thick or thin as you prefer.
- Roll up each tortilla tightly.
- Place the rolled tortillas in the freezer for about 10 minutes. This firms up the dip, making the pinwheels easier to cut.
- Cut the tortilla logs into 1/2 inch thick slices.
- Serve immediately.
Nutrition
Notes
Tried this recipe?
Let us know how it was!
Master of Culinary Visual Arts
My culinary journey started in the fast-paced kitchens of boutique coastal restaurants throughout Southern California, where I learned that beautiful food doesn’t have to be complicated. After nine years of professional cooking, I’ve made it my mission to prove that sophisticated, nutritionally sound meals can be accessible to busy home cooks who refuse to compromise on flavor or visual appeal.
What changed everything for me was watching talented home cooks feel intimidated by healthy cooking. That’s when I transitioned to private instruction, teaching busy professionals and families how to create restaurant-quality meals using simple techniques and ingredients they can actually find at their local grocery store. My “15-minute meal” frameworks are now used by several regional cooking schools!
As a third-generation Mexican-American, I love weaving vibrant Latin flavors into low-carb creations – proving that healthy eating can be both culturally authentic and visually spectacular. My “effortless elegance” philosophy is simple: nutritious food should look as stunning as it tastes, without requiring professional chef skills or expensive equipment.
When I’m not developing recipes in my San Diego coastal kitchen, you’ll find me surfing the local breaks with my Golden Retriever mix, Mango, who’s both my kitchen companion and unofficial taste-testing assistant. My personal low-carb lifestyle started as a way to maintain energy for my active coastal life, and it’s become the foundation for proving that healthy eating enhances rather than restricts life’s pleasures.