
You know those drinks you see online, the ones that look like they took an hour and five specialized pieces of equipment to make? Yeah, well, I almost always skip those. But I’ll never forget the first time I sipped a Vanilla Sweet Cream Cold Foam Cold Brew at my favorite café in Miami. It was such a blazing hot day, and that perfect mix of rich coffee, sweet vanilla cream, and the refreshing cold foam on top? Pure bliss, I tell you!
That experience totally set a new bar for my afternoon pick-me-up. So, naturally, I started experimenting immediately to make a simple, low-carb version at home that still packed a huge flavor punch. Trust me, I’ve cut out all the fussy steps. Now, I can whip up this delightful Vanilla Sweet Cream Cold Foam Cold Brew (Easy) in minutes, all while actually enjoying the process of crafting my little piece of café culture right here in my kitchen. It’s those little moments of flavor experimentation that remind me just how joyful and connective even a simple cup of coffee can be!
Why This Vanilla Sweet Cream Cold Foam Cold Brew (Easy) Is Your New Favorite Drink
I know, I know, you see those fancy coffee creations and think, “No way I can make that without a commercial espresso machine.” But that’s the beauty of this recipe! I deliberately kept everything super straightforward so you get maximum flavor reward for minimal effort. Seriously, this is the ultimate quick fix for those midday coffee slumps.
Here’s why you absolutely need to switch to making your own:
- It saves you that trip to the drive-thru lane—hello, extra five minutes of sleep!
- You control every single ingredient, from the syrup sweetness to the milk fat content.
- It’s ready before you can even decide what to wear for your next Zoom meeting.
Quick Preparation for Your Homemade Coffee
We’re talking about a total time investment of about 20 minutes, including the hands-off chilling time for the syrup. You make the simple syrup while the coffee brews or cools, and then the whole assembly takes maybe two minutes. It’s truly an Easy Recipe; no complicated tempering or whisking required!
Achieving True Café Style Flavor
The secret bang-for-your-buck here is that homemade vanilla syrup. Store-bought stuff is often just watered-down sugar, but when you use real maple syrup and a vanilla bean (or good quality extract), the flavor that hits your palate is so much richer. That’s what elevates this from a basic iced coffee to that luxurious Café Style treat you crave.
Gathering Ingredients for Vanilla Sweet Cream Cold Foam Cold Brew (Easy) Components
Okay, so before we dive into the fun part—the blending and pouring—we have to get our players assembled! Because we are making this from scratch, we’re going to tackle this in two little batches: the magical syrup that brings all the vanilla flavor, and then the items needed for the actual cold brew assembly. Don’t worry, even if your pantry is looking a little bare, you probably have most of this already!
If you are serious about making the best Homemade Coffee that tastes just like the cafe version, the syrup is non-negotiable. You can find a great base recipe for similar style syrups over here for reference: simple coffee syrup inspiration.
For the Homemade Vanilla Syrup
This is what makes the sweet cream sing! I love using a real vanilla bean because the depth of flavor is unbelievable, but if you’re short on time (or just don’t have one handy), a good quality extract works wonders. If you use the bean, make sure you split it lengthwise so all those beautiful seeds get into the mixture!
- 1 cup of water
- 1/2 cup of maple syrup (Yep, I use pure maple syrup as my sweetener base here—it handles heat better than some substitutes!)
- 1 large vanilla bean, split lengthwise, OR 1 tablespoon of high-quality vanilla extract
For the Vanilla Sweet Cream Cold Brew Assembly
Once your syrup is made and cooled down—this is crucial, don’t add hot syrup to cold ingredients!—you just need a few things to bring the whole drink together. I stick to almond milk for the cream because I find it froths up nicely, but feel free to swap that out for whatever milk or cream you love. And please, use the best quality Cold Brew you can find, or make a big batch using my go-to concentrate guide!
- 1 cup of almond milk (or milk of choice)
- 1/4 cup of the vanilla syrup you just made
- 4 cups of homemade or store-bought cold brew concentrate
- Ice, enough to fill your glass!
Step-by-Step Guide to Making Vanilla Sweet Cream Cold Foam Cold Brew (Easy)
This is where the magic happens, friend! I’ve broken this down so it feels totally manageable. We tackle the syrup first, which only takes about five minutes of active time, and then we assemble the drink. Remember the timeline: 5 minutes to cook the syrup, then about 10 minutes of cooling time before you can use it. Patience pays off, especially when you’re aiming for that perfect Starbucks vibe with this Vanilla Sweet Cream Cold Foam Cold Brew (Easy)!
Crafting the Flavor Base: Vanilla Syrup Preparation
You’ll need a small saucepan for this part. Just get your water and maple syrup together and put it over medium-high heat. You need to bring this mixture to a rolling boil—we want that maple syrup fully dissolved so we don’t have any grainy texture later. Once it’s bubbly and clear, kill the heat immediately.
Now, drop in your vanilla bean (or pour in the extract if you’re using that shortcut). Let that infuse off the heat; this steeping process is key for flavor! After it cools down completely to room temperature—this is important for texture—pull the bean out. Slop this lovely syrup into a tight jar and stash it in the fridge. It lasts for ages, which means your next few coffees are already halfway done!
Whipping the Cream for Your Vanilla Sweet Cream Cold Foam Cold Brew (Easy)
This sweet cream is what separates the basic iced coffee from the showstopper! Take your cold almond milk and measure out exactly 1/4 cup of that homemade vanilla syrup you just made. You have options here depending on what gadget you have nearby, and both are super fast.
If you have a decent blender, just toss the milk and syrup in and blend on high until you see stiff peaks start to form—it should look like thick, airy whipped cream. If you’re feeling less cleanup and more classic, just use a strong milk frother directly in the mason jar, or even an immersion blender. Shake it like crazy if you only have a jar! Either way, you want a light, airy foam that holds its shape when poured.
Assembling the Perfect Cold Brew Drink
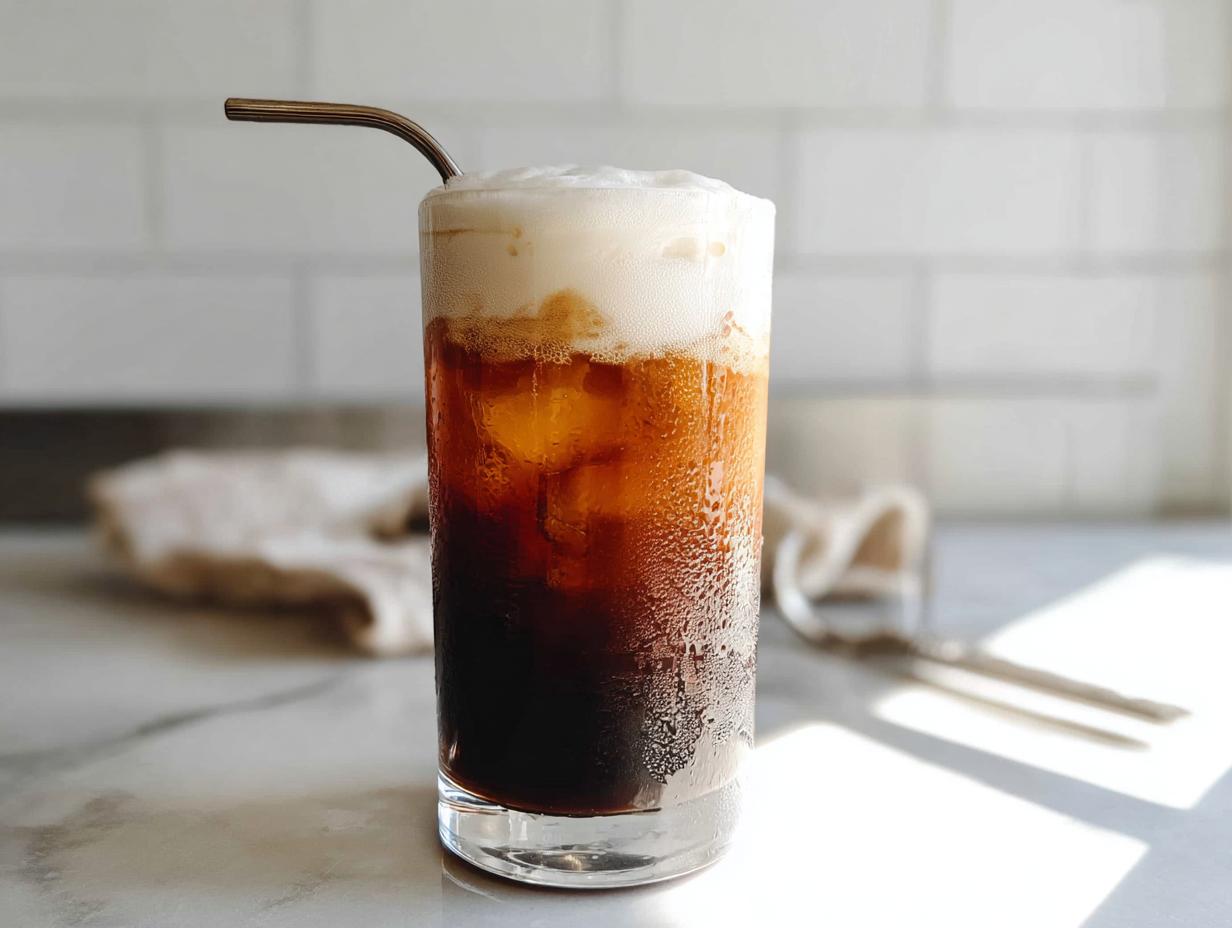
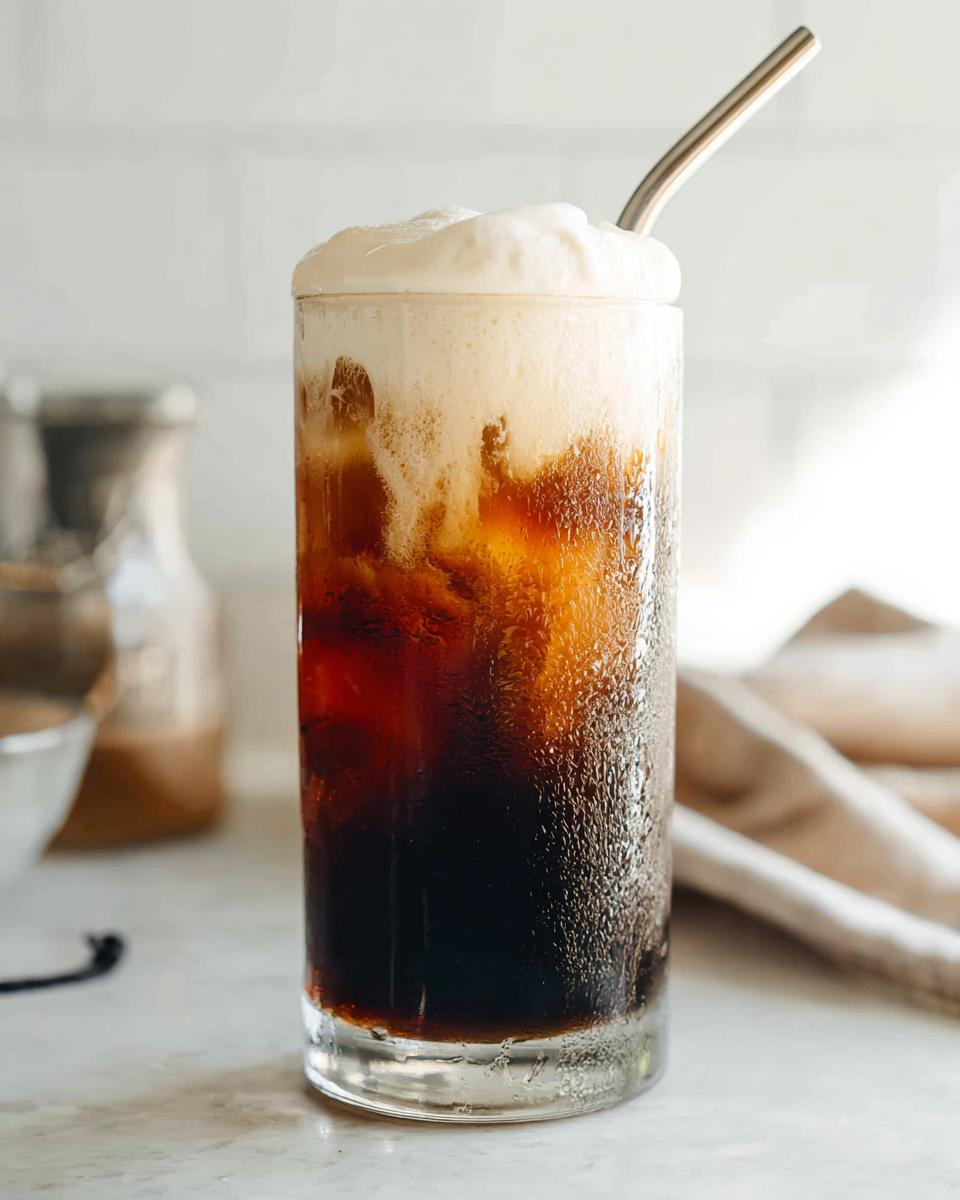
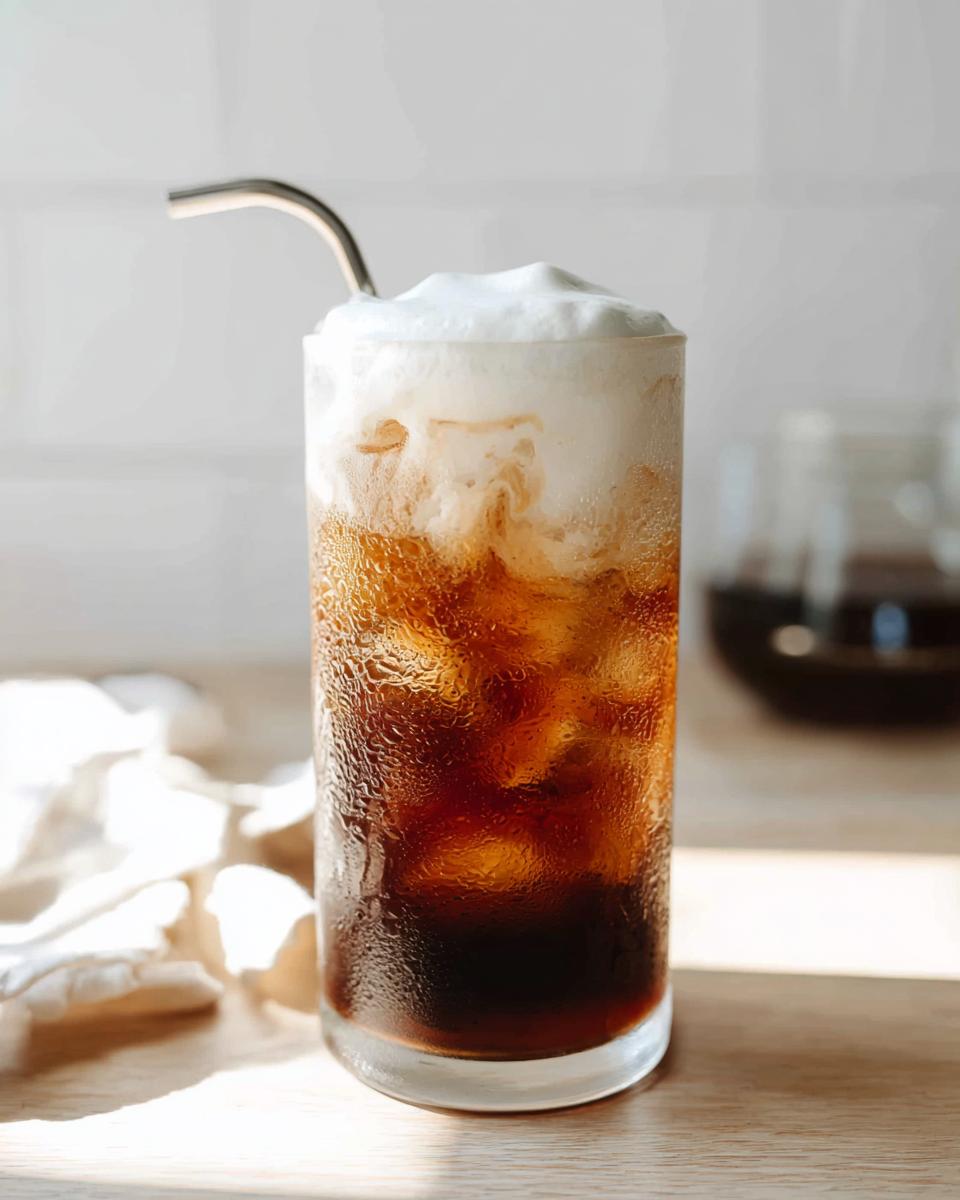
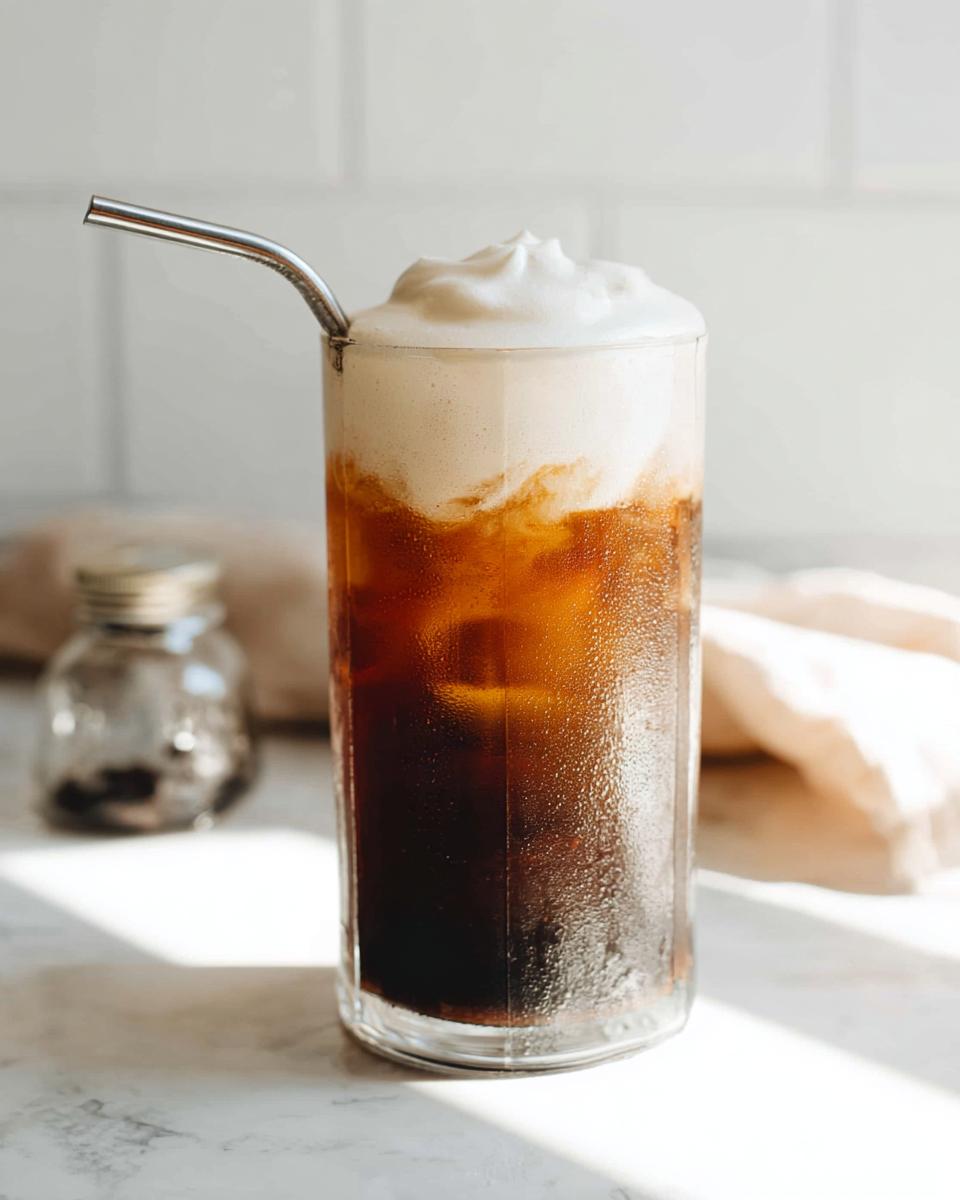
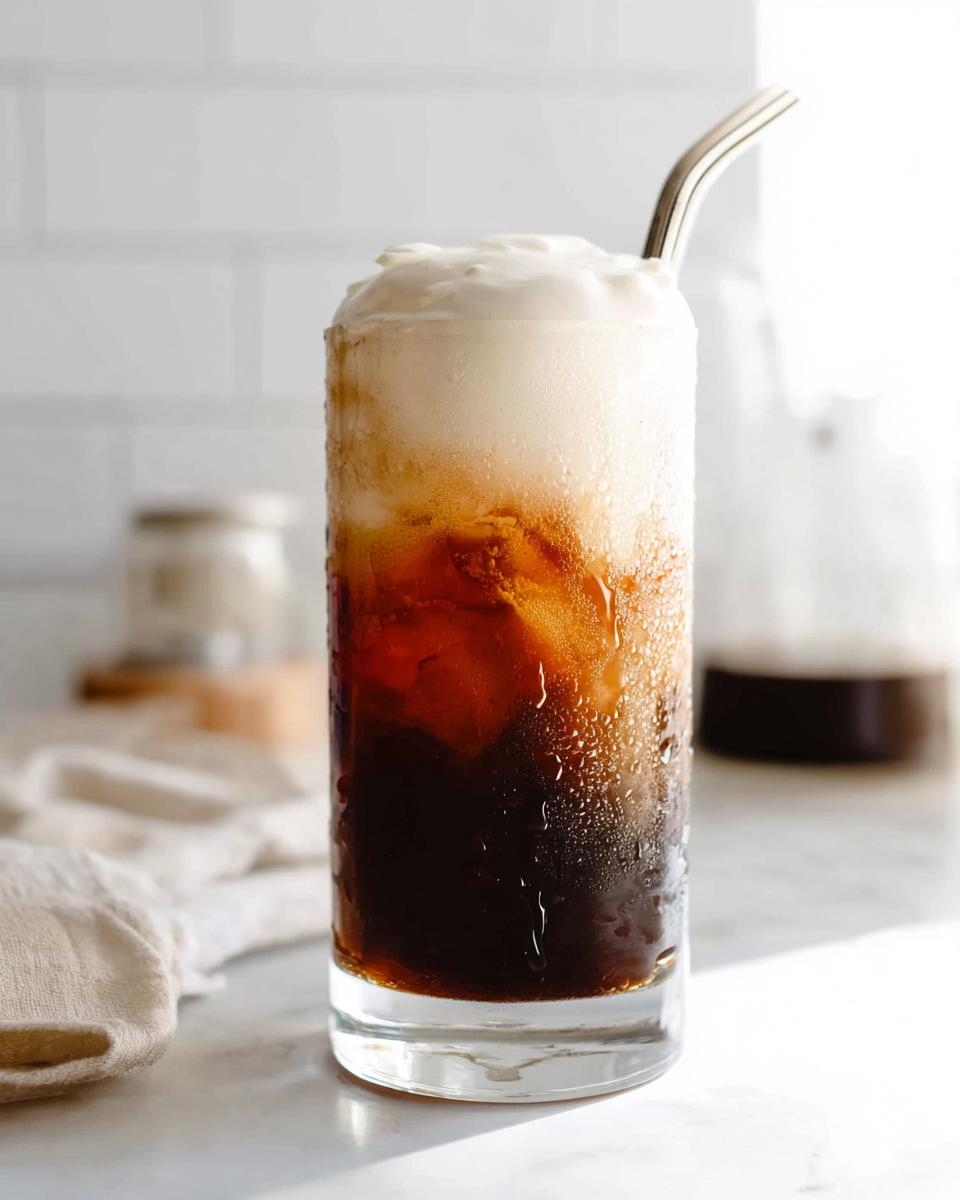
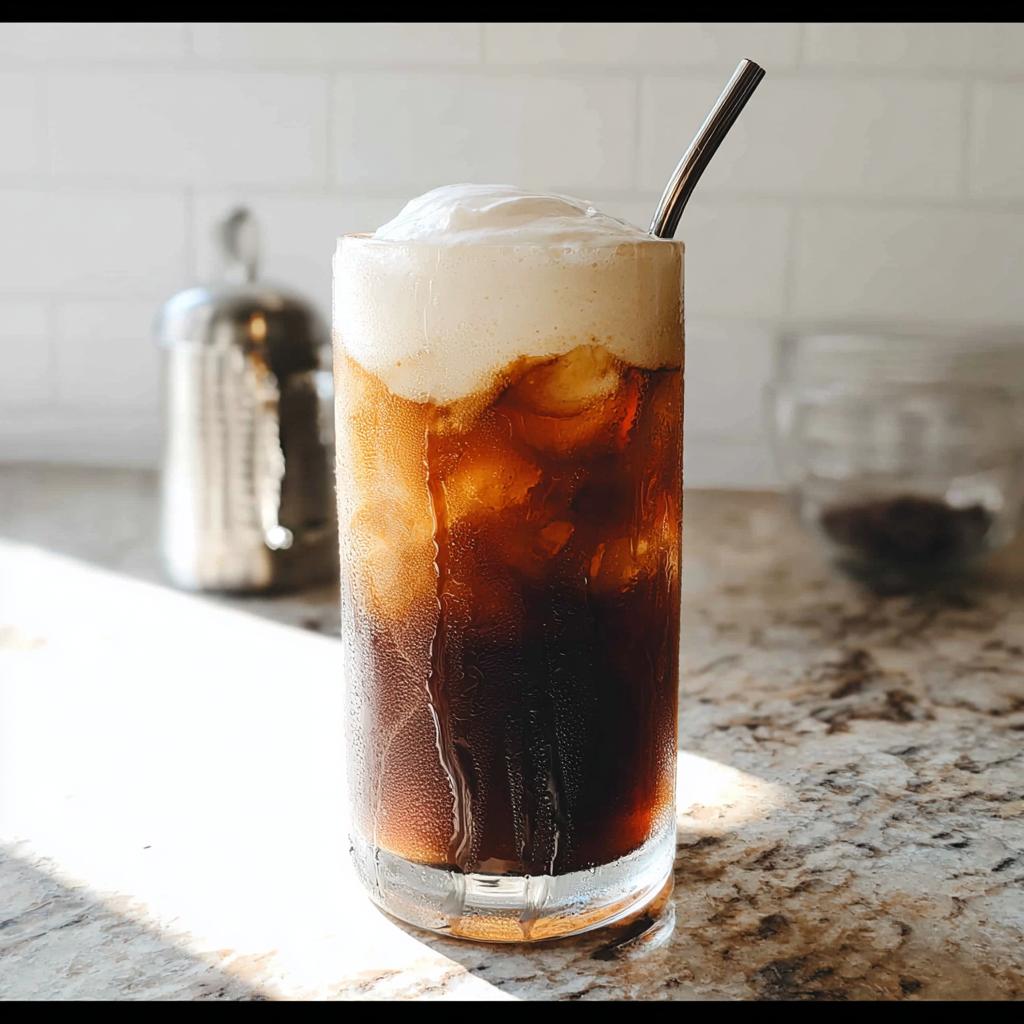
Okay, final step! Grab the biggest, tallest glass you own. We are layering this right! Start by filling that glass up almost to the top with ice. Next, pour in your 1 cup of strong, cold Cold Brew. If you need a refresher on making concentrate, check out my guide on making concentrate!
Finally, take your whipped vanilla sweet cream and gently spoon or pour it over the top of the cold brew. Don’t stir it right away! Let that creamy cloud sit high on top, then gently push a straw down through the foam layer to meet the strong coffee base. Take a sip that gets the coffee and the cream together. If you want it sweeter next time, just add a drizzle more syrup before you top it with the foam!
Tips for Perfecting Your Vanilla Sweet Cream Cold Foam Cold Brew (Easy)
Even with an Easy Recipe like this, the little details can really push your Homemade Coffee from just ‘good’ to ‘I swear this costs eight dollars at the café.’ Since this entire drink relies on two main components—the strong coffee and the sweet foam—fiddling with those is where you find your personal sweet spot, trust me.
We want to make sure you get the absolute best experience every single time. If you want to dive deeper into sourcing the best foundational coffee for your drinks, make sure you check out my thoughts on coffee bean sourcing before you start!
Choosing the Right Cold Brew for Your Recipe
The base coffee flavor matters a huge amount here because the Vanilla Sweet Cream Cold Foam is subtle and sweet. If you use a really light, acidic cold brew, it might get totally overpowered. I usually reach for something medium to dark roasted for my base concentrate because it stands up beautifully to the sweetness.
If you are using a store-bought concentrate, make sure it’s strong! If you dilute it too much before adding the ice, when the ice melts, you’re left with watery sadness. A really robust, slightly bitter base is what makes that creamy topping taste even sweeter in contrast.
Adjusting Sweetness in Your Homemade Coffee
This is where you take control, especially if you are watching your sugar intake! The recipe calls for 1/4 cup of the vanilla syrup, but you should absolutely feel empowered to cut that in half if you need to. See, the beauty of making your own syrup is that you know exactly what’s in it.
If the maple syrup isn’t quite working for your specific dietary needs, you can absolutely substitute it in the syrup-making step with a sweetener you trust. Just remember that whatever you use needs to dissolve well in water to create a successful syrup base. Don’t be afraid to taste your cold brew before adding the foam layer, adjust the syrup if needed, and then proceed!
Storage and Reheating Instructions for Vanilla Sweet Cream Cold Foam Cold Brew (Easy) Components
Now, this is super important for making this an actual weekly habit rather than just a one-time treat! You absolutely cannot store the assembled Vanilla Sweet Cream Cold Foam Cold Brew (Easy). Once that cold brew hits the foam, chaos ensues, and you lose that wonderful texture. We are only storing the fantastic components we made ahead of time.
The absolute best part about making this at home is being able to prep the flavor base. That homemade vanilla syrup we cooked up? It’s a rockstar for longevity! Because we used pure maple syrup and cooked it down slightly, it’s wonderfully stable. You can pour that into any tightly sealed mason jar or glass container and keep it right there in the fridge door.
I’ve tested this, and it stays fantastic for up to three months! That means you only have to make the syrup once every quarter, and suddenly, your coffee fix is instant!
What about the cold foam cream itself? This one is a little trickier. The heavy whipping ability of the almond milk and syrup mixture doesn’t last long once it’s been whipped up. I find that if you froth the cream mixture and then put it in a sealed container (like a shaker bottle), you get maybe 12 hours out of it before it starts separating and losing its airy structure. So, for the best Café Style results, I recommend whipping the cream mixture right before you make your single serving of the drink. Keep your cold brew concentrate chilled separately, and you are ready to go every time!
Frequently Asked Questions About Homemade Coffee Drinks
I always get questions when I post this recipe because everyone wants to make sure they get that amazing texture just right! Since this is such a popular drink, I figured I’d round up the most common things people ask about recreating this Homemade Coffee masterpiece right in their kitchen. Hopefully, this helps you next time you’re getting ready to froth up some cream!
How much caffeine is in this Vanilla Sweet Cream Cold Foam Cold Brew (Easy)?
That’s the million-dollar question, isn’t it? Look, the foam itself—the almond milk and the vanilla syrup—adds virtually zero caffeine to your drink. So, the caffeine content is 100% dependent on the base Cold Brew you decide to use. If you use a store-bought concentrate that’s already diluted for drinking, you’ll get a standard iced coffee strength. If you use a really strong, thick concentrate (which I often do!), you’re going to get a serious kick!
Basically, if you want more caffeine, use a stronger coffee base. If you want less, just dilute your concentrate a bit more before you pour it over the ice. Simple as that!
Can I make this recipe without maple syrup?
Oh, absolutely you can! The maple syrup is my current favorite for the vanilla syrup because it works so beautifully with the vanilla bean flavor, and it’s a better bet for my low-carb lifestyle. But if you don’t have maple syrup on hand, don’t stop making the recipe!
You can go back to basics and use plain white granulated sugar—just make sure you get it fully dissolved when you boil the water, okay? Or, if you’re leaning into the low-carb angle, use a bulk sweetener like erythritol or monk fruit blend that you know dissolves well in liquid. You might need to fiddle a bit with the measurements because different sweeteners absorb liquid differently, but treat it like a simple syrup base, and you’ll be fine making this Easy Recipe.
What is the difference between this and regular Cold Brew?
This is where the exciting part of the name comes in! Regular Cold Brew is just that: coffee steeped in cold water for a long time to create a smooth, low-acid concentrate, which you then cut with water or milk. It’s strong, dark, and often served black or with a splash of plain milk.
The Vanilla Sweet Cream Cold Foam takes that beautiful, strong coffee and adds a complete textural overhaul. We stir in our homemade vanilla syrup to sweeten the coffee base slightly, and then we top the whole thing with that light, airy, deliciously sweet whipped cream foam. It changes the whole experience! It adds a luxurious, creamy mouthfeel to every sip, turning it into a true Café Style indulgence without needing that high-pressure espresso machine.
Estimated Nutritional Data for This Homemade Coffee
Now, folks, I’m a cook, not a nutritionist, so please take all these numbers with a big grain of salt! I can tell you how to get the flavor perfectly right, but getting the exact macronutrient breakdown printed on my packaging is a different beast entirely.
Because we are using Homemade Coffee as our base here—and I use a strong concentrate—and then adding my custom vanilla syrup and almond milk, these figures are just a rough guide for a single serving based on the measurements provided.
You will see values swing a bit depending on how much vanilla syrup you decide to load in the foam, or if you use heavy cream instead of almond milk. If you want lower carbs, remember what we discussed about swapping out the maple syrup base!
Here is a rough estimate based on using standard unsweetened almond milk and the 1/4 cup of homemade syrup:
- Calories: Approximately 140-170 kcal
- Fat: 3g – 6g (Mostly from the almond milk)
- Protein: Under 2g
- Carbohydrates: 25g – 30g (This is where the maple syrup shows up!)
Remember to adjust for your specific choices! If you use store-bought Cold Brew that’s already sweetened, you’ll need to dial back the vanilla syrup when you make your foam. Happy sipping!
Share Your Café Style Creations
Okay, now that you have mastered the art of the fast, flavorful, and totally amazing Vanilla Sweet Cream Cold Foam Cold Brew (Easy), I really, truly want to see what you’ve made!
This is what home cooking and experimenting are all about—taking a classic idea and making it perfectly *yours*. Don’t just sip this magic in silence! Come on over and let me know how it turned out. Did you manage to nail that perfect airy foam on the first try?
Please, please, please drop a comment below right now and tell me your favorite tweak. Did you add a secret spice to my vanilla syrup? Did you use a different milk? Did you enjoy this as your weekend treat or your 2 PM slump-buster? I love hearing how you adapt these recipes for your own lifestyle and kitchen!
If you’re feeling inspired, snap a picture of your beautiful layered Homemade Coffee creation and post it up on social media. Tag me so I can see your fantastic Café Style results! We built this amazing little community together over great flavors, so feel free to link back to the full instructions here: Join our coffee-loving community here!
And if you loved how easy this was, give the recipe a rating so others know they have to try it. Cheers to making café-quality drinks without leaving the couch!
Vanilla Sweet Cream Cold Foam Cold Brew (Easy)
Ingredients
Equipment
Method
- Add water and maple syrup to a small saucepan and bring to a boil.
- When the maple syrup dissolves, turn off the heat, add the vanilla bean, and let it cool to room temperature.
- Remove the vanilla bean and store the syrup in a mason jar or glass container in the fridge for up to 3 months.
- Add almond milk and 1/4 cup of vanilla syrup to your blender and blend until it reaches a whipped consistency. Alternatively, add to a mason jar and shake vigorously or use a milk frother to froth into a cream foam.
- Add ice to a large glass and top with 1 cup of cold brew. Pour in your vanilla sweet cream to taste. Stir to combine.
Notes
Tried this recipe?
Let us know how it was!
Master of Global Fusion Innovation
My culinary adventure reflects my Lebanese-Italian heritage and a decade spent in the dynamic fusion restaurant scenes of Miami and Barcelona. I’ve made it my mission to prove that beloved global comfort foods can be successfully adapted for low-carb living without losing their soul, their cultural authenticity, or their ability to comfort.
With advanced training in molecular gastronomy and experience spanning Mediterranean, Middle Eastern, and Latin American traditions, I’ve developed what I call “respectful innovation” – culinary creativity that honors traditional cooking wisdom rather than replacing it. My alternative ingredient substitution systems are now taught in specialty diet cooking schools throughout the region.
Drawing from my trilingual upbringing, I understand how deeply food connects to identity and memory. That’s why my flavor-bridging techniques allow classic dishes from around the world to maintain their comforting, familiar qualities while meeting contemporary nutritional standards. I regularly share these techniques at international culinary symposiums and innovation events.
When I’m not experimenting in my Miami fusion kitchen laboratory, you’ll find me at local salsa dance venues – the rhythm and improvisation skills translate directly to my creative cooking process! My role as a foster parent to rescue rabbits has unexpectedly inspired some of my most creative plant-based low-carb innovations.
My personal low-carb journey began as a way to maintain energy for my active lifestyle, but it’s evolved into a professional mission of proving that healthy eating can be globally adventurous rather than restrictively limiting. Every recipe I create is a passport to culinary adventure, transforming kitchens into laboratories for exploring healthy versions of the world’s most beloved comfort foods.